Tag: pc

  • Review On Best Gaming Laptops with Strong Battery

    Review On Best Gaming Laptops with Strong Battery

    The term ” Gaming Laptop” is used to describe laptops with very powerful hardware, that allows users to play high-end games, do intense video editing, as well as other power-intensive tasks. Despite the fact that Gaming Laptops feature High-end specs, the fact that they usually feature poor battery life is unarguable. This fact is attributed to the power consumed by their high-end components. Despite the fact that most gaming laptops have been characterized by poor battery life, there are some gaming laptops that feature impressive battery life, despite their power consuming components. In this article, we explore a comprehensive list of best gaming laptops with strong battery life .

    1. Dell Inspiron 15 7000

    best gaming laptops with strong battery

    Seeking for a very good gaming laptop, that features a long-lasting battery and an affordable price, the Dell Inspiron 15 7000 may just be the laptop you have been looking for. It houses all the essentials you will need for gaming, without being too flashy.

    The Inspiron 15 7000 features an Intel Core i5-73000 processor, 8GB RAM, 256GB SSD, 1TB hard drive storage and an Nvidia GTX 1060 graphics card, with 6GB of VRAM. These specs put together makes the Inspiron 15 7000 a very awesome laptop to game on, and also an excellent machine for video editing and graphics design.  In addition, the Inspiron 15 7000 is VR ready. You can buy from Amazon or Jumia ng.The Inspiron 15 7000 features a battery rated for 7 and a half hours. 

    2. Acer Predator Helios 300

    The Helios 300, is a laptop that offers powerful hardware for gaming, without sacrificing battery life. It was designed to allow gamers game for long without plugging their power brick into an outlet. It lets users game on the go.

    The Helios 300 features an Intel Core i7-700 Processor, 16GB RAM, 256GB SSD, A Nvidia GTX 1060 graphics card. The Helios 300 is VR ready, allowing you to play VR titles. These specs put together allows users to play favorite games seamlessly. You also have the option of increasing Ram and storage, to suit your needs.  Buy from Amazon or Jumia ng.The Helios 300 offers 8 hours of battery life.  

    3. MSI GS65 THIN

    The MSI GS65 thin is a gaming laptop that provides users with an entirely different feeling. Unlike most gaming laptops, the MSI GS65 offers a more professional look. It is one of those gaming laptops you can take into a conference room, without looking odd.

    It features a relatively thin chassis that makes carriage easy. The MSI GS65 features an 8th gen core-i7 processor, 16GB RAM, 1 TB HDD, 512GB SSD, an Nvidia GTX 1060 MAX Q graphics card. This Graphics card allows MSI to achieve a lot using a thin chassis, avoiding overheating problems. With the MSI GS65 you are getting 5 hours 40 minutes of battery life.

    4. GIGABYTE AERO 15X

    best gaming laptops with strong battery

    Still, on the topic of best gaming laptops with a strong battery, the Aero 15X is yet another awesome gaming laptop that offers an impressive battery life. The Aero 15X is one of those gaming laptops that offers excellent gaming hardware, without sacrificing battery life.

    The Aero 15X is powered by an Intel Core – i7 87050H, 16GB of RAM, 512GB SSD, an Nvidia GTX 1070 max Q graphics card. The Aero 15X features a 144 Hz 4k display, that makes gameplay smoother. The Aero 15X features a 94WH battery, which will power it up to 10 hours. 

    5. Razer Blade Stealth 13.3

    best gaming laptops with strong battery

    Razer is one of the highly sought after brands we have today when it comes to gaming laptop choice. Their products have shown high efficiency, in offering quality gaming experience, allowing gamers to game seamlessly. The Razer Blade stealth 13.3 is no exception.

    The Razer blade stealth 13.3 was built to allow gamers to game on the Go, without being restricted by the size and weight of the laptop or Battery life. The Razer blade stealth 13.3 is a 13-inch laptop that is powered by a 7th gen intel processor Core – i7, 8GB Ram, 256 SSD. The Balde stealth 13.3 offers approximately 8 hours of battery life.

    6. Acer Nitro 5

    Last but not least, the Acer Nitro 5 is yet another highly recommended gaming laptop with a strong battery. It is another stealth gaming laptop, that fits into a conference room and works excellently

    The Acer Nitro 5 is powered by an Intel Core i5-7300HQ processor, A Nvidia 1050Ti graphics card with 5GB of VRAM, 8GB of DDR4 RAM and 256GB SSD. It features a 15.6-inch display with a screen resolution of 1920 X 1080 resolution. The Acer Nitro 5 features a 48WH battery. 

    There you have it – a comprehensive list of best gaming laptops with strong battery life. As already mentioned these laptops offer quality gaming hardware without sacrificing excellent battery life.
  • How to Partition a new SSD or hard drive without OS

    How to Partition a new SSD or hard drive without OS

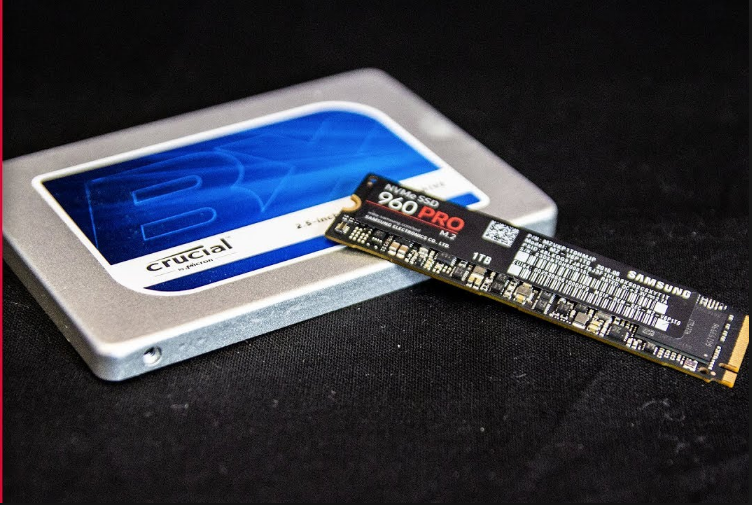
    Partitioning hard drives, with a functioning operating system, is carried out using some built-in features. You can partition your hard drive or SSD using the command prompt, Windows disk management or a third party software. However, partitioning a new hard drive or SSD without OS is an entirely different thing. Here you do not have the luxury you have on a fully functioning OS. There is no software installed, you are given a plane slate, with no tools. 

    Despite the fact that it sounds impossible, Partitioning hard drives or SSDs without OS is actually possible. In this article, we explore a tutorial on how to partition a new SSD or Hard drive without OS. 

    Please note that for you to partition the hard drive or SSD without OS, you will need a bootable device, to boot the hard drive or SSD without an operating system. In this article, I will demonstrate how to partition a new hard drive or SSD using a bootable device containing windows OS. The steps are listed below. 

    How to Partition a new SSD or hard drive without OS, During Windows Setup 

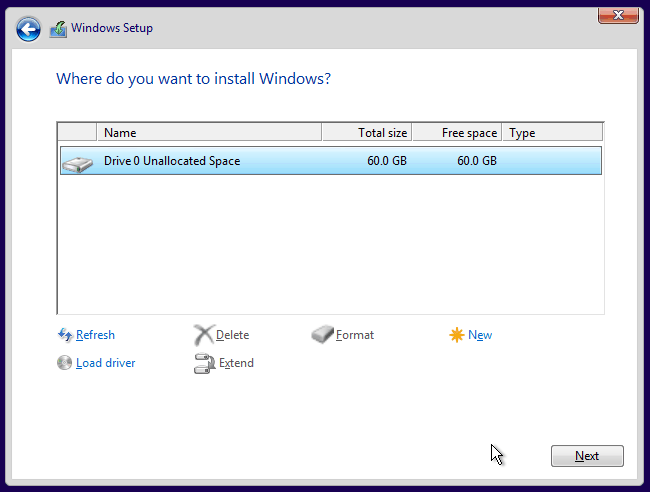
    when installing windows OS, you are provided with the option to manage your hard drive or SSD space. Here you will be able to manage the partitions on your hard drive or SSD. You can create partitions or delete already existing partitions. As already mentioned, you will need a bootable device containing windows OS.

    1 Insert the boot device into your computer. If your boot device is a disc, you are required to place it in your CD ROM. If it’s a bootable flash drive, you should plug it to any of the USB ports on your computer. 

    2. Follow all on-screen prompts until you are landed in the page where you can manage your storage space. 

    How to Partition a new  hard drive without OS

    3. Once you are on the windows storage management page, press shift+F10 simultaneously to open a command prompt. 

    How to Partition a new  hard drive without OS

    4. Type “diskpart” and press enter

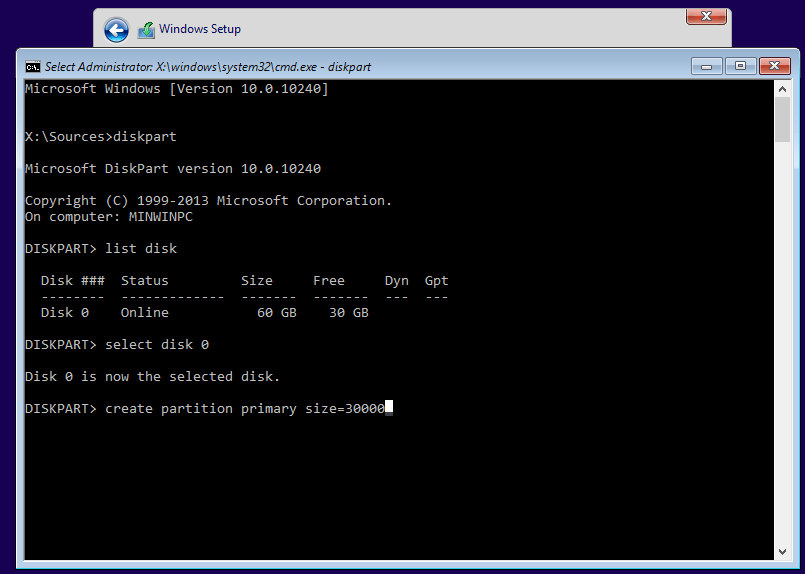
    5.  At Diskpart>, run a few lines of commands to create a new partition:

    • List disk
    • Select disk [disk number]
    • Create partition primary [size=n]
    Create Primary Partition

    Disk number and size is dependent on the configuration of your hard drive or SSD. Below is an example of how to use the above command line. 

    • List disk
    • Select disk 0
    • Create primary partition size=60000

    Note: Creating a partition of 6000MB means you are creating a partition of 60GB and also disk 0 is the name of the default partition that your hard drive or SSD has. 

    5. Hit enter

    Note: You are advised to allocate more than 100GB to your new partition, because Windows update, installed programs, and other system files will keep consuming space on system partition

    After you might have successfully carried out all the steps listed above, you will have a well partitioned hard drive. Steps listed above should be followed in order, to prevent complications. 

  • Samsung unveils the Exynos 8 Octa CPU

    Samsung unveils the Exynos 8 Octa CPU

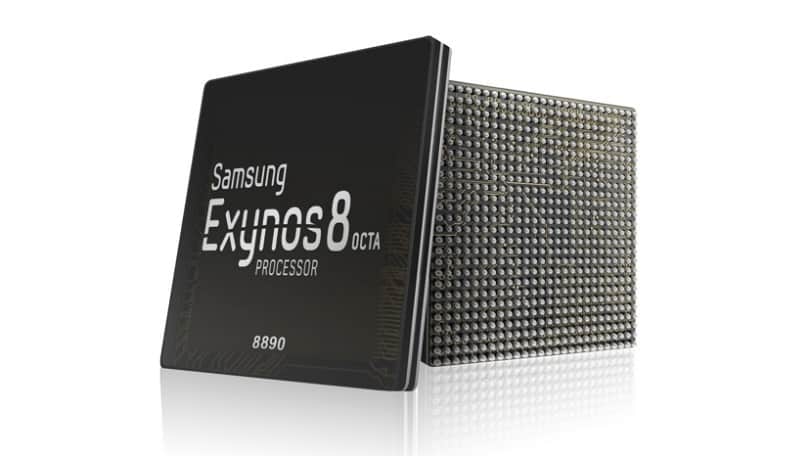
    406238-samsung-exynos-8-octa-8890Today, Samsung announced the Exynos 8 Octa 8890 CPU processor.

    This is the companies second “premium” chip built on 14nm FinFET process technology. It has a custom 64-bit CPU with four custom cores and four ARM Cortex A53 CPU cores. These specs improve the performance of the processor by 30% and cause it to use 10% less electricity.

    Samsung said devices with its chips will allow users “to enjoy and share high-resolution video content on the go with ease.”

    With our custom designed CPU cores and the industry’s most advanced LTE modem, consumers using mobile devices with the Exynos 8 Octa will experience a new level of mobile computing.” – Dr. Kyushik Hong, Vice President of System LSI marketing at Samsung Electronics.

    The tech giant has also added that the new CPU can allow for highly immersive gaming and life-like virtual reality experiences thanks to Mali-T880; ARM’s latest GPU.

    Sasmung had unveiled its first 14nm mobile application processor in February of this year. The company’s expected initiation for the Exynos 8 Octa mass production is set for later into this year.

  • Intel’s first ‘open-source PC’ on sale for $199

    Intel’s first ‘open-source PC’ on sale for $199

    Just incase you haven’t check PcWorld today, here is the latest piece of news I pulled out from there.

    Intel has shipped its first “open-source PC,” a bare-bones computer aimed at software developers building x86 applications and hobbyists looking to construct their own computer.
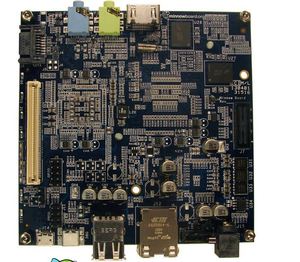
    The PC, called the MinnowBoard (shown above), is basically a motherboard with no casing around it. It was codeveloped by Intel and CircuitCo Electronics, a company that specializes in open-source motherboards, and went on sale this month for $199 from a handful of retailers.

    It’s the first open-source PC to be offered with an Intel x86 processor, and the board’s schematics and design files are published and can be replicated under a Creative Commons license. Development kits based on x86 processors from Via Technologies are already sold for robotics and other projects, but those boards are not open source.


    Intel has also shared server designs through Facebook’s Open Compute Project, but they’re aimed primarily at large companies that design and build servers in-house. The MinnowBoard, which measures 4 inches (10.16 centimeters) by 4 inches, is Intel’s first open-source hardware design for enthusiasts and developers. 
    Other open-source boards are available based on ARM processors or Arduino microcontrollers. The most notable ARM example is the Raspberry Pi,which starts at $25 and has sold in the millions.

    Details

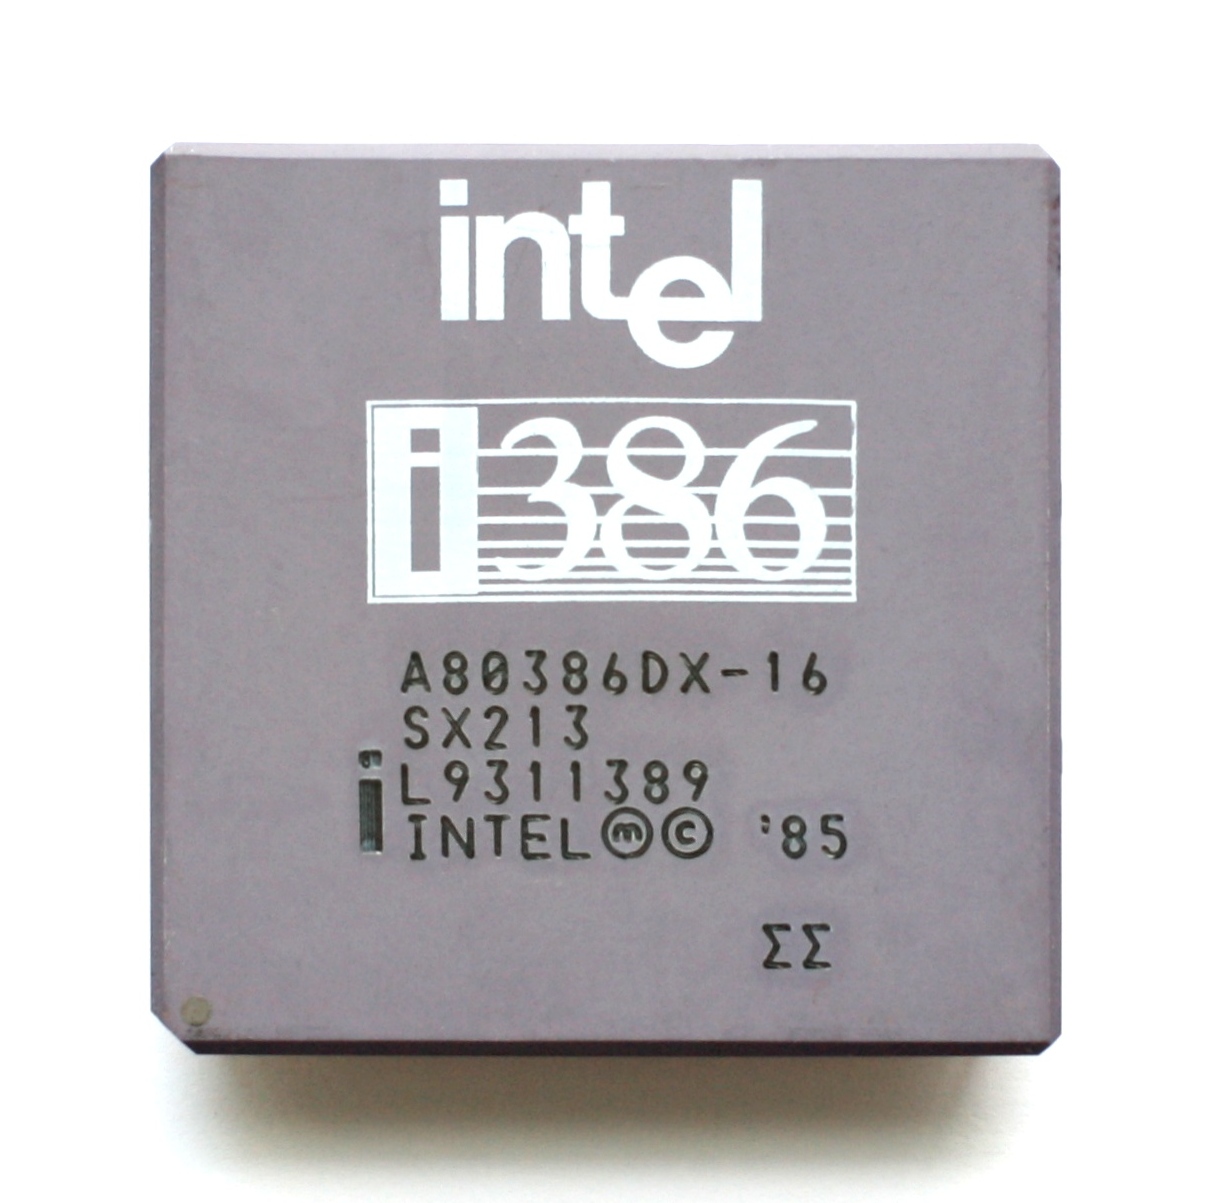
    The MinnowBoard is more expensive than ARM or Arduino boards and might be less attractive since it uses older hardware, including a 1GHz Intel Atom E640 processor, a 32-bit chip that was released in 2010.
    However, the MinnowBoard is still cheaper than most PCs and could appeal to developers looking to write and test commercial applications before they’re deployed in servers, embedded devices and other computers.
    Other hardware in the MinnowBoard includes 1GB of DDR2 memory, an HDMI port, Gigabit ethernet, USB ports, and a micro-SD slot for expandable storage. The board’s open-source UEFI firmware allows for the development of custom secure boot environments.
    The board comes pre-loaded with the Angstrom Linux distribution and is compatible with Yocto Project, which enables the creation of hardware agnostic Linux-based systems.
    The MinnowBoard also includes support for Intel’s hyperthreading and VT virtualization technology, which are only available on processors from Intel. Advanced Micro Devices and Via use different technologies to speed data transfer on chips.
    The MinnowBoard is available at online retailers including Digi-Key, Farnell, Mouser Electronics, and Newark.
    Intel and CircuitCo have also established a community website for MinnowBoard, which provides the specifications and other details of the PC. 

     The news is right on there front page, what’s your opinion on this? lets iron this out on the comment section.

  • Your PC may come with malware pre-installed

    Your PC may come with malware pre-installed


    It is rare to find a new PC that doesn’t come with additional bells and whistles in addition to the operating system itself. The “bloatware” that PC vendors add on often includes useful tools like third-party security software. It seems, though, that some PCs also come with something more insidious—pre-installed malware. Microsoft researchers investigating counterfeit software in China were stunned to find that brand new systems being booted for the first time ever were already compromised with botnet malware right out of the box. Microsoft has filed a computer fraud suit against a Web domain registered to a Chinese businessman.
    The suit alleges that the Nitol malware on the new PCs points the compromised systems to 3322.org. Microsoft believes the site is a major hub of malware and malicious online activity. Microsoft claims that site in question hosts Nitol, as well as 500 other types of malware. A Washington Post report states that it’s the largest single repository of malicious software ever encountered by Microsoft.

    Most users—particularly most users of the Microsoft Windows operating systems—are aware of the many online threats. They’ve been conditioned to install antimalware and other security software, and update it frequently to ensure it can detect and block the latest, emerging threats. It’s a problem, though, if the PC is already compromised with malware before the antimalware software is even installed or enabled. Part of the concern lies in how the pre-installed malware works, or how deeply embedded it is. Most malware can still be identified and removed by security software after the fact. However, malware threats that are planted at the kernel level of the operating system, or in the PC BIOS operate at a level that is too deep, and can avoid detection by most antimalware tools.
    Malicious software is big business, and the criminals running the business are often quite clever and innovative when it comes to finding new ways to spread it. Planting malware in PCs, smartphones, or tablets before they’re even purchased and unboxed is certainly one way to go about it.
    What can you do then to defend against these threats? For starters, buy your PC, tablet, or smartphone hardware from established, respected vendors. If you buy an HP, Dell, Acer, Sony, or other such brand name PC the odds of it being compromised with pre-installed malware out of the box are pretty low. If you buy an Apple iPad, Google Nexus 7, or Amazon Kindle Fire you will most likely get a device free of malware infections. But, if you go bargain shopping online and buy a PC or knock-off tablet from a shady, unknown site the risk is higher.
    Regardless, don’t assume that just because your PC or mobile device is brand new that it must be safe and free from malware. And, you might not want to trust the pre-installed security software, either, since you can’t verify that it’s legitimate and free from malware itself. Make sure you install a reliable cross-device security tool to detect and identify malware that may already be present.

  • How to Choose a New PC Case

    How to Choose a New PC Case

    We’ll show you how to find, buy, and build in a brand-new PC chassis.

    How To Find A PC Case

    If you aren’t a dedicated PC builder, the last thing you probably think about is your PC case. But there are a number of good reasons for moving to a new chassis: You might need space for more components; you might want more cooling; you might long for some fancy features such as clear side panels or glowing fans and lights; or you might be interested in upgrading your front-panel connectors to support the latest and greatest connection types.
    Whatever your reason for considering a new shell, we’ll walk you through the process of selecting one–and we’ll look at how to move the parts and pieces from your old case into your new case smoothly and efficiently.

    Choose a Suitable Case

    PC cases fall into three broad categories: Budget, Midrange, and High-End. But a relatively inexpensive case isn’t necessarily worse than an expensive one.
    Budget Bonanza

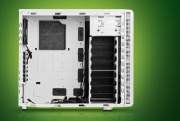
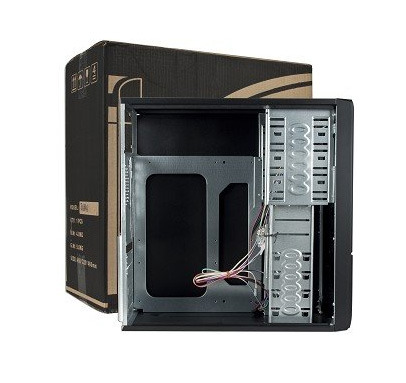
    Upgrade Your PC Case: Budget Case

    A typical budget case is inexpensive ($20 to $40), rectangular, and featureless. In other words, it’s a nondescript replacement case with few special features to help you fit more components into your rig, tidy up your cables, or installation your system’s current components easily.
    Budget cases tend to be plain, functional, and utterly ordinary.
    If you want the barest possible enclosure for your PC’s parts, have no interest in expanding your case’s features or available connections beyond what you currently have, or want to spend as little as possible on a new case, you go budget. You’ll get what you pay for with these models in this price range.
    Midrange Medley
    In this category, prices run from $75 to $200, and you’ll find considerable variation in design and construction.
    Midrange cases typically offer handy features such as soundproofing, cable channels for routing wires, and extra connection ports.

    Upgrade Your PC Case: Midrange case

    These cases may have (or lack) a number of features that suit your needs. The most important variable to consider is case dimensions, since you’ll want to know at the outset that your new chassis can hold all of your system’s components without difficulty. Problems may arise if, for example, you have an extralong video card that won’t fit into a case because of its internal layout. If you have multiple cables, liquid cooling tubes, or huge CPU coolers to accommodate, triple-check that your PC parts will fit comfortably within a prospective new case before buying it.
    Also, make sure that your new case can support all of your 3.5-inch and 5.25-inch devices. And don’t buy a three-bay case if your system uses a four-drive RAID array.
    In appraising the raw design of the case, consider whether its accouterments–such as a big door covering the front panel, lighting effects that you can’t turn on and off manually, or a manual cooling bar that falls out of the case whenever you pop off the side panel–contribute more nuisance than neatness.
    Will the case’s overall design be practical six months after you purchase it? If you buy a soundproof case in the winter, will your system be able to handle the hotter interior temperatures that occur during summertime? Keep the big picture in mind, and don’t let eye-catching details lead you astray.
    Here are some other important questions to ask: What kind of connections come built into the case’s front panel (or sides, depending on its design)? Does the case deliver true internal headers for its connections or just pass-through cables? Are the case’s USB ports upside-down? Is the case screwless? Does it come with fans preinstalled? How loud are they when you fire up a system? What other fan configurations could you mount?
    For liquid cooling enthusiasts, what size radiators does the case support? How easily could you mount one externally or internally? Does the case come with motherboard standoffs, or are they built into the motherboard tray? Can you remove the motherboard tray separately from the case? Can you install or tweak the backplane of a CPU cooler without having to remove the entire motherboard? What options does the case provide for managing the system’s cables?
    High-End Heaven

    Upgrade Your PC Case: High-End Case

    Once you break the $200 barrier, you have to deal with manufacturers who sometimes let their imaginations run wild, resulting in PC cases that may be flashier than they are functional. So don’t let an expensive case’s ingenious design blind you to potential shortcomings in its usefulness. A manufacturer may go to great lengths to craft a killer yet functional design for its unique chassis, or it may slap an outlandish design or a few gimmick features on a case that is unpleasant to work with.
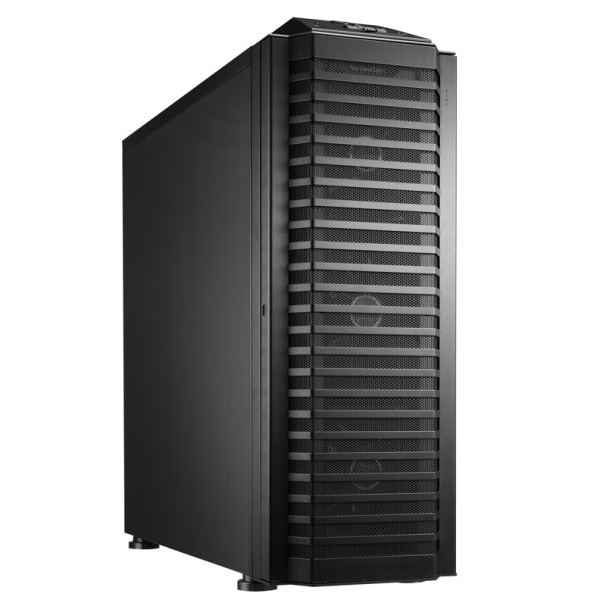
    The Lian-Li PC-P80NB is an ATX full-tower case roomy enough to hold every component you could dream of.
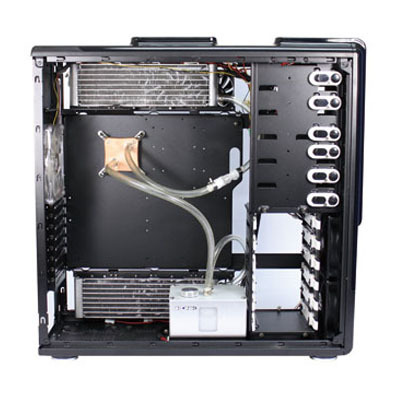
    Cases at the high end of the spectrum may come with a ton of cooling, fan controllers, and other switchable features built directly into the chassis. Some may cover every inch of the inside surface with soundproof acoustic foam; others may come with water-cooling loops built into the chassis, like the Logisys CS8009BK. And finally, some cases may be expensive simply because they’re huge: The Lian-Li PC-P80NB, for example, can support 11 PCI devices and 10 hard drives, and comes with six preinstalled fans (five 14-centimeter fans, and one 12-centimeter fan). If that meets your PC building needs, buy it; otherwise, steer clear.
    Next: Transfer your PC’s components to the new case.

    Move Your PC Components From the Old Case to the New One

    The process of transferring components from one case to another is in some ways simpler than the process of selecting the new case. Start with the components that you can easily uninstall, move, and install without affecting any others.
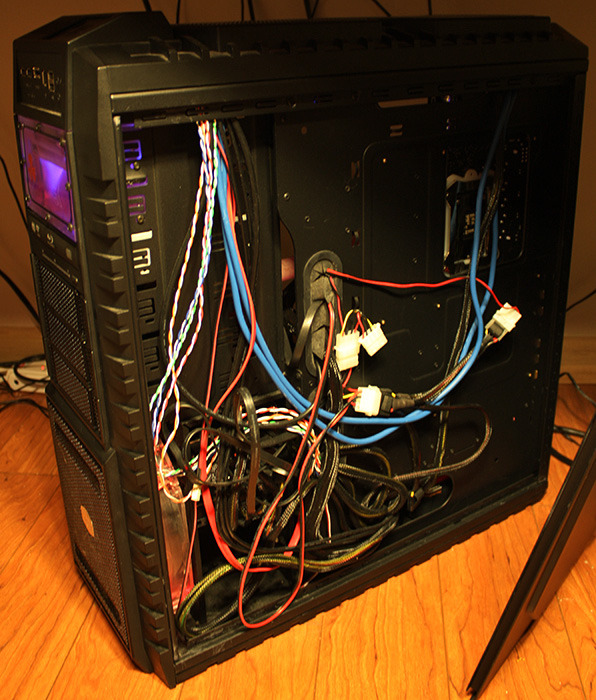
    In a typical system build, I like to start by disconnecting all of the wires and power cables in my existing chassis so that I can get the rat’s nest out of the case before I try to remove individual components. Pull out the SATA cables and the power supply, and disconnect other wires inside the system. Then pop off your system’s side panels, remove your case’s front panel (if applicable), and remove your 5.25-inch optical drives. Depending on the design of your new case, you might be able to load these components into the new shell immediately–one reason I love tool-free case designs. Hard drives come next, and they merit the same treatment.
    Many tool-free cases let you slot your components into place without using screws or removable case fixtures.
    Next, remove your PCI devices, which might consist of a single discrete video card in some instances. Assuming that you aren’t running some fancy water-cooling setup, your old case should be empty of practically everything but the motherboard by now. Unscrew it and gently remove it from the case, gripping it by the edges.
    If your new case doesn’t come with motherboard standoffs, screw them in–and install your motherboard’s I/O shield–before attempting to install the motherboard itself.
    Once the motherboard is in place, I usually attach the system’s PCI devices, especially the video card; however, this approach may make for trickier access to SATA ports or other connectors, depending on the motherboard’s layout. On the other hand, waiting to install the video card can pose a bit of a challenge if the power cables on the power supply barely reach the top connectors on the motherboard.
    Try to route as many cables as possible behind the motherboard, to keep them from cluttering up your case interior and restricting airflow.
    Once all of your components are in place and you’re ready to start connecting cables, try to use your case’s built-in cable management options to maximum advantage. In most systems, the goal is to route as many cables as possible behind the motherboard (mashed up against the right side panel). For this purpose, cases that provide multiple routing holes around the motherboard tray or fasteners (for twist ties/Velcro strips/twine or the like) behind it can be immensely helpful. Minimizing clumps of cables in the middle of your PC will give the system better airflow.
    Next, examine your case layout and verify whether you need to install the power supply at this stage. I recommend waiting until the last possible moment to install your power supply, to avoid having to deal with a bunch of loose power cables. Unfortunately, some cases make it hard to install your power supply after the motherboard is in place, so plan accordingly. Once you’ve installed the power supply and finished connecting all of the system’s cables, you should be finished.
    Transferring components from one case to another isn’t especially difficult, even for computer newbies. For most people, the most time-consuming part of the operation involves cable management–unless you’re migrating a relatively tricky system build (such as one featuring a liquid cooling loop) to a case that may require some creative thinking to achieve the desired results.
    Don’t be afraid of cases. Buy one. Build a system in one. You’ll be amazed at the options that await your consideration–including plenty of builder-friendly features–on today’s market of well-priced, well-designed chassis.

  • Easiest Way TO Eliminate Eyestrain From Your PC / Computer

    Easiest Way TO Eliminate Eyestrain From Your PC / Computer

    Building an amazing desktop computer is easy, but even after you stuff your new system with the latest hardware, hook up your cabling, and make room for your giant monitor, you’re not quite done. Make it easy on the eyes with this handy guide.

    Building a desktop computer that’s amazing is easy, if a little time-consuming. But even after you’ve stuffed your new system with all the latest hardware, hooked up your cabling, and cleaned off your desk for a giant monitor, you’re not quite done.
    Your new desktop masterpiece is going to do you little good if you can use it for only a few hours each day. And you have the failure of your own biology to thank for that: Humans were made to be hunters, gatherers, and thinkers, not desk jockeys.
    Spend too much time in front of your screen, and you’re going to wreck your eyes—and no, we’re not just channeling our worried mothers. Computer Vision Syndrome (CVS) is a real condition with real symptoms that you’ve likely already noticed at some point in your tech-centric life: bloodshot peepers staring at you in the mirror after a long day of gaming; the tired, dry feelings that you attempt to relieve by rubbing your eyes; or perhaps a bit of burning, itching, or increased sensitivity to light.
    There are plenty of ways to keep your eyes from rioting every time you fire up your favorite Web browser. Most of them are super-easy to set up and require more time than money, although fancier (and pricier) solutions can give you a beautiful desktop setup and happier eyeballs all at once. In any case, your eyes will forever thank you for your investment.

    Basic Lighting

    While you might think that you’re looking at a crisper, more pleasing picture in a dim or otherwise darker environment, you’re just forcing your eyes to work that much harder to process extreme differences in contrast. And a similar situation happens when you set up your screen in a location that creates a ton of glare: not only does your picture look horrible, but all that light mucks up the quality of your picture and forces your eyes to do a lot more refocusing to achieve better clarity.
    So if you’re sitting at a computer under fluorescent lights and you aren’t at work, just stop: This kind of overhead lighting is one of the harshest environments for your eyes to deal with.

    The best setup? Plain ol’ natural light, best deployed in the form of a window angled perpendicular to your computer screen. You might be tempted to slap your monitor or laptop in front of a huge window to enjoy some scenery while you work, but the brightness of your exterior view could stress your eyes out. You could always use blinds or curtains to limit the amount of light coming in when it’s especially bothersome, but that kind of defeats the point of the view, doesn’t it?
    When placing your screen perpendicular to your natural light source, you want to make sure that you’re balancing ambience with glare reduction: Angle your display so that extra light isn’t bouncing off your screen. And take some time to play around with your PC setup; a few minutes now will save you countless hours of agony later. Again, blinds or curtains can be an eye-saving device if the sun is really giving you trouble during certain hours of the day.

    You’ll want to supplement this natural light (or lack thereof, as the day turns to evening) with artificial lighting. And overhead lighting—even incandescent—still isn’t the best option due to its potential for glare. But you shouldn’t go to the other extreme, either. Resist the urge to purchase the classic “spotlight” desk lamp and slap its narrow cone of light somewhere on your desktop. Remember, you’re also trying to avoid sharp differences in contrast.

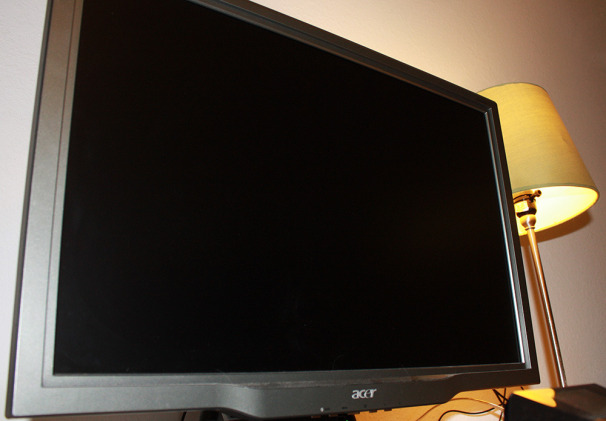
    You don’t need that much light around a monitor or laptop screen, and what you pick needs only to supply indirect light in a general area around your desk and display. A small lamp on a desk that creates a pleasant diffusion of light behind your display and prevents glare is great; a full-sized floor lamp can also work wonders, provided it physically fits into your particular desk setup. As for bulbs, consider those of the natural light (and low wattage) variety: If you need more brightness, switch to higher wattages or add another light source.

    Advanced Lighting

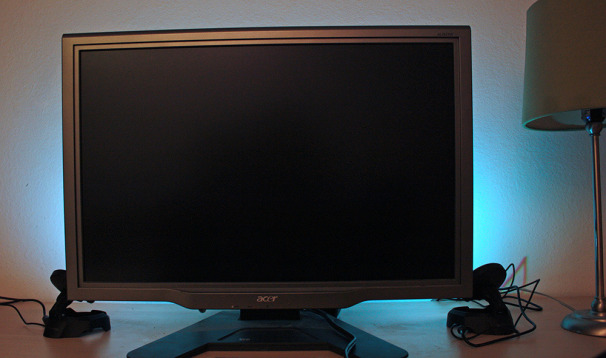
    If you’re looking for a setup that looks a little bit cooler than a tiny lamp on your desk—or if your particular desktop setup has no room for any bulkier lighting equipment—you might want to consider trying out some bias lighting.
    You’ve probably seen the concept before, likely on a Philips HDTV with ambient lighting (or as Philips brands it, “Ambilight”). The gist is simple: LED lights attached to the rear of your monitor blast the background with colored light (desktop systems only—unless you really want to silly up your laptop), helping to reduce glare in dimly lit environments, to make your picture appear sharper, and to transform your boring ol’ monitor into a glowing beacon of cool.
    As Sound and Vision’s Timothy Seppala describes the benefits of bias lighting, in an interview with Ars Technica, “It works because it provides enough ambient light in the viewing area that your pupils don’t have to dilate as far. This makes for less eyestrain when a flashbang gets thrown your way or a bolt of lightning streams across the screen.” Tim actually wrote a great guide to getting the most out of your HDTV for PCWorld that includes some tips on lighting your home theater for optimal movie watching, and you should definitely check it out if you’re a serious PC enthusiast seeking to optimize your display.
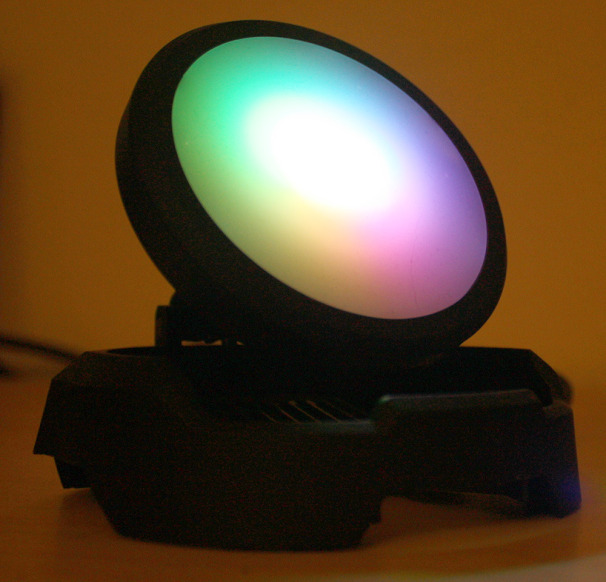
    When it comes to PC building, though, the problem with bias lighting is that few devices and software combinations exist that will allow you to achieve the perfect setup: ambient lighting that changes to match the colors appearing on your screen. We’ve had a lot of luck with Mad Catz’s Cyborg Gaming Lights. They’re a bit pricy at $100, but you get two little lighting modules that contain three LEDs (red, green, and blue) for creating any color you’re looking at.

    You just need to plug the lights into two of your system’s free USB ports (after plugging the lights’ power adapter into the wall), stash them behind your monitor, angle the lights up toward the wall, and fire up a software utility. You can then pick the color that you want to live behind your screen or set your lights to slowly rotate through a series of colors. You can also have the lights dynamically switch their appearance based on whatever happens to be on your screen—be it a game, a movie, or a picture.

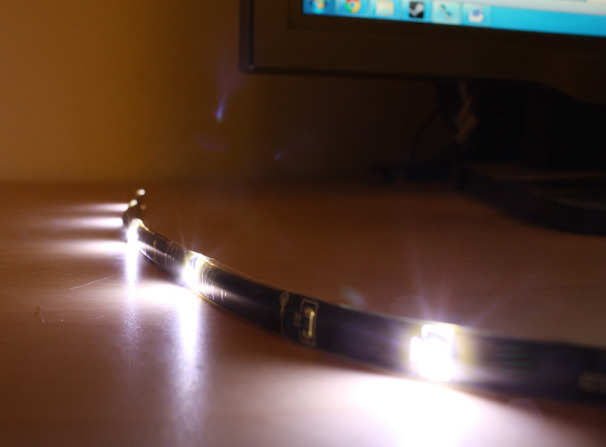
    If you’re looking for a more inexpensive way to build bias lighting into your desktop monitor, you can always pick up Antec’s Halo 6 LED Bias Lighting Kit. For a mere $13, you can slap a strip of six white LEDs to the rear of your display. These lights—or a similar style that you can pick up at your local IKEA (Ledberg or Dioder)—aren’t going to modulate to fit whatever’s on your screen. But at least you’ll be able to reap the benefits of bias lighting without breaking your bank account.
     
    A bias lighting strip that you would attach to the rear of your display.

    Beyond Lighting

    Other tricks you can employ to reduce the harmful effects of extended computer use on your eyeballs include installing little apps to remind yourself to take a much-needed eye break. Chrome users can grab the extension Gimme a Break! and Firefox fans can hit up the simple Auto Timer extension to schedule some rest time for tired eyeballs. For every 20 minutes you spend staring at a screen, you need only to focus your eyes on something else for 20 seconds—that’s not so hard, is it?
    The software fun doesn’t end there. Odds are good that you’re running your display at fairly high brightness and contrast levels, as monitors are sometimes shipped with factory-default settings that use inordinate amounts of brightness to convince you that the picture is awesome. Not good. You’ll want to fire up the Lagom LCD monitor test pages and use their instructions to set your monitor’s settings to their correct levels. Why blast your eyes with excessively bright light if you don’t have to?
    Your monitor’s color temperature can also adversely affect your eyes after prolonged periods of staring. An app like F.Lux (click on the Download link at the top of the site) will automatically adjust your monitor’s temperature to match the time: Cooler lighting during the day, mimicking the temperature of common daylight, and warmer lighting in the evening, when “you probably shouldn’t be looking at the sun,” says F.Lux.
    Finally, you can also opt for a pair of geektastic computer glasses to help you handle your display temperature situation and reduce screen glare—we’re speaking specifically of Gunnar Optiks’ line of Advanced Computer Eyeware (the company’s term, not ours).

    Gunnar Optiks claims that its glasses also help increase the moisture within your eyes—a function commonly performed by blinking, which one tends to do much less when focusing on a computer screen. We can’t say whether Gunnar’s glasses turn eyeballs into swimming pools, but we did tend to notice less eye fatigue (and didn’t seem to have the same headaches as before) after a few marathon computing sessions when equipped with its glasses. Their yellow tint does take some getting used to, however!

    Important Notice: Tweet this article with the bookmark social media share below to stand a chance to win an ipad or start making money with your twitter account (it works only with your twitter account and the more articles you tweet the more you stand a chance to win an Ipad)

  • Google Glass Launches New Age of Personal Computing

    Google Glass Launches New Age of Personal Computing


    Computerworld – Sergey Brin, CEO and co-founder of Google, wears Google Glasses during a product demonstration at the Google I/O 2012 conference last month. (Image: Stephen Lam / Reuters)When one talks of computers today, he or she could be referring to a laptop, a desktop or maybe even a smartphone. However, if Google’s latest plan stays on track, the definition of a computer could broaden significantly.

    At its Google I/O developers conference in San Francisco, the company threw a lot of effort behind the unveiling of a prototype of its so-called Google Glass computerized eyeglasses.
    The Android-powered eyeglasses are equipped with a processor, memory, camera, GPS sensors and a display screen.
    Google co-founder and CEO Sergey Brin said the Google Glass development effort is all about “doing brand new risky technological things that are really about making science fiction real.”
    In that world of science fiction, he said, computers won’t always look like what we now expect from the term. The next generation of computers won’t necessarily sit on one’s desk or lap or in one’s hand. The devices may not have a have a monitor and/or keyboard.
    Someday – probably in the near future – computers will be worn, whether incorporated into glasses, or in a piece of jewelry such as a bracelet or something else, analysts say.
    “Google Glass changes the way we will look at computers,” said Patrick Moorhead, an analyst at Moor Insights & Strategy. “It isn’t just research, it’s a workable prototype.”
    “Glass serves to stretch the technology ecosystem to even greater lengths, Moorhead said. “I believe that in five years we will see many different form factors and brands of wearable computers. We will have computers embedded in our glasses of course, but also in our jewelry and watches.”
    Moorhead noted that the U.S. military, especially the Special Forces units, already use wearable computers to for communications and GPS tasks. That technology hasn’t yet reached consumer or business users, he added.
    Google’s research efforts could hasten the mainstream use of the technologies.
    “As we see real devices in use that we previously saw only in movies and books, it will expand the possibilities even further,” said Moorhead. “We can go beyond the glasses and visualize computers in our jewelry, in our watches and even inside our bodies.”
    Charles King, an analyst at Pund-IT, said such new computing form factors are an extension of the current mobile trend, taking GPS-enabled smartphones, growing compute power and multiple new communications capabilities to the next level.
    “It’s the ever smaller and ever more powerful mobile technologies,” he added. “It’s about the things we used to see and think about in relation to sci-fi novels or Star Trek. The idea of highly mobile and highly powerful computers is extremely intriguing.”
    King said he expects there will be great demand for what he calls “mobile computing lifestyle choices” in a few years.
    “It would not surprise me if we see a lot of this in, say, five years,” he noted. “As the technology becomes more sophisticated and cheaper, it becomes something everybody can afford.”
    “Some years ago, a smartphone like the Blackberry was considered something that only business professionals needed. It doesn’t seem farfetched to think we could see Google Glass widely adopted in five years,” King added.
    Rob Enderle, an analyst with the Enderle Group, pointed out that Google Glass or other wearable computers could be very useful in many workplaces — not just the next big thing to help users look cool or geeky.
    “They could be used regularly for things like taking inventory in warehouses, and for tasks on factory floors and other places where folks need to use computers and their hands at the same time,” Enderle said.
    At the Google I/O conference, the company said it is offering prototype versions of Google Glass, dubbed the Google Glass Explorer Edition, to developers for $1,500. Brin said he expects the glasses to be generally available in 2014 — at a lower price.
    “If the developer community can come up with interesting solutions, the sky’s the limit,” said King.
    Enderle said that wearable computers could be a big step toward a new generation of compute form factors that can be embedded inside the human body.
    Putting aside visions of Star Trek’s Borg initiative, Moorhead and Enderle agreed that wearable computers are a bridge to the first such computer implants.
    “It’s an interim step toward imbedding computers into people and creating some kind of biomechanical interface that bypasses the eyes,” Enderle said, adding that he believes that computer generation is some 25 to 50 years away.  

    “The change we are working toward … is one of the big changes we will see in computing this century. It will redefine personal computing by the time it has fully matured,” he added.

    Sharon Gaudin

    Author Biography:


    Sharon Gaudin covers the Internet and Web 2.0, emerging technologies, and desktop and laptop chips for Computerworld. Follow Sharon on Twitter at @sgaudin, or subscribe to Sharon’s RSS feed . Her e-mail address is [email protected].