Tag: Facebook

  • One Time Pop-Up Or Slide-Out Facebook Like Box With Cute Subscription Form.

    One Time Pop-Up Or Slide-Out Facebook Like Box With Cute Subscription Form.

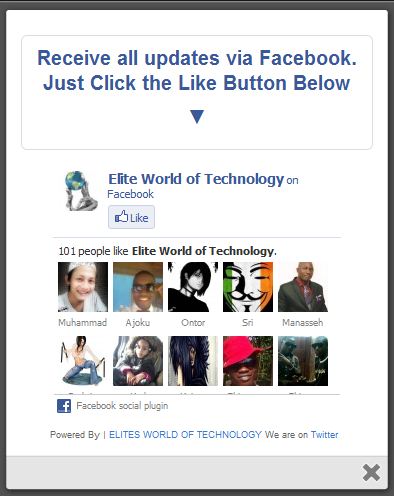
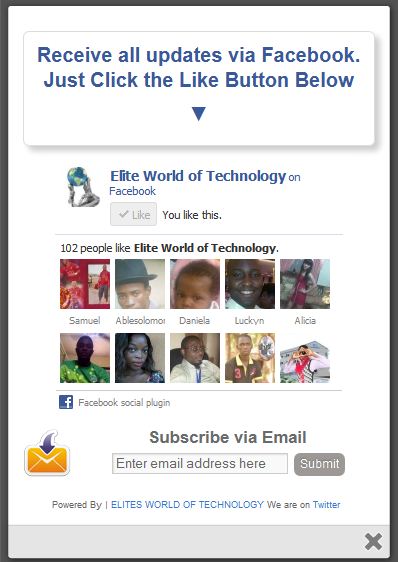
    With Subscription Form
    Without Subscription Form

    I got this trick  from an old friend -Helltrick.

    It’s such a fantastic widget to force your site visitors to subscribe to your updates via email, like your facebook page or follow you on twitter.

    Not only do we acquire the services of an amazing facebook like page we have yet another but extremely beautiful and easy to edit subscription form dozed with new CSS effects. This widget will keep pop-up/slide-out neat and clean and will surely attract visitors to subscribe.


    Demo

    To see this widget in action kindly our demo page to see a live preview on how it works.

    HOW TO ADD A ONE TIME POP-UP / SLIDE-OUT FACEBOOK LIKE BOX WITH CUTE SUBSCRIPTION LINK TO YOUR BLOG.


    In Blogspot:

    1. Login to your blogger dashboard
    2. Select Layout from your blog menu
    3. Add a new Javascript/html Gadget.
    4. Copy and paste the following code
    <style>

    /*
    ColorBox Core Style:
    The following CSS is consistent between example themes and should not be altered.
    */
    #colorbox, #cboxOverlay, #cboxWrapper{position:absolute; top:0; left:0; z-index:9999; overflow:hidden;}
    #cboxOverlay{position:fixed; width:100%; height:100%;}
    #cboxMiddleLeft, #cboxBottomLeft{clear:left;}
    #cboxContent{position:relative;}
    #cboxLoadedContent{overflow:auto;}
    #cboxTitle{margin:0;}
    #cboxLoadingOverlay, #cboxLoadingGraphic{position:absolute; top:0; left:0; width:100%;}
    #cboxPrevious, #cboxNext, #cboxClose, #cboxSlideshow{cursor:pointer;}
    .cboxPhoto{float:left; margin:auto; border:0; display:block;}
    .cboxIframe{width:100%; height:100%; display:block; border:0;}
    /*

    User Style:
    Change the following styles to modify the appearance of ColorBox. They are
    ordered & tabbed in a way that represents the nesting of the generated HTML.
    */
    #cboxOverlay{background:#000;opacity:0.5 !important;}
    #colorbox{
    box-shadow:0 0 15px rgba(0,0,0,0.4);
    -moz-box-shadow:0 0 15px rgba(0,0,0,0.4);
    -webkit-box-shadow:0 0 15px rgba(0,0,0,0.4);
    }
    #cboxTopLeft{width:14px; height:14px; background:url(http://1.bp.blogspot.com/-FiJ_Xz7txEg/Txrt0sy1TiI/AAAAAAAAFWk/Llzvkeyy_J8/s1600/controls.png) no-repeat 0 0;}
    #cboxTopCenter{height:14px; background:url(http://1.bp.blogspot.com/-TcJGMnSfOCY/TxrtzzHDLVI/AAAAAAAAFWc/mdndgrisRuA/s1600/border.png) repeat-x top left;}
    #cboxTopRight{width:14px; height:14px; background:url(http://1.bp.blogspot.com/-FiJ_Xz7txEg/Txrt0sy1TiI/AAAAAAAAFWk/Llzvkeyy_J8/s1600/controls.png) no-repeat -36px 0;}
    #cboxBottomLeft{width:14px; height:43px; background:url(http://1.bp.blogspot.com/-FiJ_Xz7txEg/Txrt0sy1TiI/AAAAAAAAFWk/Llzvkeyy_J8/s1600/controls.png) no-repeat 0 -32px;}
    #cboxBottomCenter{height:43px; background:url(http://1.bp.blogspot.com/-TcJGMnSfOCY/TxrtzzHDLVI/AAAAAAAAFWc/mdndgrisRuA/s1600/border.png) repeat-x bottom left;}
    #cboxBottomRight{width:14px; height:43px; background:url(http://1.bp.blogspot.com/-FiJ_Xz7txEg/Txrt0sy1TiI/AAAAAAAAFWk/Llzvkeyy_J8/s1600/controls.png) no-repeat -36px -32px;}
    #cboxMiddleLeft{width:14px; background:url(http://1.bp.blogspot.com/-FiJ_Xz7txEg/Txrt0sy1TiI/AAAAAAAAFWk/Llzvkeyy_J8/s1600/controls.png) repeat-y -175px 0;}
    #cboxMiddleRight{width:14px; background:url(http://1.bp.blogspot.com/-FiJ_Xz7txEg/Txrt0sy1TiI/AAAAAAAAFWk/Llzvkeyy_J8/s1600/controls.png) repeat-y -211px 0;}
    #cboxContent{background:#fff; overflow:visible;}
    #cboxLoadedContent{margin-bottom:5px;}
    #cboxLoadingOverlay{background:url(http://1.bp.blogspot.com/-PPvu-446sn4/Txrt1QsGH1I/AAAAAAAAFWw/_jWYVoR1HX8/s1600/loading-background.png) no-repeat center center;}
    #cboxLoadingGraphic{background:url(http://1.bp.blogspot.com/-31strss_1-E/Txrt1J6NThI/AAAAAAAAFWo/4P12CJPj924/s1600/loading.gif) no-repeat center center;}
    #cboxTitle{position:absolute; bottom:-25px; left:0; text-align:center; width:100%; font-weight:bold; color:#7C7C7C;}
    #cboxCurrent{position:absolute; bottom:-25px; left:58px; font-weight:bold; color:#7C7C7C;}
    #cboxPrevious, #cboxNext, #cboxClose, #cboxSlideshow{position:absolute; bottom:-29px; background:url(http://1.bp.blogspot.com/-FiJ_Xz7txEg/Txrt0sy1TiI/AAAAAAAAFWk/Llzvkeyy_J8/s1600/controls.png) no-repeat 0px 0px; width:23px; height:23px; text-indent:-9999px;}
    #cboxPrevious{left:0px; background-position: -51px -25px;}
    #cboxPrevious.hover{background-position:-51px 0px;}
    #cboxNext{left:27px; background-position:-75px -25px;}
    #cboxNext.hover{background-position:-75px 0px;}
    #cboxClose{right:0; background-position:-100px -25px;}
    #cboxClose.hover{background-position:-100px 0px;}
    .cboxSlideshow_on #cboxSlideshow{background-position:-125px 0px; right:27px;}
    .cboxSlideshow_on #cboxSlideshow.hover{background-position:-150px 0px;}
    .cboxSlideshow_off #cboxSlideshow{background-position:-150px -25px; right:27px;}
    .cboxSlideshow_off #cboxSlideshow.hover{background-position:-125px 0px;}
    /*———————————————————————————–*/
    /* Facebook Likebox popup For Blogger
    /*———————————————————————————–*/
    #subscribe {
    font: 12px/1.2 Arial,Helvetica,san-serif; color:#666;
    }
    #subscribe a,
    #subscribe a:hover,
    #subscribe a:visited {
    text-decoration:none;
    }
    .box-title {
    color: #3B5998;
    font-size: 20px !important;
    font-weight: bold;
    margin: 10px 0;
    border:1px solid #ddd;
    -moz-border-radius:6px;
    -webkit-border-radius:6px;
    border-radius:6px;
    box-shadow: 5px 5px 5px #CCCCCC;
    padding:10px;
    line-height:25px; font-family:arial !important;
    }
    .box-tagline {
    color: #999;
    margin: 0;
    text-align: center;
    }
    #subs-container {
    padding: 35px 0 30px 0;
    position: relative;
    }
    a:link, a:visited {
    border:none;
    }
    .demo {
    display:none;
    }
    </style>

    http://ajax.googleapis.com/ajax/libs/jquery/1.5/jquery.min.js
    http://yourjavascript.com/11215013191/jquery.colorbox-min.js
    <script type=”text/javascript”>
    jQuery(document).ready(function(){
    if (document.cookie.indexOf(‘visited=true’) == -1) {
    var fifteenDays = 1000*60*60*24*30;
    var expires = new Date((new Date()).valueOf() + fifteenDays);
    document.cookie = “visited=true;expires=” + expires.toUTCString();
    $.colorbox({width:”400px”, inline:true, href:”#subscribe”});
    }
    });
    </script>
    <!– This contains the hidden content for inline calls –>

    <div style=’display:none’>
    <div id=’subscribe’ style=’padding:10px; background:#fff;’>
    <h3 class=”box-title”>Receive all updates via Facebook. Just Click the Like Button Below<center><p style=”line-height:3px;” >▼</p></center></h3>
    <center>

    //www.facebook.com/plugins/likebox.php?href=http%3A%2F%2Fwww.facebook.com%2Fspan%20style=

    </center>
    <style>
    .mbt-email{
    background:url(http://4.bp.blogspot.com/_MbejYjGokMM/TSeZHmWJ6oI/AAAAAAAAALE/93ELYyzmi64/s1600/email.png) no-repeat 0px 12px ;
    width:300px;
    padding:10px 0 0 55px;
    float:left;
    font-size:1.4em;
    font-weight:bold;
    margin:0 0 10px 0;
    color:#686B6C;
    }

    .mbt-emailsubmit{
    background:#9B9895;
    cursor:pointer;
    color:#fff;
    border:none;
    padding:3px;
    text-shadow:0 -1px 1px rgba(0,0,0,0.25);
    -moz-border-radius:6px;
    -webkit-border-radius:6px;
    border-radius:6px;
    font:12px sans-serif;
    }
    .mbt-emailsubmit:hover{
    background:#E98313;
    }
    .textarea{
    padding:2px;
    margin:6px 2px 6px 2px;
    background:#f9f9f9;
    border:1px solid #ccc;
    resize:none;
    box-shadow:inset 1px 1px 1px rgba(0,0,0,0.1);
    -moz-box-shadow:inset 1px 1px 1px rgba(0,0,0,0.1);
    -webkit-box-shadow:inset 1px 1px 1px rgba(0,0,0,0.1); font-size:13px;
    width:170px;
    color:#666;}

    </style>

    <div class=”mbt-email”>
    Or Receive Updates via Email
    <form action=”http://feedburner.google.com/fb/a/mailverify?uri=blogspot/XylXo” id=”feedform” method=”post” target=”popupwindow” onsubmit=”window.open(‘http://feedburner.google.com/fb/a/mailverify?uri=blogspot/XylXo‘, ‘popupwindow’, ‘scrollbars=yes,width=550,height=520’);return true”>
    <input gtbfieldid=”3″ class=”textarea” name=”email” onblur=”if (this.value == &quot;&quot;) {this.value = &quot;Enter email address here&quot;;}” onfocus=”if (this.value == &quot;Enter email address here&quot;) {this.value = &quot;&quot;;}” value=”Enter email address here” type=”text” />
    <input type=”hidden” value=”XylXo” name=”uri”/><input type=”hidden” name=”loc” value=”en_US”/>
    <input class=”mbt-emailsubmit” value=”Submit” type=”submit” />
    </form>
    </div>
    <p style=” float:right; margin-right:35px; font-size:9px;” >Powered By | <a style=” font-size:9px; color:#3B78CD; text-decoration:none;” href=”https://ewtnet.com” rel=”nofollow”>EWT</a> Pop-Up Box <a style=” font-size:9px; color:#3B78CD; text-decoration:none;” href=”https://ewtnet.com/2012/08/one-time-pop-up-or-slide-out-facebook.html” rel=”nofollow”>Get This Widget</a></p>
    </div>
    </div>

    Website

    If you need to use this widget on any website platform other than the blogger platform, simple copy the above code to anywhere in the <body></body> section of your website.

    Make The Following Changes :

    Change Green to custom text or leave it as default, Pink with your facebook username, Blue with your RSS feed Title.


    Finally, Save your widget and you are done! Enjoy!
  • How to Avoid Facebook and Twitter Disasters

    How to Avoid Facebook and Twitter Disasters

    Who knew your boss could see so much of your Facebook page–including the pics from your wild weekend? Oversharing can lead to underemployment. Take some practical steps to control what others see about you. The power of social networks like Facebook and Twitter comes from their ability to quickly share information about your life with other people. But along with that ability comes the risk of sharing sensitive information with the wrong people, and that risk increases as your network grows well beyond your core circle of friends.
    Using Twitter and Facebook effectively takes more than discretion; you should know how to tweak the settings for these services so that you have full control over who sees what on your Facebook page or on Twitter. In the two stories linked below, and in others to come, we’ll cover both sides of the coin: how to use the tools at your disposal to keep your profiles in check, and how to handle the etiquette side of the equation, as well.

    The garden-variety freshman may not have much to worry about, but it’s a different story if you–as many people are increasingly doing–are using Facebook and Twitter not for updates about your meals, pets, and drinking binges, but for professional purposes. So we’ve outlined here a handful of common disastrous scenarios in which one (or both) of these social networks was misused, as well as the best way to prevent or remedy the problem.
    But in the end you’ll find that the fundamental lesson is invariably the same, and that’s to remember the golden rule of all social networks: Never forget that the whole world is watching.
    Now go on to:

  • Facebook Unveils New User-Generated Feature: Facebook Stories

    Facebook Unveils New User-Generated Feature: Facebook Stories

    The nearly 1 billion users (fewer, of course, if you don’t count all those bogus accounts) who use Facebook every day sure share a lot of stuff. However, a lot of it gets lost in the shuffle.
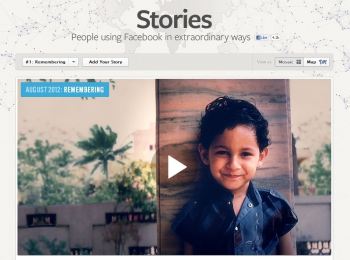
    Mayank Sharma used Facebook to rebuild memories lost due to contracting meningitis.Not anymore thanks to a new feature called Facebook Stories.
    The new site launched Thursday, and aims to showcase how Facebookers use the site in compelling ways. Each month features a different theme–the theme for August is “Remembering.”
    This month’s feature tells the story of 27-year-old Mayank Sharma, from New Delhi, India, who lost his memory after contracting a rare form of meningitis. Sharma used Facebook to rebuild the memories he had lost due to contracting the disease. He credits Facebook with helping him “rebuild” his life.
    While Sharma’s story is an extreme case, it shows the type of stories Facebook is looking for.

    What Facebook Looks For

    Other showcased features include a group of residents in Guelph, Ontario using civic pride and the town’s collective memory to save an important local building, a selection of books to read, musical playlists courtesy of Spotify, and selected articles from the New Yorker Magazine.
    Facebook says the books, playlists and New Yorker features will be updated on a monthly basis.
    Highlights on Facebook Stories
    Another monthly feature is the Infographic, which is updated each month to match the theme. This month’s edition looks at what we share most. According to Facebook, the most common story shared on the timeline is on travel, which makes up 42% of such stories.
    That was followed by stories on moves, posted 18 percent of the time, and the ever-popular relationship change, which appeared 10 percent of the time.
    These first stories were handpicked by Facebook, but future editions will include submissions from users. Those who think they might have an interesting story to share with the world via Facebook Stories can submit theirs through an online form.

  • Avoid Facebook Disasters

    Avoid Facebook Disasters

    Ignoring Facebook’s privacy options can trip up users in a number of ways.   Avoiding Facebook and Twitter Disasters

    Take some practical steps to control what others see about you on Facebook and Twitter.Ignoring Facebook’s privacy options–some of them fairly new and not well known–can trip up the social-networking site’s users in a number of ways. Here are some that everyone who has a Facebook account should be aware of.

    Oversharing With the Boss

    The disaster:Ann played hooky from work, calling in sick, and spent the day sunbathing, updating her Facebook status on her laptop all the while. The next day, her boss confronted her with the evidence that she wasn’t really ill, causing severe embarrassment and a reprimand (plus a day of docked pay).
    The solution: In this day and age, professional and personal lives often be­­come intertwined, and Facebook can be ground zero for this. You might momentarily forget that you have “friended” your boss, and that he has the same access to your ramblings on Facebook as do your real-life drinking buddies. But you can change that.

    Using Facebook’s Lists settings might have made the most sense for Ann. Lists, one of the newer features of Facebook, allow you to organize people into groups and then assign each group different levels of access to your information on Facebook.

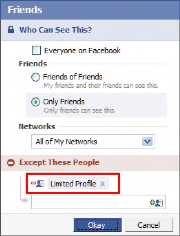
    Facebook's 'Limited Profile' option: Click for full-size image.

    ‘Limited Profile’ is a default group for less-wanted contacts, but you’ll see need to specify what rights those who are in it should have.Lists let you set who can see what on your profile. For example, if you’ve added someone as a friend but aren’t sure about them, you can relegate them to a list that you name “Limited Profile,” which will limit how much of your profile that person may view and interact with. You can also create lists for work, school, special projects, or anything else, but by default the lists don’t change how your profile displays.
    To work with Lists, click the Friends button (top bar) and +Create in the left column under Lists-or just put people on any list by using the ‘Add to list’ drop-down menu next to their name.
    Next, you need to specify how much of your information on Facebook members of each list can see. To do this, visit the Privacy Settings page (hover over ‘Settings’ in the top right of the screen, and click Privacy Settings inside the box that pops up; or go to www.facebook.com/privacy), then select Profile. Here, select Customize…from the drop-down menu next to whichever section you’d like, and type the name of the list in the box under ‘Except These People’. For Ann, dropping her workmates into a “work” list and dialing down that group’s access to the bare minimum would have saved her a lot of trouble. Specifically, she should change the ‘Status and Links’ setting so as to exclude the Limited Profile list. (Note, however, that updates to your profile from third-party applications are generally not blocked by these privacy settings.)
    UPDATE (4PM 6/24): With Facebook’s just-announced status publisher upgrade (now in beta), you will (or will soon) see an option (a gray lock with a dropdown menu) letting you control who sees these updates on an individual basis. For broad posts, “Everyone” will let the whole world (including Google and other off-Facebook locations) see the update. For more sensitive posts you can change the setting to “Friends” – or use fine-grained control through “Custom,” restricting the post to be visible only to certain friend lists.

    He Knows Where You Live

    The disaster:Getting far away from ex-boyfriend Bob wasn’t the main reason Mary moved to Pittsburgh, but it was one of the main benefits. So when Bob showed up at her new job, she was naturally disturbed. How did he find out where she was, she asked. “It was on your Facebook profile,” he replied.
    The solution: All users have extremely fine-grained control over what gets on their Facebook page, but few take full advantage of these features.
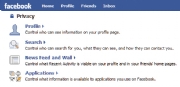
    The entry to all Facebook privacy settings is on this page. But thoroughly exploring all four of its subpages can take hours. (In this article, we’ll point you to some of the most important settings.)The controls are found in the Privacy Settings page under ‘Profile’, reachable as outlined above. Here you’ll find a list of ten items on your profile that you can turn on or off, each to a different group of Facebook users.
    ‘Profile’ lets you choose whether to block people from seeing anything beyond the most basic information (name and network) on your profile page, while ‘Basic Info’ allows viewing of gender, birthday, relationship status, and the like. ‘Personal Info’ opens the door a little wider-to your “about me” section, interests and favorites, and so on; ‘Status and Links’ controls who can see your latest status update. Most of the categories are self-explanatory (just click the question-mark icon if you need help) and can get pretty detailed. But this is also an advantage: If, like Mary, you don’t want to advertise where you work, you can turn off that detail here.
    Also, click Save Changes at the bottom of any Facebook settings screen, or your settings will not be updated.
    What should you change these settings to, then? Facebook offers numerous choices for each category: Everyone, My Networks and Friends, Friends of Friends, Only Friends, and Customize. Everyone is self-explanatory; My Networks and Friends is less inclusive, limiting profile viewing to anyone you’re friends with or with whom you share a network; Friends of Friends essentially gives you two degrees of openness instead of one; and Only Friends is exactly how it sounds.
    The Profile settings under Privacy allow you to control which Facebook users can see your profile and which ones cannot.The Customize option gives you complete command over your network settings: You can limit viewing of your profile to certain networks and, in some cases, subsets of that network. Current students, for example, can prohibit faculty or other undergrads from viewing their profile. How much to lock things down is up to you. In Mary’s case, making her Profile visible to ‘Only Friends’ would have prevented an unpleasant surprise visit.

    The Stalker Problem

    The disaster:Jessica is worried about the creepy messages and Wall posts being left by some guy she doesn’t know but whose friend request she accepted. She doesn’t want to delete her account, but she does wish to get rid of the stranger and set her profile to be discovered only by those people she allows.
    Illustration by Mick Wiggins The solution:First, Jessica should add the possible stalker to a Limited Profile list, as outlined earlier. If you have a hostile stalker, you can remove and/or block them: Go to the person’s profile page and then click the Remove from Friends option at the bottom of the left column.
    If the person persists in friend re­­quests, you can block the stalker altogether by going to the Privacy page and typing their name in the search box in the ‘Block People’ region. Standard Facebook-style search results will pop up; just click Block Person next to their name, and they won’t find you in a search, or view any part of your profile.
    For a stronger level of privacy and se­­curity, you can temporarily “go dark” by making your profile virtually invisible. Go to the Privacy settings page and click Search. Set the Search Visibility drop-down selection to Only Friends. This tells Facebook not to show your profile in public searches on the site.
    The Search Result Content section lets you choose whether to show photos or lists of friends and links. If you don’t want to be contacted at all, re­­move the check marks by both options.
    You can also use the Public Search Listing op­­tion to allow or prevent your profile from appearing in major search engine results such as those of Google.

  • Facebook’s Recommendations Bar: A Privacy Concern?

    Facebook’s Recommendations Bar: A Privacy Concern?

    Facebook has rolled out a new feature called the Recommendations Bar for website owners. The Recommendations Bar allows website owners to tap into the social network’s database of what you and your friends read, share, and like.
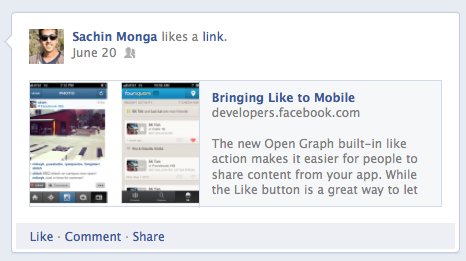
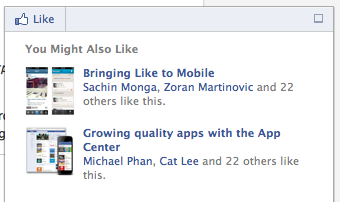
    Here’s how it works: as you read a story on a website that has the Recommendations Bar feature activated, you’ll see pop-up windows in the bottom right corner of the page. The pop-up window will contain stories from the website that your Facebook friends have shared or liked. The window also contains a Like button, allowing you to like the story without ever leaving the website.
    Also Read: How to install Facebook Recommendation Bar In Your Blog

    Several sites already use this feature, including the tech blog Mashable, entertainment site Wetpaint, and U.K.-based tabloid The Mirror. Recommendations are limited to articles on the website that were shared by Facebook users. Websites using the new feature reportedly see as much as three times as many clicks on stories that are recommended in the pop-up boxes.
    This feature obviously benefits the website owner, but what’s the benefit to you? There isn’t really one–it’s just another reason to be worried about your privacy on the social networking site.
    Don’t get me wrong–relevant recommendations from friends might be helpful. There’s a good chance that the recommended content will be something that we’ll be interested in reading, since we often pick our friends based on shared interests.

    But there’s another side to this issue, and that’s the potential privacy concern. When Facebook debuts services that share, without your explicit permission, what you’re doing online…well, it always seems to go south.
    In May, my colleague Sarah Jacobsson Purewal noted this issue regarding Facebook’s social reader apps. She said these types of features create a “giant circle of awkward oversharing that people have little control over.” Who knows–what you’re reading might reveal things about yourself that you’re not necessarily willing to share with the world.
    Since there’s no way to control what type of content is shared, except to not share or like it altogether, your personal reading habits will be on display for all your friends. The only positive here is hat, unlike Social Reader, you physically need to take action on Facebook–whether you share or like the story–for it to show up in the Recommendations Bar.

  • How To Add Facebook Recommendations Bar To Blogger

    How To Add Facebook Recommendations Bar To Blogger

    Finally, Bloggers can keep readers to their site by using this fantastic recommendation bar.
    It’s designed to display additional recommended articles right after readers have finished reading an article or spent some time on your blog. It will collapse on page load and expand once a reader has reached a specific location on your blog or finished reading the post.

    Only those articles are displayed that are previously liked or shared on Facebook. The number of likes are displayed under each article along with page title and a thumbnail. It also contains a like button and previously contained an Add to Timeline button that has been removed now.

    Unlike Facebook Recommendations box which offered related stories but with lack of user friendly interface and engagement, Facebook bar will force readers to stay longer on your site leading to increased pageviews, page impressions and thus traffic.

    HOW TO INSTALL ON BLOGGER

    This widget works on both blogger blogs and wordpress blogs. Now i’m going to take you true on how to add it on your blogger blog, the amounts of comment i get will determine if i’m going to show the wordpress tutorial. follow this simple steps to add on blogger:  

    Step1: Create a Facebook Application

    For this plugin to work you will need to create a Facebook App in seconds. The below method is the standard and correct method for creating any FB App you like.

    1. Log into Facebook Apps
    2. Click on Create New App button towards Top-rightcreate new app
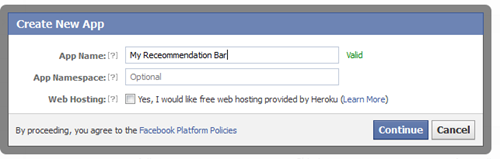
    3. In the box that pops up, type “My Recommendation Bar” inside the App name field and leave other options as default. Click continue.

    app name
         4.   Enter the captcha security code. Click Submit
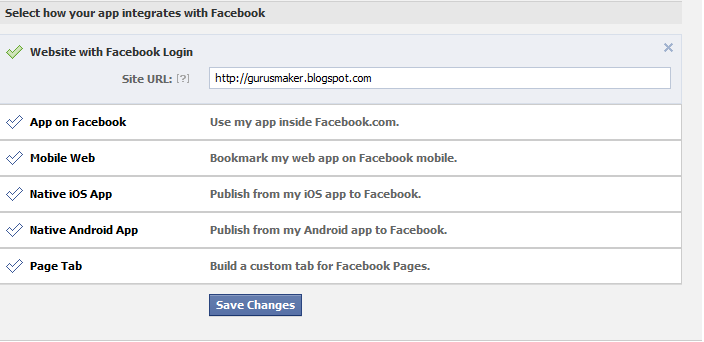
         5.  You are app is almost complete. Just click Website with Facebook Login tab and inside the box input your blog URL. See the screenshot below. Do not touch remaining options and click Save Changes.

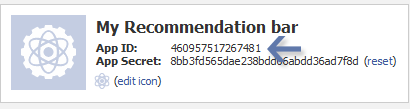
     6.   You will see two strings of alpha-numerical characters. One is App ID and the other is App secret. Just copy the App ID code and keep it save in a notepad. We will need it later.
    App ID
    Congrats App finally created! Lets proceed to step2.
    Step2: Add “Recommendations Bar” To Your Blog
    Follow these steps to add the bar to Blogger:

    1. Go to Blogger > Template
    2. Backup your template
    3. Click Edit HTML > Proceed
    4. Search For this : <html

    Replace it with this code:
    xmlns:fb=’http://ogp.me/ns/fb#’
    This will make the plugin compatible in older versions of  internet explorer also. Since blogger templates are coded in XML therefore inserting this XML namespace will enhance the plugin performance and compatibility.

         5.   Next search for <body> and just below this tag paste the following code:
    Note: If you are using the new blogger templates like Simple, Awesome Inc., Travel, Watermark or Picture window then please search <body for instead. Make sure to paste the code below the entire body tag.

    </p> <div id=’fb-root’></div> <p> <b:if cond=’data:blog.pageType == “item”‘></b:if><b:if cond=’data:blog.pageType != “static_page”‘></p> <div style=’z-index:999999; position:absolute;’> <fb:recommendations -bar action=’like’ max_age=’0′ num_recommendations=’3′ read_time=’10’ side=’right’ site=’https://ewtnet.com’ trigger=’40%’></fb:recommendations></div> <p></b:if>
    You are almost done. Make these changes:

         6.   Save your template and you are all done!
    Visit your blog and scroll down about 50% of your page and wait for 10 seconds for the plugin to expand. Enjoy the new way of free pageviews juice! 🙂

    Optional Steps

    Below are optional customization and control options. You can skip them if you want max_age: will decide the age limit of articles. Sometimes you don’t want to display too old articles so you can set it to display up to 1-180 days old posts. But if you don’t want to take age into account then let it be 0 as default.  num_recommendations: You can set how many articles to display. By increasing or decreasing the value 3
    read_time: As soon as the user reaches a specified location, the plugin would expand and before expanding it will take some time. I have kept it equal to 10 seconds, you can increase it to 30 or more as you wish.  side: You can decide the location of plugin. By default it shows up towards the bottom right corner of your page. You set it to float to left  trigger: On page load the plugin collapses and as soon as it reaches a specified location it expands. You can choose that location in three ways i.e. onvisible, X% or manual. I prefer locating the trigger point by percentage for better pageviews. The widget will expand as soon as the user scroll downs 40% of your page. You can increase or decrease this value. If you wish that the plugin must expand as soon as the reader reaches the end of your article then instead of pasting the code between the purple lines paste it just below data:post.body tag and use the value onvisible instead of 40%.  The widget will display only on post pages and not on homepage or static pages. To display it on all pages, then simply delete the purple bolded lines

  • Why you can’t undo Facebook Timeline

    Why you can’t undo Facebook Timeline

    Can’t Undo Facebook Timeline? Know Why

    After 6th December, Facebook Timeline has completely transformed the shape of old FB profiles. Some users are finding the new layout pretty complicated and unfamiliar. Whether it may be new advanced privacy settings or the new profile design, Facebook new changes are always somewhat not unanimously accepted by the 800 Million registered users.  The new Timeline design display all your posts in hierarchal way, giving more importance to your memorable posts, photos and events.
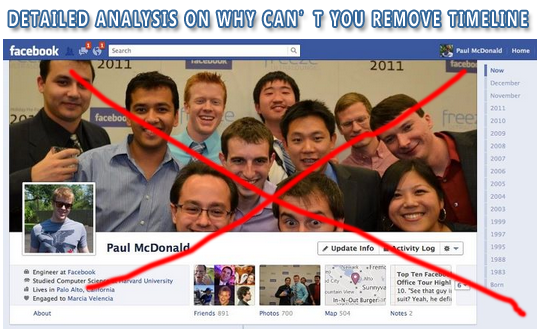
    There appears to be no option which could remove timeline or undo the new profile design change so that you could revert back to the old profile layout. No method so far seems to work, neither disabling the timeline app  is working. The Timeline App was a method by which you could set up timeline before its launch. There must be reasons behind absence of timeline Removal option. Lets analyze some facts.


    Zukerberg Recently blogged about his commitment to Facebook community saying: Quote

    I founded Facebook on the idea that people want to share and connect with people in their lives, but to do this everyone needs complete control over who they share with at all times.
    This idea has been the core of Facebook since day one. When I built the first version of Facebook, almost nobody I knew wanted a public page on the internet. That seemed scary. But as long as they could make their page private, they felt safe sharing with their friends online. Control was key. With Facebook, for the first time, people had the tools they needed to do this. That’s how Facebook became the world’s biggest community online.  We made it easy for people to feel comfortable sharing things about their real lives.
    We’ve added many new tools since then: sharing photos, creating groups, commenting on and liking your friends’ posts and recently even listening to music or watching videos together. With each new tool, we’ve added new privacy controls to ensure that you continue to have complete control over who sees everything you share. Because of these tools and controls, most people share many more things today than they did a few years ago.
    Overall, I think we have a good history of providing transparency and control over who can see your information.
    That said, I’m the first to admit that we’ve made a bunch of mistakes. In particular, I think that a small number of high profile mistakes, like Beacon four years ago and poor execution as we transitioned our privacy model two years ago, have often overshadowed much of the good work we’ve done.

    The highlighted words are where Mark himself accepts some of his past mistakes. Beacon was Facebook’s advertisement system that sent data from external websites to Facebook, for the purpose of allowing targeted ads and allowing users to share their activities with their friends. The controversial part was that Facebook was publishing User activities from other websites without explicit permission from the user. This was a complete violation of user privacy. All this was done without letting you know!
    The purpose of sharing the Beacon story is to tell you that Facebook have often taken decisions without keeping user feedback greatly in mind. Now when the entire Layout was going to be transformed, no proper Feedback campaign was ran which could ask users about their likes and dislikes concerned with the new timeline Design. Yes they tested a beta version of timeline and allowed users to try timeline in advance but why not User Feedback again?
    Mark promised on November with his blog post that user response will be given great importance but I never get it why the same mistake is repeated again?
    Now lets know the reasons that why can’t your remove, undo or delete the timeline view.
    1.To Prevent Algorithm Conflict
    Things look simple when they look alike. In order to prevent development ambiguity/complexity, all layouts are given same design structure so that it becomes easy to organize the data using the same technique without the need of two different methods for the display and arrangement of the same data on Facebook servers.
    2. To Prevent Psychological Confusion
    If the option of removing Timeline existed then it would have given rise to great confusion in interface. Facebook users are of different age and are experimented to like simplicity in design and structure. If your friend is running a timeLine and you are running Old Profile, then of course you will find it difficult to understand the updates at his profile due to different organization of data. What is placed at your left is shifted to top and right on timeline. This can discourage users from using Facebook and then can probably look for an alternative simple social media network like Google+.
    3. A Challenge to Google+
    Google Plus is the new social networking website which was launched just this July by Google Inc. Almost all features in Google+  match that of Facebook accept the introduction of Sparks, Circles and video conferencing. In order to tell its users that Facebook offers much different social touch a step like this was important. I must inform you that Facebook knew about the Google+ development and all its features much before it was launched. Because keeping an eye on your competitor is an important principle of i-marketing.

    What do you think?
    In short it is hard to believe but once again the new look has been forced upon the users without keeping the community likes and dislikes in Mind. I would love to hear about what else can you share on this latest development and do tell me if you like the new layout or not. Please give reasons why you like it. Hope to see some comfortable new changes in FB’s new design. For the time being new creative tricks are been applied to Timeline Covers. Why not Create a Hot Cover for your Profile?

    Peace and blessings pals! :)

  • Video & Text Tutorial on Facebook Video Calling

    Video & Text Tutorial on Facebook Video Calling

    Facebook Video Calling: How To Set Up & Start a Video Call?Facebook has finally started filling up the missing blanks on their social network as an answer to Google Plus Project. Together with Skype, Facebook has launched its first ever Video Calling option on there website. Facebook Users can now not only chat but they can now see their loved ones smile, wink and say lol face to face! So far there are no latency issues and video calling loads faster and works without pauses or any other pros. You don’t need to install any software or application to make this function work. Below you will find some useful Facebook video calling tips.


    How do I set up video calling?
    To start a video call with a friend you will first need to complete a quick, one-time setup:

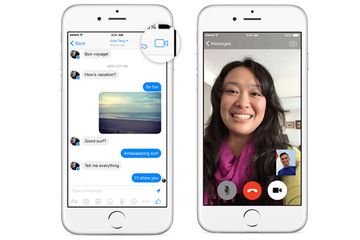
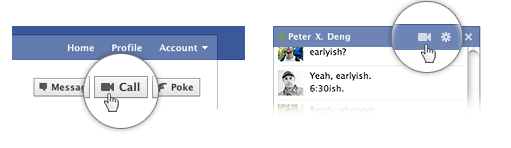
        To call a friend, click the video icon at the top of your chat window.
        Simply click the “Set Up” button and follow the easy instructions for how to set up video calling on your favorite browser.
        Once installed successfully the video call will start automatically or you can ring back your friend by clicking the video call button at the top right corner of your friends profile

    How do I start a video call with a friend?
    After the one-time set up you are now ready to make your first call:

        Visit your friend’s profile and click the “Call” button in the top right corner. You can also click the video icon at the top of the chat window.
        When your friend answers, be patient and wait for sometime till both your web cams are inter connected.
        If your friend is unavailable or offline, you can leave a video message. That’s indeed more like Yahoo’s Voice service.

    For all these steps to correctly work you must make sure that both your webcam and microphone are connected to the right slots and are in a running condition. You can still use video calling even if you don’t have a webcam. You will be able to talk to and see your friend but your friend will be able to hear your voice only.

    UPDATE: Though Facebook video calling is still a work under progress but you may find these tips useful in future. I will keep you updated with all the latest new few features.

  • Apple’s Facebook Integration Will Help Both Companies, Analysts Say

    Apple’s Facebook Integration Will Help Both Companies, Analysts Say

    Apple announcement that it’s integrating Facebook into its operating system software should be welcome news for a social network that’s taken a lot of hits in recent weeks.

    “Facebook is a company that could use some good news or could, at the very least, use a break from the seemingly non-stop drumbeat of dismal press,” said Dan Olds, an analyst at Gabriel Consulting Group. “This isn’t going to be any sort of miracle for Facebook, but it is a nice feature. And it’s [a change from] the ‘Facebook Cavalcade of Crappy News’ headlines.”

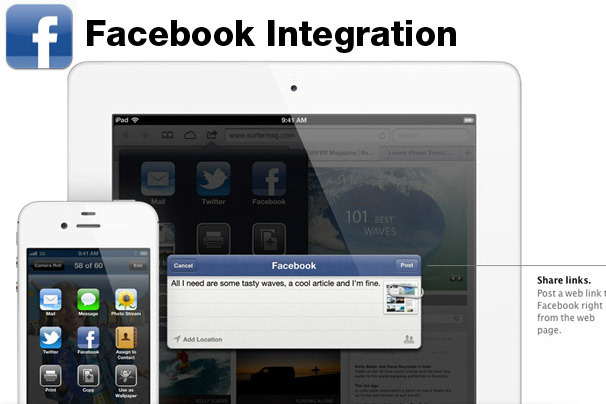
    Apple announced at its annual Worldwide Developers Conference this week that Facebook will be integrated into the iOS software that runs the iPhone and iPad, as well as into the latest OS X version, code-named Mountain Lion.
    Apple said the integration of Facebook into its operating systems will enable users to easily and seamlessly post photos, videos and updates to their Facebook accounts. The updates will let users update their Facebook status by talking to their phones, Apple added.
    The integration puts Facebook at the fingertips of Apple device users without having to use the social network’s own apps, which many experts call mediocre at best.
    While Apple’s move doesn’t offer an answer to Facebook’s problem of figuring out how to make money from mobile users, it may increase the time that millions of users spend on the site when they are on the go.
    “Apple caters to the masses and Facebook is the social media hub for the masses,” said Patrick Moorhead, an analyst with Moor Insights & Strategy.
    “This sounds positive for Facebook, which needs any kind of win. This will undoubtedly increase Facebook interaction but it still doesn’t address the mobile monetization issue. And until Facebook figures this out, not much else matters,” he added.
    As for Apple, offering integration with a wildly popular social network is a good way to keep users from drifting to other platforms, noted Rob Enderle, an analyst at the Enderle Group.
    “In general, this is a nice feature which should help prevent customer moves to Android or Windows Phone,” he added. “It showcases their increased advantage in speech in what is a speech optimized device and perhaps anticipates the long-rumored smaller iPhone, where text entry would be more difficult.”
    Olds agreed that the integration is as good for Apple as it is for Facebook.

    “There are almost a billion Facebook users. That’s a big, big number, even for Apple,” Olds said. “Down the road, there might be a mechanism where Facebook users can buy and view Apple content via the Facebook interface with friends. So there’s a lot of potential synergy here.”
    He added that it’s wise not to forget the adage, ‘the enemy of my enemy is my friend.’
    “Both companies are arrayed against Google on several fronts,” said Olds. “A combined effort, or at least a loose relationship, helps both.”

  • 500 hits/per day guaranteed with over 100 twitter followers and facebook shares

    500 hits/per day guaranteed with over 100 twitter followers and facebook shares

    You just created a new website, business or brand? It is time to create awareness. The web over the years have been somewhat populated with various contents from different website and business owners, therefore keeping young bloggers and business starters off the spotlight, many of the well-to-do starters go as far as even paying internet marketers web scammers for advert and social media followers/share and end up profiting scam.

    My Experience?


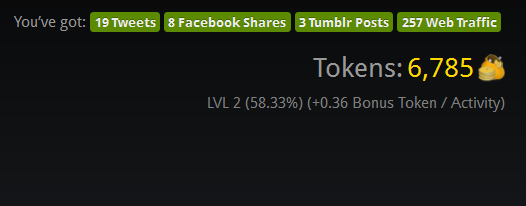
    You can actually get upto 500 hits per day, 1000 twitter followers, more than 1000 facebook shares to any website/post of your choice, over 50 facebook likes for all your blog/website post (you will need to verify your site to activate this feature), maybe 50 shares on tumblr and stumbleupon (for some reason people seems not to be using this feature often) and Page Rank 4 backlink. This is just too good to believe, but however, it is far from being exaggerated, the above stats is a friends testimony but I do have a testimony of my own: Started using linkcollider yesterday (10th May, 2013) and I already had a total of 19 Tweets 8 Facebook Shares 3 Tumblr Posts 257 Web Traffic. I had to disable the web traffic and I haven’t yet enabled the Facebook Like, Pinterest Followers, Twitter Followers and Youtube Subscribe. Below contains the screen shot of my overall stats in one day.

    Getting Started Getting started is a breeze! All you need to do is to create a free account on
    LinkCollider and add your website details.   Free Offers Buy a cheap domain name even cheaper click here.   Grab bing ads coupon code click here.

    Was this post helpful to you? Do give your feedback in the comments section below. And remember: please keep your comments relevant, and avoid spamming and/or promoting your own blog/business. Thank you 🙂