Tag: windows 7

  • Install Windows 10/8/7 From USB Flash Drive with UEFI Support

    Install Windows 10/8/7 From USB Flash Drive with UEFI Support

    When you are planning to install Windows 10, Windows 8.1 or Windows 7 on a PC, one of the requirements involves creating media to boot your computer into the setup wizard. This is especially true if you are performing a fresh installation of Windows. In which case, your boot options are DVDs and USB drives.

    Since most PC these days hardly come with an in-built DVD drive, your options are further limited to either using an external DVD drive or a USB flash drive.

    A lot of people, including me, will favor using a USB flash drive to install Windows 10. However, if you have newer hardware, it’s likely that you’re using Unified Extensible Firmware Interface (UEFI), instead of the legacy Basic Input/Output System (BIOS). If this is the case, you also have to ensure that the bootable media supports the firmware type before you can proceed with the installation.

    How is UEFI different from BIOS?

    The BIOS will soon be dead: Intel has announced plans to completely replace it with UEFI on all their chipsets by 2020. But what is UEFI, and how is it different from the BIOS we’re all familiar with?

    Both UEFI and BIOS are low-level software that starts when you boot your PC before booting your operating system, but UEFI is a more modern solution, supporting larger hard drives, faster boot times, more security features, and—conveniently—graphics and mouse cursors.

    Fortunately, if your device features a UEFI firmware, you have multiple ways to create a USB bootable media to install Windows 10, Windows 8.1 or Windows 7. You can use the Media Creation Tool, which is an easy-to-use utility made by Microsoft that downloads and copies the installation files onto a removable drive with support UEFI and BIOS. Or you can use WinToFlash, which is a freely available third-party tool that allows you to quickly create a media with support for UEFI firmware.

    [Further Reading: Create a Bootable Mac OS X Flash Drive]

    In this guide, we’ll try to walk you through the steps to create a bootable USB flash drive with support for both BIOS and UEFI. First we will try without a software, this should work for Windows 10, Windows 8.1 & Windows 7. However, some BIOS may not recognize your USB flash drive as a boot media, using the Media Creation Tool or WinToFlash software will resolve this.

    Supported Windows OS

    This guide has been tested with the following OS:
    Note, If you are performing a fresh installation of Windows 10 on a PC, you can skip straight to how to create a Windows 10 UEFI boot media using Microsoft Media Creation Tool.

    [Further Reading: How to Upgrade Windows 7 Starter into Windows 7 Home/ Professional/ Ultimate FREE!]

    You can always fall back to our troubleshooting guides should you encounter any problems while creating your bootable USB flash drive.

    What you need

    Before you begin, make sure you have an internet connection if you don’t already have a copy of the Windows OS install in a DVD, .iso or in a folder. You should also have sufficient data storage available on a computer, USB or external drive for the download. Other requirements may include:

    • A copy of the Windows OS install .iso, in a folder or DVD. You can use this page to download a disc image (ISO file) that can be used to update or install Windows 10, Windows 8.1 or Windows 7. The image can also be used to create installation media using a USB flash drive or DVD. Windows software download is free on the Microsoft OS download page but you might need to purchase a license for usage.
    • A blank USB flash drive with at least 5GB (or 4GB for Windows 8.1 and below) free space. This drive will be formatted, so make sure it doesn’t contain any important files.
    • Technician PC – Windows PC that you’ll use to format the USB flash drive
    • Destination PC – A PC that you’ll install Windows on

    Boot Windows from your USB flash drive

    Having met all the requirements above, any of the three methods below will get you a bootable USB flash drive. Make sure to pay close attention and ask any questions you may have on the comment section.

    Troubleshooting: file copy fails

    One of the most important thing to watch out for is the storage capacity of your USB flash drive. Windows 10 October release will require your flash drive to have at least 5GB storage capacity.

    Also, if you are using a modern PC and your device features a UEFI firmware, you will need to format your USB flash drive using FAT32 file system which has a file size limit of 4GB. The Windows image file (sources/install.wim) in Windows 10 October release exceeds this limit.

    Follow our Widows 10 boot media troubleshooting guide to walk around this problem.


    Create a Windows 10, 8 & 7 Bootable USB Flash Drive without using a Software

    Here’s how to create a bootable Windows installation USB drive starting with a Windows .iso file or a Windows Setup DVD without using a third-party software or Windows Media Creation Tool.

    Step 1 – Format the drive and set the primary partition as active

    • Connect the USB flash drive to your technician PC.
    • Open Disk Management: Right-click on Start and choose Disk Management.
    • Format the partition: Right-click the USB drive partition and choose Format. Select the FAT32 file system to be able to boot either BIOS-based or UEFI-based PCs.
    • Set the partition as active: Right-click the USB drive partition and click Mark Partition as Active.

    Step 2 – Copy Windows Setup to the USB flash drive

    Use File Explorer to copy and paste the entire contents of the Windows product DVD or ISO to the USB flash drive.

    Step 3 – Install Windows 10 / Windows 8.1 / Windows 7 to the new PC

    • Connect the USB flash drive to a new PC.
    • Turn on the PC and press the key that opens the boot-device selection menu for the computer, such as the Esc/F10/F12 keys. Select the option that boots the PC from the USB flash drive.
    • Windows Setup starts. Follow the instructions to install Windows.
    • Remove the USB flash drive.

    How to create a Windows 10, 8 & 7 UEFI boot media using WinToFlash Software
    Windows 10 WinToFlash software
    WinToFlash creates a bootable USB with any modern Windows Desktop [PHOTO CREDIT: EBENEZER OBASI]

    If for some reasons, copying Windows through file explorer didn’t work, you can use the WinToFlash tool to create an installation media with UEFI support. Of course, the Windows Media Creation Tool will equally work if your target is to install Windows 10 on a PC. However, it’s faster to use this tool if your already have a copy of the Windows OS install in a DVD, .iso or in a folder.

    To create a Windows install media with support for UEFI, connect a USB flash drive with at least 5GB (or 4GB for Windows 8.1 and below) of space, and then use these steps:

    Step 1 – Download & Install WinToFlash Software.

    Download the free lite edition of WinToFlash from the official website. Under “Download,” click Lite edition Setup Download.
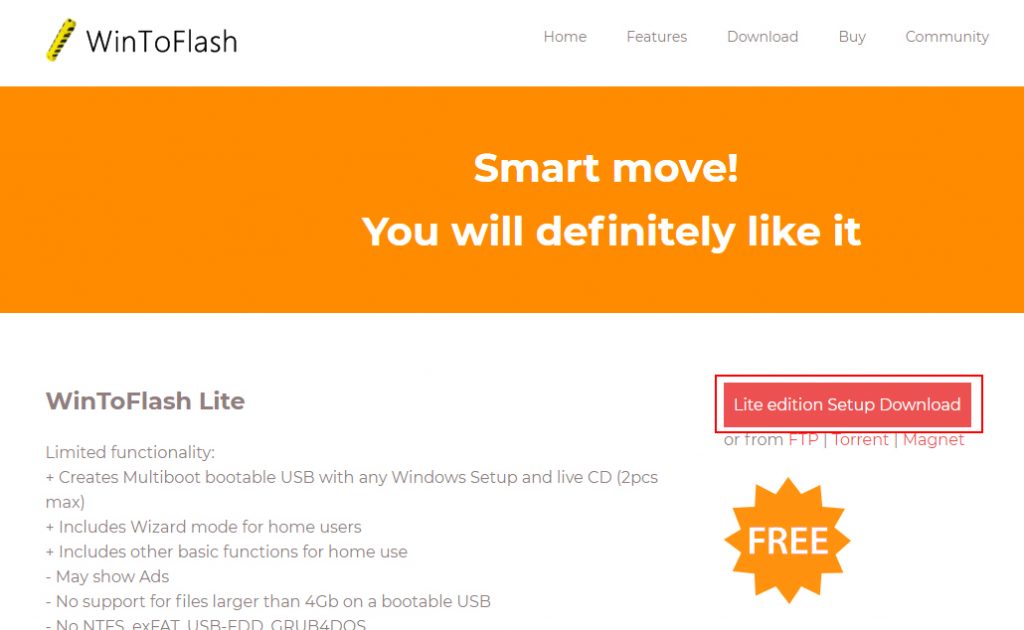
    After download is complete, open your download path and double-click the Novicorp WinToFlash Lite [The Bootable USB Creator] x.x.x Setup.exe file to launch the installation wizard.
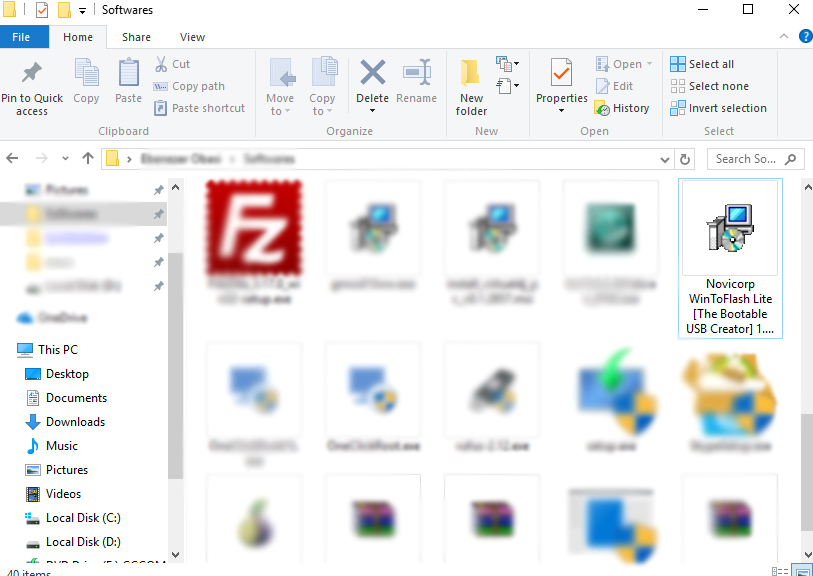
    Follow the installation wizard to install WinToFlash on your PC.

    Step 2 – Set Windows source and destination media
    After installation, click on the Novicorp WinToFlash icon from your desktop to launch the WinToFlash tool and install Windows 10 OS and below from your USB Flash Drive.

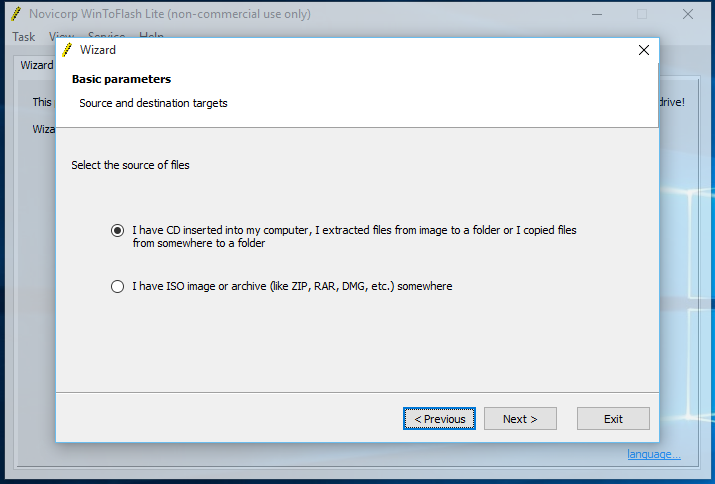
    From the application start screen, click Windows Setup Bootable USB Wizard. Select the installation source of the Windows, if you have downloaded an ISO file or loading from a folder.
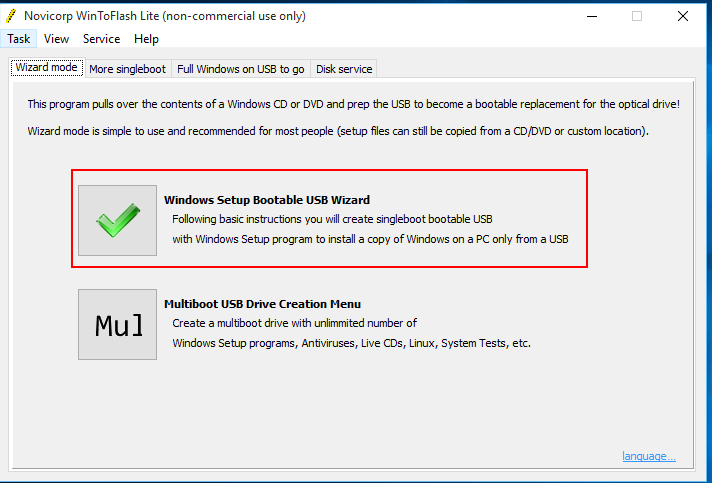
    Startup screen of WinToFlash tool. Select Windows Setup Bootable USB Wizard to load a single OS to your boot media.
    Specify Windows source path or file. If your OS is in a CD or extracted from image to a folder, go with the first option. Select the second option if the Windows software is an ISO image or archive.

    Click next to setup your Windows source and destination path.
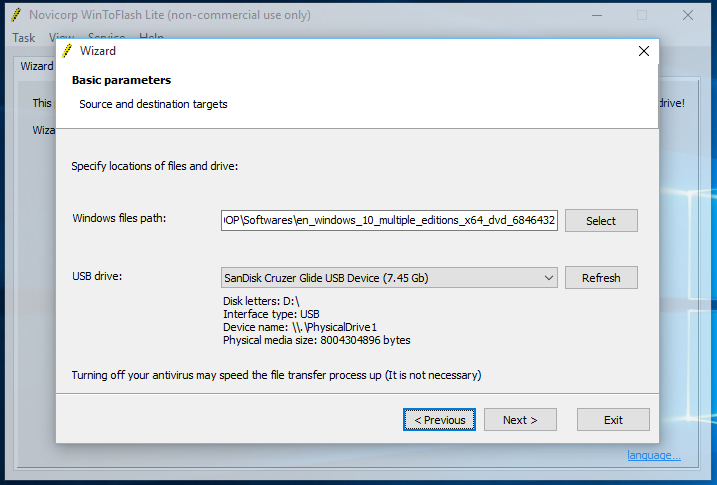
    Source and destination targets
    • The ‘Windows files path‘ specifies the path to the Windows installation files on your PC. This can be an ISO – archive or folder – CD path, depending on your selection on the previous screen.
    • Use the ‘USB drive’ drop-down to select the media you want to make bootable.

    Step 3 – Wrapping things up

    Click next and review all parameters. Make sure that you have chosen the right USB drive.
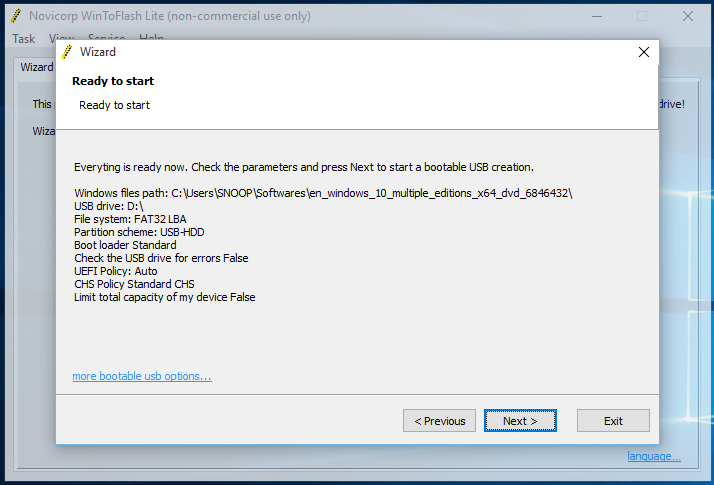
    Parameters overview
    Ensure that you have chosen the right media to avoid wiping important files from your flash drive.

    Complete settings by confirming to wipe USB flash drive and accepting WinToFlash terms (click on the images below to expand).
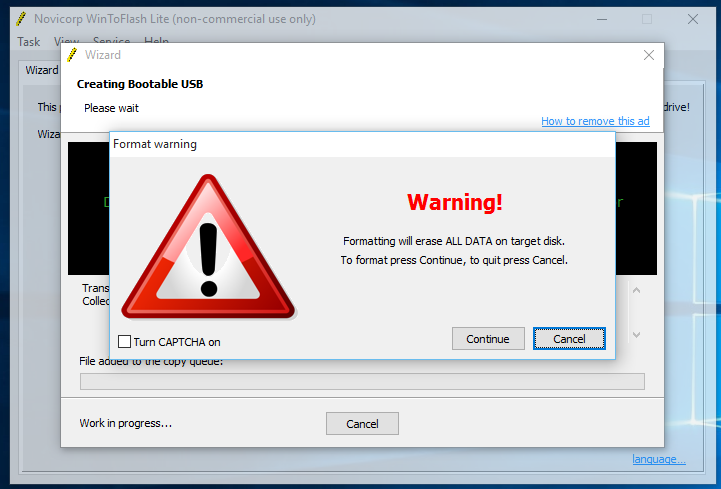
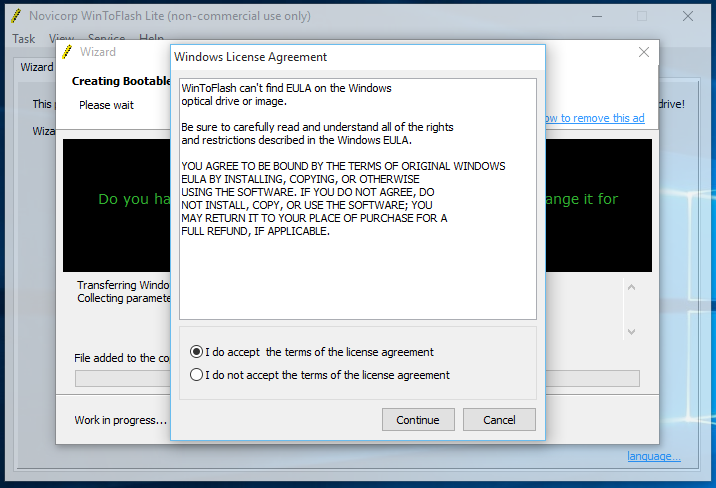
    After completing the steps, the WinToFlash tool will create a bootable media, which you can then use to install Windows 10 on devices using UEFI.
    Windows 10 installation progress on WinToFlash
    Windows 10 installation progress on WinToFlash.

    Once the USB bootable with support for UEFI has been created, you can start your device with the installation media to perform an upgrade or clean installation of Windows 10.


    How to create a Windows 10 UEFI boot media using Media Creation Tool

    If you’re planning to upgrade or install a fresh copy of Windows 10 on a system using BIOS or UEFI, you can use the Media Creation Tool to create a compatible bootable media. Just insert a USB flash drive with at least 5GB of storage to your computer, and then use these steps:

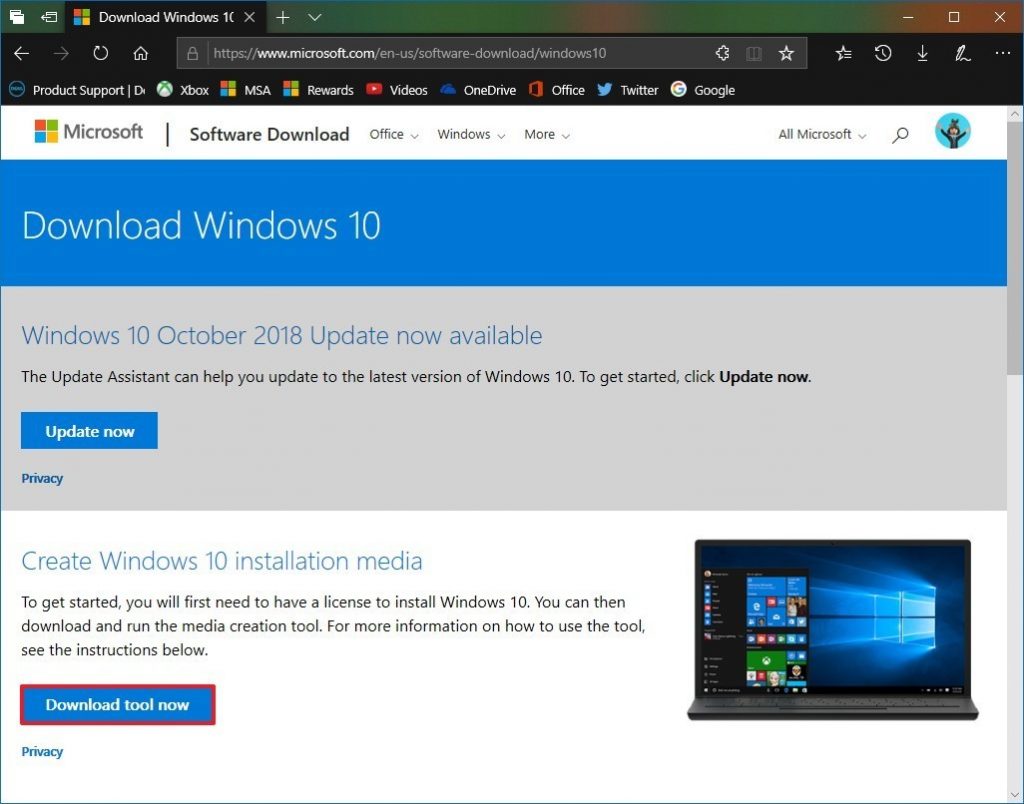
    • Open the official page.
    • Under “Create Windows 10 installation media,” click the Download tool now button.
    • Click the Save button.
    • Click the Open folder button.
    • Double-click the MediaCreationToolxxxx.exe file to launch the utility.
    • Click the Accept button to agree to the Microsoft terms.
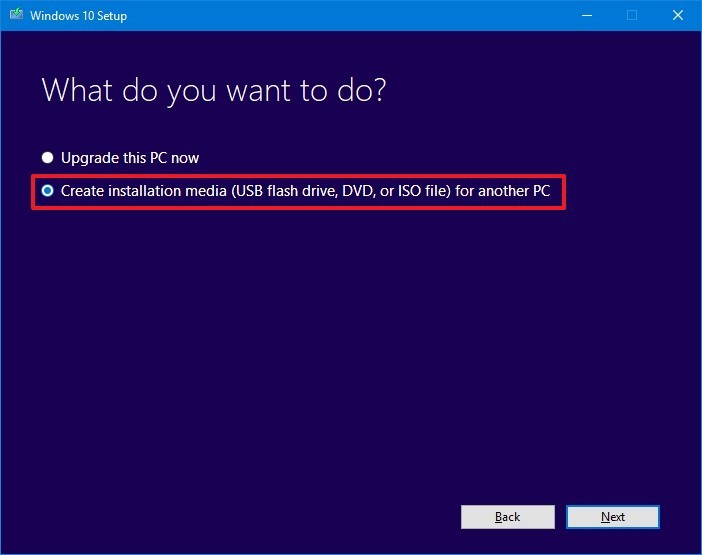
    • Select the Create installation media (USB flash drive, DVD, or ISO file) for another PC option.
    • Click the Next button.

    Select the correct language, architecture, and edition of Windows 10 if the default selection doesn’t reflect the desired options.
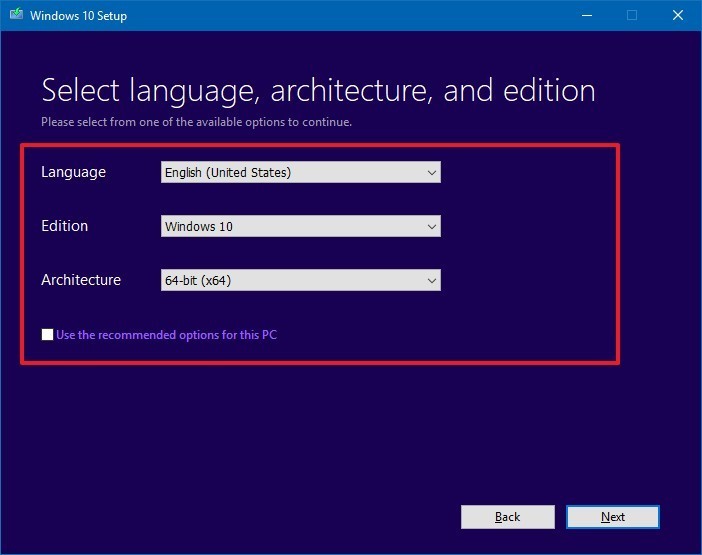
    Quick Tip: Under “Architecture,” you can select the Both option to create a bootable media that will work for devices using 64-bit and 32-bit processors. Also, if you’re unable to change these settings, make sure to clear the Use the recommended options for this PC option.

    • Click the Next button.
    • Select the USB flash drive option. (If you don’t see the drive, click the Refresh drive list option.)
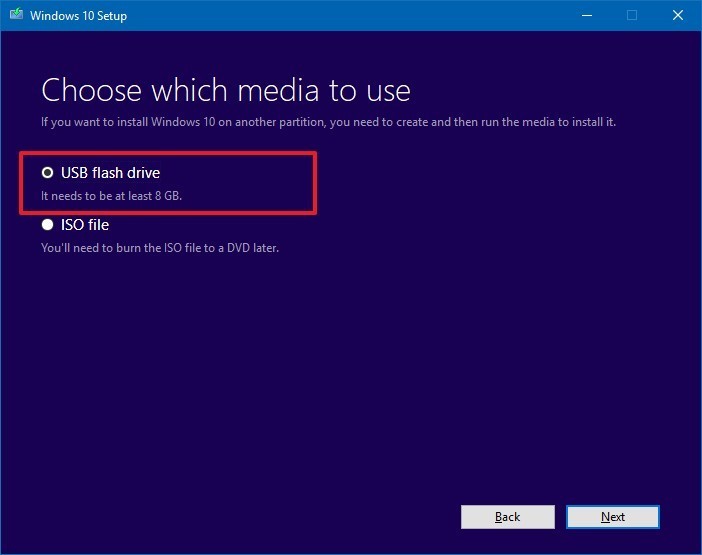
    • Click the Next button.
    • Select the removable drive from the list.
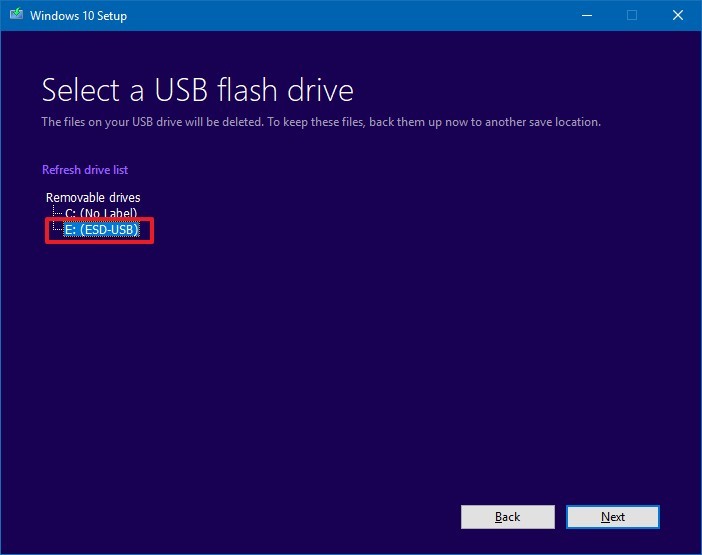
    Click the Next button. Once you’ve completed these steps, the wizard will download the Windows 10 installation files, and it’ll create the bootable media with support for UEFI as well as legacy BIOS.

    Troubleshooting Windows 10, 8 & 7 Boot Media

    UEFI systems cannot boot from NTFS and instead the device needs to be formatted with FAT32 which has a 4GB maximum size. If copy fails, it’s likely that the install.wim file on the media is larger than this file size limit. The solution is to split the WIM into multiple files using DISM.

    Split the Windows image

    Split a Windows image (.wim) file into a set of smaller (.swm) files. Use this procedure when you’re installing Windows from media that can’t handle the Windows image file size, for example:

    • DVDs (A standard single-sided DVD stores 4.7GB).
    • USB keys formatted as FAT32. FAT32 is required to boot many modern (UEFI-based) PCs, but has a maximum file size of 4GB.

    Split the file

    • Mount your Windows distribution ISO.
    • Launch Windows Command Prompt. The quickest and easiest way to do that is to type “CMD” into your Windows search box.
    • Right click on the resulting “Command Prompt” and “Run as Administrator”.
    • Copy everything except the Windows image file (sourcesinstall.wim) to the USB drive. Either drag from the mounted ISO and drop on the flash drive, or use the command below:
    robocopy D: E: /s /max:3800000000

    Where D: is the mounted ISO and E: is the USB flash drive.

    • Split the Windows image file into smaller files, and put the smaller files onto the USB drive:
    Dism /Split-Image /ImageFile:C:sourcesinstall.wim /SWMFile:C:sourcesinstall.swm /FileSize:3700

    where:

    • C:sourcesinstall.wim is the name and the location of the image file that you want to split.
    • C:sourcesinstall.swm is the destination name and the location for the split .swm files. The first split .swm file is named install.swm file. The file names for the next files include numbers, for example, install2.swm file, install3.swm file, and so on.
    • 3700 is the maximum size in MB for each of the split .swm files to be created. Kepp the size of the files below 4000 (4GB) to avoid getting the error 87 (invalid parameters) error.

    Note, Windows Setup automatically installs from this file, so long as you name it install.swm.

  • Bill Gates may be on his way Out of Microsoft; Satya Nadella to be named Microsoft CEO

    Bill Gates may be on his way Out of Microsoft; Satya Nadella to be named Microsoft CEO

    Microsoft’s cloud chief, Satya Nadella, will lead the company as its next chief executive, according to a report from Bloomberg.

    Microsoft’s board is “preparing to name” Nadella chief executive, Bloomberg reported Thursday afternoon. Nadella, whose official title is executive vice president of Microsoft’s Cloud and Enterprise group, had been one of the front-runners in the race to replace current chief executive Steve Ballmer, who said last August that he planned to step down within a year.

    But the board is also considering replacing Bill Gates as chairman of the company, Bloomberg reported, ousting the company’s co-founder and possibly replacing him with John Thompson, Microsoft’s lead independent director. If Gates is to go, as PCWorld suggested last year, it would remove two of Microsoft’s iconic employees from the software giant.

    The problem with replacing Ballmer or Gates, is that no one executive at Microsoft has traversed the range of the company’s products, which include consumer businesses like the Xbox, cloud services such as Azure, the company’s Windows business, server and development services like Visual Studio, and an emerging mobile business, too.

    Nadella, 44, is an Indian-born engineer with degrees in electronics, computer science (from the University of Wisconsin–Milwaukee), and business administration (from the University of Chicago). Nadella has worked since 1992 at Microsoft, and is credited with launching BizTalk, Microsoft’s Commerce Server, and Microsoft’s Office Small Business products.

    However, Nadella is most famous for having overseen Microsoft’s online initiatives, where he transformed Windows Live Search into Bing. The market share for Microsoft’s search offering stands at 18.2 percent, according to Microsoft’s recent earnings.

    One problem that naysayers point to: Nadella has no experience as a chief executive, unlike internal rivals like Tony Bates, who ran Skype, and external candidates like Alan Mulally of Ford, who took himself out of the running in early January, saying he was committed to Ford.

    So far, Ballmer’s commitment has been to a “devices and services” strategy. If Nadella is named CEO, its unclear whether he’d commit to that direction. On the other hand, his track record indicates that he can fulfill at least one half of that strategy.

  • Windows 8.x Busts Past 10% Market Share As Windows 7 Rises, XP Falls

    Windows 8.x Busts Past 10% Market Share As Windows 7 Rises, XP Falls

    According to Net Applications, Windows 8.x crossed the 10% barrier in December of 2013. Windows 8 and Windows 8.1 ended the year with 6.89% and 3.60% apiece for a combined 10.49% total market share.

    In the month, Windows 7 picked up 0.88% market share, as Windows XP fell below the 30 percent mark, shedding 2.24% to land at 28.98% in the month. While Windows 8.x’s market share growth is probably still under what Microsoft wants, enterprise adoption of Windows 7 appears strong as the end of Windows XP approaches.

    Windows 8 gained 0.23% market share in December, an almost surprising figure given the general availability of Windows 8.1, a free upgrade. The latter did pick up 0.96% in the month.

    It will be interesting to see how Windows 8.x’s growing market share converts into downloads of applications through the Windows Store. Previously, the Windows developer portal provided detailed download numbers. However, this morning I was unable to load the usual set of analytics through the system. Microsoft may have removed the capability.

    If so, we will not be able to correlate downloads with market share, which will limit our ability to vet Microsoft’s ability to convert new Windows 8.x users to its new application platform. That’s a shame.

    To wrap 2013, Windows 8.x manages a new threshold as Windows 7 manages to accelerate the end of Windows XP. Not a bad way to start 2014.Top Image Credit: Flickr Article Source: Techcrunch.

  • How to install Windows 7 on your Mac: The Complete Walkthrough

    How to install Windows 7 on your Mac: The Complete Walkthrough

    How to install Windows 7 on your Mac: The Complete Walkthrough
    Using Boot Camp to install Windows 7 on your Mac: The Complete Walkthrough

    Somewhat similar to the Using Boot Camp to install Vista on your Mac walkthrough, this tutorial will take you every step of the way through installing Microsoft Windows 7 on your Intel Mac (running 10.5 or later), using Boot Camp. 
    Note: if you’d rather not dual boot OS X and Windows 7, you can always install Windows 7 in a virtual environment using Parallels Desktop 6.0 for Mac.

    To install Windows 7 on your Mac using Boot Camp you will need the following:

        All firmware updates installed on your Mac (use Apple Button -> Software Update… to check)
        A Windows 7 installation DVD
        Your OS X Leopard or Snow Leopard installation DVD
        Around 30GB of empty hard drive space on your Mac. You can probably get away allocating less than 30GB to Windows 7, but it will leave very little room to install anything in Windows.
        An hour if all goes well, up to 5 hours if not
        Though not absolutely required, it’s a VERY good idea to have a complete and up to date Time Machine backup of OS X – it really came in handy for me. Because part of the process involves partitioning your drive, there’s always the distinct chance something will go wrong and everything will be wiped out.
        Patience, possibly a great deal of it. Having a book handy will also help kill time during the partitioning, installing etc).

    Installing Windows 7 via Boot Camp

        Here goes. First thing – close absolutely every open program you can. That includes those things running in the Apple Menu that you always forget about. Don’t worry about killing the Dock or Dashboard – having those running is fine.
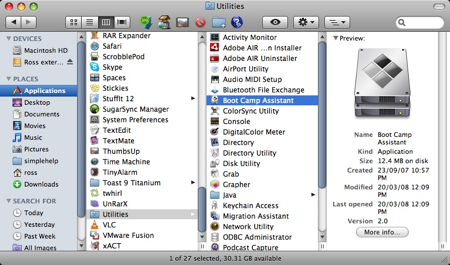
        Now open a Finder and navigate to Applications -> Utilities and double-click Boot Camp Assistant. 

    Click Continue on the initial Introduction screen. Ignore the fact that it doesn’t mention Windows 7 as a possible OS to install.
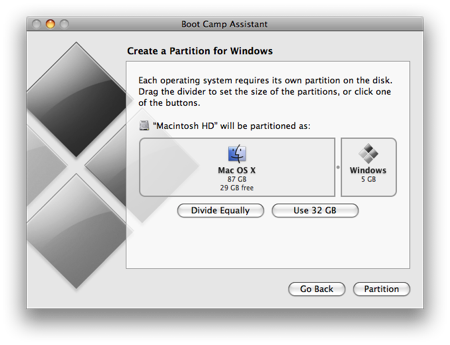
    Now you have to decide how much space you want to allocate to Windows 7. You might be able to get away with going as low as 10GB, but I would highly advise against it. You’ll have almost no space left over to install software, and your page file in Windows might cause frequent crashes. I opted for 20GB, which left me with just a bit over 16GB to use after installing Windows 7.

    To change the amount of space to dedicate to Windows 7, click the small divider between Mac OS X and Windows, and drag it to the left. 

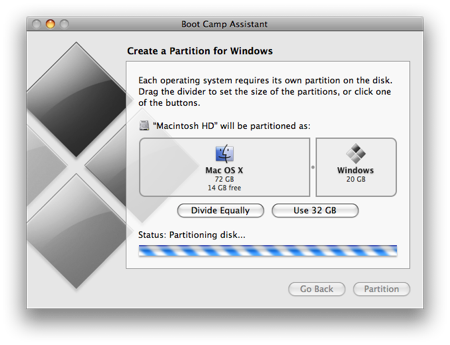
    Once you’ve determined how much space you want to allocate to Windows 7, click the Partition button. 
    The partitioning itself doesn’t take particularly long. If you receive an error, proceed to step 10 of the “How to install Vista with Boot Camp” tutorial. It provides all the troubleshooting info you need to resolve partitioning issues. Once you’ve cleared up any problems, or if everything just goes smoothly, proceed with the next step in this tutorial. 

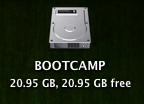
    Once completed you’ll notice a new BOOTCAMP drive on your desktop. 

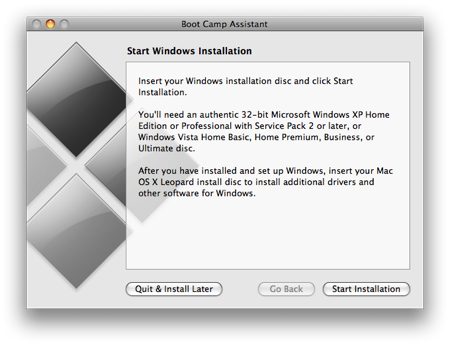
    Now insert your Windows 7 DVD and click the Start Installation button.

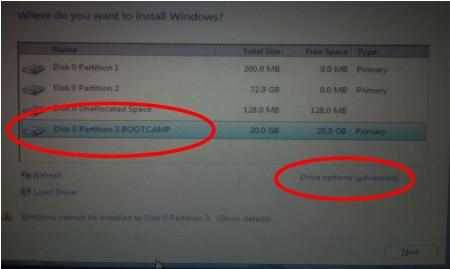
    Your Mac will restart, and Windows 7 will boot. You’ll be prompted with a window asking you which partition you want to install Windows on. Select the one with BOOTCAMP in the Name column. Selecting anything else may wipe out OS X or cause serious problems. Then select the Drive options(advanced) link. 

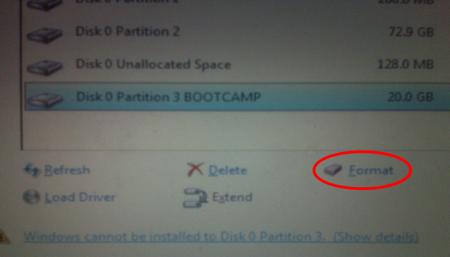
    With the BOOTCAMP volume still selected, click the Format link.

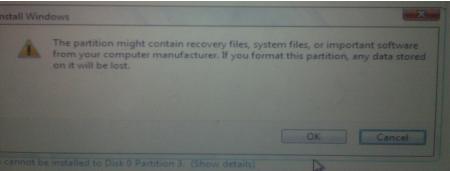
    Click OK. 

    And Windows 7 will begin to install. It’s a fairly boring process, so you may want to grab yourself a cup of coffee or your beverage of choice. But don’t go too far away, because when your system reboots, you’ll need to remove the Windows 7 DVD. 

    With the Windows 7 DVD removed, your Mac will automatically boot back into Windows 7, and the installation will complete. You’ll be prompted to select your language, keyboard layout etc. The rest of the Windows 7 installation process is very straight forward.
    Once the installation has completed and your Mac has restarted again, you’ll be able to use Windows 7. WiFi will work immediately (no drivers to install) so connect to the Internet. Windows 7 will then begin to download updates, including the proper video card driver. Let it do its thing. 

    Once completed, you’ll be prompted to reboot yet again. Do so.

    Once Windows 7 boots back up again, you’ll notice the resolution is much better, and you can enable the advanced graphics features. 

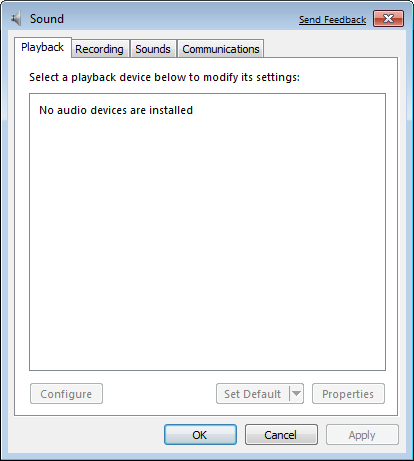
    But if you check for sound, you’ll notice there are no sound drivers installed. 

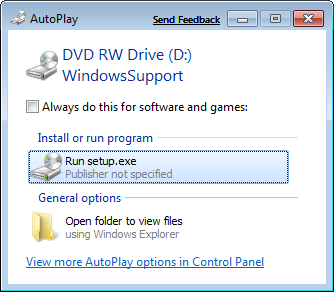
    Insert your OS X Leopard (or Snow Leopard) DVD. When prompted, select Run setup.exe. Note: If you’re using Snow Leopard and a message pops up saying “Remote Install Mac OS X”, close that window and eject the CD. Put the CD in again and this time select “Open folder to view files”, navigate to the Bootcamp folder, and run setup.exe. 

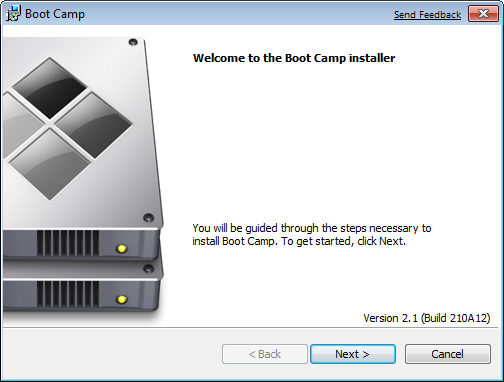
    The Boot Camp installer will launch. Click Next to begin. 

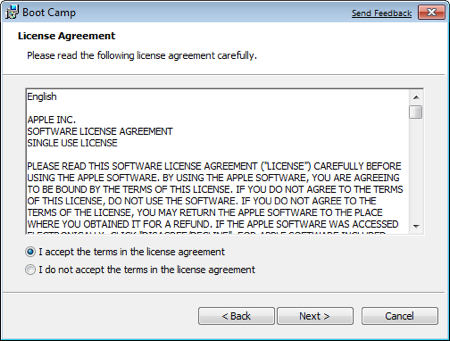
    Select I accept the terms in the license agreement and then click Next again. 

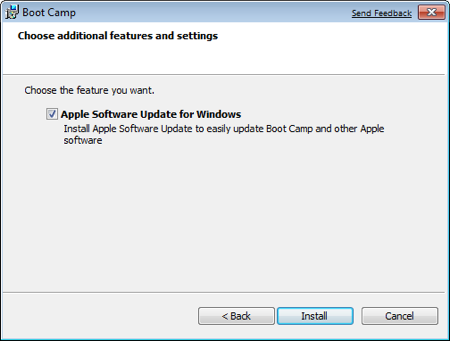
    Make sure that Apple Software Update for Windows is checked, and click Install. 

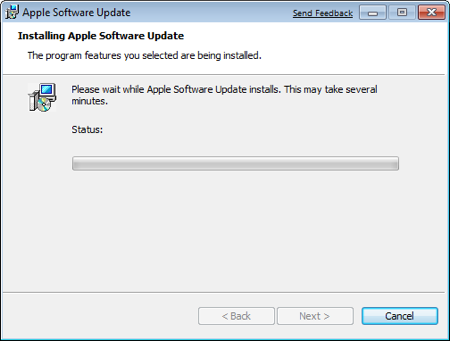
    The Boot Camp installer will do its thing, and install all the required drivers. 

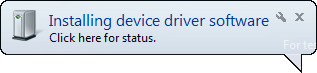
    Notifications will pop up with each driver that gets installed.

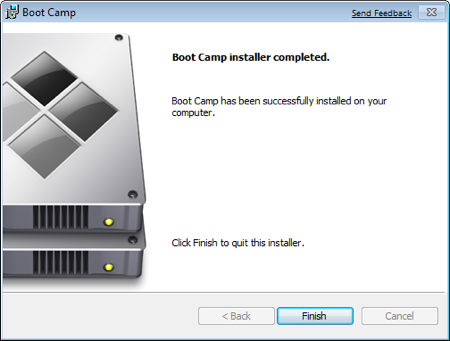
    Once completed, click Finish. 

    And yet again you’ll be prompted to reboot. Remove your OS X Leopard DVD from the drive, and click Yes to restart. 

    At this point most of the hardware on your Mac should be working in Windows. However, some iMacs and MacBook Pro’s will have to update to the 3.1 version of Boot Camp for Windows. To do so, just follow the few steps in this tutorial.
    Note: If you still have problems with sound not working, you’ll need to install the Realtek drivers.
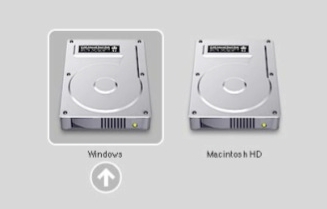
    That’s it, you’re done! When your Mac boots, hold down the Option key to select which Operating System you want to boot into. 

  • 25 Best Free Themes for Windows 7

    25 Best Free Themes for Windows 7

    Windows 7 one of the most successful operating system from Microsoft so far. Using windows 7 on your personal computer or laptop gives a new experience to its users. There are many themes, widgets, layout option in this operating system which makes it different from other windows like 98, XP. Themes are the best way to enhance your screen layout and here we are going to share best and free themes for windows 7 which you must have to try on your PC or Laptop.

    Antarctic


    Download

    Love Birds


    Download

    Surfing Theme


    Download

    Rio Movie


    Download

    Rango


    Download

    Ireland


    Download

    Waterdrops


    Download

    Small World


    Download

    Sailing


    Download

    Kang Fu Panda 2


    Download

    Harry Potter


    Download

    Mega Mind


    Download

    Halo Reach


    Download

    Bake House


    Download

    Girls Rock


    Download

    Snow Angel


    Download

    Surreal Territory


    Download

    Best of Bing 3


    Download

    Alan Wake


    Download

    Windows Live


    Download

    Snow Sport


    Download

    Fireworks


    Download

    Bunnies


    Download

    Lightning


    Download

    Nature Photograph


    Download

  • 10 Must Have Apps For Windows 7

    10 Must Have Apps For Windows 7

    apps for Windows 7

    Windows 7 is latest operating system from Microsoft and also without any doubt, a very  successful operating system yet. It has many amazing features and have a big improvement with built  application like Media player , Games , Internet Explorer  and some other menu items. But here I would like to share with you some of the best must have applications for Windows 7 without which it is just like incomplete for the purpose for which it is designed.

    1.Mozilla Firefox

    Mozilla Firefox is one of the most famous and used web browser application at the time and thousands of the people’s  are using it as  their default browser. Firefox have a lot of extensions which makes your internet accessing easy and better. The latest version of Firefox now available Mozilla Firefox 4.0 with a new look as compare to its old versions. In latest Firefox have features include tabbed browsing, spell checking, incremental find, live bookmarking, a download manager,private browsing, and more.
    Download

    2. AVG Anti-Virus 2011 Free Edition

    AVG anti-virus is a most popular antivirus in market and also have a good response by users. It protects your computer from many kinds of viruses. It is a total security which can make the scans are faster, it does install more quickly, and some tweaks to the interface have made it easier to use.  The big improvement in this edition is Link Scanner, E-Mail scanner , an Update Manager Anti-Rootkit and PC Analyzer  to provide more protection and better performance of your pc.
    Download

    3. VLC Media Player

    VLC is a free and open source cross-platform multimedia player and framework that plays most multimedia files and completes all your needs. You can play DVDs, VCD’s,  Audio CD’s, web streams, TV cards and much more. It is a Simple, Powerful and Fast media player which Plays most codecs with no codec packs needed and all there for totally free.
    Download

    4. CCleaner

    CCleaner is the most easy tool for cleaning your Windows PC. It protects your privacy online and makes your computer faster and more secure. It is very Easy to use and a small, fast download. CCleaner removes Temporary files, history, cookies, Auto complete from history, index.DAT, Recycle Bin, Recent Documents, Temporary files and Log files from your PC and an advanced features to remove unused and old registry entries. In other words we can say it works as a sweeper for Internet Explorer , Mozilla Firefox, Google Chrome, Opera, Safari and Windows.
    Download

    5. Internet Download Manager

    Internet Download Manager is used to download any thing from any site. It shows on-screen download links, which makes your internet surfing easy and fast. You can make your downloading file Pause and Resume. You can also add a new URL to download manually.
    Download

    6. Winamp

    Winamp is also another media player used widely after Windows Media Player. It is a free  media player that plays mp3 and other audio files, syncs your iPod, subscribes to Podcasts and more. It have amazing in-built loaded equalizer setting which makes a good quality of sound for listeners. You can also download more skins and visualization effects and able to customize them.
    Download

    7.Microsoft Security Essentials

    Microsoft Security Essentials provides real-time protection for your home or small business PC that guards against viruses, spyware, and other malicious software. Microsoft Secure Essentials is a free and download from Microsoft that is simple to install, easy to use, and is automatically updated to protect your PC with the latest technology. It runs quietly and efficiently in the background so that you are free to use your Windows-based PC the way you want without any interruptions or long computer wait times.
    Download

    8.CDBurnerXP

    is a free application to burn CDs and DVDs, including Blu-Ray and HD-DVDs. Though it includes XP in name but works like a charm in Windows 7. It includes the feature to  create and burn all kinds of discs,audio-CDs with or without gaps between tracks,ISO files,bootable discs. It also provide the option for data verification after burning process. Not even this, it has multi-language interface and also available different operating systems such as Windows 2000/XP/2003 Server/Vista/2008/Win7 (x86 / x64).
    Download

    9.Digsby

    Digsby is multi messenger which lets you to make instant messaging easy with various social network sites. It is an e-mail notification and  social networking tool that lets you chat with all your friends on AIM, Facebook, MSN, Yahoo, ICQ, Google Talk, and Jabber. You can manage you buddy list in simple way.You can Customize digsby with application skins to give it a personal look and feel and also manage your Hotmail, Gmail, Yahoo Mail, AOL/AIM Mail, IMAP, and POP accounts right from it.
    Download

    10. Photo Scape

    If you have low system configuration and can’t run Photoshop then here is an alternative for it. Photo Scape is a great free photo editing software application which supports RAW, as well as all other major image formats from JPEG and PNG to animated GIF’s. It comes with rebuilt templates for users to create photo collages, fumetti, and Web comics, and has a standard set of red-eye removal, light/shadow, and contrast-editing features. You can also batch edit images, combine them, and print them out one at a time or several at once. All this for free and with a small use of memory .
    Download

  • Run XP Software in Windows 7

    Run XP Software in Windows 7

    SIUC asked the Windows forum about running software intended for Windows XP in Windows 7.
    For the most part, it should just work. I’ve rarely run into programs that run fine in XP but have trouble in Windows 7.
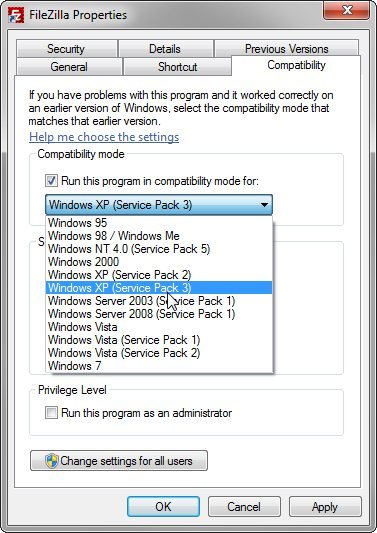
    But if you’ve run into one of those rare programs, try running it in XP Compatibility Mode:

    1. Right click the .exe file or the shortcut and select Properties.
    2. Click the Compatibility tab.
    3. Check Run this program in compatibility mode for and select an appropriate option.


    If this doesn’t work, there’s another work-around: XP Mode. (And yes, I know it’s silly that the two solutions are called XP Compatibility Mode and XP Mode.) Unfortunately, this option is only available for Windows 7 Professional and Ultimate editions.
    You’ll need to download and install Windows XP Mode and Windows Virtual PC (be patient; it’s a big download).
    Once you’re finished, you’ll be able to actually run XP inside a virtual machine in Windows 7. It’s not as smooth as simply running the programs in Windows 7–you’re in an entirely different environment. Even the hard drive that XP boots from and runs off of is a virtual one.
    But you won’t be entirely cut-off from Windows 7. You will be able to access the real hard drive from within XP, and both versions of Windows will share the same clipboard.

  • How to Install Windows 7 Without the Disc

    How to Install Windows 7 Without the Disc

    How to Install Windows 7 Without the Disc

    Here’s how to legally download Windows 7 and make your own install disc.

    Many computers ship without Windows 7 installation discs. Instead they come with “recovery” discs and/or partitions that claim to restore your PC to its “factory fresh” state, but include a ton of bloatware (free trials, media players, useless utilities, and the like) along with Windows. Removing each piece of bloat is time-consuming, and just not the same as truly starting fresh.

    In this article, you’ll learn how to make your own Windows 7 installation disc (or USB flash drive) and use the valid product key you already have to perform a fresh reinstallation. The following method is effective and legal, and doesn’t require a lot of technical expertise
    However, we don’t recommend that you delete your recovery partition or throw away your existing recovery discs. Although many people have had success with the following procedure, others have not. Some users have not been able to activate their copy of Windows even after entering a valid product key, while others own PCs that require software not included in a Windows 7 ISO. You have no way to know whether this procedure will work for you until you try, and you need a backup plan in case it doesn’t.
    Also, save your files and drivers to external media before you start. Reinstalling Windows wipes out all personal data and causes a loss of functionality in devices for which Windows lacks an adequate built-in driver. Plan on loading the latest device drivers from media you create before reinstalling Windows.

    Reinstalling Windows 7, Step by Step

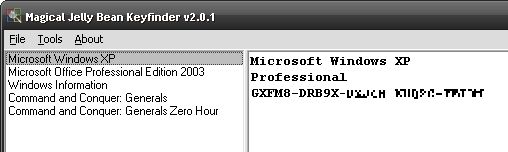
    1. Find your Windows 7 product key: Typically this 25-character alphanumeric string is printed on a sticker affixed to your PC or on documentation included with your PC. Alternatively, you can use a keyfinder program such as Magical Jelly Bean Keyfinder to pull your product key from the Registry. You need your product key to reinstall Windows.
    Magical Jelly Bean Keyfinder helps you round up your serial numbers.Magical Jelly Bean Keyfinder helps you round up your serial numbers.
    2. Download the ISO file for the version of Windows 7 you own:

    The above links point to Digital River, a licensed distributor of Microsoft software. These downloads are each over 3GB, and your product key will work only with your edition of Windows, so make sure to select the right one.
    3. Download the Windows 7 USB/DVD download tool. This utility lets you copy your Windows 7 ISO file to a DVD or USB flash drive. Whether you choose DVD or USB makes no difference; just confirm that your PC can boot to the media type you select.
    4. Boot your computer using the Windows 7 DVD or USB flash drive. Follow the prompts to prepare the destination hard drive and install Windows.

  • Try Windows 8 Without Losing Windows 7

    Try Windows 8 Without Losing Windows 7

    Anderson7 asked the Windows forum for the safest way to install Windows 8 on a system already running Windows 7.
    I wrote my opinion of Windows 8 last month. Many readers voiced their own, differing opinions. You can make up your own mind by installing the Windows 8 Consumer Preview.
    But you shouldn’t replace your current OS with one that’s not yet ready to be sold commercially. You want to install Windows 8 in a way that leaves Windows 7 unharmed.

    That’s why I recommend installing it in a virtual machine (VM). Virtual machine software imitates an actual, physical computer, onto which you can install another operating system. This is by far the easiest and safest way to try out an operating system.
    I recommend Oracle VM VirtualBox for creating and running your Windows 8 VM. It’s free, open-source, powerful, and it already supports Windows 8. (It’s main free competitor, VMWare Player, doesn’t support Windows 8 as I write this.)
    You’ll also need to download the .iso file version of the Windows 8 preview. This page contains both 32- and 64-bit editions; unlike previous Windows versions, you can’t install the 32-bit version on 64-bit hardware (at least I couldn’t). You’ll also find the product key here; you’ll need that during installation.
    Once everything is downloaded and you’ve installed VirtualBox, follow these directions:

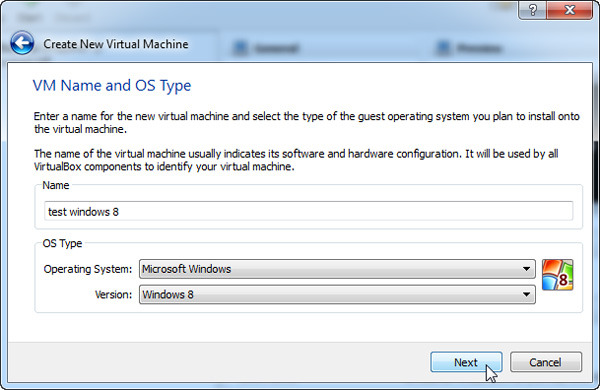
    1. Load VirtualBox, the click the New icon in the upper-left corner.
    2. This starts a wizard. Click Next.
    3. On the “VM Name and OS Type” page, enter a name that includes the phrase windows 8. Otherwise, “Windows 8” won’t show up as a Version option.
    4. Stick to defaults for the result of the wizard, even when asked if you want to “Create new hard disk.” Don’t worry, it’s just a virtual disk.
    5. When the Wizard finishes and closes, double-click the new virtual machine.
    6. Read the message about the Auto capture keyboard, then click OK.
    7. The First Run Wizard will start. When you’re asked for Installation Media, click the folder icon on the right and select your downloaded .iso file.
    8. The installation will begin after you click Start.
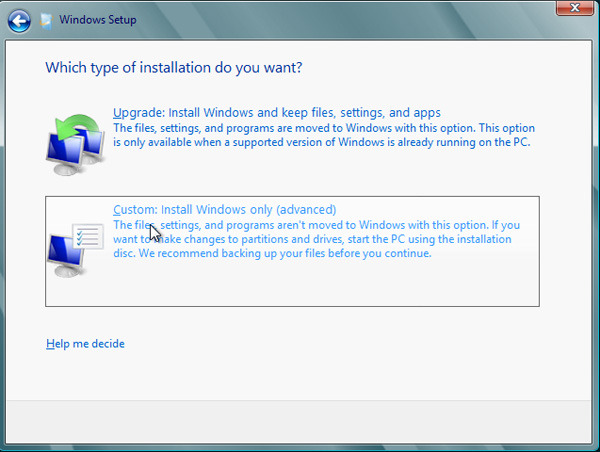
    9. When asked for a type of installation, select Custom. Don’t worry about overwriting files. The only hard drive the installation sees is the empty, virtual one.

    When you’re done, you’ll be able to run Windows 8 inside Windows 7.

  • How to Upgrade Windows 7 Starter into Windows 7 Home/ Professional/ Ultimate FREE!

    How to Upgrade Windows 7 Starter into Windows 7 Home/ Professional/ Ultimate FREE!

    I just got my new netbook 2 weeks ago, but I was greatly disappointed with the fact that it came with Microsoft Windows 7 Starter edition only not Windows 7 Home Premium, Professional or Ultimate. As we all know, Windows 7 starter is the cheapest version of Windows 7 series and you can’t even change to your favorite background wallpaper or I would suggest a handicapped version of Windows 7. Eventually my search for the upgrade begin!

    Initially I was thinking of formatting my whole hard disk and get a fresh new copy of Windows 7 Ultimate (cracked ver). But after reading some forums and comment by some of the users, I found out that we can actually upgrade our current version of Windows without going to the formatting path. Instead it could be easily upgraded to any version you prefer as easy as 1 2 3. Here go the step:

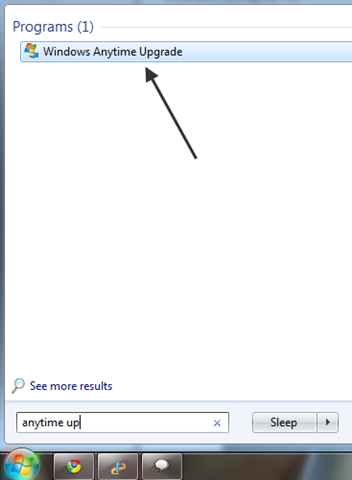
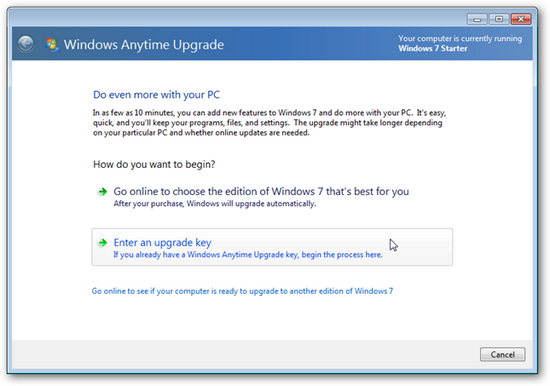
    Step 1. Enter “Anytime Upgrade” in the Start menu search,and select Windows Anytime Upgrade.

    Step 2. Select “Enter an upgrade key” from the screen.

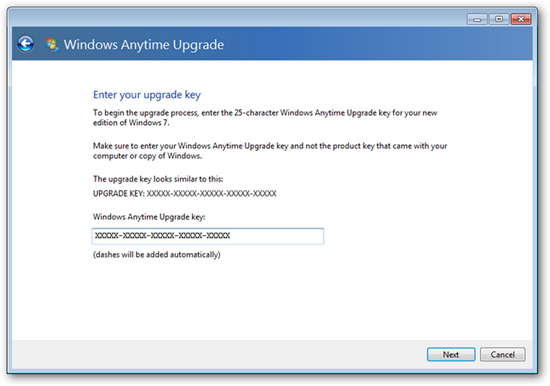
     Step 3. Download Windows 7 Anytime Upgrade keygen at Hotfile and key in the key generated into the space and click “Next”.


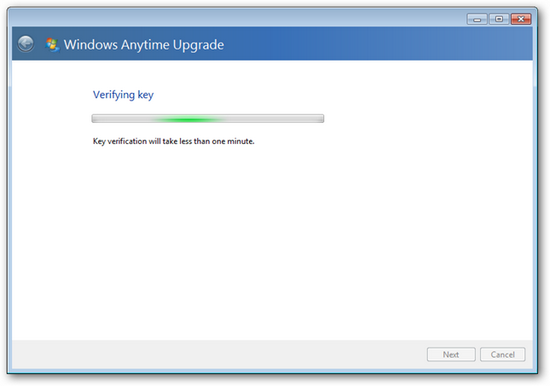
    Step 4. The key will be verified as a valid key, and Windows Anytime Upgrade will automatically choose the correct edition of Windows 7 based on your product key.  Click Next when this is finished.

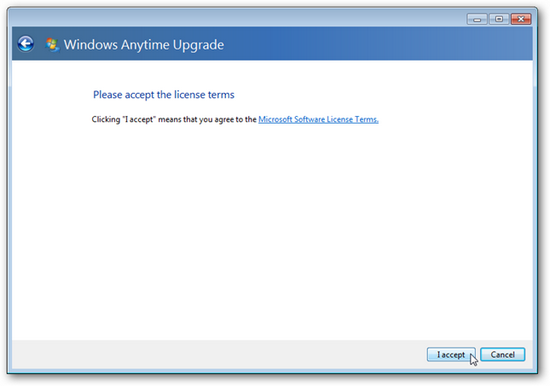
    Step 5. Click “I accept” to accept the license agreement.

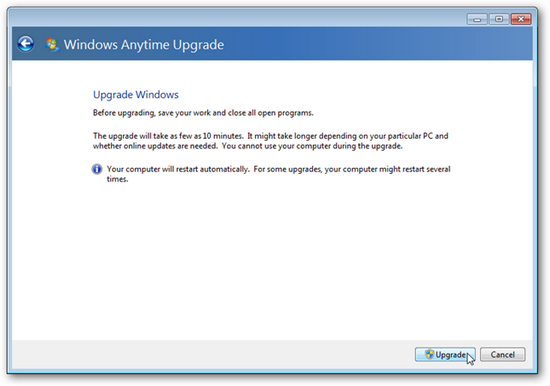
    Step 6. Click “Upgrade” to initiate the upgrade process.

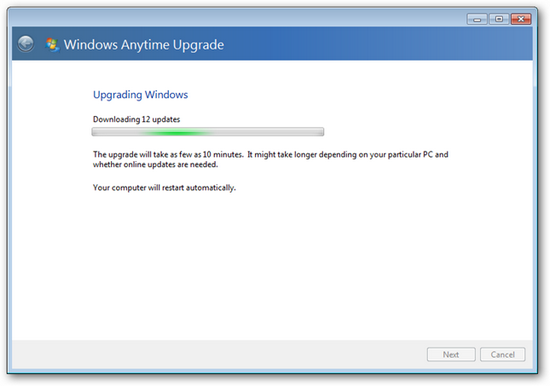
    Step 7. Wait for the Windows 7 to be installed. As stated the upgrade will take about 10 minutes but it may vary according to your connection speed.

    Step 8. Windows 7 will start installing all the feature into your computer.
    Well, you are done. You have successfully upgraded your Windows 7 Starter edition.