Author: Alexis

  • Best wireframe tools for windows

    Best wireframe tools for windows

    Developing Interfaces for websites and mobile apps requires a lot of planning and strategizing. The designer is tasked with the job of creating a standard workflow, that the developers can work with.  This is where wireframes come into play. 

    Wireframes are visual representations of what is going to be displayed on the website or the mobile app being developed. Wireframes make UI/UX designs easy to understand. Wireframes can best be described as a map to the UI design.

    Wireframe tools are essential in developing good wireframes. They make developing wireframes very easy. For beginners, most wireframe tools feature templates that make developing wireframes easy, and for the professional, they are presented with a clean slate to create their wireframes. 

    In this article, we explore a list of best wireframe tools for windows devices. As already mentioned, these wireframe tools make developing wireframes seamless. The list of wireframes are listed below:

    1. Template Toaster
    best wireframe tools for windows

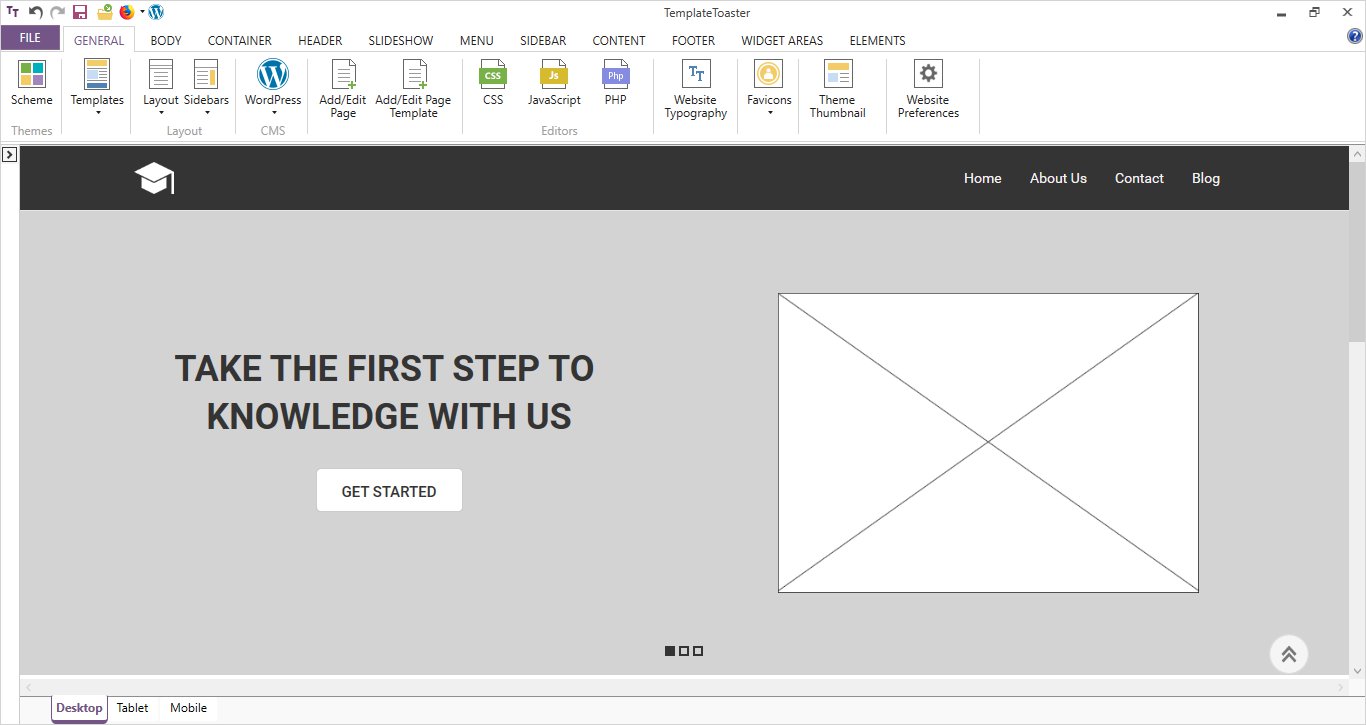
    Template toaster offers a very intuitive interface, that allows UI designers to create explainable wireframes. It helps designers create awesome wireframes from scratch, using a wide range of fonts and styling options. Apart from letting you create your own wireframe tools from scratch, Template roaster features responsive mockups with the easy learning curve. Template roster houses a feature that lets you directly upload wireframes created to the server, after which you can ask the client to view. Template roaster costs $49

    2. InVision
    best wireframe tools for windows

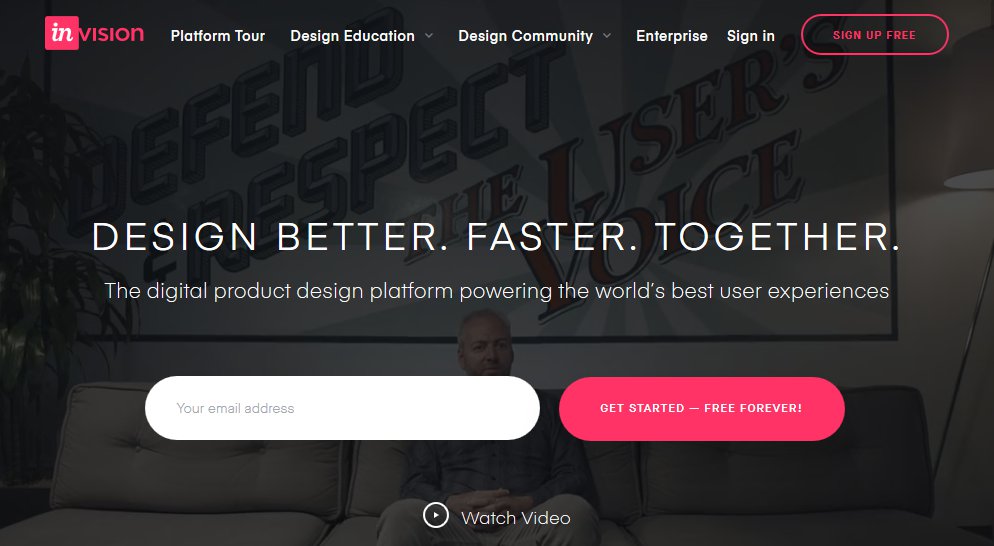
    InVision is a cloud-based wireframe tool, designed to help users develop top-notch wireframes for UI/UX projects. For starters, lets users create a clickable prototype, that gives the UI design life. It lets users create Wireframes from scratch, it features drag and drops functionality, that makes moving images and sketches very easy. The InVision wireframe houses a feature that lets designers create links to their wireframes, allowing other designers to view it and share thoughts. The InVision wireframe tools have plans that range from $15 per month to $99 per month.

    3. Moqups

    best wireframe tools for windows

    Moqups is yet another web-based wireframe tool that designed for UI/UX designers to create top-notch wireframes for presentations. Apart from being web-based. The Moqups wireframe tool is available as an app on Windows, Android, iOS, and MAC OS. The Moqups wireframe tool houses a drag and drop feature that allows designers to move characters. It also features already made templates, plenty of styling and fonts for design, integrated stencil kits and lots more. Using this tool, you will need to pay a premium fee, that ranges from $13 to $19 per month.

    4. WifreFrame.CC
    best wireframe tools for windows

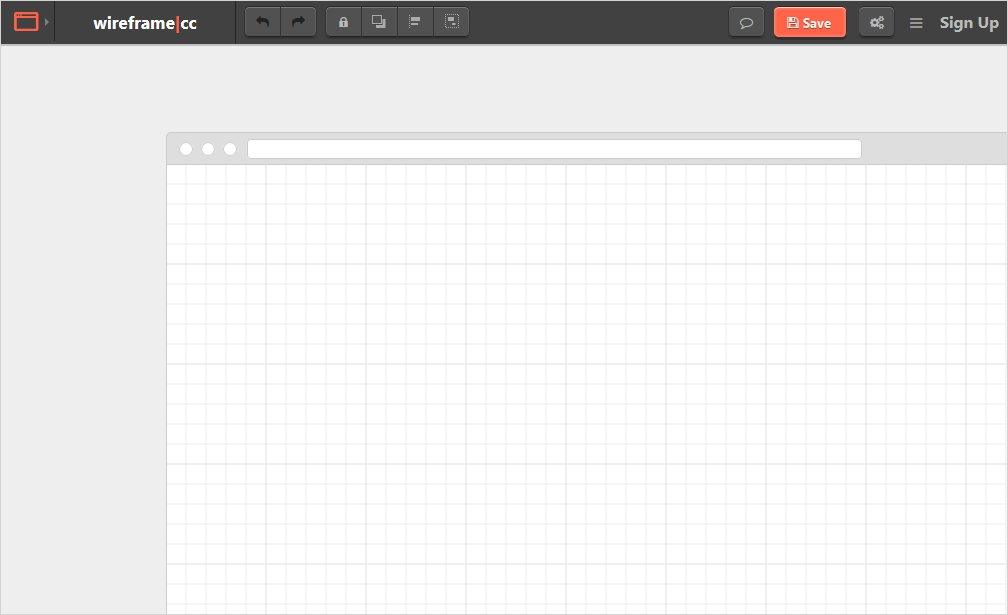
    Wireframe.cc provides a very clean and minimal interface for UI/UX designers to design engaging wireframes. Unlike other wireframe tools, Wireframe.cc doesn’t feature many icons or taskbar, everything is kept minimal. Wireframe.cc gives you the flexibility to draw whatever you feel like. Wireframe.cc features a great number of stencils to choose from, it also lets users create permalinks to their designs, allowing designers to share their work with other designers or clients.

    5. MockPlus
    best wireframe tools for windows

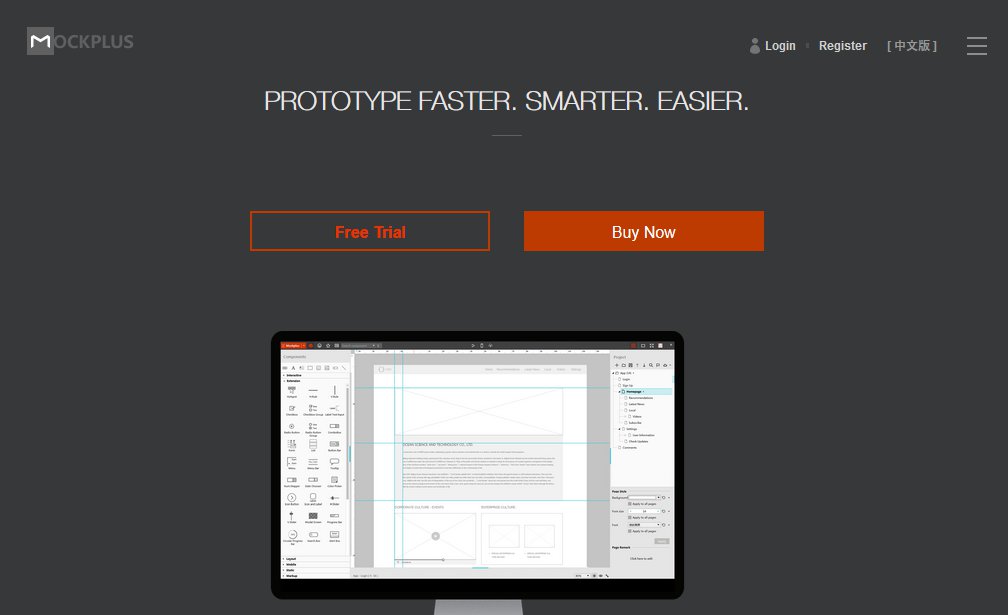
    Mockplus is one of the most sought after wireframe tools today. This fact is facilitated by a lot of obvious reasons. Mockplus houses feature professional UI designers seek. Mockplus lets designers create previews of their UI/UX designs. MockPlus has over 200 components and more than 3000 icons with easy drag and drop facility. Mockplus doesn’t require any knowledge of coding. All you have to do is drag and drop. As might have already guessed, MockPlus doesn’t come cheap; you are required to pay $199.

    6. Axure RP
    best wireframe tools for windows

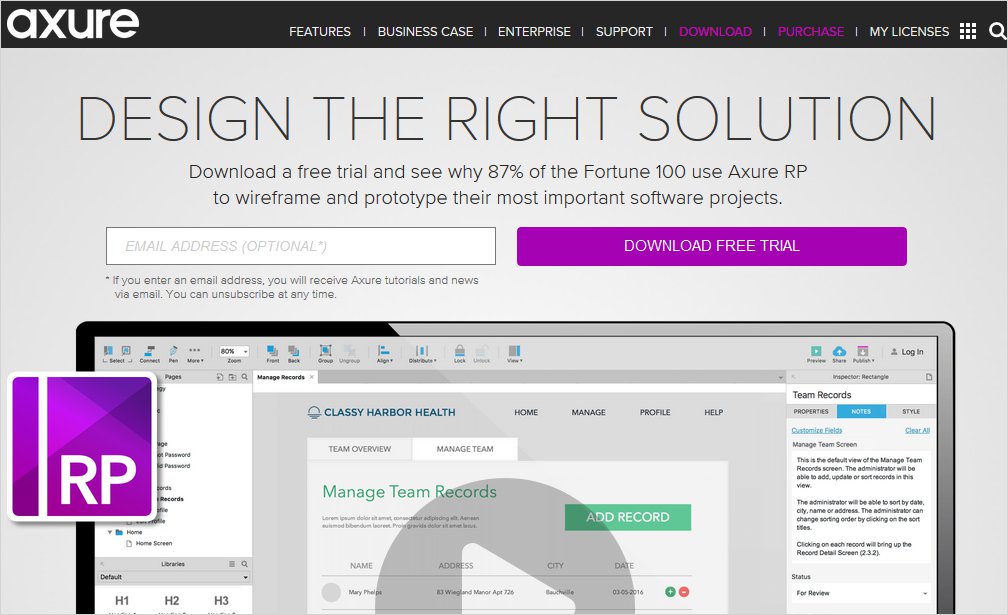
    Seeking to give your client a representation of your UI work so far. Axure RP is a wireframe tool that let’s create interactive prototypes and static wireframes. It lets you illustrate your web or mobile application map. The Axure Wireframe tool is available on both Windows and MacOS. It features drag and drop functionality, lets you test prototype on mobile devices. The Axure RP wireframe tool can be used to create High fidelity results so that the end results can be tested via a realistic prototype.

    7. Balsamiq Mockup
    best wireframe tools for windows

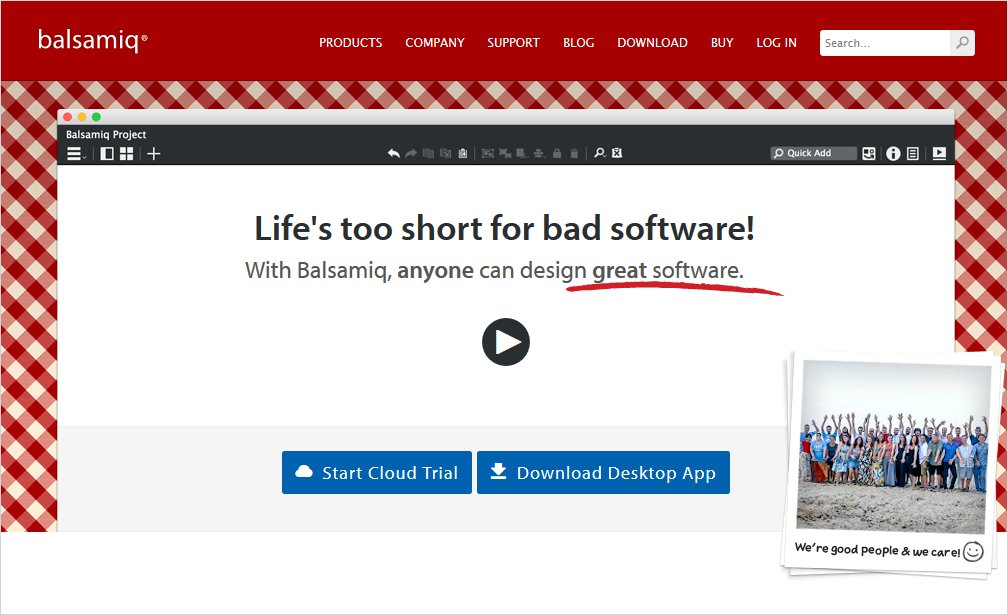
    Still, on the topic of best wireframe tools for windows, Balsamiq mockup is yet another wireframing tool designed for UI designers running windows operating system. It lets UI designers create wireframes seamlessly. It provides users with the same original feeling of sketching with a pencil, only in a digital environment. The Balasmiq wireframe tool features drag and drop function, it allows users to print the prototypes and run the online user stats. The Balasmiq wireframe tool costs $89.

    8. Justinmind
    best wireframe tools for windows

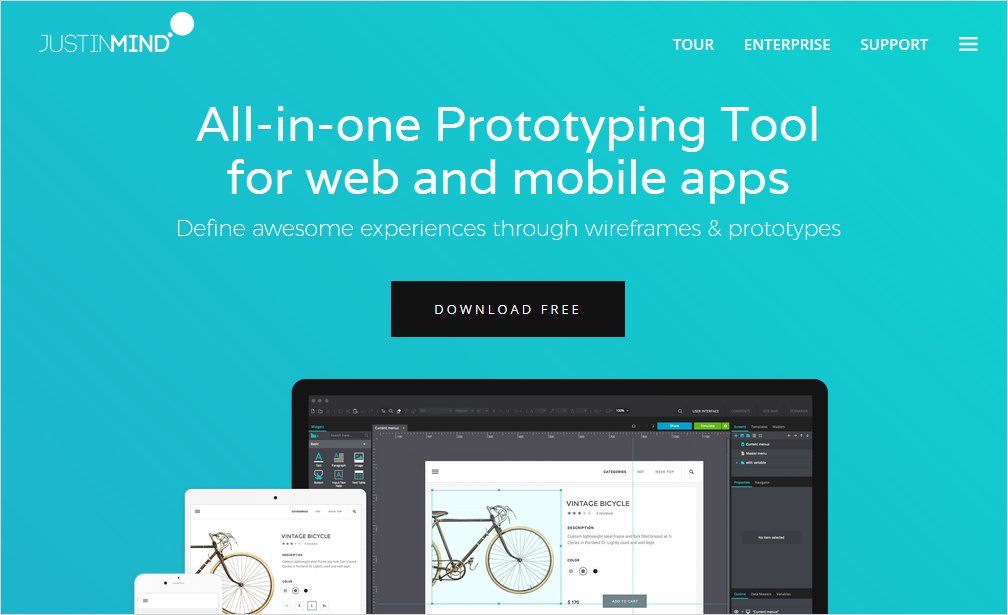
    The JustinMind Wireframe tool is yet another awesome wireframe tool. It was designed to help designers create awesome wireframes seamlessly. The JustinMind Wireframe tool lets users create operational or Clickable mockup. The JustinMind Wireframe tool is available on Windows, MacOS, Android, and iOS platforms. It houses over 500 web and mobile widgets, over 1500 UI elements for iOS, Android and Web. The JustinMind Wireframe tool costs $19.

    9. Fluid UI
    best wireframe tools for windows

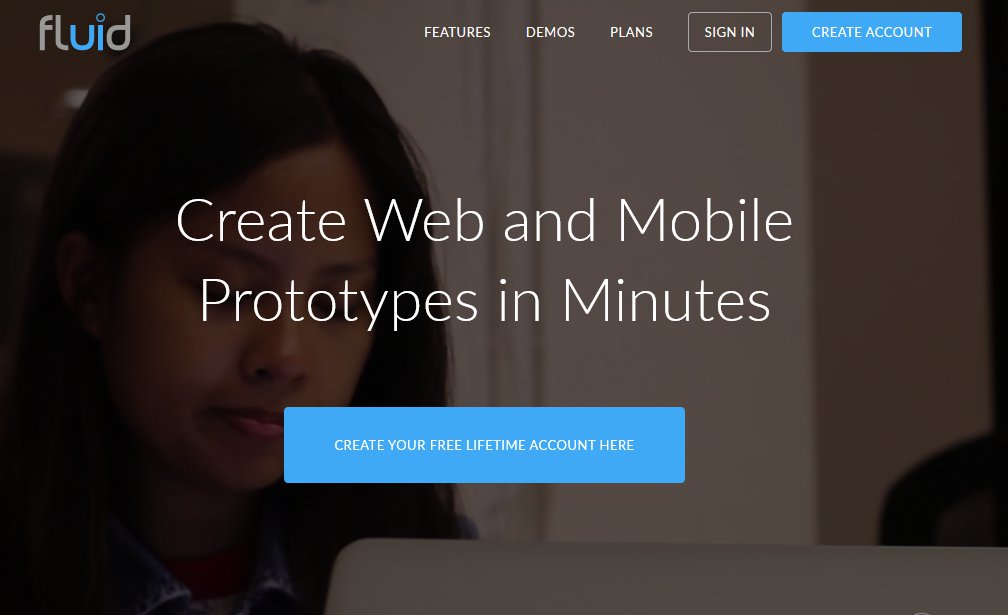
    Fluid UI is an open-source wireframe designer tool designed to help UI designers develop wireframes that depict his or plans for an app or website to be designed. Fluid UI is one of the few wireframe tools that make use of the latest technologies like HTML5, Javascript and CSS.

    The FluidUI wireframe tool features a browser-based prototyping tool, features three paid plans, to meet the needs of a lot of UI designers. Fluid UI gives designers the freedom to test wireframes on any device

    10. Proto.io
    best wireframe tools for windows

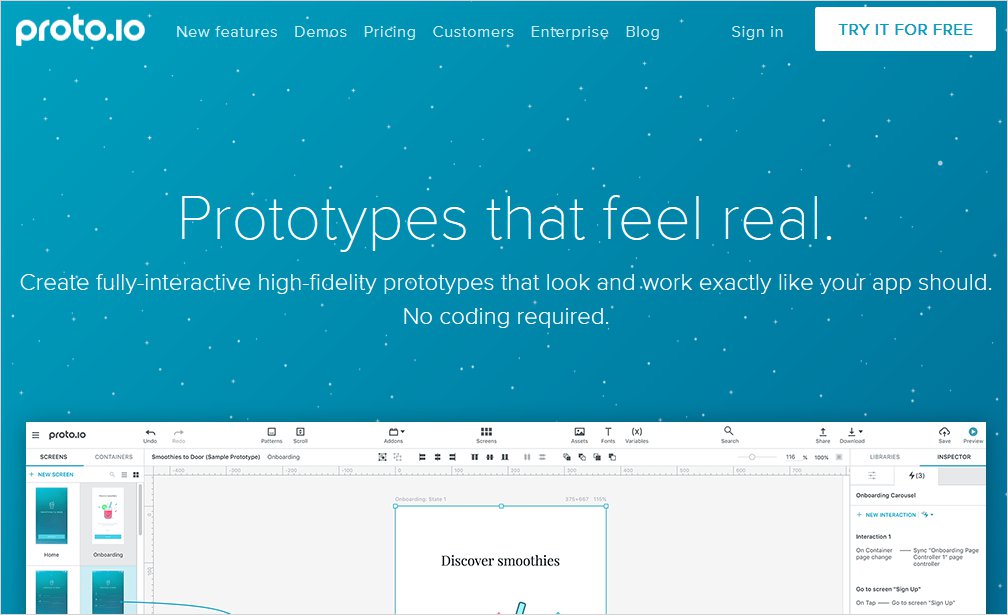
    Last but not least, Proto.io is a wireframe tool that helps designers present sketches showing the pathways of the UI/UX they are currently working on. It allows designers give clients an insight into their plans. 

    The Proto.io wireframe tool is available on both Windows and MAC operating systems. Apart from being available on both platforms, Proto.io can also be accessed via the web.  The porto.io wireframe tool features four paid plans. It provides a high fidelity interaction experience, suitable for working with complex logic and structure. It allows designers to test the prototype on mobile devices, and also make changes there. Porto.io has a massive library of UI elements. It also lets users import sketches and can be synced with Dropbox.

    There you have it – The best wireframe tools for windows devices. If you have any other recommendations, feel free to drop them in the comment section below. we would love to hear from you.
  • Top 15 Text Messaging App for Android

    Top 15 Text Messaging App for Android

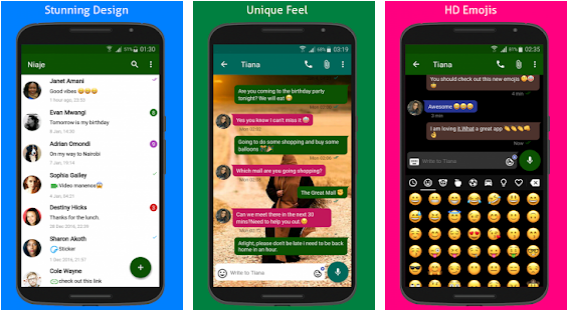
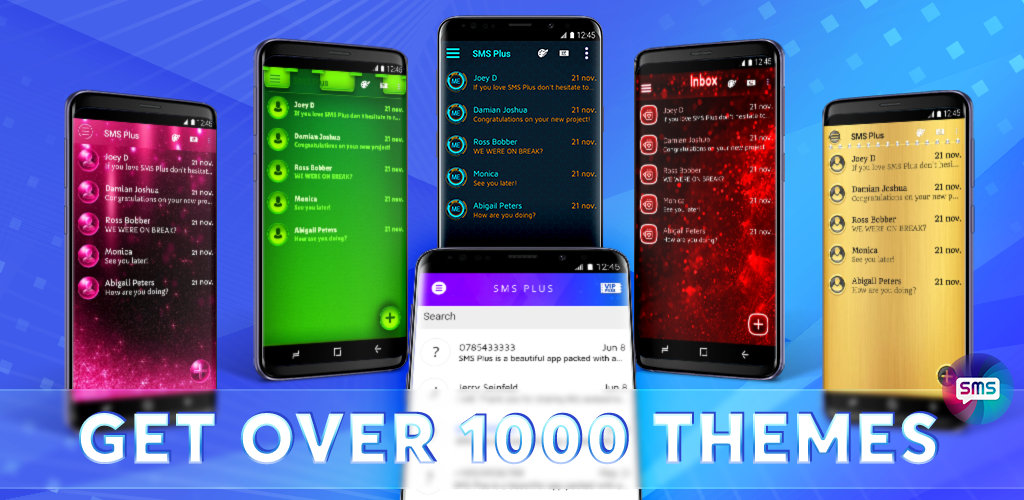
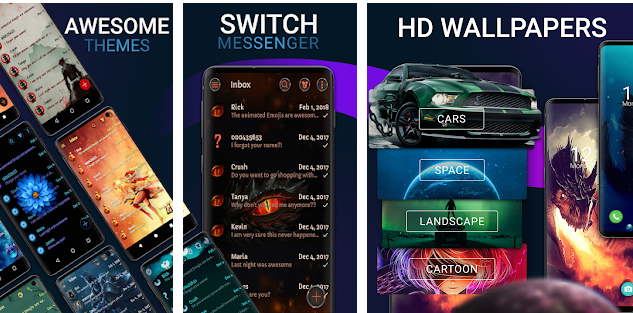
    Tired of using your stock text messaging app? Do you desire a better text messaging app that offers a ton of exciting features? In this article, we explore a list of top text messaging apps for Android. Text messaging apps featured in this article have been designed to be better alternatives to stock messaging apps. These text messaging apps are listed as follows:

    1. Textra SMS

    Top Text Messaging App for Android

    Looking for a  third party text messaging app to replace your default messaging app, The extra SMS app may be all you need. The Textra SMS app lets you send SMS and MMS to contacts on your smartphone. It also enables you to schedule the time text messages will be sent. The Textra SMS app features GIFs, 21 text sizes, message blocker/blacklisting, pin-to-top, over 3000 Android, Twitter, Emoji One & iOS style emojis automatic video & picture compression and lots more.

    The Textra SMS app has a very appealing user interface. It lets users tweak the appearance of the app to their taste. The Textra SMS app features more than 180 material design themes, bubble & app icon colors. The Textra SMS app can be set to automatically switch between dark and light modes, depending on your schedule.

    2. Chomp SMS

    Top Text Messaging App for Android

    Having over 10 million downloads, Chomp SMS is an Android app designed exclusively for sending text messages. It was intended to act as an alternative for your stock Android messaging app. It lets users send text messages as well as MMS seamlessly, in a very intuitive interface. The Chomp SMS app, allows users send scheduled text messages, messages that will be delivered on schedule. You can schedule birthday messages and lots more. Still, on the features of the Chomp text messaging app, this app features a privacy lock, privacy options, ability to stop messages while sending, SMS backup, blacklisting, text snippets, over 3000 Android, Twitter, Emoji One & iOS style emojis and lots more.

    3. Evolve SMS

    Top Text Messaging App for Android

    Evolve is yet another power text messaging app designed for Android. It provides an interface that is entirely different from stock messaging apps. It features a highly customizable interface that lets users customize the app to suit their taste. The evolve SMS app features a navigation system, that makes accessing contacts very easy.

    The Evolve SMS app features a wide range of themes to choose from, a theme store, gifs, lot of emojis. Similar to the already mentioned apps, the Evolve SMS app is available for download on the Google PlayStore.

    4. Handcent Next SMS

    Top Text Messaging App for Android

    Are you tired of using your default text messaging app? The Handcent, Next SMS app, may be the app you need. The Handcent Next SMS app was designed to be a replacement default messaging apps on Android. It features a very appealing interface that meets the needs of its users.

    The Handcent Next SMS app lets users send text messages, as well as MMS to contacts on their Android smartphone.  This app features quick reply pop-ups, Vacards, themes, backup, restore the system and lots more. The Handcent Next SMS is available on the Google PlayStore for downloads.

    5. Google Messages

    Top Text Messaging App for Android

    Despite the fact that this article is all about alternatives to stock messaging apps, the fact that Google has one of the best messaging apps we have today is unarguable.

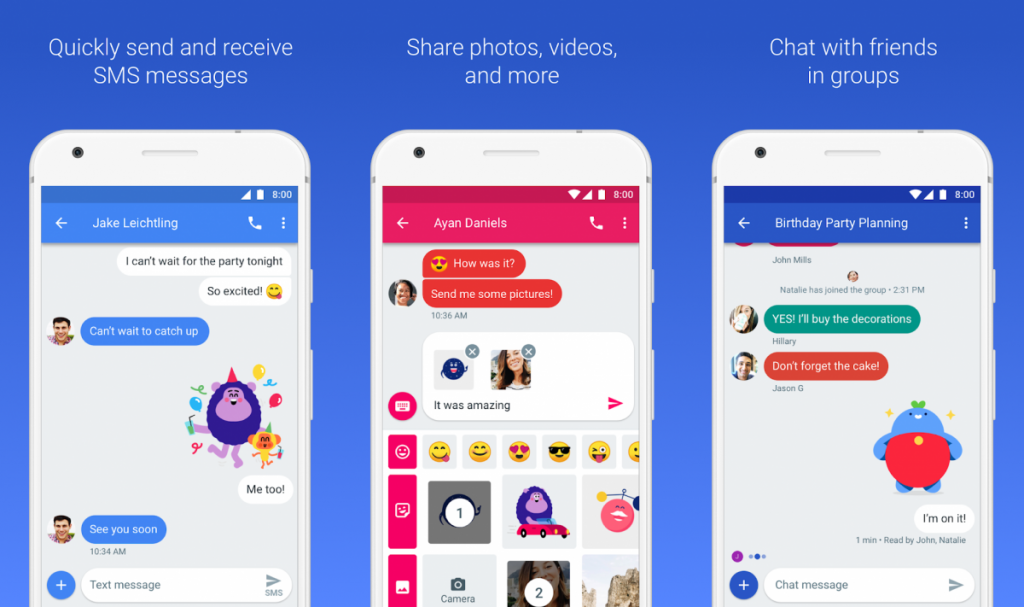
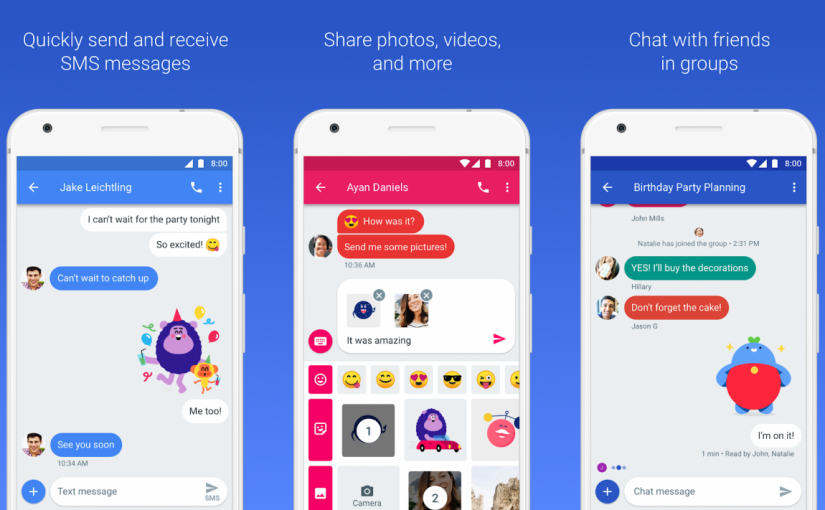
    The Google Messages app is Google’s official messaging app. It comes pre-installed on most Android smartphones. It lets users send SMS, MMS and RCS chats, allowing you to send and receive messages over wifi or cellular data. It lets you stay in touch with your friends and family, allowing you to send text messages seamlessly without stress. The interface of the Google Messages app may not be customizable, but it features clean and intuitive designs. If your Android smartphone doesn’t come with the Google Messages app pre-installed, you download it from the Google Play Store.

    6. Go SMS Pro

    Top Text Messaging App for Android

    Still on the topic of best text messaging apps for Android, the Go SMS Pro app, is yet another awesome third-party app, designed to replace stock Android messaging apps. It hs all the essential features needed in text messaging apps. Similar to some of the already mentioned apps, the Go SMS Pro app lets you customize the interface; it also comes with themes that help users design the interface to their taste.

    The Go SMS pro app features an Auto-reply feature, Spam blocking feature, scheduled message feature and lots more. This app can be downloaded from the Google PlayStore.

    7. Pulse SMS

    Top Text Messaging App for Android

    The Plusle SMS app was designed to be a very good alternative of stock messaging apps. It houses most of the features you wished you stock text messaging app featured. All these features are housed in a highly customizable interface.

    The Pulse SMS app features an Unparalleled design and fluid animations, password protection for private conversations, lets you share GIfs, features a powerful searching through messages and communications, automatic message backup and restore, enables you to preview web links, backlists pesky spammers and lots more. The Pulse SMS app can be downloaded from the Google PlayStore.

    8. QkSMS

    Top Text Messaging App for Android

    The QkSMS app is an app that offers one of the most beautiful interfaces for text messaging. It was designed to be a better alternative to stock text messaging apps. It makes sending text messages more fun.

    Qksms lets users send SMS and MMS via a highly customizable interface, with a wide range of in-built themes. QKSMS has dual sim support, allowing you send messages using any of the sims on your smartphone. It features a pre-contact notification, that allows you to prioritize and distinguish your messages. It also lets you backup and restores messages easily. This app can be downloaded from the Google PlayStore.

    9. YAATA SMS

    Top Text Messaging App for Android

    YAATA SMS is a third party app that continues the stock design of stock text messaging apps on Android. Using the YAATA app, you are offered a very familiar interface, with a lot of new features. The YAATA SMS app can be best described as an upgrade of your stock text messaging app.

    The YAATA SMS app lets users send SMS/MMS. It has multimedia messaging support that allows users to send media files ranging from videos, Audio, Vcards, and GIFs. It also houses a group chat feature, scheduled messages, allows users to convert SMS to MMS, blacklisting and lots more. This app can be downloaded from the Google PlayStore.

    10. Mood Messenger

    Top Text Messaging App for Android

    Still, on the topic of best text messaging apps for Android, the Mood Messanger is yet another awesome text messaging app, designed to replace your stock messaging app. It is an ad-free app that offers a ton of exciting features.

    The Mood messenger app lets users send and receive SMS and MMS, in a highly customizable interface. It even features a typing indicator. Mood messenger features over 100 themes, allows users to change text and font size, Animated Emojis – iOS, Android or Emoji One style emojis, animated GIf library, chat encryption and lots more. This app can an excellent from the Google PlayStore.

    11. Yippeee Messenger

    Top Text Messaging App for Android

    Yipeee lets you send and receive text messages and MMS. Similar to all the already mentioned apps, the Yipeee app was designed to replace the stock messaging app on your Android smartphone. The Yipeee features a super light and intuitive interface. Yipeee lets you customize the interface to suit your taste.

    The Yipeee text messaging app lets you share pictures and audio. it features a spam box that enables you to filter spam messages from essential messages. It has a search feature that allows you easily navigate through contacts and conversations.

    12. Dual SMS Messenger

    Top Text Messaging App for Android

    Dual SMS Messanger is a super-fast and highly customizable alternative to stock text messaging app. It offers an exciting and intuitive interface to send text messages and MMS. In addition, Dual SMS Messanger lets users customize its interface, to suit their needs.

    Dual SMS Messanger Lets users block unwanted messages; it houses a spam filter feature that lets users filter important messages from spam messages. This app is available on the Google Play Store for downloads

    13. New Switch

    Top Text Messaging App for Android

    Are you thinking of replacing your stock text messaging app? The New Switch app is yet another awesome app, that can replace the stock messaging app on your Android device. It features a minimal and intuitive interface that makes sending text messages fast and seamless. The New Switch app provides users with the power to customize their interface, allowing them to design the interface to their taste. It features a vast collection of themes that make customization faster. The new switch app has support RCS messaging, allowing users to send messages over wifi.

    14. Messaging SMS

    Top Text Messaging App for Android

    The Messaging SMS app is yet another app that offers an interface very similar to what we have on stock text messaging app. Using this app, you are provided a familiar interface with a lot of new and exciting features.

    This app lets users send SMS and MMS seamlessly in real time. It also houses security features that let users encrypt their messages. This app is available on the Google Play Store for downloads.

    15. MySMS SMS Text Messaging

    Top Text Messaging App for Android

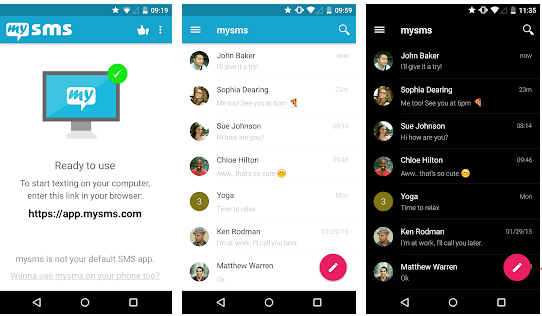
    Last but not least, the My SMS app, is yet another app that provides users with an exciting and intuitive interface to send text messages. It is a very good alternative to stock text messaging apps.

    The My SMS app can be synced to your computer, allowing you to view text typed on any of the devices. It supports remote typing, lets users create MMS group chat, lets users send multimedia messages and lots more. This app is available on the Google Play store for download.

    There you have it – The best text messaging apps for Android. If you have other recommendations, please let us know in the comment section below.

  • 3 Easy Ways to Download YouTube Videos on your PC

    3 Easy Ways to Download YouTube Videos on your PC

    The fact that youtube doesn’t allow users to download videos is not news anymore. This has been the case for a very long time. By prohibiting download of their videos, youtube can monetize their videos. This way users can stream videos, alongside the ads that play before the actual video itself.

    Putting aside the awesome streaming service youtube offers, users still desire to download youtube videos directly to their devices, for a lot of obvious reasons. Take for example you wish to start learning java off a java playlist, having to return to previous videos when you forget a particular step, can be very stressful, especially in scenarios where you have a poor internet connection. Hence the need to download youtube videos directly to your device. Downloading the java tutorial videos from youtube will make the whole revision process seamless.

    Image result for youtube

    Thanks to thoughtful thinking from a lot of developers around the world, downloading youtube videos has become a reality. In this article, we explore a tutorial, containing three easy ways to downloading youtube videos on your PC. These methods apply to both Windows and MAC computers. Methods are listed below.

     Download Youtube videos on PC, Using 4k Video Downloader

    1. Visit 4K downloader official website and download the 4k downloader software to your PC, Via this link.. 4K downloader is available on both Windows and MAC platform.

    Image titled 4K Video Downloader; 2.png

    2. Install and launch 4k Video downloader on your PC:

    On Windows computers, you are required to double click the setup file and then click yes when prompted. after which you are to follow the on-screen prompts

    On MAC, you are also expected to double click the setup file, verify the installation if necessary, and then drag the 4k video downloader icon to the ”Applications folder”, after which you are to follow on-screen prompts.

    3. Visit Youtube.com, using the browser on your PC and then navigate to the video you want to download.

    4. Copy the URL of the youtube video you wish to download. On windows, you can hold Ctrl+A  to copy video URL. While on MAC you are required to hold ⌘ Command+A to copy fully select the URL and then hold Ctrl+C or ⌘ Command+C to copy URL.

    Image titled 4K Video Downloader; 5.png

    5. Launch 4k downloader on your PC: Normally, the 4k downloader automatically opens when you copy a youtube URL. In case it doesn’t open automatically, you are required to launch it by your self. 6. Paste Video link in 4k downloader: To paste the copied youtube video link, you are required to click the ”+” icon covered engrossed on green color. 4k Downloader will then extract the youtube address.

    Image titled 4K Video Downloader; 7.png

    7. Select the video format and video quality you desire. Note: Downloading with a video quality higher than what your PC can resolve is pointless, as you won’t get the true quality of the video. If your PC maxes at 1080p, download 1080p. If your PC maxes at 4k, you can download videos with 4k resolution. 

    Image titled 4K Video Downloader; 8.png

    8. Click the download button, and select the folder you want to place the downloaded video.

    Download Youtube videos on PC, Convert2MP3

    Convert2MP3 is another platform that allows users to download youtube videos to their devices. Unlike the 4K downloader, Convert2MP3 is not an app; it can only be accessed via the website. convert2mp3.com. Steps to downloading Youtube videos on PC using the Convert2MP3 platform is given below:

    1. Visit youtube.com on your PC using an internet browser and then navigate to the video you wish to download.  

    2. Copy the URL of the youtube video you want to download. On windows, you can hold Ctrl+A  to copy video URL. While on MAC you are required to hold ⌘ Command+A to copy fully select the URL and then hold Ctrl+C or ⌘ Command+C to copy URL.

    3. Visit http://convert2mp3.com on your browser

    4. Paste the video URL in the box provided. To paste a video link, press either Ctrl+V (Windows) or ⌘ Command+V (Mac)

    5. Select Mp3 or Mp4. If you desire to convert the video to mp3 format, to be played as audio, you should select mp3 format. If you want to play the youtube video in video format, select the mp4 format.

    6. Select video quality. Convert2MP3 video quality maxes at 1080p. You are advised to download the video quality your PC can output. 

    7. Click the convert button on the right side of the page. The youtube address would be converted to a downloadable MP4 or MP3 file.

    8. Click on download and the youtube video will start downloading. 

    Note: If you the video quality you chose is higher the original video quality of the video or you tried downloading a copyrighted video, the video won’t download. You will be given an error message, before the video finish processing.

    Download Youtube videos on PC, VLC Player

    1 Visit youtube.com on your PC using an internet browser and then navigate to the video you wish to download

    2. Copy the URL of the youtube video you want to download. On windows, you can hold Ctrl+A  to copy video URL. While on MAC you are required to press ⌘ Command+A to copy entirely select the URL and then holdCtrl+C or ⌘ Command+C to copy URL.

    3. Open VLC player on your PC. In case you have not downloaded VLC player, you can download VLC player from this link. VLC is available on both Windows and MAC OS platform.

    4. Open Aa new network stream on your VLC player. Network stream allows users to play content from your web browser in VLC. To access the network stream on your VLC player follow these steps

    • Windows – Click Media, and then proceed to click Open Network stream
    • MAC – Click file, and then continue to click open Network

    5. Paste the copied URL in the box provided. Paste the video URL in the box provided. To paste a video link, press either Ctrl+V (Windows) or ⌘ Command+V (Mac)

    6. Click on the play button below the video. The youtube video will open VLC 

    7. View codec information. To view codec information, follow these steps:

    • Windows — Click Tools, and then click Codec Information
    • MAC click the window and then click on Media Information.

    8. Copy the “Location” field. At the bottom of the window, you’ll see a long address that you’ll need to copy:

    • For Windows — Right-click the “Location” text field, click Select All, and then right-click it again and click Copy.
    • For MAC — Right-click (or Control-click) the “Location” text field and click Open URL.

    9. Open a new browser tab and then paste the copied URL in the URL box and click enter 10. Download the video: To download the video, you are required to the right click the video and click save the video. The video will automatically start downloading as an MP4 on your PC There you have it – a comprehensive tutorial on three ways to download youtube videos on your PC. If you have any questions, feel free to drop them in the comment section below.

  • How to Convert Any Digital TV to a Smart TV

    How to Convert Any Digital TV to a Smart TV

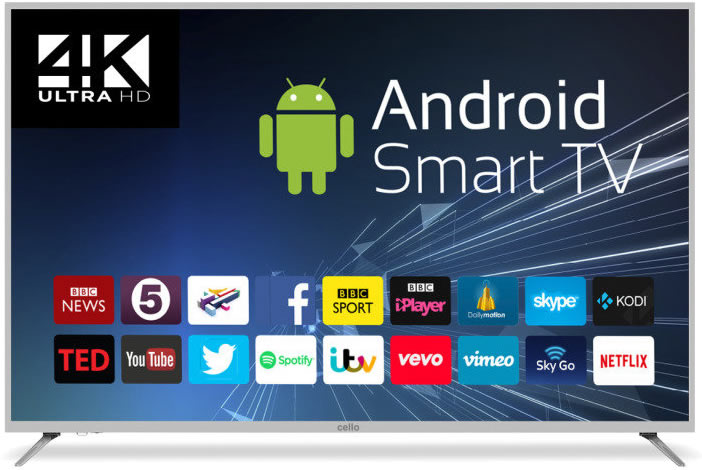
    In a bid to cut down cables, TVs have over the years metamorphosed into stand-alone gadgets, that feature built-in wireless internet connections, with support for a wide range of apps. A modern television with these features is referred to as a smart TV. A smart TV also let you record shows, take screenshots and access YouTube, Netflix and other movie outlets. Now, the idea of having a smart television sounds great, but having to purchase one, may not be too palatable.

    Smart TVs don’t exactly come cheap. If buying a one isn’t part of your budget right now, we have good news for your. You don’t necessarily need to purchase a smart TV to be able to gain access to the features of a smart TV. There are external media players you can use to turn your digital television into a smart television. These media players are also know as TV boxes.

    A TV box is a small tech gadget that basically transforms your ordinary digital TV into a smart TV. Most TV these days are already equipped with smart technology, however, these does not completely eradicate the need for a TV box. A TV box can relatively expand the capabilities of your television, turning it into a less powerful version of your computer, or a larger version of your smartphone.

    If you are in country where DSTV is supported, you won’t need an additional decoder for the kids room. You can can simply connect to DSTV online via your TV box.

    Converting your Digital TV (DTV) into a Smart TV

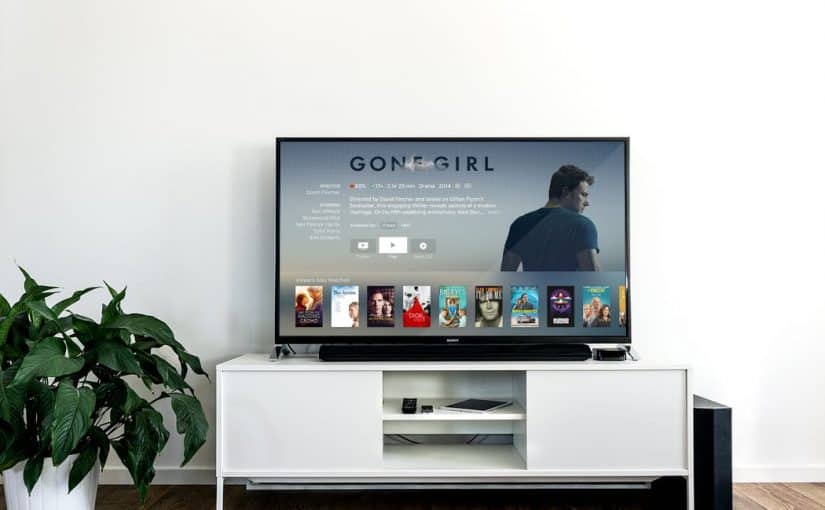
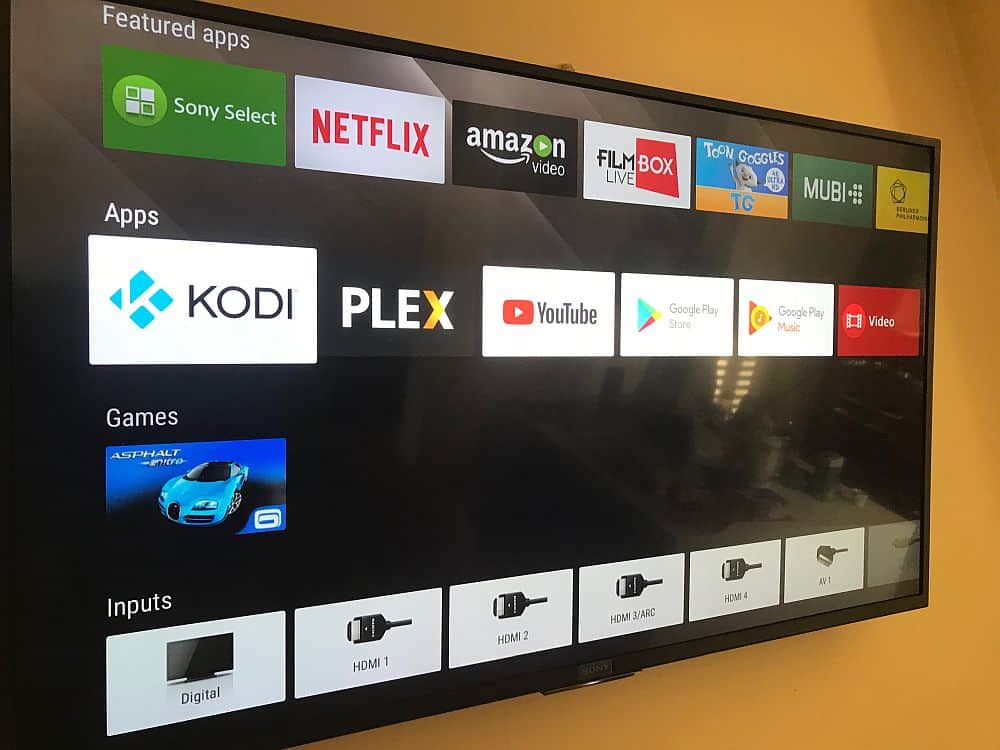
    Smart TV with Netflix, YouTube and FilmBox live pre-installed
    Smart TV with Netflix, YouTube and FilmBox live pre-installed

    In this article, we are going to explore the various ways you can convert any Digital TV to a Smart TV using a TV box. While all of these TV boxes run via similar technology, they have different operating systems and thus, different user interfaces. For example, Apple TV runs the mobile iOS format, whereas Fire TV runs off Amazon’s operating system, instantly connecting you with Alexa. Google ChromeCast on the other hand, is powered by a simplified version of Chrome OS.

    Using Media Players to Convert DTV to Smart TV

    As earlier said, turning a digital TV to a smart TV, can be done using certain external media players otherwise known as TV boxes. These media players are listed below, together with tutorials on how to use them to transform your digital TV to a smart TV.

    Using media players such as Apple TV, Fire or ChromeCast is one way of converting your old digital TV into a smart one. However, if these media players are far beyond your reach, there are cheaper alternatives such as using a white label Android TV box. This will be discussed much later in the article.

    As you venture into the life of ‘internet of everything’, be aware of some of the security concerns associated with Smart TVs. Mind you, a smart TV is only as smart as the person controlling it. The Samsung smart TV hack in 2012 highlights risk of ‘The Internet of Everything’.

    HDMI to RCA adapter

    Note that, most Android TV box or media players require a HDMI port and a HDMI cable. If your TV set doesn’t feature a HDMI port, but instead the traditional yellow red and white port, you can use an HDMI to RCA adapter.

    How to Convert any Digital TV to a Smart TV – Using Apple TV

    Unarguably, Apple TV is one of the best streaming devices we have today. It is one of the top 3 streaming devices, with others being the Amazon Fire stick and the Google ChromeCast. Apple TV is the only Apple product that isn’t restricted to Apple’s ecosystem.

    How to Convert any Digital TV to a Smart TV - Using Apple TV

    The TV gadget lets you stream videos, pictures, and music from your digital TV. Apple TV also enables you to buy or rent movies on iTunes. However, you cannot store media files on the Apple TV.

    Step 1: Locate the HDMI port on your TV

    As earlier mentioned, using a smart media player to convert your digital TV to a smart TV requires the presence of an HDMI port, and also you will need an HDMI cable. You will find HDMI ports on the body of your Digital TV. In case your digital TV doesn’t feature an HDMI port, you can use an HDMI to RCA adapter.

    Step 2: Connect Apple TV to your Digital TV

    In connecting the Apple TV to your digital TV, you will need to connect one end of the HDMI port to your Digital TV and the other end to your Apple TV. After you might have connected the Apple TV to your digital TV, you are required to power both of them and change your TV’s input to HDMI.

    Step 3: Setup Apple TV

    immediately you change your TV’s input to HDMI, the Apple TV interface will be displayed. Here you are required to select your language of choice, select a Wi-Fi network and enter a password and download any suggested updates.

    Step 4: Use Apple TV as a Smart TV

    Once you have completed the steps listed above, you will be presented with a drawer of apps, that include all the top-notch streaming service apps, you will able to stream content from Netflix, Hulu and lots more.

    How to Convert any Digital TV to a Smart TV – Using  Amazon Fire TV Stick

    Amazon Fire Stick is yet another media player that lets you turn your Digital TV into a smart TV. Amazon Fire Stick takes the shape of a pen drive. It is one of those media players that isn’t obvious. Plug it to the HDMI port of your TV, and you will have access to a wide range of streaming services, streaming services that ordinarily won’t be accessed on your digital TV.

    How to Convert any Digital TV to a Smart TV - Using  Amazon Fire TV Stick

    As you might have already guessed, the setup of the Amazon Fires Stick is very similar to that of the Apple TV, they both require a functioning HDMI. In case your digital TV doesn’t feature an HDMI port, you can use an HDMI-RCA adapter. Steps to converting your Digital TV using Amazon Fire Stick is listed below: 

    Step 1: Plug Amazon Fire Stick into HDMI Port Of Your Digital TV

    Unlike the Apple TV, Amazon Fire Stick doesn’t require an HDMI cable for connection. As earlier mentioned, the Amazon Fire Stick has the shape of a pen drive. Instead of featuring a USB A or C, the Amazon Fire Stick Features an HDMI connector. So all you need to do for connectivity is plug the Amazon Fire Stick into the HDMI port of your computer.

    In case the HDMI port of your TV is located on the rear, and you don’t have enough room for connection since the wall will be obstructing it, you can use an HDMI extension cable. You are required to plug one end of the HDMI cable to your Amazon Fire Stick, while other End will be plugged to your TV.

    Step 2: Connect Amazon Fire Stick To A Power Outlet

    Apart from featuring an HDMI connector, the Amazon Fire Stick also features a USB port. To power the Amazon Fire Stick, you are required to connect a USB power cord to it’s USB port and connect the other end to the power brick, then finally connect the Power brick to a power outlet. You are also required to place batteries in the remote of the Amazon Fire Stick.

    Step 3: Switch To HDMI Input

    To gain access to the Amazon TV Fire interface, you will need to switch your TV’s input to HDMI, since the Amazon Fire Stick was connected to the HDMI port of your TV. 

    Step 4: Setup Amazon Fire Stick

    After you must have successfully connected the Amazon Fire Stick to your Digital TV, the next step is to set up the Amazon Fire service. You will be presented with the Amazon Fire interface, as soon as you switch to HDMI output. Here you are required to perform basic tasks before you can start streaming. You will be prompted to press the play/pause button at intervals, you will be required to log in to a wireless network, inputting the password. You are also required to log in your Amazon account. This will ensure This will ensure that you can view your Amazon subscriptions and purchases. 

    Step 5: Use Amazon Fire Stick As A Smart TV

    Once you have completed the steps listed above, and Logged into your Amazon Account, you will be able to view your purchased movies, shows, and games. You will also be presented with a drawer of streaming apps, that you can use to stream content on your Digital TV 

    How to Convert any Digital TV to a Smart TV using Google ChromeCast

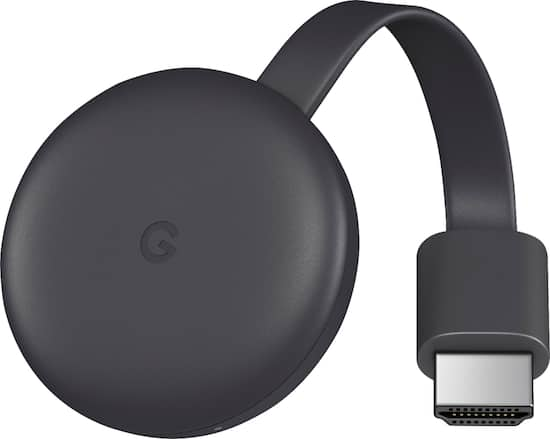
    Last but not least, is Google ChromeCast. Google ChromeCast is yet another media player that can turn your Digital TV to a Smart TV. Manufactured by Google, ChromeCast is a media player, that gives you access to many streaming services. Here are the steps to using the ChromeCast to convert your Digital TV to a smart TV.

    How to Convert any Digital TV to a Smart TV using Google ChromeCast

    Step 1: Connect ChromeCast to your TV’s HDMI

    Similar to the already mentioned media players; you will need to connect the Google ChromeCast to your digital TV. The ChromeCast comes with an HDMI connector. So all you need to do is locate the HDMI port on your digital TV and connect the ChromeCast HDMI connector. In case your TV doesn’t feature an HDMI port, you can use an HDMI-RCA adapter to connect ChromeCast to your TV

    Step 2: Connect ChromeCast To A Power Outlet

    ChromeCast comes with a power cable, you can use to power it. All you need to do is to connect the cable to the power port on the ChromeCast and then plug the other end to the USB port on your Digital TV. Please note that the 4k Version of the ChromeCast cannot be powered by a digital TV, you will need a wall socket for connection. 

    Step 3: Switch To HDMI Input

    To gain access to the ChromeCast interface, you will need to switch your TV’s input to HDMI, since the ChromeCast was connected to the HDMI port of your TV. 

    Step 4: Download Google Home App on your Smartphone

    The Google ChromeCast needs a working Google App to function. You are required to download the Google Home App on your smartphone. It is available on both the Android and IOS platform.

    Step 4: Setup Google Home App

    Launch the Google Home app on your smartphone, click on accept when prompted, you will be taken to the Google Home Page. Click on the devices icon, located on the top-right corner of your screen. Wait for ChromeCast to detect your phone. You will be presented with a confirmation message when ChromeCast recognizes your phone.

     Next, you will need to confirm the code on your TV. Once ChromeCast detects your TV, a code will appear on your TV and also on your smartphone. Make sure both codes match. After which you are to tap Yes (iPhone), or I SEE IT (Android). 

    Now tap continue and then select a wireless network for your ChromeCast. Enter the password and continue. Please note that your smartphone and ChromeCast must be connected to the same network. Follow all other on-screen prompts. 

    Step 5: Use Your ChromeCast As a Smart TV

    Upon completing the steps listed above, you will be able to stream content on your phone, directly on your digital TV. You will also be able to view apps installed on your smartphone 

    Reading through this article, you must have observed that converting your Digital TV to a smart TV, is a straightforward thing to do. All you have to do is select one these top media players, follow the steps given and you will be home and dry, Streaming media content on your digital TV, as though it was a Smart TV. 

    If you have any question, regarding this tutorial on how to convert any digital TV to a smart TV, feel free to drop them in the comment section below.

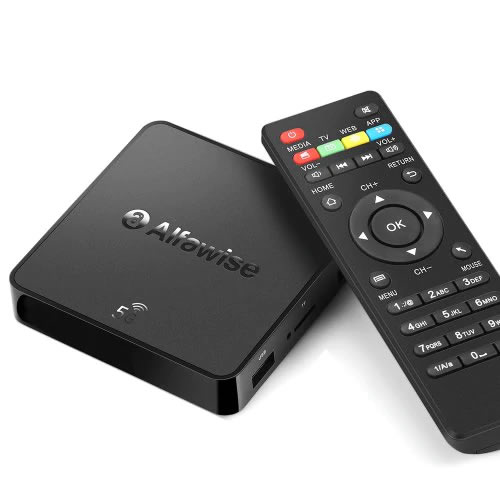
    Alfawise A8 Pro Android TV Box

    Alfawise A8 Pro Android TV Box

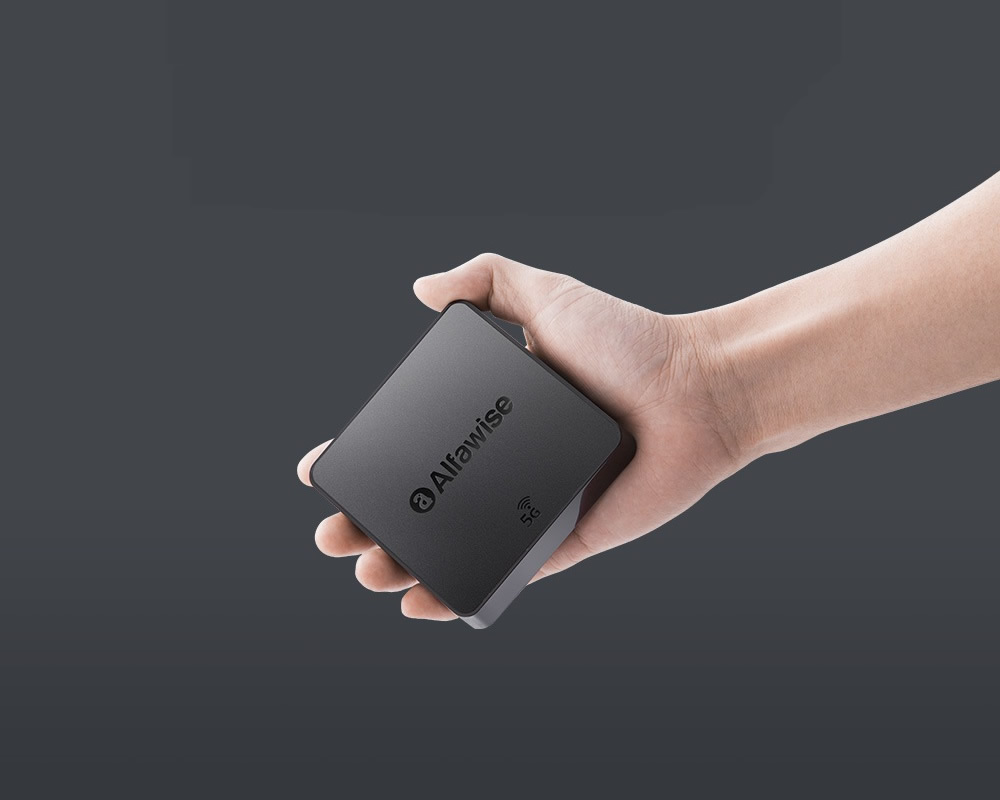
    Apple TV, Fire or ChromeCast are the most popular TV boxes in the market. Smaller players like the Alfawise A8 pro device are not so popular but equally effective. It also come way cheaper than most TV box with the same features. The Android TV box comes with both 2.4G and 5G WiFi, provides a faster and more smooth data transmission, which makes it the ideal choice for cord-cutters.

    Alfawise A8 Pro Android TV Box

    From your A8 Pro Android TV box, you can download apps, watch local TV channels, connect to streaming apps such as Hulu and Netflix. Depending on where you live, you may even be able to connect to premium cable channels at no extra cost, especially if you have installed KODI software.

    A8 Pro Android TV box comes highly recommended and may be purchased for less than $30 on Gearbest at the time of this writing.

  • How to Boost PC Wi-Fi Connections and Improve Wi-Fi Range on a Laptop

    How to Boost PC Wi-Fi Connections and Improve Wi-Fi Range on a Laptop

    Despite the existence of laptops with built-in modems, majority of the laptops we have today rely on wi-fi connections, to gain access to the internet. Being the primary source of internet connectivity, having good wi-fi connections on laptops is very sacrosanct. Poor Wi-fi connections facilitate slow internet surfing, which is something the body wants.

    How to boost your WIFI connections on Laptop

    In this article, we look at a tutorial on how to boost your WIFI connections on your laptop. Boosting your wifi connection will facilitate faster internet surfing. This tutorial is applicable on laptops running Windows operating systems, and laptops running MAC OS.

    Reduce Distance Between Laptop and Router

    Due to variance in signal strength, is a widely known fact that bringing your laptop closer to the router, it is a sure way to boosting wifi connections on your laptop. This method works flawlessly, in cases where the router has a short signal range. The closer your laptop is to the router, the better the signal.

    Another way you can combat poor signals, as a result of router distance, is by making use of a mesh wifi system. This way, a mini router will be found in all rooms of your home. A mesh wifi system consists of the main router and its nodes. These nodes or satellite module feed from the signal of the main router, they conduct signals better. This way won’t have to bother about the distance of your laptop from the router.

    Update Your Router Software

    Updating your router software is another method you can employ to tackling poor wifi connections on your laptop. Routers feature a firmware that allows manufacturers to push an update to them, allowing manufacturers to fix bugs that may hinder the proper functioning of these routers. If you reduced the distance of your laptop from the router, and you are still experiencing poor wifi signal, the next step would be to update your router’s firmware.

    Update Your Laptop Software

    Still on software. After updating the firmware of your laptop, you should also consider updating the drivers of your laptop. Update the drivers that affect the wifi connectivity of your laptop. This can be done through the manufacturers’ website.

    Install and External Adapter

    Using an old laptop that runs slow on wifi connections? If yes, purchasing an external wifi adapter is very important. The effect of a very powerful wifi adapter won’t be felt on a laptop running an old wireless adapter.

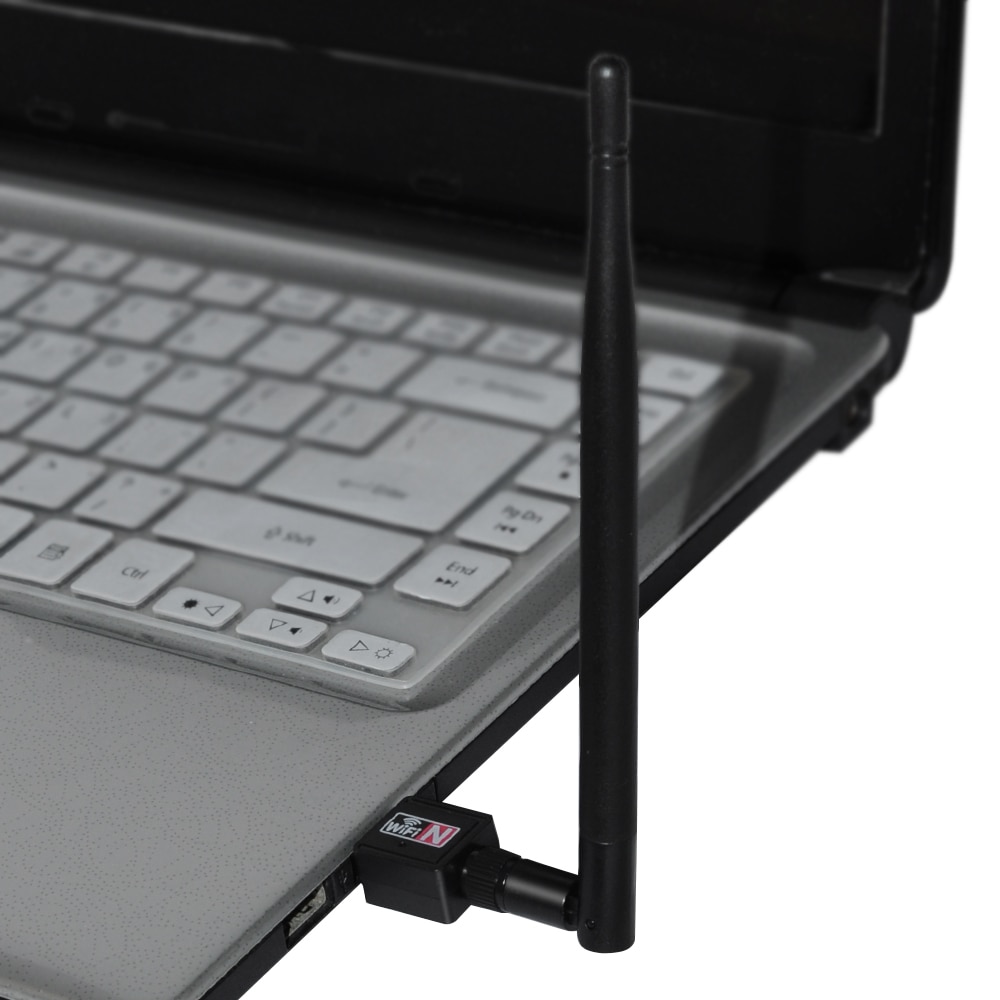
    External wifi adapters usually feature a large antenna and make use of updated technologies, designed to improve wifi signals on your outdated laptops. Using these external wifi adapters, you will need to connect them to your laptop via a functioning USB port on your laptop.

    Disable the network hogs that run in the background

    Another way to boost wifi connections on your laptop is to reduce the apps using the wifi connection. Having many background apps that make use if the connection will hinder hitch free surfing. You are advised to reduce these background apps to boost wifi connection on your laptop.

    Check Your Transmission Power Settings

    Some network adapters allow users to edit transmission settings, if the setting is available on your network adapter, you are advised to tweak the transmission settings on your network adapter. You can access this setting through the adapter’s driver interface program.

    For better wifi signals, your transmission settings should be set to a maximum of 100 percent. Also, your power settings should be removed from the power saving mode.

    There you have it – a comprehensive tutorial on how to boost connections on your laptop. In troubling shooting, the cause of a poor wifi signal, the tips mentioned above will be of immense help. You try each tip until the wifi signal on your laptop improves.

  • How to Reset a Laptop to Factory Settings on Windows & MAC

    How to Reset a Laptop to Factory Settings on Windows & MAC

    Installed software not designed for your laptop? Did you install a wrong driver on your laptop? Or did you mistakenly delete one of the important programs your laptop came with? Any of these will certainly affect the proper functioning of your laptop. Things like this happen to us sometimes. Events like this usually call for one thing, and that is resetting your laptop computer.

    In this article, we explore a tutorial on how to reset a laptop, restoring it to factory settings. This tutorial covers procedures on how to reset laptops running windows and MAC OS back to their factory settings.

    How To Reset/Restore A Laptop Running Windows Operating System Back To Factory Settings

    Before you go ahead to formatting your windows laptop, please be aware that resetting your windows laptop will wipe out all your installed programs and files on your windows laptop. Using an external hard drive is a very secure way to back up your files. Once you have backup your files, you can proceed to reset your windows laptop using the steps listed below.

    There is no autonomy when it comes to resetting windows laptops; there are several methods that can be employed in resetting a windows laptop. These methods are listed below.

    How To Reset A windows Laptop, Using Built-In Reset Option On Windows 10

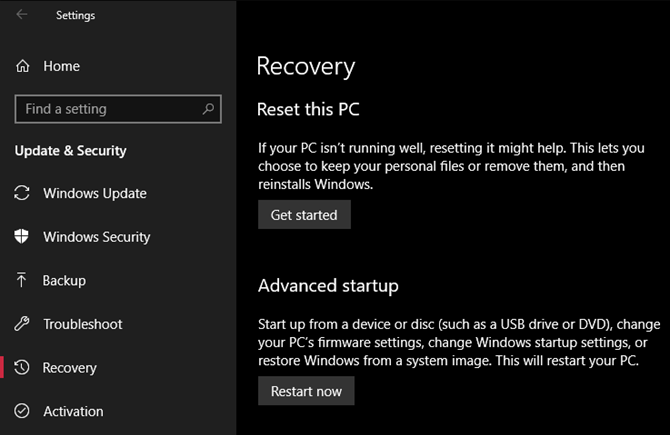
    Windows-10-Recovery-Reset
    1. On your windows laptop, Navigate through settings > Update & Security > Recovery.
    2. Under “Reset this PC” click on get started
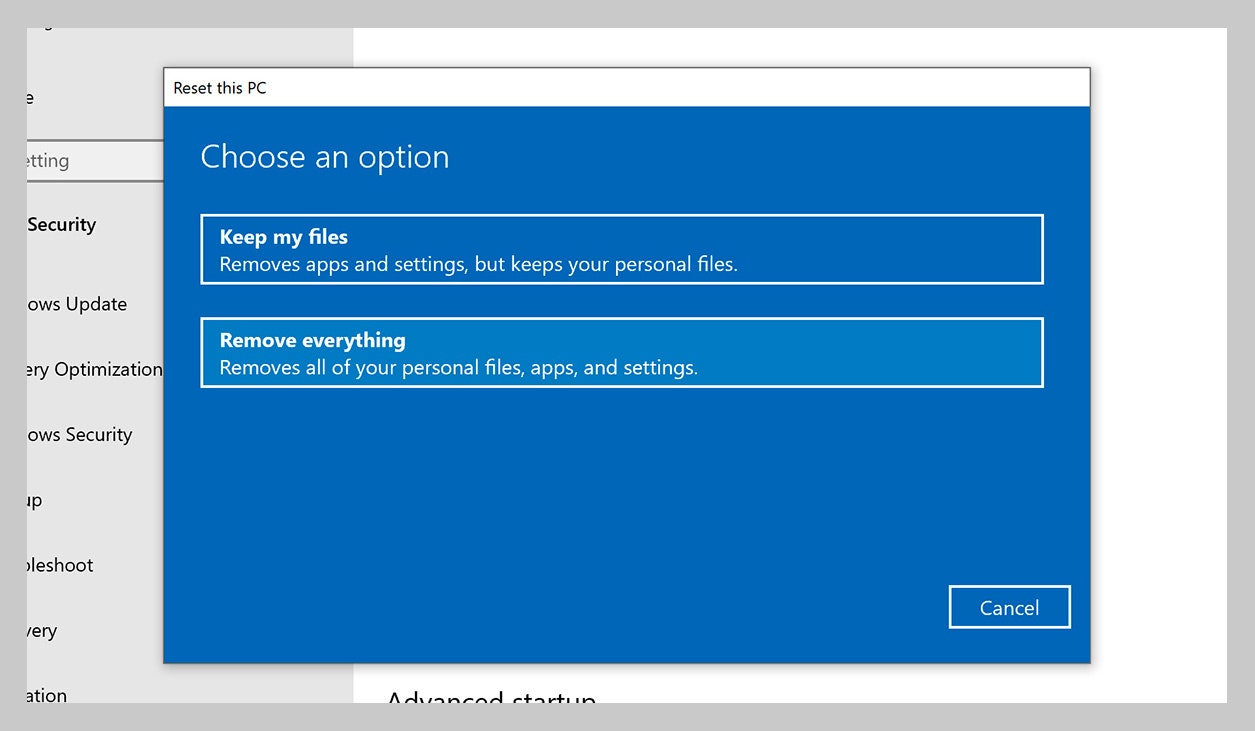
    3. You will be presented with the option to keep files, or remove everything. Select your preferred option. Keeping your files will reset your windows laptop to default, keeping your files and uninstalling your installed apps. The ” Remove Everything option,” remove resets your windows laptop, completely wiping your computer, remove all files and installed apps.

    Please Note that click the ”Erase Everything” option, will provide you with another set of options to choose from. You will be asked to select between Removing everything or remove files and clean drives. Selecting the latter will securely erase your hard drive, making it impossible to do any form of recovery.

    4. Once you have selected the option of your choice, you can proceed to click the reset button.

    How To Reset A windows Laptop, ” Fresh Start” Option in Windows 10

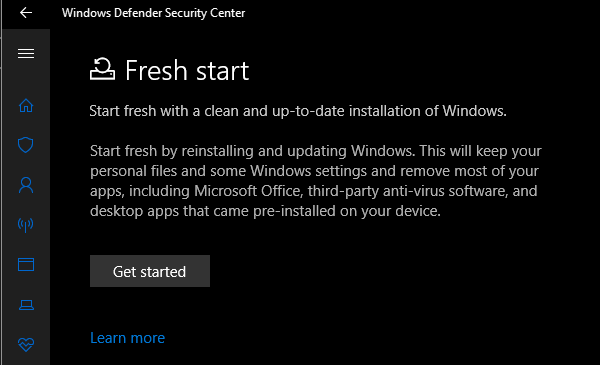
    Windows-Defender-Fresh-Start

    As earlier mentioned, there are different ways to re-setting your windows laptop. Using the Fresh Start option is another method. Steps to be followed when using this method are listed below:

    1. On your windows laptop, Navigate through Settings > Update & security > Recovery page
    2. Click the link ”Learn how to start fresh with a clean installation of windows” you will find it at the bottom of the page. You will be directed to windows defender security center. Click on Get started to proceed.

    Note: Using the fresh start option, your files will be retained. There no option to remove all files. Also note that using the fresh start option, the latest version of windows will be automatically be downloaded on your windows laptop.  Fresh start option reinstall all bloatware and keeps some of your settings intact.

    Reinstall Using A Windows Installation Media

    Using Windows 7 or later, this method is for you. The methods mentioned above is available on Windows 8 and above. If you use windows 7 or lower, you can reset your windows laptop using windows installation media.

    What is windows installation media? Windows installation media is an ISO file burnt into a pen drive or DVD. Windows installation media allows you re-install windows from scratch, provided you have a product key.

    How To Reset/Restore A Laptop Running MAC OS Back To Factory Settings

    Unlike Windows operating system, re-setting laptops running MAC OS is a lot easier. There is autonomy here, as there is only one method of getting it done. The steps are listed below:

    How to Reset a Mac

    Note: Please be aware that re-setting your MAC Book will completely wipe your hard drive, no file will be left, and all settings will be restored to default. Backup your files if need be.

    1. Hold Down Command and R keys on your keyboard, and turn on your MAC Book. Let
    2. both keys go, when te Apple Logo pops up
    3. Select Langauge and click the arrow facing right to continue
    4. Select Disk utility and continue
    5. Select your startup disk. Startup disk is named Macintosh HD by default
    6. Click the erase button
    7. From the drop-down menu, Select MAC OS Extended and click erase.
    8. click done and the exit window
    9. Connect to wifi
    10. Select Reinstall MacOS
    11. Click on continue and click agree
    12. Select boot disk and click on Install
    13. wait for the installation to complete

    Note: Your MAC Book is will restart several times during the installation. You shouldn’t be bothered, as it is normal for it to reboot.

    There you have it – a comprehensive tutorial on how to reset a laptop. As you might have already observed, re-setting a laptop isn’t as difficult as most people claim, all you have to do is follow the steps listed above. If you have any question, feel free to drop them in the comment section below.