Author: Ebenezer Obasi

  • How To Use The Old Blogger Interface Without Reverting to the Old Blogger Interface

    How To Use The Old Blogger Interface Without Reverting to the Old Blogger Interface

    How To Use The Old Blogger Interface Without Reverting to the Old Blogger Interface

    With blogger threatening to take down the old blogger interface, it becomes extremely  relevant to use this trick to work on your blogger with the old blogger interface without needing to revert to the old blogger interface.
    just follow the simple steps below:

    • On your address bar, copy and paste the link below

    http://draft.blogger.com/posts.g?blogID=8830827511167965358

    •  Replace 8830827511167965358 with your blog ID

    Tap Enter and your are done.

  • How to Connect your Twitter With your Gtalk, 2go, IM, Gmail

    How to Connect your Twitter With your Gtalk, 2go, IM, Gmail

    Twitter can be boring at time if you have a lots of  followers. I want to save you the stress of visiting your twitter to read and update tweets. I’m going to show you a proving way to update and read your tweets using your Instant Messenger or even your gmail account

    How does it work?

    The tweet.IM service sits between your Jabber or Google@Talk instant messaging account and your Twitter account and passes messages to and from, in both directions. As a result, you can create Twitter messages in your instant messaging application and send them direct to Twitter, without having to enter your Twitter account. You can also elect to receive tweets from users that you follow, directly in your instant messenger.

    HOW TO UPDATE YOUR TWITTER USING GTALK, GMAIL

    •  Visit www.twitter.com and sign in to your twitter account. Now, when you are Logged in, Go to www.tweet.im/ and click on the Sign in with twitter button.
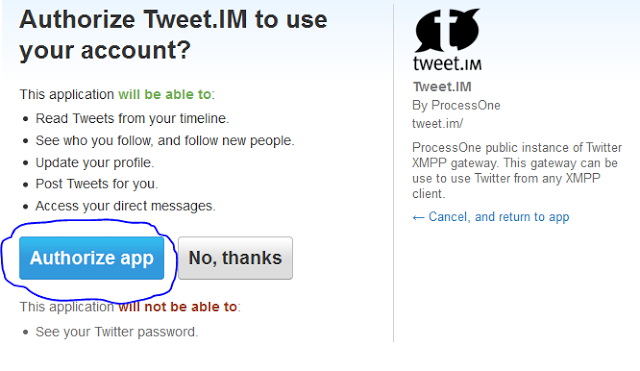
    • Click on Authorise App.
    •   Select Google Talk & put your E-mail address, then click ‘Register’
    • Login to your gmail account and you will find a box like this: This is your twitter updates   HOW TO CONNECT YOUR TWITTER ACCOUNT TO YOUR 2GO ACCOUNT
      • Open your 2go and go to Settings , click on Gateway and select Gtalk then activate using you gmail logins all in lower case.
      • Now go to your friend lists and you will see a request from Twitter, click and accept request and add Twiiter as a friend. That’s All.
  • How to Connect your Twitter With your Gtalk, 2go, IM, Gmail

    How to Connect your Twitter With your Gtalk, 2go, IM, Gmail

    Twitter can be boring at time if you have a lots of  followers. I want to save you the stress of visiting your twitter to read and update tweets. I’m going to show you a proving way to update and read your tweets using your Instant Messenger or even your gmail account

    How does it work?

    The tweet.IM service sits between your Jabber or Google@Talk instant messaging account and your Twitter account and passes messages to and from, in both directions. As a result, you can create Twitter messages in your instant messaging application and send them direct to Twitter, without having to enter your Twitter account. You can also elect to receive tweets from users that you follow, directly in your instant messenger.

    HOW TO UPDATE YOUR TWITTER USING GTALK, GMAIL

    •  Visit www.twitter.com and sign in to your twitter account. Now, when you are Logged in, Go to www.tweet.im/ and click on the Sign in with twitter button.
    • Click on Authorise App.
    •   Select Google Talk & put your E-mail address, then click ‘Register’
    • Login to your gmail account and you will find a box like this: This is your twitter updates   HOW TO CONNECT YOUR TWITTER ACCOUNT TO YOUR 2GO ACCOUNT
      • Open your 2go and go to Settings , click on Gateway and select Gtalk then activate using you gmail logins all in lower case.
      • Now go to your friend lists and you will see a request from Twitter, click and accept request and add Twiiter as a friend. That’s All.
  • How To Add the Multi Column Footer Widget To Blogger

    How To Add the Multi Column Footer Widget To Blogger

    This widget adds a multi column widget section to your blogger template. You must have seen the multi-column footer in most websites and wordpress blogs.

    The Multi Column Footer Widget allows you to add upto 4 (recommended column is 4 but you can add more sections) widgets in different columns at your footer region. This feature is quite new to blogger and luckily, you will be among the first people to enjoy this widget.

    Below we have prepared a complete walk through that will guide you in installing a similar widget to your blogger site.

    Multi column widget

    How To Add the Multi Column Footer Widget To Blogger

    First we will add the CSS code to your blogger templates and then the HTML.
    So without wasting any time lets jump straight to the steps,

    1. Go To Blogger > Design > Edit HTML
    2. Backup Your Template
    3. Search for ]]></b:skin>
    4. Just above ]]></b:skin> paste the code below,


    /*----- EWT MULTI COLUMN FOOTER WIDGET -----*/
    #lower {
    margin:auto;
    padding: 0px 0px 10px 0px;
    width: 100%;
    background:#333333;
    }
    #lower-wrapper {
    background:#333333;
    margin:auto;
    padding: 20px 0px 20px 0px;
    width: 960px;
    border:0;
    }
    #lowerbar-wrapper {
    background:#333333;
    float: left;
    margin: 0px 5px auto;
    padding-bottom: 20px;
    width: 23%;
    text-align: justify;
    color:#ddd;
    font: bold 12px Arial, Tahoma, Verdana;
    line-height: 1.6em;
    word-wrap: break-word;
    overflow: hidden;
    }
    .lowerbar {margin: 0; padding: 0;}
    .lowerbar .widget {margin: 0; padding: 10px 20px 0px 20px;}
    .lowerbar h2 {
    margin: 0px 0px 10px 0px;
    padding: 3px 0px 3px 0px;
    text-align: left;
    border:0;
    color:#ddd;
    text-transform:uppercase;
    font: bold 14px Arial, Tahoma, Verdana;
    }
    .lowerbar ul {
    color:#fff;
    margin: 0 auto;
    padding: 0;
    list-style-type: none;
    }
    .lowerbar li {
    display:block;
    color:#fff;
    line-height: 1.6em;
    margin-left: 0 !important;
    padding: 6px;
    border-bottom: 1px solid #222;
    border-top: 1px solid #444;
    list-style-type: none;
    }
    .lowerbar li a {
    text-decoration:none; color: #DBDBDB;
    }
    .lowerbar li a:hover {
    text-decoration:underline;
    }
    .lowerbar li:hover {
    display:block;
    background: #222;
    }

    5.    Now search for </body> and paste the following code just above </body>

    <div id='lower'>
    <div id='lower-wrapper'>
    <div id='lowerbar-wrapper'>
    <b:section class='lowerbar' id='lowerbar1' preferred='yes'>
    </b:section>
    </div>
    <div id='lowerbar-wrapper'>
    <b:section class='lowerbar' id='lowerbar2' preferred='yes'>
    </b:section>
    </div>
    <div id='lowerbar-wrapper'>
    <b:section class='lowerbar' id='lowerbar3' preferred='yes'>
    </b:section>
    </div>
    <div id='lowerbar-wrapper'>
    <b:section class='lowerbar' id='lowerbar4' preferred='yes'>
    </b:section>
    </div>
    <div style='clear: both;'/>
    </div>
    </div>

    6.   Save your template and you are done!
    Now go to Page Elements and add your widgets to the newly added Footer Widget that will look something like this,
    image You can observe that there a total of four columns by default and you can add as many widgets as you want to each column. If you wish to increase or decrease the number of vertical columns then follow the steps below.

    How to Customize the Widget?

    Well I will keep it simple. I think the colors and overall size and padding and margining are just perfect. The only thing that you will need to adjust according to your template is the width of the widget and the number of vertical columns.

    1.  In order to reduce or increase the overall width of the widget simply change width: 960px;
    2.  If you wish to decrease the number of widgets to three then simply delete this part of the code,
    <div id=’lowerbar-wrapper’>
    <b:section class=’lowerbar’ id=’lowerbar4‘ preferred=’yes’>
    </b:section>
    </div>

    3.  Or if you wish to add an extra column then add the code below just above <div style=’clear: both;’/>
    <div id=’lowerbar-wrapper’>
    <b:section class=’lowerbar’ id=’lowerbar#‘ preferred=’yes’>
    </b:section>
    </div>

    Remember that lowerbar# refers to the column number. So if you want to add a fifth column then simply replace  lowerbar# with lowerbar5.
    After you have added the fifth column then remember to change width: 23%; with width: 17%;
    You will repeat step 3 for as many columns as you wish to create. But three and four and five columns are a standard. Increasing them will make things look ugly.

  • The Key SEO Mistakes That You Must Avoid

    The Key SEO Mistakes That You Must Avoid


    This article presents the common mistakes which people make in search engine optimization (SEO).

    • Failure to apply constant effort in optimizing a website for search engines. SEO involves continuous effort in carrying out all the key activities that can help you rank high on search engines. Many people fail in their efforts to rank high on search engines because they expect overnight success, and they soon give up when they fail to see immediate results. It is important for you to gradually add new content to your website so that search engines visit your website more often.  You also need to steadily build links to your website in order to improve your ranking on search engines.
    • Failure to use different SEO strategies and tools. It is important for you to use different tools for optimizing your website. You must also aim to rank high on several major search engines. Choose about four main search engines and aim to rank high on them. Write and submit articles, participate in relevant forums, submit your website to many directories and search engines and exchange links with related websites that have high popularity rank. List the strategies that you intend to follow in optimizing your website for search engines, and make sure that you carry them out on a regular basis.
    • Lack of a good understanding of your niche’s keywords and phrases. If you want to successfully optimize your website, it is important that you know all your keywords and it is also important that you use these keywords on your website content, in your articles, and in any other content that you use to promote your website. Many people make the mistake of using untargeted keywords and phrases on their websites and other content that is meant to drive traffic to their website. Some internet marketers and website owners also fail to use their keywords on the title tag of their website.
    •  Lack of patience. Many web masters get impatient and they want to see their website rank high on search engines immediately. They fail to apply constant effort in implementing their SEO strategies. SEO requires that you patiently use your selected strategies and tools in optimizing your website for search engines.

    If you want to succeed in optimizing your website for search engines, it is important that you avoid the mistakes outlined above.

  • What Are The Benefits Of Optimizing Your Website For Search Engines

    What Are The Benefits Of Optimizing Your Website For Search Engines

    Search engine optimization (SEO) is very essential if you want to successfully earn money online.

    Because of the importance of SEO, many website owners spend a lot of money and effort improving their website ranking on search engines. This article outlines the key benefits of SEO to your website and to your online business’ success.

    • SEO helps to increase the ranking of your website on search engines. When your website ranks high on search engines, it means you get high volumes of traffic that is directed to your web site through the search engines. More traffic means more sales.
    • SEO helps you to save money on paid advertising. If your website is well optimized and receives large volumes of traffic through search engines, you get a large volume of traffic coming to your website through organic links on the search engines. This means that you do not have to spend money on other advertising tools such as Pay Per Click (PPC).
    • Optimizing your website for search engines and using your keywords and phrases in this process ensures that you get targeted visitors on your website. If you use all your keywords and phrases in your articles and website content, it means that your website is visible on search engines for your relevant keywords. When people type your keywords on search engines, your website ranks high on search engines.
    • SEO helps you dominate your niche. If your website ranks high on all major search engines, and for all your keywords, you soon dominate the niche and become an expert in your niche or topic. This builds a good reputation for you, which further drives more traffic to your website.

    With all these benefits of SEO, it is important that you start to optimize your website for search engines today!

  • Keyword Search Optimization Advice For Bloggers

    Keyword Search Optimization Advice For Bloggers

    If you’re blogging then you will almost certainly have heard about keyword search optimization. There are many ways to get traffic to your blog, but the best free method is to appear in the search engines for relevant keywords. Searchers will then click through to your blog to find what you’re looking for.


    Although the search engines may include your site in results when you take advantage of keyword search optimization or not, you can give them a helping hand. By doing keyword research, finding highly searched keywords, and then using them appropriately in your content, you can make sure that the search engines rank you higher for these terms.

    Keyword Density

    When writing using keywords, the number of times you include a given keyword throughout the content is known as “keyword density”. For example, if your blog post is 400 words long and contains 4 instances of the keyword, this means that you’ve got a 1% keyword density (one instance of the keyword per 100 words). There is debate about how much you should use the keywords, but it’s often recommended you use them at least once per 100 words.

    Where you use the keywords is also important. You should include them:

    • At the beginning of the title
    • Within the first sentence
    • Within the last sentence
    • And spread through the article body.

     Keep It Natural

    Although keyword search optimization is an important strategy for many bloggers, it’s also important to sound natural. After all, it’s not just the search engines looking at your content – there are real human readers too! And they’re likely to be turned off if it sounds like you’ve just stuffed in your keyword as many times as possible.


    This is why it’s important to work on writing a good blog post first, and worry about the keywords you’re including second. No matter how well you’ve incorporated keyword search optimization into your article, your site isn’t going to do well unless you can keep readers interested with well crafted, interesting content that’s written with their needs in mind.

    Too Many Keywords Can Have The Opposite Effect

    Although we all know that it’s useful to include keywords in your blog posts, including too many can even turn the search engines off. The giants like Google are well aware that bloggers and internet marketers are trying to improve their rankings with methods like this, so they won’t reward you for taking shortcuts and stuffing your content with too many keywords. If they did, it would be too easy for low quality rankings to get to the top of the rankings.

    Keywords Aren’t Everything

    Following on from the point above, it’s important to realize that Google is looking at a lot more than just keywords to rank your site. It takes into account who links back to your site, how you link to your own pages, how well your site is laid out and, importantly, whether your website actually delivers the information your visitors are searching for.

    Keyword search optimization is definitely something you should be incorporating into your blog posts if you want to take advantage of free search engine traffic. However, it’s also important to work on the quality of your blog. The visitors will follow.

  • Top 6 Tips For Driving Traffic To Your Blog

    Top 6 Tips For Driving Traffic To Your Blog

    Blogging is very effective in attracting large volumes of traffic. However, if you really want to drive huge volumes of traffic to your blog, you will need to do more than just blogging.

    This article outlines the top seven secrets for driving traffic to your blog.

    1. Create high quality content that is rich with your keywords and phrases. This brings two main benefits. First, high quality and useful content will keep your website’s visitors interested and they will visit your blog on a regular basis and will buy the products you sell on your website. Second, fresh content with your key words will improve your search engine ranking which brings traffic to your blog and website.
    2. Optimizing your titles for search engines is also an effective way of driving traffic to your website. You will need to optimize your blogs titles and use all the keywords or phrases which people use while looking for information on the internet. This will make your website visible on search engines, and your website will also rank high for all your keywords, driving traffic to your website.
    3. Use email marketing with your blog. This is an effective way of bringing readers back to your blog as well as to create a list. Having your own list is important because you can sell your products and services to your list. By using an auto responder, you can send emails to your list about updates to your blog, hence driving traffic to your blog.
    4. Social book marking is yet another powerful way to drive traffic to your blog. If you rank high on some of the most popular social book marking sites, you can drive large volumes of traffic to your website.
    5. RSS feed for blog traffic. RSS feed is another way you can use to keep people coming back to your blog because after people subscribe to read your RSS feed, they will get updates continuously. This means that you will be bringing readers back to your blog every time you make a new blog post.
    6. You can use some of your blog posts and covert them into articles. All you have to do is to add more content to your blog posts if necessary, add a catchy article heading and convert it into an article. Writing and submitting articles is one of the most excellent strategies for traffic generation.

    These six strategies can significantly increase the volume of traffic to your website and blog.

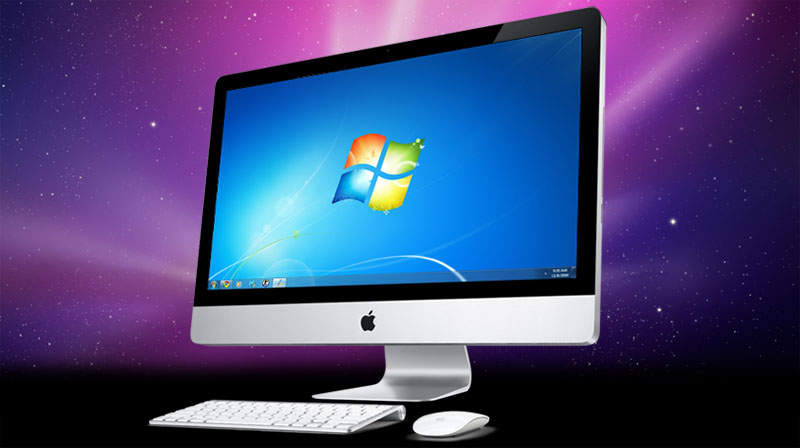
  • How to install Windows 7 on your Mac: The Complete Walkthrough

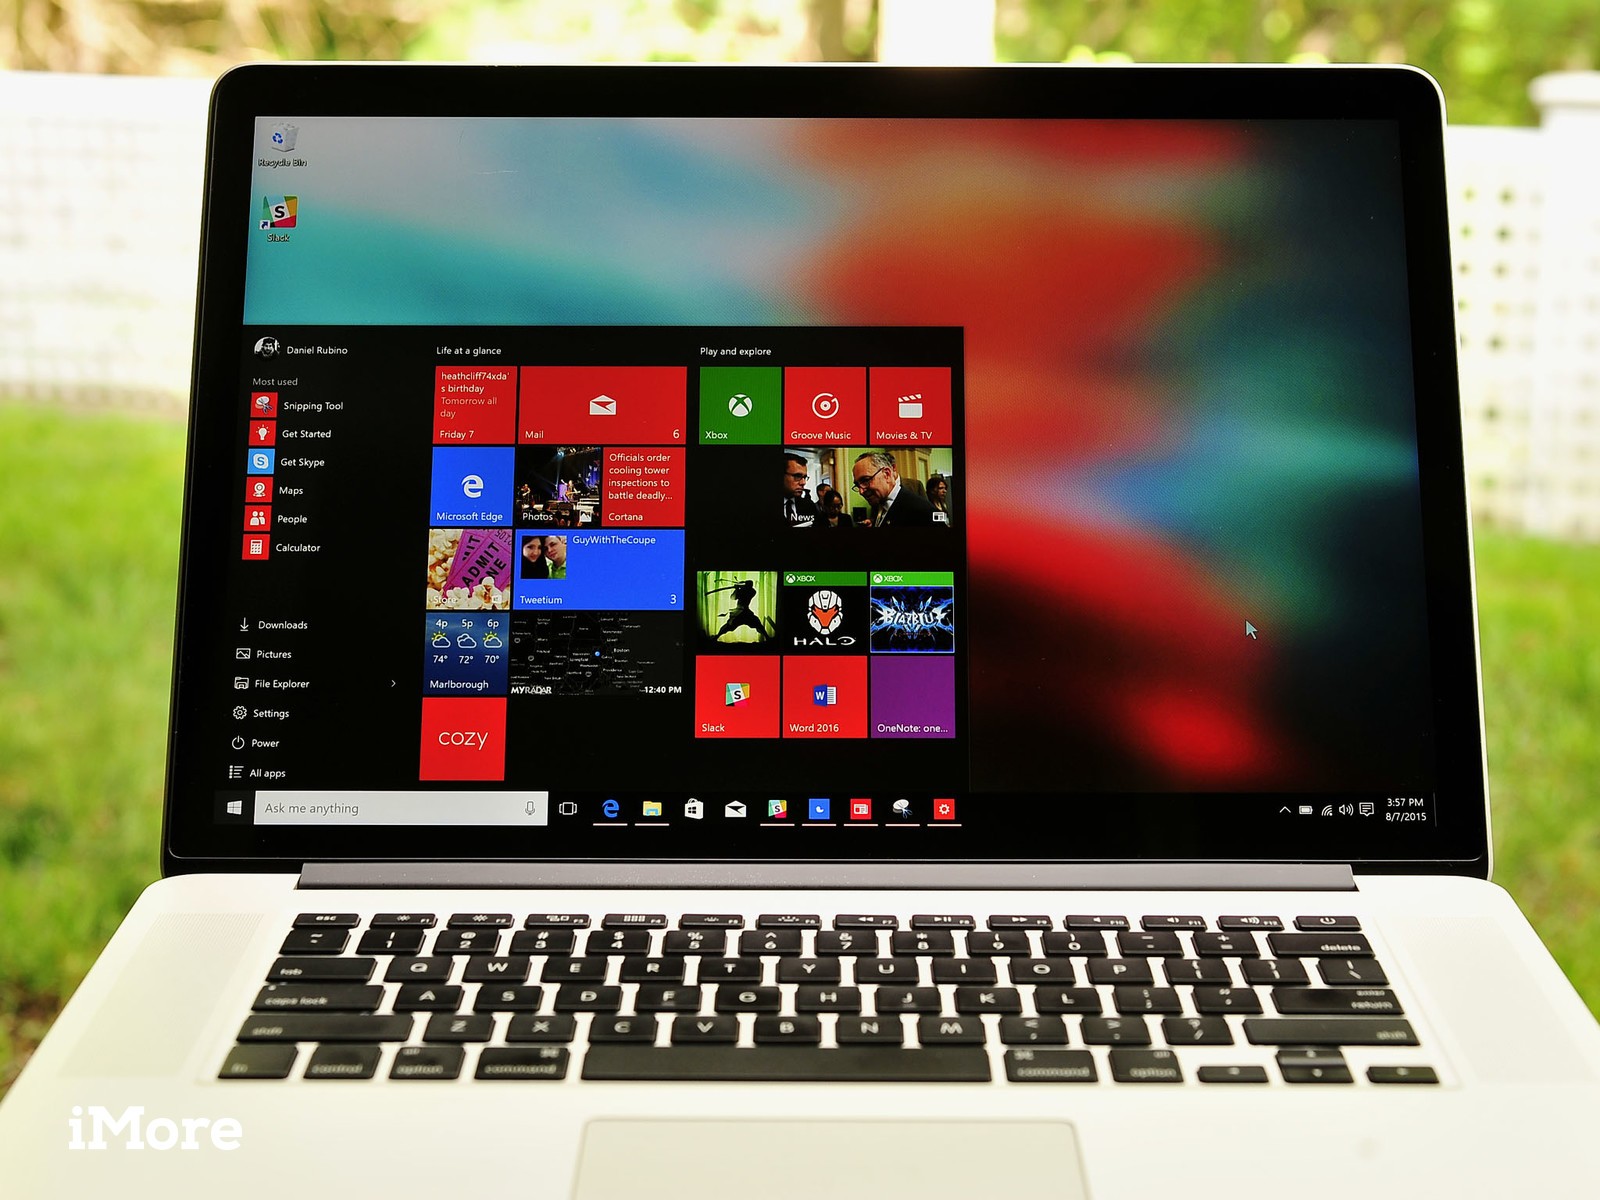
    How to install Windows 7 on your Mac: The Complete Walkthrough

    How to install Windows 7 on your Mac: The Complete Walkthrough
    Using Boot Camp to install Windows 7 on your Mac: The Complete Walkthrough

    Somewhat similar to the Using Boot Camp to install Vista on your Mac walkthrough, this tutorial will take you every step of the way through installing Microsoft Windows 7 on your Intel Mac (running 10.5 or later), using Boot Camp. 
    Note: if you’d rather not dual boot OS X and Windows 7, you can always install Windows 7 in a virtual environment using Parallels Desktop 6.0 for Mac.

    To install Windows 7 on your Mac using Boot Camp you will need the following:

        All firmware updates installed on your Mac (use Apple Button -> Software Update… to check)
        A Windows 7 installation DVD
        Your OS X Leopard or Snow Leopard installation DVD
        Around 30GB of empty hard drive space on your Mac. You can probably get away allocating less than 30GB to Windows 7, but it will leave very little room to install anything in Windows.
        An hour if all goes well, up to 5 hours if not
        Though not absolutely required, it’s a VERY good idea to have a complete and up to date Time Machine backup of OS X – it really came in handy for me. Because part of the process involves partitioning your drive, there’s always the distinct chance something will go wrong and everything will be wiped out.
        Patience, possibly a great deal of it. Having a book handy will also help kill time during the partitioning, installing etc).

    Installing Windows 7 via Boot Camp

        Here goes. First thing – close absolutely every open program you can. That includes those things running in the Apple Menu that you always forget about. Don’t worry about killing the Dock or Dashboard – having those running is fine.
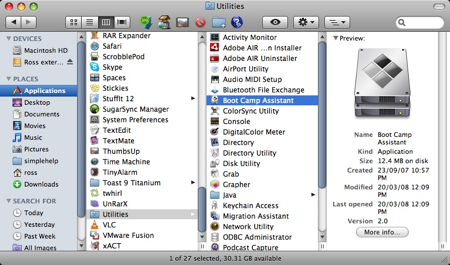
        Now open a Finder and navigate to Applications -> Utilities and double-click Boot Camp Assistant. 

    Click Continue on the initial Introduction screen. Ignore the fact that it doesn’t mention Windows 7 as a possible OS to install.
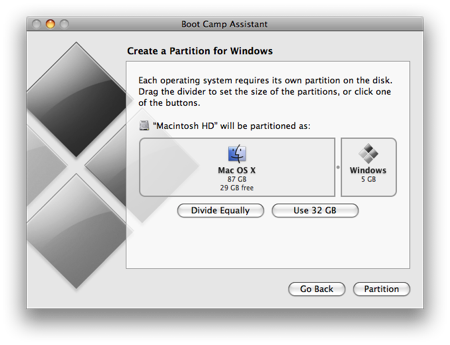
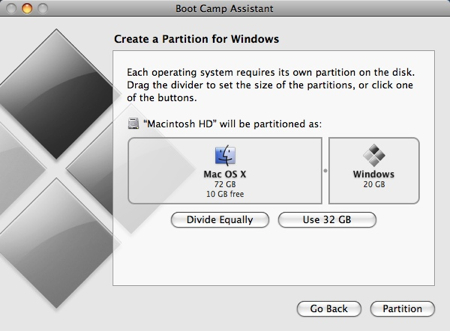
    Now you have to decide how much space you want to allocate to Windows 7. You might be able to get away with going as low as 10GB, but I would highly advise against it. You’ll have almost no space left over to install software, and your page file in Windows might cause frequent crashes. I opted for 20GB, which left me with just a bit over 16GB to use after installing Windows 7.

    To change the amount of space to dedicate to Windows 7, click the small divider between Mac OS X and Windows, and drag it to the left. 

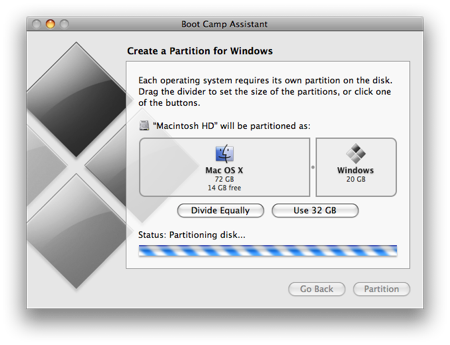
    Once you’ve determined how much space you want to allocate to Windows 7, click the Partition button. 
    The partitioning itself doesn’t take particularly long. If you receive an error, proceed to step 10 of the “How to install Vista with Boot Camp” tutorial. It provides all the troubleshooting info you need to resolve partitioning issues. Once you’ve cleared up any problems, or if everything just goes smoothly, proceed with the next step in this tutorial. 

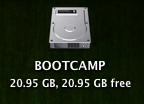
    Once completed you’ll notice a new BOOTCAMP drive on your desktop. 

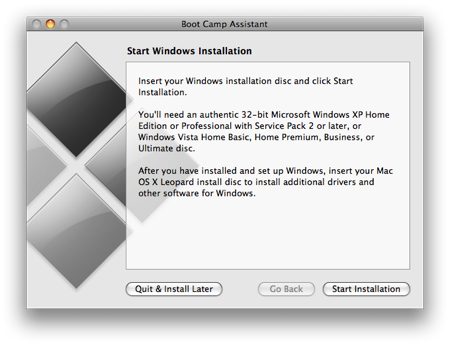
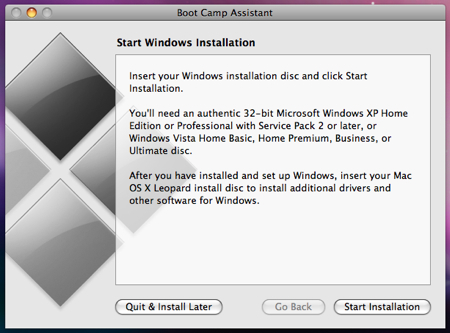
    Now insert your Windows 7 DVD and click the Start Installation button.

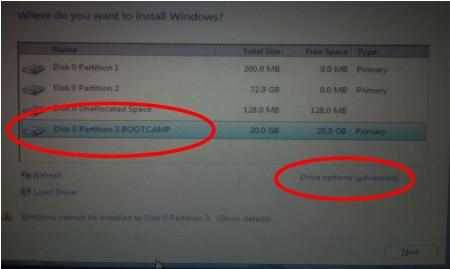
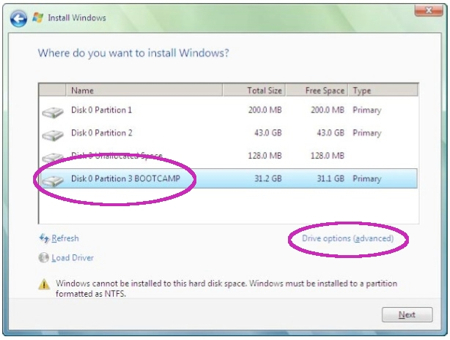
    Your Mac will restart, and Windows 7 will boot. You’ll be prompted with a window asking you which partition you want to install Windows on. Select the one with BOOTCAMP in the Name column. Selecting anything else may wipe out OS X or cause serious problems. Then select the Drive options(advanced) link. 

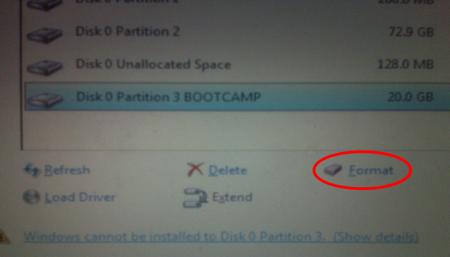
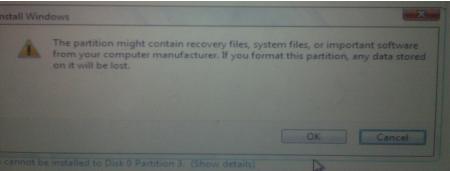
    With the BOOTCAMP volume still selected, click the Format link.

    Click OK. 

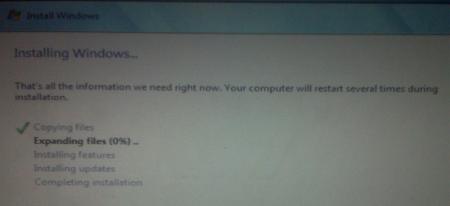
    And Windows 7 will begin to install. It’s a fairly boring process, so you may want to grab yourself a cup of coffee or your beverage of choice. But don’t go too far away, because when your system reboots, you’ll need to remove the Windows 7 DVD. 

    With the Windows 7 DVD removed, your Mac will automatically boot back into Windows 7, and the installation will complete. You’ll be prompted to select your language, keyboard layout etc. The rest of the Windows 7 installation process is very straight forward.
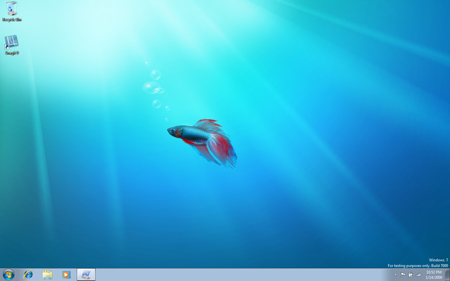
    Once the installation has completed and your Mac has restarted again, you’ll be able to use Windows 7. WiFi will work immediately (no drivers to install) so connect to the Internet. Windows 7 will then begin to download updates, including the proper video card driver. Let it do its thing. 

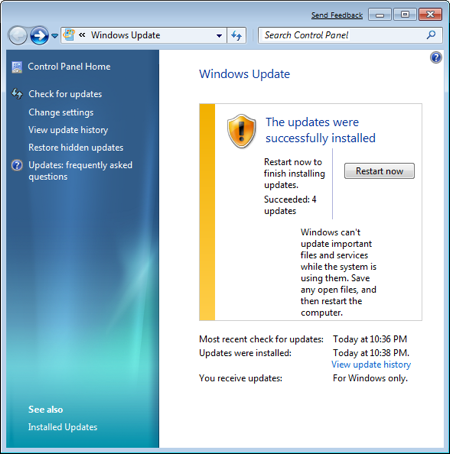
    Once completed, you’ll be prompted to reboot yet again. Do so.

    Once Windows 7 boots back up again, you’ll notice the resolution is much better, and you can enable the advanced graphics features. 

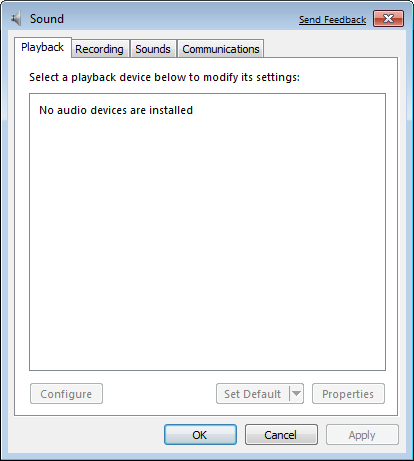
    But if you check for sound, you’ll notice there are no sound drivers installed. 

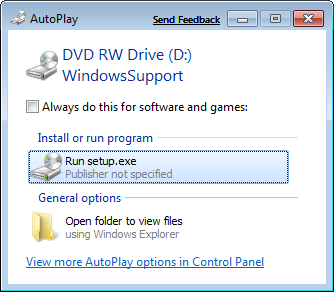
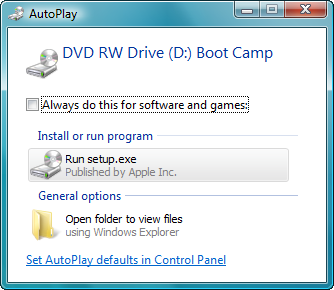
    Insert your OS X Leopard (or Snow Leopard) DVD. When prompted, select Run setup.exe. Note: If you’re using Snow Leopard and a message pops up saying “Remote Install Mac OS X”, close that window and eject the CD. Put the CD in again and this time select “Open folder to view files”, navigate to the Bootcamp folder, and run setup.exe. 

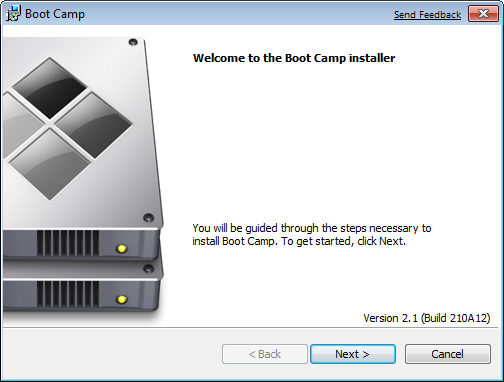
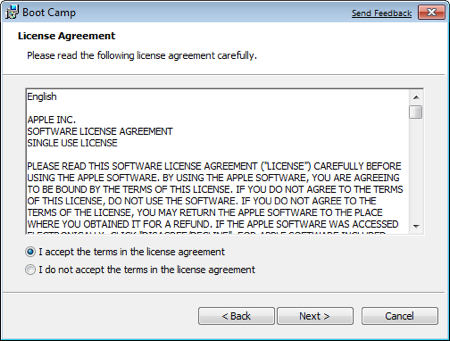
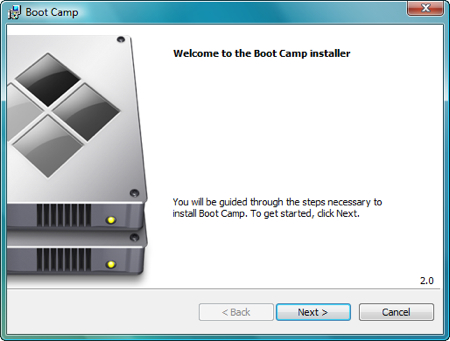
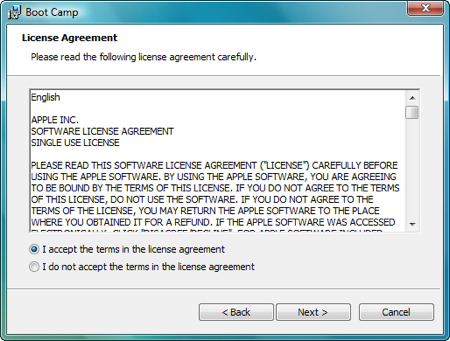
    The Boot Camp installer will launch. Click Next to begin. 

    Select I accept the terms in the license agreement and then click Next again. 

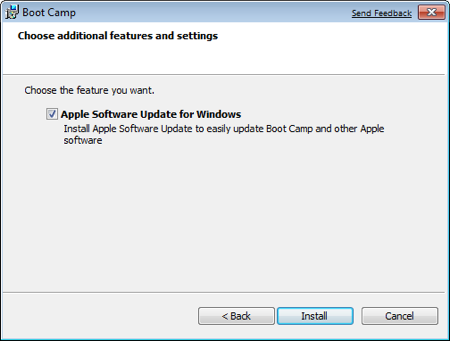
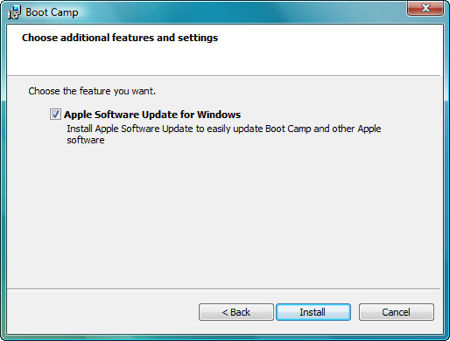
    Make sure that Apple Software Update for Windows is checked, and click Install. 

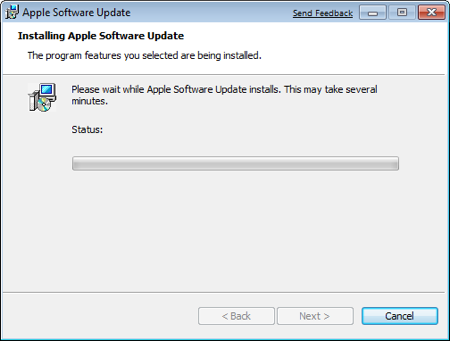
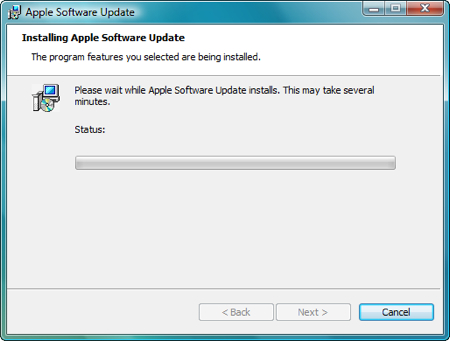
    The Boot Camp installer will do its thing, and install all the required drivers. 

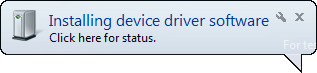
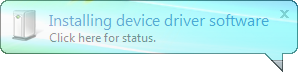
    Notifications will pop up with each driver that gets installed.

    Once completed, click Finish. 

    And yet again you’ll be prompted to reboot. Remove your OS X Leopard DVD from the drive, and click Yes to restart. 

    At this point most of the hardware on your Mac should be working in Windows. However, some iMacs and MacBook Pro’s will have to update to the 3.1 version of Boot Camp for Windows. To do so, just follow the few steps in this tutorial.
    Note: If you still have problems with sound not working, you’ll need to install the Realtek drivers.
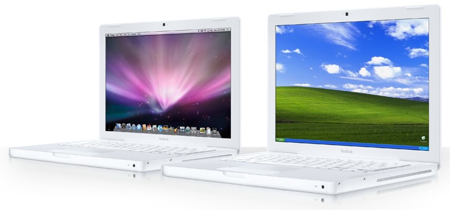
    That’s it, you’re done! When your Mac boots, hold down the Option key to select which Operating System you want to boot into. 

  • How to install Vista on your Mac: The Complete Walkthrough

    How to install Vista on your Mac: The Complete Walkthrough

    How to install Vista on your Mac: The Complete Walkthrough
    Using Boot Camp to install Vista on your Mac: The Complete Walkthrough

    This walkthrough will take you through every step of installing Microsoft Windows Vista on your Intel Mac (running 10.5 or later), using Boot Camp. It will cover a number of possible errors that you may encounter, and how to get around them. Each time I bring up an error I will explain in detail what you’ll need to do to resolve the issue and continue installing Vista. It’s up to you to decide if it’s worth the time and effort (for example, you may need to completely wipe your hard drive clean and restore from a Time Machine backup). It’s also possible that everything will go perfectly smoothly and you’ll wonder why you even needed a guide.


    To install Vista on your Mac you will need the following:

        All firmware updates installed on your Mac (use Apple Button -> Software Update… to check)
        A Vista installation DVD (Home Basic, Home Premium, Business or Ultimate)
        Your OS X Leopard installation DVD
        At least 10GB of empty hard drive space on your Mac (you can probably get away with less but you’ll have almost no room to install anything other than the OS)
        An hour and a half if all goes well, up to 5 hours if not
        Though not absolutely required, it’s a VERY good idea to have a complete and up to date Time Machine backup of OS X – it really came in handy for me
        Patience, possibly a great deal of it. Having a book handy will also help kill time during the partitioning, installing etc).

    Installing Vista via Boot Camp

        Here goes. First thing – close absolutely every open program you can. That includes those things running in the Apple Menu that you always forget about. Don’t worry about killing the Dock or Dashboard – having those running is fine.
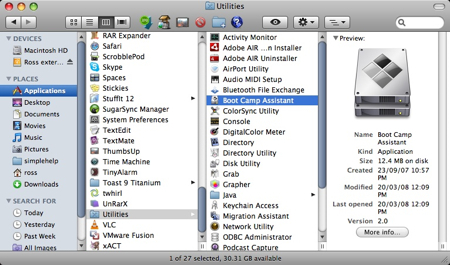
        Now open a Finder and navigate to Applications -> Utilities and double-click Boot Camp Assistant. 

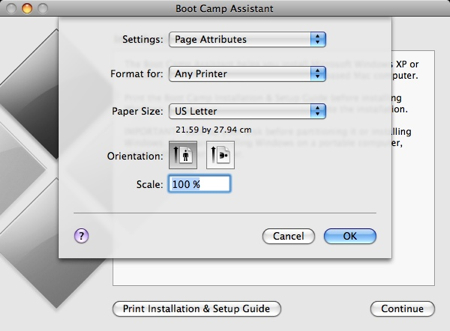
    It’s not a bad idea to have the Setup Guide handy, just in case you need it. Click the Print Installation & Setup Guide button. 
    Click OK

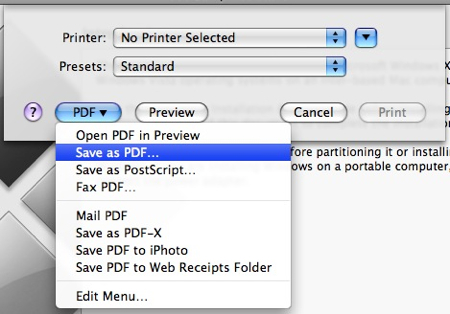
    If you have another computer around, and would like to save half a tree (printing the guide will use 20-something pages) – select the PDF button and choose Save as PDF

    If you don’t want to download my copy, enter the appropriate info (most importantly, the download location so you can find it) and click Save. Transfer the PDF to your other PC/Mac so you can access it while actually installing Vista. 

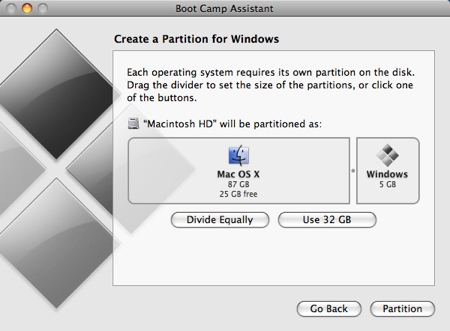
    Back at the Introduction page of the Boot Camp Assistant, click Continue. Now you have to decide how much space you want to allocate to Windows Vista. You might be able to get away with going as low as 6GB, but I would highly advise against it. You’ll have almost no space left over to install software, and your page file in Windows might cause frequent crashes. I opted for 20GB, which left me with just a bit over 15GB to use after installing Windows Vista Ultimate and upgrading to SP1.

    To change the amount of space to dedicate to Vista, click the small divider between Mac OS X and Windows, and drag it to the left. 

    When you’re happy with the amount of space that Vista will have, click Partition.

    Watch the little status indicator.. 

    and hold your breath that no errors occur. If you’re presented with a Start Windows Installation screen, proceed with step #11 below (and consider yourself very lucky). If you get an error, keep reading.

    The most common error is that OS X couldn’t move a file and the partition could not be created. There are a couple of things that could be wrong, and I’ll outline how to fix them from the fastest method to the longest method. Cross your fingers that the fastest one will resolve your problem.

    Close out of the Boot Camp Assistant and launch the Disk Utility by selecting Applications -> Utilities -> Disk Utility.

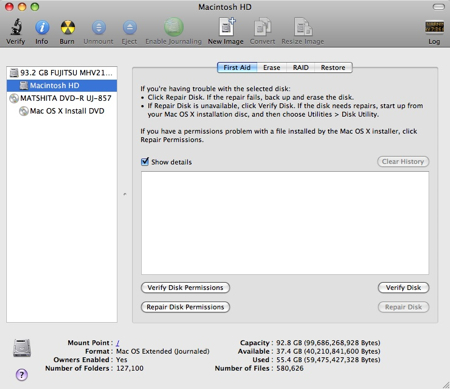
    Select your Mac drive, or the partition you were trying to install Boot Camp on (if you have more than one). Click the Verify Disk Permissions button, then the Repair Disk Permissions button. Once that’s done, click the Verify Disk button, then the Repair Disk button if it’s available.

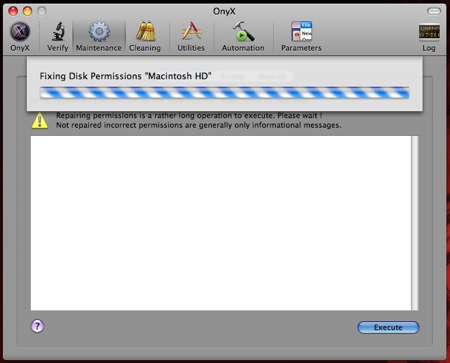
    Now go back to step #1 and try it all over again (except you don’t need to print out the PDF twice). If you were able to create the partition, excellent, continue with step #11. If you got the same “can’t move file” error, download and install OnyX Once installed, launch it (you’ll probably be prompted for your password) and select the Maintenance tab. Click the Execute button and wait.

    Once again, go back to step #1 and start all over again. If it worked this time, excellent, proceed to step #11. If it didn’t, you have another couple of choices. Neither is much fun. First, you can purchase defragging software (I’m not aware of any that are free/open source) such as iDefrag and hope that it resolves your problem (it might not). Second – and this is what I opted to do – re-install OS X by formatting the entire drive (all data will be lost), run software update to get all the firmware updates, install Vista via Boot Camp, and then restore OS X from a Time Machine backup. Like I said, not great choices. If you do decide to go the format and re-install route, I’ll outline it with a few more details –

        Know that you might lose all of your data. Time Machine could fail, your roommate might decide now would be a good time to smash your backup drive – any number of problems could occur. This is my way of saying that I will NOT be held responsible if this method causes you all kinds of nightmares. With all of that said, it worked perfectly fine for me.
        Make sure you have a 100% up to date Time Machine backup. Open Time Machine and select Back Up Now. If you opted not to back up certain folders, make sure you have the contents of those folders backed up – or remove them from the “don’t back these folders up” section of Time Machine.
        Put your OS X Leopard DVD in your DVD drive, and restart your Mac.
        Hold down the c key as your Mac restarts – this will force your Mac to boot from the DVD rather than the hard drive.
        Follow the walk-through to install OS X. Make sure you select the “format this drive then install OS X” option
        Once you’ve re-installed OS X, start your Mac and run the Software Update to make sure everything is up to date. Once completed, you’ll be prompted to reboot. Do so.
        Once again, run the Boot Camp Assistant. This time you should have no problems at all
        Carry on with step #11 below, and once you’ve completely finished installing Vista, perform a Time Machine restore. To do so, boot from the OS X DVD (hold down c as your Mac starts up) and from the Utilities menu, select Restore from Time Machine (or something like that, I forget right now). Let Time Machine do its thing (boring, takes forever) and once it’s done, reboot yet again. You’ll finally have a dual boot Mac w/ Vista and OS X.

    Alright, time to install Vista. Put your Vista DVD in your DVD drive and click Start Installation.

    A bunch of things will happen on their own. Don’t interfere with them. You’ll eventually land at a screen asking where you want to install Windows. Make sure, and I mean make sure you select the BOOTCAMP partition. Selecting anything else is going to force you to re-install OS X, and unless you have a recent Time Machine backup, you’ll lose all of your data.

    Now click the Drive options (advanced) link/button. Click Format and once it’s done, click OK. Now you can click Next

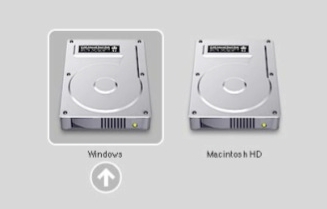
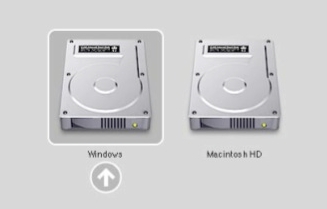
    Now Vista will install. It takes a while and it’s not particularly entertaining. Vista will restart itself at least once during the installation. If by some chance – and this shouldn’t happen – when Vista restarts itself, and you end up back in OS X instead of Vista, restart again and this time hold down the Option key as your Mac starts. You’ll be presented with a number of drive icons to choose from. Double-click the Windows icon.

    And now Vista has finished installing, you’ve setup your “account” in Vista, and you think you’re done. You’re not. Eject you Vista DVD from your DVD drive (if you have problems ejecting it go to the Computer view in Vista, click once on your DVD drive, and then select the Eject link that will show up in the menu. Now pop in your OS X Leopard DVD. You’ll be prompted “Install or run program” – click the Run setup.exe button. 

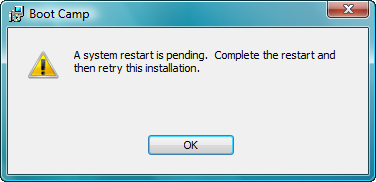
    You might be told that a system restart is pending and you can’t install anything yet. I never said this was a short process. Restart your Mac and make sure to boot into Vista. 

    This time when you Run setup.exe you’ll get the “Welcome to the Boot Camp installer” screen. Click Next

    Place a check in the “I agree” part, and click Next.

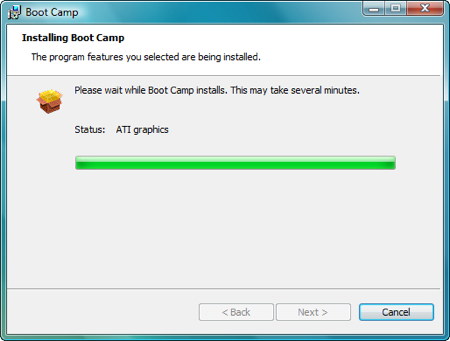
    Make sure Apple Software Update for Windows is selected, and click Install.

    Sit back and watch. Don’t interfere. Your screen may flicker, ignore it. 

    Also ignore any pop-ups that might appear in your System tray.

    Almost done.. 

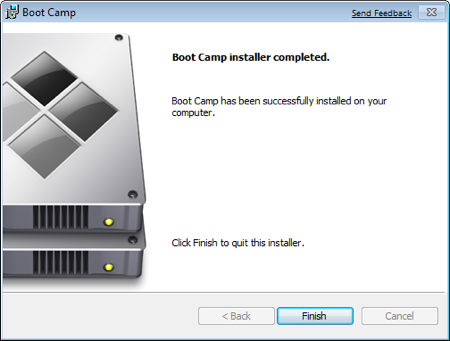
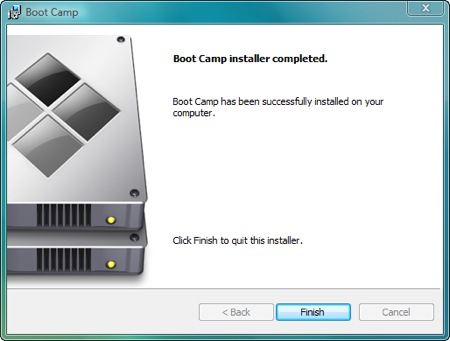
    And now you’re done. Click Finish.

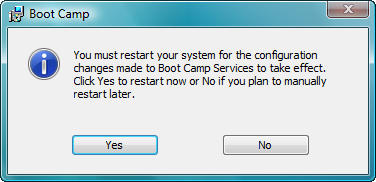
    Restart yet again. 

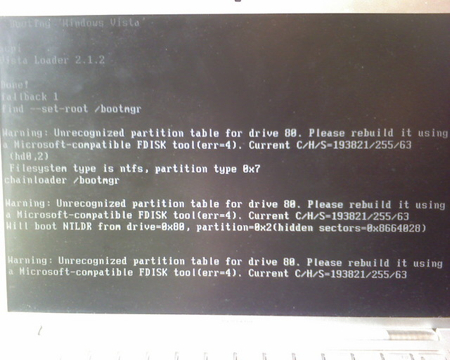
    Note: when Vista boots, you might encounter a couple screens full of error messages (Unrecognized partition table for for drive 80, can’t boot from NTLDR from drive=0×80 etc). Ignore them, and let Vista continue to boot. I have a (bad) camera phone picture of some of the errors below. 

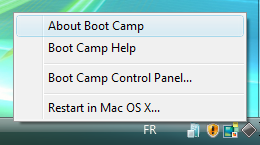
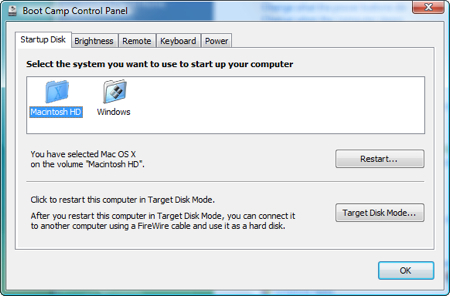
    This time when Vista starts, you’ll notice a new icon in the System tray – it’s the Boot Camp software. Click it once and a pop-up menu will appear.Select Boot Camp Control Panel…. 

    On the first tab, Startup Disk you can select which Operating System you want to boot into by default. Just high-light the one you want – but remember – you can also choose to boot to the other OS by holding down the Option key while your Mac starts. Note: you can also define which OS you want to boot into by default in your Mac. Just select the Startup Disk option in your System Preferences. 

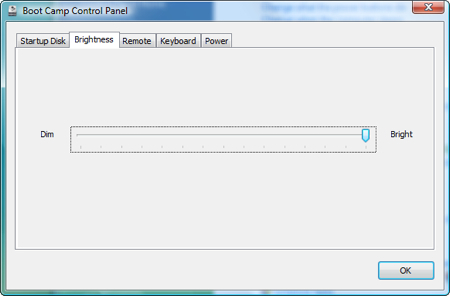
    Click the Brightness tab to adjust – you got it – the screen brightness. 

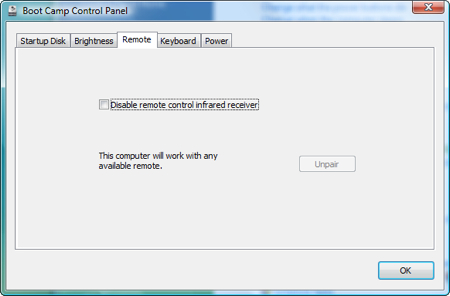
    Click the Remote tab. From here you can disable or enable the use of a remote infrared receiver. Your choice. 

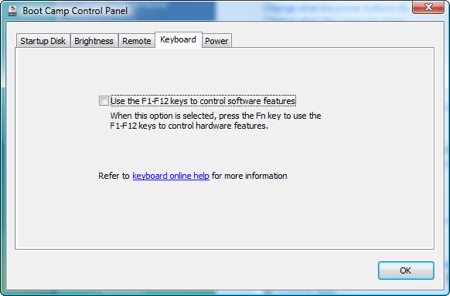
    Select the Keyboard tab to make some keyboard changes. Boring. 

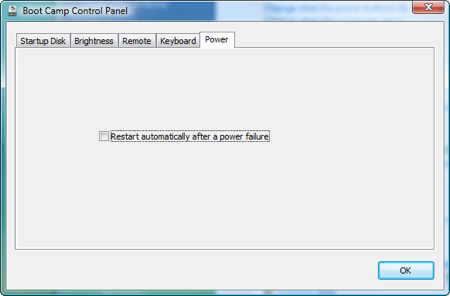
    And finally, select the Power tab. Do you want to automatically restart after a power failure? Here’s where you decide. When you’re done reviewing all of the Boot Camp Control Panel options, click OK

    And one last thing. Remember – no matter which Operating System, Vista or OS X, you decide to have as the one you automatically boot into when your Mac is turned on, you can select the other one by holding down the Option key as your Mac starts. 

  • HTC Evo 4G LTE

    HTC Evo 4G LTE

    HTC Evo 4G LTE Review: Gorgeous, but No LTE for Now  

    Sprint’s original HTC Evo 4G was the carrier’s very first 4G WiMAX phone. Two years (and a few other Evos) later, we have the HTC Evo 4G LTE ($200 with a new two-year contract from Sprint; price as of 5/10/12). But despite the name, this smartphone is currently just a 3G phone until Sprint builds out its LTE network. Outside of this issue, the Evo 4G LTE is a solid phone. The display, camera, design, and multimedia features make it the best phone currently coming from Sprint. Sprint will have the HTC Evo 4G LTE available on May 18.

    Different Design on HTC Evo 4G LTE


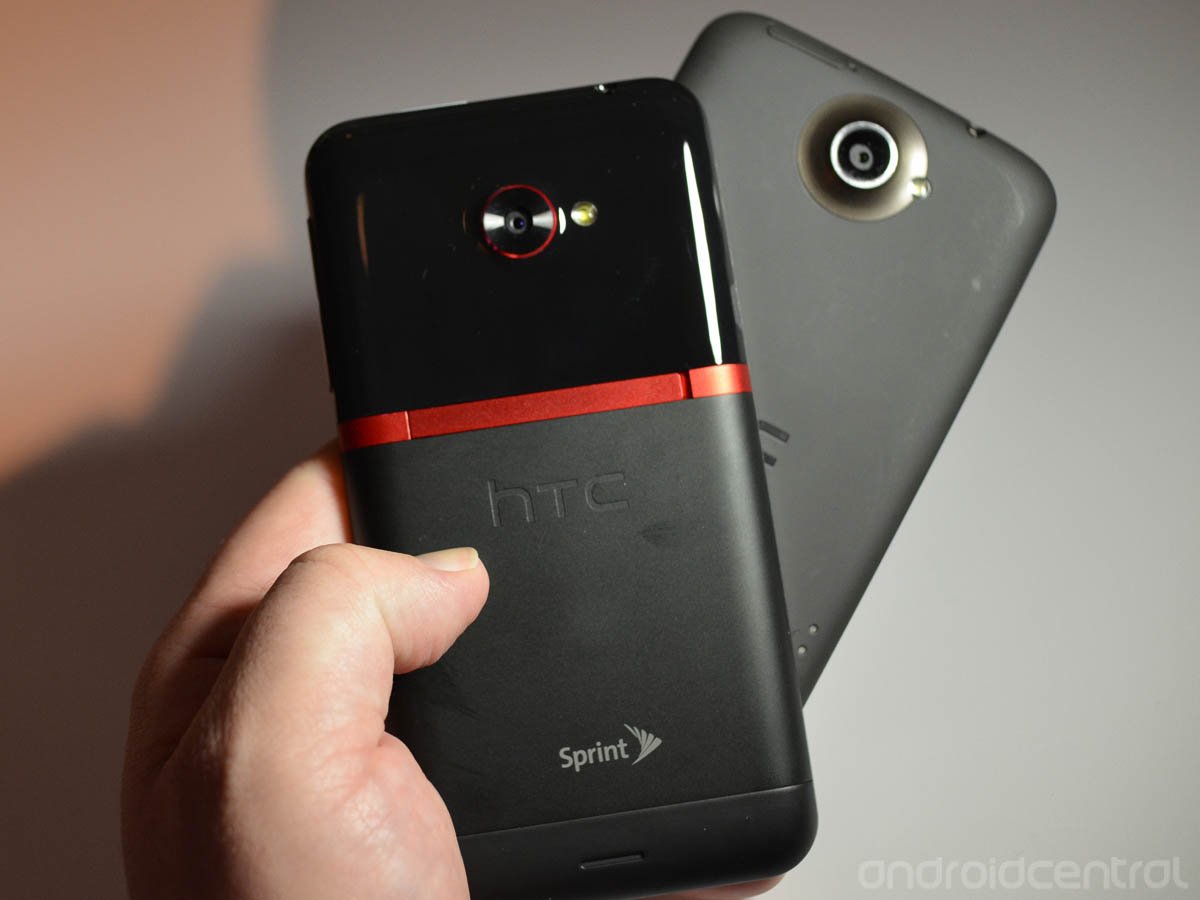
    The Evo’s kickstandThe HTC Evo 4G LTE might share a lot of specs in common with the One X on AT&T, but its design is totally different. With its black body and red accents, you might mistake it for a Verizon phone; it looks an awful lot like the newly announced HTC Droid Incredible 4G LTE. It holds onto the Evo design legacy, however, with a bright red kickstand. You flip the kickstand out and set your Evo on a table for some hands-free video watching. The kickstand is a little difficult to open, however. You’ll need some nails to get it out. The kickstand divides the Evo’s battery cover, which is part glossy black plastic and part matte, soft-touch rubber.

    Measuring 5.3-by-2.7-by-0.35 inches, the Evo is slightly smaller than the One X, which measures 5.3-by-2.8-by-0.4 inches. The Evo is an ounce heavier, at 4.7 ounces, than the One X (4.6 ounces).

    The Evo has a 4.7-inch 1280-by-720 HD pixel display with IPS (In Plane Switching) technology. We loaded the Evo up with a few test photos we use across phones to test display quality. These images include a colorscale test, a grayscale test, and photos of people. In our colorscale test, I could detect some oversaturation as the colors bled into one another (see sample photo). In the portrait photos, skin tones had a ruddy look–another sign of oversaturation. Details appeared sharp, however, as did text.

    Android 4.0 with HTC Evo 4G LTE Sense


    HTC Sense–the manufacturer’s user interface over Android–has garnered a mixed response from consumers and tech journalists alike. And Android 4.0 (Ice Cream Sandwich) has, by far, the best-looking interface of any version of Android. I understand why manufacturers slapped on overlays in the early days of Android: The underlying interfaces were ugly. HTC Sense is undeniably pretty. But its animations and colorful widgets have a tendency to bog down the operating system.

    Perhaps my idea that manufacturers might leave Android 4.0 alone and just add a few customized widgets was just wishful thinking. To HTC’s credit, Sense 4.0 is much subtler than previous versions of the interface. The company has cleared out many unnecessary icons and text that cluttered older versions of Sense. You can still pinch the screen to see all seven of your homescreens, and you get that handy customizable lock screen that we saw with Sense 3.0.

    Still, Android purists might take offense to a few changes. The Recent Apps UI has been tweaked in typical Sense fashion. Rather than displaying your apps or websites as a list with thumbnails, it displays them as pages that flip as you flick through them. The Sense widgets are a bit too busy and garish for my liking, but you can easily remove them.

    HTC Sense also makes some very basic tasks more difficult than they should be. For example, to change the phone’s wallpaper, you have to dig through multiple menus in the Settings. Changing the wallpaper in vanilla Android 4.0 is as simple as holding down on the homescreen.

    The Evo 4G LTE comes with a significant amount of carrier and manufacturer-added software, but that seems to be the norm these days. You can disable some of these so they don’t show up in your apps menu. Annoyingly, you can’t disable either the Sprint Music Plus player or the Sprint Zone.

    Camera


    Sprint and HTC unleashed a bunch of journalists in the city of New Orleans to test out the HTC Evo’s camera in the field. Like the HTC One series of phones, the Evo 4G LTE has HTC’s ImageSense camera software and the HTC ImageChip, which supports a which supports an f2.0 aperture and a handful of different shooting modes, including High Dynamic Range (HDR), Macro, and Panorama. HTC also claims that One cameras have an almost no-lag shutter speed. In my hands-on tests, I found the no-lag claim to be pretty much true. My photos taken in automatic mode looked excellent, with good colors and crisp Indoor Photo Using Automatic Modedetails. Most of the shooting modes worked quite well, too, especially the macro mode (see example photos).
     HDR made my photos look a bit spooky–I prefer the HDR mode on the iPhone 4S’s camera. You can also add Instagram-like filters to your photos, but I don’t think they look very good. A better bet would be to add a third-party app like, well, Instagram or Pixlr, which has even more filters.
     This Evo also has a very cool continuous shooting feature, which lets you take multiple pictures at a time. You can then use the camera app’s Best Photo feature, which will automatically pick the cleanest photos out of the group. You can use continuous shooting with both the onscreen shutter button and the physical key. It is a little sensitive, however. When I was snapping photos from a tour bus in New Orleans, I accidentally took multiple pictures without meaning to.

    The Evo has a dedicated camera shutter button, which is always a plus, as it helps stabilize the phone before you take your photo. Annoyingly, you can’t press the button when the phone is locked to jump directly to the camera app.

    Multimedia

    All HTC One phones have Beats Audio built in. Beats Audio automatically turns on when you play music, but you can opt to turn it off. I could definitely hear a positive change in music quality, especially with rock and metal music, when Beats was running. Bass sounded richer and the vocals fuller. Beats Audio also kicks in when you play a YouTube video.

    Unlike the One phones, the Evo has a microSD slot so you can expand your phone’s memory beyond the built-in 16GB, with photos, video, apps, and so on.

    The phone also comes with HTC Watch, which is the company’s movie-streaming service. If you wish to stream movies off your phone, however, I’d go with Netflix, as it has a larger library than Watch.

    Performance

    Using the FCC-approved Ookla Speedtest.net app, I tested Sprint’s 3G network in two cities: New Orleans and San Francisco. In New Orleans, the HTC Evo achieved an average of 1.4 Mbps for download speeds and 0.52 Mbps for upload speeds. In San Francisco, Sprint’s 3G network was a bit faster, with an average of 1.69 Mbps for downloads and 0.90 Mbps for upload speeds.

    These are okay speeds for 3G, but I’ve been spoiled by 4G. Videos started and stalled over YouTube and Web pages weren’t loading as quickly as I’m used to. Even T-Mobile’s HSPA+ network seems much faster than Sprint’s 3G network. But until Sprint LTE comes to your city, you’re stuck with 3G. Even if you have WiMax in your city, the Evo 4G LTE isn’t compatible with that network.

    I ran both the Quadrant and Vellamo benchmarking apps to see how powerful the Qualcomm S4 1.5GHz dual-core processor is on the HTC EVO 4G LTE. With Vellamo (which was developed by Qualcomm), the Evo had a score of 2392, slightly ahead of the HTC One S, which has the same processor and achieved a score of 2365.

    Under Quadrant, the HTC Evo got a score of 5145, which put it slightly ahead of both the One S and the Galaxy Nexus. I also ran a few graphics-heavy games, like World of Goo and Osmos, and the Evo handled them flawlessly.

    While we haven’t yet completed our formal battery tests, I used the EVO 4G LTE for an afternoon photo outing. After 2 hours and about 50 photos later, I noticed a significant drop in battery life. You might not use the camera as heavily in a short time span as I did for this review, but one of the main selling points of this phone is the camera. I also ran a 26-minute video over YouTube with the battery starting at 76 percent charged. After the video was finished, the Evo had a battery life of 67 percent. We’ll update the Evo’s battery life results once we finish our formal testing.

    We experienced uneven call quality with both the HTC One X and the One S, but the Evo sounded good on both ends of the line. My friends said my voice sounded clear and natural, and they didn’t hear any crackling or static as they did on the One phones.

    The EVO 4G LTE will be the first handset on a U.S. carrier with HD Voice. Sprint’s demo of HD Voice at the EVO 4G LTE’s launch in New York City showed how it significantly decreases background noise.

    This is made possible by the Snapdragon processor, which uses dual-microphone noise suppression and earpiece active noise cancellation. It also relies on Sprint to finish its upgrades to its 3G network so we were unfortunately unable to test this feature. Also, HD Voice will only work if both people on a call are using an HD Voice-supported smartphone on an HD Voice-supported network.

    Bottom Line

    The Evo phones have always been Sprint’s strongest offering, and the Evo 4G LTE is no exception. From its beautiful design to the versatile camera to the fast performance, this is Sprint’s best phone–and one of the best Android phones available. But without LTE, it feels as if it is not quite living up to its potential.

    That Sprint is releasing LTE phones (the Evo, the LG Viper, and the Galaxy Nexus) without an actual 4G LTE network in place is a bit frustrating. While the company has disclosed the initial six cities for launch (Atlanta, Baltimore, Dallas, Houston, Kansas City and San Antonio), it has not said when these networks will turn on. And unless you live in one of those cities, you’ll find it hard to get excited about LTE. Sprint’s 3G network feels painfully slow, too, especially when you compare it to other carriers’ 4G networks. Sprint has announced that it will release 15 more 4G devices, most of them handsets. Unless you are 100 percent committed to the Evo legacy or are dying to upgrade your phone, I’d hold off on buying the Evo until you know that you’ll get LTE or have seen what else is available before locking into a two-year contract.


  • 7 Great Google Spreadsheet Gadgets

    7 Great Google Spreadsheet Gadgets

    7 Great Google Spreadsheet Gadgets
    Inside Google Docs’ spreadsheet component, you’ll find gadgets that endow the app with powers thatTurn text into a QR code.even Excel users will envy. Included are tools for creating animated pie charts, producing QR codes, generating organizational charts, and more. You can also plot data in color by country on a map, and you can publish a map with your office location marked on it. All of these tricks are easy to pull off–I’ll show you how.

    1. Make Your Own QR Codes

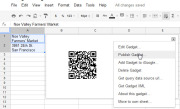
    QR codes are ubiquitous these days. They’re a great way to share contact details, URLs, product information, and other brief amounts of text. To create a QR code in a Google Docs spreadsheet, first type the text for the code into one or more adjacent cells in a column of the spreadsheet. Choose Insert > Gadget >All,locate the QR Code gadget, and click Add to spreadsheet. When the Gadget Settings dialog box appears, drag over the cells containing the text for the code, click OK, and then clickApply & Close. The generated QR code will display in the gadget dialog box. You can drag the gadget dialog box–as you can all gadget dialog boxes–and place it anywhere on the spreadsheet. To see the options for working with any gadget, click the down arrow in the top corner of the gadget dialog box. The options for the QR Code gadget include using ‘Publish Gadget’ to obtain some code that you can use on your website to display the QR code. You can also use Print Screen on the code and then insert it into a document or other publication.

    2. Make Your Own Custom Google Map

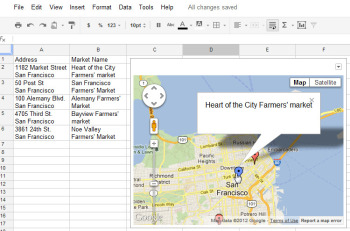
    7 Great Google Spreadsheet GadgetsThe Map gadget uses content from Google Maps to display the addresses you have entered as markers on the map.Pictures convey more information than words do, and a map offers the easiest way to show people where your office and other places of interest are located. The Map gadget lets you create a custom Google Map with pointers to the places you want to highlight, and it’s simple to use. To begin, type a list of addresses, one per row down a single column. If you want a tooltip to appear over the map location when someone hovers over the marker, type the text for this item in the cell to the right of the address. For example, to produce a map of local farmers’ markets, type each address in one cell and the name of the farmers’ market in the adjoining cell to the right. Choose Insert > Gadget >Maps, and click Add to Spreadsheet. Now select the range of cells containing your address and tooltip data, and then enter a title for the map in the Title box. If your data includes tooltips, select the Last Column as Tooltips checkbox, and then click theZoom Using Mouse Wheel checkbox. From the ‘Map type’ list, select the type of map–Normal is a good choice–and then click Apply & Close. The gadget dialog box will now show a map with the addresses plotted on it. As with the other gadgets, you can publish the Map gadget for use on your website to show your business locations or places of interest to your customers.

    3. Create Quick and Easy Organization Charts

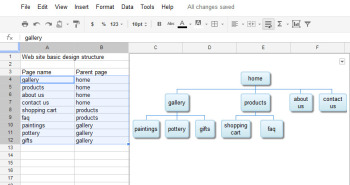
    Organization charts are handy for describing how your business is set up, but they also work well for diagramming website designs and displaying any other data in a hierarchical arrangement. 7 Great Google Spreadsheet GadgetsThe Organization Chart gadget can create a hierarchical chart showing the design for your website or the management structure of your business.

    4. Produce an Interactive Table

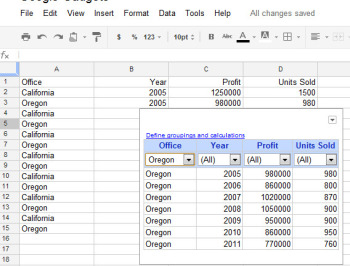
    7 Great Google Spreadsheet GadgetsAt its simplest, the Table gadget lets you filter data to see a subset of it.The Google Table gadget allows you to analyze data by creating a table that supports filtering, grouping, and even totaling. Insert the gadget by choosingInsert > Gadget > Tables > Add to spreadsheet. Select the range containing your data, including the heading row, and click OK. Click in the Title box and type a title for your tables. Select the checkboxes for Show Filters and Enable Grouping, and then click Apply & Close.To group the data by the contents of column A, for example, click the Define groupings and calculations link, select that column’s heading, and click the arrow to add it to ‘Group by Box’. Click Next, and select a column to calculate. To sum Profit, for instance, set the Profit entry to Total. You can apply calculations to multiple columns, if you desire, or to none at all if you just want to group the data.You’ll see a table appear in the gadget dialog box, with the headings over each column. Use the filter box at the top of each column to filter that column of data. Click OK, and the gadget will show you the grouped data, with any calculations appearing in the row above the appropriate group. You can collapse and expand the groups as necessary to see the values in the table.

    5. Create a Gantt Chart From Project Data

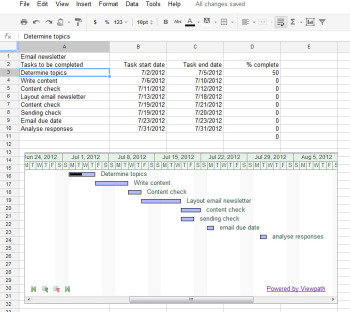
    7 Great Google Spreadsheet GadgetThe Gantt Chart gadget illustrates the tasks in a project and the time allotted for each of them.You can use a Gantt chart to display projects involving tasks that must be performed over time. To make this type of chart, you need three columns of data (with an optional fourth column). In the first column, place a list of the individual tasks in the overall project–the steps needed to create and publish an email newsletter, for example. In the second column, place the start date for each task; in the third column, insert the end date for the task. If you wish, you can add a fourth column containing the percentage completed for that task. To produce the Gantt chart, chooseInsert > Gadget > Charts. Locate the Gantt chart and click Add to spreadsheet. Select the data for the tasks, the start and end dates, and the completed percentage, and click OK. Set the Name column to the column containing the task names. Set the Start column, Finish column, and % Complete column to the column letters containing that data (typically columns B, C, and D), and click Apply & Close. The Gantt chart will present the tasks to be completed, their start and end dates, and the progress made toward their completion to date.

    6. Plot Data as Colors on a Map

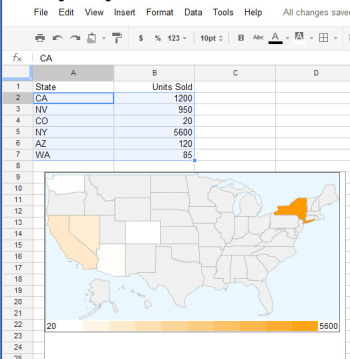
    7 Great Google Spreadsheet GadgetThe Heatmap gadget shows relative values as colors on a map.You can plot data related to states or countries on a heat map, with small values indicated by light colors and larger values rendered in darker and more saturated colors. To plot the data correctly, you must use ISO country codes (or, for U.S. states, the usual two-letter state codes). Place the data to plot in the cell to the right of each relevant state or country. Choose Insert > Gadget > Map > Heatmap, and then click Add to spreadsheet. Select the data–including the locations and the data to plot, but not the column headings–and click OK. Type a title for the heatmap in the Title box, select the map type from the Region box (click USA to plot data on a United States map), and click Apply & Close. The map will appear with the regions colored appropriately for the value of the data associated with each.

    7. Create an Animated Pie Chart

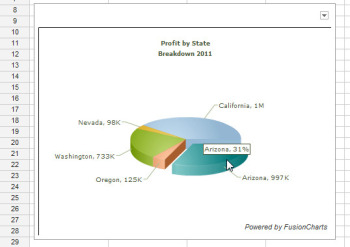
    7 Great Google Spreadsheet GadgetsDrag on a pie slice in the animated pie chart to offset it from the chart itself.Interactive charts are more interesting to look at than static graphs. You can create animated pie charts in a Google spreadsheet using a gadget. For this chart, you need only the categories and one set of data, because pie charts can plot only a single data series. Insert the gadget by choosing Insert > Gadget > Charts. Locate the FusionCharts Pie & Donut Widget, and click Add to spreadsheet. Click in the Range box, select the data to plot–omitting the column headings–and click OK. Now select the chart type, such as Pie 3D. Type a caption and subcaption for the chart to inform the viewer as to the information the chart is intended to convey. Enable the Animate checkbox, and, if you prefer, enable Values On and Labels On to show both labels and values for each pie slice. If you enable Tooltips, the mouse pointer will show a tooltip if the user hovers the mouse over a given slice. Select Format Number and set Decimals to No Decimal so that numbers will be constrained in size. Enabling Shorten Values will ensure that the chart presents large values legibly. Click Apply & Close. When the chart appears, you can drag on a pie slice to explode it from the chart. Right-click the chart and click Enable Rotation so that you can then rotate the chart with your mouse. Gadgets such as these add a range of extra functions to Google spreadsheets, allowing you to do new things with your data and display it in ways that can help your business.

    The first step in producing an organization chart is to create the data on which it will be based. In one column, type each employee’s name, or whatever other text should appear in each box in the chart. In each adjoining cell to the right, type the corresponding manager’s name, or whatever information you wish to display in the box at the next higher level in the chart. Don’t put any top-level information–such as the highest manager’s name or a website’s home page–in the first column, because they have nothing above them in the hierarchy. If you want two lines of text in a box, type one line and press Alt-Enter to start a second line. Confirm that the spelling of each name or box label is identical wherever you use it, or the chart won’t render correctly. If necessary, copy the contents of a cell rather than retyping it to make sure that each entry that should be identical–such as “home” in the example illustrated here–remains so. Now choose Insert > Gadget > Diagrams > Organization Chart, and click Add to spreadsheet. Select the cells in the two columns containing the data, and click OK. Type a title in the Title box, and click Apply & Close. The organization chart will appear in your spreadsheet.  

  • Android Tablets Beating Out iPad in Business and IT: Report

    Android Tablets Beating Out iPad in Business and IT: Report

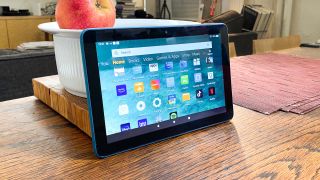
    Android Tablets Beating Out iPad in Business: Apple’s iPad may still be considered the king of tablets in many quarters, but new research data casts a shadow of doubt over how long that will continue.   that will continue.

    android apple tablet
    •  

    In fact, a full 44 percent of first-time tablet buyers in business and IT plan to purchase an Android Tablets in the upcoming 12 months, compared with just 27 percent planning to go with an iPad, according to a new study from IDG Connect (IDG Connect is part of IDG, which owns PCWorld.com). “The rise in tablet usage and increasing prevalence of BYOD is set to have a fundamental impact on IT and business over the next few years,” said Kathryn Cave, editor at IDG Connect, in a press release announcing the results. “These findings signify changes in work mobile consumption and market leadership in the tablet arena.”
    Only Three Percent Opt for Windows 8 To conduct its research, IDG Connect recently surveyed 3,124 IT and business professionals around the globe. Seventy-one percent of respondents said they already own a tablet, and 51 percent of those reported having an iPad, IDG Connect reported.

    Android Tablets Beating Out iPad in Business

    For future purchases, though, Android was clearly the preferred choice, with 44 percent of respondents saying they’d choose a device that uses the Linux-based operating system. Only three percent of respondents said they’d opt for Windows 8, and 21 percent said they weren’t sure. Global Variations The research results are even more interesting when broken down geographically. In Africa, 44 percent indicated they’d choose an Android tablet, compared with only 21 percent planning to buy an iPad. Similarly, in Europe, 23 %of new buyers said they plan to buy an iPad, compared with a full 49 percent who have set their sights on an Android tablet. North America and Australia/New Zealand, interestingly, showed the lowest preference for Android tablets, only 30 percent of North American buyers and 35 percent of those in Australia/New Zealand choosing them over iPads.

  • Sony Debuts New Android 4.0 Xperia Miro and Tipo via Facebook Campaign

    Sony Debuts New Android 4.0 Xperia Miro and Tipo via Facebook Campaign


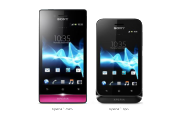
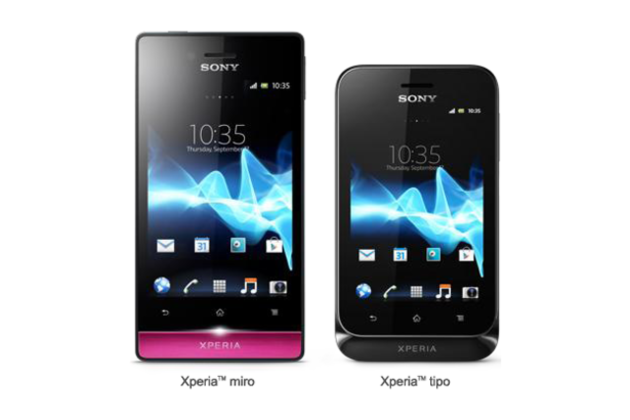
    Japanese electronics maker Sony has announced two new smartphones, the Xperia Miro and Xperia Tipo ahead of schedule following a successful social media campaign. The new smartphones, which will run on Android 4.0, were launched 9 days early after Facebook users brought announcement date and timeforward by 20 seconds with each click they made on the Sony page. The two smartphones will be the first by Sony to run on Ice Cream Sandwich and will feature Facebook integration. Despite having a low-end 800MHz Qualcomm processor and 512MB of RAM, the Xperia Miro will also feature a 3.5 inch touchscreen,
    a front-facing 5 megapixel camera, 4GB of internal storage, Wi-Fi, Bluetooth, MicroUSB and contactless DLNA connectivity to enable content to be shared and viewed on TVs, tablets and PCs.   The Xperia Miro features Sony’s xLoud audio technology and also comes preloaded with the Music Unlimited app which has access to millions of music tracks on the Sony Entertainment Network for a monthly subscription fee. The Xperia Tipo is targeted at a slightly lower end of the market, featuring a 3.2 inch touchscreen, Bluetooth, Wi-Fi and a 3.2 megapixel camera.  

  • Why you can’t undo Facebook Timeline

    Why you can’t undo Facebook Timeline

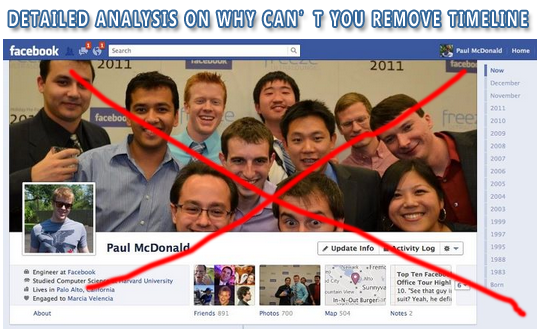
    Can’t Undo Facebook Timeline? Know Why

    After 6th December, Facebook Timeline has completely transformed the shape of old FB profiles. Some users are finding the new layout pretty complicated and unfamiliar. Whether it may be new advanced privacy settings or the new profile design, Facebook new changes are always somewhat not unanimously accepted by the 800 Million registered users.  The new Timeline design display all your posts in hierarchal way, giving more importance to your memorable posts, photos and events.
    There appears to be no option which could remove timeline or undo the new profile design change so that you could revert back to the old profile layout. No method so far seems to work, neither disabling the timeline app  is working. The Timeline App was a method by which you could set up timeline before its launch. There must be reasons behind absence of timeline Removal option. Lets analyze some facts.


    Zukerberg Recently blogged about his commitment to Facebook community saying: Quote

    I founded Facebook on the idea that people want to share and connect with people in their lives, but to do this everyone needs complete control over who they share with at all times.
    This idea has been the core of Facebook since day one. When I built the first version of Facebook, almost nobody I knew wanted a public page on the internet. That seemed scary. But as long as they could make their page private, they felt safe sharing with their friends online. Control was key. With Facebook, for the first time, people had the tools they needed to do this. That’s how Facebook became the world’s biggest community online.  We made it easy for people to feel comfortable sharing things about their real lives.
    We’ve added many new tools since then: sharing photos, creating groups, commenting on and liking your friends’ posts and recently even listening to music or watching videos together. With each new tool, we’ve added new privacy controls to ensure that you continue to have complete control over who sees everything you share. Because of these tools and controls, most people share many more things today than they did a few years ago.
    Overall, I think we have a good history of providing transparency and control over who can see your information.
    That said, I’m the first to admit that we’ve made a bunch of mistakes. In particular, I think that a small number of high profile mistakes, like Beacon four years ago and poor execution as we transitioned our privacy model two years ago, have often overshadowed much of the good work we’ve done.

    The highlighted words are where Mark himself accepts some of his past mistakes. Beacon was Facebook’s advertisement system that sent data from external websites to Facebook, for the purpose of allowing targeted ads and allowing users to share their activities with their friends. The controversial part was that Facebook was publishing User activities from other websites without explicit permission from the user. This was a complete violation of user privacy. All this was done without letting you know!
    The purpose of sharing the Beacon story is to tell you that Facebook have often taken decisions without keeping user feedback greatly in mind. Now when the entire Layout was going to be transformed, no proper Feedback campaign was ran which could ask users about their likes and dislikes concerned with the new timeline Design. Yes they tested a beta version of timeline and allowed users to try timeline in advance but why not User Feedback again?
    Mark promised on November with his blog post that user response will be given great importance but I never get it why the same mistake is repeated again?
    Now lets know the reasons that why can’t your remove, undo or delete the timeline view.
    1.To Prevent Algorithm Conflict
    Things look simple when they look alike. In order to prevent development ambiguity/complexity, all layouts are given same design structure so that it becomes easy to organize the data using the same technique without the need of two different methods for the display and arrangement of the same data on Facebook servers.
    2. To Prevent Psychological Confusion
    If the option of removing Timeline existed then it would have given rise to great confusion in interface. Facebook users are of different age and are experimented to like simplicity in design and structure. If your friend is running a timeLine and you are running Old Profile, then of course you will find it difficult to understand the updates at his profile due to different organization of data. What is placed at your left is shifted to top and right on timeline. This can discourage users from using Facebook and then can probably look for an alternative simple social media network like Google+.
    3. A Challenge to Google+
    Google Plus is the new social networking website which was launched just this July by Google Inc. Almost all features in Google+  match that of Facebook accept the introduction of Sparks, Circles and video conferencing. In order to tell its users that Facebook offers much different social touch a step like this was important. I must inform you that Facebook knew about the Google+ development and all its features much before it was launched. Because keeping an eye on your competitor is an important principle of i-marketing.

    What do you think?
    In short it is hard to believe but once again the new look has been forced upon the users without keeping the community likes and dislikes in Mind. I would love to hear about what else can you share on this latest development and do tell me if you like the new layout or not. Please give reasons why you like it. Hope to see some comfortable new changes in FB’s new design. For the time being new creative tricks are been applied to Timeline Covers. Why not Create a Hot Cover for your Profile?

    Peace and blessings pals! :)

  • Video & Text Tutorial on Facebook Video Calling

    Video & Text Tutorial on Facebook Video Calling

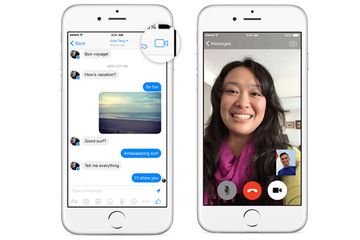
    Facebook Video Calling: How To Set Up & Start a Video Call?Facebook has finally started filling up the missing blanks on their social network as an answer to Google Plus Project. Together with Skype, Facebook has launched its first ever Video Calling option on there website. Facebook Users can now not only chat but they can now see their loved ones smile, wink and say lol face to face! So far there are no latency issues and video calling loads faster and works without pauses or any other pros. You don’t need to install any software or application to make this function work. Below you will find some useful Facebook video calling tips.


    How do I set up video calling?
    To start a video call with a friend you will first need to complete a quick, one-time setup:

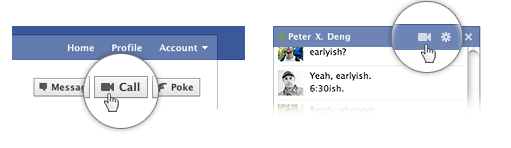
        To call a friend, click the video icon at the top of your chat window.
        Simply click the “Set Up” button and follow the easy instructions for how to set up video calling on your favorite browser.
        Once installed successfully the video call will start automatically or you can ring back your friend by clicking the video call button at the top right corner of your friends profile

    How do I start a video call with a friend?
    After the one-time set up you are now ready to make your first call:

        Visit your friend’s profile and click the “Call” button in the top right corner. You can also click the video icon at the top of the chat window.
        When your friend answers, be patient and wait for sometime till both your web cams are inter connected.
        If your friend is unavailable or offline, you can leave a video message. That’s indeed more like Yahoo’s Voice service.

    For all these steps to correctly work you must make sure that both your webcam and microphone are connected to the right slots and are in a running condition. You can still use video calling even if you don’t have a webcam. You will be able to talk to and see your friend but your friend will be able to hear your voice only.

    UPDATE: Though Facebook video calling is still a work under progress but you may find these tips useful in future. I will keep you updated with all the latest new few features.

  • Google Explains The Difference Between Google Plus,  1 Button & Search

    Google Explains The Difference Between Google Plus, 1 Button & Search


    Google+ is the most recent player in the social networking field. When it first came, we reckoned it was just another attempt by Google to counter Facebook’s increasing dominance, and that it will fail like other projects from Google in the past such as Google Buzz, Orkut etc. But now, it seems that it is obviously here to stay. Google+ is a lot more than just a social networking website. The +1 button isn’t just another Like button, as you will see later in this post. Google+ is a site where you can show your interests, have connections, and build an identity. It’s a friend of webmasters, who can achieve a lot more by using this simple social site. In a way, Google is trying to provide a coherent experience to the users by introducing all their products such as Google Search, GMail, Google News, etc. And Google+ could be the glue that holds everything together to provide an uninterrupted and ‘seamless Google experience’ to the users. In this post, we will talk about how important Google+ is, and why should you use the +1 button, and how it all helps webmasters.

    Starting out with Google Plus
    First of all, you need to have a presence on Google+ for it to be of any use to you. Read our post on how to join Google+. A public profile on Google Plus is very important. You can also create a separate Google+ page or your blog or brand, just like a Facebook Page. Google+ then gives you many features. Here is a video by Google’s Developer Programs Tech Lead, Maile Ohye, who summarizes the concepts explained in this post.


    Intimacy; Create Circles, follow people, and Hang out!
    Google introduced this great feature of Circles. Circles can come in real handy if you want to do targeted marketing. You can share your updates with any of your circles, and the people in the remaining circles won’t get those updates. This way, you can only share your personal updates with your family circle, and brand related updates to its respective circle. Also, you can set up more circles and target a specific audience, such as only men, or only women etc.

    At Google+, you can follow anyone, just like Twitter. It doesn’t need confirmation. So if you would like to get updates from your favorite brand, you can simply follow them. On the other hand, if you don’t want someone to follow you, you can simply block them out!

    Another great feature that inspired change in Facebook is the Hangouts feature. With this, up to ten people can start a conference video call and talk to each other.
    Google+ Interaction
    Google+ Interaction allows you to edit any of your posts at any time, kinda like a blog post. You can also edit your comments. Unlike a blog post, however, which is always pushed down as new posts arrive, your posts on Google+ will remain on the top depending on their popularity and the comments on them.
    The +1 Button
    The +1 Button is more than just a Like button you normally find on Facebook. With it, you can build your reputation. It helps you to publicly recommend and share content you find useful. Unlike the Like button on Facebook which is limited to Facebook itself, the +1 information for a content is available throughout the web on search results, ads and sites. Hence, it isn’t just confined to Google+, but it extends over to all Google products. Also, you can track and manage all your +1s, so that you can revoke them at any time if you don’t like them anymore.

    The advantage of the +1 button is, you can +1 a post directly from search results. And if any of the people you know have +1’d a post, you will see it right below the search results. That way, if you +1 something, you’re indirectly recommending it to your followers.

    With the +1 button, you can also get great metrics from Google Analytics and Google Webmaster Tools. The +1s data on your Webmaster Tools will help you better understand your audience by seeing what gender or age group +1’d your posts the most etc. You can also see the +1s for particular pages on your website, and the +1s that were gives for certain pages from other sites on the web.All this shows how you are building your reputation.
    +1 Search Integration
    We already talked about how you can +1 a search result right from the SERPs. But there is one thing you need to know. While searching for your results, Google takes your +1 history into account. For example, if I search for ‘earning methods’ and +1 our sister blog smartearningmethods.com, the next time I search for ‘earning methods’, SmartEarningMethods will come up in the top spots. Also, if any of my friends has +1’d another blog, that will come up too. Hence, getting +1s on your posts could prove very useful to you, since Google returns tailored results for each individual.

    In search results, Google might also show who the author of a content is. This is where a profile comes in useful. If you have a profile linked to that content, Google might shows that as well, which increases your chances of getting followers.

    Google+ can project your brand far beyond your own reach. Users who +1 your content are actually recommending your content to their own followers, who in turn might +1 the content, and so on. Hence, a network builds up with your content at its center. Facebook also has a somewhat similar feature, but the reason Google+ is ahead in this area is, Facebook’s shares are limited to Facebook only, where as the +1 button shows up on search results and is accessible throughout the web.

    That was some basic information about Google+ and the +1 button you need to know. Google+ indeed is a a great new opportunity for you to grow your brand’s reach.

  • 25 Best Free Themes for Windows 7

    25 Best Free Themes for Windows 7

    Windows 7 one of the most successful operating system from Microsoft so far. Using windows 7 on your personal computer or laptop gives a new experience to its users. There are many themes, widgets, layout option in this operating system which makes it different from other windows like 98, XP. Themes are the best way to enhance your screen layout and here we are going to share best and free themes for windows 7 which you must have to try on your PC or Laptop.

    Antarctic


    Download

    Love Birds


    Download

    Surfing Theme


    Download

    Rio Movie


    Download

    Rango


    Download

    Ireland


    Download

    Waterdrops


    Download

    Small World


    Download

    Sailing


    Download

    Kang Fu Panda 2


    Download

    Harry Potter


    Download

    Mega Mind


    Download

    Halo Reach


    Download

    Bake House


    Download

    Girls Rock


    Download

    Snow Angel


    Download

    Surreal Territory


    Download

    Best of Bing 3


    Download

    Alan Wake


    Download

    Windows Live


    Download

    Snow Sport


    Download

    Fireworks


    Download

    Bunnies


    Download

    Lightning


    Download

    Nature Photograph


    Download

  • 10 Must Have Apps For Nokia 5800

    10 Must Have Apps For Nokia 5800

    Z

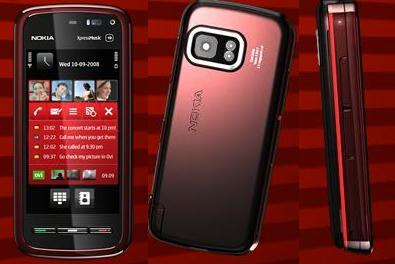
    nokia-xpress-music-5800Nokia, the one of most popular and trusted mobile company. Nokia made wide range of mobile phones for every kind of user either the user is rich or belongs to middle class. Here recently Nokia launch Nokia 5800, a Symbian OS v9.4 based mobile phone with TFT resistive touchscreen.  Nokia 5800 is a fully loaded features n work over both Wi-Fi and 3G connections. Nokia 5800 has an amazing feature of  TV-Out, which makes it different from other segments by Nokia. Here are the 10 best applications from my personal view which I think makes its performance excellent from good. These apps are about your social network, Business, Security, Entertainment and as well as for students.

    1.Nimbuzz

    Nimbuzz is application for free calls and messaging using your different social media. You can use your  Yahoo!, Windows Live/MSN, AIM, ICQ, Google Talk, Facebook, MySpace, Hyves and SIP (VoIP) accounts at a same time and can customize contacts list and tabs. In new version some changes, New chat style layout, Recent Calls tab, Real time call rates for cheap international calls with Nimbuzz Out, New profile style.
    Download

    2.MazeLock

    MazeLock is the one of best security app for your phone from strangers. Just install and watch carefully the default unlock pattern. It is an innovative way to unlock your touch screen phone just set your own unlock pattern by connecting some of the nine white dots together. When you try to unlock your phone, you need to draw the same pattern exactly as you set.
    Download

    3.Moneycontrol-Markets on Mobile

    Worried about your investments in market and enable to know information, here is the solution for you while using Nokia 5800.This application is powered by moneycontrol.com, India’s no.1 financial and business portal trusted by millions. Use the application to get real-time stock quotes, Indian and Global market Indices, manage and keep track of your investment portfolio, watch Live TV and get in-depth coverage & analysis of financial markets, economy and business.
    Download

    4.AroundMe

    Stranger in a new area and want to find restaurants, banks, ATM, gas stations, and other local services while using Nokia 5800, here is the best app for you which not even tells you about places around you, also tells the maps, directions, routes, street view and read reviews about your destination.
    Download

    5.Mundu TV

    Mundu TV is Television on your mobile. Mundu TV provides a rich TV viewing experience with network independence, subscription with unlimited usage. Now everyone with an Internet access will watch their favorite channels live. You can access Mundu TV over a GPRS , 3G or WiFi connection.
    Download

    6. Kaspersky Mobile Security

    Kaspersky Mobile Security is the one of the best security app for Nokia mobile phones. Now don’t worry about your phone to lost or stolen with the Anti-Theft Locate. In case your device  lost or stolen GPS Find will help you to locate your device. This app keeps your mobile life truly private you can hide or un-hide your contacts and communications history to others.
    Download

    7.Opera Mobile Web Browser

    Opera Mobile Web Browser is one of the most popular and using web browser for mobile not even in Nokia it is used on all platforms, Android, Java and iPhones. It is fast, smooth, safe and makes surfing the Web on a mobile device like never before. In latest version the interface looks better with your device and gives Opera Mobile a sleek, modern appearance. Opera Mobile Web Browser comes ultimate when your device connected with WiFi or wireless broadband  connection.
    Download

    8.AccuWeather.com WRT Widget

    With this application you’ll have access to the current conditions and severe weather risk for the next 6 hours, rain and snow totals for the next 5 days, temperature and sky conditions for the next 15 hours, 10 days and nights of forecasts, daytime high wind speed and or satellite map centered on your location with 5 levels of zoom.
    Download

    9.Dictionary & Translation Pro

    Dictionary & Translation Pro is an extremely simple app to use and all you really have to do is touch once to access a thesaurus, dictionary, and translation service all in one. You can get information for a variety of different languages including Arabic, French, Spanish, German, Hindu, Italian, and many others. There are over a million words that are located in the dictionary portion. You can simple Dictionary, and Translator with use of left and right buttons.
    Download

    10.Wikipedia Reader

    Wikipedia Reader is an amazing app to read about every topic to related every field. Wikipedia Reader Widget for Symbian is a Web Runtime application that allows reading Wikipedia pages in a format appropriate for small screens. Wikipedia reader have  bookmarks, history, collapsible sections and beta support for reading in all languages. It is a very useful app for students.
    Download

  • 10 Must Have Apps For Your Android Phone

    10 Must Have Apps For Your Android Phone

    Android is one of the most popular mobile operating system in the world by Google’s mobile operating system which has been growing exponentially since its launch in late 2008. Android is an open source mobile operating system and have number of useful apps which potentially increase the functionality of the device. Sometimes it becomes so hard to find such a useful apps. Here,I am going to share best Android Apps from my point of view, which you must have on your Android phone.

    Real Player


    RealPlayer has made its way to Android and can be a great thing. Real Player is a media player app for your Android Phone, plays Music , Videos , Show Photos. Real player also offers you to create your Playlists to arrange your songs according to your choice. You can sort your music according to the albums, play recently added music to the library. Real Player is not just a music player it also acts as photo editing app for photos you can zoom, crop, Slide show, Rotete and more from the same app.
    Download

    Photoshop Express


    The Photoshop Express is one of the most popular photo editing app by Adobe. Photoshop Exprees allows you portable image editing option like crop, rotate, adjust color, and add special effects. Access all your photos form your mobile and quickly share with family and friends. PhotoShop Express contains the amazing effects, Soft Focus, and Sharpen, Borders and more in just a touch. Photoshop Express lets you access your entire online photo and video library directly from your Photoshop.com account.  It is just like having thousands of photos and videos right in your pocket.
    Download

    Bubble Buster


    Bubble Buster is a gaming app for your Android device. Bubble Buster is an entertaining app,helps one to pass your time for hours, where a challenging strategy to be implemented to advance to the levels. The distinct colored bubbles will keep coming from top of the screen, and the player should aim at the bubbles and tap to shoot with another similar colored bubble to clear the down pouring bubbles which clear the screen and also overflow. Bubble Buster has numerous levels, and once you finish with the present level, you will be able to notice an indicator for next level which can be downloaded.
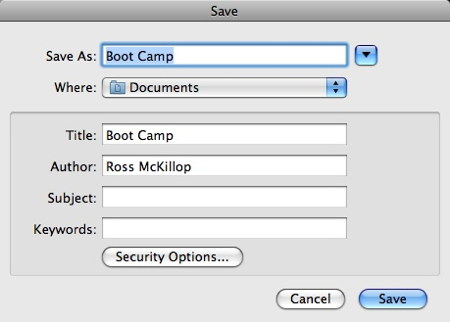
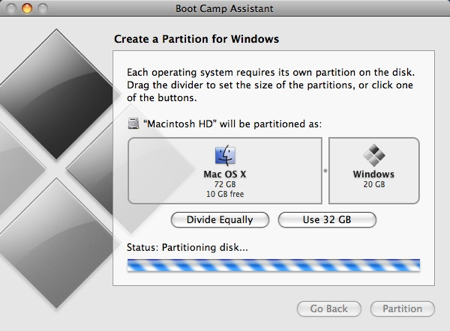
    Download

    Tube Mate


    Tube Mate lets Android Device users to Search Videos, Related Videos, Favorites and store them to SD card.Tube Mate is a Youtube video browser and download tool. Tube Mate lets you to download High Quality and High Definition videos to SD Card. TubeMate for Android features 480×270 for general devices.
    Download

    Skype

    Now make Video Calls, Instant Messaging with one application from your Android Device. Skype  has been developed in close conjunction with Google to enjoy IM and keep contact books up to date by syncing Skype contacts with the handset’s address book. When you first fire it up, you have the option of adding all your Skype contacts to your main address book and works over WiFi and 3G.
    Download

    eBuddy Messenger

    eBuddy Messenger is almost all in one Instant Messenger App. It is works very quick with MSN, Yahoo, AIM, Google Talk, MySpace, and Hyves for instant Messenging. You can sort contacts by names, groups, or accounts and add a slew of alert bells and whistles and the feature offers page tabs for your buddy list, your open chats, and your accounts. eBuddy has a visually humorous, light exterior that comes complete with a little “eBuddy” buddy logo.
    Download

    Yahoo! Messenger

    Yahoo is the one the populer social network and it possesses most of the ingredients necessary to make a great IM experience. With Yahoo Messenger for Android, stay in touch with your IM friends. Always know when you get a new message or friend request. Access your friends’ status and update your own availability. Check out your friends and add new ones. Chat with your Yahoo! Messenger and MSN/Windows Live friends. Send camera and gallery photos and express yourself with emoticons and receive pix from your IM friends.

    Download

    Tic Tac Toe


    Tic Tac Toe is the gaming app for Android Device. Tic Tac Toe is the game is to get, horizontal, vertical or the diagonal cells marked with the same symbol. You can play TicTacToe against the mobile or your friends(1 Player or 2 Player) into 3×3 or 6×6 level mode with excellent graphics .
    Download

    Anti-Virus Free


    Now protect you mobile from virus with Anti-Virus Free from AVG-Mobilation.  Anti-Virus Free protect Android Phone  from Viruses , ,malware & exploits in real-time. It’s easy-to-use virus protection, as well as a real-time scanner, backup assistant, phone locator, task killer, app locker and local device wipe. With Real Time Scanner, keeps you protected no meter how you download your apps or games or data via Bluetooth.
    Download

    Google Maps


    >Google Maps for Android offers one of the best experiences you can get. Google Maps tells you how to get where you want to go by car, public transport, good old-fashioned shoe leather, and now, by bike. Voice-guided navigation takes you turn by turn, and voice search keeps your typing fingers fresh. Google Places feature is now integrated with Twitter, allowing users to share their opinion and other information about a specific location.
    Download