Apps for your Mac. Mac OS is a series of graphical user interface-based operating systems developed by Apple Inc. for their Macintosh line of computer systems. The Mac OS has been pre-installed on almost every Macintosh computer sold. It was first invented in 1984 and now many of its upper versions are ailable.
There are a ton of MacOS applications that you can find on the App Store on your Mac or on internet and some of them are commonly used by many Mac users, but here are the 10 best and must have apps for you Mac.
Backup & Time Machine
The very first thing to do your Mac is to create a backup solution. It will be ill-advised or even stupid not to do so.
latest MacOS comes with a built-in backup feature Time Machine which allows you to automatically back up your personal data, including apps, music, photos, email, and documents. Having a backup allows you to recover files that were deleted, or that were lost because the hard disk (or SSD) in your Mac needed to be erased or replaced.
Having a third party backup application may not be necessary but if you are looking for a reliable alternative to Time Machine, Silverkeeper is your best bet.
SilverKeeper is a Backup application for Mac. It automates backups to external storage devices like hard drives, and other removable storage devices that have SATA/eSATA, IDE, ATA/ATAPI, SCSI, USB, or FireWire interfaces connected with Mac and the backup can be stored as disc image backups to network storage devices.
Audacity is the one of the most popular open source digital audio editor available for Mac. It is a multiplatform, open-source editor Audacity has leaped to the top of our list with its clean interface, excellent features, and support for 32-bit floating-point audio. This editor offers you to record and play sounds and import and export WAV, AIFF, MP3, and OGG files with some ultimate features of mix tracks, or apply effects to your recordings, cut, copy and past (also able to undo). It also has effects like echo, fade, modulation, normalization, reverse, tempo and Publishing Options.
VLC media player is a free and open source media player and multimedia framework. It is a highly portable multimedia player for various video formats, including MPEG-1, MPEG-2, MPEG-4 and DivX as well as for DVDs, VCDs, and various streaming protocols. It is not just a video player, has ability to play many audio formats, including OGG, MP2, MP3 and MP4.
GIMP is a free software raster graphics editor. GIMP becomes the one of the most powerful general-purpose image editors around, the upgrades make the GNU Image Manipulation Program eminently comparable to Photoshop with its amazing features. The advanced scripting interface allows everything from the simplest task to the most complex image manipulation procedures to be easily scripted.
Gimp is easy to learn for beginners and easier to use. Overall, GIMP is a must-have application for Mac.
Apps for your Mac, FileZilla is an easy-to-use FTP client that allows you to view, edit, upload, download, and delete files from a Website or network.
FileZilla is a FTP (File Transfer Protocol) based application. Its easy-to-use interface makes locating and editing files on your website easy. You can also upload or download files with a single button click. It also allows you to synchronize the navigation of a local folder with a remote folder, saving you time and reducing the risk of uploading to the wrong folder.
If you are a developer, consider installing VS Code for your code editing.
Google Chrome may be the most popular, fast, secure and widely used as default web browser. Opera on the other hand is redefining the purpose of web browsers and taking browsing experience to new heights.
Facebook Messenger on Opera browser
Released in 2019, Opera 75 is built on Chromium engine; same technology as Google Chrome at the core. Chromium is an open-source browser project that aims to build a safer, faster, and more stable way for all users to experience the web.
One of the most important improvements is that the browser now support an instant messaging feature that supports multiple IM networks, including Facebook Messenger, WhatsApp, Telegram, Instagram, Twitter, and VK. You can use these IMs without leaving the browser window or opening a browser tab.
Apps for your Mac, the Unarchiver is a free data decompression frontend of libxad, which supports more formats than Archive Utility (formerly known as BOMArchiveHelper), the built-in archive unpacker program in Mac OS X. It supported file formats include Zip, Tar-GZip, Tar-BZip2, RAR, 7-zip, LhA, StuffIt and many other old and obscure formats. Download
8. Anxiety
Anxiety is a super-lightweight To-do list application for Mac OS X Leopard that synchronizes with iCal and Mail. Its aim is to provide a streamlined, easily accessible interface to add and check off your tasks, while remaining poised to melt into the background at a moments notice. Anxiety also makes it very easy to create and add new notes in a second and you can also choose to have the program’s icon appear either in your menu bar or on the Dock. Download
9. LibreOffice
LibreOffice is your Mac substitute of Microsoft Office. Well, not really, but it’s a free office package for your Mac. Its clean interface and feature-rich tools help you unleash your creativity and enhance your productivity.
Apps for your Mac ,Don’t take your work as a boring thing. Play Angry Birds on your Mac OS , one the most famous game, playing world wide. There is no definition, no any discussion and no need for any disruption. It’s a wonderful game for all kind of users. Which once start make our better and interesting. Download
Windows Media Player is the one of the default softwares which comes with all the windows operating systems like windows 7, XP, Vista, 98. It is the default application in windows for playing videos & audio but it has certain limitations too. So, I am going to share some of the best alternatives of windows media player which you can use at free of cost for playing your audio & videos.
1.VLC media player
VLC media player is a free and open source media player and multimedia framework. It is a cross-platform media player, with versions for Microsoft Windows, Mac OS X, GNU, Linux, BeOS, MorphOS, BSD, Solaris, iOS and eComStation.The toolbars are fully customizable, so you can have only the buttons you need in the interface, there are AirTunes streaming, and there’s better integration in Gtk environments. A a wide range of video and audio formats can be played, including OGG, MP2, MP3, MP4, DivX, HD codecs like AES3, Raw Dirac, and even support for playing back zipped files. Download
2. Media Player Classic
Media Player Classic (MPC) is a compact media player for 32-bit and 64-bit Microsoft Windows a lightweight Media Player. This single player easily replaces the four or five video players installed on most systems. The Media Player Classic is available in many different languages (English, Belarusian, Catalan, Portuguese (Brazilian), Mandarin Chinese, Czech, Dutch, French, German, Hungarian, Italian, Japanese, Korean, Polish and more).This program also plays most audio formats.Media Player Classic also easily loads and plays DVDs. We liked how you can easily increase or decrease playback speed. Download
3.Winamp
Winamp is the one of the most famous and widely used media player designed for Windows, Linux and Android. Winamp supports music playback using MP3, MIDI, MOD, MPEG-1 audio layers 1 and 2, AAC, M4A, FLAC, WAV and WMA. Winamp was one of the first common music players on Windows to support playback of Ogg Vorbis by default.Winamp have ability to sync non-DRMed files to your PC from your device, an optional new interface layout and a built-in browser for media discovery.Winamp have playlist options to make playlists while playing media another effective feature it have inbuilt equalizer setting. Winamp has thousands of skins and plug-ins that allow you to change the look-and-feel of the player, as well as add new features.If you want MP3 encoding and full-speed CD burning, you have to shell out $19.95 for the Pro version. Download
4.RealPlayer
RealPlayer is a cross-platform media player by RealNetworks that plays a number of multimedia formats including MP3, MPEG-4, QuickTime, Windows Media, and multiple versions of proprietary RealAudio and RealVideo formats.RealPlayer for Windows already had most of that down, offering a sweeping array of features, from one-click video downloading to automatic transcoding to social network sharing.The latest version of the software adds even more devices to the ever-expanding list of compatible handsets. Plus, RealPlayer now shows USB-connected smartphones and cameras inside the library in the main app window, allowing users to quickly and easily transfer content to the devices via drag-and-drop. It have hundreds of Plug-ins. Download
5.ALL Player
ALL Player is a most popular program for watching movies with matching subtitles freeware media player. Unlike other media players, it does not use Windows Media Player to play media, but rather asks DirectX directly. The amazing features, Detection of missing codecs needed to open a media file, Integration with a reader (a speech synthesizer) for subtitles reading, Intelligent subtitles, in which the time they are displayed is dependent on how fast users can read them, Password protection of media, Creating a menu, Automatically downloading subtitles from the internet, Downloading video files from YouTube, Playlists. ALL Player is available in different languages (English, Polish, Russian, German, French, Spanish, Czech, Chinese, Hungarian, Italian, Portuguese, Slovak and more). Download
40 Firefox Extensions: Firefox is one of the best browsers at this time which is being used by thousands of peopleheir default browser. one of the great perks of Firefox is that there are tons of extensions present that enhance the user experience. These extensions are either used for time saving, quick browsing, and for best user experience. Basically Firefox extensions are small add-ons that add new functionality to Mozilla, which makes it more popular among the users. Today on internet roughly 30% of the users are using Firefox Extensions, which is next to IE. There are a lot of extensions present on the internet but here i am going to show the best collection of Firefox extension which on my experience, are very handy to use it in our daily surfing.
Video Download Helper Firefox Extension
The Download Helper gives you an easy way to download and convert Web videos from hundreds of YouTube-like sites. This works also for audio and picture galleries. Download
No Script
The best security you can get in a web browser. Allow active content to run only from sites you trust, and protect yourself against XSS and Clickjacking attacks. Download
Adblock Plus
Annoyed by adverts? Troubled by tracking? Bothered by banners? Install Adblock Plus now to regain control of the internet and change the way that you view the web. Download
FlashGot
Download all the links, movies and audio clips of a page at the maximum speed with a single click, using the most popular, lightweight and reliable external download managers. Download
Greasemonkey Firefox Extensions
Customize the way a web page displays or behaves, by using small bits of JavaScript. Download
Personas Plus
Free, easy-to-install “skins” for Firefox Extensions. Choose from over 180,000 cool designs, including art from Harry Potter and Bob Marley. Join over 8 million people from around the world who are asking themselves: “What Will My Browser Wear Today?” Download
FoxTab
3D in your browser! FoxTab brings innovative 3D functionality to your Firefox. Download
Easy You Tube Video Downloader Firefox Extensions
Easiest You tube video downloader ever, single click non-intrusive direct download buttons for FLV, 3GP, MP3, MP4, 720p HD and 1080p Full-HD qualities. Download
Download Statusbar Firefox Extensions
View and manage downloads from a tidy status bar without the download window getting in the way of your web browsing. Download
I’m Translator
Online Translator performs real-time translation for Albanian, Arabic, Bulgarian, Catalan, Chinese (Simp.), Chinese (trad.), Croatian, Czech, Danish, Dutch, English, Estonian, Filipino, Finnish, French, Galician, German, Greek, Hebrew, Hindi, Hungarian, Indonesian, Italian, Japanese, Korean, Latvian, Lithuanian, Maltese, Norwegian, Polish, Portuguese, Romanian, Russian, Serbian, Slovak, Slovenian, Spanish, Swedish, Thai, Turkish, Ukrainian, Vietnamese languages and their combinations. Download
Web of Trust – Safe Browsing Tool
Firefox Extensions: Web of Trust is the leading website reputation rating tool and one of Mozilla’s most popular add-ons. Our safe surfing tool uses an intuitive traffic-light style rating system to help you see which websites are trusted when you search, surf and shop online. Download
Stylish
User styles are themes for web sites. User styles empower your browsing experience by letting you customize web sites. Take out irrelevant content, change colors, or completely redesign the entire site. You can even use user styles as themes on the interface of Firefox, Thunderbird, and SeaMonkey themselves. Download
Xmarks Sync
Xmarks is the #1 bookmarking add-on. It takes only a moment to get up and running with Xmarks. After you install the add-on, click on the notification to set up Xmarks and start backing up and synchronizing your bookmarks. Install Xmarks on each computer you use, and it seamlessly integrates with your web browser and keeps your bookmarks safely backed up and in sync Download
Ant Video Downloader and Player
With the Ant.com Video Downloader, you can download video from Youtube or any other streaming site. Rare are the sites you will not be able to download from. We have integrated a flash video player too, so that you can play your files immediately. Download
Web Developer
The Web Developer extension adds various web developer tools to a browser. Download
Speed Dial
With Speed Dial, you can easily access your most used websites. To show the Speed Dial tab, use the Speed Dial button (which can be added to the toolbar), or enter “chrome://speeddial/content” in your location bar. Download
Firefox Sync
Free browser add-on that lets you stay in sync with your Firefox. Access your history, passwords, bookmarks and even open tabs across all your devices. Download
Foxy Proxy Standard
Foxy Proxy is an advanced proxy management tool that completely replaces Firefox’s limited proxying capabilities. It offers more features than Switch Proxy, Proxy Button, Quick Proxy, xyz proxy, Proxy Tex, Tor Button, etc. Download
Fire FTP
Fire FTP is a free, secure, cross-platform FTP/SFTP client for Mozilla Firefox which provides easy and intuitive access to FTP/SFTP servers Download
Tab Mix Plus
Tab Mix Plus enhances Firefox’s tab browsing capabilities. It includes such features as duplicating tabs, controlling tab focus, tab clicking options, undo closed tabs and windows, plus much more. It also includes a full-featured session manager with crash recovery that can save and restore combination of opened tabs and windows. Download
Fastest Fox – Browse Faster
Save time by speeding up repetitive tasks. Get faster, parallelized downloads, see definitions, auto-load the next page, improve searching, and more. Fastest Fox will dramatically enhance your productivity! Download
Flash Video Downloader (You Tube Downloader)
Flash Video Downloader helps you to download flash video (.flv) from You Tube, Daily motion, Break.com and other 200+ video sharing websites in one click. You can download, mp4 (iPod), avi and other media formats. Flash games download available. Download
Cooliris
The Cooliris 3D Wall — The fastest and most stunning way to browse photos and videos from the Web or your desktop. Effortlessly scroll an infinite “3D Wall” of content from Facebook, Google, YouTube, Flickr, and more. Even watch TV shows & movies. Download
AddThis
With one click, AddThis enables you to instantly share and bookmark web pages, blogs, news, photos, videos, and any other content to the most popular destinations. And it’s free! Download
Screengrab
Firefox Extensions: Screengrab! saves webpages as images, It will capture what you can see in the window—the entire page, just a selection, a particular frame, basically it saves webpages as images – either to a file or to the clipboard. It captures Flash too! Download
Cool Previews
Browse faster — Preview links and images without leaving your current page or tab. Just mouse over any link, and a separate preview window appears to show you the content. (TIP: Mouse over subsequent links while the preview window is still open!) Download
iacros for Firefox
i Mros was designed to automate the most repetitious tasks on the web. If there’s an activity you have to do repeatedly, just record it in i Macros. The next time you need to do it, the entire macro will run at the click of a button! With i Macros, you can quickly and easily fill out web forms, remember passwords, create a web mail notifier, download information from other sites, scrape the Web (get data from multiple sites), and more Download
PDF Download
Use PDF Download to do whatever you like with PDF files on the Web. Regain control and eliminate browser problems, view PDFs directly in Firefox as HTML, and use the all-new Web-to-PDF toolbar to save and share Web pages as high-quality PDF files. Download
Element Hiding Helper for Adblock Plus
You simply select the element you want to hide and then choose which attributes of this element should be taken into account when hiding it in the future. The element hiding rule is generated and added automatically. Download
YouTube to MP3
Adds links to convert and download Youtube, MyVideo, Clipfish, Sevenload, Dailymotion, MySpace videos as MP3 files. This addon uses the free service of Video2mp3.net. Download
Similar Web
The easiest way to find the best websites on the Internet! As you browse the internet, find the most interesting related sites on the web by similarity and category and get the latest articles and buzz on every website you visit. Download
Stumble Upon
Stumble Upon helps you discover great websites that match your interests. Simply click the Stumble button and see the best websites. There are over 500 topics to choose from, and, the more you use it, the better your recommendations become! Download
Forecast fox Weather
Get international weather forecasts from AccuWeather.com and display them in any toolbar or status bar with this highly customizable and unobtrusive extension. Download
Bit Defender Quick Scan
The quickest way to find out if your computer is infected! BitDefender QuickScan is a very fast antivirus scanner, able to determine in a matter of seconds (up to 1-2 minutes on first-time scans) if a system is infected with malware. Download
Read It Later
Save pages to read later with just one click. When you have time, access your reading list from any computer or phone, even without an internet connection Download
Addon Fox
Automatically install the best Firefox addons! Includes over one hundred hand-picked addons from the following categories: Customization, Downloads, Fun, Languages, Media, Programming, Security, Privacy, Social, and Visual. Easily choose which addons you want and get them installed all at once. Download
Google Shortcuts
Display all Google services as buttons or as a space-saving dropdown menu next to your address bar. Reach services like Gmail, Google reader, Google maps, Google calendar, and many more in a single click from your browser Download
Image Zoom
Easily zoom in, zoom out, fit image to screen or set custom zoom on individual images within a web page. All this can be done by using the context menu or a combination of mouse buttons and scroll wheel. Handy to see the finer details of smaller pics or to make very large pics fit within your screen. Download
1-Click You Tube Video Download
You Tube download in a single click. Download You Tube videos in FLV, 3GP and MP4 (both High Definition and iPod compatible High-Quality). The simplest You Tube Video Downloader for all You Tube Flash sites, period. Download
Fire Download
The Fire Download extension for Firefox and Wyzo lets you manage and accelerate your web downloads up to 10x faster! With Fire Download, download acceleration is seamlessly displayed within the downloads window. Try the ultimate download accelerator! Download
Benchmarking is the standard by which a PC’s performance is determined.
To thoroughly determine a PC’s performance, you need to use multiple tools and utilities specifically designed to tax each major component. We show you which tools to use, describe how to get results that are reliable and repeatable, and explain what all those numbers mean.
Running benchmarks on a PC enables users to evaluate performance, to identify potential bottlenecks, and to choose effective system upgrades. Unfortunately, many users imagine that system performance is simply a matter of CPU frequency or memory capacity, which leads them to think that dropping in a faster CPU or more memory will automatically and immediately yield noticeable performance improvements. In reality, however, that is not always the case. Though CPU and memory upgrades help in some situations, it often makes more sense to upgrade the storage subsystem or the graphics board if you’re looking for perceptible improvement in system responsiveness or gaming performance, for example. If you ran a series of benchmarks and identified which components were holding your system back, you’d be able to choose the most effective upgrade for your current system–or determine which components make the most sense in a new system suited to your particular needs. Several different types of benchmarks are available for evaluating a system’s performance. Some use synthetic tests that don’t necessarily reflect real-world usage, while others employ scripted tests that rely on actual applications and simulated real-world workloads. Some benchmarks assess the performance of a single component, while others measure total system performance. To best gauge the overall performance of a PC, consider running some combination of all of these different types of benchmarks, based on your usage patterns.
Benchmarking Do’s and Don’ts
Before running any benchmarks, you need to consider a number of hardware and software factors, in order to avoid potential damage to your system and to ensure consistent, accurate results. We’ll look at hardware factors first. Many benchmarks place significant stress on specific components, so you need to ensure that all such components are in good working order, properly cooled (if necessary), and receiving adequate power. If you have a component that seems unstable or unreliable during normal, day-to-day use, subjecting it to a taxing benchmark could kill it. Also, an inadequately cooled or underpowered device that works most of the time may become unstable under stress. That said, we’ve run benchmarks for many years, and have had only a handful of components fail due to the demands of a benchmark test–and those components were likely defective to begin with. On the software front, parameters for the operating system, applications, and drivers must be satisfied to ensure accurate, repeatable benchmark results. Windows (and other) operating systems proactively prefetch data and store numerous temporary files that could interfere with a benchmark, so it’s best to clear out any temporary files and prefetch data before running a test. In Windows 7, you can find prefetch data in C:WindowsPrefetch, and temporary files in C:WindowsTemp and C:Users[username]AppDataLocalTemp. If you have applications running, it may not be safe (or possible) to delete all temporary files, so restart your system and shut down any applications that may be running in the background before wiping out any temporary files. You don’t want applications or utilities that may be running in the background to interfere with the benchmark, so shut them down. This is especially important in connection with antimalware utilities, remote desktop tools, and downloaders that intermittently consume CPU, memory, and storage resources and steal application focus. Unless you’re testing a system as it shipped from an OEM to evaluate the effects of background applications on performance, shut them down before running the tests. In the same vein, most operating systems load multiple services and perform maintenance during the initial boot process. Consequently, after boot-up, it’s best to let the system “settle” and reach an idle state, with no drive or CPU activity, before you run a test. Using the correct (typically the latest) drivers for a component is another important step to take to ensure that it is operating and performing optimally. This is especially true of graphics boards and motherboards/chipsets, where the wrong driver can significantly worsen the system’s frame rates or transfer speeds and latency. Finally, confirm that the operating system is fully updated and patched to ensure optimal compatibility and to reflect the current, real-world OS configuration–not the OS as it may have shipped years ago.
Benchmarking Individual Components
Many components in a system contribute to its overall performance, but the CPU/processor, memory, graphics board, and storage configuration generally play the largest roles for most users. Which of these components is the most important in a particular case depends on the individual person’s usage patterns, however. A gamer seeking the best possible frame rates, for example, will probably be better served by a faster GPU than by more memory. A casual user seeking a more responsive system may benefit most by upgrading a slow hard drive to a fast solid-state drive. You must decide which aspects of system performance are most important to you, tailor the suite of benchmarks to your specific needs, and then weigh the individual test results accordingly.
CPU/Processor
The most useful CPU benchmarks place a heavy workload on the CPU while minimizes the influence of other system components. SiSoft’s SANDRA 2012 incorporates a few CPU-centric synthetic benchmarks that test a chip’s performance with various mathematical workloads. The tests are multithreaded and generally scale with higher-clocked speeds and more CPU cores. SANDRA also provides results from other CPUs for easy comparison. Utilities like SiSoft’s SANDRA 2012 incorporate various easy-to-use, synthetic benchmarks for testing the performance of different system components. Another popular CPU benchmark is Cinebench. Cinebench renders a 3D scene using the animation engine from Maxon’s Cinema 4D. Cinebench is free, works with multiple operating systems, and can run in single-threaded mode (to test the performance of a single CPU core) or in multithreaded mode (to tax all of the cores in a CPU). If all is working properly, an Intel Core i7-2700K will score about 1.55 in Cinebench’s (R11.5) single-threaded test and about 7.05 in its multithreaded test. Maxon’s Cinebench, based on the company’s Cinema 4D animation software, tests single-threaded and multithreaded CPU performance.
GPU/Graphics Board
Myriad graphics-related benchmarks are available for testing a GPU’s performance. Many games have built-in tools to test performance; and you can test games that don’t with a utility called Fraps that shows real-time frame rates and tracks performance over time. Many synthetic and “canned” graphics benchmarks don’t use actual game engines to test performance, but produce comparable results nonetheless. Fraps tests how well a game is performing on your system, even if the game doesn’t offer a built-in benchmark. For testing a GPU’s performance, we recommend using a mixture of synthetic and real-world tests to see how the GPU handles a range of different workloads. Futuremark’s 3DMark 7 is a popular tool that provides an overall 3DMark score, as well as numerical results for each of the individual tests that contribute to the final score. Another handy synthetic benchmarking is Unigine Heaven. Heaven can test a GPU’s performance using DirectX 9, 10, or 11 or OpenGL paths, with varying levels of image quality and tessellation. Heaven’s results identify both an overall score and a frame rate. The Unigine Heaven benchmarking tests GPU performance in multiple DirectX or OpenGL modes. In a system powered by an Intel Core i7-3960X, when tested at a resolution of 1920 by 1200 with 4X MSAA, 16X anisotropic filtering, and high tessellation, an Nvidia GeForce GTX 560 Ti will score about 665 points in Unigine Heaven, at about 26.4 frames per second. At the same settings, a Radeon HD 7850 will score about 706 points, at 28 fps. If you have a faster GPU than those cited here, your system should be able to beat these scores, but a slower GPU won’t be able to catch them.
Memory
The most common method of evaluating memory performance is via synthetic tests designed to ascertain peak bandwidth and latency. Performance variables include the operating frequency and capacity of the memory, and the number of channels that a given system uses. AIDA64 Extreme Edition has an excellent built-in memory benchmark that tests read, write, and copy bandwidth, as well as latency; but it is available only as a limited trial unless you pay for the full edition of the tool. The free edition of SiSoft SANDRA 2012 offers memory bandwidth and latency tests, too. It reports bandwidth scores in gigabytes per second (GBps) and latency in nanoseconds. The tests are easy to run and take moments to complete. An Intel Core i7-2700K-based system with 8GB of DDR3-1333MHz system memory running in a dual-channel configuration (two memory sticks) should offer about 16 GBps of bandwidth at an access latency in the 29ns range. Higher clocked memory should deliver more bandwidth and lower latency. SiSoft SANDRA 2012’s Memory Bandwidth benchmarking tests peak bandwidth using both integer and floating point tests.
Drives/Storage
CrystalDIskMark is an excellent tool for testing a drive’s read and write performance at several different transfer sizes. To test the performance of a hard drive or solid-state drive adequately, your best bet is to use a benchmarking that evaluates read and write transfer speeds (with both sequential and random workloads), as well as access latency. Trace-based tests, like those used in PCMark, that track performance over time with simulated application workloads are also beneficial. One of the better free tools for testing a drive’s performance is CrystalDiskMark. This benchmark is particularly useful because it tests both sequential and random read and write speeds with both large and small block sizes, and with queue depths of up to 32. A SATA II Corsair solid-state drive earned the scores shown in the screenshot at right. Hard-disk drive scores will be much lower, but most newer SATA III SSDs will score higher. CrystalDiskMark doesn’t report access latency, however, so it’s a good idea to use a tool such as HD Tune, IOMeter, or the Physical Disk Benchmark in SiSoft SANDRA 2012 for this purpose.
Total System Benchmarking
Among total system benchmarking, the rather basic Windows Experience Index (WEI) built into Windows 7 and Vista isn’t a good choice, owing to the rudimentary nature of the tests and the lack of granularity in the results. Instead consider using a suite such as BAPCO’s Sysmark or Futuremark’s PCMark 7; both are widely accepted and generate extensive results. Sysmark is expensive and tends to be difficult to run, however, whereas PCMark 7 is available in a free basic edition and can be run with a single click. PCMark 7 runs a wide range of tests that tax CPU, GPU, memory, and disk performance; and it generates scores for each test–with higher scores reflecting better performance. PCMark 7 tends to emphasize disk/storage performance, but we’re fine with that. Upgrading from a hard drive to a solid state drive tends to be one of the best upgrades a user can make to improve system responsiveness, and PCMark 7’s results reflect that. Futuremark’s PCMark 7 evaluates system performance by testing CPU, GPU, memory, and storage subsystem performance. To give you a baseline for comparison, an Intel Core i7-2700K-based system with 8GB of RAM, a discrete Nvidia GeForce GTX 280 graphics card, and a 7200-rpm hard drive will earn a PCMark score of roughly 3800. Upgrade that same system with an SSD, and its score will jump to about 5100.
Digesting the Results
Most benchmarking scores are easy to understand. But keep in mind that higher scores don’t always point to better performance. On most benchmarks, higher frame rates or scores do mean that one system or component outperformed another; but some benchmarks are timed–and may output results in minutes or seconds. In such results, lower scores usually indicate better performance.
Important Notice: Tweet this article with the bookmark social media share below to stand a chance to win an ipad or start making money with your twitter account (it works only with your twitter account and the more articles you tweet the more you stand a chance to win an Ipad)
VLC is a free and open source cross-platform multimedia player and framework,that plays most multimedias files as well as DVD, Audio CD, VCD, and various streaming protocols. Skins gives the media player a new look on the operating system so here is the collection of some skins which you may use on your system. It is simple to use, yet very powerful and extendable. to use these skins after downloading follow these instructions. Skins do not work on Mac OS X! Put the downloaded VLT files in the following folder:
On Windows: the skins folder in the VLC installation directory (e.g. C:Program FilesVLCskins)
On Linux/Unix: ~/.local/share/vlc/skins2
Then open your VLC settings and change your interface from native to skins. You can choose your desired skin already there or change it when you are in the skins mode by rightclicking somewhere on the skin and going to Interface>Choose Skin. VLC needs to be restarted to change to skins mode.
Media Player 12 by sebweber
Black v 2.0 by Letis
Slick Iphone Skin by Maunil Patel
Pardus white by gölge
Pardus by gölge
DestroyVLC by Erik Teichmann
Alienware Darkstar by Universematrix
WMP11_B – resizable and with total time by ANGEL_B
When you are planning to install Windows 10, Windows 8.1 or Windows 7 on a PC, one of the requirements involves creating media to boot your computer into the setup wizard. This is especially true if you are performing a fresh installation of Windows. In which case, your boot options are DVDs and USB drives.
Since most PC these days hardly come with an in-built DVD drive, your options are further limited to either using an external DVD drive or a USB flash drive.
A lot of people, including me, will favor using a USB flash drive to install Windows 10. However, if you have newer hardware, it’s likely that you’re using Unified Extensible Firmware Interface (UEFI), instead of the legacy Basic Input/Output System (BIOS). If this is the case, you also have to ensure that the bootable media supports the firmware type before you can proceed with the installation.
How is UEFI different from BIOS?
The BIOS will soon be dead: Intel has announced plans to completely replace it with UEFI on all their chipsets by 2020. But what is UEFI, and how is it different from the BIOS we’re all familiar with?
Both UEFI and BIOS are low-level software that starts when you boot your PC before booting your operating system, but UEFI is a more modern solution, supporting larger hard drives, faster boot times, more security features, and—conveniently—graphics and mouse cursors.
Fortunately, if your device features a UEFI firmware, you have multiple ways to create a USB bootable media to install Windows 10, Windows 8.1 or Windows 7. You can use the Media Creation Tool, which is an easy-to-use utility made by Microsoft that downloads and copies the installation files onto a removable drive with support UEFI and BIOS. Or you can use WinToFlash, which is a freely available third-party tool that allows you to quickly create a media with support for UEFI firmware.
In this guide, we’ll try to walk you through the steps to create a bootable USB flash drive with support for both BIOS and UEFI. First we will try without a software, this should work for Windows 10, Windows 8.1 & Windows 7. However, some BIOS may not recognize your USB flash drive as a boot media, using the Media Creation Tool or WinToFlash software will resolve this.
You can always fall back to our troubleshooting guides should you encounter any problems while creating your bootable USB flash drive.
What you need
Before you begin, make sure you have an internet connection if you don’t already have a copy of the Windows OS install in a DVD, .iso or in a folder. You should also have sufficient data storage available on a computer, USB or external drive for the download. Other requirements may include:
A copy of the Windows OS install .iso, in a folder or DVD. You can use this page to download a disc image (ISO file) that can be used to update or install Windows 10, Windows 8.1 or Windows 7. The image can also be used to create installation media using a USB flash drive or DVD. Windows software download is free on the Microsoft OS download page but you might need to purchase a license for usage.
A blank USB flash drive with at least 5GB (or 4GB for Windows 8.1 and below) free space. This drive will be formatted, so make sure it doesn’t contain any important files.
Technician PC – Windows PC that you’ll use to format the USB flash drive
Destination PC – A PC that you’ll install Windows on
Boot Windows from your USB flash drive
Having met all the requirements above, any of the three methods below will get you a bootable USB flash drive. Make sure to pay close attention and ask any questions you may have on the comment section.
One of the most important thing to watch out for is the storage capacity of your USB flash drive. Windows 10 October release will require your flash drive to have at least 5GB storage capacity.
Also, if you are using a modern PC and your device features a UEFI firmware, you will need to format your USB flash drive using FAT32 file system which has a file size limit of 4GB. The Windows image file (sources/install.wim) in Windows 10 October release exceeds this limit.
Step 1 – Format the drive and set the primary partition as active
Connect the USB flash drive to your technician PC.
Open Disk Management: Right-click on Start and choose Disk Management.
Format the partition: Right-click the USB drive partition and choose Format. Select the FAT32 file system to be able to boot either BIOS-based or UEFI-based PCs.
Set the partition as active: Right-click the USB drive partition and click Mark Partition as Active.
Step 2 – Copy Windows Setup to the USB flash drive
Use File Explorer to copy and paste the entire contents of the Windows product DVD or ISO to the USB flash drive.
Step 3 – Install Windows 10 / Windows 8.1 / Windows 7 to the new PC
Connect the USB flash drive to a new PC.
Turn on the PC and press the key that opens the boot-device selection menu for the computer, such as the Esc/F10/F12 keys. Select the option that boots the PC from the USB flash drive.
Windows Setup starts. Follow the instructions to install Windows.
Remove the USB flash drive.
How to create a Windows 10, 8 & 7 UEFI boot media using WinToFlash Software
WinToFlash creates a bootable USB with any modern Windows Desktop [PHOTO CREDIT: EBENEZER OBASI]
If for some reasons, copying Windows through file explorer didn’t work, you can use the WinToFlash tool to create an installation media with UEFI support. Of course, the Windows Media Creation Tool will equally work if your target is to install Windows 10 on a PC. However, it’s faster to use this tool if your already have a copy of the Windows OS install in a DVD, .iso or in a folder.
To create a Windows install media with support for UEFI, connect a USB flash drive with at least 5GB (or 4GB for Windows 8.1 and below) of space, and then use these steps:
Step 1 – Download & Install WinToFlash Software.
Download the free lite edition of WinToFlash from the official website. Under “Download,” click Lite edition Setup Download.
After download is complete, open your download path and double-click the Novicorp WinToFlash Lite [The Bootable USB Creator] x.x.x Setup.exe file to launch the installation wizard.
Follow the installation wizard to install WinToFlash on your PC.
Step 2 – Set Windows source and destination media
After installation, click on the Novicorp WinToFlash icon from your desktop to launch the WinToFlash tool and install Windows 10 OS and below from your USB Flash Drive.
From the application start screen, click Windows Setup Bootable USB Wizard. Select the installation source of the Windows, if you have downloaded an ISO file or loading from a folder.
Startup screen of WinToFlash tool. Select Windows Setup Bootable USB Wizard to load a single OS to your boot media.
Specify Windows source path or file. If your OS is in a CD or extracted from image to a folder, go with the first option. Select the second option if the Windows software is an ISO image or archive.
Click next to setup your Windows source and destination path.
The ‘Windows files path‘ specifies the path to the Windows installation files on your PC. This can be an ISO – archive or folder – CD path, depending on your selection on the previous screen.
Use the ‘USB drive’ drop-down to select the media you want to make bootable.
Step 3 – Wrapping things up
Click next and review all parameters. Make sure that you have chosen the right USB drive.
Ensure that you have chosen the right media to avoid wiping important files from your flash drive.
Complete settings by confirming to wipe USB flash drive and accepting WinToFlash terms (click on the images below to expand).
After completing the steps, the WinToFlash tool will create a bootable media, which you can then use to install Windows 10 on devices using UEFI.
How to create a Windows 10 UEFI boot media using Media Creation Tool
If you’re planning to upgrade or install a fresh copy of Windows 10 on a system using BIOS or UEFI, you can use the Media Creation Tool to create a compatible bootable media. Just insert a USB flash drive with at least 5GB of storage to your computer, and then use these steps:
Under “Create Windows 10 installation media,” click the Download tool now button.
Click the Save button.
Click the Open folder button.
Double-click the MediaCreationToolxxxx.exe file to launch the utility.
Click the Accept button to agree to the Microsoft terms.
Select the Create installation media (USB flash drive, DVD, or ISO file) for another PC option.
Click the Next button.
Select the correct language, architecture, and edition of Windows 10 if the default selection doesn’t reflect the desired options.
Quick Tip: Under “Architecture,” you can select the Both option to create a bootable media that will work for devices using 64-bit and 32-bit processors. Also, if you’re unable to change these settings, make sure to clear the Use the recommended options for this PC option.
Click the Next button.
Select the USB flash drive option. (If you don’t see the drive, click the Refresh drive list option.)
Click the Next button.
Select the removable drive from the list.
Click the Next button. Once you’ve completed these steps, the wizard will download the Windows 10 installation files, and it’ll create the bootable media with support for UEFI as well as legacy BIOS.
Troubleshooting Windows 10, 8 & 7 Boot Media
UEFI systems cannot boot from NTFS and instead the device needs to be formatted with FAT32 which has a 4GB maximum size. If copy fails, it’s likely that the install.wim file on the media is larger than this file size limit. The solution is to split the WIM into multiple files using DISM.
Split the Windows image
Split a Windows image (.wim) file into a set of smaller (.swm) files. Use this procedure when you’re installing Windows from media that can’t handle the Windows image file size, for example:
DVDs (A standard single-sided DVD stores 4.7GB).
USB keys formatted as FAT32. FAT32 is required to boot many modern (UEFI-based) PCs, but has a maximum file size of 4GB.
Split the file
Mount your Windows distribution ISO.
Launch Windows Command Prompt. The quickest and easiest way to do that is to type “CMD” into your Windows search box.
Right click on the resulting “Command Prompt” and “Run as Administrator”.
Copy everything except the Windows image file (sourcesinstall.wim) to the USB drive. Either drag from the mounted ISO and drop on the flash drive, or use the command below:
robocopy D: E: /s /max:3800000000
Where D: is the mounted ISO and E: is the USB flash drive.
Split the Windows image file into smaller files, and put the smaller files onto the USB drive:
C:sourcesinstall.wim is the name and the location of the image file that you want to split.
C:sourcesinstall.swm is the destination name and the location for the split .swm files. The first split .swm file is named install.swm file. The file names for the next files include numbers, for example, install2.swm file, install3.swm file, and so on.
3700 is the maximum size in MB for each of the split .swm files to be created. Kepp the size of the files below 4000 (4GB) to avoid getting the error 87 (invalid parameters) error.
Note, Windows Setup automatically installs from this file, so long as you name it install.swm.
Windows 10 comes with a lot of amazing features but not all of them are readily available. Let’s dig a little deeper and unveil new tweaks, tricks and features that will change the way you use your PC.
With it being free, and Microsoft pushing the update to users, most of you probably already have migrated to Windows 10. Its constantly evolving nature means fresh features arrive twice per year, and with all the new goodies come a legion of new tweaks and tricks—some of which unlock powerful functionality hidden to everyday users. Others simply let you mold the Windows 10 experience into the shape you see fit. Here are some of the most useful tweaks, tricks, and tips that we are able to put together.
However, you need to brace yourself as some of these may break as the operating system evolves given Microsoft’s new “Windows as a service” mentality. The idea is to keep this page updated overtime to reflect the OS’s current status.
Activate Windows 10 Night Light
If you use an iPhone, iPad or macOS system you may use the built-in blue light feature ‘Night Shift’.
The Night Light feature you’ll find in Windows 10 is pretty much Night Shift for Windows.
Night Light makes the screen warmer in the evenings as it reduces the amount of blue light emitted.
Various scientific studies show that exposure to blue light in the evening makes it harder to fall asleep because (like all artificial light) it affects the circadian rhythms that manage our body clock.
Once preserve of late-night caffeine fuelled coders and over-worked, under-fed writers, screen temperature features have since become mainstream. Google’s Android and ChromeOS operating systems have one, as do iOS and macOS from Apple, and Microsoft’s Windows 10.
Like those features, Windows 10 Night Light automatically warms the temperature of your display after sunset. This makes your laptop screen or PC monitor easier on your eyes and reduces disruption to your circadian rhythm, helping it to tick along nicely.
In the morning, your display returns to its regular settings.
Night Light is a system feature; you do not need to install a separate application like Flux to use it. This makes it very easy to automatically adjust the screen temperature in Windows 10.
Night Light for Ubuntu will automatically adjust the amount of blue light your monitor or laptop display emits based on your location and the time of day.
These features are said to help reduce eye strain by adjusting your screen’s color temperature during after-dark computing sessions. That makes it easier to fall asleep when you’re done.
To activate Night Light, head to Settings > System > Display. Once you’ve done so, open the feature’s settings to fine-tune its behavior.
Scroll any window even when they’re inactive
It used to be that Windows only allowed you to scroll active windows. Now in Windows 10, you can set an option to scroll both active and inactive windows by just hovering with the mouse cursor over a window.
This feature is not a ground-breaking Windows 10 hack or tweak but it comes quite handy when time is in essence and your need to peek through your to-do list.
Windows 10 inactive scroll feature is enabled by default, but if it’s not, go to Settings > Devices > Mouse & touchpad, and make sure to enable the Scroll inactive windows when I hover over them option.
Find the hidden images
The lock screen and logon screen have some really cool images, which as it turns out, by default both rotate AND change.
It may seems Microsoft has a CDN that updates these images based on what you click that you like or not. Want to save one or more of those images for future use? Here’s where they are hiding!
Open Explorer and browse to:
%localappdata%PackagesMicrosoft.ContentDeliveryManager_[custom string of characters]LocalStateAssets
Copy all of the files to a new directory.
Open a command prompt in that directory.
Run this command ren . *.png and [enter]
Browse through them and find the ones you like!
Make Cortana’s ears perk up
Cortana’s finally made the leap to the PC in Windows 10, assuming many of the operating system’s search functions and dishing out just as much sass as the Windows Phone version. But by default, she doesn’t listen for your commands. But by default, she doesn’t listen for your commands.
If you’d like to be able to just shout commands at your PC, launch Cortana by clicking the search field in the taskbar and select the three-lined options menu in the upper-left corner. Select Settings for the list, then simply enable the “Let Cortana respond when you say ‘Hey Cortana’” option. You’ll need an active microphone for this to work, of course.
While you’re poking around Cortana’s options, you can dive into the Notebook menu to fine-tune exactly what personal data Microsoft’s digital assistant can access. Remember, however, that like Google Now, Cortana’s effectiveness is directly related to how much she knows about you.
Enabling Cortana on the Windows lock screen lets you use voice commands to view and edit your schedule at a glance. It’s pretty handy! To turn on the feature, open Cortana and head to “Cog” icon > Settings > Use Cortana even when my device is locked.
Secret, powerful new command line tools
Windows 10 packs a slew of nifty new command line features, including—hallelujah!—the ability to copy and paste inside the command prompt with Crtl + C and Crtl + V.
To activate the goodies, open the command prompt. Right-click its title bar, then select Properties. You can find and enable the new features under the Edit Options section of the Options tab.
Bash comes to Windows
If you got all hot and bothered over the ability to use keyboard shortcuts to paste text in the Command Prompt, wait until you get a load of this.
The Windows 10 Anniversary Update added the full, legendary Bash shell to Microsoft’s operating system, thanks to a partnership with Canonical, the company that guided Ubuntu Linux’s development. And it’s running natively, without virtual machines or containers. With the right tricks, you can even use Bash to run graphic Linux applications or even the Unity desktop itself right inside Windows—though those unintended features are definitely limited. Look for Ubuntu, Fedora, and SUSE Linux entries in the Windows Store to start using Bash in Windows.
Windows 10 Audio Source Switching
Windows 10’s in-taskbar volume controls pack a niche, yet nifty touch: selectable sources. Clicking the audio device name in the volume controls summons a list of all connected audio outputs, meaning you can switch from your headphones to your speakers and back again without having to dive into the Control Panel. Yay!
The April 2018 Update added more granular audio options to the Settings app too, breaking them away from the Control Panel even further.
Activate Windows 10 Spatial Sound
That’s not the only audio trick lurking within Windows 10. Windows Sonic for Headphones offers a virtual surround sound format that can make the audio coming from your headset feel more lush and atmospheric. The effectiveness of the feature varies depending on your gear and how sensitive you are towards audio cues.
To activate Windows Sonic, right-click the speaker/audio icon in the system tray on the right side of your task bar, then select Spatial sound (none). In the window that opens, click the drop-down menu and select Windows Sonic for Headphones. Click , then OK, and you’re done!
Windows Timeline
Timeline helps you pick up where you left off. Clicking the Task View button in the taskbar or pressing Windows Key + Tab summons the feature, which displays a—you guessed it—time line of your activity in supported apps, stretching back over the past. Even more handily, Microsoft lets you group related apps together into “Activities” in Timeline, so that when you open that week-old budget document, for example, the presentations and websites you referenced at the time can be easily summoned as well. This even syncs across devices, so it could be especially useful if you use multiple PCs.
The fly in the ointment: Only a limited number of apps work with Timeline currently, though Microsoft offers tools for developers to bake in support. That includes Office, Adobe’s Creative Cloud, and native Windows 10 apps like News and Maps, but Microsoft Edge is the only compatible browser. Bummer. You can deactivate Timeline by heading to Settings > Privacy > Activity History.
Cloud clipboard
Windows 10’s copy and paste functionality has been hit and miss for years, but now you can deploy that bugginess across multiple PCs with cloud clipboard—a genuinely useful feature introduced in the October 2018 Update. Head to Start > Settings > System > Clipboard and enable “Sync across devices” to start copying data on one PC and pasting it on another PC.
While you’re in this menu, enabling “Clipboard history” lets you save multiple items to the clipboard so you can use them again later. Nifty stuff.
Your Phone
Want to tie your phone and PC closer together? Download Microsoft’s Your Phone companion app for Android, and link it to your PC using the new Your Phone app from the Microsoft Store.
Your Phone lets you open, view, copy, and share photos that you took on your phone, as well as send and reply to texts right on your PC. There’s an iOS version as well, but it’s much, much more limited.
Snip & Sketch
The firmly entrenched Snipping Tool within Windows is finally getting replaced and upgraded. The October 2018 Update added Snip & Sketch, a new tool that lets you select a portion of the screen to copy when you press Windows + Shift + S. After doing so, the selected screenshot will be copied to your clipboard, so you can paste it into any image editing software—including the standalone Snip & Sketch app, which lets you annotate and share your marked-up images.
Near Share
Near Share makes it easy to share files and URLs with local PCs over the air, negating the need for flash drives or chat apps to pass something along. If you open the Share interface in Microsoft Edge or File Explorer, you’ll see PCs with Nearby Sharing enabled appear as an option if you have the April 2018 Update installed. Recipients receive a pop-up notification when something is sent. Think of it as an alternative to Apple’s Airdrop, albeit one without any mobile support.
To use Near Share, your computer needs both Bluetooth and Wi-Fi working, and you’ll have to enable the Nearby Sharing option in Settings before you can start using it. Transfer speeds were pretty slow and Bluetooth-like in our tests, so you may still want to resort to alternative means to pass especially large files around. Microsoft says the feature automatically chooses to use Wi-Fi or Bluetooth depending on what’s available, and what’s faster.
Ransomware protection
Ransomware is a growing problem. It infects PCs, encrypts your files, and holds everything hostage until you pay a ransom—hence the name. The best defense against ransomware is frequent backups and strong security software, but Windows 10 now includes basic protection right in your operating system.
Controlled Folder Access “protects your files and folders from unauthorized changes by unfriendly applications.” Your Documents, Pictures, Movies, and Desktop folders are protected by default, though you can block other folders manually or whitelist trusted software to access your locked-down info. You can tweak Controlled Folder Access by opening the Windows Security app (formerly Windows Defender), heading to the Virus & threat protection tab, and clicking the “Manage ransomware protection” link at the bottom.
Dark theme
If you love dark themes, you love dark themes. Light themes sear your eyeballs. Fortunately, Windows 10 now supports a dark theme.
Head to Start > Settings > Personalization > Color and select the “dark” option under “Choose your default app mode.” The Windows 10 October 2018 Update extended the dark theme to include File Explorer, too. Enjoy!
Enable Windows 10 Dynamic Lock
Say goodbye to Windows + L. Dynamic Lock is a handy feature that pairs your PC with your phone over Bluetooth, then automatically locks your computer when you wander away from it.
To start using it, marry the two devices in Control Panel > Hardware and Sound > Devices and Printers, then activate Dynamic Lock at Settings > Account > Sign-in options.
Game Bar
If you’re into playing around on your PC, Windows 10’s Game Bar—summoned by pressing Windows + G in-game—holds all sorts of nifty extras. It’s always been able to take screenshots or videos of gameplay clips, but as of the Windows 10 Creators Update, the Game Bar also offers easy-peasy Beam game streaming and the intriguing Game Mode, which can improve performance on resource-limited systems. The October 2018 Update overhauled the interface yet again, adding inline volume controls.
The Game Bar’s handy even if you don’t actually play, as it can be used to record video of any app—not just games. Windows 10 also has a dedicated Gaming section in its Start menu Settings to let you tinker with options, including Xbox networking and parental controls.
Per-app GPU management
The Windows 10 April 2018 Update added the ability to tell Windows which graphics hardware—discrete or integrated—to use when you open specific apps. It sounds niche, but the feature could prove pretty helpful if you’ve got a gaming laptop and want it to last longer.
By default, booting up a game switches over to discrete graphics, which use a lot more energy than the graphics cores integrated in Intel chips and AMD Ryzen APUs. But a lot of indie and retro games play just fine on integrated graphics. With Windows 10’s per-app GPU management, you can manually tell the system to stick to the more power-efficient option for games that don’t need the extra oomph.
Go to Settings > Display, then click the Graphics settings link at the very bottom of the page to start tinkering.
OneDrive Files on Demand
It’s back, huzzah! OneDrive Files on Demand resurrects Windows 8.1’s “placeholder” feature for the cloud storage service baked into Windows 10. OneDrive Files on Demand shows all of the files you have stored in OneDrive in a folder on your PC, but they’re just pointers synced with the cloud—not actually files installed on your PC. Unless you want them to be. You can select which files and folders to make available locally.
Storage Sense
Over time, your PC can quietly fill with needless junk without your even realizing it, as the Recycle Bin and temporary files suck up your storage. Storage Sense helps combat the creep. Head to Settings > System > Storage and enable the Storage Sense option to have Windows start automatically clearing out unneeded temporary files, and deleting any files in your Recycle Bin over 30 days old. You can tweak those options using the Change how we free up space link underneath the option.
The October 2018 Update added the ability to have Storage Sense send long-untouched files from anywhere on your computer to your OneDrive cloud storage, freeing up space on your hard drive. It could be a useful addition if you’re close to filling up your local storage, but keep an eye on your available OneDrive space—cloud storage isn’t free. Fortunately, the feature includes granular controls.
Mixed Reality
The Fall Creators Update added “Mixed Reality” to Windows 10. The most obvious use for it is in the legion of new Windows Mixed Reality headsets, but you can check out the benefits even if you don’t have one of those. The Mixed Reality Viewer app lets you drag digital 3D objects you’ve created in the Paint 3D app into the real world, using the combined might of your device’s camera and display. It’s not really augmented reality since you can’t interact with the objects, but it’s closer to “Mixed Reality” than the headsets are.
Somewhat related, the nifty Story Remix tool in the Photos app lets you add fantastic 3D animations to videos you’ve captured, among many other talents. It’s pretty sweet!
Start menu folders
What’s old is new again: You can create basic Start menu folders in Windows 10, organizing Live Tiles into clusters. Simply drag your Start menu apps on top of each other to create folders that expand when clicked on. As of the October 2018 Update, you can now name the folders you create, but you have to expand it open to see the option.
Troubleshooting, troubleshot
The Windows 10 Creators Update added a helpful touch for distressed PC users. The operating system’s consolidated all of its troubleshooting tools in a single location: Home > Update & Security > Troubleshoot. If you run into trouble, run there first.
Turn off File Explorer’s Quick Access view
When you open File Explorer in Windows 10, it defaults to a new Quick Access view that shows your most frequently accessed folders and recently viewed files. I love it, personally, but if you’d rather File Explorer defaulted to the “This PC” view found in Windows 8, here’s how.
Open File Explorer, then select View > Options from the Ribbon. A Folder Options window will open. Click the “Open File Explorer” drop-down menu at top, then select the “This PC” option. Click OK and you’re done!
Manage notifications
Windows 10’s Action Center houses and manages the notifications spawned by your system’s various apps. You might not want every Windows Store app you install barking at you all the time, however, or maybe you don’t want to see any notifications while you’re in presentation mode. You might just want to silent the annoying ads that the Get Office app spawns. Fortunately, those are easy to tweak.
To tinker with you your notification settings, head to Start menu > Settings > Systems > Notifications and actions. Individual Windows Store apps, like the Mail app, tend to have more granular notification options in the Settings menus inside the apps themselves.
Schedule your restarts
This is wonderful. If you’ve got pending updates that require you to reboot your PC, Windows 10 will allow you to schedule a specific time for it to do so. Finally!
Open the Settings option in the Start menu, then head to Updates and Recovery > Windows Update > Restart options to see the scheduling screen above.
Get Windows updates from other sources
But the Windows Update upgrades don’t end there. Windows 10 introduces a new option that lets you download updates using peer-to-peer technology, rather than Microsoft directly. It could help you get that hot security patch faster when everybody’s hammering Microsoft’s dedicated servers, or save you bandwidth in a computer-crowded house—just download the new patch once from Microsoft, then share it among the PCs under your care.
To tinker with the setting, head to Start > Settings > Update & Recovery > Delivery Optimization. By default, “Get updates from more than one place” is enabled and configured to grab updates from PCs on both your local network and the Internet at large. If you don’t like the idea of your PC using your bandwidth to share Windows Updates with strangers, be sure to disable it. If you leave it active, the “Advanced options” link lets you fine-tune how Windows uses your network to download and share updates, as you can see above.
Seize control of Windows Updates
While the ability to schedule installation times for updates is very welcome indeed, not everyone is happy about the way Windows 10 handles patches—specifically, that you can’t refuse them. Windows 10 Pro users—but not Windows 10 Home users—can delay downloading updates for some time, but eventually, Microsoft will force them on you.
There are some actions you can take to exert control over your Windows Update experience, however. Most notably, if you’re using Wi-Fi for connectivity, you can set Windows 10’s Wi-Fi connections as metered to download updates when you’d like to, rather than when Microsoft wants you to. The Active Hours feature lets you tell Windows specific times not to install updates. And if you ever encounter a borked update that refuses to play nice with your PC, Microsoft’s released a tool that allows you to choose individual updates so they won’t be downloaded again.
Those workarounds aren’t a replacement for being able to manually choose the Windows Update you’d like to install, but they should help ease the sting a little, at least.
Fresh keyboard shortcuts!
Windows 10 packs a handful of fresh keyboard shortcuts, all tied to newfound abilities inside the revamped operating system. There are many more than we can list here, so head over to our guide to Windows 10’s keyboard shortcuts to learn all about them. If you really want to get fancy, augment those hotkeys with Windows 10’s new touchpad gestures for true shortcut mastery.
Declutter your taskbar
Two of Windows 10’s standout features are its Cortana search integration and newly added virtual desktop support—but they claim a sizeable chunk of your taskbar. If you don’t care about either (or don’t mind using Windows key + Tab to leap through virtual desktops) you can reclaim that onscreen real estate.
Everything starts by right-clicking an empty section of your taskbar. Select Cortana, and choose to Show Cortana icon only. You can also remove the Cortana and Task View buttons from the same Taskbar menu.
Thank You!
We feel the need to thank you following through with this long episode of top 30 Windows 10 trick, tips and tweaks. The article doesn’t stop here; share your ideas with us on the comment section.
The Day 2 keynote at Google I/O was no match for yesterday’s Android keynote (though it did have people skydiving again), but Google delivered when it came to Google Docs: At long last, Google Docs has offline editing. The update has been added to Google Docs as of today, but you’ll need to take a few steps to enable it.
Offline mode in Google Docs is especially useful while traveling on an airplane or if you’re in a cafe with no Internet connectivity. When you get back online, your changes will be synced to the cloud. One drawback, however, is that offline support isn’t available to the full Google Docs suite. You’ll be able to edit only documents offline. You can view spreadsheets, but you can’t edit them. Presentations, drawings and other items from your Documents List won’t be available while you’re offline. If you use Firefox or Internet Explorer, this next bit of news might be disappointing: Offline mode works only in the Chrome browser. It’s a smart tactic by Google to get people to use Chrome, but it is a bit annoying if you don’t regularly use the browser. You’ll need to enable offline mode before you can use it.After setting up Chrome, you will need to allow offline access on your computer. If you’re using the classic look, click the gear icon in the upper right-hand of your window. If you are using the new look, click the grey gear just above your document list. You’ll see a new option in the drop-down menu that reads “Set up Docs offline (beta).” After clicking on that option, you’ll be taken to a separate window with an “Enable offline Docs” button. When you complete that step, you’ll be asked to install the Google Drive Chrome web app (if you haven’t already). You’re taken directly to the Chrome Store where you can quickly download the Drive app. The app will show up alongside your other Chrome apps; click on it and you’re back to your Documents List. Calling offline “magic” is bit over the top, don’t you think?In the upper right corner, you’ll see a notification informing you that your recently open documents and spreadsheets are being synchronized. Click “View offline Docs” from the gear menu, and you can see which documents are available to you offline. And that’s it–you’re ready to start working on Google Docs offline. The whole process takes about five minutes to set up if you already have Chrome installed on your PC. Google Documents in offline mode worked well and felt stable once I had it set up. I was disappointed that Well, it is still in beta.you can’t actuallycreate documents offline; you can only edit them. Bizarrely, there’s a button at the top of your offline documents window labeled “New Document,” but clicking on it brings you to a page informing you “this document is not available offline.” It seems like an oversight to include this non-functioning function, but this is a Google beta project after all. I hope that Google expands offline editing mode to spreadsheets and presentations in future updates as well.
The concept of data recovery is fairly old among internet users. But having a reputable software that really works in getting back deleted files has been the biggest quest of Pc users.
This is why we deemed it necessary to introduce one of these free data recovery app that really works when it comes to the business of getting lost files back.
Whether you want to restore the data from a laptop, USB stick, memory card and/or any digital device, EaseUS data recovery app will captivate your attention by recovering all the lost data.
Features of EaseUS Free Data Recovery Wizard
It is free to download and use (limited only by functions).
It can restore any lost or formatted data from the device.
The best feature is recycle bin recovery. It can regain the deleted data also whether it is a video, album or any other file.
Ability to recover files with both rapid and deep scan mode.
Quick scan allows recently deleted files to be detected quickly while deep scan can help recover somewhat older files.
Ability to recover every kind of fille type and extension in record time like photos, videos, compressed files, pdfs and more.
Ease of recovery from server units, personal computers, office computers, hard drive etc.
Filter option to wade through the required files of a certain type.
This app is easy to use and recovers the data securely free by using the deep scan mode.
It is a virus free app and runs on all type of servers.
Its recovering speed is faster and provides you with a basic feature of “Quick scan mode” along with the “Deep scan mode”.
All types of files, images, videos, emails, audios or documents can be easily retrieved by EaseUS.
This free data recovery software supports all kinds of language such as traditional or simplified Chinese, French, German, Turkish, Korean, English, Arabic, Russian and many more.
Lifetime technical support and upgrade support.
File type Supported:
EaseUS comes with a versatile option of file support and mainly supports all kinds of files.
It assists all types of documents such as DOC, PPT, PDF, XLS, HTML/HTM, EPS, etc.
For the video recovering it easily recovers the FLV, MP4, MP4V, MPEG, AVI etc.
All forms of JPG, JPEG, PNG, BMP, GIF, PSD, WMF, RAW etc. can be revived.
Audios like MP3, MP4A, M4V, MPG, FLV, VQF etc. are supported on this application.
The emails can be restored back into the device even from Outlook and supports the PST, DBX, EMLX, etc.
It also supports the archive files such as ZIP,ISO, HTML SITX etc.
How to recover lost files with EaseUS data recovery Wizard?
The free data recovery software goes with the 3 easy steps of recovering the data back into your device or card.
All you have to do is to install this application from the EaseUS website. After the installation is complete, step one is to launch the app. The second step is to scan. Scan the data that you want to recover.
You can also filter or search the data for the rapid scanning of the data you want. After the scanning is complete, the third and final step is to recover. This might take some minutes. After this the required data that you want is recovered back on your device.
EaseUS memory card data recovery:
A memory card is the brain of a camera, a mobile phone or even a laptop which can contain thousands of important photographs, videos or even files.
IF you’ve accidentally formatted your memory card, using EaseUS, the free data recovery software, you can easily get it back in no time.
Supporting every type of memory card from the SD card, memory sticks, compact flash card, and digital card to the multimedia card and so on. It also has support for every kind of memory card manufacturer like Samsung, Toshiba, Transcend, Sony etc.
Steps for recovering a memory card through EaseUS:
Launch EaseUS, the data recovery software for free and select the type of files you want to recover and click next.
Choose a directly for your scan; for disk recovery, after adding it to the computer through port or connector, choose the directly it is in.
After the files have been recovered, just simply choose the files you want to recover and click on the “recover” button to get them back.
EaseUS Pro packages:
EaseUS comes up with a free and two pro packages. The free package includes the recovery of the data up to 2GB and supports all file types. There is no free upgrade or technical support feature available in this package.
While the two Pro and Pro+WinPE packages that costs 69.95$ and 99.90$ respectively, comes with numerous features. Both the packages allow you an unlimited data recovery option along with the free lifetime upgrade and free technical support.
The pro packages are single license. The Pro+WinPE comes with an extra feature of “Bootable media for emergency” i.e. it restores the data even when system breaks down.
Darwin Life is a new fertility clinic that aims to get women over the age of 40 pregnant with ‘perfect babies’. The World Health Organization (WHO) ranks infertility as the third most serious health condition in the world, after cancer and heart disease. A Chinese founder and researcher Dr. John Zhang is developing controversial methods of fertility that involves replacing some of the chromosomes in a patient’s eggs with those of a younger woman’s.
The treatment is called ‘spindle nuclear transfer’, often referred to as a three-parent-baby technique, and it is outlawed in the United States. It’s been refused for FDA approval because it involves what some view as gene manipulation.
Doctor Zang’s work helped a woman with a rare disease called Leigh Syndrome become pregnant last year. The idea was that with the help of a donor’s chromosomes that the baby would protected against inheriting its mother’s disease, while still remaining genetically related to her.
Zang reported mixed results; the baby was born healthy but damaged DNA from the mother was unintentionally transferred over thus creating a possibility for health problems in the future for the child.
The alternative is standard in-vitro fertilization (IVF) where the entire egg is harvested from the donor and placed inside the mother – thus the baby is genetically related to the donor, even though the mother gives birth.
In this case the chromosomes were harvested in the United States, but the actual application and implanting occurred in Mexico due to US restrictions and ethical concerns. America isn’t the only country concerned about the ethics; the UK allows the procedure, but only in cases where normal conception or IVF might put the baby at high risk for health issues.
Doctor Zang wants to do more than use his method to eliminate hereditary diseases. He wants to impregnate women ages 42 through 47 who often can’t get pregnant even though they produce eggs.
The startup also aims to blow the ‘playing God’ conversation wide-open. The Doctor told Technology Review:
Everything we do is a step toward designer babies, with nuclear transfer and gene editing together, you can really do anything you want.
He’s referring to the ability for parents to choose a child’s eye color or decide if their child will be tall or not. It’s a minefield of ethics concerns – is it okay to edit genes to lower the risk of cancer? What about to increase your baby’s I.Q.?
What happens when intelligence becomes the territory of the wealthy? This is another example of the twisting complexity of the world we live in. Perfect people are on the way and I don’t think any of us are ready for that.
From time memorial, man has indulged himself into seeking out ways to improve his living standard. The application of this science into practical purposes is what is termed ‘technology’.
The constant evolution of technology has affected every part of human existence: information is more accessible, we enjoy good roads, better & healthy living. We can also admit that the introduction of some technology has shortened our existence on earth; with the worldwide life expectancy age just lying above 70 years, life is indeed very short.
Games such as Awale are not only there for our entertainment, it also improve family and friendship bonding. These days, we have school and work commitments which make it increasingly difficult to enjoy the thrills that gaming brings. That is where online gaming platforms steps in, providing online gaming platforms where you can play countless games online, with the added benefit of betting.
My business here today is to discuss 3 important games, with historic background that technology has presented us in a platter of gold – playable in your mobile devices at your convenience.
Awale
Awale also known as Ókwè, Alancho, Ayoayo, Oware or Ise, has its root in Africa and played worldwide. A common name in English is Awari but one of the earliest Western scholars to study the game, R.S. Rattray, used the name Wari.
The game is considered the national game of the Ashanti kingdom in Ghana; it is also played traditionally in Nigeria, especially in the Igbo-speaking tribes. Known to encourage family bonding, Awale is one on the most social two-player abstract.
Backgammon is one of the oldest board games known to man. It goes down to the ages when human bones were used for dice and Emperor Nero and Claudius making a fortune through gambling.
Just before technology stepped in, the church and government banished backgammon because of the gambling aspect of it. However, some Good Samaritan in the 1920s introduced doubling to rekindle interest in the game.
In recent years, backgammon has been studied with great interest by computer scientists. Owing to this research, backgammon software has been developed that is capable of beating world-class human players (see TD-Gammon for an example). More developers are also pushing out backgammon games you can play both on your Android and iOS devices.
You can find backgammon games you can play for free on Android here and here, for iOS.
Chess
The Chess game needs no introduction. The game has been around ever since the 6th AD. It’s thought to have originated from India with its modern version (Romantic Era of Chess) characterized by swashbuckling attacks, clever combinations, brash piece sacrifices and dynamic games. Winning was secondary to winning with style.
According to a survey in 2012, “chess players now make up one of the largest communities in the world: 605 million adults play chess regularly”. Chess is played at least once a year by 12% British people, 15% Americans, 23% Germans, 43% Russians, and 70% Indian people.
What’s more? Technology has ensured that the new era of chess can be taking anywhere with you. Thousands of chess games have been developed for both PC and mobile. Even the famous Microsoft Windows 7 Ultimate edition comes with the Chess game as one of the pre-packaged system application.
Owing to the modern trend of mobile technology, mobile application developers has delivered by making countless Chess games you can download both on the Android store and Apple store.
Happy Sunday to all EWT readers! This is the 7th month of the year and I hope everything’s going according to plan? If it’s not, it’s not too late to start afresh. One of our major objectives this year is to provide you with valuable information that will help you reach your ambitions in as much as it is tech related.
Regardless of your social class, occupation or belief this apps will help you manage your weekdays effectively and subsequently giving you a memorable week in the end. Keep your eyes fixed as we take you down the stream.
The more I think of Sunday is the more I think of social networking. What other way would you rather spend a cool Sunday evening aside saying hello to your co-workers, leaving a voice note to your classmate or even sharing your awesome videos, musics and photos with your distant family and friends? Pheed is the Android application that lets you achieve all this without lifting a foot.
The free social networking application lets you share voice-notes, musics, videos, photos and text with your followers.
A free app to quickly convert video clips and photos into awesome editable movie; you can add your custom background music, graphics and movie effects.
Imagine having everything you need in one app. This is what Binu is all about. The application serves as a valuable resource for news in your locality. You can also add links to your favourite news website and the app gives recent updates from the websites you have added.
Binu has an in-built chat messenger, 15 credit to send SMS to any phone number globally, sport news resources, dictionary, bible, quran, wikipedia, etc. The application is free, very portable and easy to use.
Talking of having a mobile branch of your office, all it takes is $14.99 – OfficeSuite Pro allows you to view, create, edit, print and share Microsoft Word, Excel and PowerPoint files on the go. You can also open attachments and see PDF files on an Android based phone or tablet with our feature-rich mobile office solution.
OfficeSuite Pro includes a File Browser and integration with Cloud service leaders: Box, DropBox, Google Drive, SkyDrive and SugarSync to give users a multitude of options on how to manage files and attachments.
With the great features of smartphones we often forget that it is actually a phone. Callist Call Manager ensure that you don’t miss that important call you want to make. With the application you can keep a list of the people you want and need to talk to, schedule call reminders, add notes and repetitions, add to, delete from and organise your Callist with simple touch gestures, call, text and email your favorite contacts and contacts you recently talked to.
The application also deliver after call pop ups e.g. If you had a missed call or you could not reach someone Callist will show you a popup from which you can easily add a call reminder directly into your Callist (Can be done automatically, if you’d like).
Above all, this app is free, ads-free and easy to use.
This application will take note of all your activities this week: The people you talk to, the places you visit, the images you capture, and the songs you listen to, etc. And like your brain, it initiates thoughts and ideas for you, it helps you remember information and tries to anticipate adequate actions.
Do not loose this app: You will need it at the weekend. Camera ZOOM FX could easily be the best replacement for the N5 camera application which lacks a lot of options like 16:9 highres shot for example. It takes only $2.95 to preserve that decent memory. If Camera ZOOM FX doesn’t sound like a great app to you, you might as well hang on to any of the awesome camera app that made our best android camera app list.
A compilation of Vodafone Qatar recharge codes for daily, weekly and monthly internet data plans
Just moved into Qatar? Here is a list of Vodafone Qatar internet pack activation and deactivation codes. We have selected all the offers in place and grouped them into daily, weekly and monthly plans.
With this page, you will be able to get started with Vodafone QA internet. We will show you how to configure your device for internet access, list of internet plans available and how to check your data balance. Note that when you use all your data allowance or do not have a data plan, you’ll be charged on a standard rate of 55Dhs/MB
Vodafone Internet Settings
If you need internet settings for you phone send the word “Internet” to 802. In less than 2 minutes you will receive the settings to your device
Vodafone Online Recharge
First, you need to know that Vodafone QA has setup a nice platform online for Qatar users to directly recharge their data packs and purchase call credits online. The website accepts payments via Visa & MasterCard.
The Vodafone QA online payment platform is pretty easy to use and free to access. However, if you prefer to recharge your internet plans directly from your dialing pad, keep scrolling.
Vodafone QA Daily Plans
The daily 24 hours internet plans are suitable for those with small internet demands.
Internet Plan
Data Allowance
Price
Activation Code
Validity Period
Description
Daily Pack 1
10 MB
QR1
Dial *100# or *200*302#
Same Day till Midnight
Auto-renewed when internet is used.
Daily Pack 5
250 MB
QR5
For Prepaid Dial *200*500# and Postpaid Dial *110*120#
24hours (1 day)
Data plan is not auto-renewed
Vodafone QA Weekly Internet Plans
Spending a week vacation in Qatar? The weekly internet pack is probably what you need. It offers data allowance ranging from 75 MB to unlimited bandwidth.
You can also use the weekly plan to download unlimited amount of movies and musics to watch during the weeks. If you are a heavy internet user, I suggest you use the weekly internet plan.
Internet Plan
Data Allowance
Price
Activation Code
Validity Period
Description
Weekly Pack 6
75 MB
QR6
Dial *100# or *200*306#
7 days
Can be auto-renewed on days when internet is used.
Weekly Pack 10
150 MB
QR10
Dial *100# or *200*710#
7 days
Can be auto-renewed.
Weekly Pack 20
1 GB (1,000 MB)
QR20
Dial *100# or *200*720#
7 days
Can be auto-renewed.
Weekly Pack 100
Unlimited
QR100
Dial *100# or *200*600#
7 days
Can be auto-renewed.
Vodafone QA Monthly Internet Plans
If you are an average internet user, here is a list of monthly internet plans you can choose from.
My vodafone app is a mobile application that lets you manage your Vodafone account straight from your smartphone. My Vodafone app gives you ability the view all the details about your mobile line as well as recharge your voice credit and data plan.
The app is available for Android and iOs devices and it’s completely free to download and install.
Smart Data Rate
Vodafone Smart Data Rate is a fall-back alternative when your data plan is depicted.
With Smart Data Rate, once you finish the data in your monthly Postpaid plan or the data in your Prepaid Internet Pack, you’ll be charged a discounted rate up to 95% for the additional data you use rather than the standard data rate of 99Dhs/MB (effective 22 April, 2016).
How it works:
Once a customer is subscribed to Smart Data Rate, the additional data is added in steps after they have finished all the data in their plan or internet pack as shown below:
Postpaid Smart Data Rate Steps
Additional Data
Charges
Validity
Step 1
0 – 200MB
QR 20
End of bill period
Step 2
200 – 400MB
QR 20
End of bill period
Step 3
400 – 600MB
QR 20
End of bill period
Step 4
600 – 800MB
QR 20
End of bill period
Step 5
800 MB+
10 Dhs/MB (100QR/GB)
End of bill period
Prepaid Smart Data Rate Steps
Additional Data
Charges
Validity
Step 1
0 – 150MB
QR 3
Until Midnight on the same day
Step 2
150 – 300MB
QR 3
Until Midnight on the same day
Step 3
300 – 450MB
QR 3
Until Midnight on the same day
Step 4
450 – 600MB
QR 3
Until Midnight on the same day
Step 5
600 – 750MB
QR 3
Until Midnight on the same day
Step 6
750 MB+
2Dhs/MB
Until Midnight on the same day
Smart Data Rate Activation/Deactivation:
Smart Data Rate is free of charge for both Postpaid and Prepaid customers!
Postpaid: Dial110111# to activate for FREE and Dial *100# and follow the menu to deactivate
Prepaid:Dial200111# to activate for FREE and Dial 250111# to deactivate
If you’re starting to dip your toes into creating HD videos then you may find that sometimes the videos that you save in HD don’t actually look that great. For beginners it can be difficult to navigate through some of the technical areas of video settings – but it is necessary to do so if you want to ensure that the videos you save in HD actually turn out well.
Understanding Resolution
Essentially ‘HD’ or ‘High Definition’ is a type of resolution. In turn, resolution is a description of the amount of pixels contained in the video. For example a ‘Full HD’ resolution of 1080p is essentially 1920×1080 would be 1920 pixels wide and 1080 pixels tall.
While the resolution does affect how your videos appear, it is by no means the only factor at work, however. Assuming you’re saving an HD video in HD resolutions and it doesn’t look good then that likely means that there is some other factor that is the culprit.
Looking at the Bitrate and Frame Rate
Aside from resolution, the two big factors that can affect the quality of your videos are its bitrate and frame rate. The frame rate is essentially the number of frames per second that will be displayed on your screen – so the higher it is, the ‘smoother’ your video will appear. Ideally the number to shoot for in terms of frame rate is 60 for the smoothest possible playback supported by most monitors and TVs.
On the other hand, bitrate is a bit harder to understand but is basically the amount of space that can be used for every second of video. As such a higher bitrate will provide a better quality but come at the cost of a much larger file size. If the video isn’t allowed to have enough space to properly display at that resolution then you can expect the quality to be poor.
That is part of why using Movavi Screen Capture Studio for HD video capture is ideal. Not only is it capable of recording HD videos at a high frame rate, but it can also help you to save it easily with presets to automatically optimize your video based on the device or platform that you’re using.
It even includes a complete suite of video editing features so you can cut and combine video segments, enhance the video quality, apply special effects, add audio tracks, and insert customizable text. In short, you should be able to use Movavi Screen Capture Studio to improve your video further.
If you want to create and save HD videos while making sure they look good there is no easier way than by using Movavi Screen Capture Studio. Just give it a try for yourself and see what it can do.
The festive period is almost over and it is my believe that you have already made arrangements to live a healthy live, have a good time and enjoy a prosperous life in this new year.
In less than two weeks from now it will be ‘back to school’ for every college student. As usual, you have made your usual commitments; top your class, be the smartest kid on board or even eyeing a spot in any of the ten ‘2014 scholarships to study abroad’ watch list. I’m also aware that most of you have gone through the games that rocked in 2013 and have decided to take your hands off the gaming pads.
If you have made any of the above resolutions, I am here to show you how to work towards them using your Android smartphone. Sit back, get a pen and let me walk you through the top six Android apps that you need as a science college student.
You don’t want to carry a gigantic physics text book to everywhere you go to but you can always carry your Android smartphone around and with this application in it, you can rock Physics from anywhere and anytime.
The application covers most of physical formulas with descriptions and images. It is perfect for students to do physics homework quickly and accurately.
Though this app will cost you a cup of coffee but $3.63 is enough to save you from your algebra & calculus hassles.
Math Helper allows you not only to see the answer or result of a math or algebra problem, but you can also obtain a detailed step-by-step solution so that you may learn how to do the problems rather than just getting the answers.
If you don’t know what for example enzymes means, then this is a great choice. ;). Just avoid as many pop up ads as possible, you really don’t blame them for embedding so many pop up ads, do you? It’s a great app for any student offering biology as a subject or course.
Nice to brush up your knowledge on chemistry and is indeed very helpful. Includes a periodic table with links to wikipedia also allows students to perform simple grams/moles calculations, calculate mass percents and do stoichiometry with that compound.
The application arrays variety of useful tools arranged in tabular forms. The tabular forms are easy for quick remembrance.
Like Twitter, Facebook (and now, Telegram), the use of usernames makes it easier to find and locate users on the website. However, finding or adding users by username isn’t something very common among mobile messaging apps. WhatsApp allows you to add a username or moreorless, a nickname but people can neither find nor add you with this username – something privacy lovers will appreciate.
Telegram on it’s own right is taking a different path. Since last year the company made it possible for you to add friends by username – without necessarily knowing their phone numbers – on their mobile app.
The advantage of a username is that you can share your contact details for Telegram without revealing your phone number, thus safeguarding some level of privacy. A lot of users has been asking us how to add a username to the app. So, here is a step to step guide:
Add Username on Telegram
Tap the menu button on your Android screen.
Launch Telegram application.
Tap the Apps button on your Android screen. Locate and launch the Telegram application.
Tap the menu icon on Telegram
Navigate to Settings
On the Telegram app tap the menu icon (represented with three horizontal lines) and open Settings. Among other options on settings, you will find Username which is set to ‘None‘ by default.
Username is set to ‘None’ by default.
Tap on Username.
Tapping on the Username option will open a page where you can enter or modify your username. Simply enter your desired username on the text input box.
Usernames must be a minimum of five characters — so you can’t make up for losing out on a one-letter Twitter handle here — and can contain letters, numbers and underscores.
Save your username.
Save your new username by tapping ‘Good’ sign at the top-right side of your screen.
You are also free to change your alias, so long as the new one is not already taken.
Like 2016, 2015 started with a lot of promises and big time resolution for technology companies, but unfortunately, not all those technologies made it through the year.
A large number of services/technologies either died, discontinued or gradually faded away in 2015. For every success recorded in 2015, there was a complementing failure. There is no shame in it, after all, the market is a battlefield. Some technology will fall to a better competition, others will simply fail to replicate the first spark there product generated or just not good enough in the modern trend. However, before we welcome what 2016 have in stock for us, let’s pause to remember five notable products and services whose death in 2015 will forever remain in our memory.
Replaceable batteries (c. 1954-2015)
Replaceable batteries (c. 1954-2015)
The 61 long years of replaceable batteries finally came to an unexpected end in 2015 – well, in a way. If you used Samsung smartphone in 2013 then you are no stranger to short battery life, but then, you can at least carry 3 backup batteries in your pack… Not anymore!
The movement was first started when Apple decided that it could reduce the weight of devices by sealing non-removable batteries in their systems. Introducing the non-removable battery technology with the original iPhone and the first MacBook Air, and it has since stuck with this plan.
Today, no Apple products feature replaceable batteries, and neither does much of anything else. This year even the Samsung Galaxy Note line, long known for replaceable batteries, ditched them too. Today, the LG G4 is the only mainstream smartphone left that has one. We’re calling it dead except in niche or corporate products as of this year.
Windows RT (2012-2015)
Windows RT (2012-2015)
Microsoft had only 3 years to surrender their failed attempt to create a cheap lite version of disastrous Windows 8. This “lite” version of Windows 8 was created for lower-power, cheaper tablets that couldn’t run the full-fledged OS.
RT-powered Windows tablets met with immediate disdain due to performance problems, a lack of software, and compatibility issues. Development on the OS ended in 2013, and when the Surface 2 was discontinued in February, Windows RT breathed its last. All Windows RT support formally ends in January 2018.
Mozilla Firefox OS for Smartphone (2013 – 2015)
Mozilla Firefox OS for Smartphone (2013 – 2015)
In February 2013, Mozilla founded an initiative that let you have an open, web-based framework that anyone could work with, instead of closed platforms and apps – Firefox OS.
Firefox OS proved the flexibility of the Web, scaling from low-end smartphones all the way up to HD TVs. However, the OS couldn’t stand the competition from other tech giants or “weren’t able to offer the best user experience possible” as the owners claimed and hence the death of this initiative.
Even if Mozilla has maintained that they are still willing to “experiment” with the software on smart devices — they just won’t be the kind of devices that make phone calls.
Amazon Fire Phone (2014-2015)
Amazon Fire Phone (2014-2015)
After upending publishing, retail, and cloud services, Amazon took on the cell phone industry in 2014 with its first-ever smartphone.
It will probably be its last.
The idea wasn’t particularly bad in concept: The Fire Phone was ambitious, designed to integrate with the retailer’s various offerings and make it easier to take advantage of the many services available to Amazon Prime members, along with more standard Android features. But for a phone focused on media consumption, the Fire Phone was undercooked and complicated, and its unique features just didn’t work well enough. Massive discounts began within months, and Amazon pulled the plug barely a year after launch.
Internet Explorer (1995-2015)
Internet Explorer (1995-2015)
The death of Microsoft Internet Explorer will probably be celebrated as the death of a tyrant by some PC users. Can it be that we’ve suffered for a full 20 years with good ol’ “Internet Exploder?” Designed as a competitor to Netscape—Netscape!—back in 1995, IE once boasted market share of over 90 percent, and as recently as 2009 still had a share of over 60 percent.
The dramatic rise of Chrome and, to a lesser extent, Safari killed IE, but the death blow has been delivered by Microsoft itself. While some of its code is still buried inside the guts of Windows 10, IE is effectively no more, replaced by Microsoft Edge—which was developed entirely separately from IE—as the default Windows browser. Microsoft has already announced restricted support plans for IE and will sunset it along with older versions of Windows.
NASA is bringing you even more closer to planet pluto, this time with a photograph that reveals the dwarf planet’s heart-shaped region called Tombaugh Regio – NASA of course, is not a stranger when it come to parading such images..
During New Horizons’ closest flyby in July, the probe’s Long Range Reconnaissance Imager (LORRI) zoomed in on the area and took photos within 9,550 miles of its surface. The stunning images of Pluto’s ‘heart of darkness’ were unveiled alongside two breathtaking animations showing flyovers of the plains and mountains of the frozen world.
‘I’m a little biased, but I think the solar system saved the best for last,’ New Horizons’ principle investigator, Alan Stern, said during the unveiling.
On July 14 the telescopic camera on NASA’s New Horizons spacecraft took the highest resolution images ever obtained of the intricate pattern of “pits” across a section of Pluto’s prominent heart-shaped region, informally named Tombaugh Regio. The image is part of a sequence taken by New Horizons’ Long Range Reconnaissance Imager (LORRI) as the spacecraft passed within 9,550 miles (15,400 kilometers) of Pluto’s surface, just 13 minutes before the time of closest approach. [Image credit: NASA/JHUAPL/SwRI]As you can see, Pluto’s heart is scarred with pits, which New Horizons’ scientists believe may have formed due to “a combination of ice fracturing and evaporation.” These pits seem to follow a pattern, and the team believes it could provide clues on the planet’s ice flow and the exchange of nitrogen between its surface and atmosphere. Whatever secrets the region reveals, this is now how I’ll imagine a scarred heart looks after a number of heartbreaks from now on.
A group of cyber activist has claimed that it downed Donald Trump’s website after the later said the United States government should ban muslims from entering the US. The statement has since triggered missed reaction around the globe including a threat YouTube video by Anonymous – a group of online activist allegedly fighting ISIS the cyber way – citing that Trump’s comments would help the Islamic State group recruit terrorists.
The site was unavailable during the early afternoon of Friday, and according to a media report had been down for about an hour earlier in the day. Around 9 a.m. Friday there, the Anonymous Twitter account @YourAnonNews posted tweets saying the group had taken down the site.
Trump Towers NY site taken down as statement against racism and hatred. https://t.co/n5ftLrOs1P (what you see is cloudflare offline backup)
In a video the group posted on YouTube, the cyber activist warned that “Donald Trump, think twice before you speak anything,”. The YouTube video was heavily modified to avoid voice detection.
Anonymous frequently hacks websites in the name of political causes and says it is engaged in a cyberwar against the Islamic State. It claims to have taken down thousands of Twitter accounts that support the group.
Earlier this week, Trump said the U.S. should bar all Muslims from entering the U.S. as a measure to prevent terror attacks, “until our country’s representatives can figure out what’s going on.” The statements drew widespread condemnation in the U.S. and elsewhere but support from some right-leaning commentators. An NBC/Wall Street Journal poll found 57 percent of Americans opposed the idea.
This isn’t the first time Anonymous has targeted Trump. In August, the group broke into Trump.com in order to leave a message to Jon Stewart as he was about to leave The Daily Show. As we await the group’s next move, they’ve already announced that Friday will be a day to troll ISIS.
Trump is the leading Republican candidate in the 2016 presidential election.
The buzz is real! Mozilla is putting an end to the development of Firefox OS for smartphone.
Following rumours and tweets in the social media, Techcrunch has published a post that confirms that Firefox OS will no longer be developed for smartphones. This unwillingness of Mozilla to continue their quest for mobile phone democracy which let you have an open, web-based framework that anyone could work with, instead of closed platforms and apps was triggered due to the team’s inability to deliver “best user experience possible”, the statement reads.
“We are proud of the benefits Firefox OS added to the Web platform and will continue to experiment with the user experience across connected devices. We will build everything we do as a genuine open source project, focused on user experience first and build tools to enable the ecosystem to grow.
Firefox OS proved the flexibility of the Web, scaling from low-end smartphones all the way up to HD TVs. However, we weren’t able to offer the best user experience possible and so we will stop offering Firefox OS smartphones through carrier channels.
We’ll share more on our work and new experiments across connected devices soon.”
Although the mobile OS was massively use in some part of Africa and South America, mostly because of its price, the brand was unable to maintain their stand in the smartphone market with other cheaper alternatives emerging from every corners of the world.
However, Mozilla has maintained that they are still willing to “experiment” with the software on smart devices — they just won’t be the kind of devices that make phone calls.
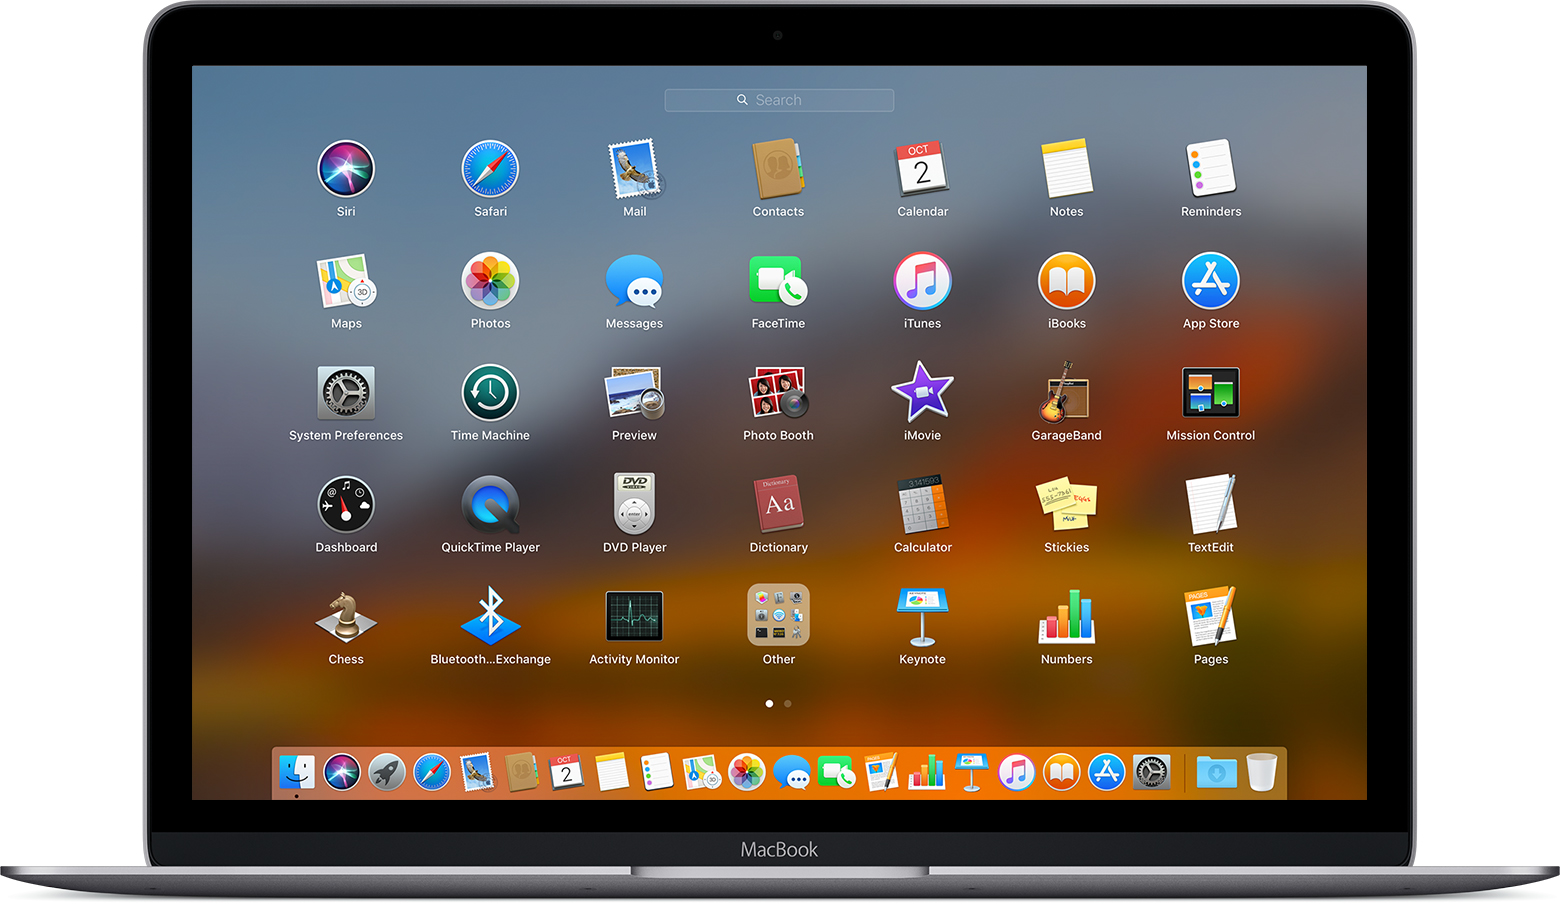
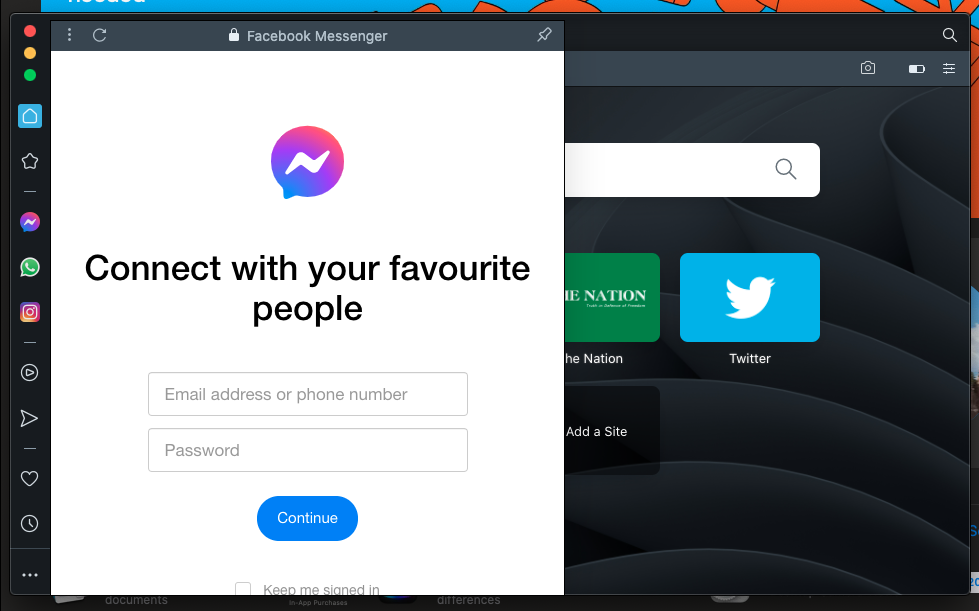
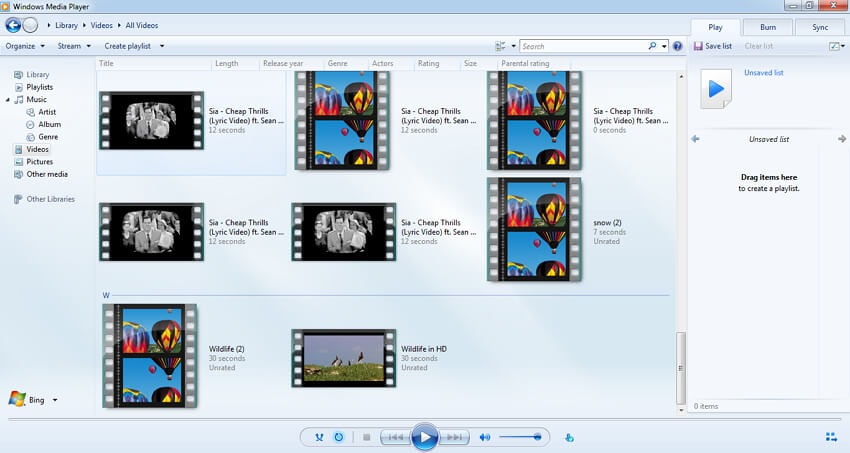

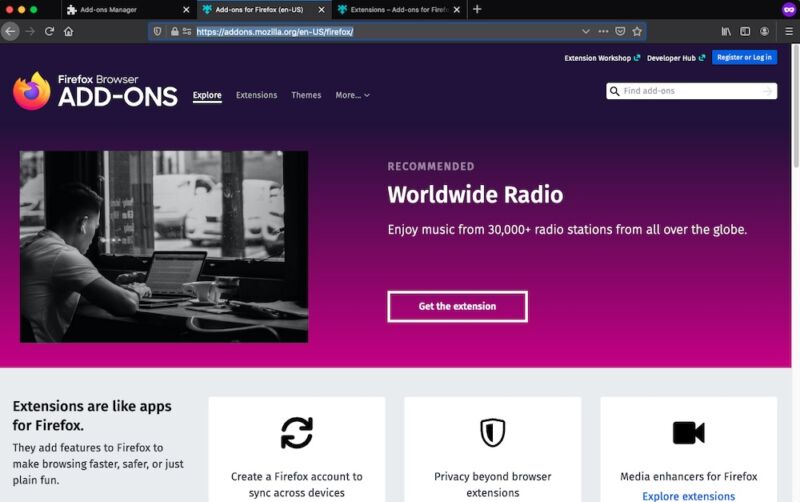
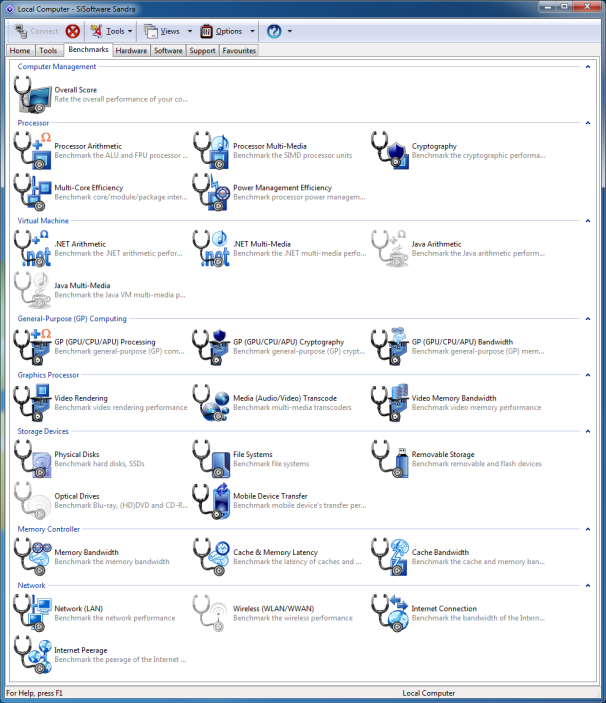
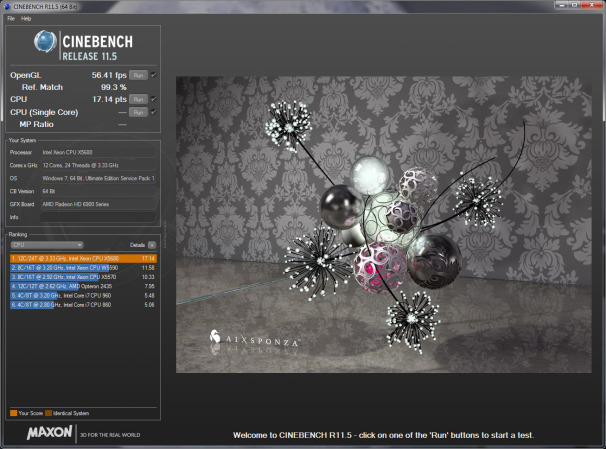 Maxon’s Cinebench, based on the company’s Cinema 4D animation software, tests single-threaded and multithreaded CPU performance.
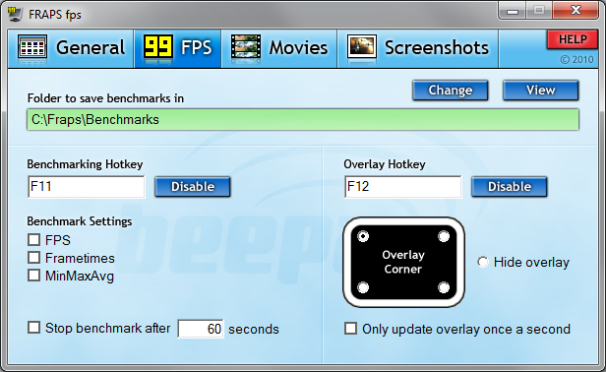 Fraps tests how well a game is performing on your system, even if the game doesn’t offer a built-in benchmark.
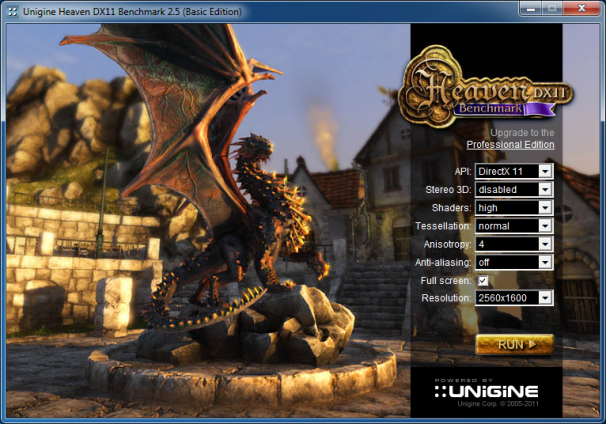 The Unigine Heaven benchmarking tests GPU performance in multiple DirectX or OpenGL modes.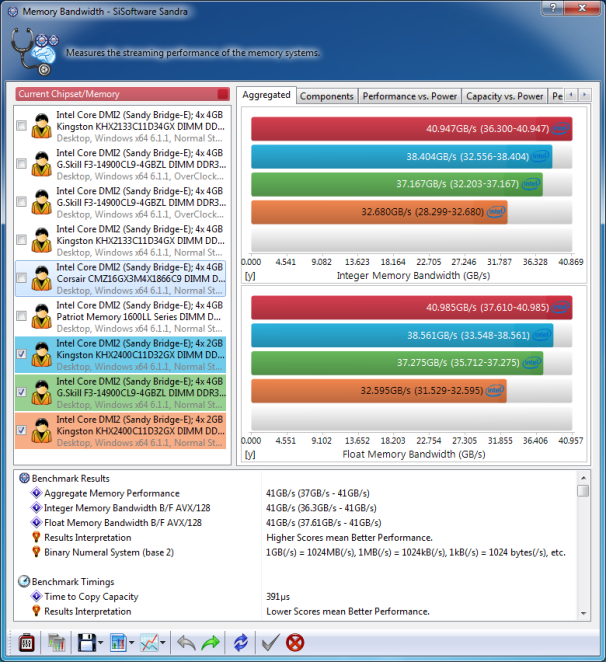
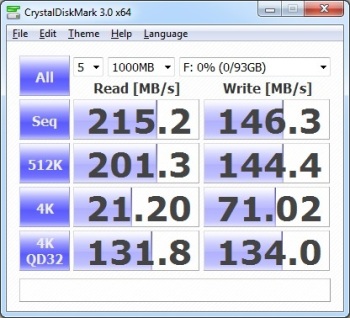 CrystalDIskMark is an excellent tool for testing a drive’s read and write performance at several different transfer sizes.
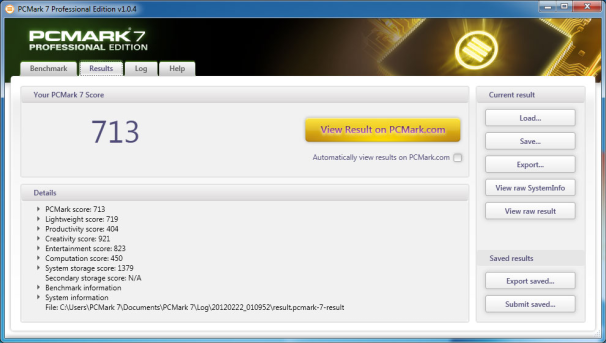 Futuremark’s PCMark 7 evaluates system performance by testing CPU, GPU, memory, and storage subsystem performance.


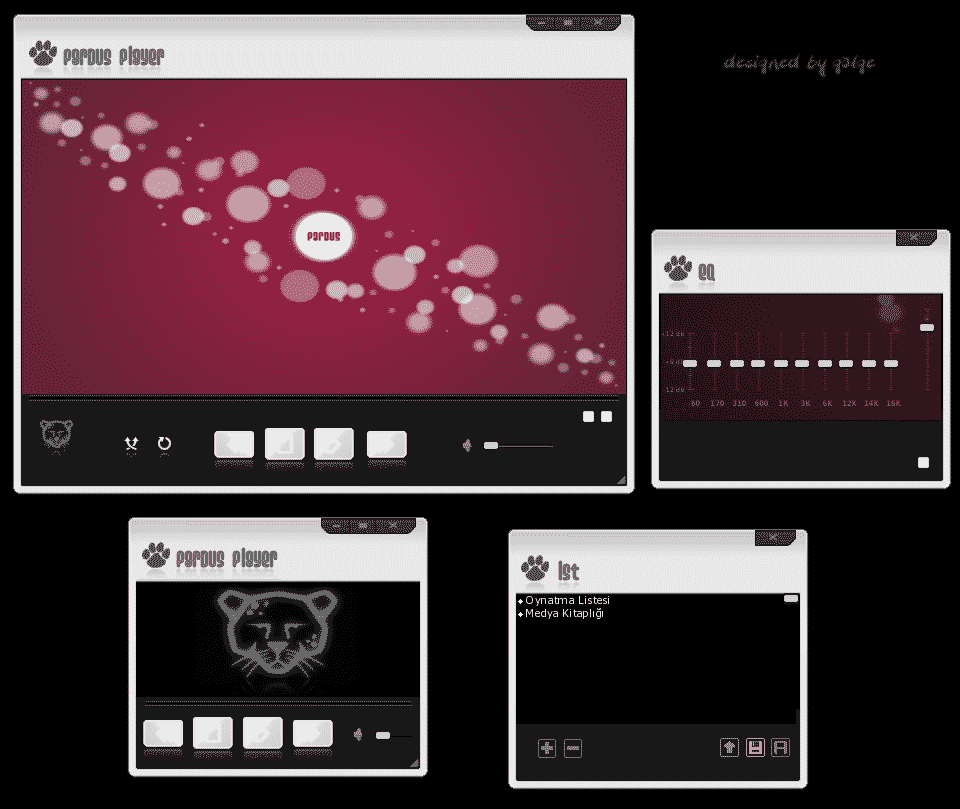


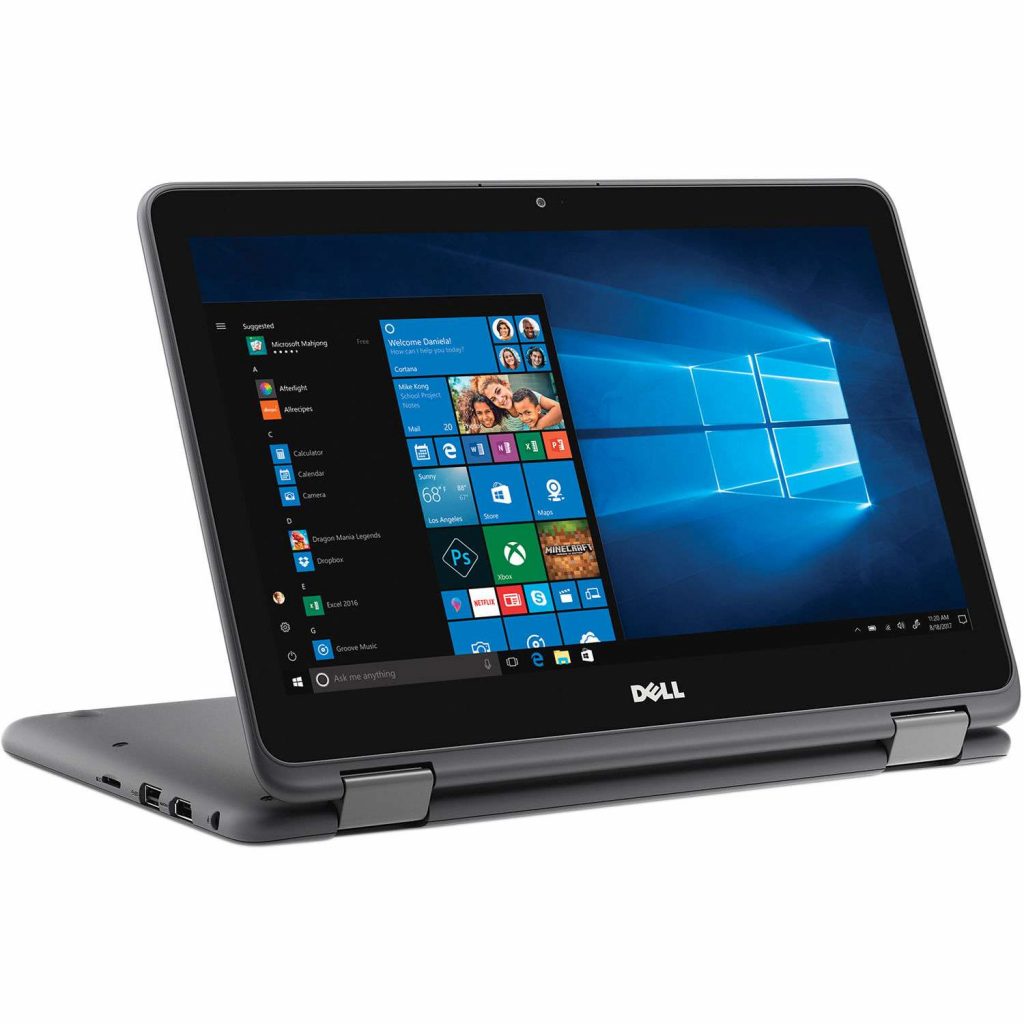
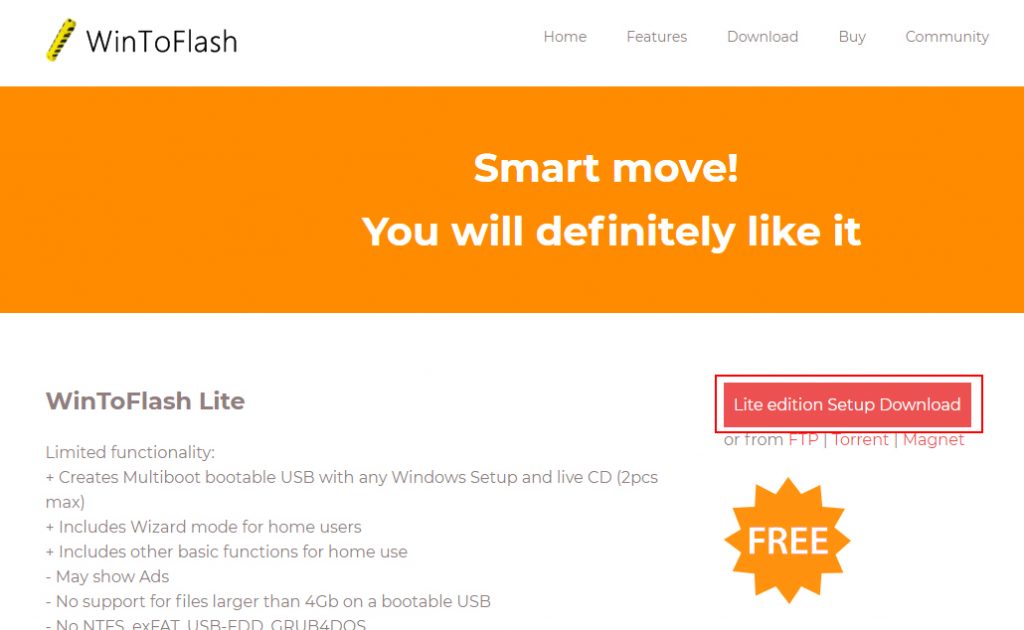
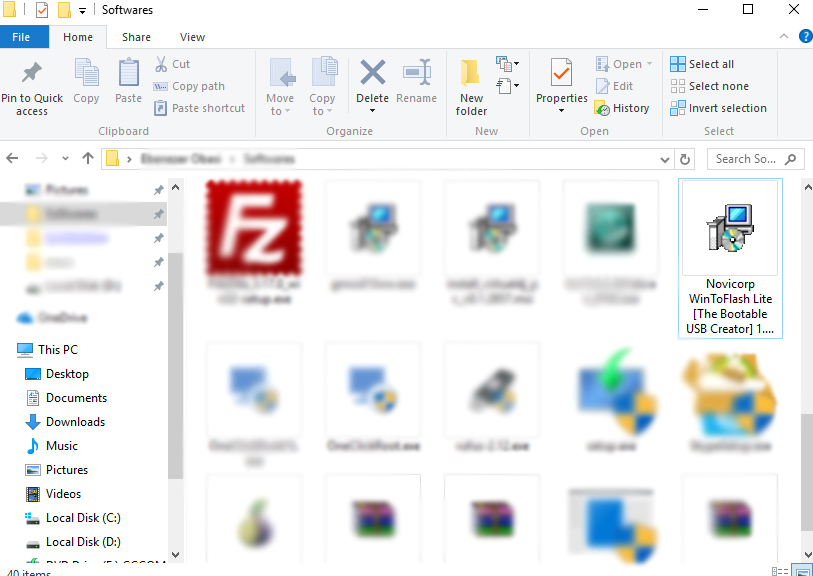
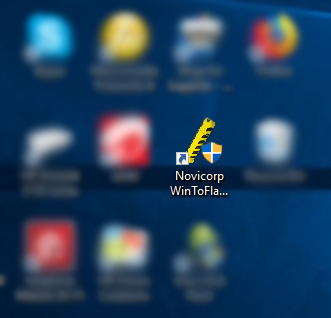
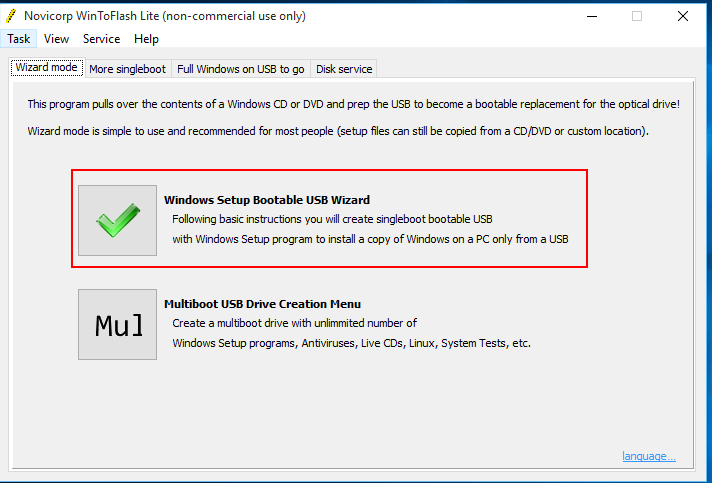
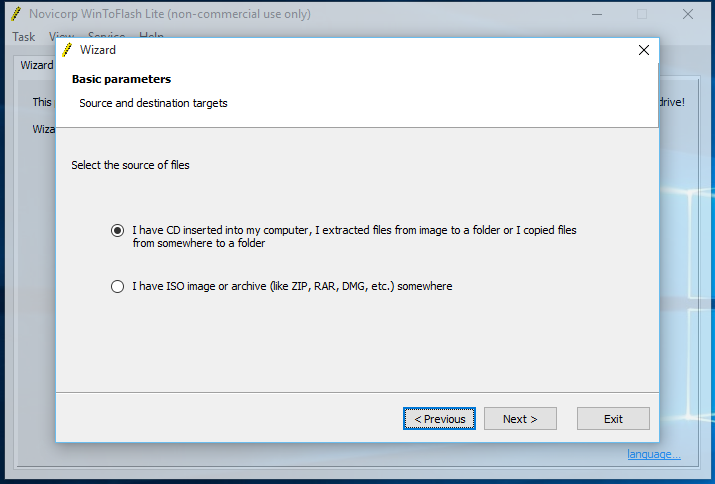
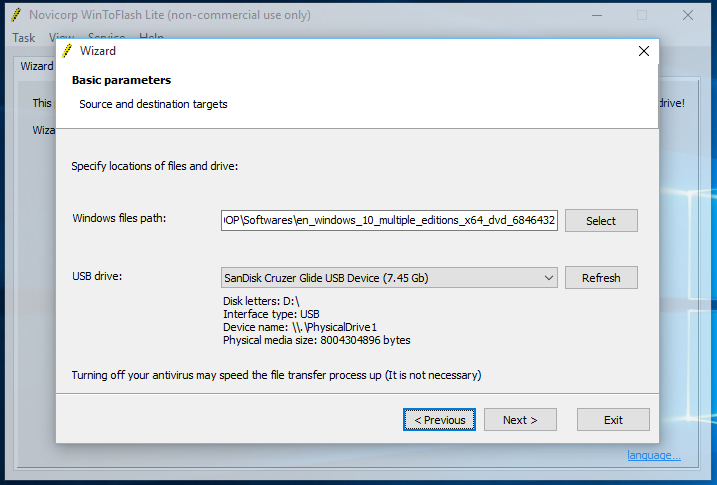
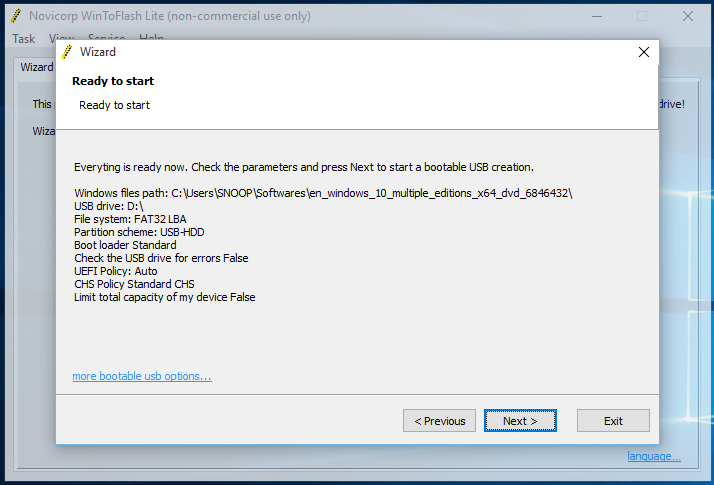
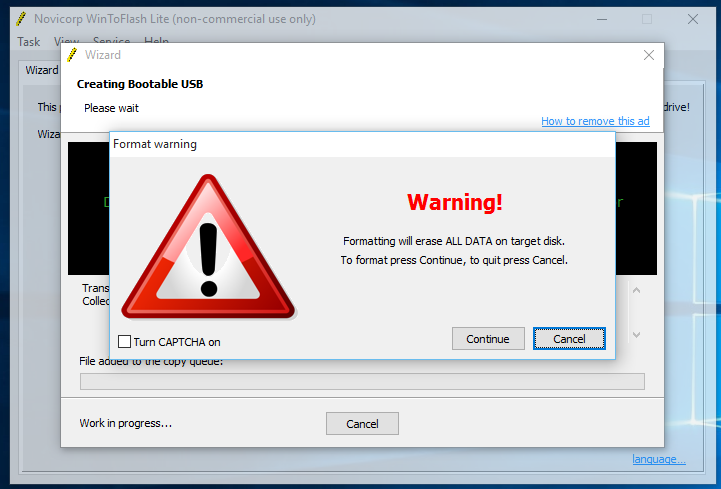
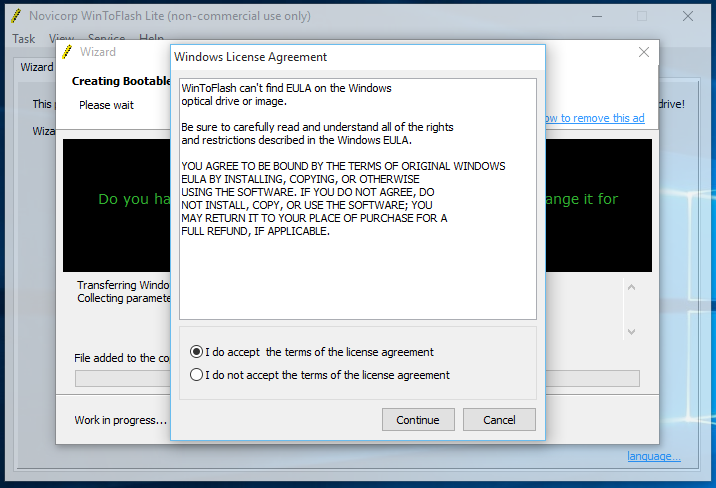
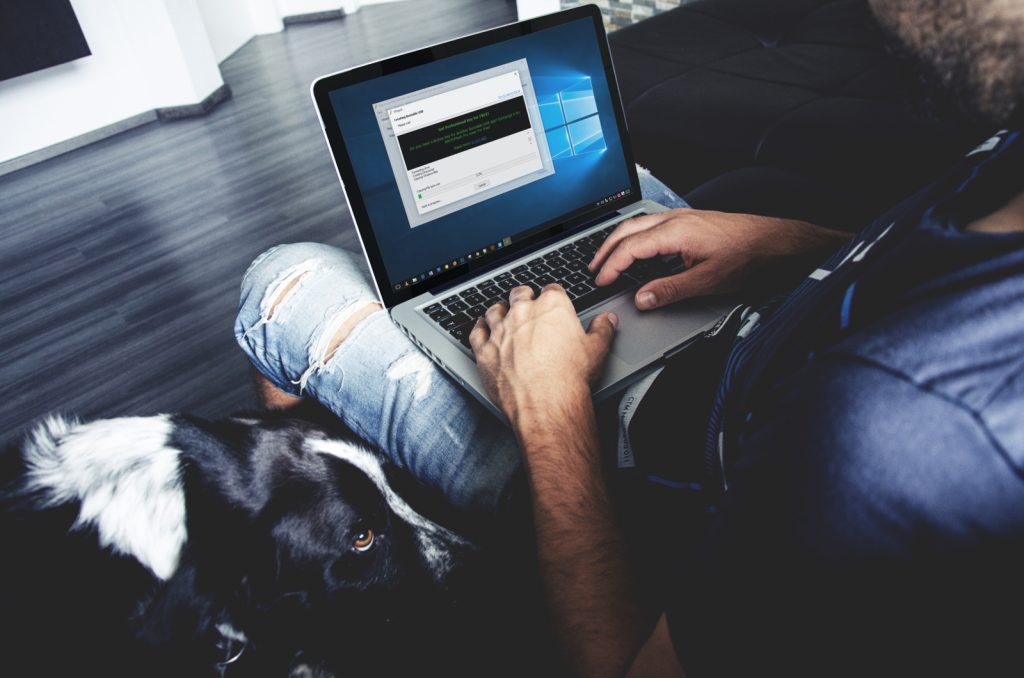
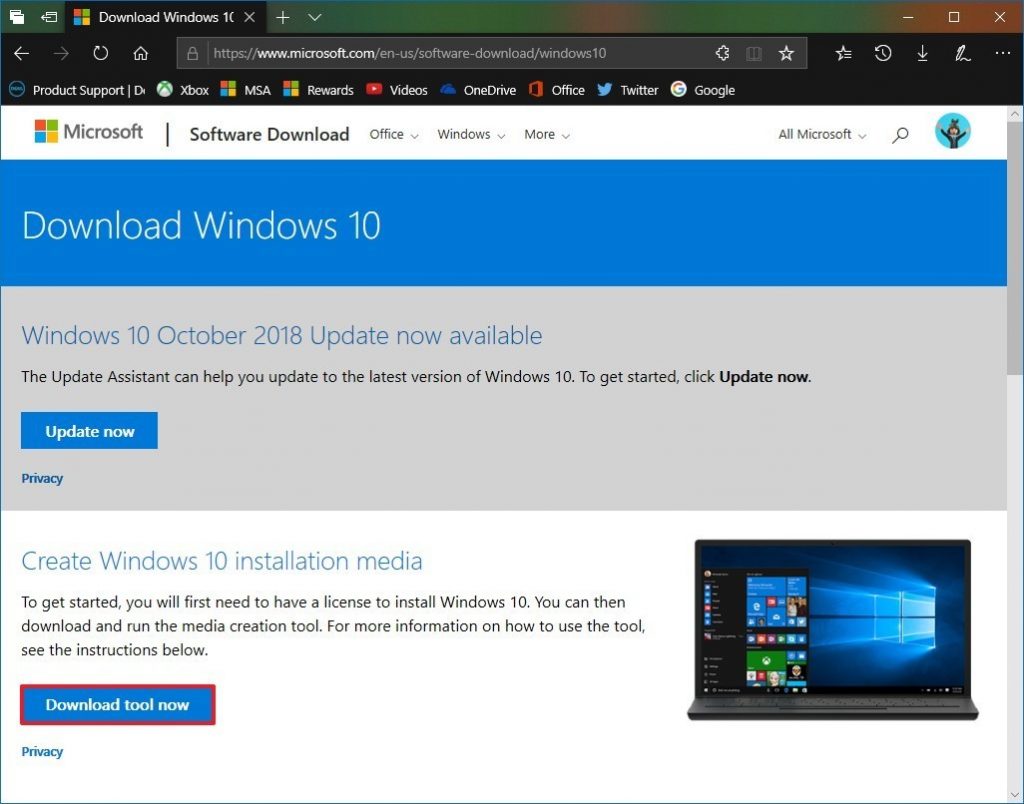
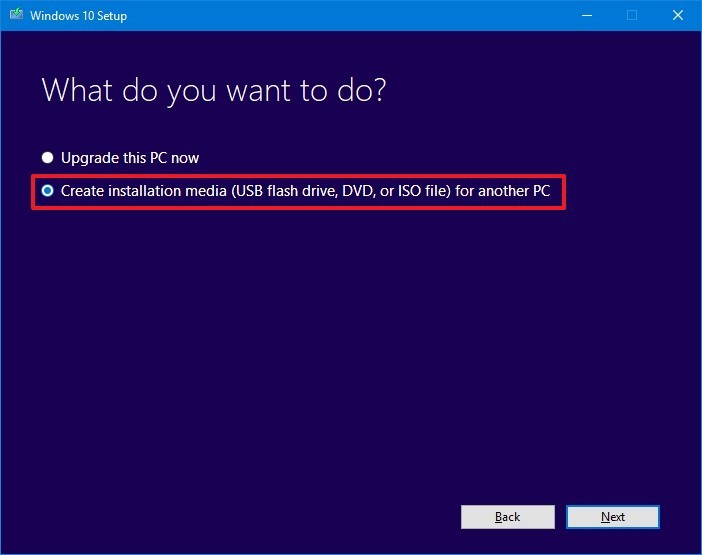
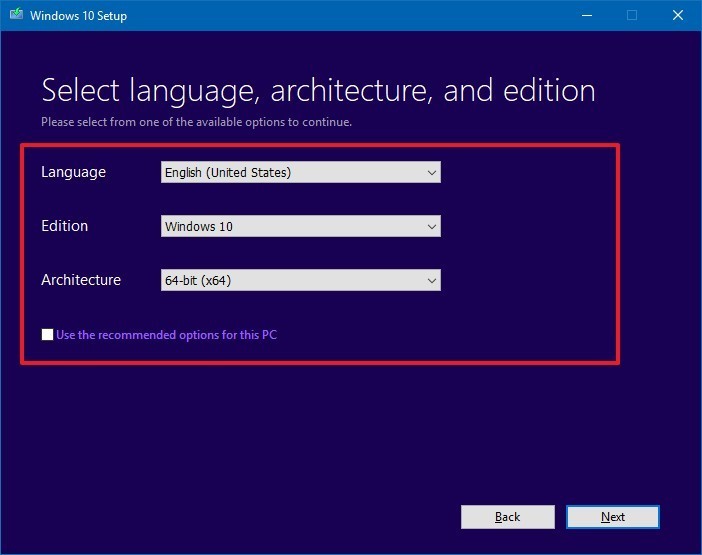
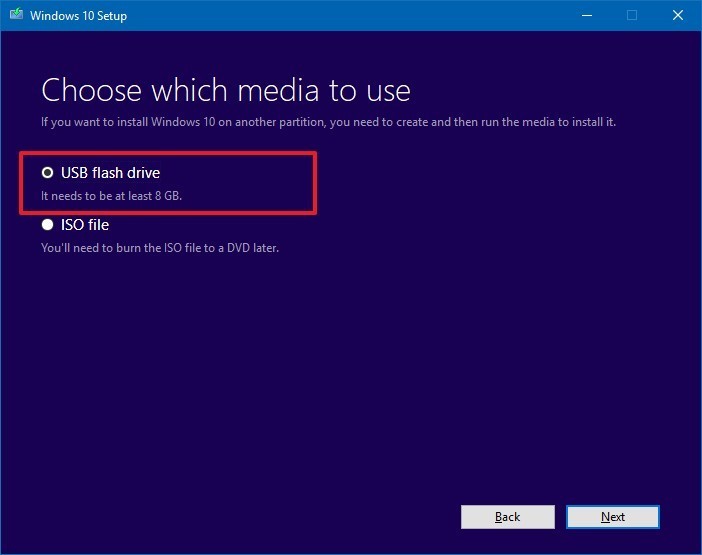
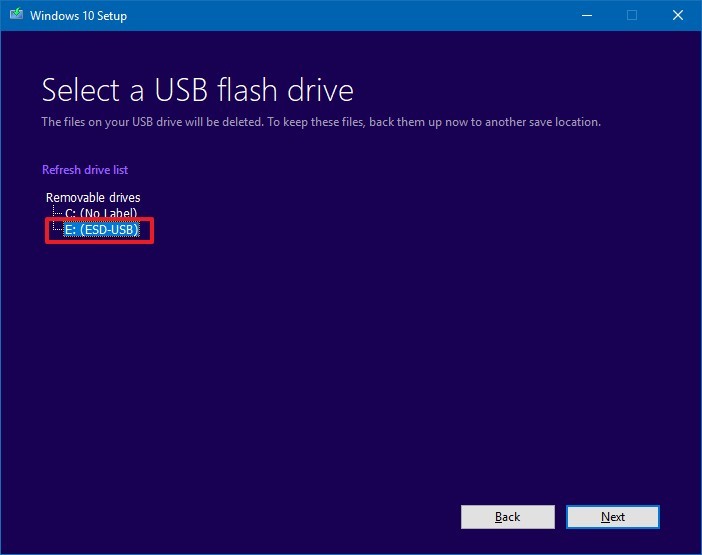
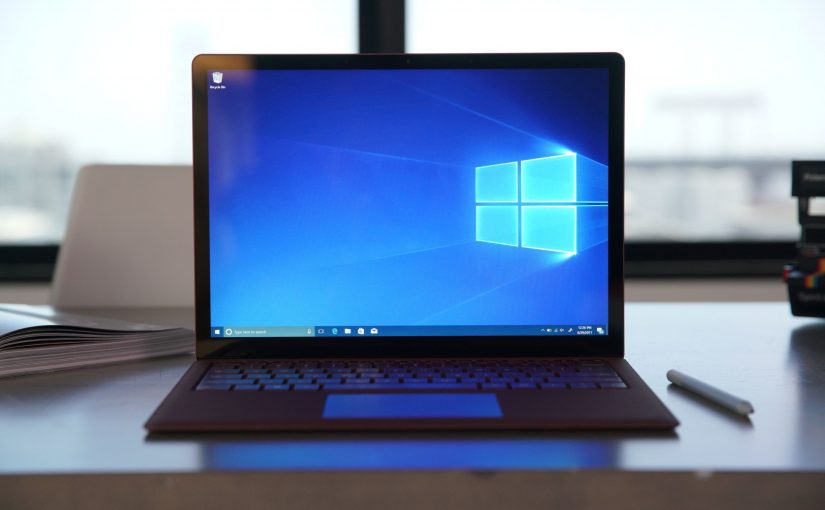


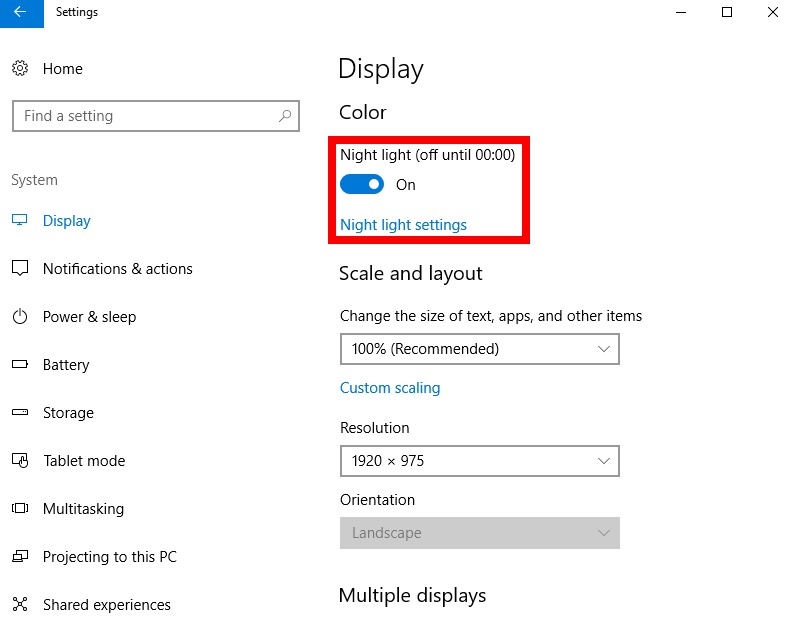
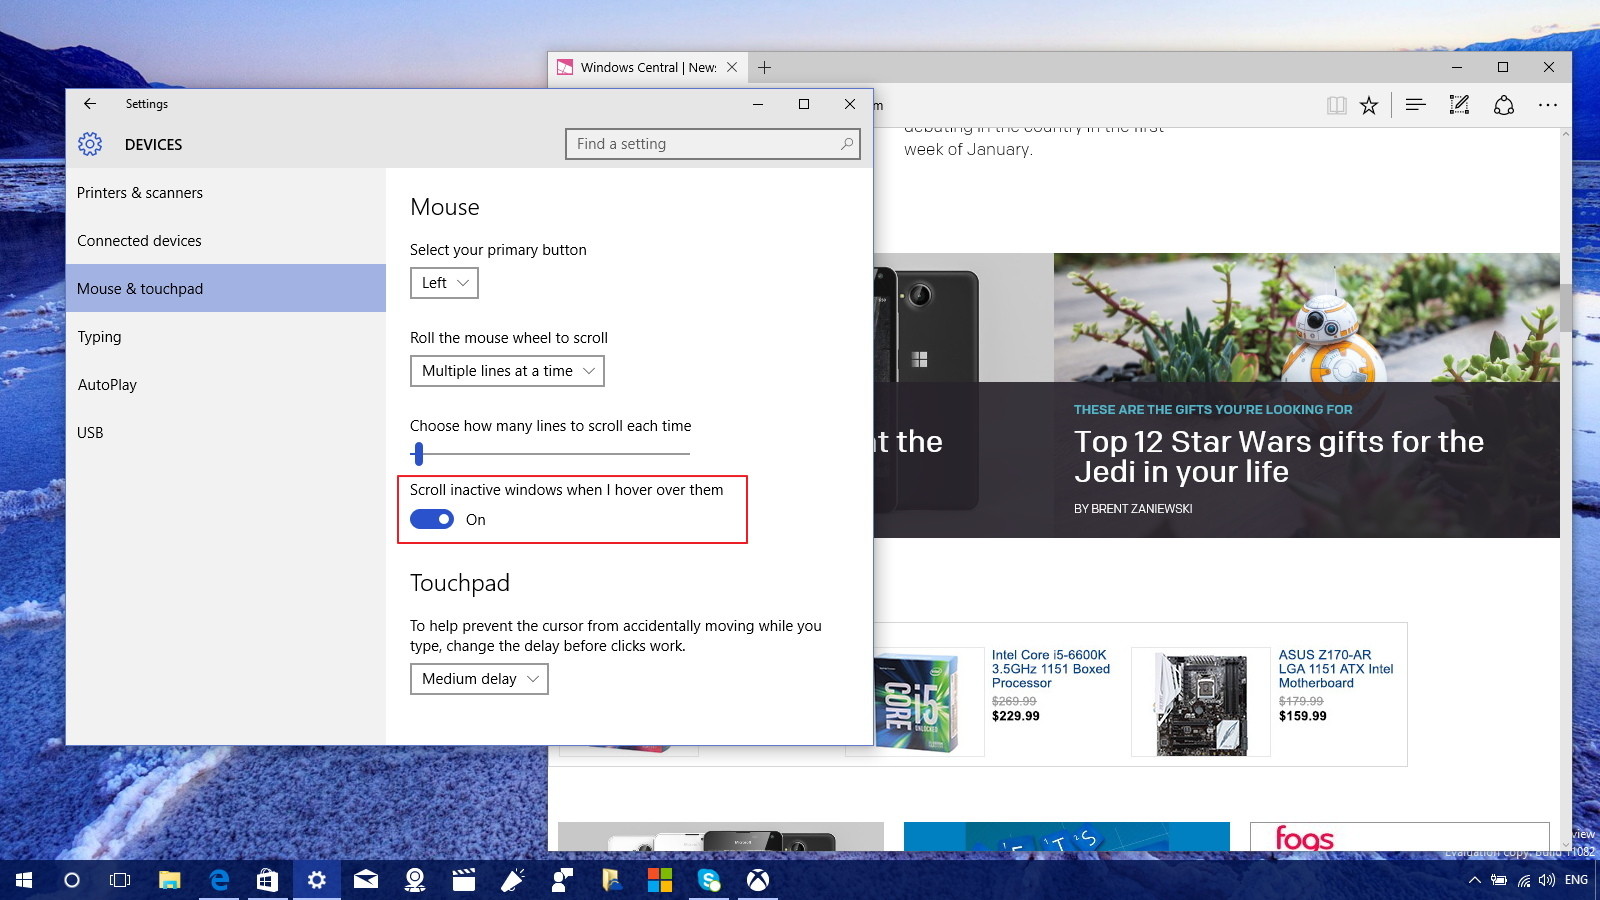
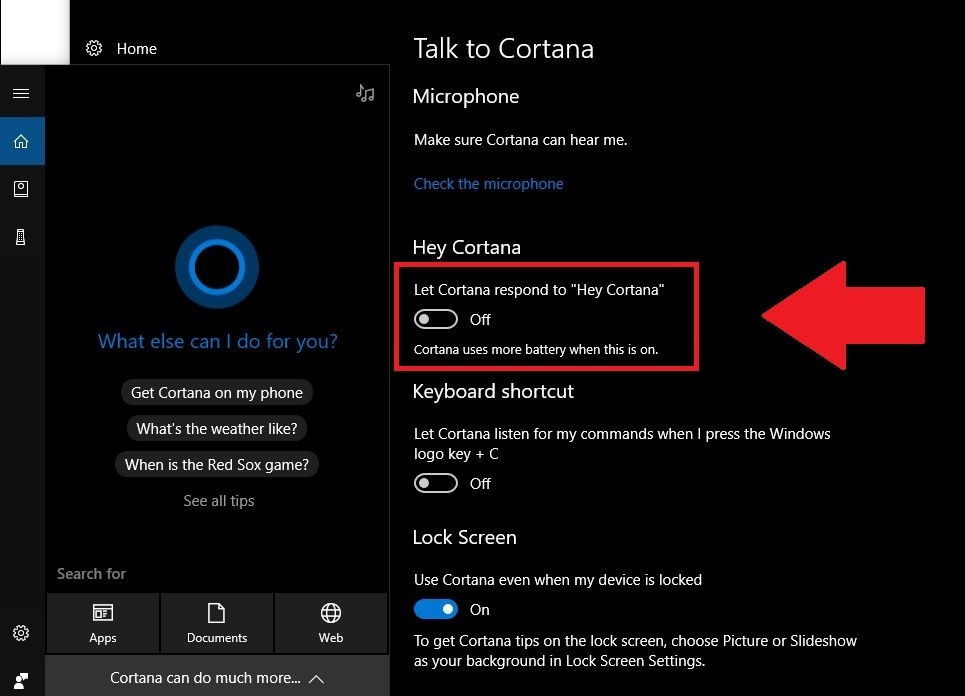
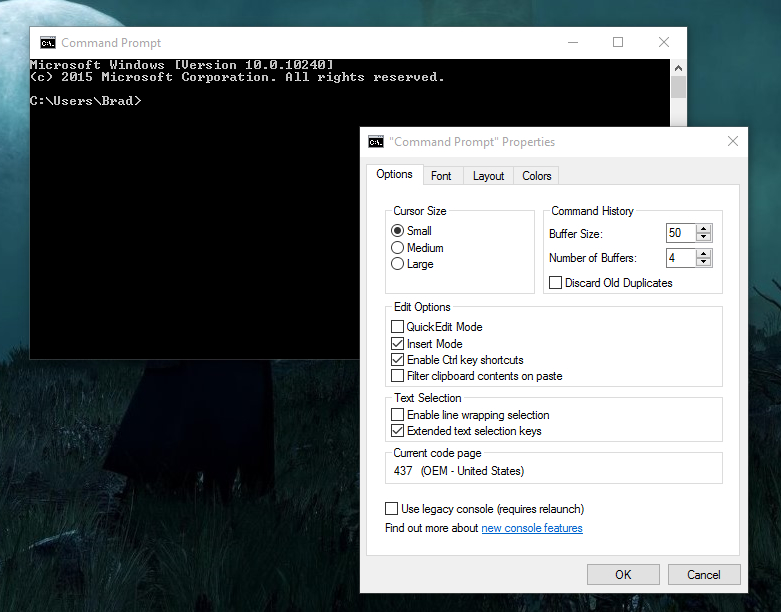
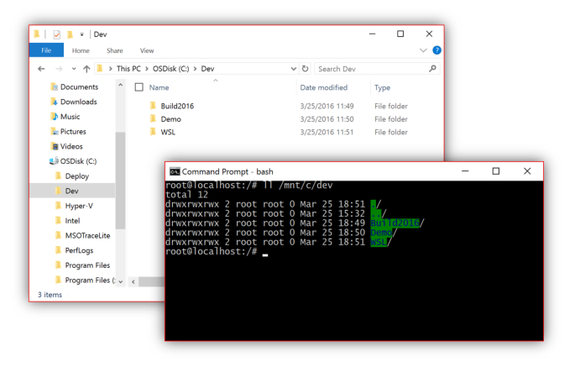
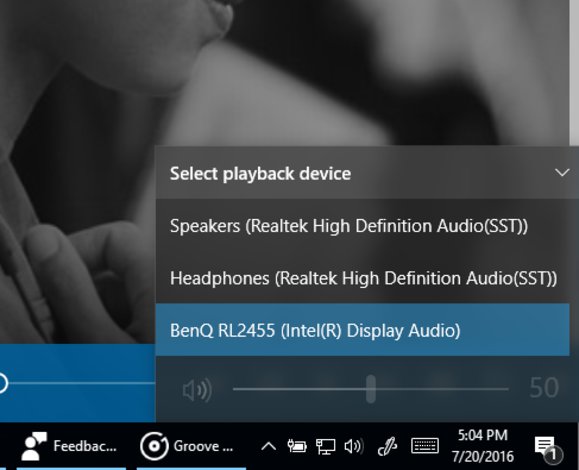
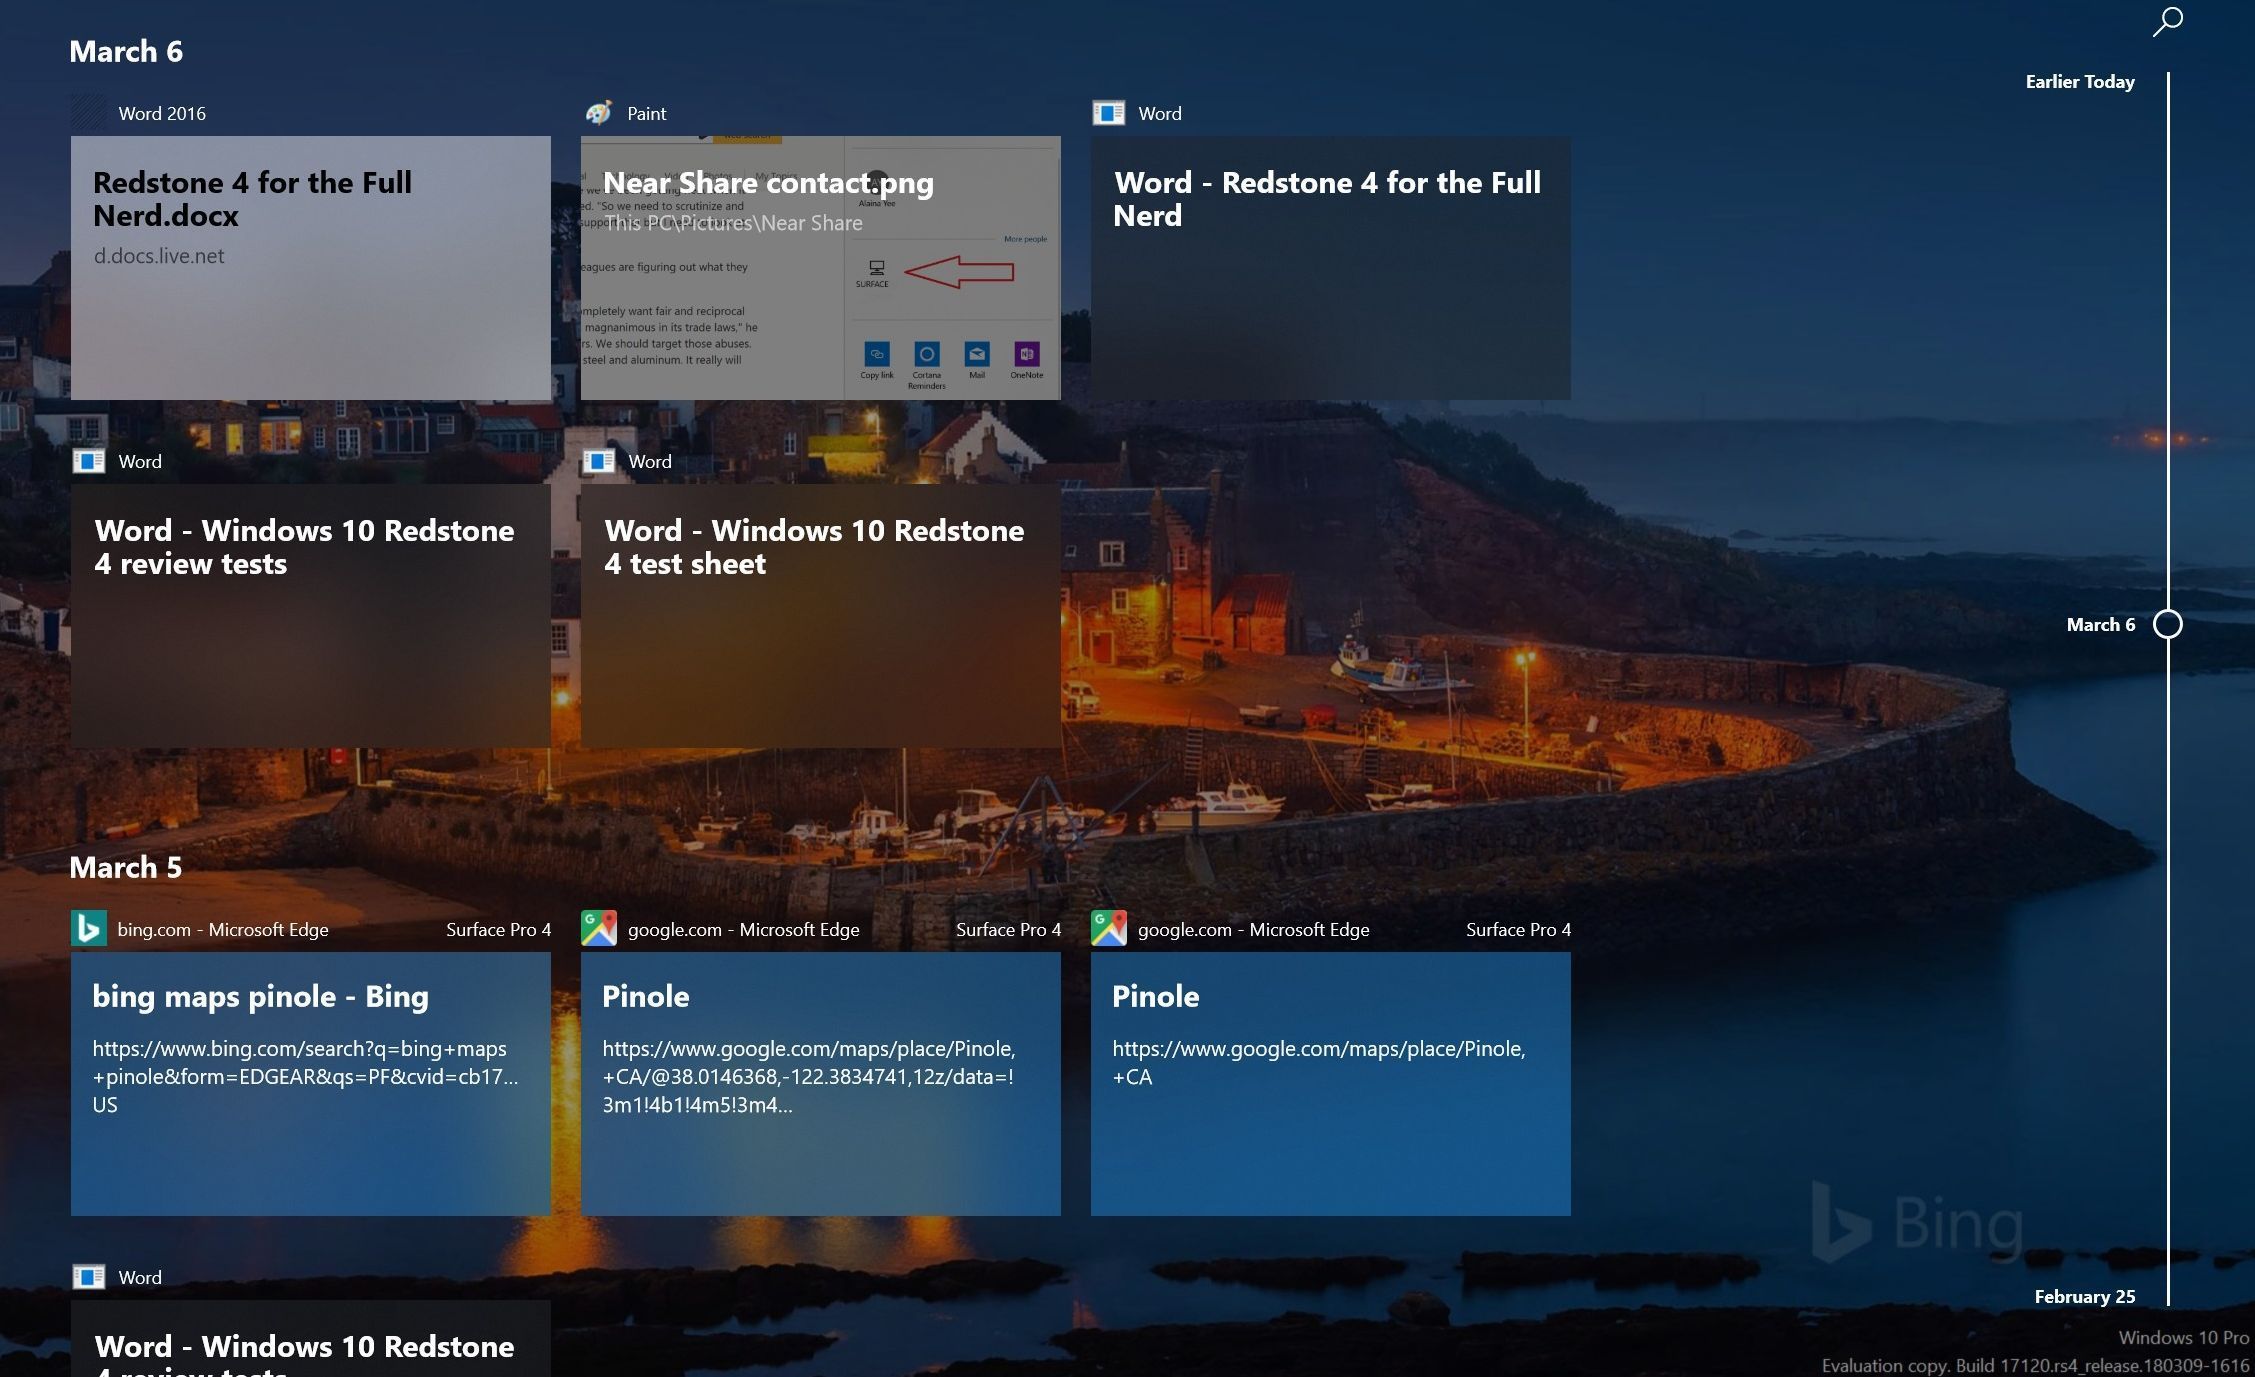
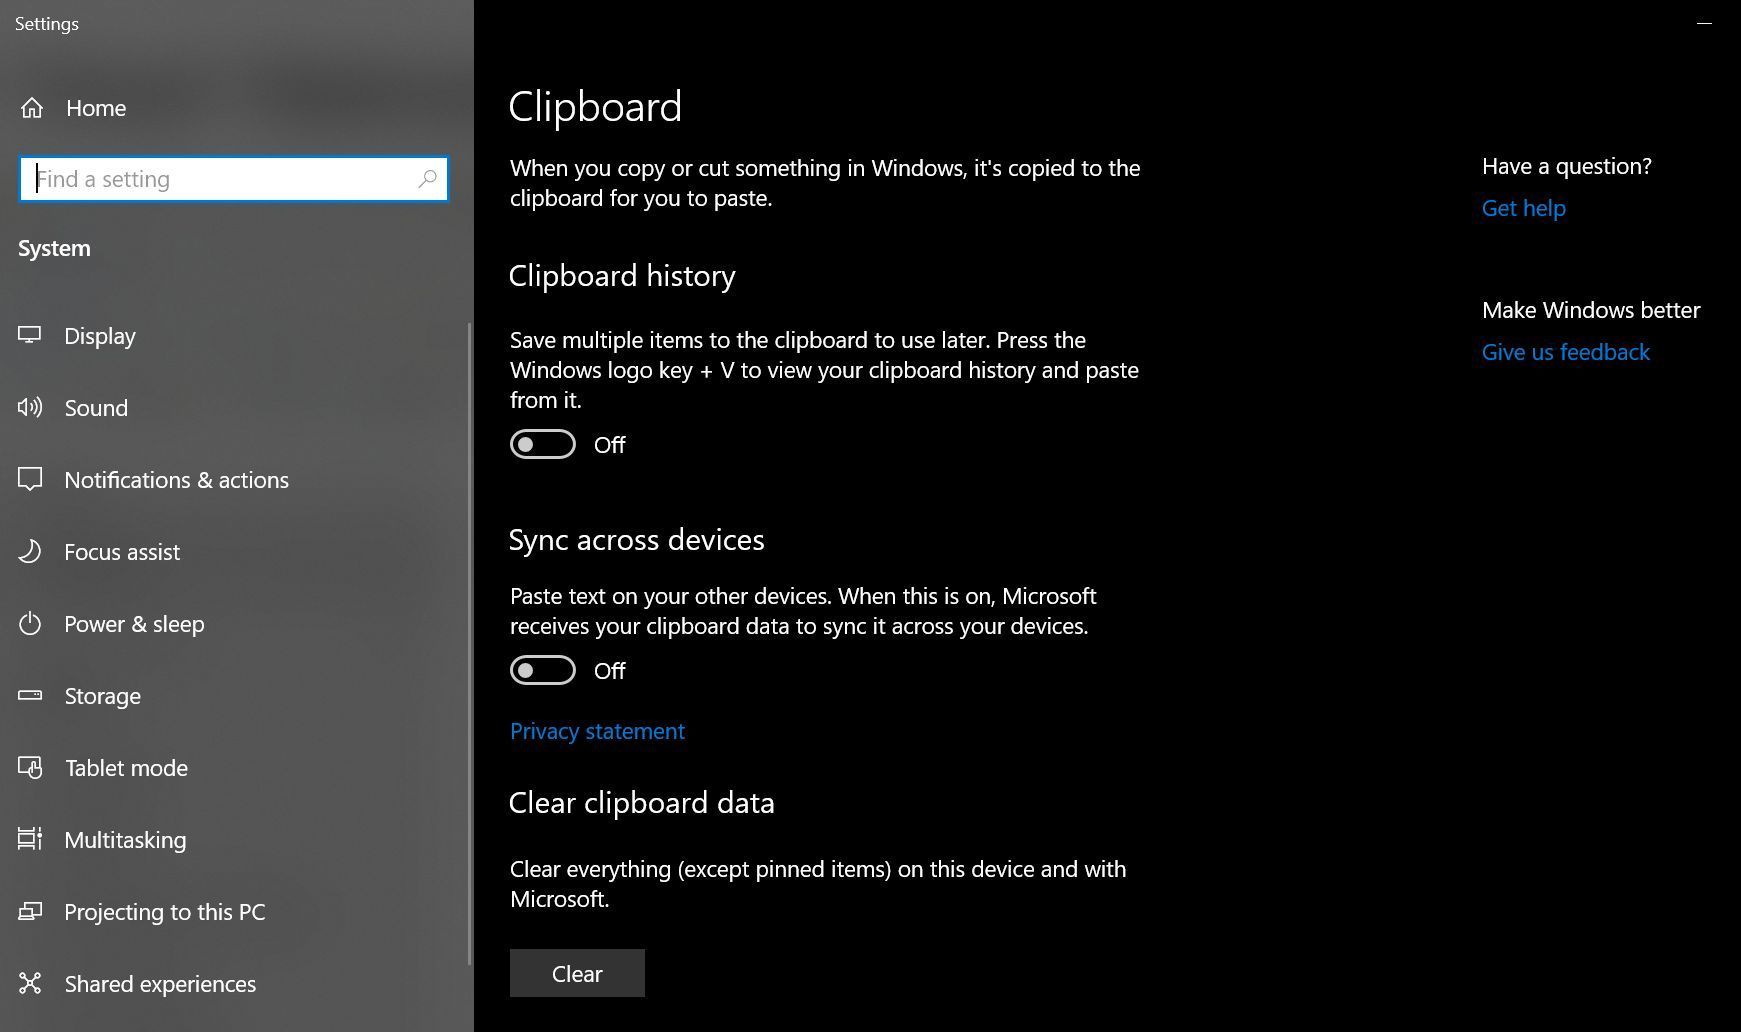
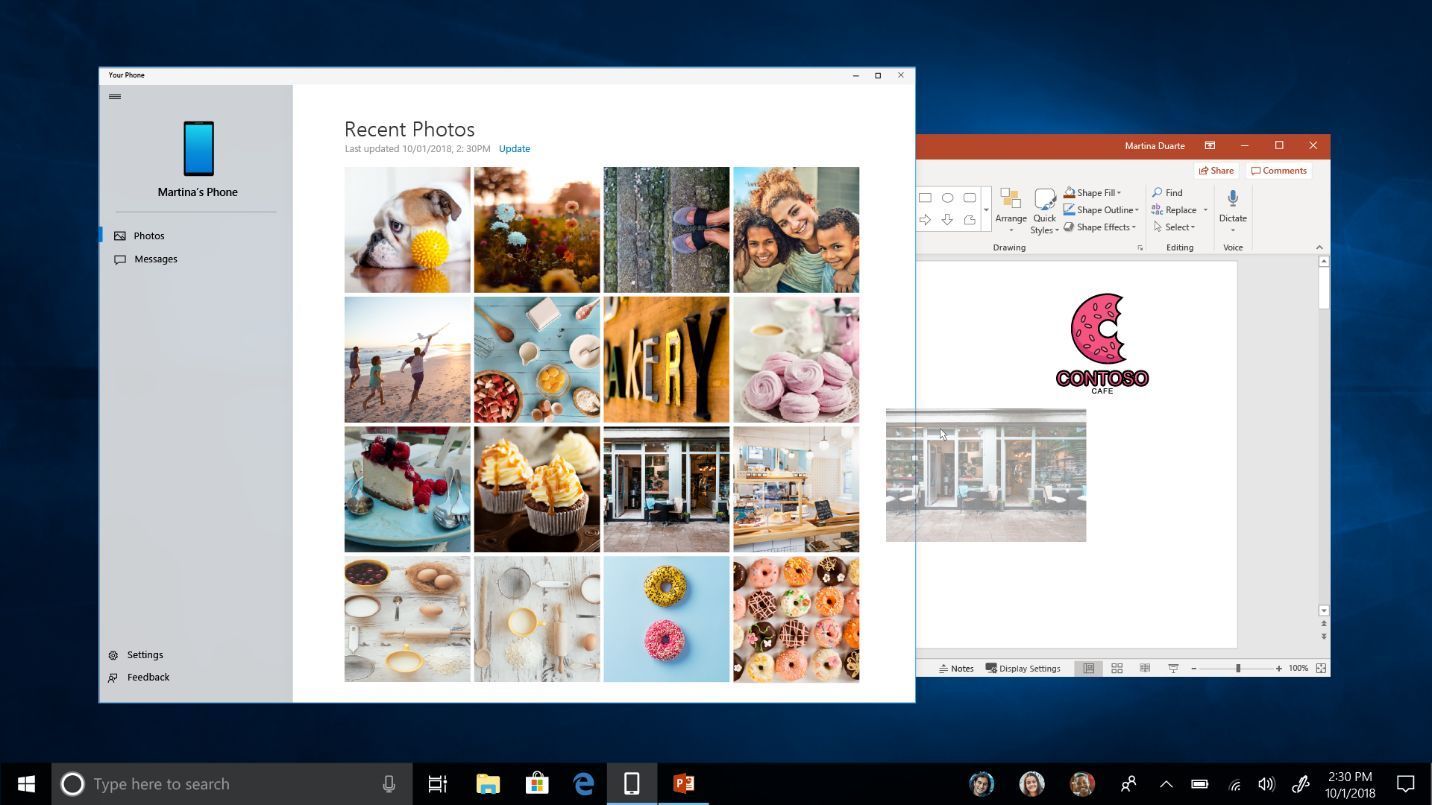
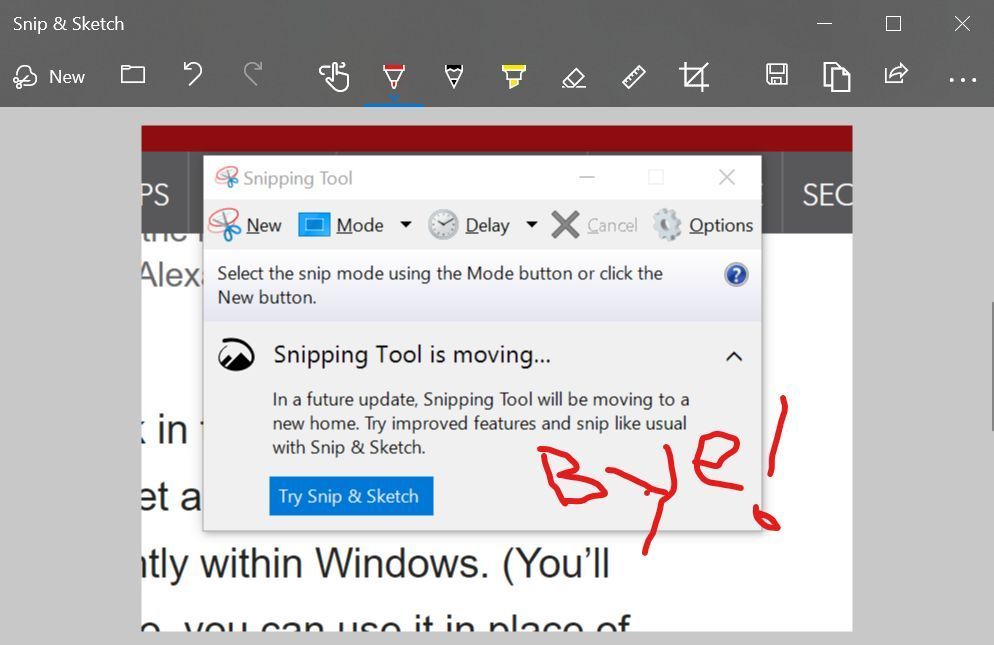
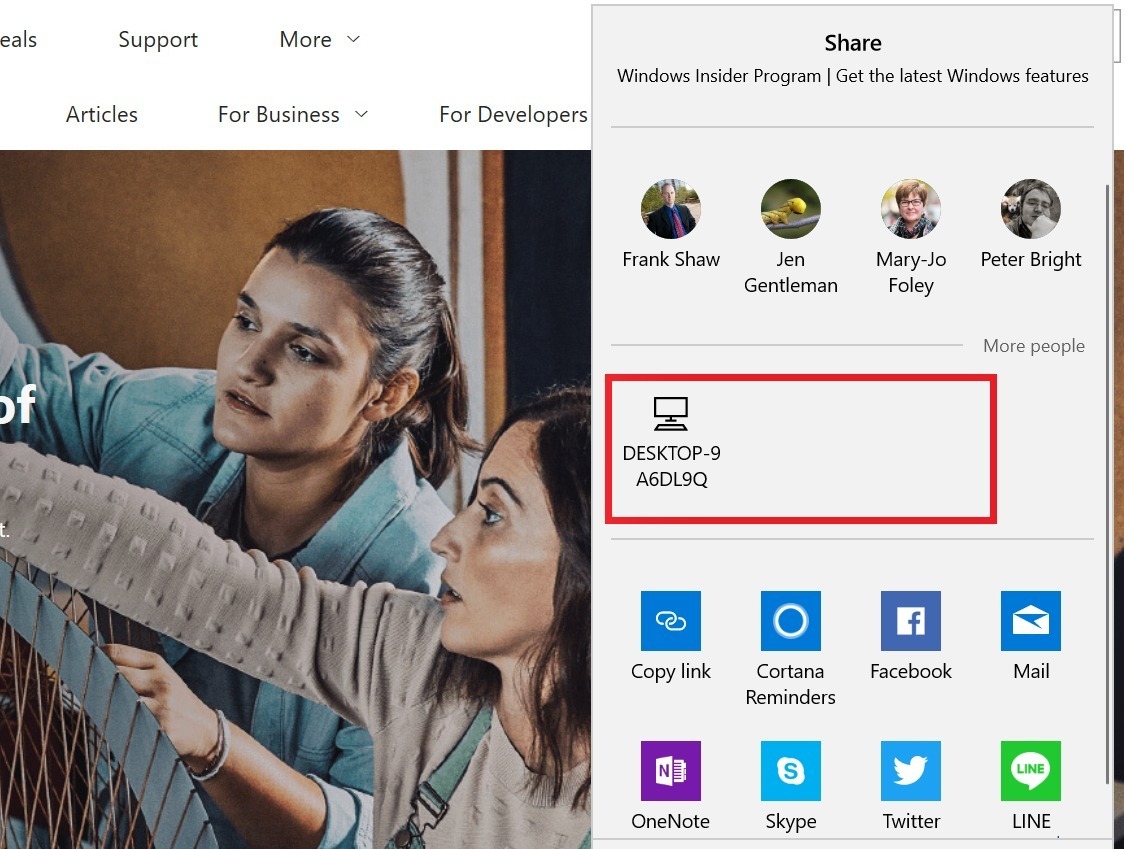
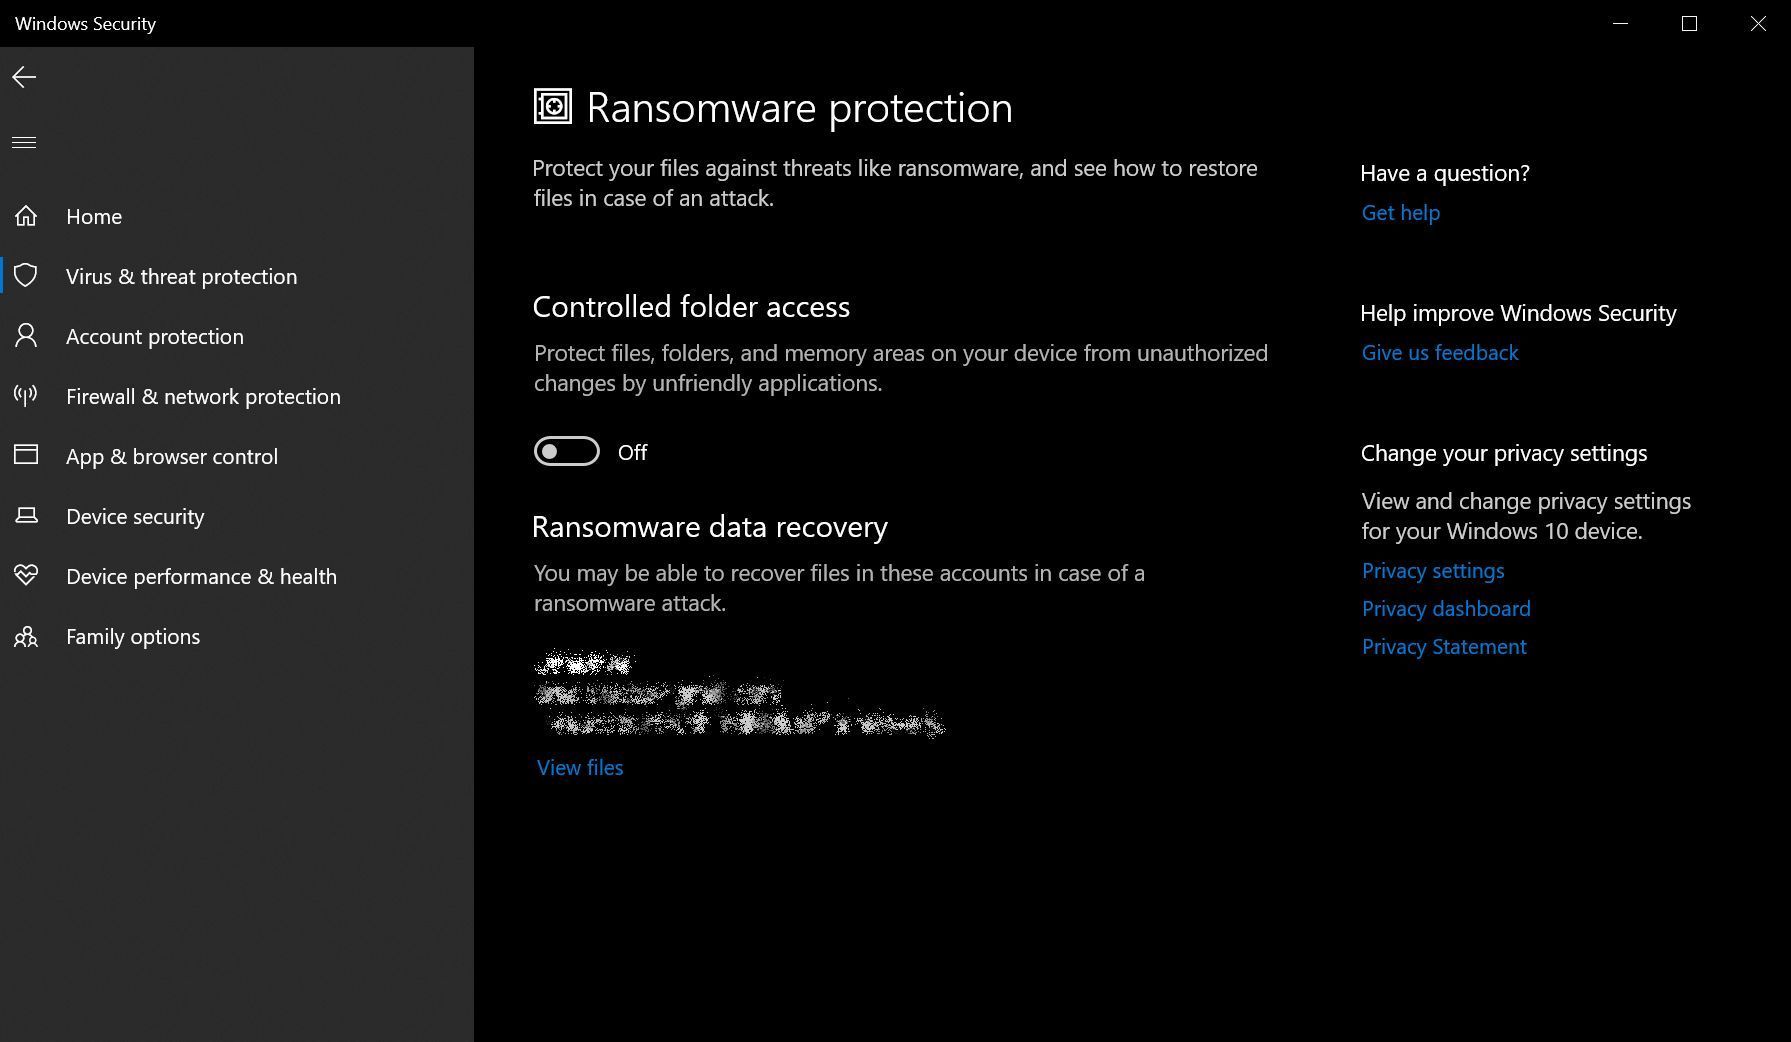
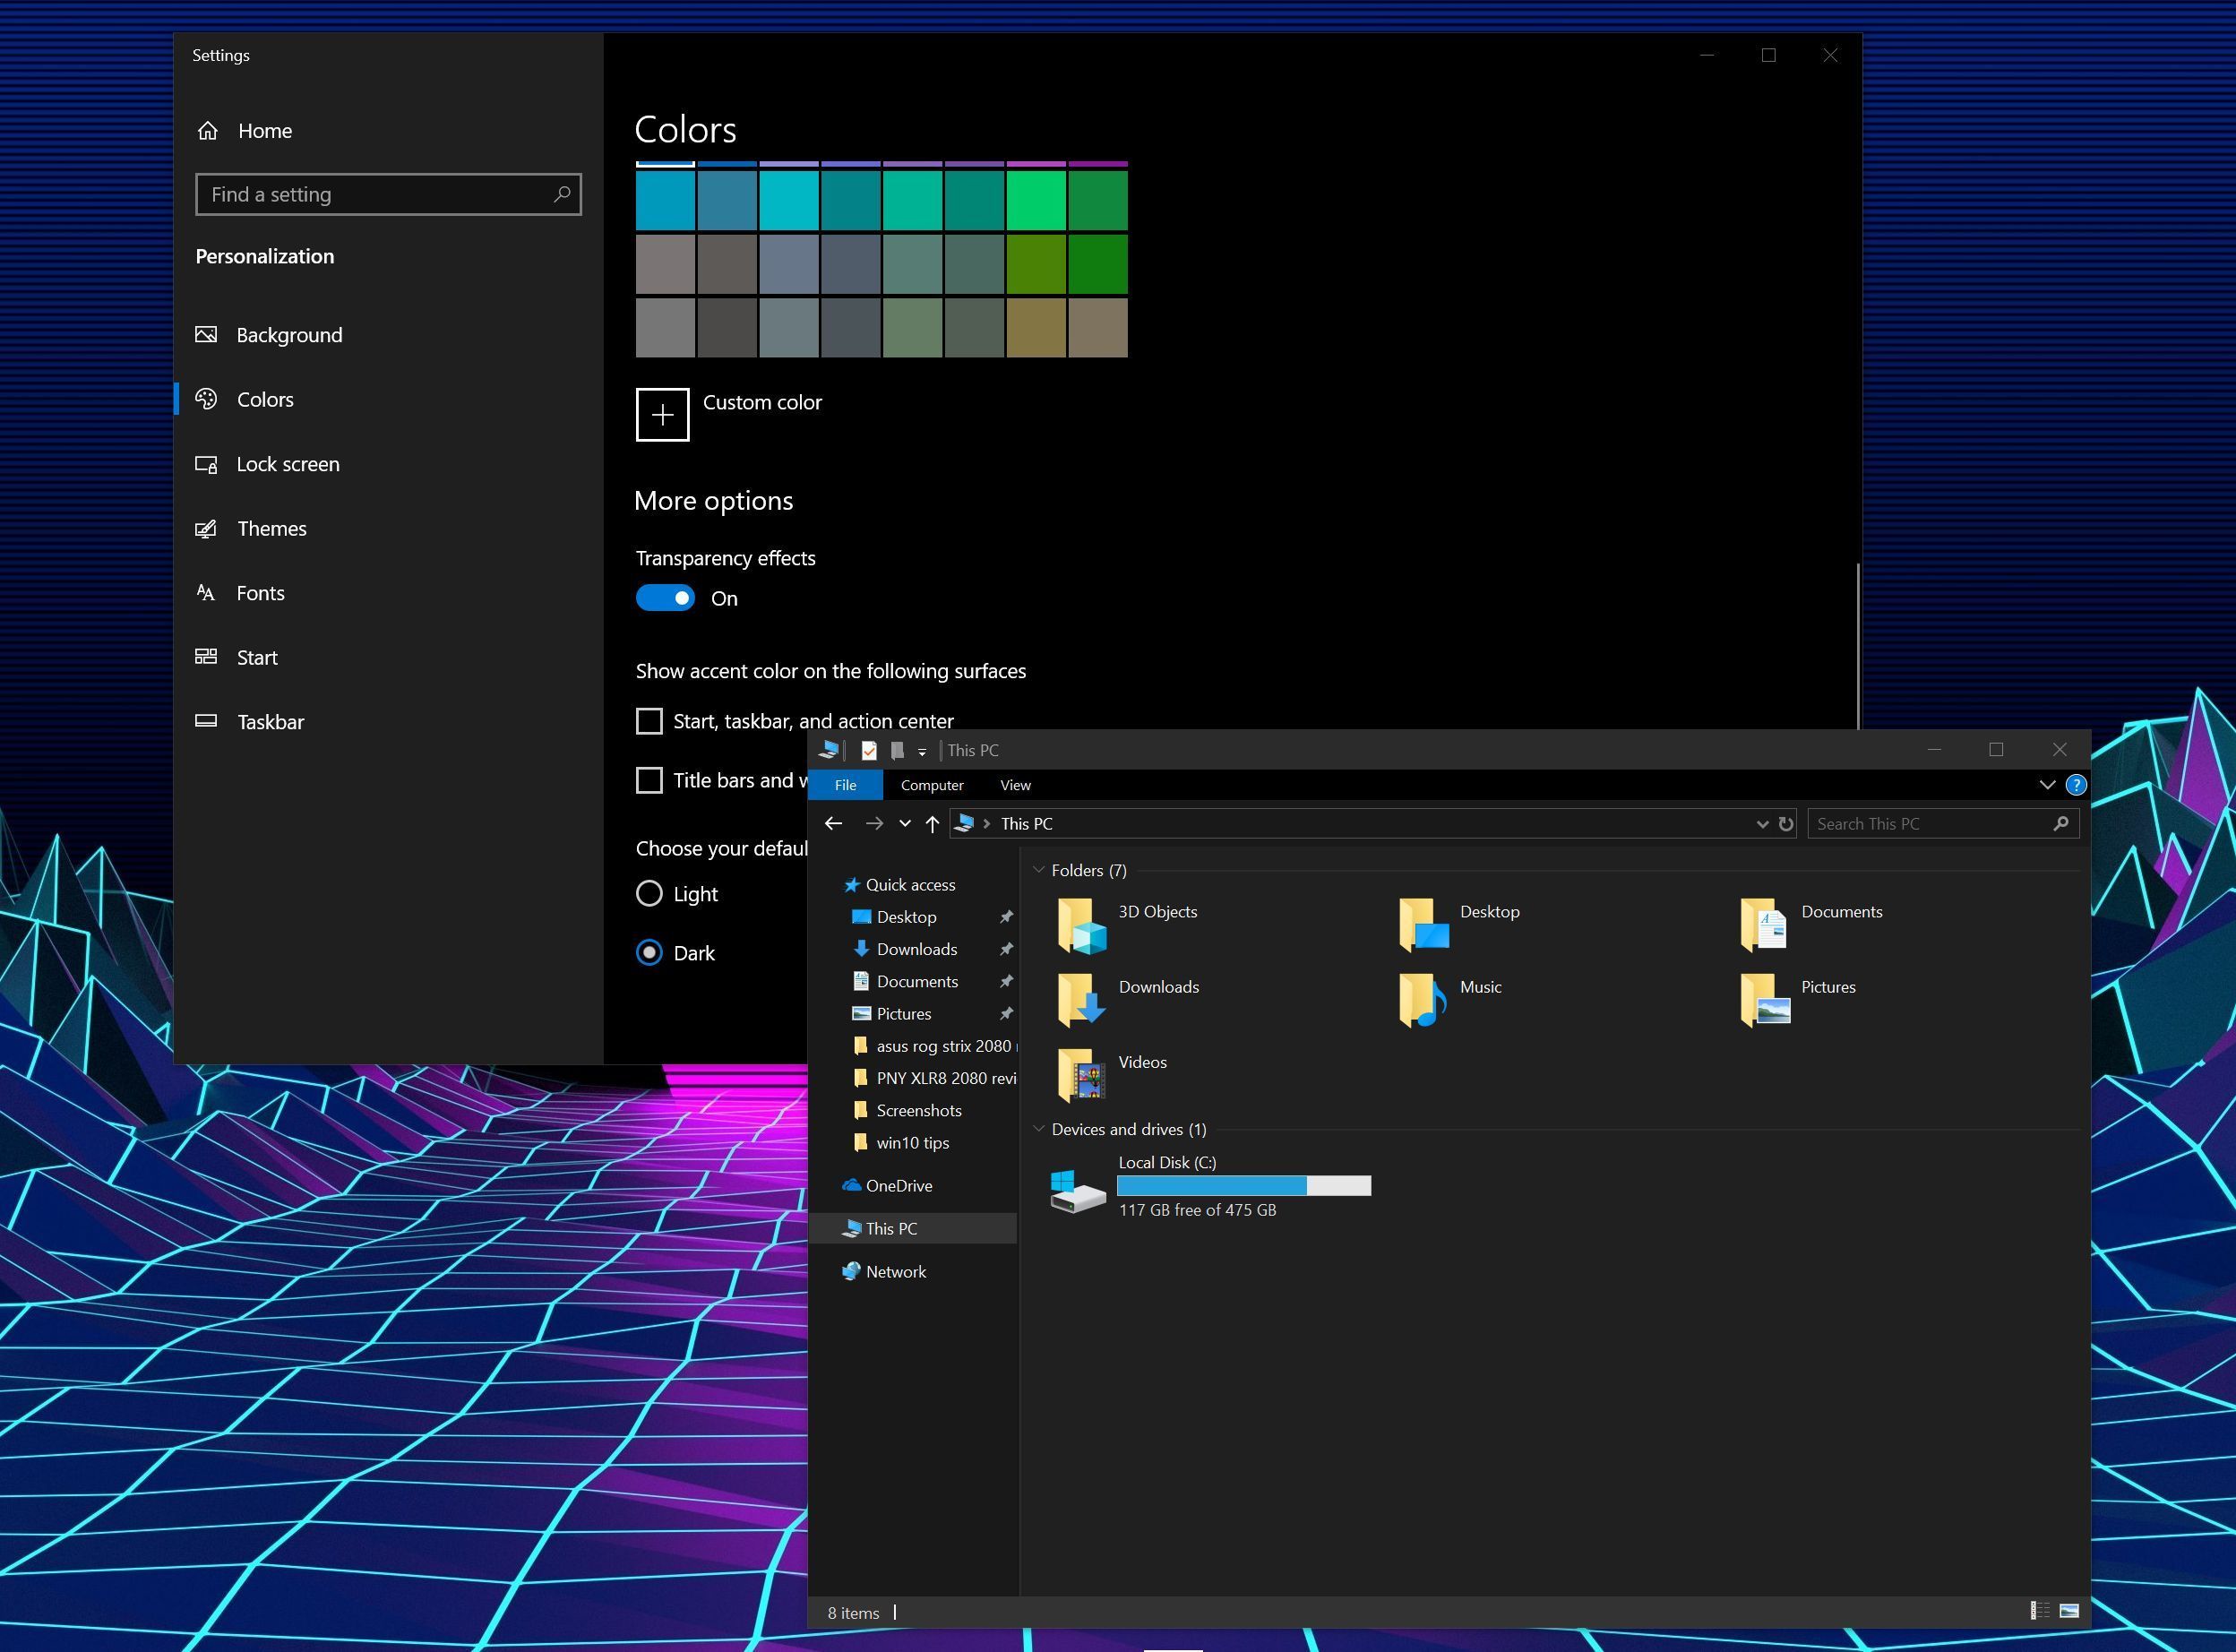
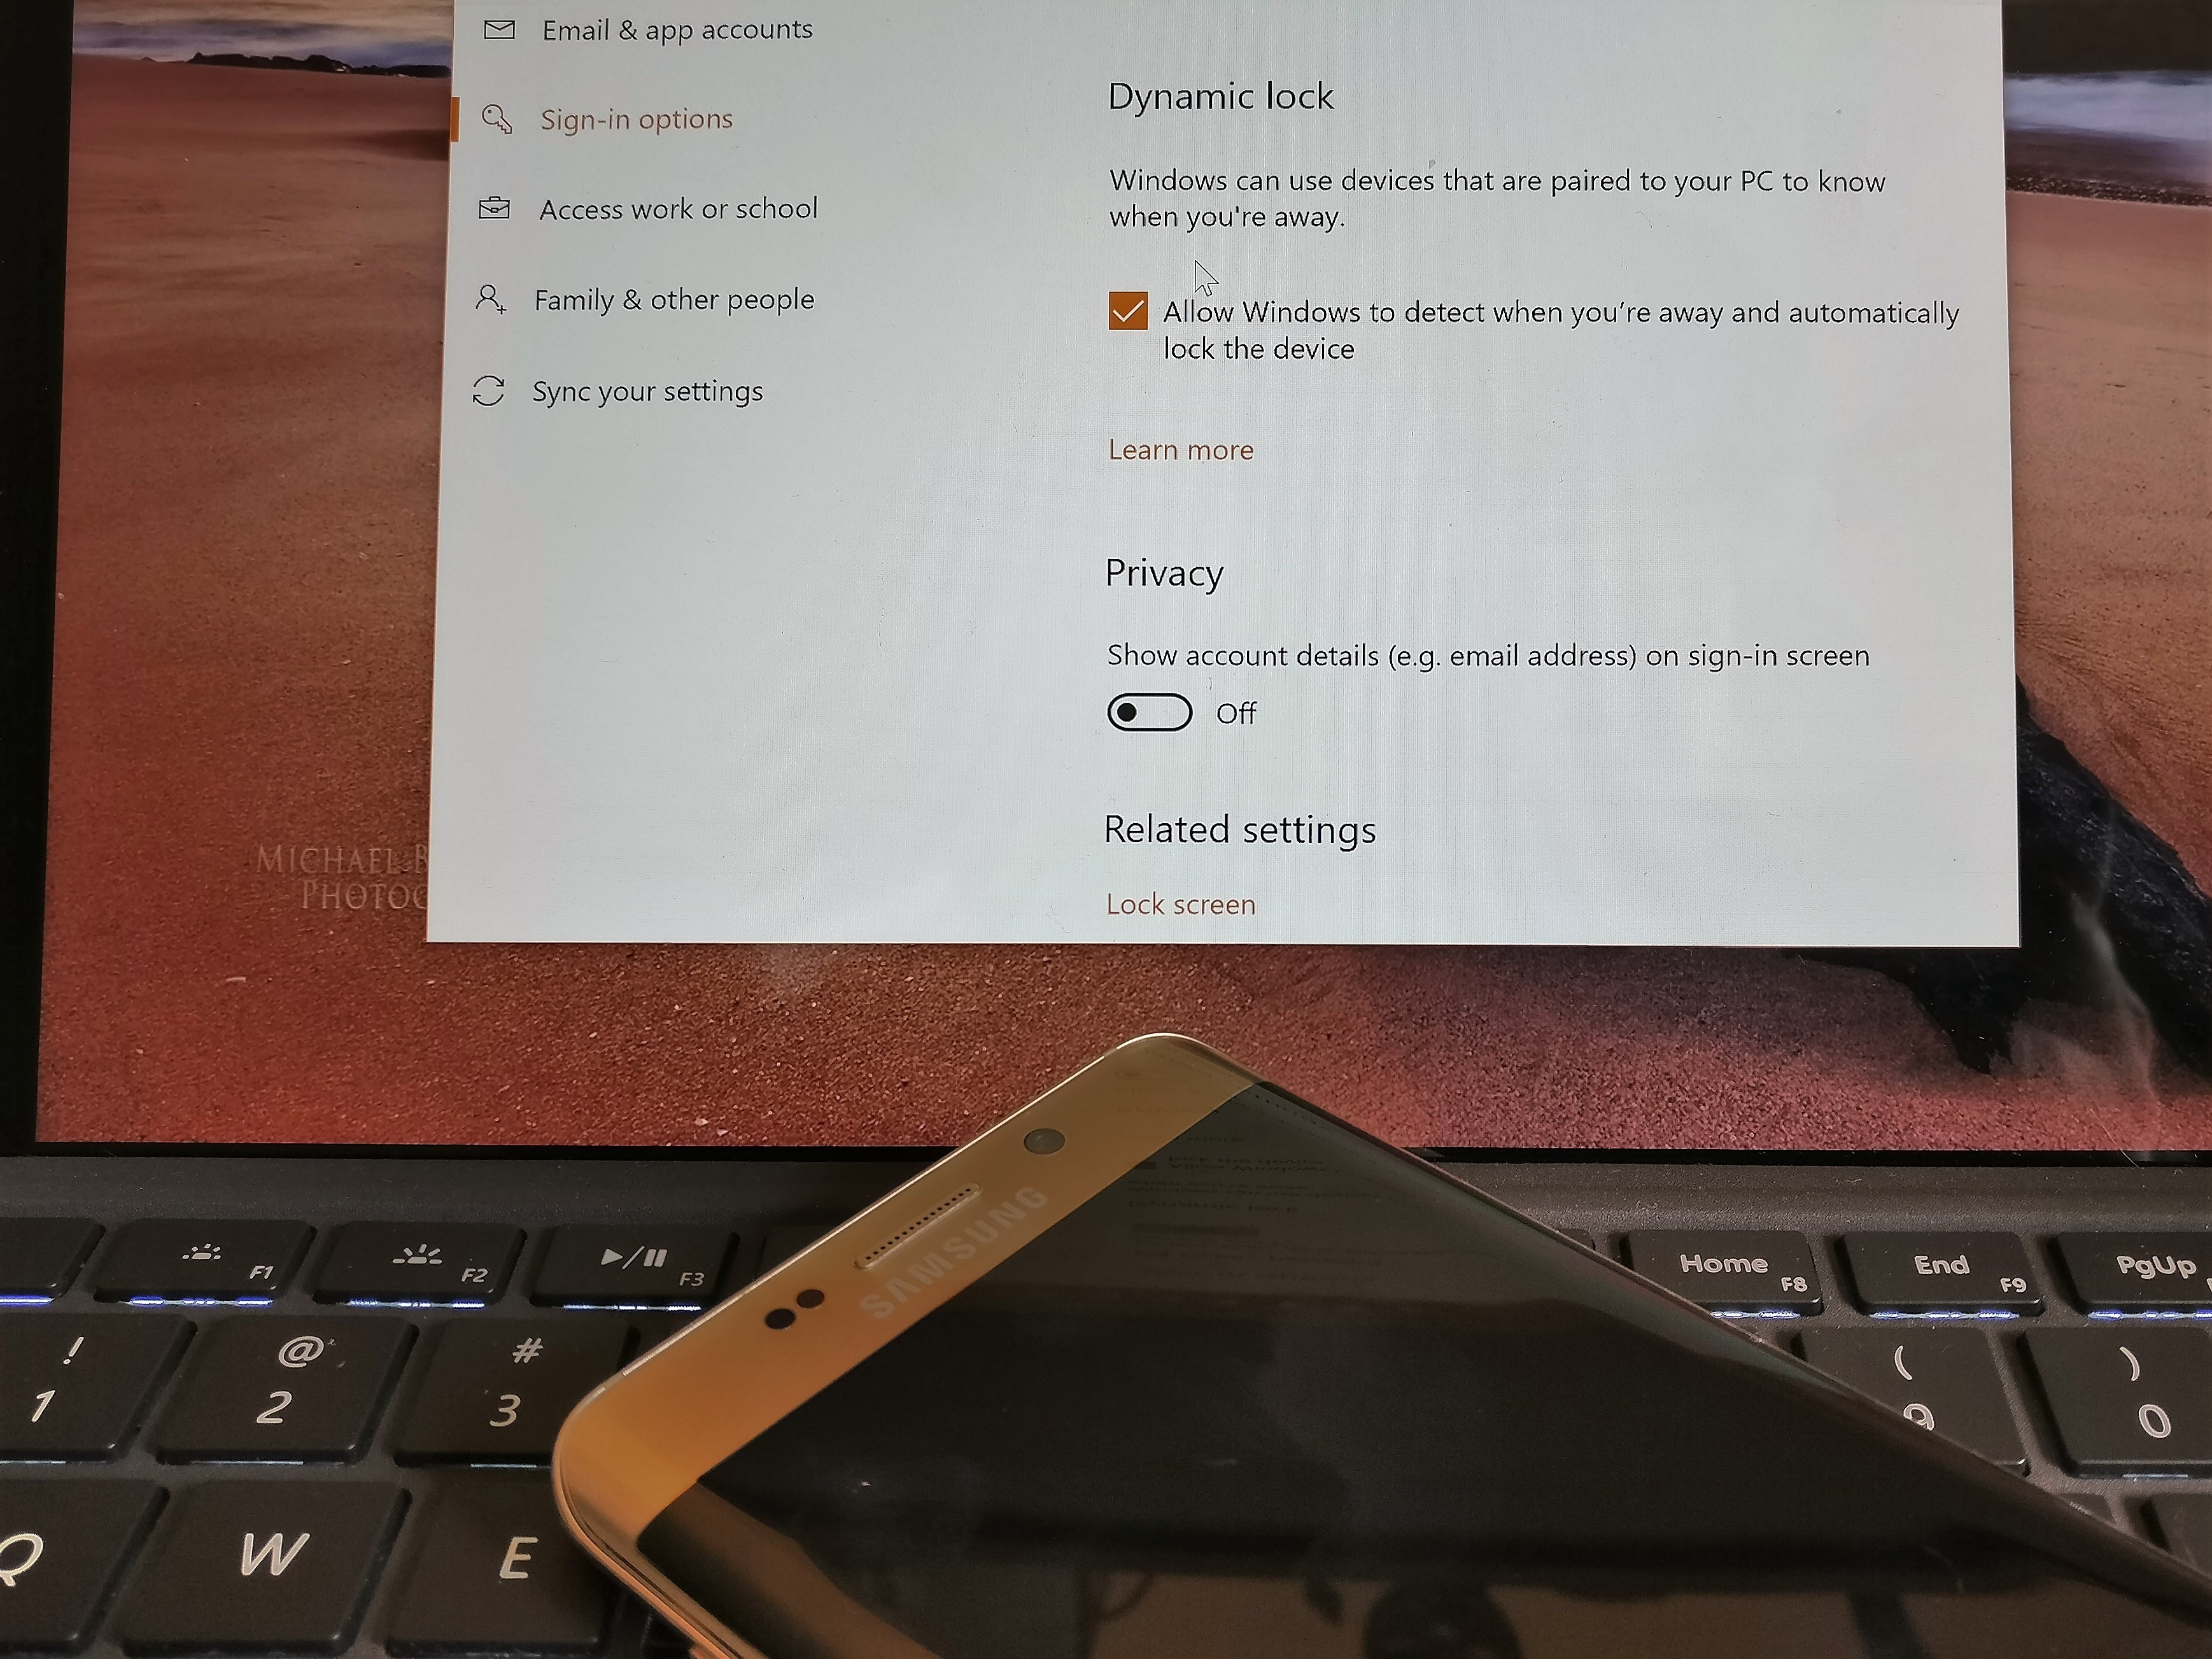
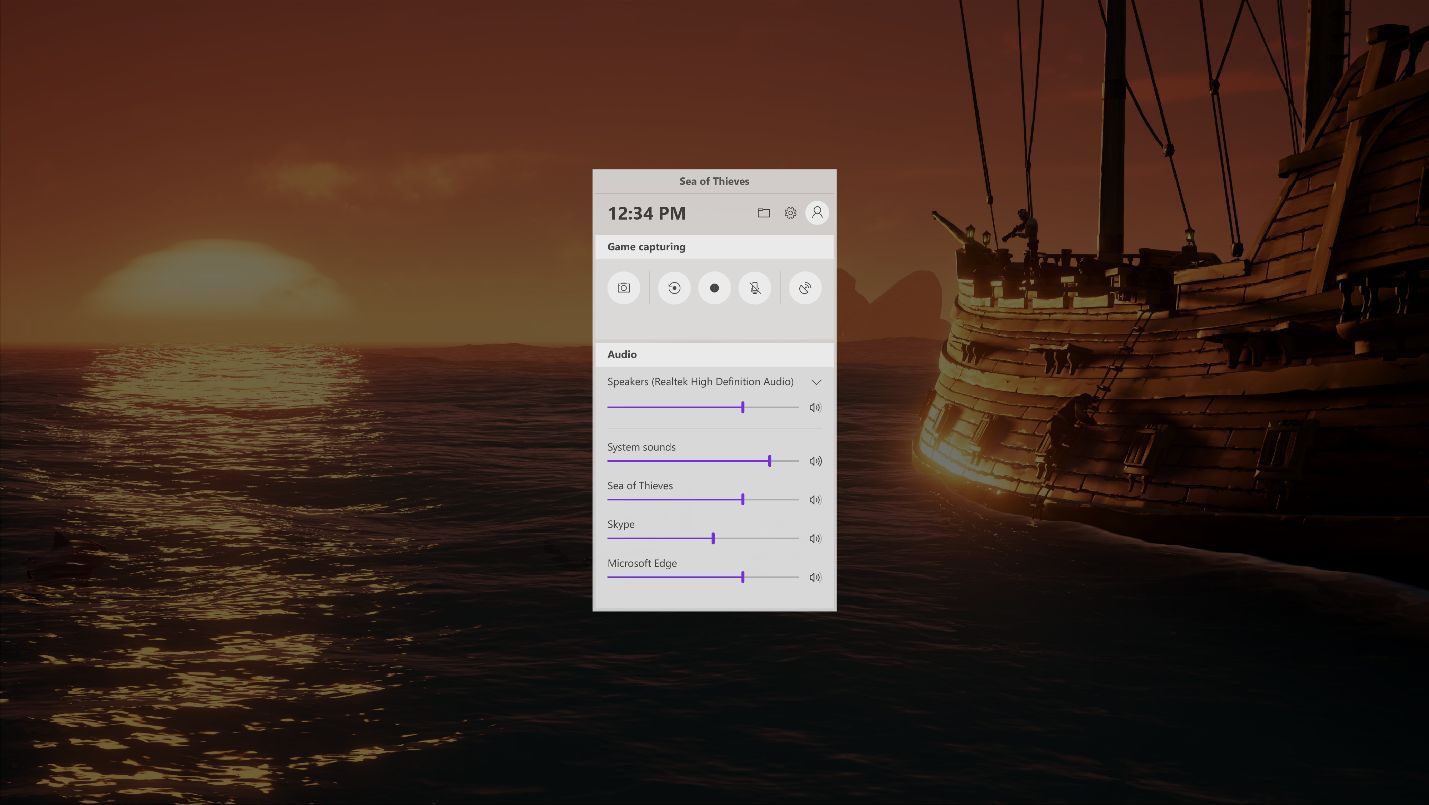
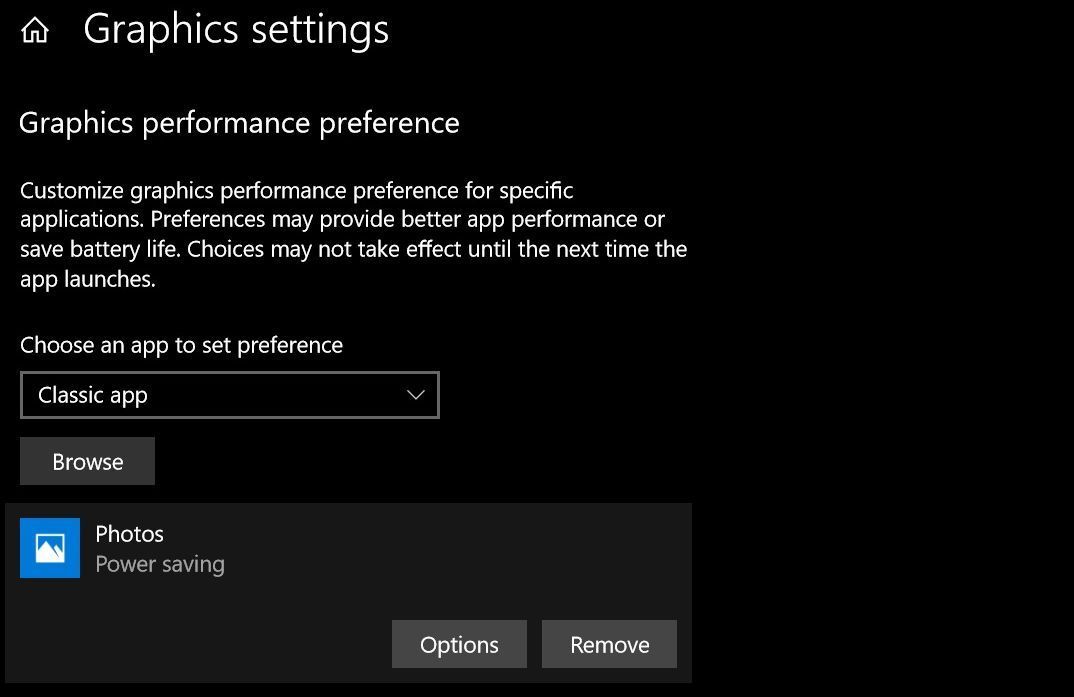
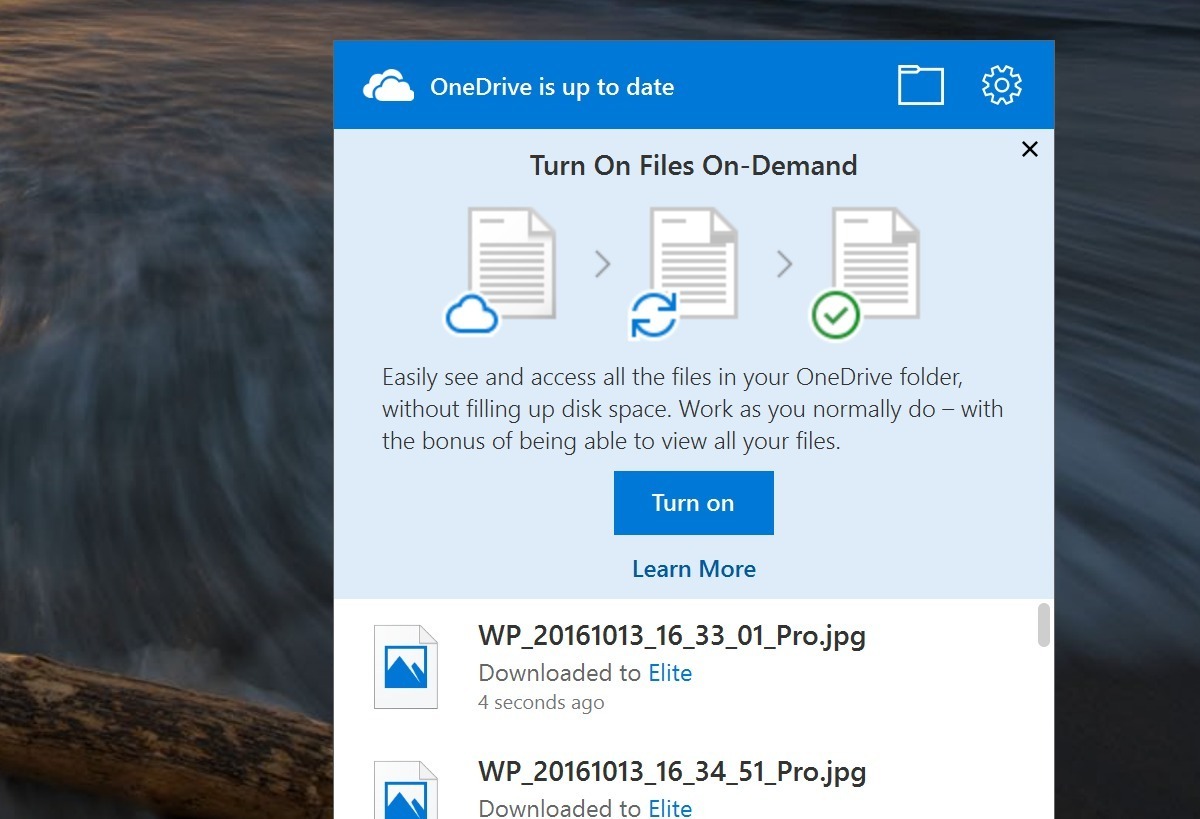
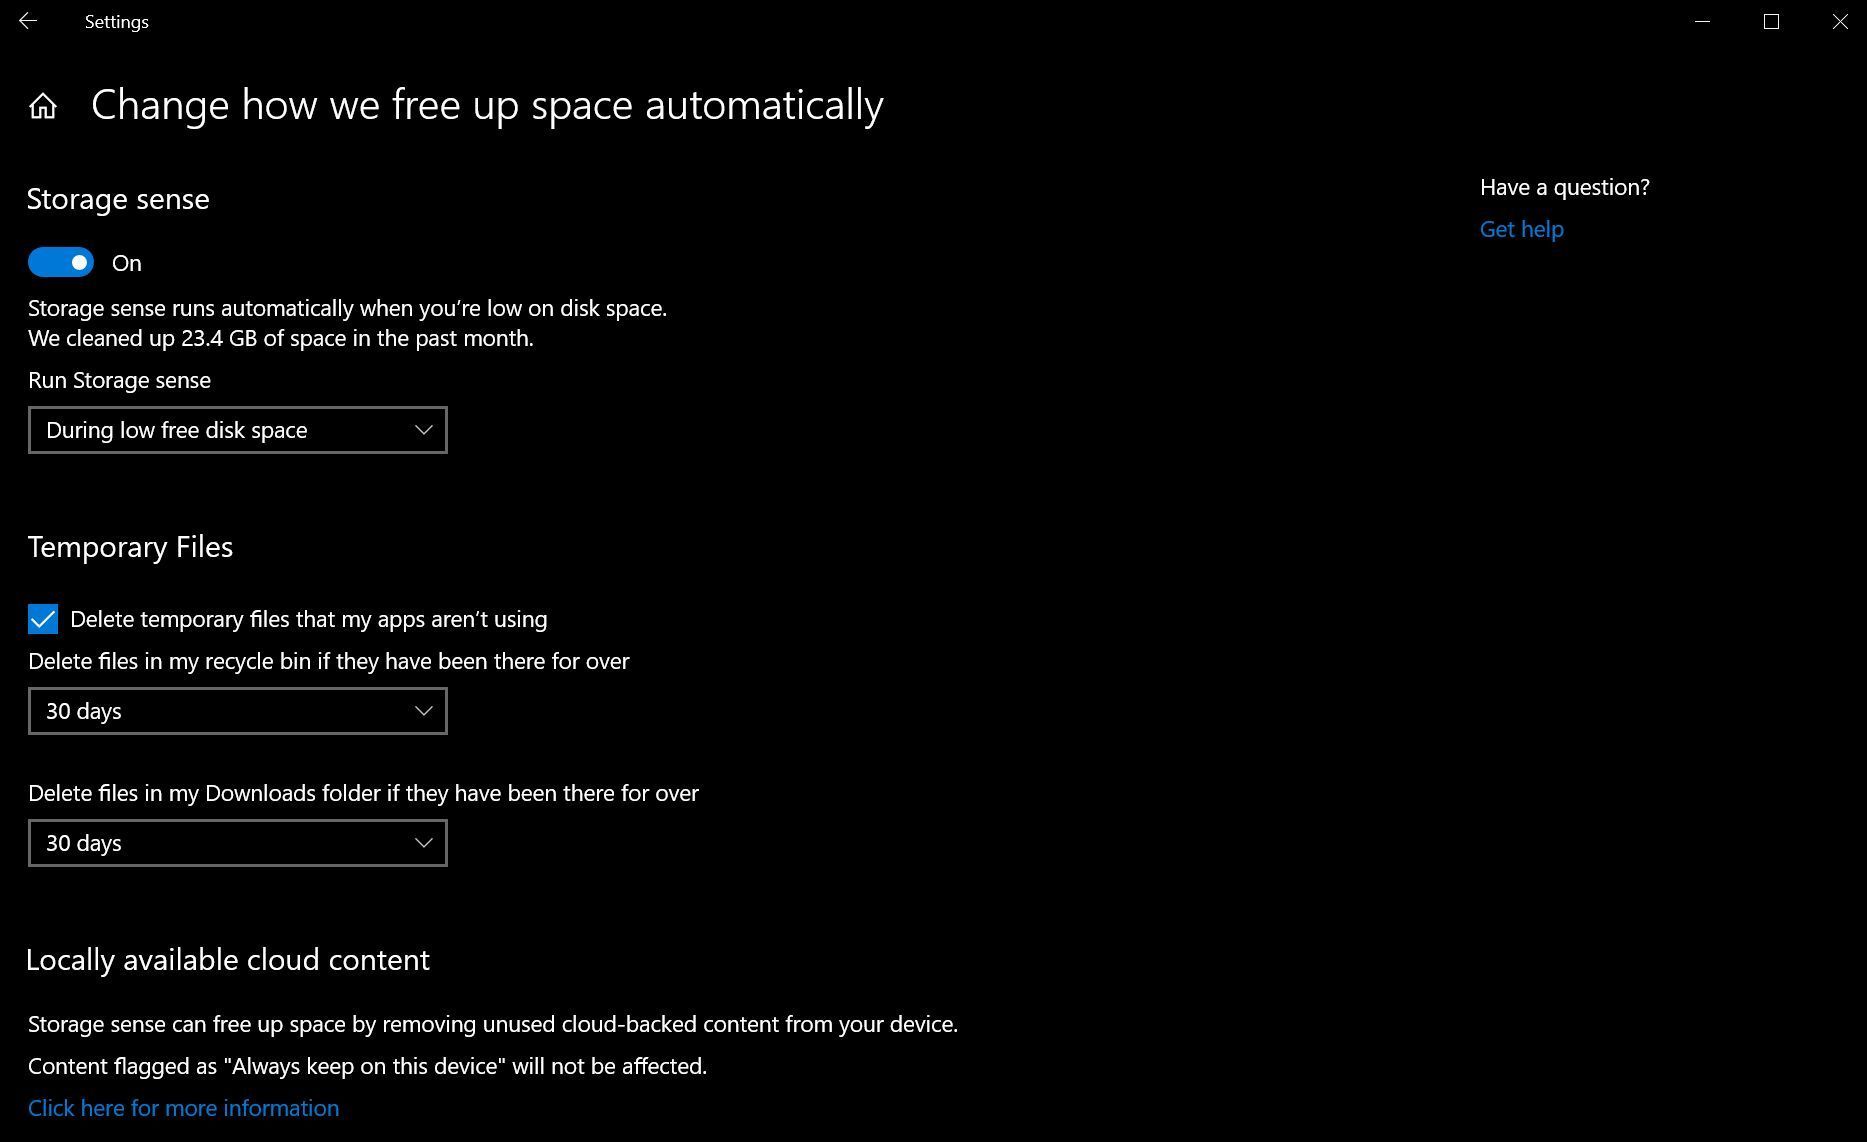
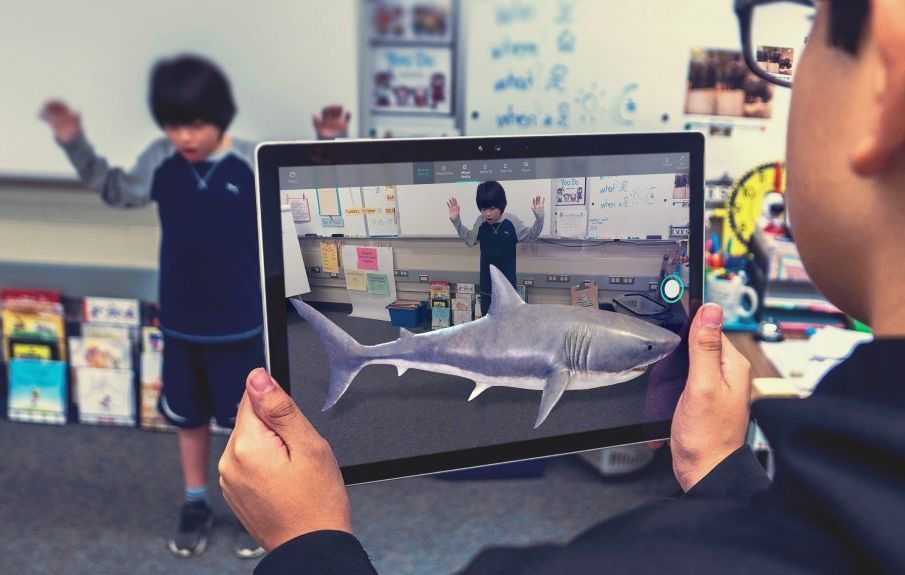
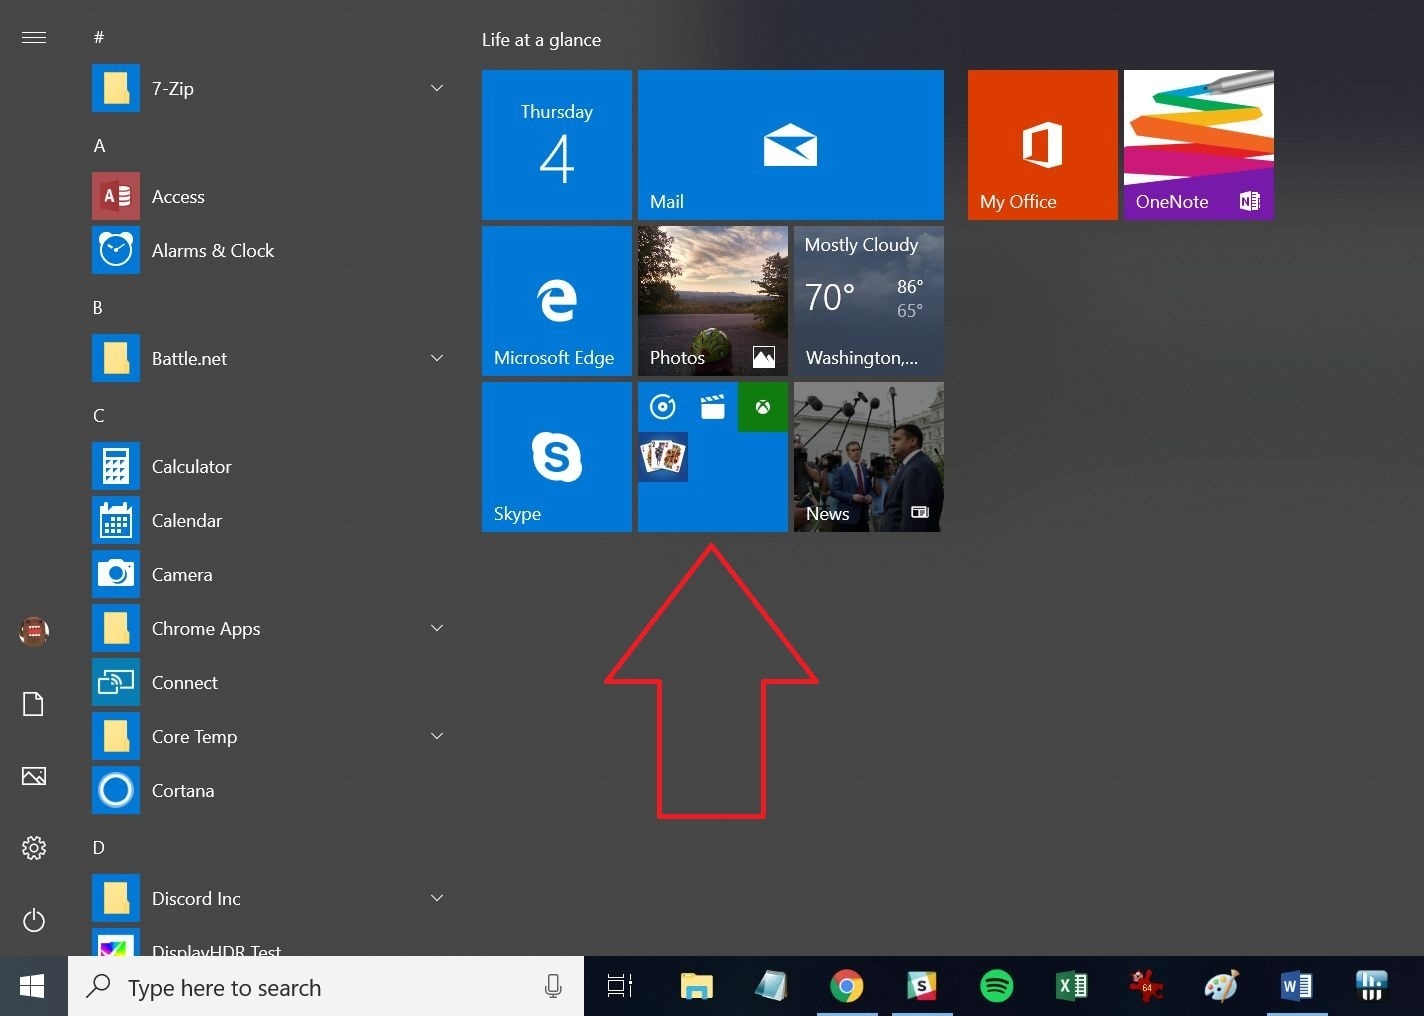
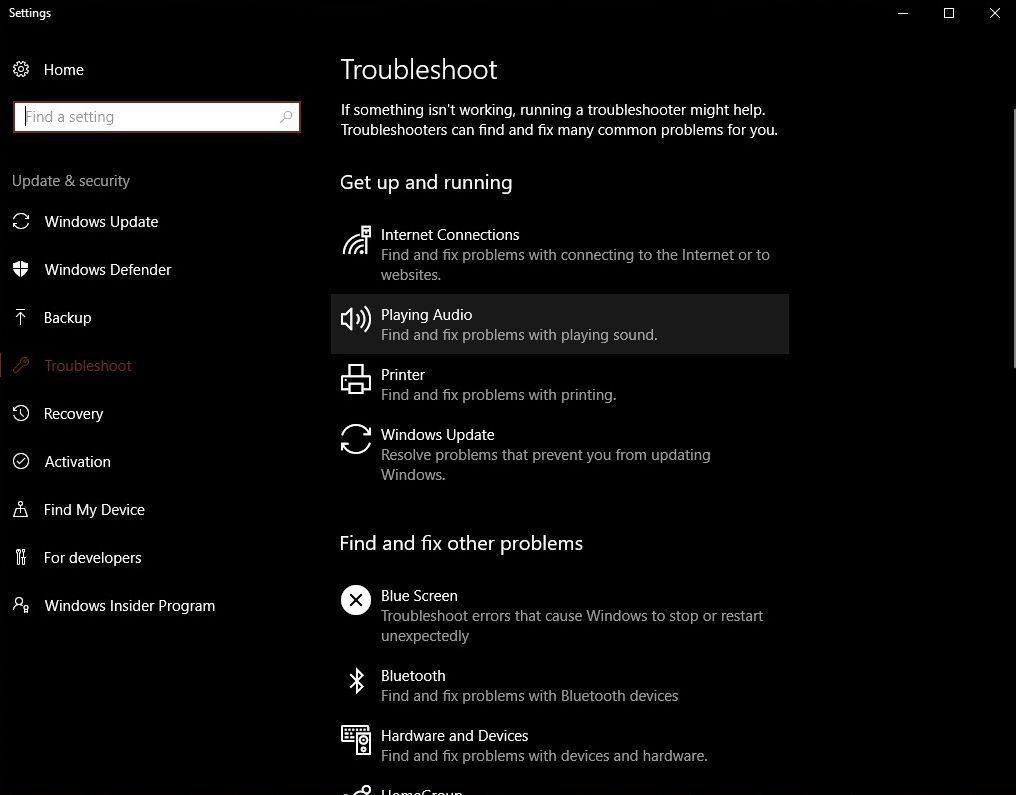
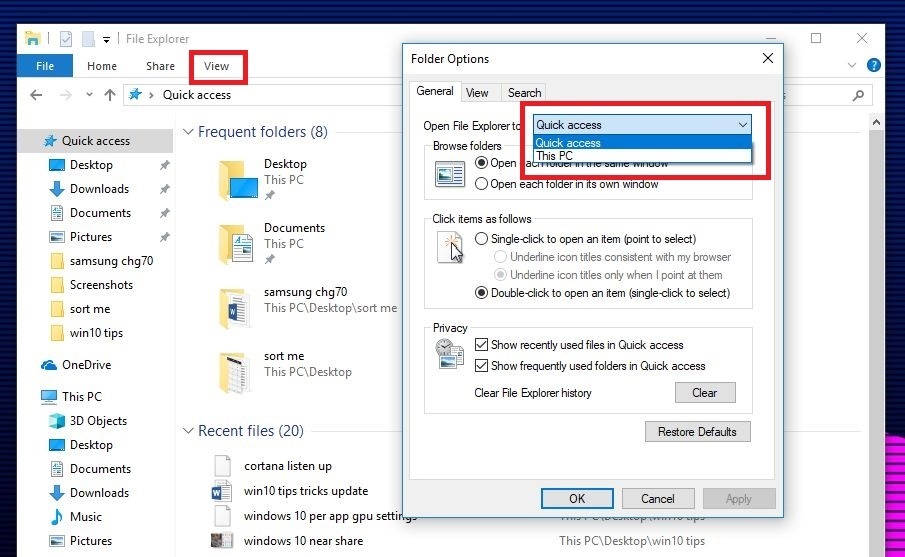
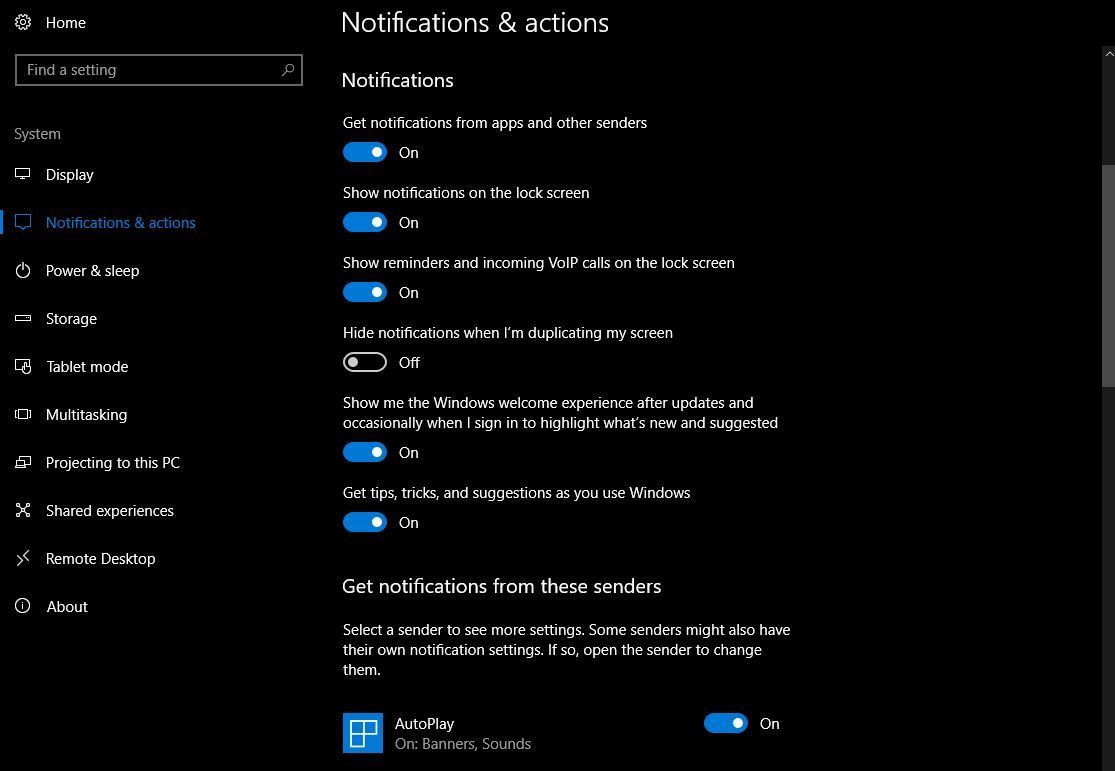
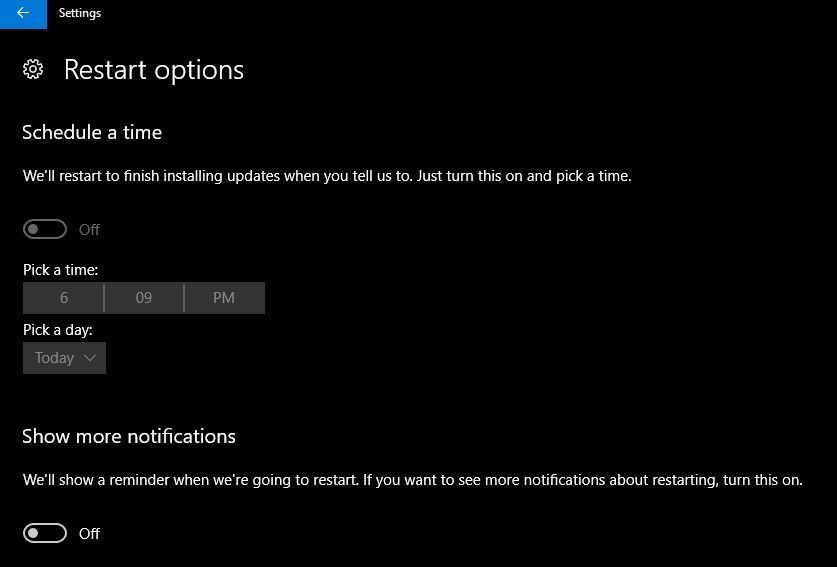
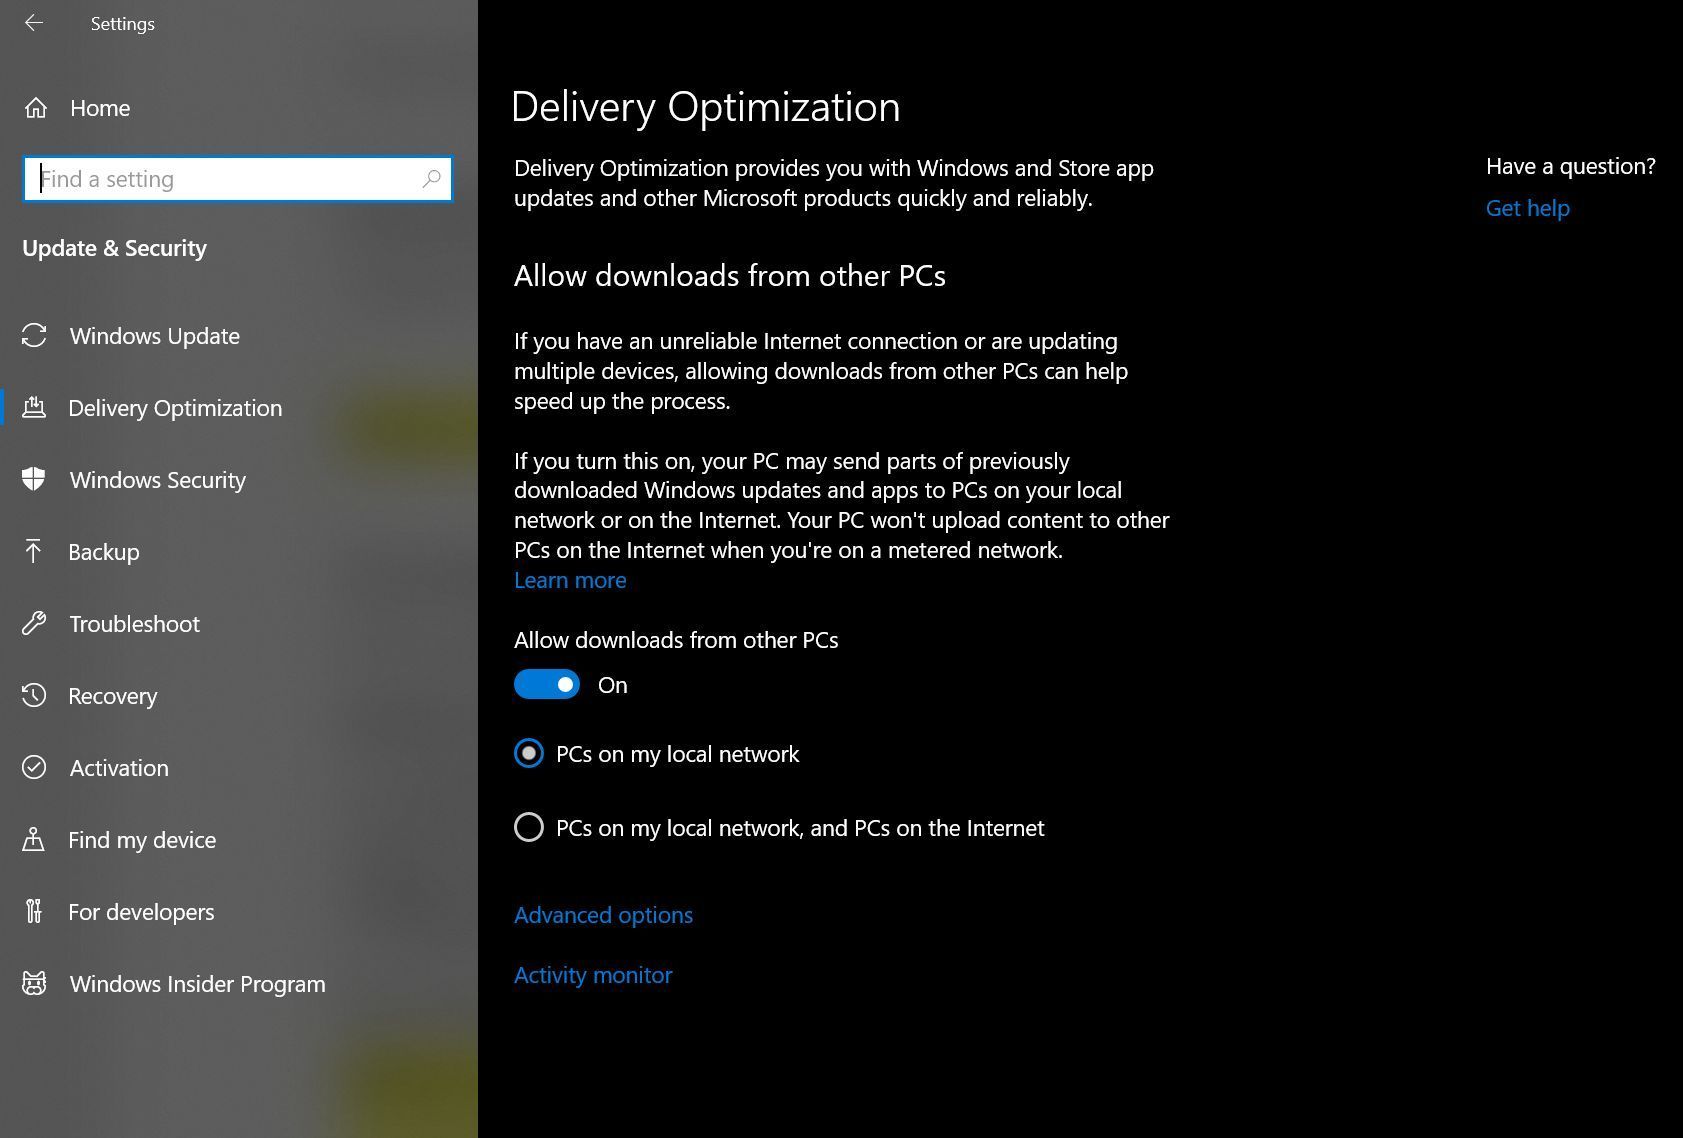

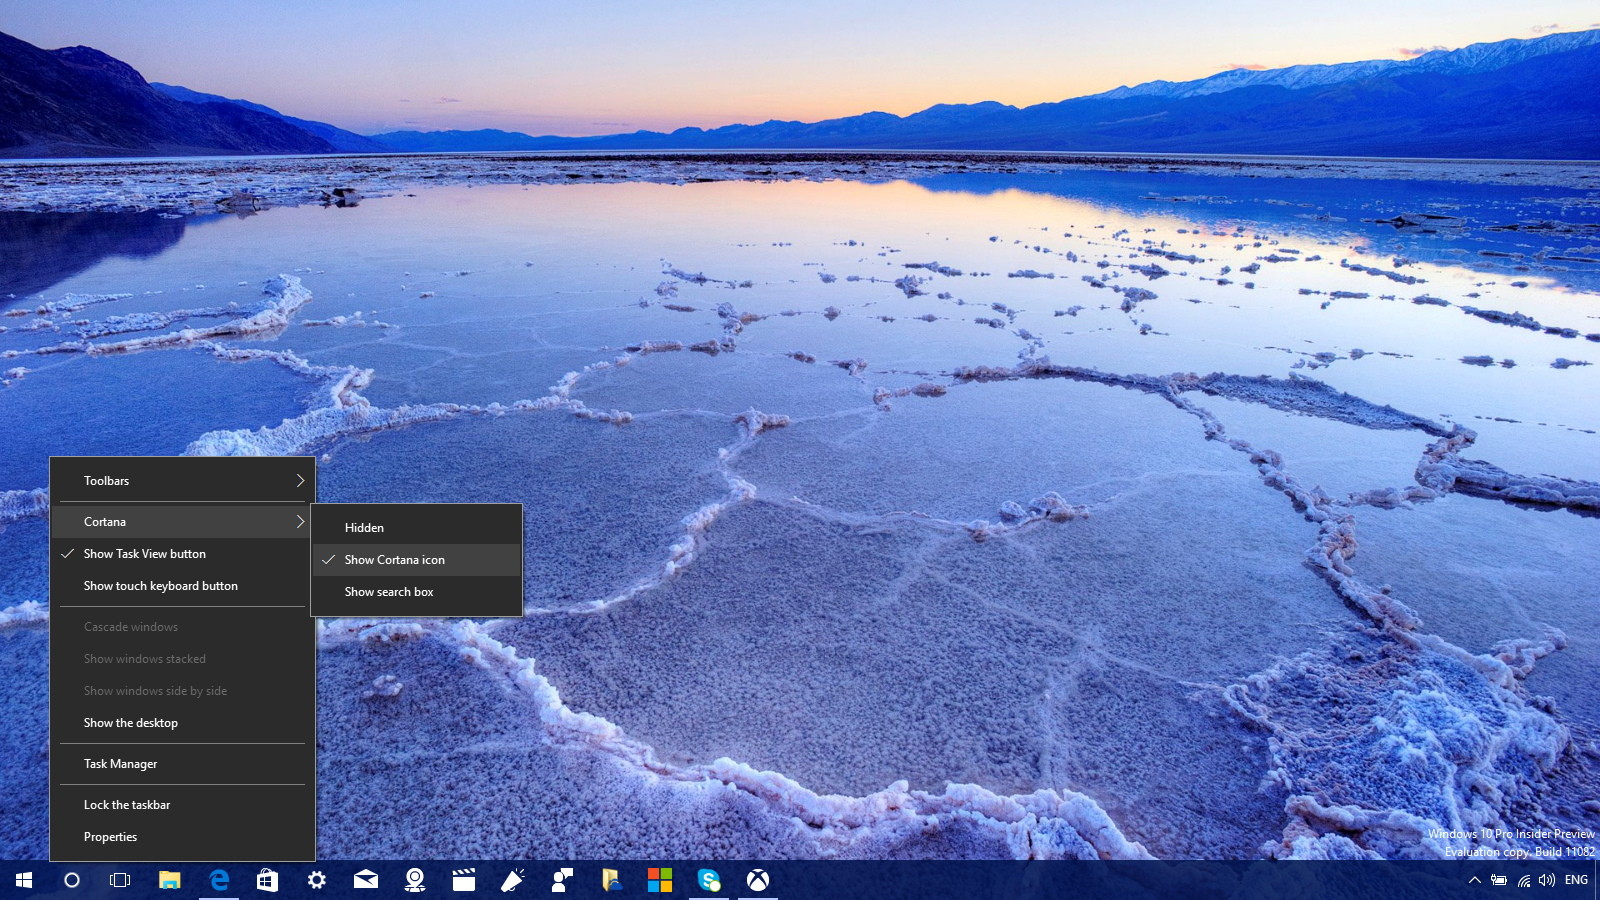
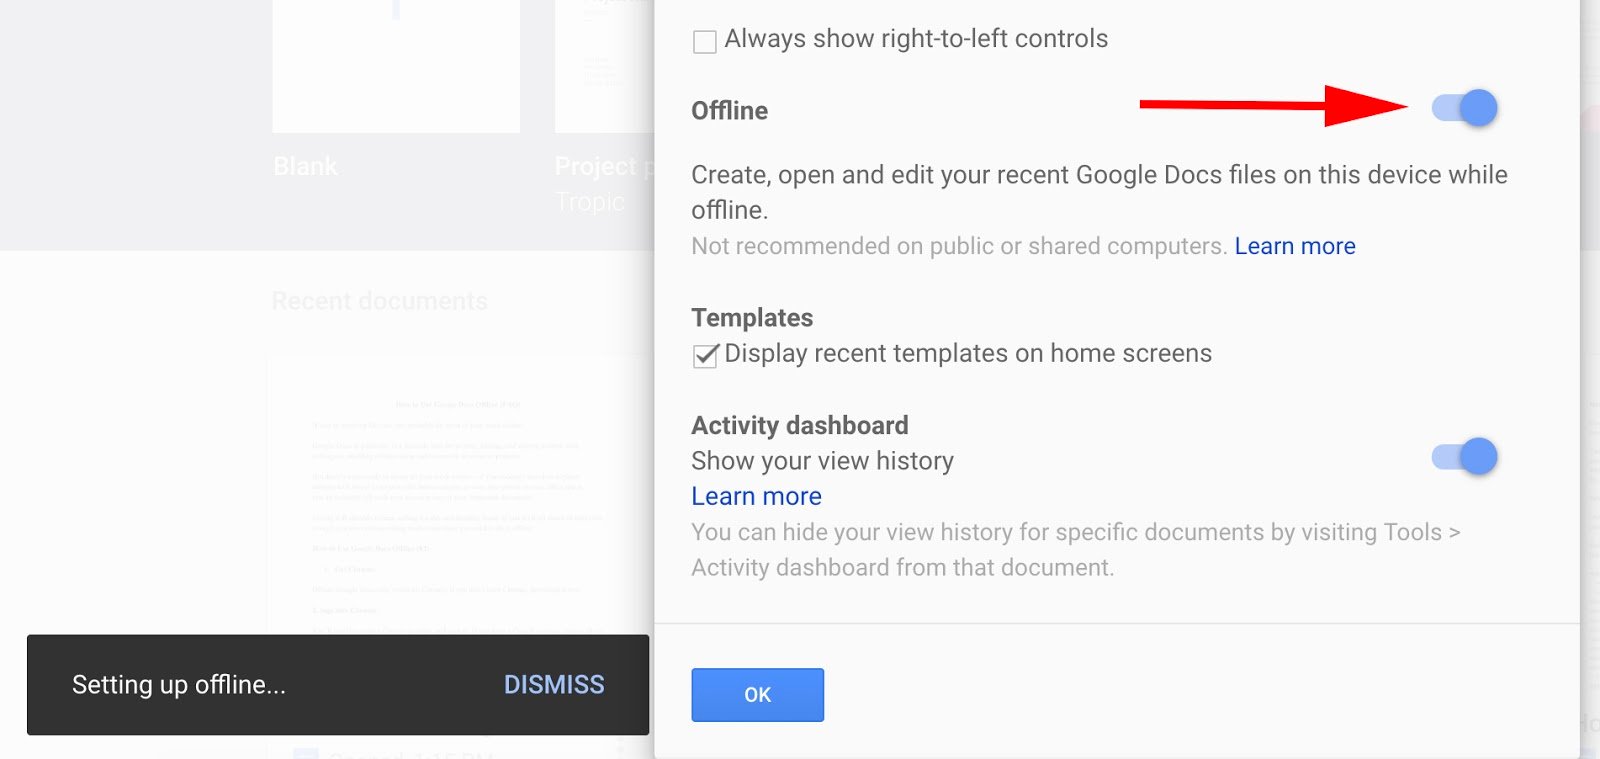

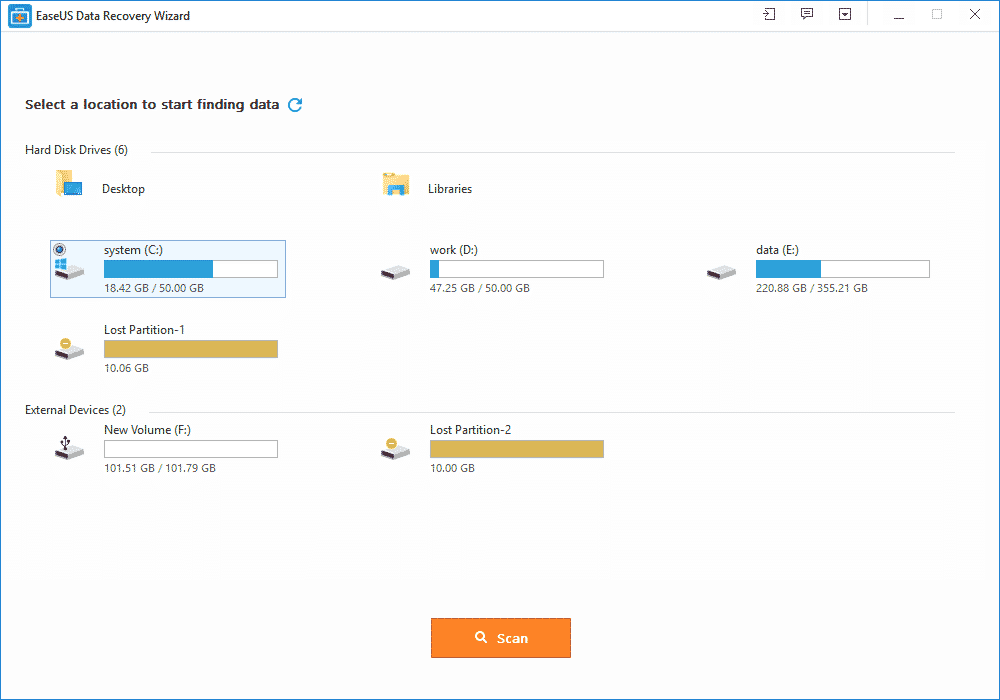
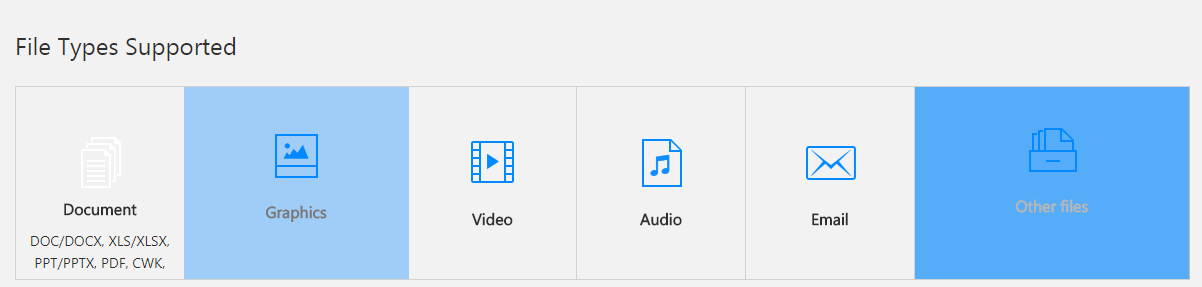





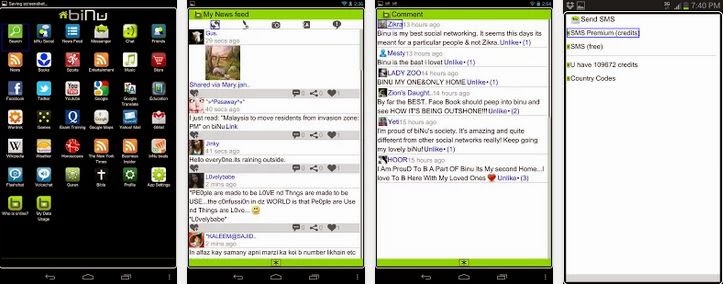
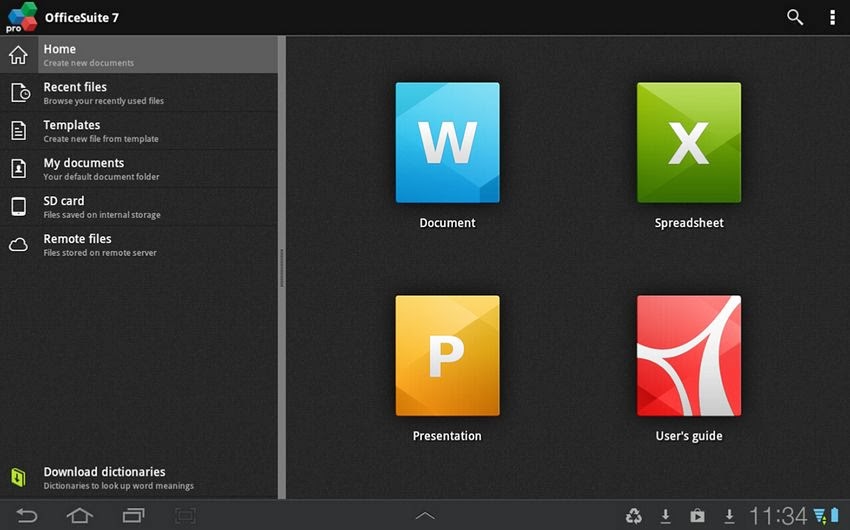
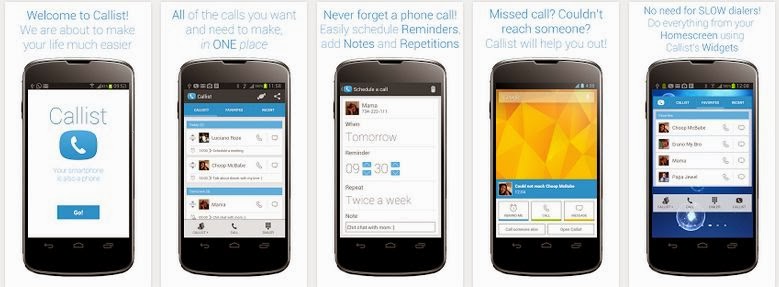






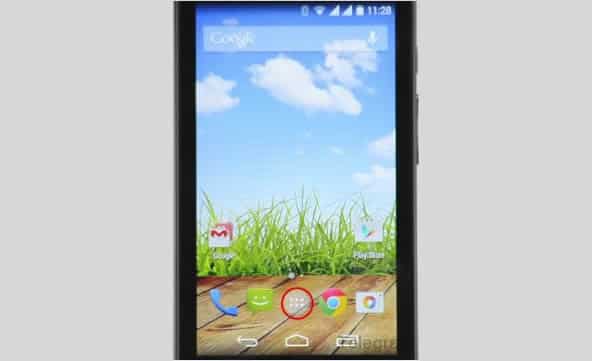
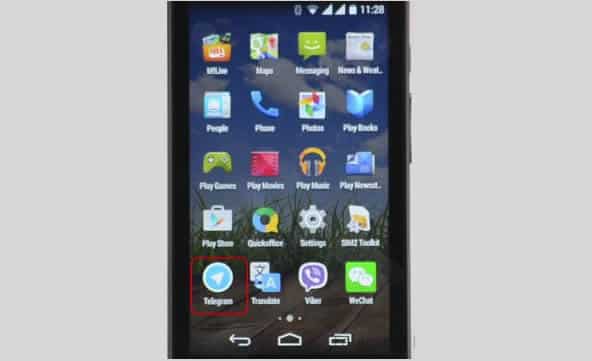
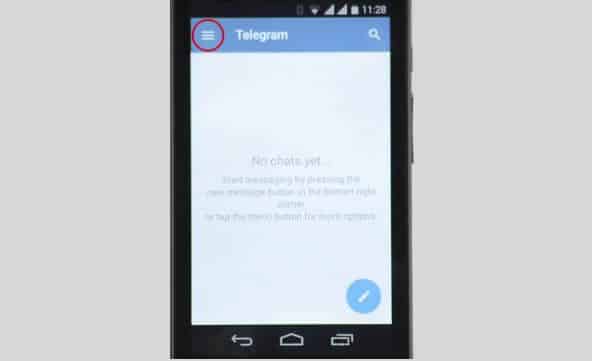
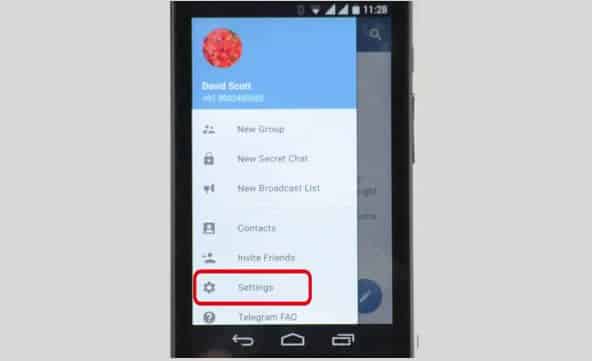
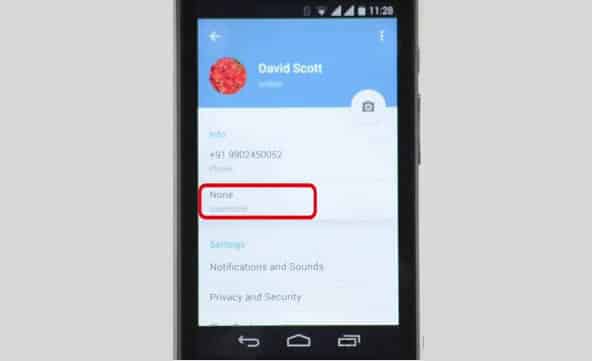
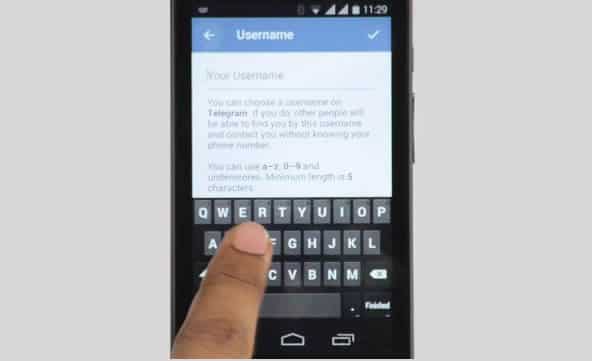
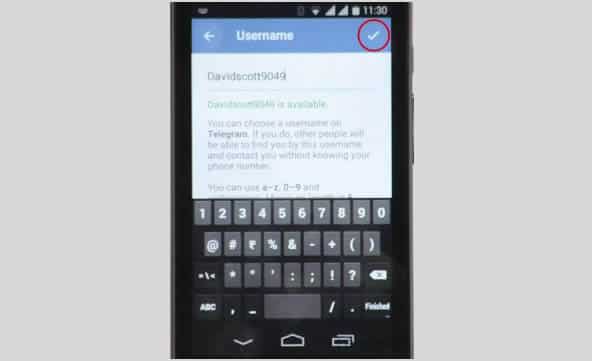

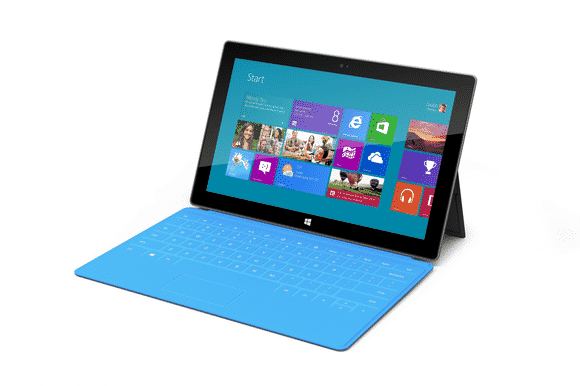
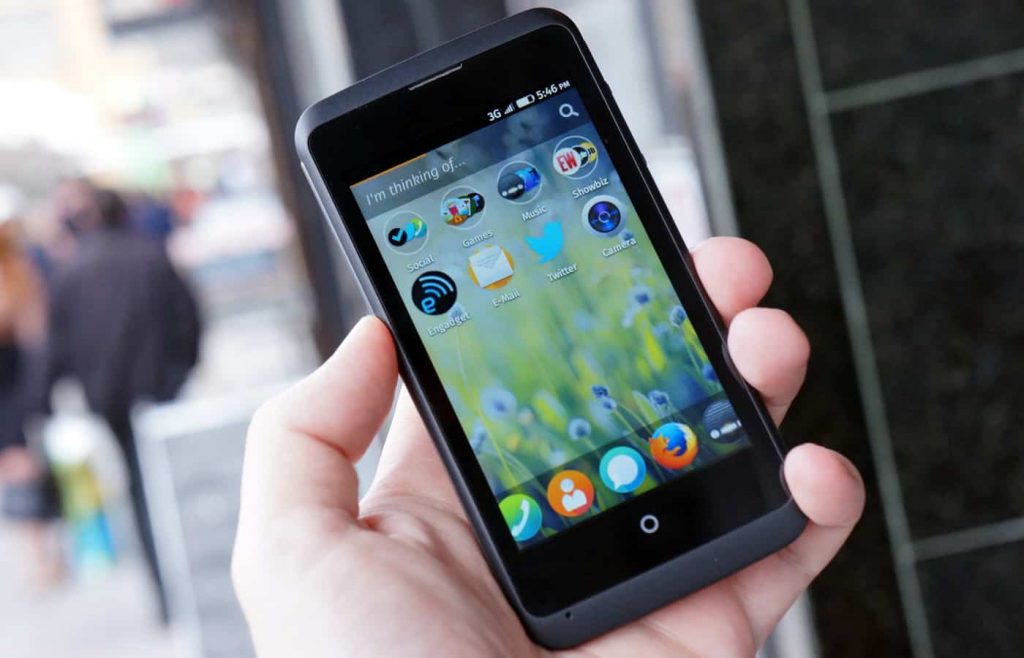
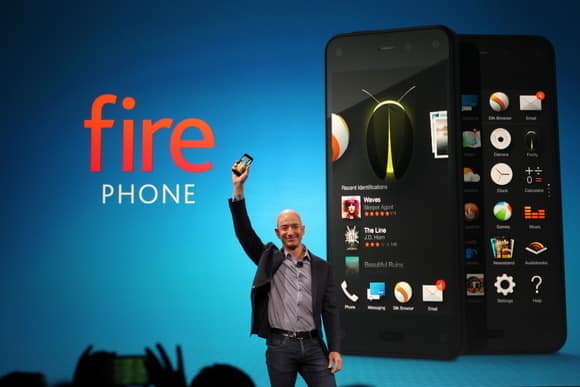
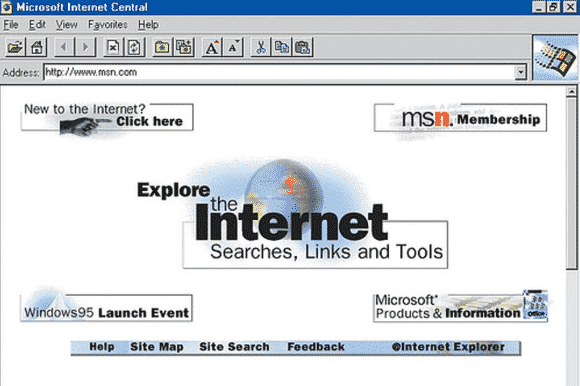





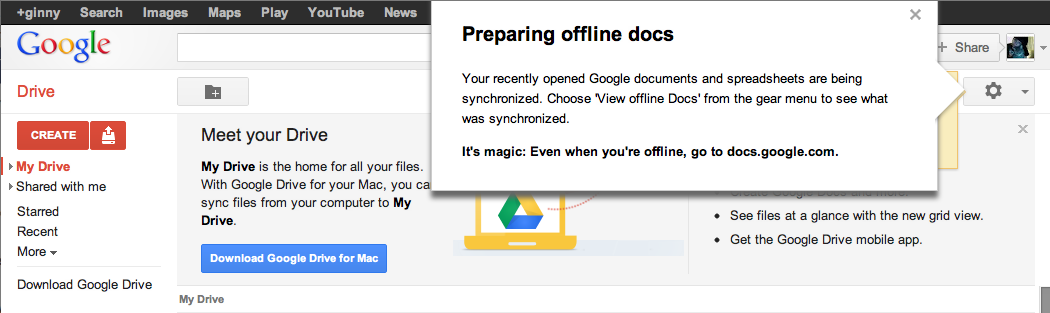

You must be logged in to post a comment.