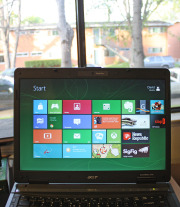
When it is down to the customization of your Windows PC, it goes beyond the changing of icons and wallpaper. Windows 8, 7, XP and those before them, allows you to install custom themes of your preference, however, due to the fact that most of the themes developed by third-parties developers may contain malwares which are harmful to your PC; Microsoft has disallowed the ability to install themes from third-parties developer, hence, this tutorial.
Among our numerous contenders, Ultra UXTheme Patcher stands out as the best Windows 8 Themes application program. All you have to do is install it on your system and it will automatically modify the required items.
Once you have installed the program you can then use any custom Windows 8 themes on your PC . Just download any custom windows 8 themes and copy it over to this directory in your windows PC:
C:WindowsResourcesThemes
Note: Some themes might require a few additional instructions to install . Check the description of the themes for any addition instructions .
Wi-Fi hotspots are nothing more than just a wireless access point, which grants internet accessibility to network devices in various public locations, such as cafes, restaurants, hotels and airports. Schools and businesses are also opting for the Wi-Fi hotspots and using them for their intranet or internet networks. Same Wi-Fi technology is utilized in wireless networks at home. Devices get connected to Wi-Fi hotspots via the use of a Wi-Fi network adapter. In fact, today the latest laptops and computers are designed with built-in adapters. The hotspots that are used in public locations usually require paid subscriptions and credit cards.
Neighborhood cafes, universities and similar places are opting to use the free Wi-Fi hotspots. With this, more and more users are connecting to the public Wi-Fi networks. As a result, security risks are increasing. In fact, Wi-fi hotspots are more like unsecured networks, which provide opportunities for hackers to take complete advantage of the technology. Your personal information is under threat if you access personal account information and passwords while using a public Wi-Fi hotspot. So, prior to using the local internet or WiFi hotspots from a restaurant or a café, do make sure to follow the following rules:
Always keep in mind that these networks are not secured and safe. They are always unsecured network connections. If you have to provide passwords or log onto something, do think twice and keep your guard on.
Make use of built-in security tools, Windows and Mac OS X have. They come with inbuilt features that enable firewall of a user and keep a check of the incoming traffic. The feature only helps to keep the hackers or unethical entities away from your system and personal information.
Disable file sharing.
Keep a tab on padlock. The sites that make use of HTTPS are capable of encrypting your activities. Users doing anything on the sites are confidential. Opt for the padlock, which is present on the address bar. You can also download and install HTTPS Everywhere.
Hackers are capable of retrieving even saved passwords that from your installed keyloggers or Registry. Therefore, try to protect and secure your passwords. Install features like LastPass or similar add-ons, whereby you can store your passwords safely in the cloud.
Hackers use different techniques and gimmicks to lure their victims. They might also use fake networks and grab hold of their victims online. Therefore, check the name of the network or better, ask and confirm the same with the employees of the concerning place.
Bottom line, it is always required to make use of your common sense whenever opting for public Wi-Fi hotspots or networks. If you sense any threat to security, immediately keep your guard on and avoid shopping or doing online activities where sharing personal details is a mandatory.
Ofcours, everyone wants to navigate more fluently on skype while using a computer but not everyone knows it’s “hotkeys”. The use of keyboard shortcuts helps you navigate easily and save time while using the VoIP service.
“It makes you a Ninja” but unfortunately, not everyone knows how to setup this all important keyboard shortcuts. In this tutorial, I’m going to take you on a walk-through on how to setup and personalize your keyboard shortcut for skype.
#1. Enabling Keyboard Shortcut in Skype
These are keyboard shortcuts for when you want to:
Answer a call
Answer a call with video
Ignore a call
End a call
Take a snapshot during video calls
Focus on Skype
Search for people on Skype
Mute your microphone
Toggle mute (Push-to-talk)
Switch view
If you have already enabled keyboard shortcut for your skype skip this part, otherwise:
Locate tools on your skype interface
Click on options
At the bottom of the list, click on the advance tab and
Select hotkeys (is represented with
Check the box next to “Enable keyboard shortcuts.” Do not close the window.
Check the actions you want to enable hotkeys for.
#2. Personalize your Keyboard Shortcuts
In the “hotkey” window you will find a couple of hotkey commands already set up, but you can personalize all the actions with shortcuts of your own preference.
Simply click on the check box next to an action,
Click on Change selected shortcut
Add your own shortcut key sequence into a pop-up window.
The number of shortcuts you want to setup depends on you, Avoid using complex key combination that will be difficult for you to remember, I suggest using hotkey commands that you’re already familiar with, e.g., “Control” + “F” for search. Once you’ve personalized the hotkeys to your taste, click “Save” at the bottom of the window.
The introduction of mozilla firefox 23 has seen the option to disable or enable javascript removed from the primary user interface. Alex Limi earlier explained the reason behind this decision, citing user protection as their major reason.
Most sites these days that aren’t just displaying content will fail in interesting& mysterious ways if you don’t have JavaScript enabled. For the general population, Firefox will appear broken.-Alex Limi
A Back Door
Well, the good news is that firefox actually left us a back door: the option was not entirely removed from the browser, it was hidden from the primary user interface as part of an effort to simplify the Firefox options set and to protect users from unintentionally damaging their Firefox browser.
Show me the Way
You can enable or disable your javascript in mozilla firefox by either using the about:config interface or through the use of add-ons.
Using about:config Interface
Enter about:config in your address bar
Click “I’ll be careful, I promise”
In the search bar just at the top of the page, search for “javascript.enabled” (without quotes).
Right click on the result named “javascript.enabled” and click “Toggle”.
JavaScript is now disabled for your browser, to re-enable javascript, simply repeat the above steps.
Using Add-ons
The No-Script add-on will help you manage javascript setting for each page you visit or you can download the QuickJava add-on to quickly (one click for all) enable or disable javascript in your browser.
Here are the best pieces of computing facts & advice we’ve ever heard. Useful information never goes out of style.
While the computer technologies seem so ordinary and familiar there are still some facts about them which may surprise you. The internet was born 40 years ago, in a lab at the University of California, Los Angeles. Today it wraps the entire planet and features in the daily routine of more than 1.5 billion people. Of course, it’s easy to take the internet for granted and forget that it’s very much a work in progress. So what forces are shaping it, how big has it grown, and will it ever evolve a mind of its own? Here’s a collection of facts you probably didn’t know about the computers and the internet. Check them out.
TAKE A BREAK…… Technology never stops moving foward. Hardware gets faster, and operating systems gain new features and (we hope) finesse. This is natural computing law.But just because computers are one big exercise in evolutionary progress, that doesn’t mean certain computing maxims ever go out of style. Take, for example, the nuggets of wisdom in the following list. All of these things are as true today as they were 2, 5, and in some cases even 10 or 20 years ago. Below, we give you the best pieces of computing advice we’ve ever heard. Have we left anything out? Share your suggestions in the comments section of this article.
1) When in doubt, punch out
If something isnt working on your PC, dont wring your hands and yell at the screen. Just restart the system. That simple act alone will fix many of the problems you may be experiencing. When your PC restarts, it clears out all the temporary files in the RAM and relaunches the operating system. This wipes away any files that may have been giving your PC fitsand the operating system starts fresh and unfettered by whatever was affecting it. If you want to do these things without restarting, click Start, then Run, and type %temp% into the command line.
2) Expect your battery to let you down
It’s simply Murphy’s Law: Your laptop or tablet will poop out the moment you need it most. That is life. Always bring your power cables with you on the road, and if possible invest in backup and secondary battery options.
3) Crowdsource your troubleshooting
Chances are, the help resources at your device manufacturers website wont address your exact headache, but if you type an error message or problem you’re having into Google, you’ll inevitably find helpful information from poor souls who have encountered the very same issue.
4) Back everything up
Never get caught with just one copy of anything that you want to keep. Always back up your data, and then back up your backups. Consider backing up both to an external drive and to a cloud storage service. Its a good idea to keep separate system and data partitions to back up your data partition daily, and back up your system partition (Windows as well as your installed programs) at least quarterly.
5) Remember that thumb drives are your friends
Its very easy to lose track of the recovery discs that come with a new PC, so keep a USB drive with recovery software on it in case something goes wrong. Store it away in a safe, easy-to-remember place. And in that same safe place, keep both electronic and print copies of all your software keys.
6) Look to last years model for a better value
Tech manufacturers always charge a premium for the latest and greatest hardware and typically you don’t really need the world’s fastest processor, graphics card, or I/O technology. So do yourself a favor and consider buying hardware that was best-in-class during a previous manufacturing cycle. It will likely be heavily marked down, but still wholly capable and packed with performance.
7) Skip the extended warranty
Don’t be a sap. Extended warranties are designed to prey on your fear that the hardware you just purchased is already on its death bed. From a return-on-investment perspective, extended warranties almost never pay offexcept for the companies that sell them.
8) Read the manual
You might be surprised at what you can learn by reading user manuals. Its natural to just jump right in and begin doing the things you expect a device or application to do, but I’ve found that by reading the manual I can learn about features and functions I didn’t know existed. Reading the manual can increase the benefit you derive from your device, and make you feel a whole lot better about buying it.
9) Consider the total cost of ownership
This maxim mostly applies to purchases of printers and subsidized phones. If you intend to do a lot of printing, pay close attention to the cost and efficiency of consumables, namely the ink or toner. And if you’re investing in a new smartphone plan, consider what you’ll be paying month to month…to month…to month…
10) Resist the urge to impulse-shop
A tech geek is never more dangerous than when perusing the aisles of a brick-and-mortar hardware store. If you absolutely must purchase a new toy in person, make sure to do your research beforehand. Don’t be swayed by the razzle-dazzle of salespeople, and arm yourself with deep product knowledge before you enter a store. Also, always ask the retailer to match lower Internet pricing, if you can find it. (You’ll want to bring your smartphone with you.)
11) Keyboard shortcuts: Use them, love them, live them
You can work far faster (and look way cooler) by mastering keyboard shortcuts for the programs, services, and operating systems you use every day. To learn these shortcuts, check out our Forum’s numerous articles containing keyboard shortcuts for every major OS and many popular applications. Get started with Windows 7 shortcuts.
12) Build your own
In many cases, building your own PC can be a less expensive proposition than buying a prefab systemand even when it isn’t cheaper, building your own ensures that you get the precise configuration that fits your needs (this is especially true for gaming PCs).
13) Keep your software up-to-date
The message windows reminding you to update your software can get annoying, but its a good idea to stop what youre doing and click the ‘Update now’ button. You’ll get the all the functionality the software has to offer, and you’ll also obtain vital security patches that can protect your system from software crashes and data loss.
14) Use an ergonomic keyboard and mouse tray
You might not realize how much time you spend at your desk. Hours can fly by when you re in the zone, and those hours of typing and mousing add up. Carpal-tunnel syndrome and other repetitive-stress injuries are a real risk for the information workers of today, and they can cost you dearly in pain and missed work. A small investment in adjustable, ergonomic keyboard and mouse trays, coupled with some research on correct positioning, can save you a lot of trouble.
15) Encrypt sensitive stuff
Encrypt any file you wouldn’t want to share with a thief, including email. My program of choice: TrueCrypt. But don’t bother to encrypt the entire drive. Just create a TrueCrypt volume and keep your sensitive files there.
16) Label your power bricks
Every time you buy a new device, you wind up with a new power adapter. They collect under desks, behind PCs, and in boxes in the closet. It’s almost as if they’re breeding. Its easy to lose track of which one goes to which device, and its possible to harm your gear by using the wrong power cable. So the first thing you should do after buying new gear is to label the power brick, permanently pairing it with the right device.
17) Hide those cables
The tangled mess of cables and wires under your desk will only get worse and worseand you wont realize how much it bugs you until you finally clean it all up. You can bundle groups of wires by running them through toilet paper tubes, or binding them with pipe cleaners or small bands of velcro, and then use binder clips to tie the bundled wires to the underside of your desk, or any place where theyre out of sight.
18) Stay wired when you want to connect
Wired ethernet will always be faster and more reliable than wireless networking. If you regularly do something (for work or play) on your home computer that relies on a constant Web connection, you may be better off using a wired internet connection. Wired connections are capable of far faster data speeds and are simply not subject to the many factors that can disrupt a wireless connection.
19) Put your router in the middle
Position your wireless router as close as you can to the center of your home. This action can help ensure that all the wireless devices in your home are within range of the access point. Youll also find that the signals coming from your router are more likely to reach their destination if the antenna is elevated off the floor a few feet.
20) Stop thieves
People store gigabytes of vital information on their portable devices, yet they rarely think about protecting their devices from theft. One of the best things you can do is to install a GPS-enabled antitheft program on your laptop, tablet, or phone. If your device goes missing, the software will lock the OS, report the device’s location to you via GPS, and in some cases even capture and send some photos of the thief.
21) Investigate crashes
If your PC seems to crash frequently, the Windows Reliability Monitor (Control Panel > System and Security > Action Center > Reliability Monitor) can help isolate the cause. The utility keeps track of all hardware and software crashes and warnings, organising them by date. By clicking on one, you can see the full details of what happened.
22) For gamers: Update your drivers
Confirm whether you have the latest drivers for your PC’s graphics and sound hardware. Game developers create their titles using the latest features and functionality in graphics cards. If youre using older drivers, your graphics card might not be up to the task of rendering the game properly on screen.
23) Take a screenshot
Save a screenshot (or snap a photo and save it to Evernote) of every weird problem or crash you see. Having an image can help immensely if the problem becomes chronic and you need assistance in fixing it.
24) Use two-factor authentication
Two-factor authentication simply means that logging in to a given service requires two separate forms of authentication: something you know (such as a password) and something you own, typically your smartphone. For example, you can enable two-factor authentication for your Gmail account. Doing so will require you to have your smartphone nearby every time you try to log in to your account so that the service can send you a unique alphanumeric code via SMS, but the arrangement makes it much more difficult for hackers to break into your account.
25) Change your router’s default SSID
The easiest thing you can do to improve the security of your wireless network is to change both the login and the password for your router to unique alphanumeric phrases that only you know. Since finding the default login and password for almost every router on the market is child’s play online, leaving your router at the defaults allows anyone to gain access to the wireless network in your home or small business.
26) Shun ‘Free Public Wi-Fi’
The ‘Free Public Wi-Fi’ network you might see listed on your Windows PC when you’re in various public places is the result of an old Windows XP bug that causes the OS to set up an ad hoc data-sharing network for connected PCs if it can’t connect to a trusted wireless network automatically. Connecting to this type of device-to-device ad hoc network rarely poses any immediate danger, but it won’t get you onto the Web, either. And malicious users could spy on the connection and steal valuable information from you.
27) Say no to cookies
Enable the Do Not Track feature on your browser. This feature will send a message to the websites you visit that it is not okay for them to install cookies in your browser that will record your movements around the Web. Unless you want that to happen, of course.
28) The best tip of all: Take a break
Every so often, take an electronic sabbatical. Go 24 hours without looking at a screen. It’s good for your eyes, and it reduces the chance of burnout. It also reminds you of how powerful personal computers of all shapes and sizes have become and that thought alone might make everyone a little more tolerant and patient when problems arise.
Here are the best pieces of computing facts & advice we’ve ever heard. Useful information never goes out of style.
While the computer technologies seem so ordinary and familiar there are still some facts about them which may surprise you. The internet was born 40 years ago, in a lab at the University of California, Los Angeles. Today it wraps the entire planet and features in the daily routine of more than 1.5 billion people. Of course, it’s easy to take the internet for granted and forget that it’s very much a work in progress. So what forces are shaping it, how big has it grown, and will it ever evolve a mind of its own? Here’s a collection of facts you probably didn’t know about the computers and the internet. Check them out.
TAKE A BREAK…… Technology never stops moving foward. Hardware gets faster, and operating systems gain new features and (we hope) finesse. This is natural computing law.But just because computers are one big exercise in evolutionary progress, that doesn’t mean certain computing maxims ever go out of style. Take, for example, the nuggets of wisdom in the following list. All of these things are as true today as they were 2, 5, and in some cases even 10 or 20 years ago. Below, we give you the best pieces of computing advice we’ve ever heard. Have we left anything out? Share your suggestions in the comments section of this article.
1) When in doubt, punch out
If something isnt working on your PC, dont wring your hands and yell at the screen. Just restart the system. That simple act alone will fix many of the problems you may be experiencing. When your PC restarts, it clears out all the temporary files in the RAM and relaunches the operating system. This wipes away any files that may have been giving your PC fitsand the operating system starts fresh and unfettered by whatever was affecting it. If you want to do these things without restarting, click Start, then Run, and type %temp% into the command line.
2) Expect your battery to let you down
It’s simply Murphy’s Law: Your laptop or tablet will poop out the moment you need it most. That is life. Always bring your power cables with you on the road, and if possible invest in backup and secondary battery options.
3) Crowdsource your troubleshooting
Chances are, the help resources at your device manufacturers website wont address your exact headache, but if you type an error message or problem you’re having into Google, you’ll inevitably find helpful information from poor souls who have encountered the very same issue.
4) Back everything up
Never get caught with just one copy of anything that you want to keep. Always back up your data, and then back up your backups. Consider backing up both to an external drive and to a cloud storage service. Its a good idea to keep separate system and data partitions to back up your data partition daily, and back up your system partition (Windows as well as your installed programs) at least quarterly.
5) Remember that thumb drives are your friends
Its very easy to lose track of the recovery discs that come with a new PC, so keep a USB drive with recovery software on it in case something goes wrong. Store it away in a safe, easy-to-remember place. And in that same safe place, keep both electronic and print copies of all your software keys.
6) Look to last years model for a better value
Tech manufacturers always charge a premium for the latest and greatest hardware and typically you don’t really need the world’s fastest processor, graphics card, or I/O technology. So do yourself a favor and consider buying hardware that was best-in-class during a previous manufacturing cycle. It will likely be heavily marked down, but still wholly capable and packed with performance.
7) Skip the extended warranty
Don’t be a sap. Extended warranties are designed to prey on your fear that the hardware you just purchased is already on its death bed. From a return-on-investment perspective, extended warranties almost never pay offexcept for the companies that sell them.
8) Read the manual
You might be surprised at what you can learn by reading user manuals. Its natural to just jump right in and begin doing the things you expect a device or application to do, but I’ve found that by reading the manual I can learn about features and functions I didn’t know existed. Reading the manual can increase the benefit you derive from your device, and make you feel a whole lot better about buying it.
9) Consider the total cost of ownership
This maxim mostly applies to purchases of printers and subsidized phones. If you intend to do a lot of printing, pay close attention to the cost and efficiency of consumables, namely the ink or toner. And if you’re investing in a new smartphone plan, consider what you’ll be paying month to month…to month…to month…
10) Resist the urge to impulse-shop
A tech geek is never more dangerous than when perusing the aisles of a brick-and-mortar hardware store. If you absolutely must purchase a new toy in person, make sure to do your research beforehand. Don’t be swayed by the razzle-dazzle of salespeople, and arm yourself with deep product knowledge before you enter a store. Also, always ask the retailer to match lower Internet pricing, if you can find it. (You’ll want to bring your smartphone with you.)
11) Keyboard shortcuts: Use them, love them, live them
You can work far faster (and look way cooler) by mastering keyboard shortcuts for the programs, services, and operating systems you use every day. To learn these shortcuts, check out our Forum’s numerous articles containing keyboard shortcuts for every major OS and many popular applications. Get started with Windows 7 shortcuts.
12) Build your own
In many cases, building your own PC can be a less expensive proposition than buying a prefab systemand even when it isn’t cheaper, building your own ensures that you get the precise configuration that fits your needs (this is especially true for gaming PCs).
13) Keep your software up-to-date
The message windows reminding you to update your software can get annoying, but its a good idea to stop what youre doing and click the ‘Update now’ button. You’ll get the all the functionality the software has to offer, and you’ll also obtain vital security patches that can protect your system from software crashes and data loss.
14) Use an ergonomic keyboard and mouse tray
You might not realize how much time you spend at your desk. Hours can fly by when you re in the zone, and those hours of typing and mousing add up. Carpal-tunnel syndrome and other repetitive-stress injuries are a real risk for the information workers of today, and they can cost you dearly in pain and missed work. A small investment in adjustable, ergonomic keyboard and mouse trays, coupled with some research on correct positioning, can save you a lot of trouble.
15) Encrypt sensitive stuff
Encrypt any file you wouldn’t want to share with a thief, including email. My program of choice: TrueCrypt. But don’t bother to encrypt the entire drive. Just create a TrueCrypt volume and keep your sensitive files there.
16) Label your power bricks
Every time you buy a new device, you wind up with a new power adapter. They collect under desks, behind PCs, and in boxes in the closet. It’s almost as if they’re breeding. Its easy to lose track of which one goes to which device, and its possible to harm your gear by using the wrong power cable. So the first thing you should do after buying new gear is to label the power brick, permanently pairing it with the right device.
17) Hide those cables
The tangled mess of cables and wires under your desk will only get worse and worseand you wont realize how much it bugs you until you finally clean it all up. You can bundle groups of wires by running them through toilet paper tubes, or binding them with pipe cleaners or small bands of velcro, and then use binder clips to tie the bundled wires to the underside of your desk, or any place where theyre out of sight.
18) Stay wired when you want to connect
Wired ethernet will always be faster and more reliable than wireless networking. If you regularly do something (for work or play) on your home computer that relies on a constant Web connection, you may be better off using a wired internet connection. Wired connections are capable of far faster data speeds and are simply not subject to the many factors that can disrupt a wireless connection.
19) Put your router in the middle
Position your wireless router as close as you can to the center of your home. This action can help ensure that all the wireless devices in your home are within range of the access point. Youll also find that the signals coming from your router are more likely to reach their destination if the antenna is elevated off the floor a few feet.
20) Stop thieves
People store gigabytes of vital information on their portable devices, yet they rarely think about protecting their devices from theft. One of the best things you can do is to install a GPS-enabled antitheft program on your laptop, tablet, or phone. If your device goes missing, the software will lock the OS, report the device’s location to you via GPS, and in some cases even capture and send some photos of the thief.
21) Investigate crashes
If your PC seems to crash frequently, the Windows Reliability Monitor (Control Panel > System and Security > Action Center > Reliability Monitor) can help isolate the cause. The utility keeps track of all hardware and software crashes and warnings, organising them by date. By clicking on one, you can see the full details of what happened.
22) For gamers: Update your drivers
Confirm whether you have the latest drivers for your PC’s graphics and sound hardware. Game developers create their titles using the latest features and functionality in graphics cards. If youre using older drivers, your graphics card might not be up to the task of rendering the game properly on screen.
23) Take a screenshot
Save a screenshot (or snap a photo and save it to Evernote) of every weird problem or crash you see. Having an image can help immensely if the problem becomes chronic and you need assistance in fixing it.
24) Use two-factor authentication
Two-factor authentication simply means that logging in to a given service requires two separate forms of authentication: something you know (such as a password) and something you own, typically your smartphone. For example, you can enable two-factor authentication for your Gmail account. Doing so will require you to have your smartphone nearby every time you try to log in to your account so that the service can send you a unique alphanumeric code via SMS, but the arrangement makes it much more difficult for hackers to break into your account.
25) Change your router’s default SSID
The easiest thing you can do to improve the security of your wireless network is to change both the login and the password for your router to unique alphanumeric phrases that only you know. Since finding the default login and password for almost every router on the market is child’s play online, leaving your router at the defaults allows anyone to gain access to the wireless network in your home or small business.
26) Shun ‘Free Public Wi-Fi’
The ‘Free Public Wi-Fi’ network you might see listed on your Windows PC when you’re in various public places is the result of an old Windows XP bug that causes the OS to set up an ad hoc data-sharing network for connected PCs if it can’t connect to a trusted wireless network automatically. Connecting to this type of device-to-device ad hoc network rarely poses any immediate danger, but it won’t get you onto the Web, either. And malicious users could spy on the connection and steal valuable information from you.
27) Say no to cookies
Enable the Do Not Track feature on your browser. This feature will send a message to the websites you visit that it is not okay for them to install cookies in your browser that will record your movements around the Web. Unless you want that to happen, of course.
28) The best tip of all: Take a break
Every so often, take an electronic sabbatical. Go 24 hours without looking at a screen. It’s good for your eyes, and it reduces the chance of burnout. It also reminds you of how powerful personal computers of all shapes and sizes have become and that thought alone might make everyone a little more tolerant and patient when problems arise.
It is rare to find a new PC that doesn’t come with additional bells and whistles in addition to the operating system itself. The “bloatware” that PC vendors add on often includes useful tools like third-party security software. It seems, though, that some PCs also come with something more insidious—pre-installed malware. Microsoft researchers investigating counterfeit software in China were stunned to find that brand new systems being booted for the first time ever were already compromised with botnet malware right out of the box. Microsoft has filed a computer fraud suit against a Web domain registered to a Chinese businessman. The suit alleges that the Nitol malware on the new PCs points the compromised systems to 3322.org. Microsoft believes the site is a major hub of malware and malicious online activity. Microsoft claims that site in question hosts Nitol, as well as 500 other types of malware. A Washington Post report states that it’s the largest single repository of malicious software ever encountered by Microsoft.
Most users—particularly most users of the Microsoft Windows operating systems—are aware of the many online threats. They’ve been conditioned to install antimalware and other security software, and update it frequently to ensure it can detect and block the latest, emerging threats. It’s a problem, though, if the PC is already compromised with malware before the antimalware software is even installed or enabled. Part of the concern lies in how the pre-installed malware works, or how deeply embedded it is. Most malware can still be identified and removed by security software after the fact. However, malware threats that are planted at the kernel level of the operating system, or in the PC BIOS operate at a level that is too deep, and can avoid detection by most antimalware tools. Malicious software is big business, and the criminals running the business are often quite clever and innovative when it comes to finding new ways to spread it. Planting malware in PCs, smartphones, or tablets before they’re even purchased and unboxed is certainly one way to go about it. What can you do then to defend against these threats? For starters, buy your PC, tablet, or smartphone hardware from established, respected vendors. If you buy an HP, Dell, Acer, Sony, or other such brand name PC the odds of it being compromised with pre-installed malware out of the box are pretty low. If you buy an Apple iPad, Google Nexus 7, or Amazon Kindle Fire you will most likely get a device free of malware infections. But, if you go bargain shopping online and buy a PC or knock-off tablet from a shady, unknown site the risk is higher. Regardless, don’t assume that just because your PC or mobile device is brand new that it must be safe and free from malware. And, you might not want to trust the pre-installed security software, either, since you can’t verify that it’s legitimate and free from malware itself. Make sure you install a reliable cross-device security tool to detect and identify malware that may already be present.
We’ll show you how to find, buy, and build in a brand-new PC chassis.
If you aren’t a dedicated PC builder, the last thing you probably think about is your PC case. But there are a number of good reasons for moving to a new chassis: You might need space for more components; you might want more cooling; you might long for some fancy features such as clear side panels or glowing fans and lights; or you might be interested in upgrading your front-panel connectors to support the latest and greatest connection types. Whatever your reason for considering a new shell, we’ll walk you through the process of selecting one–and we’ll look at how to move the parts and pieces from your old case into your new case smoothly and efficiently.
Choose a Suitable Case
PC cases fall into three broad categories: Budget, Midrange, and High-End. But a relatively inexpensive case isn’t necessarily worse than an expensive one. Budget Bonanza
A typical budget case is inexpensive ($20 to $40), rectangular, and featureless. In other words, it’s a nondescript replacement case with few special features to help you fit more components into your rig, tidy up your cables, or installation your system’s current components easily. Budget cases tend to be plain, functional, and utterly ordinary. If you want the barest possible enclosure for your PC’s parts, have no interest in expanding your case’s features or available connections beyond what you currently have, or want to spend as little as possible on a new case, you go budget. You’ll get what you pay for with these models in this price range. Midrange Medley In this category, prices run from $75 to $200, and you’ll find considerable variation in design and construction. Midrange cases typically offer handy features such as soundproofing, cable channels for routing wires, and extra connection ports.
These cases may have (or lack) a number of features that suit your needs. The most important variable to consider is case dimensions, since you’ll want to know at the outset that your new chassis can hold all of your system’s components without difficulty. Problems may arise if, for example, you have an extralong video card that won’t fit into a case because of its internal layout. If you have multiple cables, liquid cooling tubes, or huge CPU coolers to accommodate, triple-check that your PC parts will fit comfortably within a prospective new case before buying it. Also, make sure that your new case can support all of your 3.5-inch and 5.25-inch devices. And don’t buy a three-bay case if your system uses a four-drive RAID array. In appraising the raw design of the case, consider whether its accouterments–such as a big door covering the front panel, lighting effects that you can’t turn on and off manually, or a manual cooling bar that falls out of the case whenever you pop off the side panel–contribute more nuisance than neatness. Will the case’s overall design be practical six months after you purchase it? If you buy a soundproof case in the winter, will your system be able to handle the hotter interior temperatures that occur during summertime? Keep the big picture in mind, and don’t let eye-catching details lead you astray. Here are some other important questions to ask: What kind of connections come built into the case’s front panel (or sides, depending on its design)? Does the case deliver true internal headers for its connections or just pass-through cables? Are the case’s USB ports upside-down? Is the case screwless? Does it come with fans preinstalled? How loud are they when you fire up a system? What other fan configurations could you mount? For liquid cooling enthusiasts, what size radiators does the case support? How easily could you mount one externally or internally? Does the case come with motherboard standoffs, or are they built into the motherboard tray? Can you remove the motherboard tray separately from the case? Can you install or tweak the backplane of a CPU cooler without having to remove the entire motherboard? What options does the case provide for managing the system’s cables? High-End Heaven
Once you break the $200 barrier, you have to deal with manufacturers who sometimes let their imaginations run wild, resulting in PC cases that may be flashier than they are functional. So don’t let an expensive case’s ingenious design blind you to potential shortcomings in its usefulness. A manufacturer may go to great lengths to craft a killer yet functional design for its unique chassis, or it may slap an outlandish design or a few gimmick features on a case that is unpleasant to work with. The Lian-Li PC-P80NB is an ATX full-tower case roomy enough to hold every component you could dream of. Cases at the high end of the spectrum may come with a ton of cooling, fan controllers, and other switchable features built directly into the chassis. Some may cover every inch of the inside surface with soundproof acoustic foam; others may come with water-cooling loops built into the chassis, like the Logisys CS8009BK. And finally, some cases may be expensive simply because they’re huge: The Lian-Li PC-P80NB, for example, can support 11 PCI devices and 10 hard drives, and comes with six preinstalled fans (five 14-centimeter fans, and one 12-centimeter fan). If that meets your PC building needs, buy it; otherwise, steer clear. Next: Transfer your PC’s components to the new case.
Move Your PC Components From the Old Case to the New One
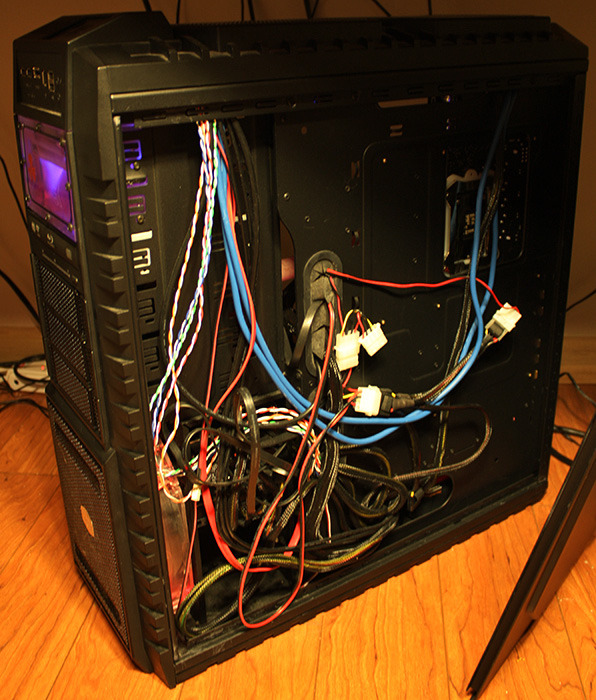
The process of transferring components from one case to another is in some ways simpler than the process of selecting the new case. Start with the components that you can easily uninstall, move, and install without affecting any others. In a typical system build, I like to start by disconnecting all of the wires and power cables in my existing chassis so that I can get the rat’s nest out of the case before I try to remove individual components. Pull out the SATA cables and the power supply, and disconnect other wires inside the system. Then pop off your system’s side panels, remove your case’s front panel (if applicable), and remove your 5.25-inch optical drives. Depending on the design of your new case, you might be able to load these components into the new shell immediately–one reason I love tool-free case designs. Hard drives come next, and they merit the same treatment. Many tool-free cases let you slot your components into place without using screws or removable case fixtures. Next, remove your PCI devices, which might consist of a single discrete video card in some instances. Assuming that you aren’t running some fancy water-cooling setup, your old case should be empty of practically everything but the motherboard by now. Unscrew it and gently remove it from the case, gripping it by the edges. If your new case doesn’t come with motherboard standoffs, screw them in–and install your motherboard’s I/O shield–before attempting to install the motherboard itself. Once the motherboard is in place, I usually attach the system’s PCI devices, especially the video card; however, this approach may make for trickier access to SATA ports or other connectors, depending on the motherboard’s layout. On the other hand, waiting to install the video card can pose a bit of a challenge if the power cables on the power supply barely reach the top connectors on the motherboard. Try to route as many cables as possible behind the motherboard, to keep them from cluttering up your case interior and restricting airflow. Once all of your components are in place and you’re ready to start connecting cables, try to use your case’s built-in cable management options to maximum advantage. In most systems, the goal is to route as many cables as possible behind the motherboard (mashed up against the right side panel). For this purpose, cases that provide multiple routing holes around the motherboard tray or fasteners (for twist ties/Velcro strips/twine or the like) behind it can be immensely helpful. Minimizing clumps of cables in the middle of your PC will give the system better airflow. Next, examine your case layout and verify whether you need to install the power supply at this stage. I recommend waiting until the last possible moment to install your power supply, to avoid having to deal with a bunch of loose power cables. Unfortunately, some cases make it hard to install your power supply after the motherboard is in place, so plan accordingly. Once you’ve installed the power supply and finished connecting all of the system’s cables, you should be finished. Transferring components from one case to another isn’t especially difficult, even for computer newbies. For most people, the most time-consuming part of the operation involves cable management–unless you’re migrating a relatively tricky system build (such as one featuring a liquid cooling loop) to a case that may require some creative thinking to achieve the desired results. Don’t be afraid of cases. Buy one. Build a system in one. You’ll be amazed at the options that await your consideration–including plenty of builder-friendly features–on today’s market of well-priced, well-designed chassis.
Building an amazing desktop computer is easy, but even after you stuff your new system with the latest hardware, hook up your cabling, and make room for your giant monitor, you’re not quite done. Make it easy on the eyes with this handy guide.
Building a desktop computer that’s amazing is easy, if a little time-consuming. But even after you’ve stuffed your new system with all the latest hardware, hooked up your cabling, and cleaned off your desk for a giant monitor, you’re not quite done. Your new desktop masterpiece is going to do you little good if you can use it for only a few hours each day. And you have the failure of your own biology to thank for that: Humans were made to be hunters, gatherers, and thinkers, not desk jockeys. Spend too much time in front of your screen, and you’re going to wreck your eyes—and no, we’re not just channeling our worried mothers. Computer Vision Syndrome (CVS) is a real condition with real symptoms that you’ve likely already noticed at some point in your tech-centric life: bloodshot peepers staring at you in the mirror after a long day of gaming; the tired, dry feelings that you attempt to relieve by rubbing your eyes; or perhaps a bit of burning, itching, or increased sensitivity to light. There are plenty of ways to keep your eyes from rioting every time you fire up your favorite Web browser. Most of them are super-easy to set up and require more time than money, although fancier (and pricier) solutions can give you a beautiful desktop setup and happier eyeballs all at once. In any case, your eyes will forever thank you for your investment.
Basic Lighting
While you might think that you’re looking at a crisper, more pleasing picture in a dim or otherwise darker environment, you’re just forcing your eyes to work that much harder to process extreme differences in contrast. And a similar situation happens when you set up your screen in a location that creates a ton of glare: not only does your picture look horrible, but all that light mucks up the quality of your picture and forces your eyes to do a lot more refocusing to achieve better clarity. So if you’re sitting at a computer under fluorescent lights and you aren’t at work, just stop: This kind of overhead lighting is one of the harshest environments for your eyes to deal with.
The best setup? Plain ol’ natural light, best deployed in the form of a window angled perpendicular to your computer screen. You might be tempted to slap your monitor or laptop in front of a huge window to enjoy some scenery while you work, but the brightness of your exterior view could stress your eyes out. You could always use blinds or curtains to limit the amount of light coming in when it’s especially bothersome, but that kind of defeats the point of the view, doesn’t it? When placing your screen perpendicular to your natural light source, you want to make sure that you’re balancing ambience with glare reduction: Angle your display so that extra light isn’t bouncing off your screen. And take some time to play around with your PC setup; a few minutes now will save you countless hours of agony later. Again, blinds or curtains can be an eye-saving device if the sun is really giving you trouble during certain hours of the day. You’ll want to supplement this natural light (or lack thereof, as the day turns to evening) with artificial lighting. And overhead lighting—even incandescent—still isn’t the best option due to its potential for glare. But you shouldn’t go to the other extreme, either. Resist the urge to purchase the classic “spotlight” desk lamp and slap its narrow cone of light somewhere on your desktop. Remember, you’re also trying to avoid sharp differences in contrast. You don’t need that much light around a monitor or laptop screen, and what you pick needs only to supply indirect light in a general area around your desk and display. A small lamp on a desk that creates a pleasant diffusion of light behind your display and prevents glare is great; a full-sized floor lamp can also work wonders, provided it physically fits into your particular desk setup. As for bulbs, consider those of the natural light (and low wattage) variety: If you need more brightness, switch to higher wattages or add another light source.
Advanced Lighting
If you’re looking for a setup that looks a little bit cooler than a tiny lamp on your desk—or if your particular desktop setup has no room for any bulkier lighting equipment—you might want to consider trying out some bias lighting. You’ve probably seen the concept before, likely on a Philips HDTV with ambient lighting (or as Philips brands it, “Ambilight”). The gist is simple: LED lights attached to the rear of your monitor blast the background with colored light (desktop systems only—unless you really want to silly up your laptop), helping to reduce glare in dimly lit environments, to make your picture appear sharper, and to transform your boring ol’ monitor into a glowing beacon of cool. As Sound and Vision’s Timothy Seppala describes the benefits of bias lighting, in an interview with Ars Technica, “It works because it provides enough ambient light in the viewing area that your pupils don’t have to dilate as far. This makes for less eyestrain when a flashbang gets thrown your way or a bolt of lightning streams across the screen.” Tim actually wrote a great guide to getting the most out of your HDTV for PCWorld that includes some tips on lighting your home theater for optimal movie watching, and you should definitely check it out if you’re a serious PC enthusiast seeking to optimize your display. When it comes to PC building, though, the problem with bias lighting is that few devices and software combinations exist that will allow you to achieve the perfect setup: ambient lighting that changes to match the colors appearing on your screen. We’ve had a lot of luck with Mad Catz’s Cyborg Gaming Lights. They’re a bit pricy at $100, but you get two little lighting modules that contain three LEDs (red, green, and blue) for creating any color you’re looking at. You just need to plug the lights into two of your system’s free USB ports (after plugging the lights’ power adapter into the wall), stash them behind your monitor, angle the lights up toward the wall, and fire up a software utility. You can then pick the color that you want to live behind your screen or set your lights to slowly rotate through a series of colors. You can also have the lights dynamically switch their appearance based on whatever happens to be on your screen—be it a game, a movie, or a picture. If you’re looking for a more inexpensive way to build bias lighting into your desktop monitor, you can always pick up Antec’s Halo 6 LED Bias Lighting Kit. For a mere $13, you can slap a strip of six white LEDs to the rear of your display. These lights—or a similar style that you can pick up at your local IKEA (Ledberg or Dioder)—aren’t going to modulate to fit whatever’s on your screen. But at least you’ll be able to reap the benefits of bias lighting without breaking your bank account. A bias lighting strip that you would attach to the rear of your display.
Beyond Lighting
Other tricks you can employ to reduce the harmful effects of extended computer use on your eyeballs include installing little apps to remind yourself to take a much-needed eye break. Chrome users can grab the extension Gimme a Break! and Firefox fans can hit up the simple Auto Timer extension to schedule some rest time for tired eyeballs. For every 20 minutes you spend staring at a screen, you need only to focus your eyes on something else for 20 seconds—that’s not so hard, is it? The software fun doesn’t end there. Odds are good that you’re running your display at fairly high brightness and contrast levels, as monitors are sometimes shipped with factory-default settings that use inordinate amounts of brightness to convince you that the picture is awesome. Not good. You’ll want to fire up the Lagom LCD monitor test pages and use their instructions to set your monitor’s settings to their correct levels. Why blast your eyes with excessively bright light if you don’t have to? Your monitor’s color temperature can also adversely affect your eyes after prolonged periods of staring. An app like F.Lux (click on the Download link at the top of the site) will automatically adjust your monitor’s temperature to match the time: Cooler lighting during the day, mimicking the temperature of common daylight, and warmer lighting in the evening, when “you probably shouldn’t be looking at the sun,” says F.Lux. Finally, you can also opt for a pair of geektastic computer glasses to help you handle your display temperature situation and reduce screen glare—we’re speaking specifically of Gunnar Optiks’ line of Advanced Computer Eyeware (the company’s term, not ours). Gunnar Optiks claims that its glasses also help increase the moisture within your eyes—a function commonly performed by blinking, which one tends to do much less when focusing on a computer screen. We can’t say whether Gunnar’s glasses turn eyeballs into swimming pools, but we did tend to notice less eye fatigue (and didn’t seem to have the same headaches as before) after a few marathon computing sessions when equipped with its glasses. Their yellow tint does take some getting used to, however!
Important Notice: Tweet this article with the bookmark social media share below to stand a chance to win an ipad or start making money with your twitter account (it works only with your twitter account and the more articles you tweet the more you stand a chance to win an Ipad)
With interactive documents, you can choose from a range of predefined options for data, instead of typing the data from scratch each time. If you write lots of letters to the same few correspondents, generate electronic data-entry forms, produce documents with boilerplate language, or find yourself typing the same phrases over and over, wouldn’t it be convenient if your documents were already partially formatted and allowed you to make selections from drop-down menus instead of copying and pasting from documents you created earlier? I’ll show you how to use the Content Control tools within Microsoft Word to create templates that you can use every day.
How to Find Word’s Content Controls
Content Controls let you add interactive elements to your Word documents, but you might not even know they exist because they’re accessible only from the Developer tab in Word’s Ribbon, and that tab is disabled by default. To enable it in Word 2010, choose File > Options > Customize Ribbon. In the right-hand panel, locate and click the Developer checkbox and click OK. In Word 2007, choose File > Word Options and then click the Show Developer Tab in the Ribbon checkbox (from the Popular set of options) and click OK. Now select the Developer tab, locate the Controls group, and click Design Mode. You’re ready to set up your controls.
Select a Date Using the Date Picker Control
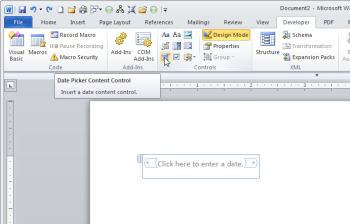
Hover your mouse over the icons in the Controls group, and a label will pop up identifying each control. The Date Picker Content Control creates a placeholder that you can use to choose a date from a calendar. The Date Picker Content Control will display a small calendar that allows the user to choose a date.Click the icon to add this element to your document. Turn off Design Mode, and you’ll see a box labeled ‘Click here to enter a date.’ The calendar will appear when you click the down arrow on the control. Pick a date, and that date will appear automatically in the document. The Date Picker has some handy settings you can configure. To see these, click Design Mode once again. Click the Date Picker control and then click the Properties button (it’s in the Controls segment of the Ribbon). Use the Properties dialog box to format the control (for instance, to have the month spelled out instead of being represented numerically). You can also use Properties to lock the content control so that it can’t be deleted, or you can add a title to the control telling the user about its purpose (“Select a date for a meeting,” for example). Finally, you can format the control with a Word style so that the date looks the way you want it to. If you use styles, and the style set changes, the date’s text formatting will automatically change to match the new style set.
Add a Content Control to Manage Text Entry
Use the Plain Text Content Control as a placeholder for a user to enter text into the document.The Plain Text Content Control creates a designated place for someone to enter text into a document. You can preformat the text in this control using a defined style, so that any text the user enters there will appear a certain way. You can also elect to permit or disallow carriage returns. On top of that, you can leave this control as is, lock it so that it cannot be deleted, or set it so that it automatically disappears once its contents have been edited. In the last mode, the content control will appear in the document until someone has typed text in it; as soon as they do, the content control will vanish, but the text typed into it will remain.
Select an Item From a List of Options
Populate the Drop-Down List Content Control with items for the user to choose from.With some documents, you’ll want to pick from a limited number of options presented in a list. In these cases, creating a template with the Drop-Down List Content Control or the Combo Box Content Control is the way to go. Click the Drop-Down List Content Control to add it to the document. For this control, you can not only type a title and use a style to format its contents, but also format it so that it cannot be deleted. To prepopulate the control with a set of choices, select the control and then click Properties. Now click Add in the Properties dialog box, and type an entry for the list (for this example, leave the display name and the value the same). Repeat this step with each entry for the list, and click OK when you’re finished. When you click Design Mode and return to the document, you’ll see the words ‘Choose an item’ in gray. Click that text, and a drop-down box will appear with the words in your list. Click one of these items, and the word will appear in the document.
Use the Check Box Control to Create Checklists
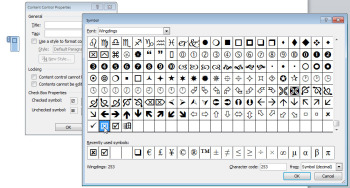
You can change the symbols used in the Check Box Content Control.The Check Box Content Control allows a user to place a checkmark to indicate their selection of an item. To add one to your document, click the Check Box Content Control and then click Properties. A Check Box can toggle between two states when clicked on: selected, represented by an X inside a box, and not selected, which shows a blank space inside the box. To change these symbols, open Properties, click the Change button, and choose a font from the dialog box (I suggest something from the Wingdings family.)
Add Quick Parts to a Document
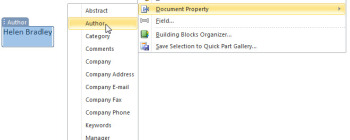
The document properties on the Insert tab are another form of content control–these are populated from data stored in the document.Some document properties, such as the author’s name, are stored in every Word document, but usually they don’t display in the document. Here’s an easy way to add that information so that it does appear: While you’re in Design Mode, select the Insert tab on the Ribbon. Click Quick Parts and then Document Property. Finally, choose the property–Author, for example–to insert that information into the document automatically. Choose the Developer tab and click Properties while this control is selected, and you can set the text style or other properties for the control. To see where the Author data is sourced from, click File > Options. You’ll see User Name in the Popular group of settings; this is the value that populates the document’s Author property. If you change this information, you must restart Word for the change to take effect.
Put Controls to Work in a Document
You’ve probably already come up with a thousand ways to use Word’s Content Controls. If you haven’t, think of any documents you create on a regular basis that include repetitive data-entry tasks: memos, fax covers, shipping documents, and so on. Include a Date Picker control anywhere in the document template that calls for a date. Add a Drop-Down List control to pick an item from a predefined list. Use a Check Box control to select or deselect various options. Using Content Controls not only helps you complete documents quickly, but also allows you to preset a document’s layout so that you don’t need to align everything perfectly every time you create it. Once you’ve created your template, save it by choosing File > Save As > Save as Type, and choose Word Template (*.dotx). Be sure to click the Templates link in the top-left corner of the Save As dialog box to store the template in the Templates folder. Type a name for the template, click Save, and close it. In the future, you can create a new document based on this template by choosing File > New > My Templates and then clicking the desired template to open it.
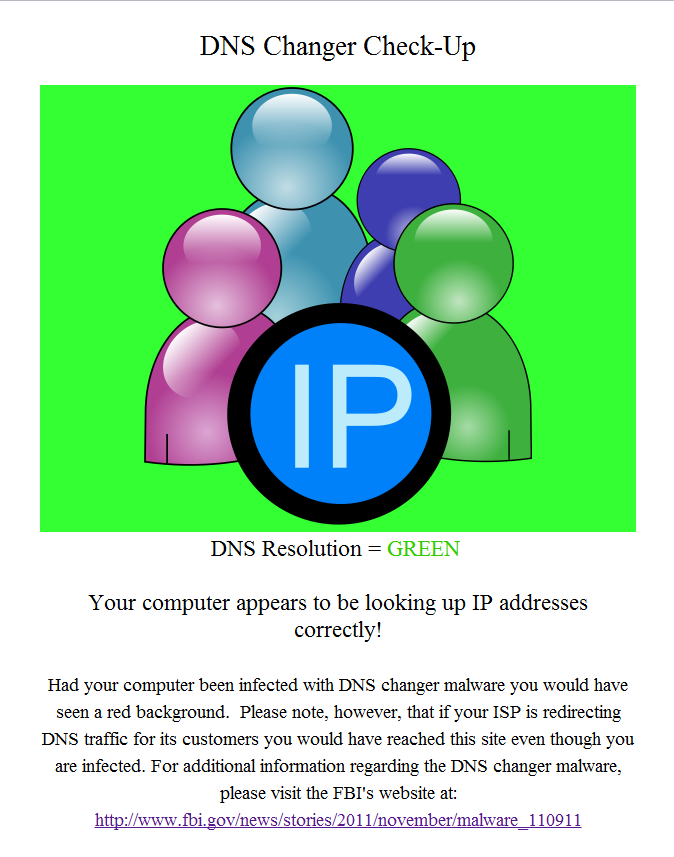
If the DNSChanger rootkit has infected your PC, you’ll lose access to the Internet when the FBI shuts down DNSChanger’s surrogate DNS servers. Here’s how to determine whether you’re infected, and what to do if you are.
In July the Internet Systems Consortium will permanently shut down DNS servers deployed to serve as temporary surrogates for rogue DNS servers shut down as part of Operation Ghost Click, an FBI operation that brought down an Estonian hacker ring last year. If your PC is one of the more than 1 million computers infected that carry DNSChanger you might unknowingly be relying on one of the FBI’s temporary servers to access the Internet, and if you don’t eliminate DNSChanger from your PC before the FBI pulls the plug on its servers, you’ll be left without Internet access. Read on to learn how to discover whether you’re infected with DNSChanger, and what you can do to eliminate it from your system.
How to Tell Whether DNSChanger Has Infected Your PC
The DNSChanger Check-Up websites will automatically check which DNS servers you’re using; it will let you know that your PC is clean by flashing a green background.To figure out whether you’ve been infected with DNSChanger, just point your Web browser to one of the (admittedly amateur-looking) DNSChanger Check-Up websites that Internet security organizations maintain across the globe. The link above will take you to a DNS Changer Check-Up page in the United States that the DNS Changer Working Group maintains; if you live outside the United States, you can consult the FBI’s list of DNSChanger Check-Up websites to find an appropriate service for your region. Unfortunately, if your router is infected, those websites will think that your PC is infected, even though it may be clean; worse, if your ISP redirects DNS traffic, your PC may appear to be clean even though your DNS settings may have been maliciously altered. If you want to be certain that your PC is free of DNSChanger malware, you need to manually look up the IP addresses of the DNS servers that your PC contacts to resolve domain names when browsing the Web. To look up which DNS servers your Windows 7 PC is using, open your Start menu and either run the Command Prompt application or type cmd in the Search field. Once you have a command prompt open, type ipconfig /allcompartments /all at the command line and press Enter. A big block of text should appear; scroll through it until you see a line that says ‘DNS Servers’, and copy down the string(s) of numbers that follow (there may be more than one string here, meaning that your PC accesses more than one DNS server). Use the /ipconfig command to look up the IP addresses of the DNS server(s) that your PC is using. It’s even easier for Mac OS X users to determine the IP addresses of the DNS servers that their PC uses. Open the Apple menu (usually located in the upper-left corner of the screen) and select System Preferences. Next, click the Network icon to open your Network Settings menu; navigate to Advanced Settings, and copy down the string(s) of numbers listed in the DNS Server box. Mac users can find their DNS server IP address(es) under the DNS tab of the Advanced Network Settings menu. Once you know the IP addresses of the DNS servers that your PC is using, head over to the FBI DNSChanger website and enter those addresses into the search box. Press the big blue Check Your DNS button, and the FBI’s software will tell you whether your PC is using rogue DNS servers to access the Internet.
What to Do If Your PC Is Infected by DNSChanger
If your PC is infected with DNSChanger, you’ll have to do some intensive work to get rid of it. DNSChanger is a powerful rootkit that does more than just alter DNS settings; if you’ve been infected with DNSChanger, your safest course is to back up your important data, reformat your hard drive(s), and reinstall your operating system. For more information, consult our guide to reinstalling Windows. If you’re leery of reformatting your entire PC, you can try rooting out the DNSChanger rootkit with a free rootkit removal utility such as Kaspersky Labs’ TDSSKiller. As the name implies, Kaspersky released the program to help PC owners seek and destroy the TDSS rootkit malware, but it also detects and attempts to eliminate DNSChanger and many other forms of rootkits. If the infected PC is on a network, you’ll have to check every other PC on the network for signs of infection, and then check your router’s settings to ensure that it isn’t affected (DNSChanger is programmed to change router DNS settings automatically, using the default usernames and passwords of most modern routers). To do this, copy down your router’s DNS server IP addresses (located in your router’s settings menu; read “How to Set Up a Wireless Router” for more information) and check them against the FBI’s IP address database mentioned above. If your router is infected, reset the router and confirm that all network settings are restored to the manufacturer’s defaults. When you’re done, repeat the steps outlined above to verify that your PC is no longer infected with DNSChanger. With all traces of this vicious malware eliminated, you should have nothing to fear when the FBI shuts down the ISC’s temporary DNS servers in July.
How to install Windows 7 on your Mac: The Complete Walkthrough Using Boot Camp to install Windows 7 on your Mac: The Complete Walkthrough
Somewhat similar to the Using Boot Camp to install Vista on your Mac walkthrough, this tutorial will take you every step of the way through installing Microsoft Windows 7 on your Intel Mac (running 10.5 or later), using Boot Camp. Note: if you’d rather not dual boot OS X and Windows 7, you can always install Windows 7 in a virtual environment using Parallels Desktop 6.0 for Mac. To install Windows 7 on your Mac using Boot Camp you will need the following:
All firmware updates installed on your Mac (use Apple Button -> Software Update… to check) A Windows 7 installation DVD Your OS X Leopard or Snow Leopard installation DVD Around 30GB of empty hard drive space on your Mac. You can probably get away allocating less than 30GB to Windows 7, but it will leave very little room to install anything in Windows. An hour if all goes well, up to 5 hours if not Though not absolutely required, it’s a VERY good idea to have a complete and up to date Time Machine backup of OS X – it really came in handy for me. Because part of the process involves partitioning your drive, there’s always the distinct chance something will go wrong and everything will be wiped out. Patience, possibly a great deal of it. Having a book handy will also help kill time during the partitioning, installing etc).
Installing Windows 7 via Boot Camp
Here goes. First thing – close absolutely every open program you can. That includes those things running in the Apple Menu that you always forget about. Don’t worry about killing the Dock or Dashboard – having those running is fine. Now open a Finder and navigate to Applications -> Utilities and double-click Boot Camp Assistant. Click Continue on the initial Introduction screen. Ignore the fact that it doesn’t mention Windows 7 as a possible OS to install. Now you have to decide how much space you want to allocate to Windows 7. You might be able to get away with going as low as 10GB, but I would highly advise against it. You’ll have almost no space left over to install software, and your page file in Windows might cause frequent crashes. I opted for 20GB, which left me with just a bit over 16GB to use after installing Windows 7.
To change the amount of space to dedicate to Windows 7, click the small divider between Mac OS X and Windows, and drag it to the left. Once you’ve determined how much space you want to allocate to Windows 7, click the Partition button. The partitioning itself doesn’t take particularly long. If you receive an error, proceed to step 10 of the “How to install Vista with Boot Camp” tutorial. It provides all the troubleshooting info you need to resolve partitioning issues. Once you’ve cleared up any problems, or if everything just goes smoothly, proceed with the next step in this tutorial. Once completed you’ll notice a new BOOTCAMP drive on your desktop. Now insert your Windows 7 DVD and click the Start Installation button. Your Mac will restart, and Windows 7 will boot. You’ll be prompted with a window asking you which partition you want to install Windows on. Select the one with BOOTCAMP in the Name column. Selecting anything else may wipe out OS X or cause serious problems. Then select the Drive options(advanced) link. With the BOOTCAMP volume still selected, click the Format link. Click OK. And Windows 7 will begin to install. It’s a fairly boring process, so you may want to grab yourself a cup of coffee or your beverage of choice. But don’t go too far away, because when your system reboots, you’ll need to remove the Windows 7 DVD. With the Windows 7 DVD removed, your Mac will automatically boot back into Windows 7, and the installation will complete. You’ll be prompted to select your language, keyboard layout etc. The rest of the Windows 7 installation process is very straight forward. Once the installation has completed and your Mac has restarted again, you’ll be able to use Windows 7. WiFi will work immediately (no drivers to install) so connect to the Internet. Windows 7 will then begin to download updates, including the proper video card driver. Let it do its thing. Once completed, you’ll be prompted to reboot yet again. Do so. Once Windows 7 boots back up again, you’ll notice the resolution is much better, and you can enable the advanced graphics features. But if you check for sound, you’ll notice there are no sound drivers installed. Insert your OS X Leopard (or Snow Leopard) DVD. When prompted, select Runsetup.exe. Note: If you’re using Snow Leopard and a message pops up saying “Remote Install Mac OS X”, close that window and eject the CD. Put the CD in again and this time select “Open folder to view files”, navigate to the Bootcamp folder, and run setup.exe. The Boot Camp installer will launch. Click Next to begin. Select I accept the terms in the license agreement and then click Next again. Make sure that Apple Software Update for Windows is checked, and click Install. The Boot Camp installer will do its thing, and install all the required drivers. Notifications will pop up with each driver that gets installed. Once completed, click Finish. And yet again you’ll be prompted to reboot. Remove your OS X Leopard DVD from the drive, and click Yes to restart. At this point most of the hardware on your Mac should be working in Windows. However, some iMacs and MacBook Pro’s will have to update to the 3.1 version of Boot Camp for Windows. To do so, just follow the few steps in this tutorial. Note: If you still have problems with sound not working, you’ll need to install the Realtek drivers. That’s it, you’re done! When your Mac boots, hold down the Option key to select which Operating System you want to boot into.
How to install Vista on your Mac: The Complete Walkthrough Using Boot Camp to install Vista on your Mac: The Complete Walkthrough This walkthrough will take you through every step of installing Microsoft Windows Vista on your Intel Mac (running 10.5 or later), using Boot Camp. It will cover a number of possible errors that you may encounter, and how to get around them. Each time I bring up an error I will explain in detail what you’ll need to do to resolve the issue and continue installing Vista. It’s up to you to decide if it’s worth the time and effort (for example, you may need to completely wipe your hard drive clean and restore from a Time Machine backup). It’s also possible that everything will go perfectly smoothly and you’ll wonder why you even needed a guide.
To install Vista on your Mac you will need the following:
All firmware updates installed on your Mac (use Apple Button -> Software Update… to check) A Vista installation DVD (Home Basic, Home Premium, Business or Ultimate) Your OS X Leopard installation DVD At least 10GB of empty hard drive space on your Mac (you can probably get away with less but you’ll have almost no room to install anything other than the OS) An hour and a half if all goes well, up to 5 hours if not Though not absolutely required, it’s a VERY good idea to have a complete and up to date Time Machine backup of OS X – it really came in handy for me Patience, possibly a great deal of it. Having a book handy will also help kill time during the partitioning, installing etc).
Installing Vista via Boot Camp
Here goes. First thing – close absolutely every open program you can. That includes those things running in the Apple Menu that you always forget about. Don’t worry about killing the Dock or Dashboard – having those running is fine. Now open a Finder and navigate to Applications -> Utilities and double-click Boot Camp Assistant. It’s not a bad idea to have the Setup Guide handy, just in case you need it. Click the Print Installation & Setup Guide button. Click OK If you have another computer around, and would like to save half a tree (printing the guide will use 20-something pages) – select the PDF button and choose Save as PDF If you don’t want to download my copy, enter the appropriate info (most importantly, the download location so you can find it) and click Save. Transfer the PDF to your other PC/Mac so you can access it while actually installing Vista. Back at the Introduction page of the Boot Camp Assistant, click Continue. Now you have to decide how much space you want to allocate to Windows Vista. You might be able to get away with going as low as 6GB, but I would highly advise against it. You’ll have almost no space left over to install software, and your page file in Windows might cause frequent crashes. I opted for 20GB, which left me with just a bit over 15GB to use after installing Windows Vista Ultimate and upgrading to SP1.
To change the amount of space to dedicate to Vista, click the small divider between Mac OS X and Windows, and drag it to the left. When you’re happy with the amount of space that Vista will have, click Partition. Watch the little status indicator.. and hold your breath that no errors occur. If you’re presented with a Start Windows Installation screen, proceed with step #11 below (and consider yourself very lucky). If you get an error, keep reading.
The most common error is that OS X couldn’t move a file and the partition could not be created. There are a couple of things that could be wrong, and I’ll outline how to fix them from the fastest method to the longest method. Cross your fingers that the fastest one will resolve your problem.
Close out of the Boot Camp Assistant and launch the Disk Utility by selecting Applications -> Utilities -> Disk Utility.
Select your Mac drive, or the partition you were trying to install Boot Camp on (if you have more than one). Click the Verify Disk Permissions button, then the Repair Disk Permissions button. Once that’s done, click the Verify Disk button, then the Repair Disk button if it’s available. Now go back to step #1 and try it all over again (except you don’t need to print out the PDF twice). If you were able to create the partition, excellent, continue with step #11. If you got the same “can’t move file” error, download and install OnyX Once installed, launch it (you’ll probably be prompted for your password) and select the Maintenance tab. Click the Execute button and wait. Once again, go back to step #1 and start all over again. If it worked this time, excellent, proceed to step #11. If it didn’t, you have another couple of choices. Neither is much fun. First, you can purchase defragging software (I’m not aware of any that are free/open source) such as iDefrag and hope that it resolves your problem (it might not). Second – and this is what I opted to do – re-install OS X by formatting the entire drive (all data will be lost), run software update to get all the firmware updates, install Vista via Boot Camp, and then restore OS X from a Time Machine backup. Like I said, not great choices. If you do decide to go the format and re-install route, I’ll outline it with a few more details –
Know that you might lose all of your data. Time Machine could fail, your roommate might decide now would be a good time to smash your backup drive – any number of problems could occur. This is my way of saying that I will NOT be held responsible if this method causes you all kinds of nightmares. With all of that said, it worked perfectly fine for me. Make sure you have a 100% up to date Time Machine backup. Open Time Machine and select Back Up Now. If you opted not to back up certain folders, make sure you have the contents of those folders backed up – or remove them from the “don’t back these folders up” section of Time Machine. Put your OS X Leopard DVD in your DVD drive, and restart your Mac. Hold down the c key as your Mac restarts – this will force your Mac to boot from the DVD rather than the hard drive. Follow the walk-through to install OS X. Make sure you select the “format this drive then install OS X” option Once you’ve re-installed OS X, start your Mac and run the Software Update to make sure everything is up to date. Once completed, you’ll be prompted to reboot. Do so. Once again, run the Boot Camp Assistant. This time you should have no problems at all Carry on with step #11 below, and once you’ve completely finished installing Vista, perform a Time Machine restore. To do so, boot from the OS X DVD (hold down c as your Mac starts up) and from the Utilities menu, select Restore from Time Machine (or something like that, I forget right now). Let Time Machine do its thing (boring, takes forever) and once it’s done, reboot yet again. You’ll finally have a dual boot Mac w/ Vista and OS X.
Alright, time to install Vista. Put your Vista DVD in your DVD drive and click Start Installation. A bunch of things will happen on their own. Don’t interfere with them. You’ll eventually land at a screen asking where you want to install Windows. Make sure, and I mean make sure you select the BOOTCAMP partition. Selecting anything else is going to force you to re-install OS X, and unless you have a recent Time Machine backup, you’ll lose all of your data.
Now click the Drive options (advanced) link/button. Click Format and once it’s done, click OK. Now you can click Next. Now Vista will install. It takes a while and it’s not particularly entertaining. Vista will restart itself at least once during the installation. If by some chance – and this shouldn’t happen – when Vista restarts itself, and you end up back in OS X instead of Vista, restart again and this time hold down the Option key as your Mac starts. You’ll be presented with a number of drive icons to choose from. Double-click the Windows icon.
And now Vista has finished installing, you’ve setup your “account” in Vista, and you think you’re done. You’re not. Eject you Vista DVD from your DVD drive (if you have problems ejecting it go to the Computer view in Vista, click once on your DVD drive, and then select the Eject link that will show up in the menu. Now pop in your OS X Leopard DVD. You’ll be prompted “Install or run program” – click the Run setup.exe button. You might be told that a system restart is pending and you can’t install anything yet. I never said this was a short process. Restart your Mac and make sure to boot into Vista. This time when you Run setup.exe you’ll get the “Welcome to the Boot Camp installer” screen. Click Next. Place a check in the “I agree” part, and click Next. Make sure Apple Software Update for Windows is selected, and click Install. Sit back and watch. Don’t interfere. Your screen may flicker, ignore it. Also ignore any pop-ups that might appear in your System tray. Almost done.. And now you’re done. Click Finish. Restart yet again. Note: when Vista boots, you might encounter a couple screens full of error messages (Unrecognized partition table for for drive 80, can’t boot from NTLDR from drive=0×80 etc). Ignore them, and let Vista continue to boot. I have a (bad) camera phone picture of some of the errors below. This time when Vista starts, you’ll notice a new icon in the System tray – it’s the Boot Camp software. Click it once and a pop-up menu will appear.Select Boot Camp Control Panel…. On the first tab, Startup Disk you can select which Operating System you want to boot into by default. Just high-light the one you want – but remember – you can also choose to boot to the other OS by holding down the Option key while your Mac starts. Note: you can also define which OS you want to boot into by default in your Mac. Just select the Startup Disk option in your System Preferences. Click the Brightness tab to adjust – you got it – the screen brightness. Click the Remote tab. From here you can disable or enable the use of a remote infrared receiver. Your choice. Select the Keyboard tab to make some keyboard changes. Boring. And finally, select the Power tab. Do you want to automatically restart after a power failure? Here’s where you decide. When you’re done reviewing all of the Boot Camp Control Panel options, click OK. And one last thing. Remember – no matter which Operating System, Vista or OS X, you decide to have as the one you automatically boot into when your Mac is turned on, you can select the other one by holding down the Option key as your Mac starts.
SIUC asked the Windows forum about running software intended for Windows XP in Windows 7. For the most part, it should just work. I’ve rarely run into programs that run fine in XP but have trouble in Windows 7. But if you’ve run into one of those rare programs, try running it in XP Compatibility Mode:
Right click the .exe file or the shortcut and select Properties.
Click the Compatibility tab.
Check Run this program in compatibility mode for and select an appropriate option.
If this doesn’t work, there’s another work-around: XP Mode. (And yes, I know it’s silly that the two solutions are called XP Compatibility Mode and XP Mode.) Unfortunately, this option is only available for Windows 7 Professional and Ultimate editions. You’ll need to download and install Windows XP Mode and Windows Virtual PC (be patient; it’s a big download). Once you’re finished, you’ll be able to actually run XP inside a virtual machine in Windows 7. It’s not as smooth as simply running the programs in Windows 7–you’re in an entirely different environment. Even the hard drive that XP boots from and runs off of is a virtual one. But you won’t be entirely cut-off from Windows 7. You will be able to access the real hard drive from within XP, and both versions of Windows will share the same clipboard.
Here’s how to legally download Windows 7 and make your own install disc.
Many computers ship without Windows 7 installation discs. Instead they come with “recovery” discs and/or partitions that claim to restore your PC to its “factory fresh” state, but include a ton of bloatware (free trials, media players, useless utilities, and the like) along with Windows. Removing each piece of bloat is time-consuming, and just not the same as truly starting fresh. In this article, you’ll learn how to make your own Windows 7 installation disc (or USB flash drive) and use the valid product key you already have to perform a fresh reinstallation. The following method is effective and legal, and doesn’t require a lot of technical expertise However, we don’t recommend that you delete your recovery partition or throw away your existing recovery discs. Although many people have had success with the following procedure, others have not. Some users have not been able to activate their copy of Windows even after entering a valid product key, while others own PCs that require software not included in a Windows 7 ISO. You have no way to know whether this procedure will work for you until you try, and you need a backup plan in case it doesn’t. Also, save your files and drivers to external media before you start. Reinstalling Windows wipes out all personal data and causes a loss of functionality in devices for which Windows lacks an adequate built-in driver. Plan on loading the latest device drivers from media you create before reinstalling Windows.
Reinstalling Windows 7, Step by Step
1. Find your Windows 7 product key: Typically this 25-character alphanumeric string is printed on a sticker affixed to your PC or on documentation included with your PC. Alternatively, you can use a keyfinder program such as Magical Jelly Bean Keyfinder to pull your product key from the Registry. You need your product key to reinstall Windows. Magical Jelly Bean Keyfinder helps you round up your serial numbers. 2. Download the ISO file for the version of Windows 7 you own:
The above links point to Digital River, a licensed distributor of Microsoft software. These downloads are each over 3GB, and your product key will work only with your edition of Windows, so make sure to select the right one. 3. Download the Windows 7 USB/DVD download tool. This utility lets you copy your Windows 7 ISO file to a DVD or USB flash drive. Whether you choose DVD or USB makes no difference; just confirm that your PC can boot to the media type you select. 4. Boot your computer using the Windows 7 DVD or USB flash drive. Follow the prompts to prepare the destination hard drive and install Windows.
Anderson7 asked the Windows forum for the safest way to install Windows 8 on a system already running Windows 7. I wrote my opinion of Windows 8 last month. Many readers voiced their own, differing opinions. You can make up your own mind by installing the Windows 8 Consumer Preview. But you shouldn’t replace your current OS with one that’s not yet ready to be sold commercially. You want to install Windows 8 in a way that leaves Windows 7 unharmed. That’s why I recommend installing it in a virtual machine (VM). Virtual machine software imitates an actual, physical computer, onto which you can install another operating system. This is by far the easiest and safest way to try out an operating system. I recommend Oracle VM VirtualBox for creating and running your Windows 8 VM. It’s free, open-source, powerful, and it already supports Windows 8. (It’s main free competitor, VMWare Player, doesn’t support Windows 8 as I write this.) You’ll also need to download the .iso file version of the Windows 8 preview. This page contains both 32- and 64-bit editions; unlike previous Windows versions, you can’t install the 32-bit version on 64-bit hardware (at least I couldn’t). You’ll also find the product key here; you’ll need that during installation. Once everything is downloaded and you’ve installed VirtualBox, follow these directions:
Load VirtualBox, the click the New icon in the upper-left corner.
This starts a wizard. Click Next.
On the “VM Name and OS Type” page, enter a name that includes the phrase windows 8. Otherwise, “Windows 8” won’t show up as a Version option.
Stick to defaults for the result of the wizard, even when asked if you want to “Create new hard disk.” Don’t worry, it’s just a virtual disk.
When the Wizard finishes and closes, double-click the new virtual machine.
Read the message about the Auto capture keyboard, then click OK.
The First Run Wizard will start. When you’re asked for Installation Media, click the folder icon on the right and select your downloaded .iso file.
The installation will begin after you click Start.
When asked for a type of installation, select Custom. Don’t worry about overwriting files. The only hard drive the installation sees is the empty, virtual one.
When you’re done, you’ll be able to run Windows 8 inside Windows 7.
Here’s our guide to resetting your Windows password if you don’t have access to a previously created password-reset disk.
The easiest way to reset a forgotten Windows password is to use a previously created password-reset disk. You can create such a disk (on USB removable media or a floppy) within the Windows User Accounts menu by opening the Windows Control Panel, selecting User Accounts, and clicking Create a password reset disk in the left pane. You should take this step with a new PC; once you have the disk, you can insert it when starting the PC to cause Windows to display the ‘Reset password’ option at the login screen, allowing you to regain access to your system. However, if you don’t have a password-reset disk and you need to reset your Windows password, I suggest using the following Sticky Keys trick.
Reset Your Windows Password Using the Command Prompt
1. Boot your computer using your Windows installation disc. 2. Wait for the setup files to load, and select your language. Click Next. 3. Click the Repair your computer link on the Install Windows screen. 4. Select the operating system to repair, and note the drive letter on which the OS is installed (it is probably C: or D:). Click Next. 5. Click Command Prompt at the bottom of the list of recovery tools. Now you need to overwrite the Sticky Keys executable with the Command Prompt executable. Sticky Keys is an accessibility feature that allows a user to tap the Shift, Ctrl, Alt, or Windows key once to achieve the same effect as holding the key down. Ordinarily, tapping Shift five times activates Sticky Keys–but with this trick, you are going to make tapping Shift five times activate the Windows Command Prompt instead. The instructions below use drive letter C: as an example. If your operating system is installed on another drive, replace C: with the appropriate drive letter. 1. In the Command Prompt window, type copy c:windowssystem32sethc.exe c: and press Enter. 2. Type copy /y c:windowssystem32cmd.exe c:windowssystem32sethc.exe and press Enter. 3. Exit the Command Prompt and reboot the computer. At the login screen, tap Shift five times. The Command Prompt will pop up. 4. Type net user usernamepassword, replacing username with your username and password with a new password. 5. Exit the Command Prompt, and log in using your new password. To prevent another user from exploiting the same trick to reset your password, you can restore Sticky Keys as follows: 1. Step through the instructions above to boot the PC using your Windows installation disc, open the recovery tools, and launch the Command Prompt. 2. Type copy /y c:sethc.exe c:windowssystem32sethc.exe and press Enter. 3. Exit the Command Prompt and reboot the computer. Pressing Shift five times will now activate Sticky Keys instead of the Command Prompt. Store your Windows installation disc in a secure location. Caution: Resetting a password using the Sticky Keys trick means you will lose access to encrypted files, encrypted email messages, and stored passwords for Internet Explorer and network resources. Remember to back up your important data regularly.
I just got my new netbook 2 weeks ago, but I was greatly disappointed with the fact that it came with Microsoft Windows 7 Starter edition only not Windows 7 Home Premium, Professional or Ultimate. As we all know, Windows 7 starter is the cheapest version of Windows 7 series and you can’t even change to your favorite background wallpaper or I would suggest a handicapped version of Windows 7. Eventually my search for the upgrade begin!
Initially I was thinking of formatting my whole hard disk and get a fresh new copy of Windows 7 Ultimate (cracked ver). But after reading some forums and comment by some of the users, I found out that we can actually upgrade our current version of Windows without going to the formatting path. Instead it could be easily upgraded to any version you prefer as easy as 1 2 3. Here go the step: Step 1. Enter “Anytime Upgrade” in the Start menu search,and select Windows Anytime Upgrade.
Step 2. Select “Enter an upgrade key” from the screen.
Step 3. Download Windows 7 Anytime Upgrade keygen at Hotfile and key in the key generated into the space and click “Next”.
Step 4. The key will be verified as a valid key, and Windows Anytime Upgrade will automatically choose the correct edition of Windows 7 based on your product key. Click Next when this is finished. Step 5. Click “I accept” to accept the license agreement. Step 6. Click “Upgrade” to initiate the upgrade process. Step 7. Wait for the Windows 7 to be installed. As stated the upgrade will take about 10 minutes but it may vary according to your connection speed. Step 8. Windows 7 will start installing all the feature into your computer. Well, you are done. You have successfully upgraded your Windows 7 Starter edition.
I have already discussed about a small but useful utility Asterisk Key to find hidden passwords in Internet Explorer. But scope of this application is not limited to web browsers only. It can also be used to reveal passwords hidden under asterisks from any windows applications like Google Talk, Yahoo Messenger etc. How many times have you forgotten your saved passwords? It happens with everyone. But don’t worry. Things can be a lot easier after you learn how to use this software. All you have to do is to launch the application for which the password has to be found along with Asterisk Key. Then click on “Recover” button in Asterisk Key. That’s it. You can see in the image below the password gets revealed along with the application name. It’s very simple. Now a forgotten password hidden under asterisks is just a click away. Also, you can easily hack others stored passwords as well. Enjoy!!! Download:- Asterisk Key Any comments are whole heartedly appreciated. P.S. Asterisk Key size is just 453 Kb and it does not work with Firefox. It’s up to you if you use if for hacking.
With so many cracking tools coming up to break windows password, it’s very difficult to protect your personal computer from unauthorized access. Even BIOS passwords is easy to crack. Nothing is secure and safe these days. Now no more worries, I just found a simple trick by which you can easily protect your windows from unwanted usage. This really cool and hidden feature of Windows lets you maintain your privacy of data on your computer even if you are not around.
What it does is that it adds an extra secret key along with your windows password. So when your computer is started, it first asks for the secret key and then the windows password. Windows password can easily be hacked but you cannot get around this secret key which we will be going to store in a removable devices such as USB drive etc. Here goes the step-by-step procedure for achieving an extra level of protection. 1.) Open run dialog box. 2.) Type SYSKEY and click OK. 3.) Check the Encryption Enabled radio button. 4.) Click on Update.
5.) Under System Generated Password choose Store Startup Key on Floppy Disk. (Now many of you must be thinking that this tutorial is waste. Where in the hell should be get Floppy no? Don’t worry; you don’t require any Floppies for this. Just insert your USB device and change its Drive Letter to A:. I am using my IPOD shuffle for this purpose. You can use your Pen Drive. Read further to learn how to change Drive Letters.) 6.) After you have inserted your USB device, right click My Computer -> Manage -> Storage -> Disk Management. 7.) Now you will see all storage volumes there. Choose your USB volume, right click on it and select option Change Drive Letters and Paths…
8.) From the long list of available drive letters choose A:. 9.) Now return back to SYSKEY, choose Startup Key on Floppy Disk and click OK.
10.) No 10th Step. You are done. The next time you start your computer, you’ll have to insert this USB device when asked and then only you can login to your account. You can also see a registry file named StartKey stored in your USB device. I am still looking for the possible ways to login to my personal computer just in case if my IPOD (USB device) is broken or unavailable. If you have idea to break this protection, please share that with us. It will be useful as well.
Many times we need to unblock certain websites to gain access to some important stuffs. We all know many ways to do that. But how about actually learning to block one? Have you even been in a situation when you have to block certain websites from your computer for any reason? Well, I am not sure about any body else but certainly I have been many times in such situation. Parents may also want to prevent access to certain websites on their computer so that children can’t get to them from internet. So what’s the solution? Aaaah… It’s very simple.
1.) Open “Run” from the start menu (or press WinKey + r). Just copy paste the following path and hit ENTER. notepad %windir%system32driversetchosts
Alternately, go to C:WindowsSystem32DriversEtc and find the file “hosts”. Open that file in Notepad. 2.) When this hosts file is opened in Notepad, at the end of the file you will see something like “127.0.0.1 localhost”. 3.) Under “127.0.0.1 localhost” just add another website URL that you want to block. For Example:- 127.0.0.1 localhost 127.0.0.2 www.rakshitk.com 127.0.0.3 www.whoismadhur.com 4.) Make sure every time you add another website, the last digit of the address 127.0.0.x should not be the same.
5.) Save the file and exit. So, here you go. Restart your browser if it is opened and changes will take place immediately. The good thing is that no message, no pop ups nothing will be displayed when someone tries to open a blocked website. Your browser will just fail to open those websites without any error messages.
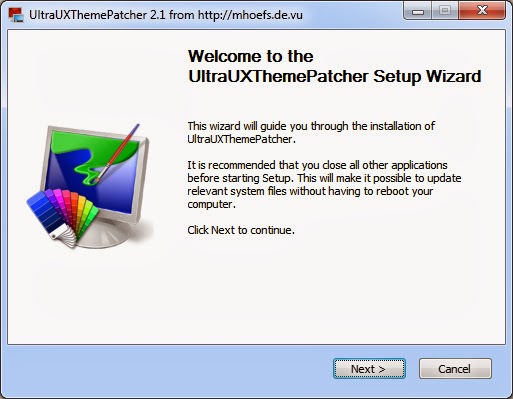

 Same Wi-Fi technology is utilized in wireless networks at home. Devices get connected to Wi-Fi hotspots via the use of a Wi-Fi network adapter. In fact, today the latest laptops and computers are designed with built-in adapters. The hotspots that are used in public locations usually require paid subscriptions and credit cards.

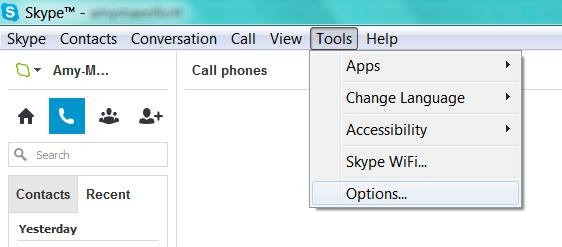

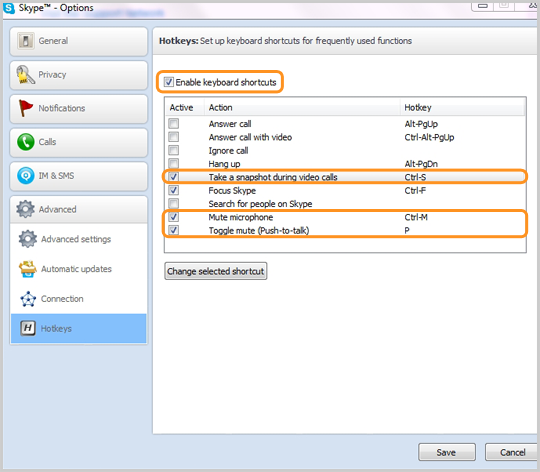
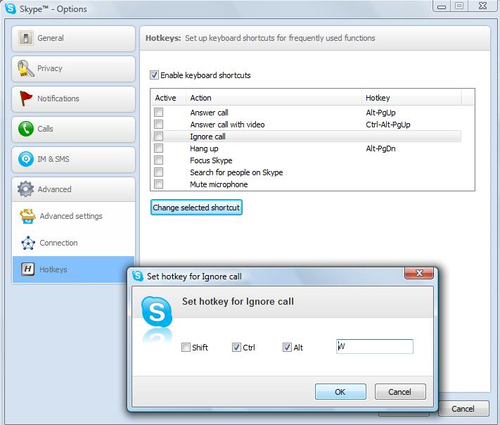






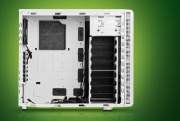
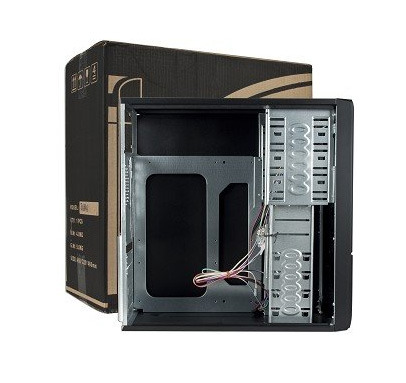
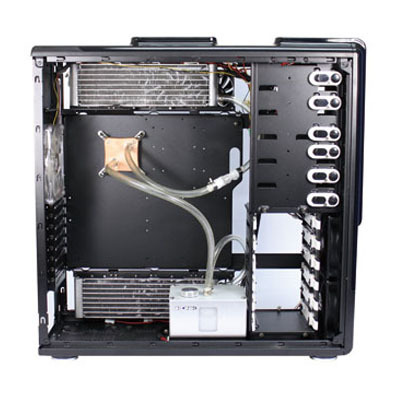
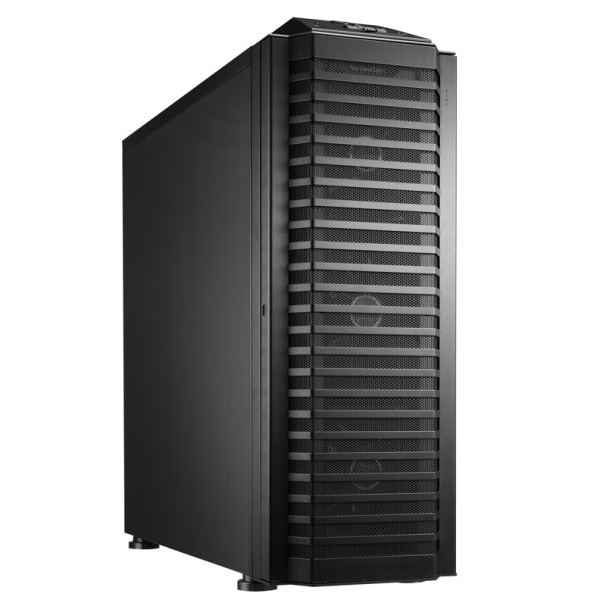


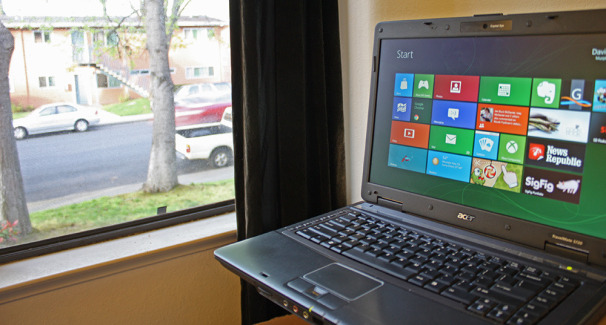
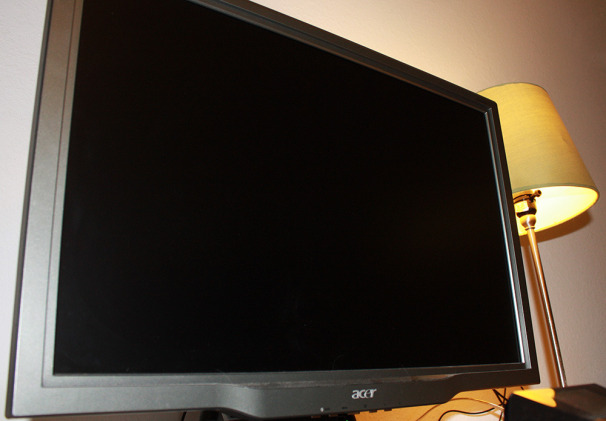
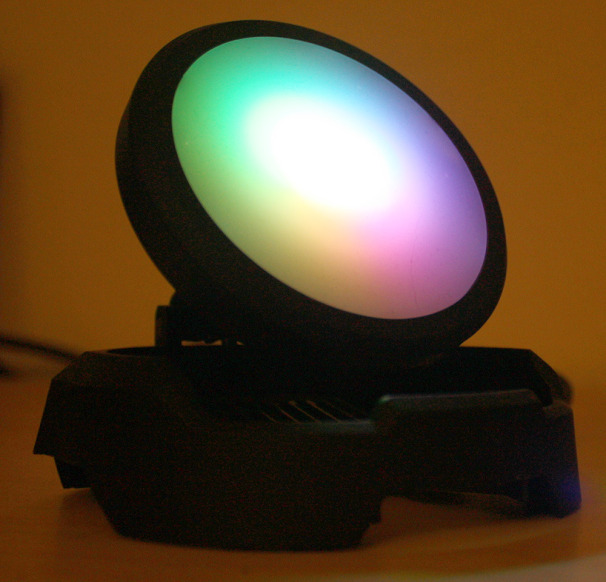
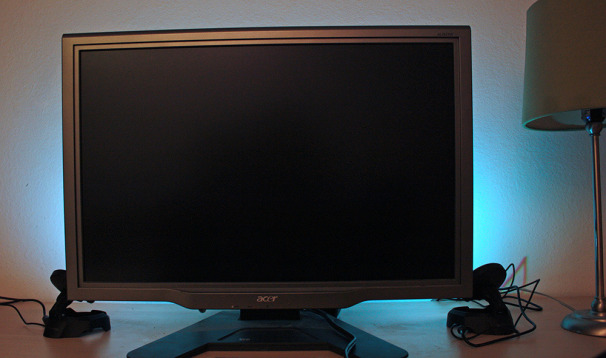



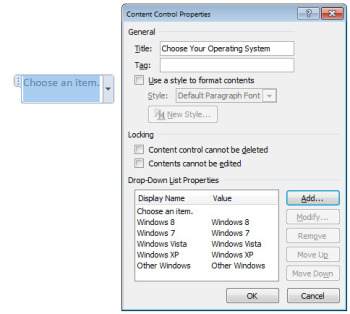

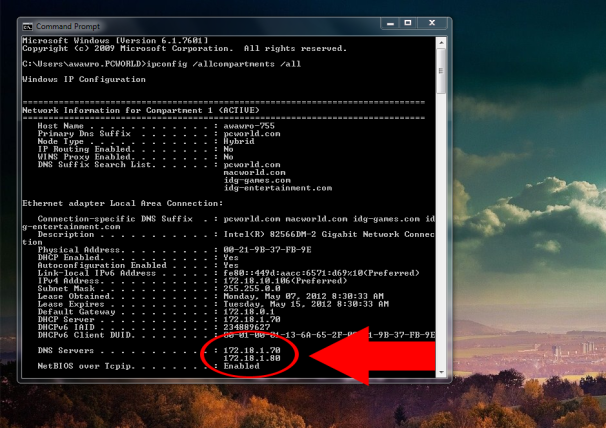
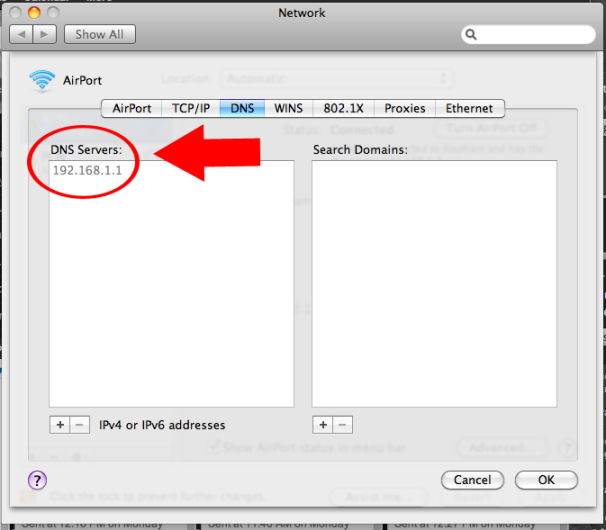
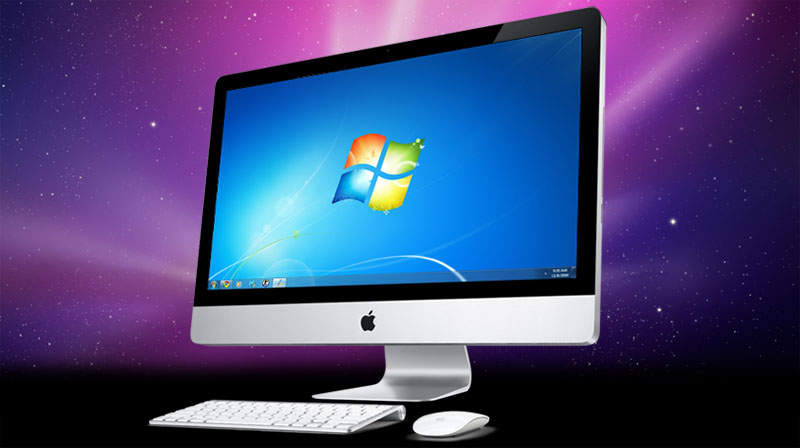

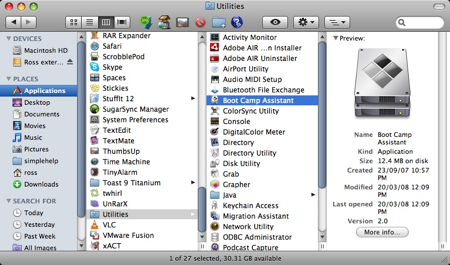
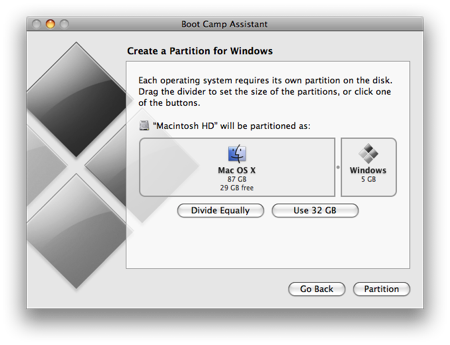
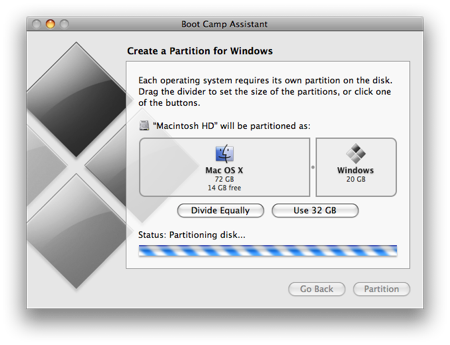
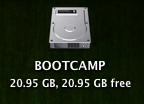
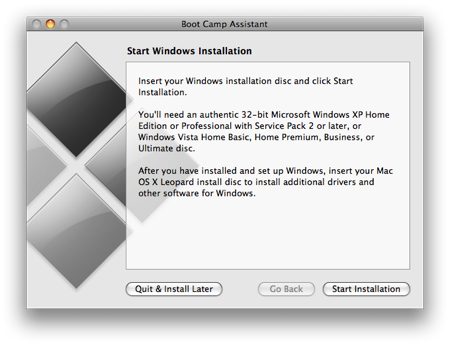
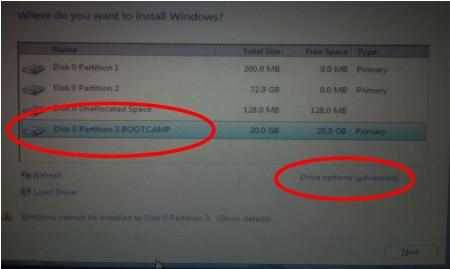
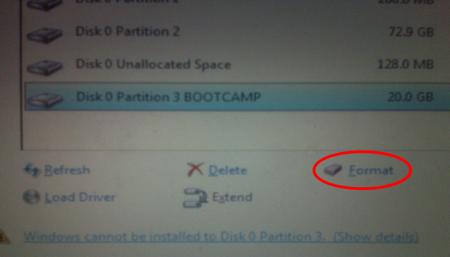
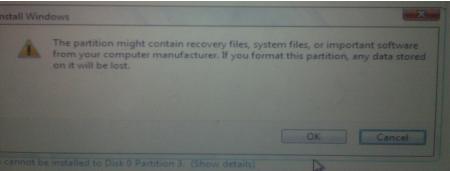
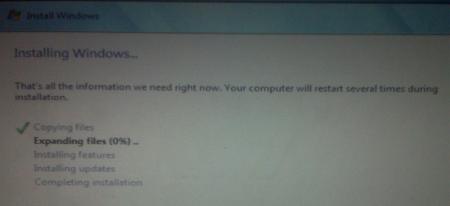
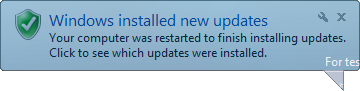
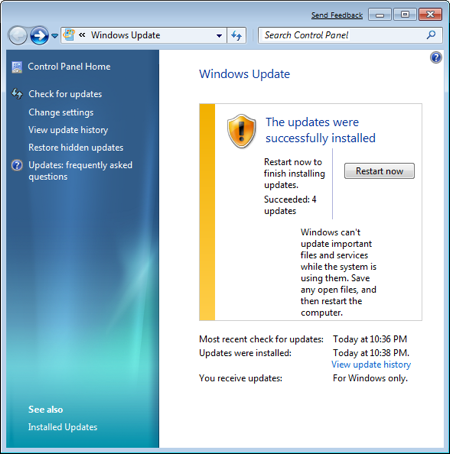
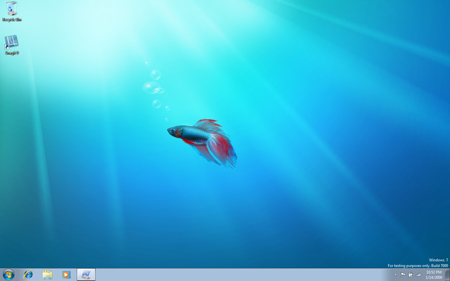
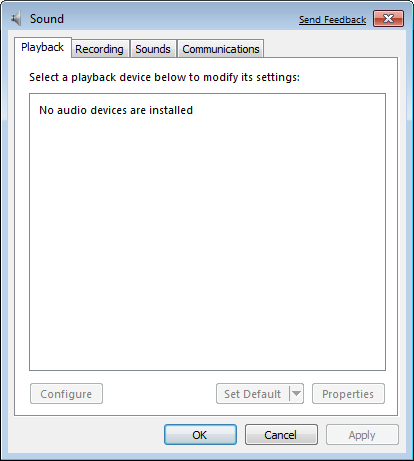
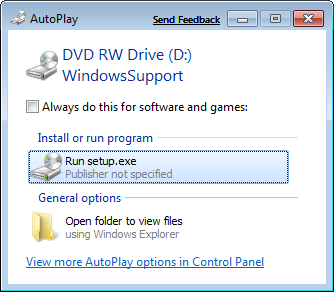
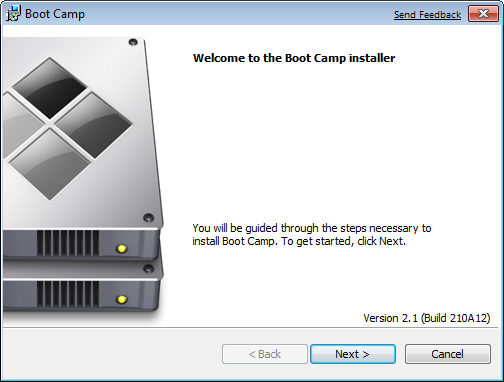
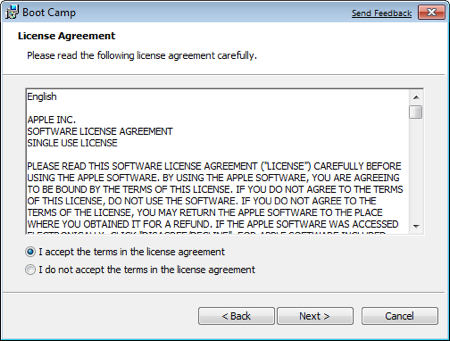
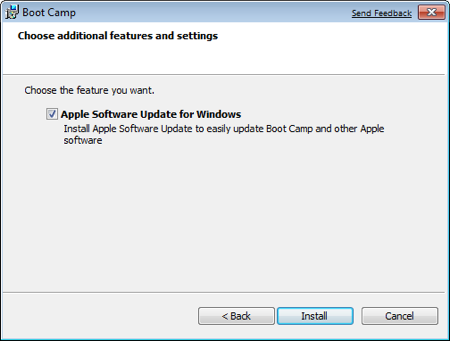
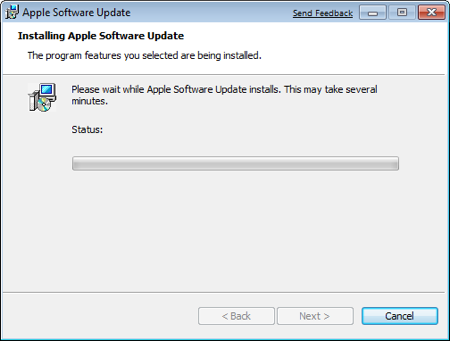

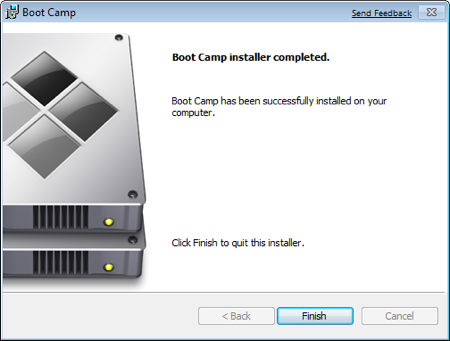

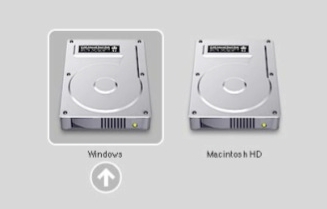
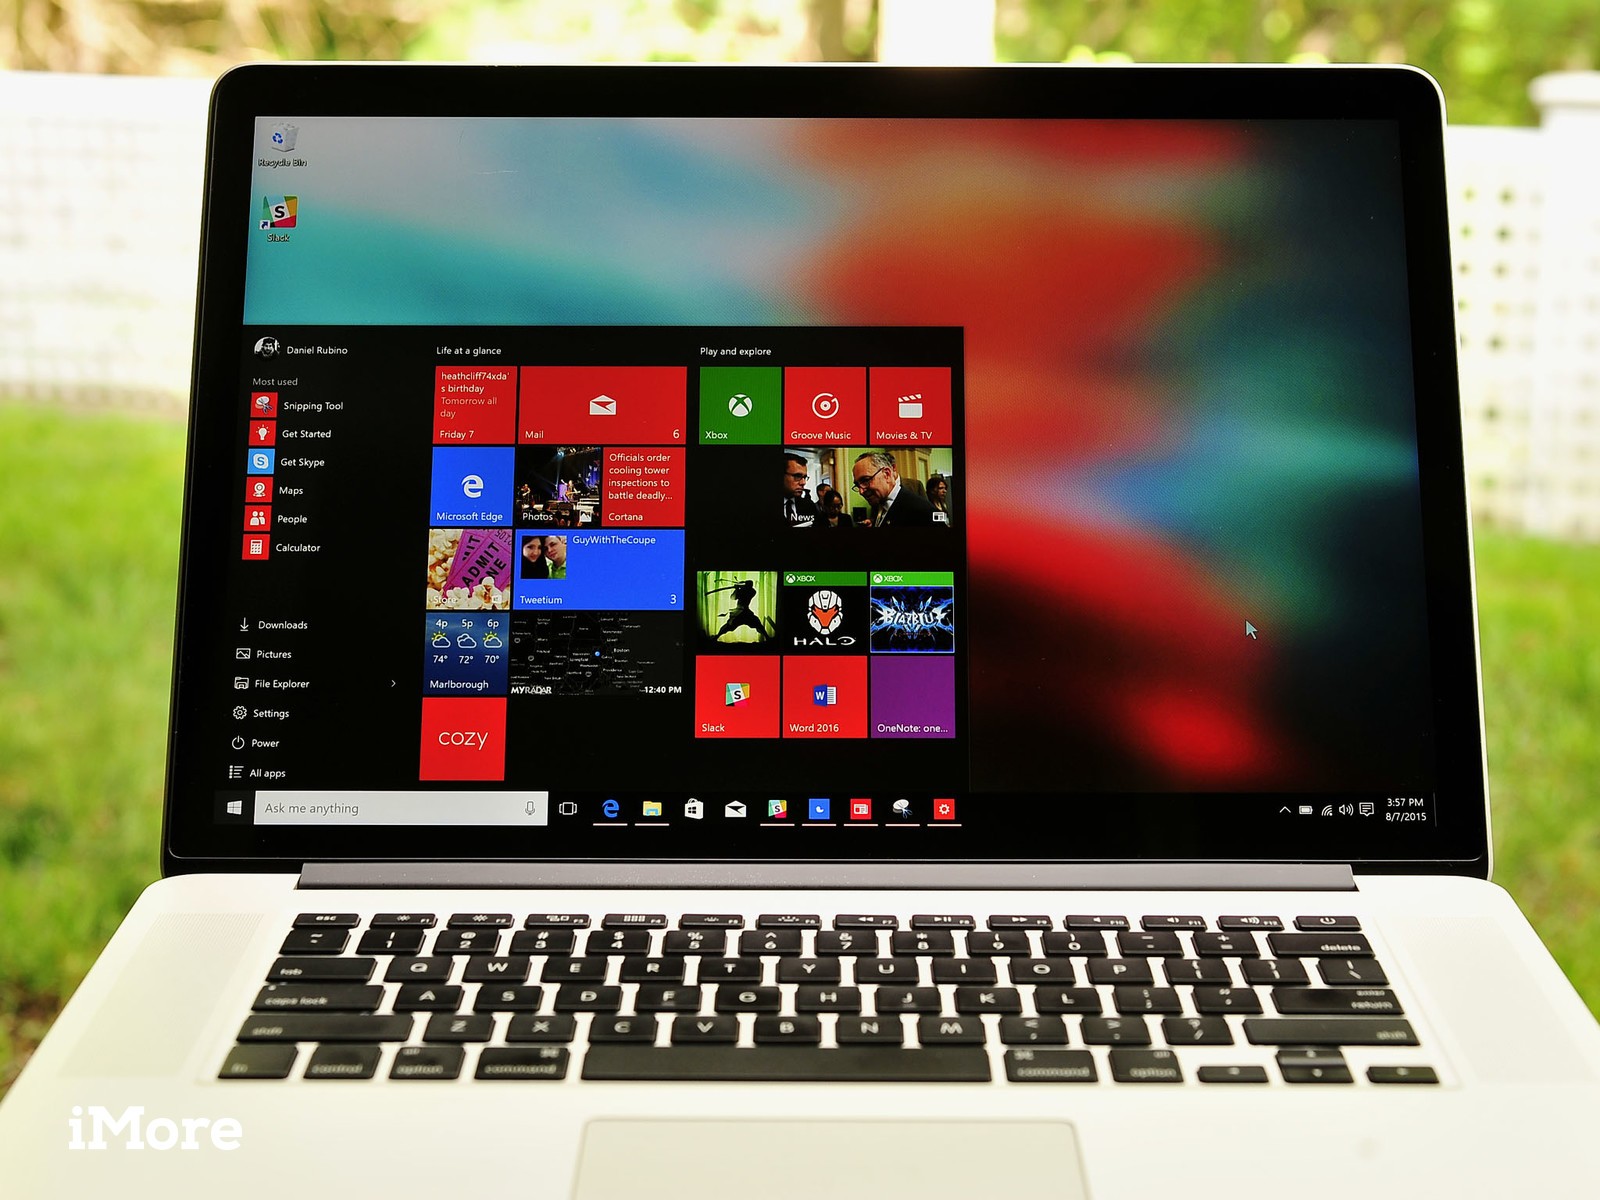
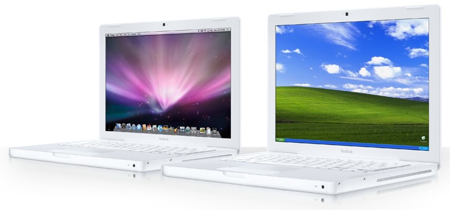
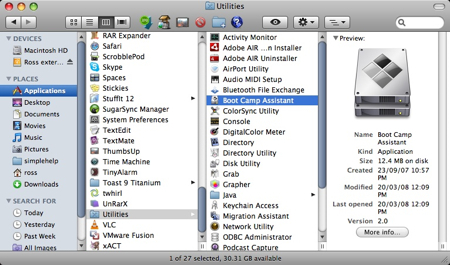
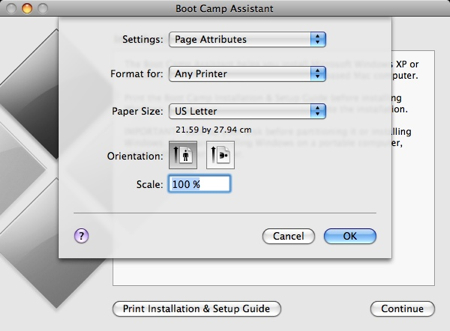
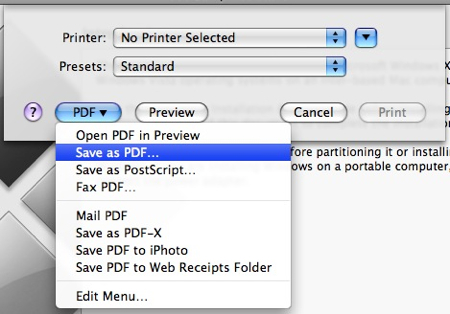
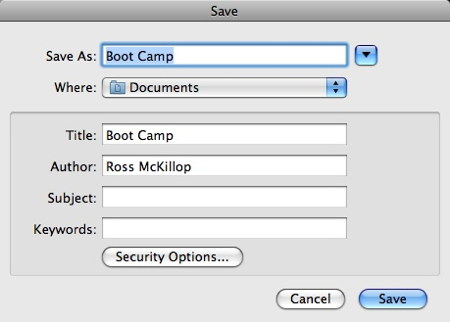
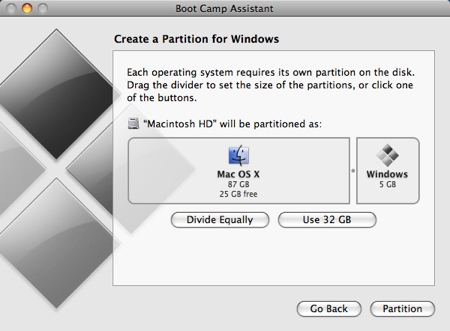
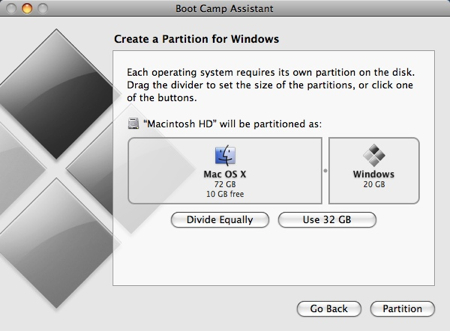
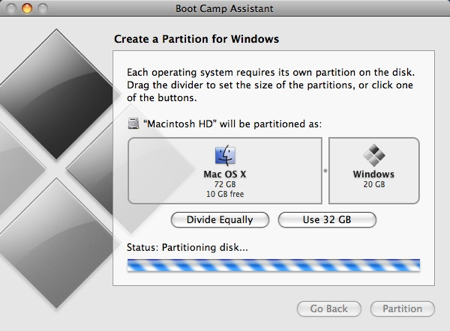
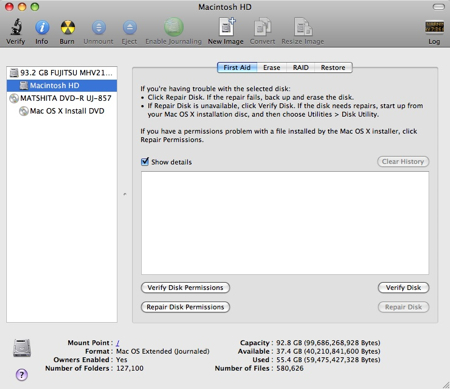
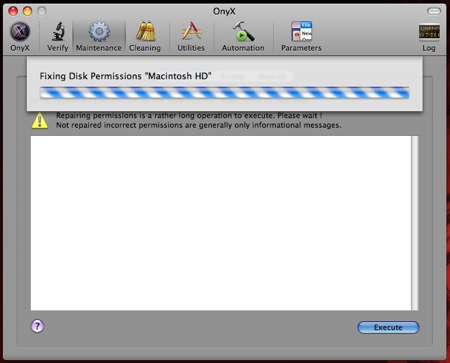
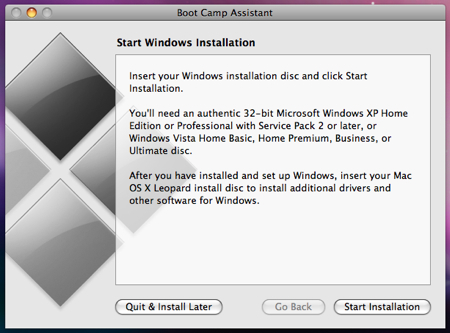
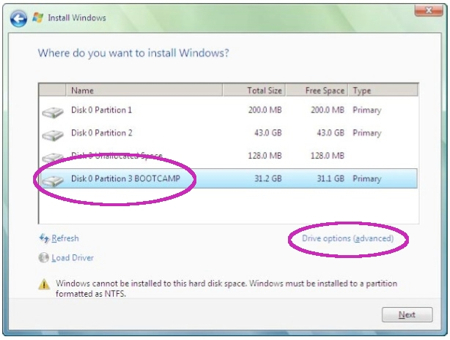
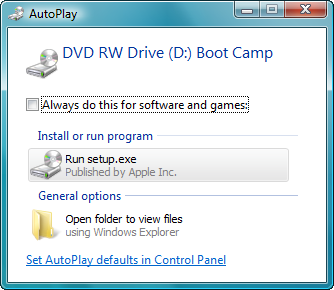
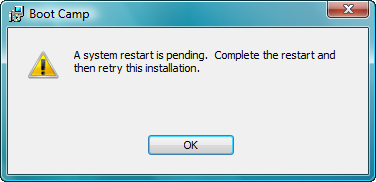
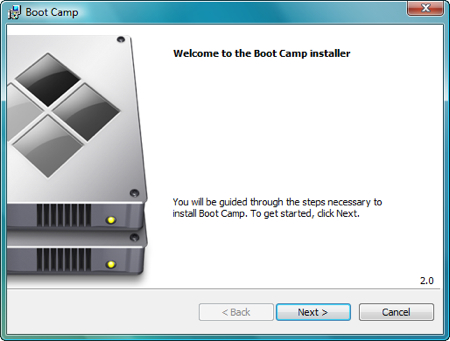
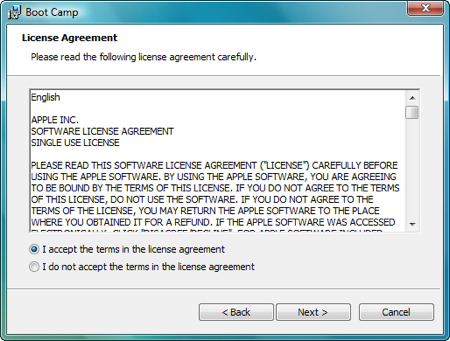
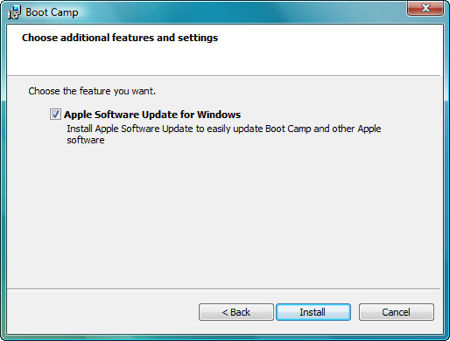
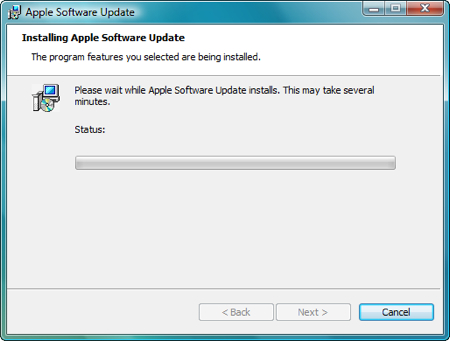

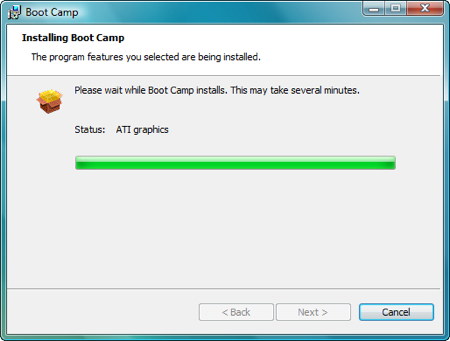
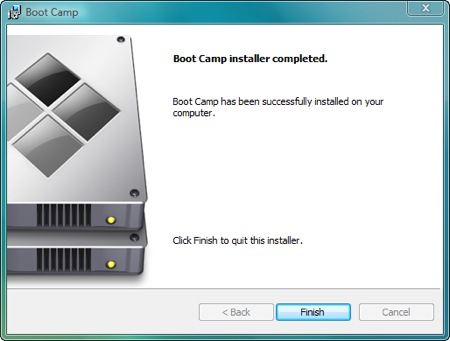
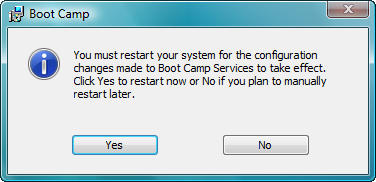
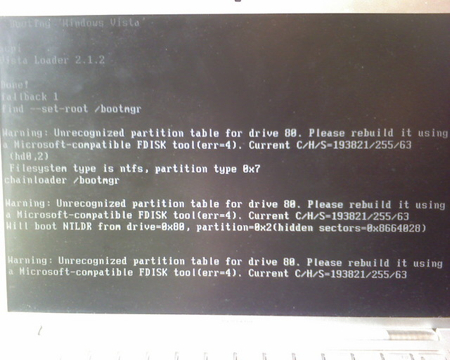
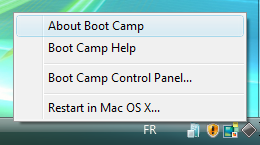
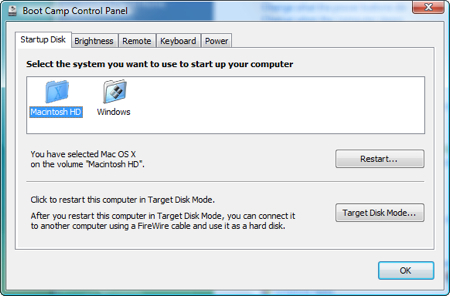
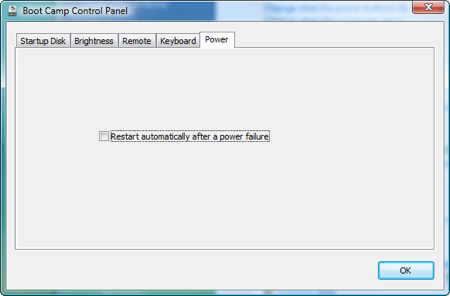
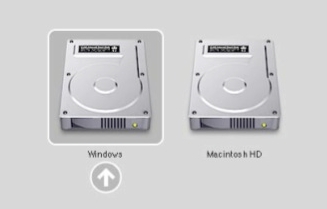
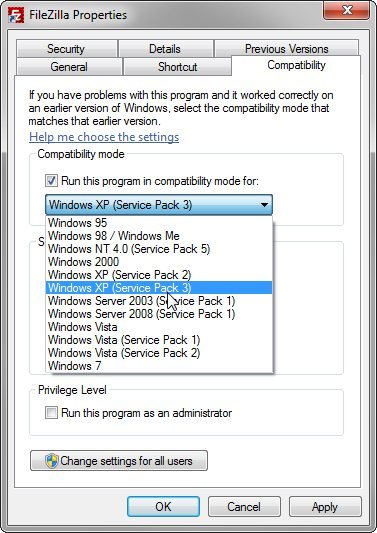
 Magical Jelly Bean Keyfinder helps you round up your serial numbers.