Imagine turning on your computer one day only to find your files, photos, and work are all gone. It happens more often than you think, but it’s easily preventable with the right backup plan. Windows 10 and Windows 11 offer powerful tools to back up everything you care about, whether you use an external drive or cloud storage. This guide will walk you through the easiest ways to set up your backup and secure your digital life.
1. How to Backup Files Using File History (Windows 10 and Windows 11)
File History automatically backs up important folders like Desktop, Documents, Pictures, and Music. It’s an easy-to-use tool that helps you quickly recover files if they get lost or corrupted.
Backup Windows 10 to External Drive
Step 1: Connect an external drive to your PC.
Step 2: Go to Settings > Update & Security > Backup.
Step 3: Click Add a drive and select your external drive.
Step 4: Turn on Automatically back up my files.
Step 5: Click More options to choose which folders to back up and how often.
Backup Windows 11 to External Drive
Step 1: Connect your external drive.
Step 2: Open the Search bar and type File History.
Step 3: Select File History from the search results.
Step 4: Click Select drive and choose your backup drive.
Step 5: Turn on File History to start backing up your files.
Note: Windows 11 limits File History to certain folders. To back up other locations, move files into the default folders.
2. How to Use Windows Backup App
The Windows Backup app lets you back up settings, files, and apps directly to the cloud (OneDrive). It’s a seamless option if you want to ensure your data is accessible from any device.
How to Set Up Windows Backup
Step 1: Open Settings > Accounts > Windows backup.
Step 2: Sign in with your Microsoft account.
Step 3: Turn on the options for:
Remember my apps
Remember my preferences
Back up my files to OneDrive
This makes switching to a new device or recovering files very easy.
3. How to Create a Full System Image Backup (Windows 10/11)
System Image Recovery creates a complete copy of your system, including Windows, settings, apps, and files. It’s a great way to ensure that if your system fails, you can quickly restore everything to its original state.
Create a System Image Backup
Step 1: Connect an external hard drive (formatted as NTFS).
Step 2: Open the Control Panel.
Step 3: Go to Backup and Restore (Windows 7).
Step 4: Click Create a system image on the left.
Step 5: Choose your external drive or network location.
Step 6: Follow the prompts and click Start backup.
Tip: You must create new system images regularly to keep your backup updated. Make sure your drive has enough space to store the image.
4. Best Third-Party Backup Tool Option: EaseUS Todo Backup
For users looking for more flexibility beyond the built-in Windows tools, third-party software like EaseUS Todo Backup can be considered. It offers a variety of features such as:
Backing up individual files, folders, entire partitions, or the full system.
Scheduling automatic backups based on your preferred frequency.
Cloning hard drives for easy migration or upgrades.
Saving backup copies to external drives, cloud services, or network storage (NAS).
EaseUS Todo Backup has both free and paid versions available. Users can explore these options based on their backup needs and preferences.
Frequently Asked Questions (FAQ)
Q: How often should I back up my files on Windows? It’s recommended to set up automatic backups through File History or Windows Backup to back up your files daily or weekly, depending on your needs.
Q: Can I back up my system to a cloud service like OneDrive? Yes, Windows allows you to back up important files to OneDrive using the Windows Backup app. However, a full system backup (like a system image) requires external or network storage.
Q: What’s the difference between File History and System Image Recovery? File History backs up individual files and folders, allowing you to recover previous versions. System Image Recovery creates a complete snapshot of your entire system, including Windows, settings, and apps, which can be restored in case of major system failure.
Have you ever encountered a problem where your Windows PC won’t boot or crashes repeatedly?. This kind of situation can be extremely exasperating, especially if you’re in the middle of very important tasks. Fortunately, Windows 10 and 11 come with a built-in feature called “Safe Mode” that can help you troubleshoot or fix these sorts of issues. Here in this article, we’re going to cover the Safe Mode for Windows 10/11 PC booting options that put some computing magic right at your fingertips.
What does Safe Mode do on a Computer?
Typically, when a PC is powered up, it loads numerous drivers that enable the computer’s operating system to interact with various hardware devices and software applications. But when a computer is booted up in Safe Mode, only a few essential drivers that the computer needs to operate are loaded. They include the mouse drivers, keyboard drivers, and display drivers.
Device drivers or drivers as they are commonly referred to are software programs that allow the operating system to properly interact with the hardware components. Such as printers, motherboards, graphics cards, network adapters, ports, sound cards, and other external peripherals connected to the computer. Without device drivers, the operating system may not be able to adequately run these devices.
Safe mode is a substitute way to fire up your laptop by utilizing just the necessary programs for running it. Booting into Safe Mode in Windows 10/11 is necessary when your notice that your PC’s OS constantly fails to start up or crashes and you can’t seem to identify the underlying cause. There may be a number of different reasons why this is happening. Such as viruses or malware, corrupt files, or other unidentified issues. What Safe Mode does on your computer is to enable you to recognize and rectify the issue.
How to Boot Your PC in Safe Mode for Windows 10/11
Starting a Windows PC in Safe Mode disables all unnecessary programs and drivers which might reduce some features and functionalities. Such as reduced graphics performance, the computer running slowly, or the absence of security features. A few applications may not function properly, with the computer screen resolution appearing different than usual.
Booting your PC in Safe Mode for Windows 10/11 can be accomplished through three different methods, each of which is contingent on the computer’s existing condition. They are all relatively straightforward; via Settings, Sign-in screen, or through a Blank Screen. Although accessing Safe Mode through the blank screen is the most challenging and is normally required for PCs that have encountered very serious issues and need to be restarted numerous times.
Here are the 3 ways to start your PC in Safe Mode in Windows 10/11:
Start Safe Mode via Settings
Navigate to the Start button and select Settings
Select System, then Recovery
Click on ‘Advanced Startup’
A prompt will appear ‘We will reboot your device, so save your work’
Select the Restart Now option
After the reboot, select the ‘Choose an option prompt
Click on Troubleshoot then select Advanced options
Once a screen with options pops up, select Startup Settings then hit the Restart button.
How to Start Safe Mode via Sign-in Screen
Locate the ‘Start’ Menu
Click on the Power button at the bottom right of the menu
Press and hold down the ‘Shift’ key
While holding down the Shift key, hit the Restart button
And wait for the computer to reboot.
Once it restarts, select the ‘Choose an option prompt
Click on Troubleshoot then select Advanced options
Once a screen with options pops up, select Startup Settings then hit the Restart button.
Safe Mode for Windows 10/11 via Blank Screen
Press and hold down the power button for 10 seconds to turn off your PC.
Press the power button to restart.
Once Windows has started, repeat the previous steps twice (press and hold for 10 secs to turn on, then restart again).
After turning off and restarting the computer for the third time, the computer will restart into Automatic Repair.
Select Advanced options for winRE(Windows Recovery Environment).
Then select the ‘Choose an option prompt
Click on Troubleshoot then select Advanced options
Once a screen with options pops up, select Startup Settings then hit the Restart button.
There you go, how to boot into safe mode in Windows 10/11 whenever your PC is having startup glitches, or constantly crashing.
Benchmarking is the standard by which a PC’s performance is determined.
To thoroughly determine a PC’s performance, you need to use multiple tools and utilities specifically designed to tax each major component. We show you which tools to use, describe how to get results that are reliable and repeatable, and explain what all those numbers mean.
Running benchmarks on a PC enables users to evaluate performance, to identify potential bottlenecks, and to choose effective system upgrades. Unfortunately, many users imagine that system performance is simply a matter of CPU frequency or memory capacity, which leads them to think that dropping in a faster CPU or more memory will automatically and immediately yield noticeable performance improvements. In reality, however, that is not always the case. Though CPU and memory upgrades help in some situations, it often makes more sense to upgrade the storage subsystem or the graphics board if you’re looking for perceptible improvement in system responsiveness or gaming performance, for example. If you ran a series of benchmarks and identified which components were holding your system back, you’d be able to choose the most effective upgrade for your current system–or determine which components make the most sense in a new system suited to your particular needs. Several different types of benchmarks are available for evaluating a system’s performance. Some use synthetic tests that don’t necessarily reflect real-world usage, while others employ scripted tests that rely on actual applications and simulated real-world workloads. Some benchmarks assess the performance of a single component, while others measure total system performance. To best gauge the overall performance of a PC, consider running some combination of all of these different types of benchmarks, based on your usage patterns.
Benchmarking Do’s and Don’ts
Before running any benchmarks, you need to consider a number of hardware and software factors, in order to avoid potential damage to your system and to ensure consistent, accurate results. We’ll look at hardware factors first. Many benchmarks place significant stress on specific components, so you need to ensure that all such components are in good working order, properly cooled (if necessary), and receiving adequate power. If you have a component that seems unstable or unreliable during normal, day-to-day use, subjecting it to a taxing benchmark could kill it. Also, an inadequately cooled or underpowered device that works most of the time may become unstable under stress. That said, we’ve run benchmarks for many years, and have had only a handful of components fail due to the demands of a benchmark test–and those components were likely defective to begin with. On the software front, parameters for the operating system, applications, and drivers must be satisfied to ensure accurate, repeatable benchmark results. Windows (and other) operating systems proactively prefetch data and store numerous temporary files that could interfere with a benchmark, so it’s best to clear out any temporary files and prefetch data before running a test. In Windows 7, you can find prefetch data in C:WindowsPrefetch, and temporary files in C:WindowsTemp and C:Users[username]AppDataLocalTemp. If you have applications running, it may not be safe (or possible) to delete all temporary files, so restart your system and shut down any applications that may be running in the background before wiping out any temporary files. You don’t want applications or utilities that may be running in the background to interfere with the benchmark, so shut them down. This is especially important in connection with antimalware utilities, remote desktop tools, and downloaders that intermittently consume CPU, memory, and storage resources and steal application focus. Unless you’re testing a system as it shipped from an OEM to evaluate the effects of background applications on performance, shut them down before running the tests. In the same vein, most operating systems load multiple services and perform maintenance during the initial boot process. Consequently, after boot-up, it’s best to let the system “settle” and reach an idle state, with no drive or CPU activity, before you run a test. Using the correct (typically the latest) drivers for a component is another important step to take to ensure that it is operating and performing optimally. This is especially true of graphics boards and motherboards/chipsets, where the wrong driver can significantly worsen the system’s frame rates or transfer speeds and latency. Finally, confirm that the operating system is fully updated and patched to ensure optimal compatibility and to reflect the current, real-world OS configuration–not the OS as it may have shipped years ago.
Benchmarking Individual Components
Many components in a system contribute to its overall performance, but the CPU/processor, memory, graphics board, and storage configuration generally play the largest roles for most users. Which of these components is the most important in a particular case depends on the individual person’s usage patterns, however. A gamer seeking the best possible frame rates, for example, will probably be better served by a faster GPU than by more memory. A casual user seeking a more responsive system may benefit most by upgrading a slow hard drive to a fast solid-state drive. You must decide which aspects of system performance are most important to you, tailor the suite of benchmarks to your specific needs, and then weigh the individual test results accordingly.
CPU/Processor
The most useful CPU benchmarks place a heavy workload on the CPU while minimizes the influence of other system components. SiSoft’s SANDRA 2012 incorporates a few CPU-centric synthetic benchmarks that test a chip’s performance with various mathematical workloads. The tests are multithreaded and generally scale with higher-clocked speeds and more CPU cores. SANDRA also provides results from other CPUs for easy comparison. Utilities like SiSoft’s SANDRA 2012 incorporate various easy-to-use, synthetic benchmarks for testing the performance of different system components. Another popular CPU benchmark is Cinebench. Cinebench renders a 3D scene using the animation engine from Maxon’s Cinema 4D. Cinebench is free, works with multiple operating systems, and can run in single-threaded mode (to test the performance of a single CPU core) or in multithreaded mode (to tax all of the cores in a CPU). If all is working properly, an Intel Core i7-2700K will score about 1.55 in Cinebench’s (R11.5) single-threaded test and about 7.05 in its multithreaded test. Maxon’s Cinebench, based on the company’s Cinema 4D animation software, tests single-threaded and multithreaded CPU performance.
GPU/Graphics Board
Myriad graphics-related benchmarks are available for testing a GPU’s performance. Many games have built-in tools to test performance; and you can test games that don’t with a utility called Fraps that shows real-time frame rates and tracks performance over time. Many synthetic and “canned” graphics benchmarks don’t use actual game engines to test performance, but produce comparable results nonetheless. Fraps tests how well a game is performing on your system, even if the game doesn’t offer a built-in benchmark. For testing a GPU’s performance, we recommend using a mixture of synthetic and real-world tests to see how the GPU handles a range of different workloads. Futuremark’s 3DMark 7 is a popular tool that provides an overall 3DMark score, as well as numerical results for each of the individual tests that contribute to the final score. Another handy synthetic benchmarking is Unigine Heaven. Heaven can test a GPU’s performance using DirectX 9, 10, or 11 or OpenGL paths, with varying levels of image quality and tessellation. Heaven’s results identify both an overall score and a frame rate. The Unigine Heaven benchmarking tests GPU performance in multiple DirectX or OpenGL modes. In a system powered by an Intel Core i7-3960X, when tested at a resolution of 1920 by 1200 with 4X MSAA, 16X anisotropic filtering, and high tessellation, an Nvidia GeForce GTX 560 Ti will score about 665 points in Unigine Heaven, at about 26.4 frames per second. At the same settings, a Radeon HD 7850 will score about 706 points, at 28 fps. If you have a faster GPU than those cited here, your system should be able to beat these scores, but a slower GPU won’t be able to catch them.
Memory
The most common method of evaluating memory performance is via synthetic tests designed to ascertain peak bandwidth and latency. Performance variables include the operating frequency and capacity of the memory, and the number of channels that a given system uses. AIDA64 Extreme Edition has an excellent built-in memory benchmark that tests read, write, and copy bandwidth, as well as latency; but it is available only as a limited trial unless you pay for the full edition of the tool. The free edition of SiSoft SANDRA 2012 offers memory bandwidth and latency tests, too. It reports bandwidth scores in gigabytes per second (GBps) and latency in nanoseconds. The tests are easy to run and take moments to complete. An Intel Core i7-2700K-based system with 8GB of DDR3-1333MHz system memory running in a dual-channel configuration (two memory sticks) should offer about 16 GBps of bandwidth at an access latency in the 29ns range. Higher clocked memory should deliver more bandwidth and lower latency. SiSoft SANDRA 2012’s Memory Bandwidth benchmarking tests peak bandwidth using both integer and floating point tests.
Drives/Storage
CrystalDIskMark is an excellent tool for testing a drive’s read and write performance at several different transfer sizes. To test the performance of a hard drive or solid-state drive adequately, your best bet is to use a benchmarking that evaluates read and write transfer speeds (with both sequential and random workloads), as well as access latency. Trace-based tests, like those used in PCMark, that track performance over time with simulated application workloads are also beneficial. One of the better free tools for testing a drive’s performance is CrystalDiskMark. This benchmark is particularly useful because it tests both sequential and random read and write speeds with both large and small block sizes, and with queue depths of up to 32. A SATA II Corsair solid-state drive earned the scores shown in the screenshot at right. Hard-disk drive scores will be much lower, but most newer SATA III SSDs will score higher. CrystalDiskMark doesn’t report access latency, however, so it’s a good idea to use a tool such as HD Tune, IOMeter, or the Physical Disk Benchmark in SiSoft SANDRA 2012 for this purpose.
Total System Benchmarking
Among total system benchmarking, the rather basic Windows Experience Index (WEI) built into Windows 7 and Vista isn’t a good choice, owing to the rudimentary nature of the tests and the lack of granularity in the results. Instead consider using a suite such as BAPCO’s Sysmark or Futuremark’s PCMark 7; both are widely accepted and generate extensive results. Sysmark is expensive and tends to be difficult to run, however, whereas PCMark 7 is available in a free basic edition and can be run with a single click. PCMark 7 runs a wide range of tests that tax CPU, GPU, memory, and disk performance; and it generates scores for each test–with higher scores reflecting better performance. PCMark 7 tends to emphasize disk/storage performance, but we’re fine with that. Upgrading from a hard drive to a solid state drive tends to be one of the best upgrades a user can make to improve system responsiveness, and PCMark 7’s results reflect that. Futuremark’s PCMark 7 evaluates system performance by testing CPU, GPU, memory, and storage subsystem performance. To give you a baseline for comparison, an Intel Core i7-2700K-based system with 8GB of RAM, a discrete Nvidia GeForce GTX 280 graphics card, and a 7200-rpm hard drive will earn a PCMark score of roughly 3800. Upgrade that same system with an SSD, and its score will jump to about 5100.
Digesting the Results
Most benchmarking scores are easy to understand. But keep in mind that higher scores don’t always point to better performance. On most benchmarks, higher frame rates or scores do mean that one system or component outperformed another; but some benchmarks are timed–and may output results in minutes or seconds. In such results, lower scores usually indicate better performance.
Important Notice: Tweet this article with the bookmark social media share below to stand a chance to win an ipad or start making money with your twitter account (it works only with your twitter account and the more articles you tweet the more you stand a chance to win an Ipad)
With the continual erosion of internet privacy and the rising level of security threats, more people are now turning to virtual private networks. VPNs encrypt your internet traffic, making it invisible to third parties like surveillance agencies, your internet provider, and the network admin. Plus, they protect your devices from hackers and the risks associated with public WiFi networks. Keep reading because https://privacyspark.com/ is going to give you key details on how to stay anonymous online.
How VPNs Work
A VPN (Virtual Private Network) is a channel that allows you
to browse the internet with enhanced security and privacy. It also gives you
the ability to get around content as well as censorship restrictions.
Typically, a VPN works by establishing an encrypted connection between your device or
computer and a VPN server. This encrypted connection is often considered as a
protected ‘tunnel’ through which users can access everything on the internet
while appearing to be in the same location as the server they’re connected to.
This technology gives you a high level of online anonymity, allows you to access everything online without restrictions, and provides you with enhanced security. VPNs will encrypt and secure your online traffic, whilst also unblocking content from various parts of the world.
Without a good VPN, everything you do on the internet is
traceable to your physical location as well as the device you’re using. Every
device which connects to the internet comes with a unique IP address that can
be altered by the VPN server you’re utilizing.
Since most VPN providers have servers located all over the world, you’ll
have access to numerous connection possibilities.
The Benefits
There are many reasons why you may want to consider utilizing
a VPN and these include:
Surfing the internet without exposing your real IP address as
well as your geo-location.
Adding an extra level of privacy and security by encrypting
your online activity.
Preventing your ISP (Internet Service Provider), governments,
third parties, and network administrators from spying on your internet
activities.
Unblocking websites and accessing content that’s restricted
to specific geographic locations.
Bypassing censorship by getting around regional restrictions.
Browsing the internet
with peace of mind.
Protecting yourself from
hackers whenever you’re connected to public WiFI connections in airports,
cafes, and hotels.
Their Legality
VPNs are absolutely legal. They’re designed to help users
protect their online privacy and security. Most businesses are now utilizing
VPNs – and that won’t change any time soon.
Nonetheless, there are few exceptions in places such as the
United Arab Emirates, where the use of virtual private networks is currently
restricted. But still, the laws in these countries don’t outlaw the VPN itself.
Rather, it restricts the use of VPNs to bypass the state censorship efforts.
China and Russia have also attempted to ban certain VPNs- but
these measures typically fail, because of the fact that VPN traffic can be
hidden to appear like regular HTTPS traffic.
Conclusion
VPNs are routinely utilized by businesses across the globe
for network security. Thus, you’ll never witness an outright ban on all VPNs
since they’re absolutely necessary for both businesses as well as individual
security. All you need is to shop around for reputable providers such as NordVPN, VyprVPN, CyberGhost, and
ExpressVPN, who offer reliable products.
In this article, we explore a comprehensive tutorial featuring procedures to change wireless security on a laptop. Here we explore inevitable steps to take in changing the security/password of a wi-fi router using your laptop. You would also learn how to change your Wi-fi router’s security type here. The steps taken are listed below.
1. Open Your Router’s Configuration Page
You can access your Router configuration page if your laptop is connected to the router. You can connect your laptop to your router using an Ethernet cable or The Router password. In a situation where you have forgotten the password, using an Ethernet cable is preferable because you will not be required to input any password.
After you might have connected your laptop to your router, you are to input the IP address on your browser, to gain access to its software platform. The Standard Router Addresses are 192.168.1.1, 192.168.0.1, 192.168.2.1, or 10.0.1.1(Apple) or 10.0.0.1. Enter any of these Addresses and hit enter.
If you find it difficult to access your Router’s software platform using the already mentioned IP addresses, you can source for the exact I using the command prompt. Once Command prompt is opened, type ipconfig and hit enter. Now look for active connection in the list and find your Router Default Gateway address. The Default Gateway is your Router’s IP address.
If you are still finding difficult to source for your Router’s gateway address, you advised to reset your router for about 30 seconds, to restore it back to factory settings. After which you are to look up the default address for your Router’s model and enter it into your browser URL box
2. Enter Your Router’s Username and Password
Apart from the normal connection password, you are required to input a special username and password, to gain access to the admin platform. Please note that the default Username for most routers is “admin” or “userAdmin” and the default password is “admin”, “password” or your current Wi-Fi’s password. If you changed your the username and password before now, you are required to input the one you enrolled.
3. Open The Wireless Section
Once you have successfully gained entry to your Router’s software platform using your browser, you ate presented with different tabs that perform different functions. Since you want to change your Router’s wireless security, you are required to click on the Wireless tab.
4. Change the password
By now you should be in the Wireless tab on your Router’s admin page. In the Wireless tab, Look for the box labeled “Password”, “Passphrase” or “Shared Key”. Some Routers require you re-enter the admin password, for confirmation. You are advised to create a very strong password, featuring letters, numbers, and symbols.
5. Change Your Security Type
Please note that there are three main types of wireless encryption: WEP, WPA, and WPA2. If you desire the most secured network, you are required to make use of WPA2. Using this network type, you may experience problems connecting to older devices. If you run into these problems, you are advised to switch to WPA.
6. Change Your Network Name
If you desire to have a unique Router name, you have the option to set a unique name here. This will make discovery very easy, you won’t have to guess your Router’s name, in a situation where they are many similar Routers in the same space.
7. Save your Settings
After you might have successfully carried out all the steps listed above, the next step will be to save the changes you made to the security setting. This way all changes made will take effect. The save button is usually located on the top or bottom of the page. Locate it and click on it to save changes. You can now go ahead to test the new password.
There You have it – a comprehensive list of procedures to change wireless security on a laptop. If you have any questions, feel free to drop them in the comment section below.
Despite the existence of laptops with built-in modems, majority of the laptops we have today rely on wi-fi connections, to gain access to the internet. Being the primary source of internet connectivity, having good wi-fi connections on laptops is very sacrosanct. Poor Wi-fi connections facilitate slow internet surfing, which is something the body wants.
In this article, we look at a tutorial on how to boost your WIFI connections on your laptop. Boosting your wifi connection will facilitate faster internet surfing. This tutorial is applicable on laptops running Windows operating systems, and laptops running MAC OS.
Reduce Distance Between Laptop and Router
Due to variance in signal strength, is a widely known fact that bringing your laptop closer to the router, it is a sure way to boosting wifi connections on your laptop. This method works flawlessly, in cases where the router has a short signal range. The closer your laptop is to the router, the better the signal.
Another way you can combat poor signals, as a result of router distance, is by making use of a mesh wifi system. This way, a mini router will be found in all rooms of your home. A mesh wifi system consists of the main router and its nodes. These nodes or satellite module feed from the signal of the main router, they conduct signals better. This way won’t have to bother about the distance of your laptop from the router.
Update Your Router Software
Updating your router software is another method you can employ to tackling poor wifi connections on your laptop. Routers feature a firmware that allows manufacturers to push an update to them, allowing manufacturers to fix bugs that may hinder the proper functioning of these routers. If you reduced the distance of your laptop from the router, and you are still experiencing poor wifi signal, the next step would be to update your router’s firmware.
Update Your Laptop Software
Still on software. After updating the firmware of your laptop, you should also consider updating the drivers of your laptop. Update the drivers that affect the wifi connectivity of your laptop. This can be done through the manufacturers’ website.
Install and External Adapter
Using an old laptop that runs slow on wifi connections? If yes, purchasing an external wifi adapter is very important. The effect of a very powerful wifi adapter won’t be felt on a laptop running an old wireless adapter.
External wifi adapters usually feature a large antenna and make use of updated technologies, designed to improve wifi signals on your outdated laptops. Using these external wifi adapters, you will need to connect them to your laptop via a functioning USB port on your laptop.
Disable the network hogs that run in the background
Another way to boost wifi connections on your laptop is to reduce the apps using the wifi connection. Having many background apps that make use if the connection will hinder hitch free surfing. You are advised to reduce these background apps to boost wifi connection on your laptop.
Check Your Transmission Power Settings
Some network adapters allow users to edit transmission settings, if the setting is available on your network adapter, you are advised to tweak the transmission settings on your network adapter. You can access this setting through the adapter’s driver interface program.
For better wifi signals, your transmission settings should be set to a maximum of 100 percent. Also, your power settings should be removed from the power saving mode.
There you have it – a comprehensive tutorial on how to boost connections on your laptop. In troubling shooting, the cause of a poor wifi signal, the tips mentioned above will be of immense help. You try each tip until the wifi signal on your laptop improves.
Installed software not designed for your laptop? Did you install a wrong driver on your laptop? Or did you mistakenly delete one of the important programs your laptop came with? Any of these will certainly affect the proper functioning of your laptop. Things like this happen to us sometimes. Events like this usually call for one thing, and that is resetting your laptop computer.
In this article, we explore a tutorial on how to reset a laptop, restoring it to factory settings. This tutorial covers procedures on how to reset laptops running windows and MAC OS back to their factory settings.
How To Reset/Restore A Laptop Running Windows Operating System Back To Factory Settings
Before you go ahead to formatting your windows laptop, please be aware that resetting your windows laptop will wipe out all your installed programs and files on your windows laptop. Using an external hard drive is a very secure way to back up your files. Once you have backup your files, you can proceed to reset your windows laptop using the steps listed below.
There is no autonomy when it comes to resetting windows laptops; there are several methods that can be employed in resetting a windows laptop. These methods are listed below.
How To Reset A windows Laptop, Using Built-In Reset Option On Windows 10
On your windows laptop, Navigate through settings > Update & Security > Recovery.
Under “Reset this PC” click on get started
You will be presented with the option to keep files, or remove everything. Select your preferred option. Keeping your files will reset your windows laptop to default, keeping your files and uninstalling your installed apps. The ” Remove Everything option,” remove resets your windows laptop, completely wiping your computer, remove all files and installed apps.
Please Note that click the ”Erase Everything” option, will provide you with another set of options to choose from. You will be asked to select between Removing everything or remove files and clean drives. Selecting the latter will securely erase your hard drive, making it impossible to do any form of recovery.
4. Once you have selected the option of your choice, you can proceed to click the reset button.
How To Reset A windows Laptop, ” Fresh Start” Option in Windows 10
As earlier mentioned, there are different ways to re-setting your windows laptop. Using the Fresh Start option is another method. Steps to be followed when using this method are listed below:
On your windows laptop, Navigate through Settings > Update & security > Recovery page
Click the link ”Learn how to start fresh with a clean installation of windows” you will find it at the bottom of the page. You will be directed to windows defender security center. Click on Get started to proceed.
Note: Using the fresh start option, your files will be retained. There no option to remove all files. Also note that using the fresh start option, the latest version of windows will be automatically be downloaded on your windows laptop. Fresh start option reinstall all bloatware and keeps some of your settings intact.
Reinstall Using A Windows Installation Media
Using Windows 7 or later, this method is for you. The methods mentioned above is available on Windows 8 and above. If you use windows 7 or lower, you can reset your windows laptop using windows installation media.
What is windows installation media? Windows installation media is an ISO file burnt into a pen drive or DVD. Windows installation media allows you re-install windows from scratch, provided you have a product key.
How To Reset/Restore A Laptop Running MAC OS Back To Factory Settings
Unlike Windows operating system, re-setting laptops running MAC OS is a lot easier. There is autonomy here, as there is only one method of getting it done. The steps are listed below:
Note: Please be aware that re-setting your MAC Book will completely wipe your hard drive, no file will be left, and all settings will be restored to default. Backup your files if need be.
Hold Down Command and R keys on your keyboard, and turn on your MAC Book. Let
both keys go, when te Apple Logo pops up
Select Langauge and click the arrow facing right to continue
Select Disk utility and continue
Select your startup disk. Startup disk is named Macintosh HD by default
Click the erase button
From the drop-down menu, Select MAC OS Extended and click erase.
click done and the exit window
Connect to wifi
Select Reinstall MacOS
Click on continue and click agree
Select boot disk and click on Install
wait for the installation to complete
Note: Your MAC Book is will restart several times during the installation. You shouldn’t be bothered, as it is normal for it to reboot.
There you have it – a comprehensive tutorial on how to reset a laptop. As you might have already observed, re-setting a laptop isn’t as difficult as most people claim, all you have to do is follow the steps listed above. If you have any question, feel free to drop them in the comment section below.
When you are planning to install Windows 10, Windows 8.1 or Windows 7 on a PC, one of the requirements involves creating media to boot your computer into the setup wizard. This is especially true if you are performing a fresh installation of Windows. In which case, your boot options are DVDs and USB drives.
Since most PC these days hardly come with an in-built DVD drive, your options are further limited to either using an external DVD drive or a USB flash drive.
A lot of people, including me, will favor using a USB flash drive to install Windows 10. However, if you have newer hardware, it’s likely that you’re using Unified Extensible Firmware Interface (UEFI), instead of the legacy Basic Input/Output System (BIOS). If this is the case, you also have to ensure that the bootable media supports the firmware type before you can proceed with the installation.
How is UEFI different from BIOS?
The BIOS will soon be dead: Intel has announced plans to completely replace it with UEFI on all their chipsets by 2020. But what is UEFI, and how is it different from the BIOS we’re all familiar with?
Both UEFI and BIOS are low-level software that starts when you boot your PC before booting your operating system, but UEFI is a more modern solution, supporting larger hard drives, faster boot times, more security features, and—conveniently—graphics and mouse cursors.
Fortunately, if your device features a UEFI firmware, you have multiple ways to create a USB bootable media to install Windows 10, Windows 8.1 or Windows 7. You can use the Media Creation Tool, which is an easy-to-use utility made by Microsoft that downloads and copies the installation files onto a removable drive with support UEFI and BIOS. Or you can use WinToFlash, which is a freely available third-party tool that allows you to quickly create a media with support for UEFI firmware.
In this guide, we’ll try to walk you through the steps to create a bootable USB flash drive with support for both BIOS and UEFI. First we will try without a software, this should work for Windows 10, Windows 8.1 & Windows 7. However, some BIOS may not recognize your USB flash drive as a boot media, using the Media Creation Tool or WinToFlash software will resolve this.
You can always fall back to our troubleshooting guides should you encounter any problems while creating your bootable USB flash drive.
What you need
Before you begin, make sure you have an internet connection if you don’t already have a copy of the Windows OS install in a DVD, .iso or in a folder. You should also have sufficient data storage available on a computer, USB or external drive for the download. Other requirements may include:
A copy of the Windows OS install .iso, in a folder or DVD. You can use this page to download a disc image (ISO file) that can be used to update or install Windows 10, Windows 8.1 or Windows 7. The image can also be used to create installation media using a USB flash drive or DVD. Windows software download is free on the Microsoft OS download page but you might need to purchase a license for usage.
A blank USB flash drive with at least 5GB (or 4GB for Windows 8.1 and below) free space. This drive will be formatted, so make sure it doesn’t contain any important files.
Technician PC – Windows PC that you’ll use to format the USB flash drive
Destination PC – A PC that you’ll install Windows on
Boot Windows from your USB flash drive
Having met all the requirements above, any of the three methods below will get you a bootable USB flash drive. Make sure to pay close attention and ask any questions you may have on the comment section.
One of the most important thing to watch out for is the storage capacity of your USB flash drive. Windows 10 October release will require your flash drive to have at least 5GB storage capacity.
Also, if you are using a modern PC and your device features a UEFI firmware, you will need to format your USB flash drive using FAT32 file system which has a file size limit of 4GB. The Windows image file (sources/install.wim) in Windows 10 October release exceeds this limit.
Step 1 – Format the drive and set the primary partition as active
Connect the USB flash drive to your technician PC.
Open Disk Management: Right-click on Start and choose Disk Management.
Format the partition: Right-click the USB drive partition and choose Format. Select the FAT32 file system to be able to boot either BIOS-based or UEFI-based PCs.
Set the partition as active: Right-click the USB drive partition and click Mark Partition as Active.
Step 2 – Copy Windows Setup to the USB flash drive
Use File Explorer to copy and paste the entire contents of the Windows product DVD or ISO to the USB flash drive.
Step 3 – Install Windows 10 / Windows 8.1 / Windows 7 to the new PC
Connect the USB flash drive to a new PC.
Turn on the PC and press the key that opens the boot-device selection menu for the computer, such as the Esc/F10/F12 keys. Select the option that boots the PC from the USB flash drive.
Windows Setup starts. Follow the instructions to install Windows.
Remove the USB flash drive.
How to create a Windows 10, 8 & 7 UEFI boot media using WinToFlash Software
WinToFlash creates a bootable USB with any modern Windows Desktop [PHOTO CREDIT: EBENEZER OBASI]
If for some reasons, copying Windows through file explorer didn’t work, you can use the WinToFlash tool to create an installation media with UEFI support. Of course, the Windows Media Creation Tool will equally work if your target is to install Windows 10 on a PC. However, it’s faster to use this tool if your already have a copy of the Windows OS install in a DVD, .iso or in a folder.
To create a Windows install media with support for UEFI, connect a USB flash drive with at least 5GB (or 4GB for Windows 8.1 and below) of space, and then use these steps:
Step 1 – Download & Install WinToFlash Software.
Download the free lite edition of WinToFlash from the official website. Under “Download,” click Lite edition Setup Download.
After download is complete, open your download path and double-click the Novicorp WinToFlash Lite [The Bootable USB Creator] x.x.x Setup.exe file to launch the installation wizard.
Follow the installation wizard to install WinToFlash on your PC.
Step 2 – Set Windows source and destination media
After installation, click on the Novicorp WinToFlash icon from your desktop to launch the WinToFlash tool and install Windows 10 OS and below from your USB Flash Drive.
From the application start screen, click Windows Setup Bootable USB Wizard. Select the installation source of the Windows, if you have downloaded an ISO file or loading from a folder.
Startup screen of WinToFlash tool. Select Windows Setup Bootable USB Wizard to load a single OS to your boot media.
Specify Windows source path or file. If your OS is in a CD or extracted from image to a folder, go with the first option. Select the second option if the Windows software is an ISO image or archive.
Click next to setup your Windows source and destination path.
The ‘Windows files path‘ specifies the path to the Windows installation files on your PC. This can be an ISO – archive or folder – CD path, depending on your selection on the previous screen.
Use the ‘USB drive’ drop-down to select the media you want to make bootable.
Step 3 – Wrapping things up
Click next and review all parameters. Make sure that you have chosen the right USB drive.
Ensure that you have chosen the right media to avoid wiping important files from your flash drive.
Complete settings by confirming to wipe USB flash drive and accepting WinToFlash terms (click on the images below to expand).
After completing the steps, the WinToFlash tool will create a bootable media, which you can then use to install Windows 10 on devices using UEFI.
How to create a Windows 10 UEFI boot media using Media Creation Tool
If you’re planning to upgrade or install a fresh copy of Windows 10 on a system using BIOS or UEFI, you can use the Media Creation Tool to create a compatible bootable media. Just insert a USB flash drive with at least 5GB of storage to your computer, and then use these steps:
Under “Create Windows 10 installation media,” click the Download tool now button.
Click the Save button.
Click the Open folder button.
Double-click the MediaCreationToolxxxx.exe file to launch the utility.
Click the Accept button to agree to the Microsoft terms.
Select the Create installation media (USB flash drive, DVD, or ISO file) for another PC option.
Click the Next button.
Select the correct language, architecture, and edition of Windows 10 if the default selection doesn’t reflect the desired options.
Quick Tip: Under “Architecture,” you can select the Both option to create a bootable media that will work for devices using 64-bit and 32-bit processors. Also, if you’re unable to change these settings, make sure to clear the Use the recommended options for this PC option.
Click the Next button.
Select the USB flash drive option. (If you don’t see the drive, click the Refresh drive list option.)
Click the Next button.
Select the removable drive from the list.
Click the Next button. Once you’ve completed these steps, the wizard will download the Windows 10 installation files, and it’ll create the bootable media with support for UEFI as well as legacy BIOS.
Troubleshooting Windows 10, 8 & 7 Boot Media
UEFI systems cannot boot from NTFS and instead the device needs to be formatted with FAT32 which has a 4GB maximum size. If copy fails, it’s likely that the install.wim file on the media is larger than this file size limit. The solution is to split the WIM into multiple files using DISM.
Split the Windows image
Split a Windows image (.wim) file into a set of smaller (.swm) files. Use this procedure when you’re installing Windows from media that can’t handle the Windows image file size, for example:
DVDs (A standard single-sided DVD stores 4.7GB).
USB keys formatted as FAT32. FAT32 is required to boot many modern (UEFI-based) PCs, but has a maximum file size of 4GB.
Split the file
Mount your Windows distribution ISO.
Launch Windows Command Prompt. The quickest and easiest way to do that is to type “CMD” into your Windows search box.
Right click on the resulting “Command Prompt” and “Run as Administrator”.
Copy everything except the Windows image file (sourcesinstall.wim) to the USB drive. Either drag from the mounted ISO and drop on the flash drive, or use the command below:
robocopy D: E: /s /max:3800000000
Where D: is the mounted ISO and E: is the USB flash drive.
Split the Windows image file into smaller files, and put the smaller files onto the USB drive:
C:sourcesinstall.wim is the name and the location of the image file that you want to split.
C:sourcesinstall.swm is the destination name and the location for the split .swm files. The first split .swm file is named install.swm file. The file names for the next files include numbers, for example, install2.swm file, install3.swm file, and so on.
3700 is the maximum size in MB for each of the split .swm files to be created. Kepp the size of the files below 4000 (4GB) to avoid getting the error 87 (invalid parameters) error.
Note, Windows Setup automatically installs from this file, so long as you name it install.swm.
Windows 10 comes with a lot of amazing features but not all of them are readily available. Let’s dig a little deeper and unveil new tweaks, tricks and features that will change the way you use your PC.
With it being free, and Microsoft pushing the update to users, most of you probably already have migrated to Windows 10. Its constantly evolving nature means fresh features arrive twice per year, and with all the new goodies come a legion of new tweaks and tricks—some of which unlock powerful functionality hidden to everyday users. Others simply let you mold the Windows 10 experience into the shape you see fit. Here are some of the most useful tweaks, tricks, and tips that we are able to put together.
However, you need to brace yourself as some of these may break as the operating system evolves given Microsoft’s new “Windows as a service” mentality. The idea is to keep this page updated overtime to reflect the OS’s current status.
Activate Windows 10 Night Light
If you use an iPhone, iPad or macOS system you may use the built-in blue light feature ‘Night Shift’.
The Night Light feature you’ll find in Windows 10 is pretty much Night Shift for Windows.
Night Light makes the screen warmer in the evenings as it reduces the amount of blue light emitted.
Various scientific studies show that exposure to blue light in the evening makes it harder to fall asleep because (like all artificial light) it affects the circadian rhythms that manage our body clock.
Once preserve of late-night caffeine fuelled coders and over-worked, under-fed writers, screen temperature features have since become mainstream. Google’s Android and ChromeOS operating systems have one, as do iOS and macOS from Apple, and Microsoft’s Windows 10.
Like those features, Windows 10 Night Light automatically warms the temperature of your display after sunset. This makes your laptop screen or PC monitor easier on your eyes and reduces disruption to your circadian rhythm, helping it to tick along nicely.
In the morning, your display returns to its regular settings.
Night Light is a system feature; you do not need to install a separate application like Flux to use it. This makes it very easy to automatically adjust the screen temperature in Windows 10.
Night Light for Ubuntu will automatically adjust the amount of blue light your monitor or laptop display emits based on your location and the time of day.
These features are said to help reduce eye strain by adjusting your screen’s color temperature during after-dark computing sessions. That makes it easier to fall asleep when you’re done.
To activate Night Light, head to Settings > System > Display. Once you’ve done so, open the feature’s settings to fine-tune its behavior.
Scroll any window even when they’re inactive
It used to be that Windows only allowed you to scroll active windows. Now in Windows 10, you can set an option to scroll both active and inactive windows by just hovering with the mouse cursor over a window.
This feature is not a ground-breaking Windows 10 hack or tweak but it comes quite handy when time is in essence and your need to peek through your to-do list.
Windows 10 inactive scroll feature is enabled by default, but if it’s not, go to Settings > Devices > Mouse & touchpad, and make sure to enable the Scroll inactive windows when I hover over them option.
Find the hidden images
The lock screen and logon screen have some really cool images, which as it turns out, by default both rotate AND change.
It may seems Microsoft has a CDN that updates these images based on what you click that you like or not. Want to save one or more of those images for future use? Here’s where they are hiding!
Open Explorer and browse to:
%localappdata%PackagesMicrosoft.ContentDeliveryManager_[custom string of characters]LocalStateAssets
Copy all of the files to a new directory.
Open a command prompt in that directory.
Run this command ren . *.png and [enter]
Browse through them and find the ones you like!
Make Cortana’s ears perk up
Cortana’s finally made the leap to the PC in Windows 10, assuming many of the operating system’s search functions and dishing out just as much sass as the Windows Phone version. But by default, she doesn’t listen for your commands. But by default, she doesn’t listen for your commands.
If you’d like to be able to just shout commands at your PC, launch Cortana by clicking the search field in the taskbar and select the three-lined options menu in the upper-left corner. Select Settings for the list, then simply enable the “Let Cortana respond when you say ‘Hey Cortana’” option. You’ll need an active microphone for this to work, of course.
While you’re poking around Cortana’s options, you can dive into the Notebook menu to fine-tune exactly what personal data Microsoft’s digital assistant can access. Remember, however, that like Google Now, Cortana’s effectiveness is directly related to how much she knows about you.
Enabling Cortana on the Windows lock screen lets you use voice commands to view and edit your schedule at a glance. It’s pretty handy! To turn on the feature, open Cortana and head to “Cog” icon > Settings > Use Cortana even when my device is locked.
Secret, powerful new command line tools
Windows 10 packs a slew of nifty new command line features, including—hallelujah!—the ability to copy and paste inside the command prompt with Crtl + C and Crtl + V.
To activate the goodies, open the command prompt. Right-click its title bar, then select Properties. You can find and enable the new features under the Edit Options section of the Options tab.
Bash comes to Windows
If you got all hot and bothered over the ability to use keyboard shortcuts to paste text in the Command Prompt, wait until you get a load of this.
The Windows 10 Anniversary Update added the full, legendary Bash shell to Microsoft’s operating system, thanks to a partnership with Canonical, the company that guided Ubuntu Linux’s development. And it’s running natively, without virtual machines or containers. With the right tricks, you can even use Bash to run graphic Linux applications or even the Unity desktop itself right inside Windows—though those unintended features are definitely limited. Look for Ubuntu, Fedora, and SUSE Linux entries in the Windows Store to start using Bash in Windows.
Windows 10 Audio Source Switching
Windows 10’s in-taskbar volume controls pack a niche, yet nifty touch: selectable sources. Clicking the audio device name in the volume controls summons a list of all connected audio outputs, meaning you can switch from your headphones to your speakers and back again without having to dive into the Control Panel. Yay!
The April 2018 Update added more granular audio options to the Settings app too, breaking them away from the Control Panel even further.
Activate Windows 10 Spatial Sound
That’s not the only audio trick lurking within Windows 10. Windows Sonic for Headphones offers a virtual surround sound format that can make the audio coming from your headset feel more lush and atmospheric. The effectiveness of the feature varies depending on your gear and how sensitive you are towards audio cues.
To activate Windows Sonic, right-click the speaker/audio icon in the system tray on the right side of your task bar, then select Spatial sound (none). In the window that opens, click the drop-down menu and select Windows Sonic for Headphones. Click , then OK, and you’re done!
Windows Timeline
Timeline helps you pick up where you left off. Clicking the Task View button in the taskbar or pressing Windows Key + Tab summons the feature, which displays a—you guessed it—time line of your activity in supported apps, stretching back over the past. Even more handily, Microsoft lets you group related apps together into “Activities” in Timeline, so that when you open that week-old budget document, for example, the presentations and websites you referenced at the time can be easily summoned as well. This even syncs across devices, so it could be especially useful if you use multiple PCs.
The fly in the ointment: Only a limited number of apps work with Timeline currently, though Microsoft offers tools for developers to bake in support. That includes Office, Adobe’s Creative Cloud, and native Windows 10 apps like News and Maps, but Microsoft Edge is the only compatible browser. Bummer. You can deactivate Timeline by heading to Settings > Privacy > Activity History.
Cloud clipboard
Windows 10’s copy and paste functionality has been hit and miss for years, but now you can deploy that bugginess across multiple PCs with cloud clipboard—a genuinely useful feature introduced in the October 2018 Update. Head to Start > Settings > System > Clipboard and enable “Sync across devices” to start copying data on one PC and pasting it on another PC.
While you’re in this menu, enabling “Clipboard history” lets you save multiple items to the clipboard so you can use them again later. Nifty stuff.
Your Phone
Want to tie your phone and PC closer together? Download Microsoft’s Your Phone companion app for Android, and link it to your PC using the new Your Phone app from the Microsoft Store.
Your Phone lets you open, view, copy, and share photos that you took on your phone, as well as send and reply to texts right on your PC. There’s an iOS version as well, but it’s much, much more limited.
Snip & Sketch
The firmly entrenched Snipping Tool within Windows is finally getting replaced and upgraded. The October 2018 Update added Snip & Sketch, a new tool that lets you select a portion of the screen to copy when you press Windows + Shift + S. After doing so, the selected screenshot will be copied to your clipboard, so you can paste it into any image editing software—including the standalone Snip & Sketch app, which lets you annotate and share your marked-up images.
Near Share
Near Share makes it easy to share files and URLs with local PCs over the air, negating the need for flash drives or chat apps to pass something along. If you open the Share interface in Microsoft Edge or File Explorer, you’ll see PCs with Nearby Sharing enabled appear as an option if you have the April 2018 Update installed. Recipients receive a pop-up notification when something is sent. Think of it as an alternative to Apple’s Airdrop, albeit one without any mobile support.
To use Near Share, your computer needs both Bluetooth and Wi-Fi working, and you’ll have to enable the Nearby Sharing option in Settings before you can start using it. Transfer speeds were pretty slow and Bluetooth-like in our tests, so you may still want to resort to alternative means to pass especially large files around. Microsoft says the feature automatically chooses to use Wi-Fi or Bluetooth depending on what’s available, and what’s faster.
Ransomware protection
Ransomware is a growing problem. It infects PCs, encrypts your files, and holds everything hostage until you pay a ransom—hence the name. The best defense against ransomware is frequent backups and strong security software, but Windows 10 now includes basic protection right in your operating system.
Controlled Folder Access “protects your files and folders from unauthorized changes by unfriendly applications.” Your Documents, Pictures, Movies, and Desktop folders are protected by default, though you can block other folders manually or whitelist trusted software to access your locked-down info. You can tweak Controlled Folder Access by opening the Windows Security app (formerly Windows Defender), heading to the Virus & threat protection tab, and clicking the “Manage ransomware protection” link at the bottom.
Dark theme
If you love dark themes, you love dark themes. Light themes sear your eyeballs. Fortunately, Windows 10 now supports a dark theme.
Head to Start > Settings > Personalization > Color and select the “dark” option under “Choose your default app mode.” The Windows 10 October 2018 Update extended the dark theme to include File Explorer, too. Enjoy!
Enable Windows 10 Dynamic Lock
Say goodbye to Windows + L. Dynamic Lock is a handy feature that pairs your PC with your phone over Bluetooth, then automatically locks your computer when you wander away from it.
To start using it, marry the two devices in Control Panel > Hardware and Sound > Devices and Printers, then activate Dynamic Lock at Settings > Account > Sign-in options.
Game Bar
If you’re into playing around on your PC, Windows 10’s Game Bar—summoned by pressing Windows + G in-game—holds all sorts of nifty extras. It’s always been able to take screenshots or videos of gameplay clips, but as of the Windows 10 Creators Update, the Game Bar also offers easy-peasy Beam game streaming and the intriguing Game Mode, which can improve performance on resource-limited systems. The October 2018 Update overhauled the interface yet again, adding inline volume controls.
The Game Bar’s handy even if you don’t actually play, as it can be used to record video of any app—not just games. Windows 10 also has a dedicated Gaming section in its Start menu Settings to let you tinker with options, including Xbox networking and parental controls.
Per-app GPU management
The Windows 10 April 2018 Update added the ability to tell Windows which graphics hardware—discrete or integrated—to use when you open specific apps. It sounds niche, but the feature could prove pretty helpful if you’ve got a gaming laptop and want it to last longer.
By default, booting up a game switches over to discrete graphics, which use a lot more energy than the graphics cores integrated in Intel chips and AMD Ryzen APUs. But a lot of indie and retro games play just fine on integrated graphics. With Windows 10’s per-app GPU management, you can manually tell the system to stick to the more power-efficient option for games that don’t need the extra oomph.
Go to Settings > Display, then click the Graphics settings link at the very bottom of the page to start tinkering.
OneDrive Files on Demand
It’s back, huzzah! OneDrive Files on Demand resurrects Windows 8.1’s “placeholder” feature for the cloud storage service baked into Windows 10. OneDrive Files on Demand shows all of the files you have stored in OneDrive in a folder on your PC, but they’re just pointers synced with the cloud—not actually files installed on your PC. Unless you want them to be. You can select which files and folders to make available locally.
Storage Sense
Over time, your PC can quietly fill with needless junk without your even realizing it, as the Recycle Bin and temporary files suck up your storage. Storage Sense helps combat the creep. Head to Settings > System > Storage and enable the Storage Sense option to have Windows start automatically clearing out unneeded temporary files, and deleting any files in your Recycle Bin over 30 days old. You can tweak those options using the Change how we free up space link underneath the option.
The October 2018 Update added the ability to have Storage Sense send long-untouched files from anywhere on your computer to your OneDrive cloud storage, freeing up space on your hard drive. It could be a useful addition if you’re close to filling up your local storage, but keep an eye on your available OneDrive space—cloud storage isn’t free. Fortunately, the feature includes granular controls.
Mixed Reality
The Fall Creators Update added “Mixed Reality” to Windows 10. The most obvious use for it is in the legion of new Windows Mixed Reality headsets, but you can check out the benefits even if you don’t have one of those. The Mixed Reality Viewer app lets you drag digital 3D objects you’ve created in the Paint 3D app into the real world, using the combined might of your device’s camera and display. It’s not really augmented reality since you can’t interact with the objects, but it’s closer to “Mixed Reality” than the headsets are.
Somewhat related, the nifty Story Remix tool in the Photos app lets you add fantastic 3D animations to videos you’ve captured, among many other talents. It’s pretty sweet!
Start menu folders
What’s old is new again: You can create basic Start menu folders in Windows 10, organizing Live Tiles into clusters. Simply drag your Start menu apps on top of each other to create folders that expand when clicked on. As of the October 2018 Update, you can now name the folders you create, but you have to expand it open to see the option.
Troubleshooting, troubleshot
The Windows 10 Creators Update added a helpful touch for distressed PC users. The operating system’s consolidated all of its troubleshooting tools in a single location: Home > Update & Security > Troubleshoot. If you run into trouble, run there first.
Turn off File Explorer’s Quick Access view
When you open File Explorer in Windows 10, it defaults to a new Quick Access view that shows your most frequently accessed folders and recently viewed files. I love it, personally, but if you’d rather File Explorer defaulted to the “This PC” view found in Windows 8, here’s how.
Open File Explorer, then select View > Options from the Ribbon. A Folder Options window will open. Click the “Open File Explorer” drop-down menu at top, then select the “This PC” option. Click OK and you’re done!
Manage notifications
Windows 10’s Action Center houses and manages the notifications spawned by your system’s various apps. You might not want every Windows Store app you install barking at you all the time, however, or maybe you don’t want to see any notifications while you’re in presentation mode. You might just want to silent the annoying ads that the Get Office app spawns. Fortunately, those are easy to tweak.
To tinker with you your notification settings, head to Start menu > Settings > Systems > Notifications and actions. Individual Windows Store apps, like the Mail app, tend to have more granular notification options in the Settings menus inside the apps themselves.
Schedule your restarts
This is wonderful. If you’ve got pending updates that require you to reboot your PC, Windows 10 will allow you to schedule a specific time for it to do so. Finally!
Open the Settings option in the Start menu, then head to Updates and Recovery > Windows Update > Restart options to see the scheduling screen above.
Get Windows updates from other sources
But the Windows Update upgrades don’t end there. Windows 10 introduces a new option that lets you download updates using peer-to-peer technology, rather than Microsoft directly. It could help you get that hot security patch faster when everybody’s hammering Microsoft’s dedicated servers, or save you bandwidth in a computer-crowded house—just download the new patch once from Microsoft, then share it among the PCs under your care.
To tinker with the setting, head to Start > Settings > Update & Recovery > Delivery Optimization. By default, “Get updates from more than one place” is enabled and configured to grab updates from PCs on both your local network and the Internet at large. If you don’t like the idea of your PC using your bandwidth to share Windows Updates with strangers, be sure to disable it. If you leave it active, the “Advanced options” link lets you fine-tune how Windows uses your network to download and share updates, as you can see above.
Seize control of Windows Updates
While the ability to schedule installation times for updates is very welcome indeed, not everyone is happy about the way Windows 10 handles patches—specifically, that you can’t refuse them. Windows 10 Pro users—but not Windows 10 Home users—can delay downloading updates for some time, but eventually, Microsoft will force them on you.
There are some actions you can take to exert control over your Windows Update experience, however. Most notably, if you’re using Wi-Fi for connectivity, you can set Windows 10’s Wi-Fi connections as metered to download updates when you’d like to, rather than when Microsoft wants you to. The Active Hours feature lets you tell Windows specific times not to install updates. And if you ever encounter a borked update that refuses to play nice with your PC, Microsoft’s released a tool that allows you to choose individual updates so they won’t be downloaded again.
Those workarounds aren’t a replacement for being able to manually choose the Windows Update you’d like to install, but they should help ease the sting a little, at least.
Fresh keyboard shortcuts!
Windows 10 packs a handful of fresh keyboard shortcuts, all tied to newfound abilities inside the revamped operating system. There are many more than we can list here, so head over to our guide to Windows 10’s keyboard shortcuts to learn all about them. If you really want to get fancy, augment those hotkeys with Windows 10’s new touchpad gestures for true shortcut mastery.
Declutter your taskbar
Two of Windows 10’s standout features are its Cortana search integration and newly added virtual desktop support—but they claim a sizeable chunk of your taskbar. If you don’t care about either (or don’t mind using Windows key + Tab to leap through virtual desktops) you can reclaim that onscreen real estate.
Everything starts by right-clicking an empty section of your taskbar. Select Cortana, and choose to Show Cortana icon only. You can also remove the Cortana and Task View buttons from the same Taskbar menu.
Thank You!
We feel the need to thank you following through with this long episode of top 30 Windows 10 trick, tips and tweaks. The article doesn’t stop here; share your ideas with us on the comment section.
If you really want to get fancy, augment those hotkeys and use Windows 10 like a ninja, try new Windows 10 touchpad gestures for laptop.
Microsoft changed Windows for the better when it introduced trackpad gestures in Windows 8. The new gestures made controlling your PC a far more fluid experience, helping you get things done more efficiently without the need for mouse-like buttons at the top of the touch area.
In Windows 10, Microsoft improved on Windows 8’s foundation. Beyond integrating existing gestures, the company added new touch controls and dumped items that wouldn’t make any sense in Windows 10, like swiping in from the right edge for the Charms bar (since Windows 10 doesn’t have a Charms bar).
The only requirement for using these gestures is that you have a precision touchpad, so some older laptops won’t be able to use them.
If you’re not sure if your touchpad supports gestures, open the Settings app and go to Devices > Mouse & touchpad. Under the “Touchpad” heading it will say “Your PC has a precision touchpad” if you can swipe and tap instead of clicking.
Select an item: Tap on the touchpad
Scroll: Place two fingers on the touchpad and slide horizontally or vertically
Zoom in and out: Place two fingers on the touchpad and pinch in or stretch out.
Right-click: Tap the touchpad with two fingers, or press on the bottom right corner
Open Task View: Place three fingers on the touchpad and swipe up (away from you).
Show desktop: Place three fingers on the touchpad and swipe down (towards you). Reverse the movement to get all your windows to return.
Switch between open windows: Place three fingers on the touchpad and swipe right or left (this is the same as pressing Alt + Tab).
Drag an open window: Double-tap and then drag from the title bar
Open Cortana: Tap the touchpad with three fingers. If you’d rather this gesture opened Action Center instead, you can change this default in Settings > Devices > Mouse & touchpad.
Windows 10 adds all sorts of nifty new features designed to appeal to PC power users, but it also includes some nifty newcomers that you can’t actually see—fresh keyboard shortcuts!
The details come courtesy of Brandon LeBlanc of Microsoft’s Blogging Windows blog. If you install Windows 10 be sure to check these out.
Snapping window: Windows key + Left or Right — LeBlanc says: “(Can be used with UP or DOWN to get into quadrants.)” Quadrants is the new Snap view mode that pins apps to the four quarters of the screen.
Switch to recent window: Alt + Tab – LeBlanc says: “Hold shows new Task View window view, let go and switches to app.”
Task view: Windows + Tab – LeBlanc says: “New Task view opens up and stays open.”
Create new virtual desktop: Windows key + Ctrl + D
Close current virtual desktop: Windows key + Ctrl + F4
Switch virtual desktop : Windows key + Ctrl + Left or Right
The Command Prompt and its Experimental Properties tab in Windows 10.
If you want to start using Windows 10’s greatly enhanced Command Prompt hotkeys (copy-pasting via the keyboard, yesssss) then be sure to check out Scott Hanselman’s extensive post on the topic.
Windows 10’s newfound support for keyboard shortcuts in the Command Prompt isn’t enabled by default, however. To enable it, right-click the Command Prompt’s title bar and select Properties. Open the new-to-Windows-10 “Experimental” tab and check the box next to “Enable experimental console features.” Finally, check the boxes next to “Enable new Ctrl key shortcuts” and “Extended edit keys,” then click OK.
Dense concentrations of Wi-Fi access points and routers in large cities could be attacked by malware able to spread silently from node to node, researchers at the University of Liverpool have shown for the first time.
In the experiment conducted by Jonny Milliken, Valerio Selis and Professor Alan Marshall, a specially-crafted virus called ‘Chameleon’ was pitted against a range of common access points with poorly-secured management interfaces (i.e. using default passwords). Once access had been achieved, Chameleon then attempted to take control of the device by re-flashing its firmware with a replacement, open source OpenWrt. Attackers gaining control in this way would be able to monitor traffic for credentials or other data but the team’s real discovery was that Chameleon would also be able to spread and infect other routers in its neighbourhood in a manner similar to an “airborne virus.”
Having proved the concept in the lab, the team modelled the attack against the sort of Wi-Fi density found in two cities, Belfast and London, finding that even using an infection rate of five to ten percent, Chameleon would be able to infect several thousand access points within a few months.
Outbreak…and resistance
Although this sounds like a small number and a long timescale, in a large city each one of these access points could be serving anything from a handful to many thousands of people, so attackers would have gained access to potentially large amounts of valuable data.
Most striking of all, because many access points are left untouched and unmanaged, the attack would be hard to detect. Access points using encryption would offer a small challenge to the extent that re-flashing them would destroy the embedded key. This would need to be captured first.
The team doesn’t reveal which brands or classes of access point or router were vulnerable to Chameleon but were in no doubt that the re-flashing attack would work in the real world.
“In some cases it will work, in some cases it will fail; some are resilient against it, some are not,” Professor Alan Marshall told Techworld.
“It was assumed that it wasn’t possible to develop a virus that could attack WiFi networks but we demonstrated that this is possible and that it can spread quickly. We are now able to use the data generated from this study to develop a new technique to identify when an attack is likely,” said Marshall.
Attack the weakest (access) points
“Whilst many APs are sufficiently encrypted and password protected, the virus simply moved on to find those which weren’t strongly protected including open access WiFi points common in locations such as coffee shops and airports.”
According to Marshall, the solution is to embed intrusion prevention technology into access points, something he was pursuing through Queen’s University Belfast spin-out, Traffic Observation and Management.
The research highlights the unprotected state of router/access point technology, which rely on correctly-configured encryption and management to keep out attackers. But there is growing evidence that even without direct wireless attacks, these devices are riddled with vulnerabilities.
Microsoft has again painted a grim picture for customers who remain on Windows XP and Office 2003 after it ends support for the old OS and suite in early April, but it’s unclear if the company is succeeding in its campaign to convince holdouts to upgrade.
In a blog post on Wednesday, Microsoft reiterated that consumers and businesses that stick with the products past the April 8 deadline will face severe security risks and be unable to take advantage of technical advances. “Computers currently running Windows XP and Office 2003 won’t stop working on April 9, but over time security and performance will be affected,” reads the post.
Specifically, Windows XP PCs won’t be able to run many “newer” applications or work with new hardware due to unsupported drivers. Additionally, PCs running the OS will become easy prey to malware, because Microsoft won’t release new security updates and bug fixes for it, nor offer support services and technical content updates. Office 2003, on the other hand, can’t provide modern mobility and cloud capabilities, according to Microsoft.
Unsurprisingly the solution the company offers is for customers to adopt Windows 8.1 and Office 365, while acknowledging that in most instances PCs running Windows XP lack the hardware specs to run the new OS. “The majority of PCs running Windows XP are not capable of upgrading to Windows 8.1 due to the age of the hardware,” the post reads.
Windows XP remains quite popular despite its age—it was first released in 2001. According to the latest figures from NetApplications, Windows XP has an almost 30 percent share of the desktop OS market, second only to Windows 7 which has about 47 percent. By contrast, Windows 8, which started shipping in October 2012, and its 8.1 update, released a year later, have a combined share of about 10.6 percent.
Windows 8 and its update have drawn criticism for their touch-optimized interface and a series of disruptive bugs. Microsoft is promising another update for the spring that will make the OS friendlier for mouse-and-keyboard users, but the impression in the marketplace is that Microsoft has struggled to get Windows 8 right. The most pessimistic critics have likened Windows 8 to the disastrous Windows Vista, released in 2007 and generally panned.
Office 2003 is also still heavily used. According to the results of a Forrester Research survey released in October, Office 2003 was in use in 28 percent of businesses polled, behind Office 2007 (51 percent) and Office 2010 (85 percent). The latest version of Office—called Office 2013 when sold via traditional perpetual license and Office 365 when sold via an annual subscription—was at the time used in 22 percent of companies polled, and with a slower adoption than Office 2010 at a comparable stage of release, according to Forrester.
The recent versions of Google Chrome will let you synchronize your Google account with Chrome so that you don’t have to login again to each Google products (e.g. Google Drive, Gmail, Blogger, Google Play, etc) website you visit. This will also mean that anybody who has access to your Google Chrome browser can easily explore your email and other Google products without your consent.
How do you ensure that no intruder can have access to your Google account without you logging off? If you share a PC at home, other family members can start searching the web as you by simply opening Chrome.
Luckily, Chrome’s multiple profile support can help, providing an easy-peasy way for multiple people to use the same browser without worrying about intruders or having to constantly sign in and out of Google profiles.
How to Add a New User
First off, open Google Chrome’s menu—the icon with three horizontal lines in the upper right-hand corner—and open the Settings option. Towards the bottom you’ll see a “Users” section >> Simply click on Add new user.
A pop up window will appear with a bunch of user icons and new user account configuration. Choose an icon and name for your profile, you will have to decide whether you want to create a desktop shortcut icon for the profile, and then tap the “Create” button. Viz.. In a few seconds, a new window will open with the new user profile.
Notice that the first time you create a new user profile, Chrome will actually create two profiles: One called “Default Profile” for the person who is currently signed in to Chrome, and one for the new profile that you just created.
So the first time you add a new user, you are actually creating two profiles. To change the name of the default profile to something more user friendly, go back to the Chrome settings tab. Highlight the default profile in the “Users” section and the click the “Edit…” button to change the name.
That’s pretty much it. Just follow the same process as many times as you need to create a user profile for each member of your household.
Create User Profiles for Kids
If your kid is less than 16 years old. You need to be weary of what he/she does on the internet. The most reliable, easy and cheap way to achieve that is with Google Chrome. The browser allows you to supervise a particular profile. You can block the profile from visiting certain websites, view website histories by that user profile, delete and add bookmark.
To be able to monitor your kid internet activities, you will need to create a special kind of profile called a supervised user, a beta-grade profile type Google added to Chrome earlier in January.
To make a supervised user, simply click the checkbox next to “This is a supervised user managed by [email address].” Parents of supervised users can block specific websites, check out the websites they’ve visited, and lock kids into Google’s “Safe search.” If you block a website that your child thinks they should be allowed to view, they can even send you a request to unblock it, and you can manage settings for your supervised users via the dashboard at chrome.com/manage.
You need to be weary of the fact that user profiles are not password protected, however, so Chrome’s supervised users feature is far from fool proof. You will still have to keep an eye on your child’s surfing habits to make sure they are using their profile and not switching over to yours, or—if you’re really worried—create separate user accounts as the operating system level .
How to Switch between Profiles
To switch between users, just click the user icon that appears in the upper left corner of the browser window. The other created users will appear in a drop down menu. Select the one you want to switch to and a new window will open for that user profile. If that’s too much trouble, you can also use the customized desktop shortcuts Chrome offers to make when creating a profile to open the browser as a particular user.
This wrangle has been a real bone of contention in the past few years and will continue to rage inasmuch as newer generations are born and newer technologies are being introduced. However, while battling with this puzzle, EWT staff has listed some basic factors to aid you make a viable decision when choosing your first programming course.
Before we dismantle our enumeration it is exigent and imperative to note some of the common programming languages you are likely to choose from.
Some Common Programming Languages
Perl
Java
C++
C#
Python
Ruby
Eiffel
PHP
JavaScript
ABAP
Objective-C
Ajax
Clipper
Harbour
Gambas
ABL
OZ
Delphi
Now lets take a look at those crucial factors that will affect your decision while choosing your first programming language.
Career
Of course, this is the very first thing that should come into your mind. You need to consider which language will be the most valuable throughout a career or rather, which programming language will be feasible over a long-term career.
You need to consider your main field of specialization, which of the programming languages will aid you in that field and finally how much time do you have at your disposal.
Conceptual Foundation and Easy Transition
As a beginner the syntax of programming may appear a bit strange; some of the concepts may seem a hard nut to crack but a fastidious observation and implementation of that concept may lead to better understanding of similar concepts.
One of the easiest method of mastering various programming languages is by starting from the ones that allows you to transit gradually to another language. Languages such as Java, C# and C++ are the basics of programming. Mastering any of this three will enlighten your brain and lay a fundamental foundation for learning other programming skills. Starting with more advance languages such as Object-C, Ruby or Python which has a more crooked and complicated syntax structure will be a hectic experience when reverting to the basic ones.
Monetization and Marketability
Of course, after completing your programming course you might want to take a vacation in a luxurious environment, dry your toes and flaunt some cash. That is probably the easiest part of learning programming if you made the right choice. Ask me what I think: You want to work at Google? Best go Python. You want to work in the enterprise space, learn Java or C#. You want to build websites? Probably go PHP or Ruby. Pledged your soul to Apple? Just dive into Objective-C. Anything other this; you are out of employment.
For those Americans who are seriously considering going into coding I recommend you start with Java, gradually progress to C# then anything can follow. Intending web programmers can start with JavaScript, PHP and Ajax. W3schools offers free web base course on the major web programming languages including JavaScript and PHP. Moreover, several programming eBooks can as well be downloaded free or paid online: A little Google search will change everything.
Does the cluttered ribbon menu in windows 8 annoy you? Ian Paul – PC World will tell us exactly how to clean it up.
When it comes to Windows, there is nothing I love more than Microsoft’s infamous Ribbon interface—and nothing I hate more. Using it in Microsoft Office is great, but adding Ribbon to Windows 8’s file explorer was a bit much for me.
So I decided to pare File Explorer down a little and put the features I might need front and center, while banishing the rest of the Ribbon from my sight. If you’re tired of dealing with a Ribbon-loaded File Explorer, here’s a quick way to simplify your menu hopping.
The Home tab of Windows 8’s stock Ribbon interface.
But first…
Before we get going, let’s run down some basic anatomy of Windows Explorer. At the very top of the window you’ll see a file folder icon in the upper left corner. Next to that are a few icons and a downward facing arrow. That small set of icons is known as the Quick Access Toolbar (QAT).
Below that, where you see menu options for File, Home, Share, and View—each with their own mess of icons—is the infamous Ribbon we were talking about earlier.
And now, on with the show…
How to clean up the Ribbon interface
First, click on the QAT’s downward arrow to show the functions you can add to the Quick Access Toolbar, including undo, redo, delete, properties, new folder, and rename. Some of these should already be selected. Add the feaures you use on a regular basis; they should appear in the QAT immediately. Fear not if you don’t see a beloved function: The QAT can have any Ribbon UI feature you want. To add your favorites, just right-click the option in the Ribbon and select “Add to Quick Access Toolbar” in the pop-up menu that appears.
That’s it! Now that you’ve got your QAT fine-tuned, it’s time to give it a more prominent placement and banish the Ribbon UI. Right-click the Ribbon and select “Show Quick Access Toolbar below the Ribbon.” Next, right-click the Ribbon again and select “Minimize the Ribbon.”
Click “Minimize the Ribbon” to, well, you know.
Windows 8’s File Explorer should now look similar to what you see below, with the Ribbon pushed to the background as much as possible and the Quick Access Toolbar front and center with all your favorite menu options.
Well, that’s much less of an eyesore.
Forgotten, but never gone
The Ribbon may be banished, but it’s not gone for good. Anytime you need to access the Ribbon, simply click on the menu option you need (File, Home, etc.,) and the Ribbon interface will briefly reappear. If you want the Ribbon back permanently, just right-click the Ribbon’s menu options and deselect “Minimize the Ribbon.” You can put the QAT up at the top again by right-clicking it and select “Show Quick Access Toolbar above the Ribbon.” These few simple steps can make File Explorer a lot easier to use—and a tiny bit closer to the standard menu interface found in previous versions of Microsoft’s OS. The same basic procedure can help you clean up Microsoft Office’s Ribbon UI, if you consider it an eyesore, too. I hope it helps! Full credit to this article goes to Ian Paul and PC World
“All work without play” they said, “makes Jack a dull boy”. 2013 would have been incomplete without all the fun in it. Today, EWT is bringing your attention to the top 20 PC games that branded our 2013.
The games shortlisted here can easily contend for the ‘best game of the year’ award. If your most preferred game is not listed here, you are free to include it on the comment section. The qualifications for contention: The game must be a stand-alone product that you can buy on its own, and it must run on a PC.
DayZ is a gritty, authentic, open-world survival horror hybrid-MMO game, in which players follow a single goal: to survive in the harsh post-apocalyptic landscape as long as they can. Players can live through powerful events and emotions arising from the ever-evolving emergent gameplay.
In Papers, Please, you win the lottery. Unfortunately, it’s the labor lottery, and you’re pressed into service as a border-crossing guard for your vaguely Eastern Bloc country Arstotzka. Your job is to examine people’s passports and—as drab days stretch into miserable weeks—make sure no criminal scum is trying to get into the country using falsified documents. Of course, the “criminal scum” is often people just like you—like the man who immigrates with no problem but whose wife has counterfeit papers. Do you let her in anyway? Or do you do your job and reject her? Keep in mind that if you let her in, there’s a good chance your pay will get docked and your family won’t eat tonight. Papers, Please is brutal. Unforgiving. Bleak.
After a swift fall from grace with the last two middling chapters of the Assassin’s Creed franchise (Revelations and III), I thought I was done. Burned out. Imagine my surprise when I put 15 hours into Black Flag my first day. Sailing around the Caribbean, sinking boats just to cause chaos, with my crew of pirates belting out sea chanties—I liked being a pirate. Star of the show Edward Kenway is the most affable protagonist the series has ever had. While some lament the lack of plot progression in the overarching series, I’m actually glad proceedings are less self-serious this time around. Assassin’s Creed IV is pure, unadulterated fun. Just make sure to keep a bottle of rum close at hand. Or this weird nonalcoholic rum for all you youngsters.
The Stanley Parable, once a mod for Half-Life 2, is now a stand-alone game. If you don’t know what The Stanley Parable is about, I highly recommend that you skip the rest of this entry and just go download the demo. Choice is the operative word in The Stanley Parable. You play Stanley, a hapless office worker who suddenly realizes that all his coworkers are missing. Also, a British guy narrates everything. “Stanley came to two doors and walked through the one on the right, towards his boss’s office,” the narrator says cheerfully. Do you listen to him, or do you rebel and walk through the door on the left? Do you stand there, paralyzed by choice, for minutes on end? Or do you contemplate how utterly meaningless life is? Let’s be honest: It’s probably the last one.
Eu não falo Português. Still, that didn’t stop me from becoming eternal king of the Portuguese Empire, a globe-spanning operation that discovered the Americas before Columbus was even born, and that grew to control the entire New World. In Europa Universalis IV, you take control of a country in the early Renaissance era and guide it toward empire. Or don’t. It’s a giant political sandbox. Want to know what would’ve happened if Ireland had thrown in with the French during the Hundred Years’ War? Or if the Holy Roman Empire had become an exceptional naval power? Go ahead and try it. The complexity of Europa Universalis IV’s grand-strategy approach takes some getting used to, but stick with it and you’ll suddenly find you’re making political decrees at four in the morning, wearing a crown you fashioned from an old pizza box. Perfect.
Look at your shelf of films (or your Netflix account or wherever they live). Are a good portion of your favorites neon-soaked, 1980s action films? Ones that feature spandex, an abundance of one-liners, and cheesy synthesizer and saxophone music? Far Cry 3: Blood Dragon takes place in a post-nuclear-war 2007. Your name is Sergeant Rex Power Colt. You have an electronic eye and a cybernetic arm. Your character is voiced by Michael “Kyle Reese” Biehn. It’s basically the same game as Far Cry 3, except way more pink. And way more amazing.
It’s been months, and I still don’t quite know how to put my experience with Gone Home into words—or perhaps I don’t want to. The experience is intensely personal, and not everyone is going to get as much out of it as I did. Gone Home is not, despite outward appearances, a horror game. There are no enemies to encounter, no middle act where you blow up the house and save the universe. Gone Home is a story of a family—and the secrets the family members keep even from one another, secrets that are hidden in the backs of old drawers and stashed under beds. What can you learn from the letter your mother uses for a bookmark? How about the box of papers in the basement? Or the details of an old rejection slip addressed to your dad? A lot, it turns out. Gone Home takes people as its premise, and people are fascinating.
8. Call of Juarez: Gunslinger
Call of Juarez: Gunslinger abandons the self-seriousness of the last Call of Juarez game (The Cartel) and returns to the Old West, winning it the title of best arcade-style shooter of the year. You play as Silas Greaves, a grizzled bounty hunter and legend of the Old West. Greaves is actually the narrator of Gunslinger, relating his tales to a crowd of saloon patrons. And, as you can imagine, his tales are a bit…tall. Yes, you play the unreliable narrator of your own stories. The other people in the bar will call Greaves out on his lies, and the game world changes accordingly. “Now hang on, I didn’t say they were Apaches, I said they fought like Apaches!” Greaves says, and suddenly the Apache enemies turn into generic bandits. It’s a refreshing approach—toying with game tropes without taking itself too seriously. And for only $15? It’s a steal.
9. Tomb Raider
I never thought that in 2013 I’d be putting a Tomb Raider title on the Game of the Year list, but here we are. Developed by Crystal Dynamics, the new Tomb Raider is (like so many things these days) a dark, gritty reboot of the franchise. In this case, however, it’s a gritty reboot that works. The iconic Lara Croft is younger here, not as sure of herself. She’s shipwrecked on a mysterious island where the locals are less than friendly, and from there the game plays a bit like an open-world Uncharted. And I mean that comparison in the most favorable way. Tomb Raider’s mechanics just feel right: The game has dozens of collectibles scattered around the world, and for the first time in a long, long while, I actually snagged them all, just so I could keep playing.
10. Saints Row IV
If Saints Row were a presidential candidate, it would endorse Fun. Capital F. “Restrict guns? No, I want the entire world to have guns,” says President Saints Row IV. “Oh, and here are some superpowers and a kickin’ soundtrack and—you know what, let’s just remake Crackdown, but make it silly.” I love Crackdown. Remake Crackdown but set it in the anything-goes, Saints Row universe, where every moment is a new pop-culture reference, and one of your many superpowers lets you turn yourself into a nuclear explosion? Awesome. Plus, I think there’s an unspoken rule that any game prominently featuring Aerosmith’s perennial classic “I Don’t Want to Miss a Thing” has to make the GOTY list.
BioShock Infinite didn’t match its potential. Set aside the fact that the middle chapter is a drag, and you’re still left with an extremely problematic story that never quite gets a handle on any of its themes. And yet there were moments (particularly this one) that provided brief glimpses of the game it might have been, and even those brief glimpses were better than a lot of games. BioShock Infinite didn’t “save video games,” and it certainly didn’t have the same impact as the original BioShock, but those sky-high expectations were always unrealistic. It’s a shooter with a story that’s marginally better than those of most other shooters, set in a high-concept world that occasionally falters and shows its seams.
Starcraft II: Heart of the Swarm is the first expansion pack to Starcraft II, and the second chapter in a planned trilogy of games. The game’s campaign takes place after the events of the first game and you take on the role of Sarah Kerrigan and the Zerg race in an all new single-player campaign. Like the first game, you’ll decide how to proceed through the campaign by choosing your missions and your army’s upgrades—which now in the form of Zerg evolutionary enhancements. The multiplayer portion of the game, which is arguably what most people are going to get the game for, is also getting some major additions with new buildings, units, and associated strategies.
Battlefield 4 is being developed on a powerful next-gen engine and features Destruction 4.0 — allowing for Battlefield: Bad Company 2 style effects — tessellation and dynamic weather effects. As with Battlefield 3, the next entry in the series’ primary platform will be PC. More than just a yearly upgrade, the game will come with a host of improvements to the way its maps are set. For instance, each map in the game will be subject to various weather conditions including fog, sandstorms, rain and haze with these being completely random according to the leak. This, and a dedicated single-player campaign will be part and parcel of the next-gen Battlefield 4 experience.
SimCity is one of our most wanted games of 2013 for the PC. Heck, it’s been one of our most wanted games for a decade now. We’ve wanted a proper, current-generation sequel to SimCity 4, a game which has—thus far—remained uncontested by the likes of too many city simulations that simply fail to compete. The new SimCity offers a city simulation with more detail than ever before thanks to the powerful Glassbox engine it runs on, which simulates everything from underground water tables to the spread of fire, pollution, and crime. Beyond that, it’s got detail that’ll make use of high-end PC hardware to their max, pushing the boundaries of what’s possible in a simulation. It’s got its share of problems, but they’ve been fixed. Aside from the game’s always online requirement, most of its issues that were around during its launch have since been alleviated, making it one of the best city simulation games of all time.
Total War: Rome II is set to be the latest and greatest title in Creative Assembly’s Total War series of real-time strategy games. As the eight standalone title in the series, Rome II is set in the classical antiquity with a focus on the Roman Republic. The game is set to offer a much larger campaign than any previous Total War title, encompassing the extent of the Roman Empire and its environs. This time around however, players will be prompted with a variety of decisions to make throughout their campaign. For the first time ever, players will have to make decisions which affect how the campaign plays out by assigning traits to their legions, customizing their loadouts, and more. Additionally, the game’s developers also seek to capture the uniqueness of the different cultures and fighting forces of the time so you won’t simply be commanding cloned armies to fight one another. Each unit in the game will have a unique look and feel associated to its culture, and a technological tree that makes historical sense.
Planetary Annihilation can be best described as the spiritual successor to Total Annihilation and Supreme Commander, offering real-time strategy battles that take place on a planetary scale. Games are expected to vary from half-hour 2-player battles to large scale, and lengthy 40-player matches. The game is set to feature a planet-based map system spanning over multiple star systems, different types of planets, and even asteroids. Players will be able to conquer planets and even entire solar systems in their war for galactic dominance.
Metro: Last Light is the sequel to Metro 2033, taking place a year after the events of the first game. Originally slated for release in 2012, the game has since been delayed to an early 2013 release. The writer of the books, Dmitry Glukovsky has been signed on to work with the developers on the game. Like Metro 2033, the game is expected to make full use of the PC’s capabilities to offer better visuals than its console counterparts.
Crysis 3 may be getting released on consoles, but it’s a game that finds its home on the PC as its developers plan to make full use of the PC’s powerful hardware. Veering away from the corridor shooter gameplay of the second Crysis, Crysis 3 is set to offer wide open spaces in a New York City overrun by flora and fauna. Much like the first Crysis and Far Cry before it, players can expect to be able to utilize free-form strategies against AI opponents as they traverse through the wide open areas.
Wasteland 2 is a tactical turn-based and party-based RPG with an “old school” isometric view in which players take control of a party of up to seven characters (three of which are NPCs), and all of whom are highly customizable. Wasteland 2 comes from the makers of Fallout and the original Wasteland—precursors to just about every other modern RPG. As one of the first major games to be funded by Kickstarter, Wasteland 2’s development is entirely independent from the machinations and meddling of marketing departments and corporate big-wigs.
Brothers – A Tale of Two Sons is a videogame developed by Starbreeze Studios in partnership with 505 Games. A lovely game just enough to squeak in at the bottom of the list.
Android OS is gradually taking it’s place as the mobile king: every tom, dick and harry now own one. This insane increase in consumers has lead to the development of many third-party ‘useful’ Android application.
As a measure intended to shield your Android device from malwares synonymous with most third-party applications, the OS does not accept application unapproved by Google (unapproved applications may be installed but will not work correctly on non-rooted Android devices).
Rooting (or jailbreaking) your Android device gives you unimaginable control over your device, letting you have master control on how your device functions; update the OS, replace the firmware, overclock (or underclock) the processor, customize just about anything.
In the past rooting might be an easy “nut to crack” for Mr. tom Mr. dick, but certainly not for Mr. harry. The process was generally complicated and you might just end up in the ‘bricked’ zone with one miscalculated move. In this tutorial, I’m going to show you how to root/jailbreak any Android phone with just 1 click (or maybe 2).
Requirements:
– A healthy Windows PC (Windows XP, 7, 8 or higher).
– You must have Kingo Android Root software installed in your PC. If you don’t have the software, you can download a copy here.
– Your device must be properly charged.
Compatibility Check Up
To begin the rooting process, make sure you have downloaded and installed Kingo Android Root software on your PC: The application will root any (or at least 95%) android device with 1 click but to remain on the safer side, check if your device is compatible with the software.
Enable USB Debugging
If your device is among the compatible devices, proceed to your device settings and enable USB debugging. If it’s running Android 4.0 or 4.1 follow this steps to enable USB debugging:
GOTO Settings.
Navigate to Developer Options
Tick the box just beside “USB debugging.” (You may need to switch “Developer options” to On before you can do so.)
Follow this steps if your device is running on Android 4.2 and later:
GOTO Settings
Navigate to About Phone
Enter Developer Options
Tick the box next to “USB debugging“.
Then Click OK to save your changes.
Run Kingo Android Root Software
After enabling USB debugging on your device, locate Kingo Android Root icon on your start menu or desktop. Run the application by double clicking on it and connect your device via its USB sync cable. If your device is connected successfully, you should see an indication at the bottom-left corner of the software interface.
1 Click Rooting
Once your device is connected; you are just 1 click away from being the master of your Android phone/tablet. Click ROOT, grab a cup of coffee and watch Kingo Android Root do the rest for you. The whole process is automated and should take up to 2 mins; your device maybe rebooted a couple of times.
Beware: Rooting your Android device will make it open to malware attack, to remain on the safer side; only install applications from trusted sources and websites.
Un-Root your Android
If you decided rooting is just ‘what it is’ you can always sign off by running the Kingo Android Root software on your PC, reconnect your device via USB sync cable and click UNROOT when your device is set.
You can also opt for any of these popular Android UNroot methods instead. They’re best for mostly MTK-powered devices.
Although future generations of PCs are likely to be operated on Android OS with Lenovo’s latest invention, Windows PC and Mac users can still enjoy Android apps without installing Android OS.
Bluestacks is a free software that allows you to use your favorite Android apps on a Windows PC or Mac. You can download apps like Angry Birds Space, 2go, Whatsapp or BBM to Go directly into Bluestacks, or sync the apps from your phone using the Bluestacks Cloud Connect Android app.
Using Bluestacks is similar to using an Android tablet: It works a bit like a widget. When clicked, the BlueStacks App Player will display the ten apps that have already been pre-installed and application suggestions which can be installed using Google Play Store. You can install more application by clicking on More below the big + sign. Bluestacks can be viewed in minimized or full screen.
Download Bluestacks
To download Bluestacks, proceed to Bluestacks download page, click on the download button that fits your OS description. The Download Now link will download a small installer file to your desktop. Remain online and double-click the installer to proceed with the actual download.
Please note that Bluestacks is currently in beta stage: Beta or prerelease software is not intended for inexperienced users, as the software may contain bugs or may potentially damage your system. I strongly recommend that users exercise caution and save all mission-critical data before installing or using this software.
I have personally tried this software on Windows XP, Windows 7 & Windows 8, the performance is great and it is worth trying!
Bill & Microsoft has made many structural changes by implementing Metro UI and Start Screen in Windows 8. But the PC side of Windows 8 has not seen any dramatic changes except the removal of Start Menu and Aero Glass Transparency feature. Windows 8 like Windows 7 and others before them, has a lot of customization features that helps you define an entirely new look for your Windows PC .
Sometimes, the quest for customizing the desktop look can consume a lot of time; so you don’t have to actually customize your windows 8 PC, rather you can download many custom windows 8 themes and use them on your windows 8 PC (Check out 25 best themes for Windows 7) .
Most of these windows 8 themes are the products of talented artists/developers who make these themes available as a free download for everyone . But like most windows programs , windows 8 themes download from un-trusted sites might contain malware in them . So it is always advisable to download windows 8 themes from reputed sources only .
As a tradition that has been laid by the predecessors, Windows 8 does not allow the installation of third-parties themes by default, hence, it is recommended you read How to Install Third-Party Windows 8 Themes before you proceed to the next section of this article.
In this article, we shall consider the top 25 most-outstanding Windows 8 themes you can apply on your desktop.
1) Space Blueberries 4.8
Theme Name: Space Blueberries 4.8 OS Version: Windows 8 Artist: Neiio
Description: Work is one of the best Windows 8 theme which has glowing dark interface. It gives you breathing space while working on multiple documents.
4) Snow Leopard glass
Theme Name: Snow Leopard glass OS Version: Windows 8 Artist: Sagorpbd
Description: Aer08Glow is a port of the default Windows 7 theme with a few modifications. This theme has glow on the caption buttons and 2 styles: one with square corners and one with rounded corners. To use this theme with rounded corners you have to enable Aero Glass Transparency in Windows 8.
10) Chromium
Theme Name: Chromium OS Version: Windows 8 Artist: Reymonvisual
Description: Be greeted by the sweetness of the rising sun every moment your PC is booted. Win Blue n Red Windows 8 theme is the perfect blend for ‘red’ in ‘blue’, with a perfect ‘black’ to see off the dark sides.
15) Different Touch 8
Theme Name: Different Touch 8 OS Version: Windows 8 Artist: Sagorpirbd
Description: Darkness has overshadowed light! The new ‘red’ brightens the appearance of your Windows 8 theme. Gray8 new red is an easy going theme with boundless customization.
19) Twentythirteen
Theme Name: Twentythirteen OS Version: Windows 8 Artist: sand-and-mercury
Description: Twentythirteen is a new Goddamn visual style for your bullshit Windows 8 RTM desktop.
20) Abisso
Theme Name: Abisso OS Version: Windows 8 Artist: Ezio DOWNLOADDescription: Abisso is one word for ‘true transparency’: The Windows 8 theme has a clean dark background with blue color scheme.
21) Elune
Theme Name: Elune OS Version: Windows 8 Artist: Neiio
Description: Gradually drift away from the original look of Windows 8. With Ourea windows 8 themes; the future is in your hands.
24) Alduin Windows 8 themes
Theme Name: Alduin Windows 8 themes OS Version: Windows 8 Artist: Charleston2378 DOWNLOADDescription: This list cannot be completed without the inclusion of the beautiful work of Charleston. Alduin is a Windows 8 minimalistic theme with deep dark background.
25) Nimbus
Theme Name: Nimbus OS Version: Windows 8 Artist: Neiio
Description: Closing our list of top 25 elegant Windows 8 themes today is: Nimbus. This theme has an extra-ordinary layout that allows you to choose from various color schemes and background.
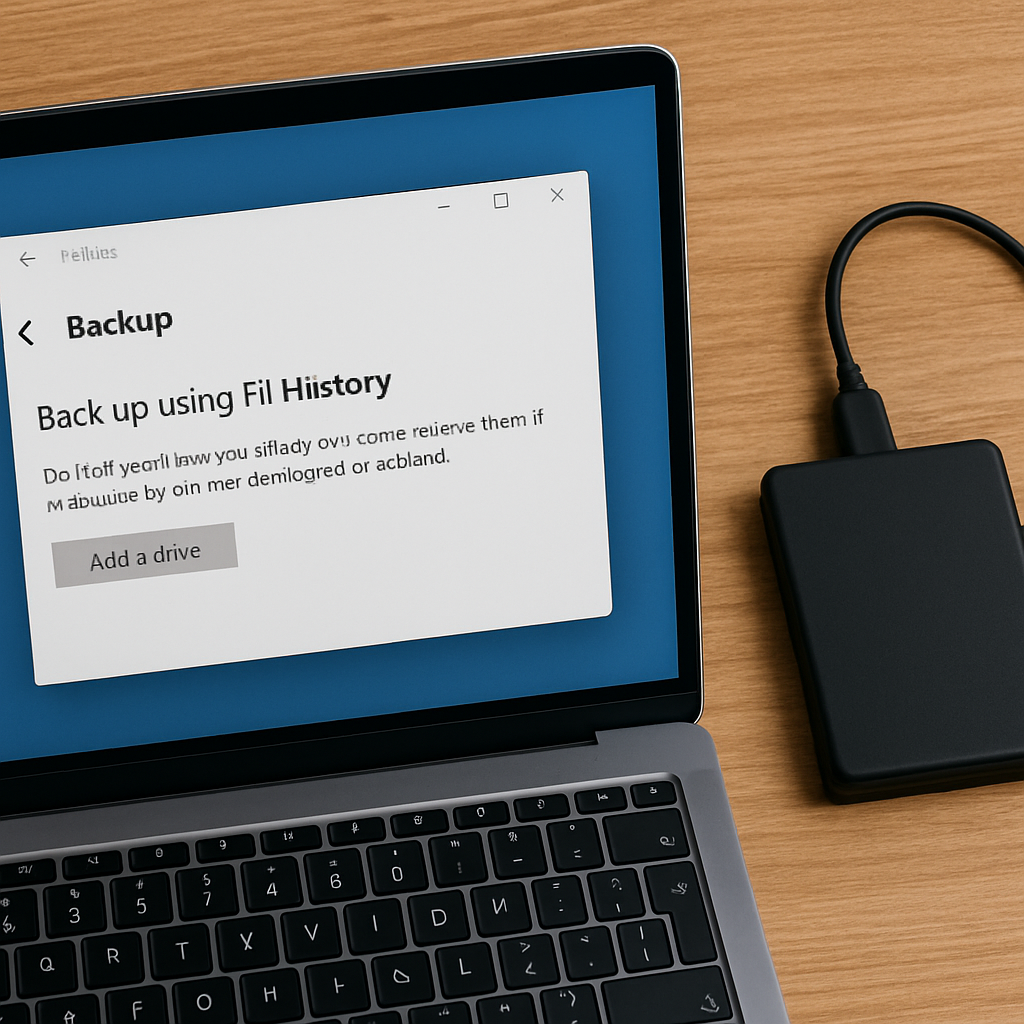
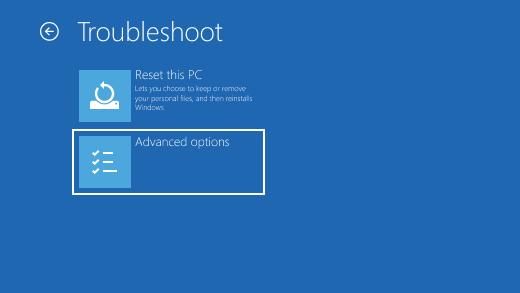

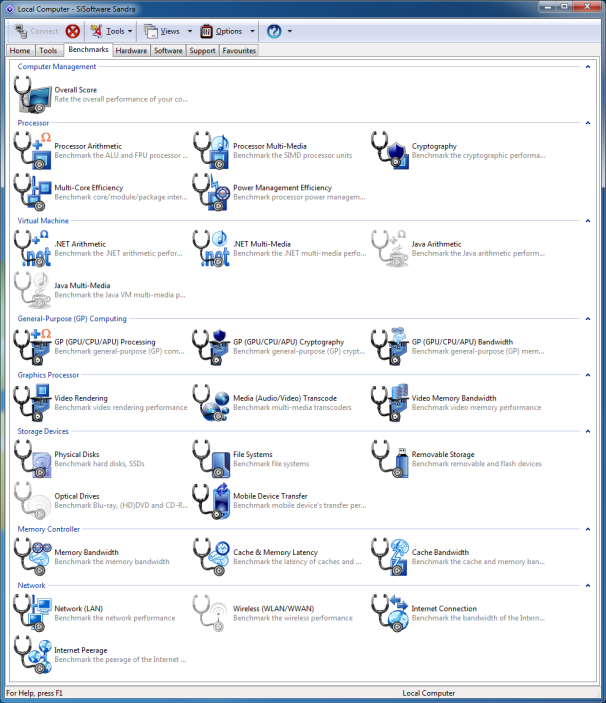
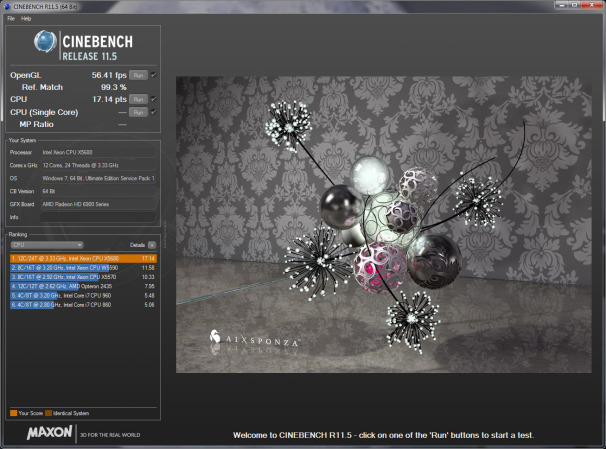 Maxon’s Cinebench, based on the company’s Cinema 4D animation software, tests single-threaded and multithreaded CPU performance.
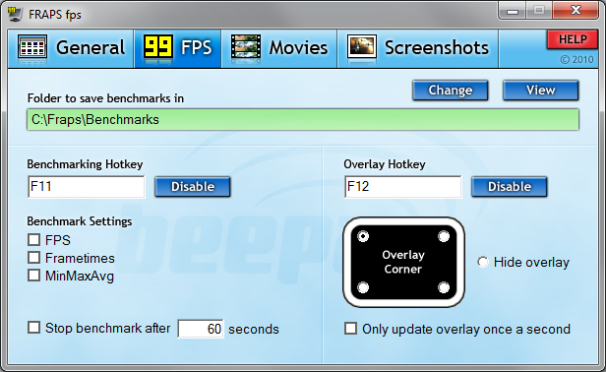 Fraps tests how well a game is performing on your system, even if the game doesn’t offer a built-in benchmark.
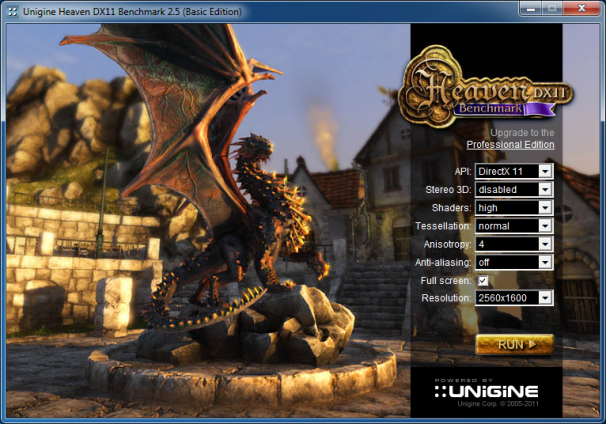 The Unigine Heaven benchmarking tests GPU performance in multiple DirectX or OpenGL modes.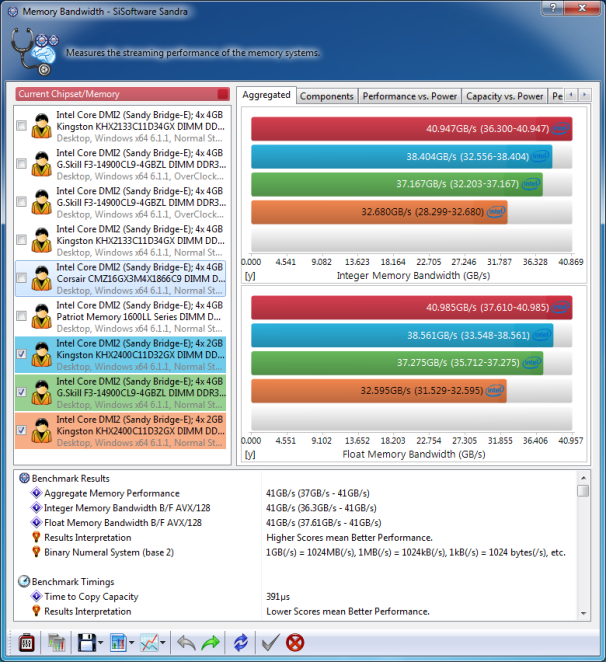
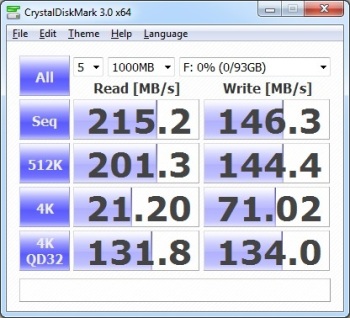 CrystalDIskMark is an excellent tool for testing a drive’s read and write performance at several different transfer sizes.
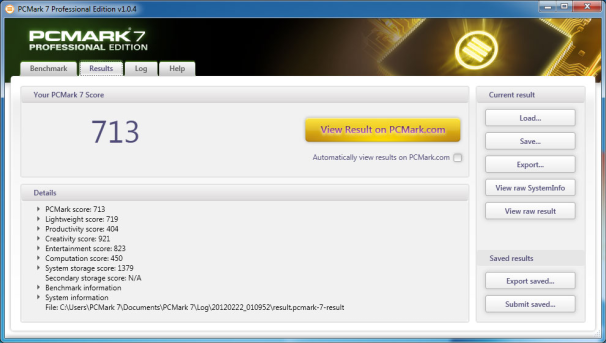 Futuremark’s PCMark 7 evaluates system performance by testing CPU, GPU, memory, and storage subsystem performance.

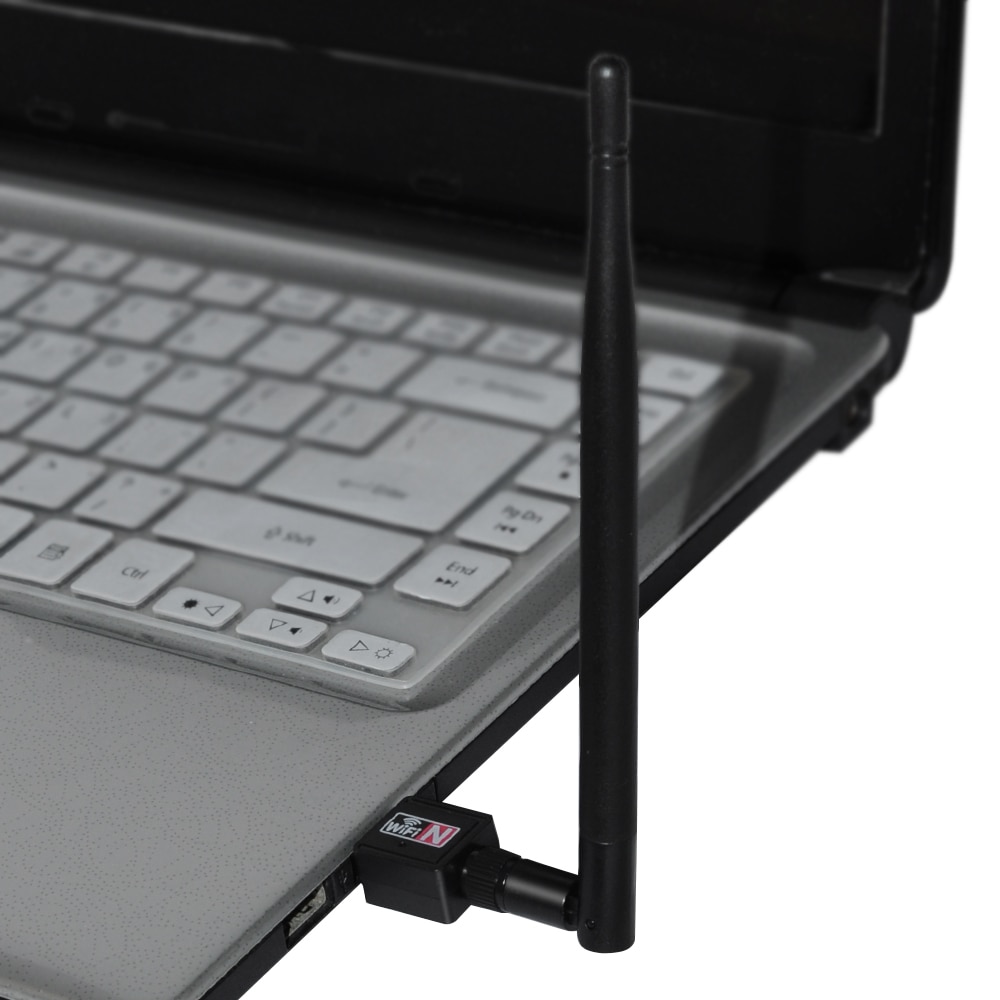
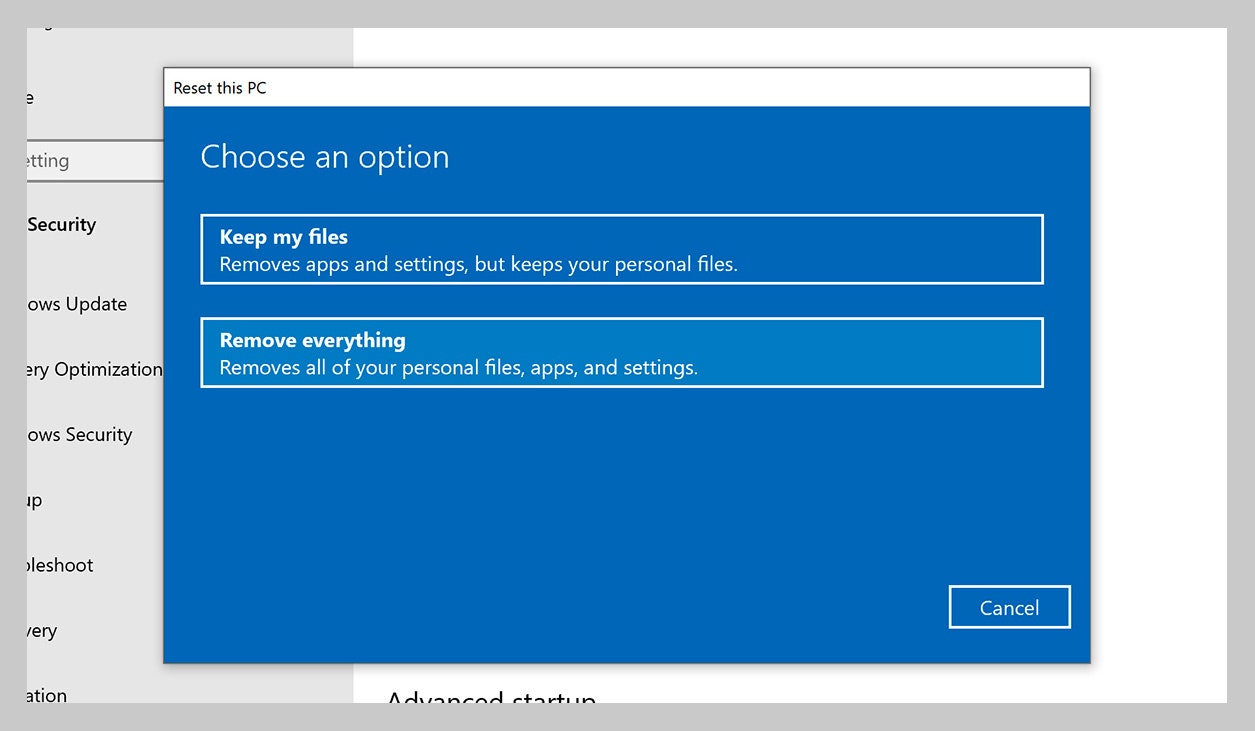
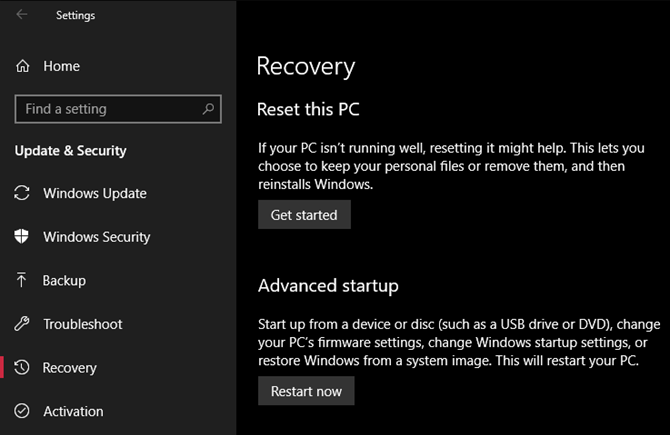
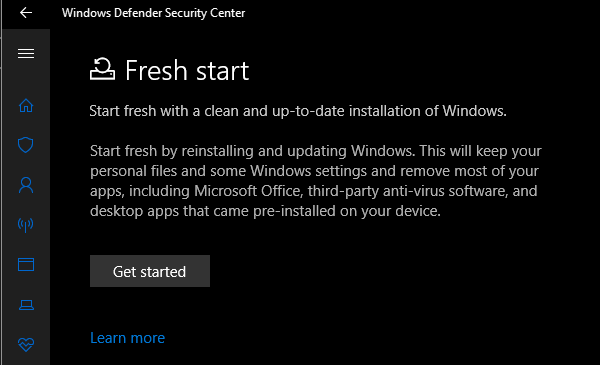

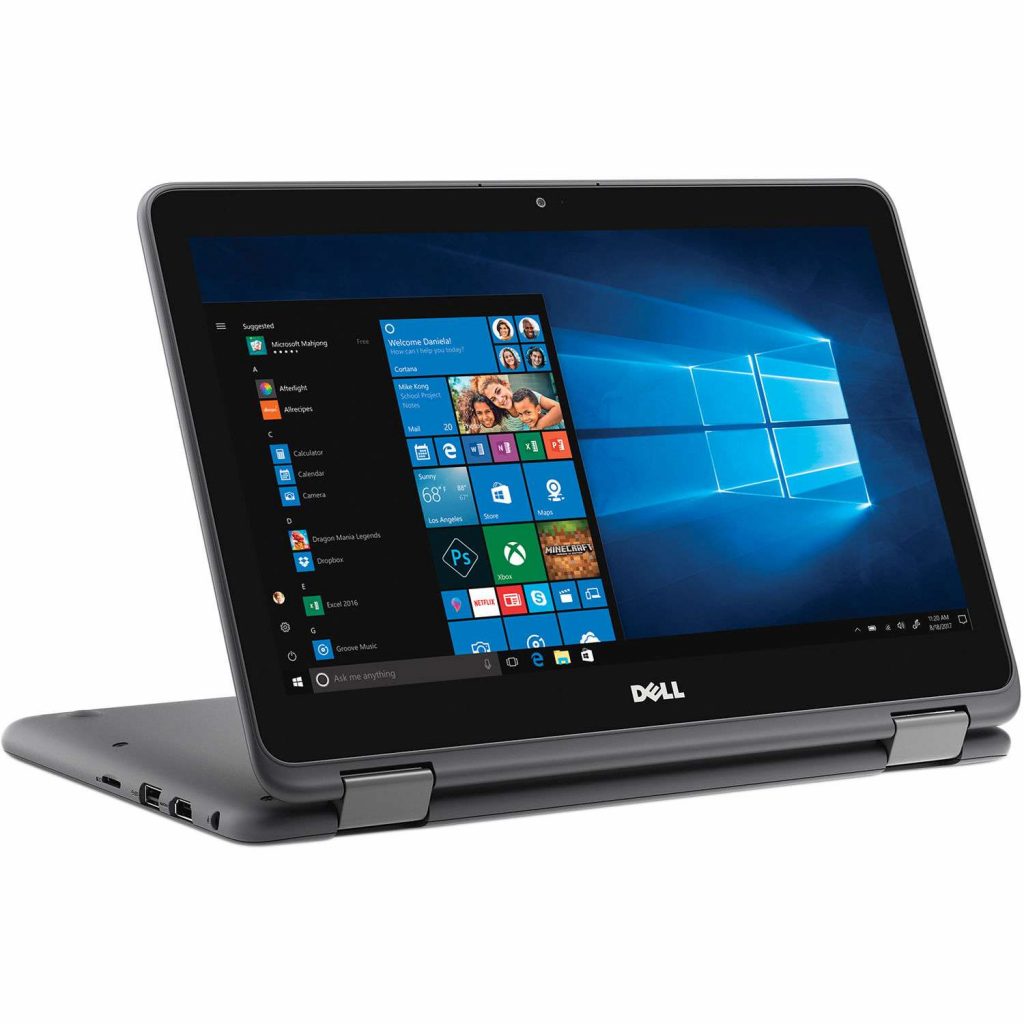
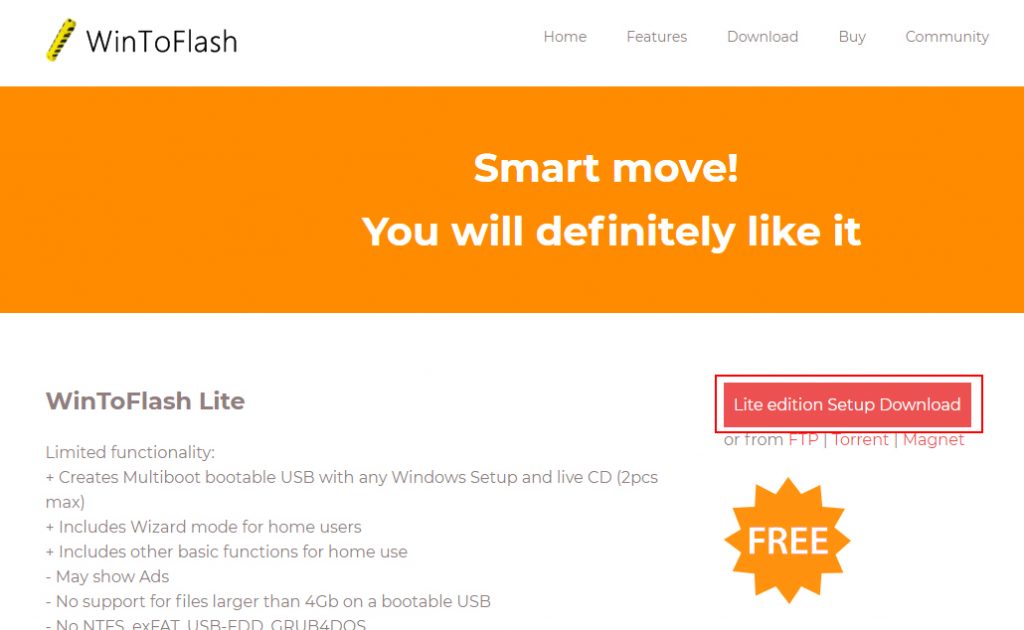
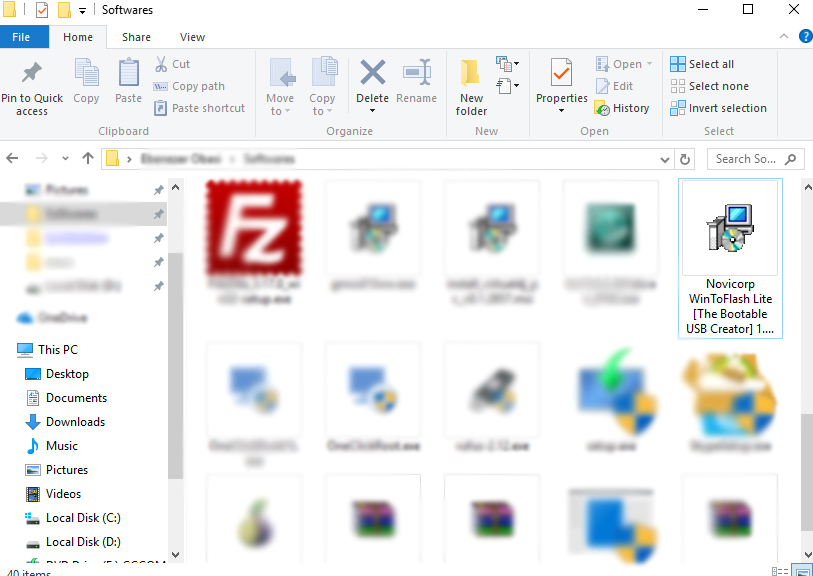
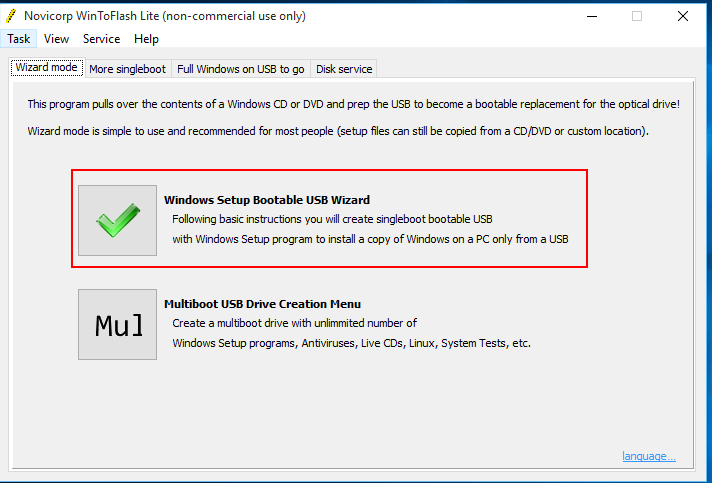
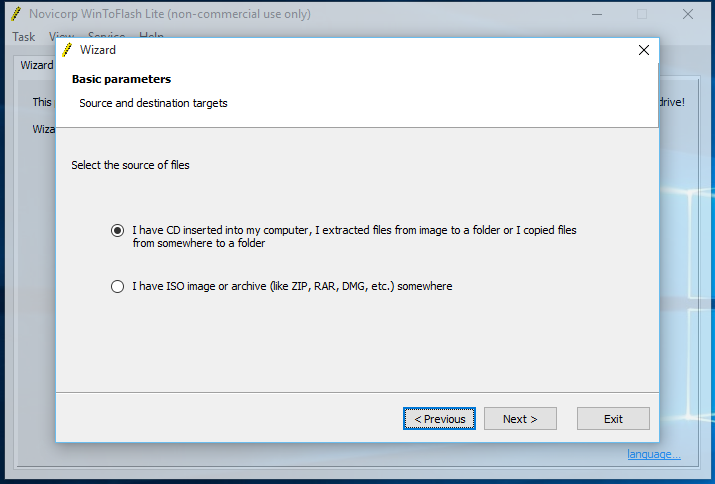
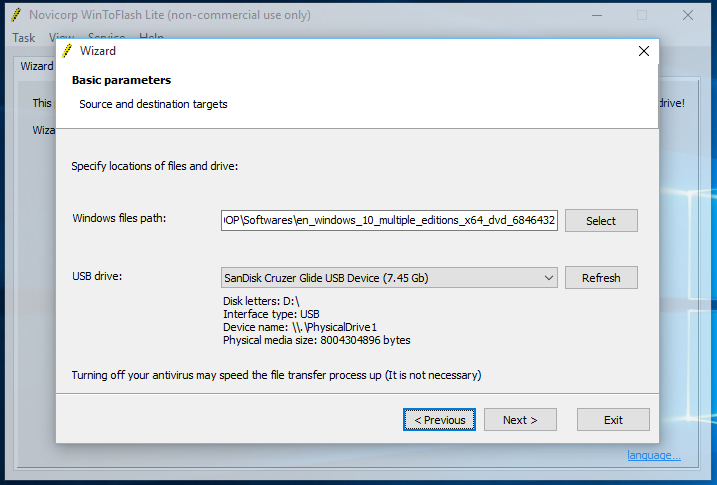
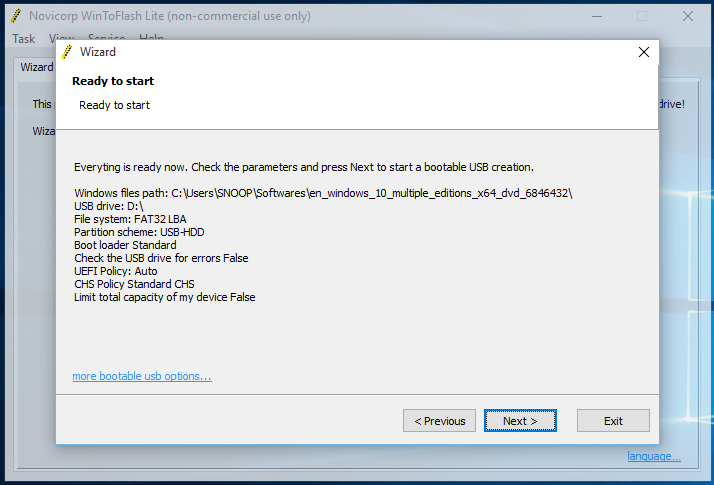
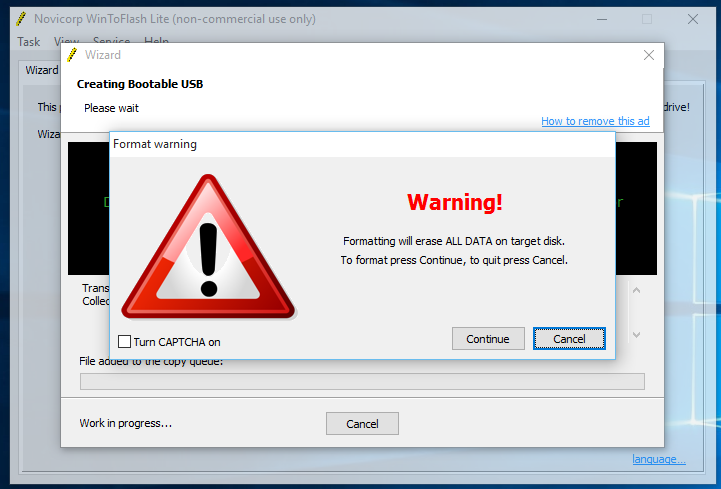
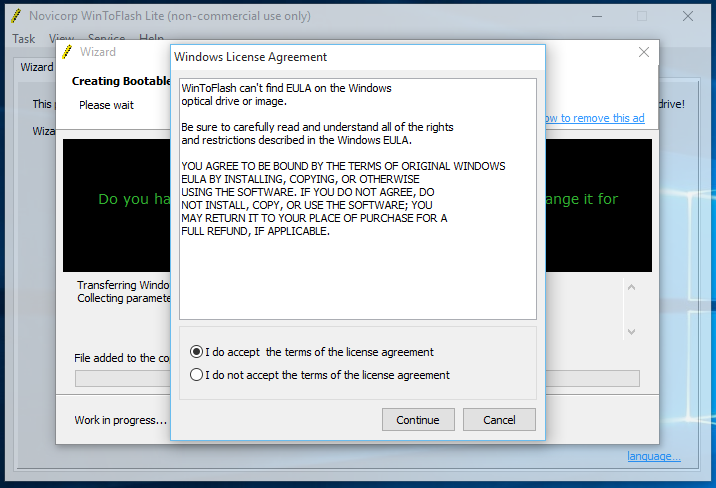
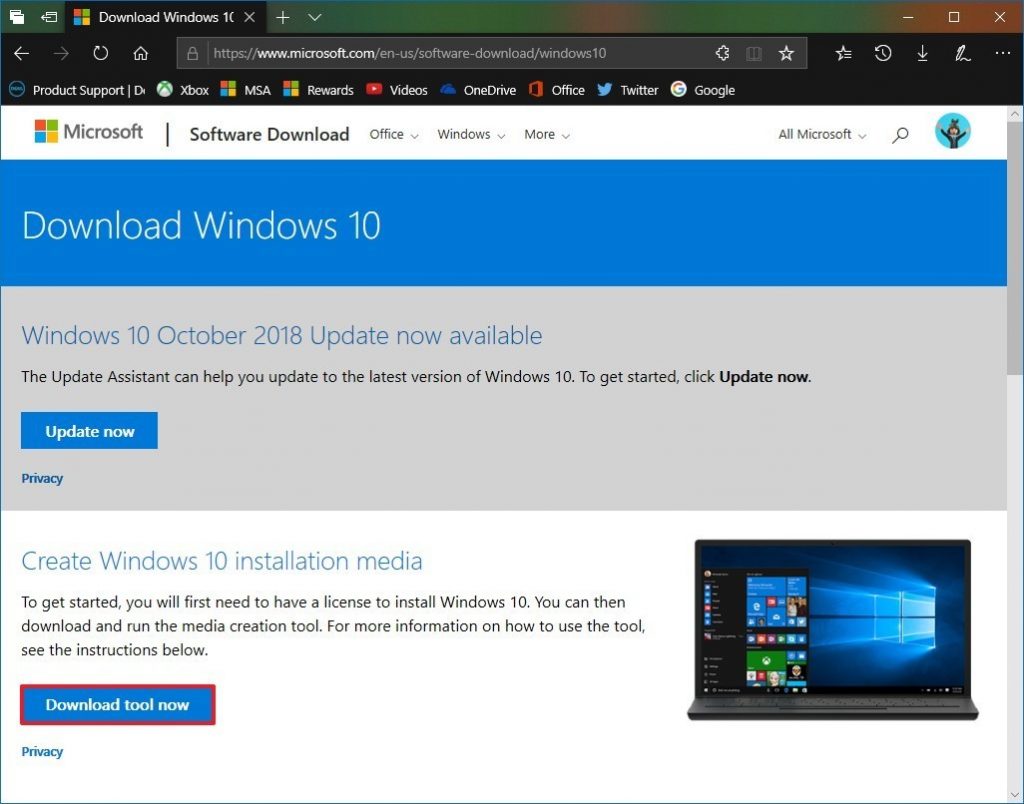
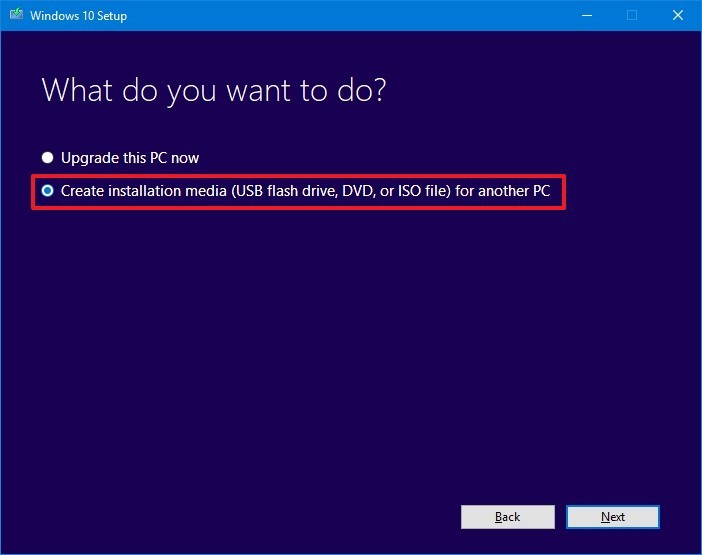
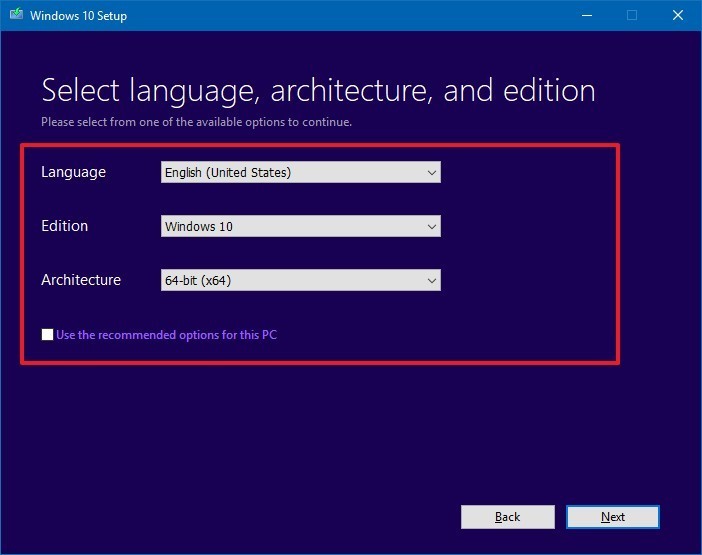
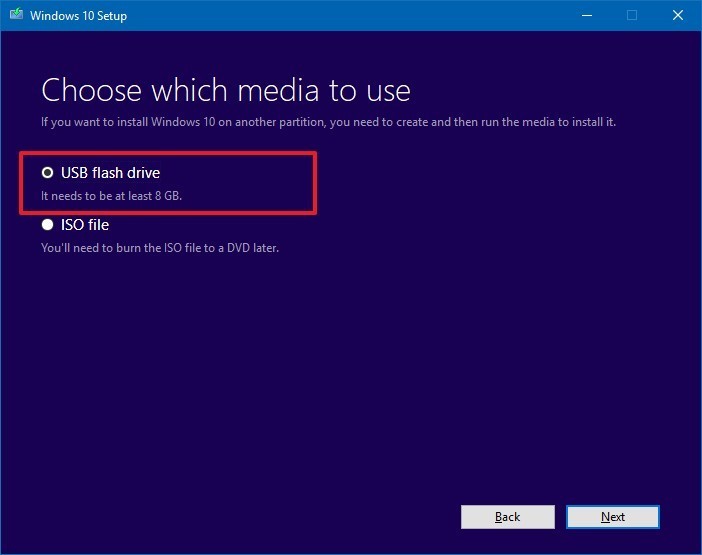
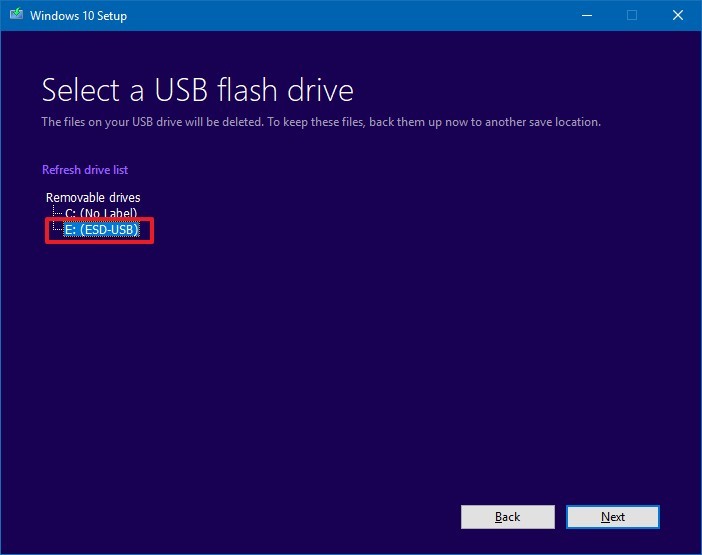


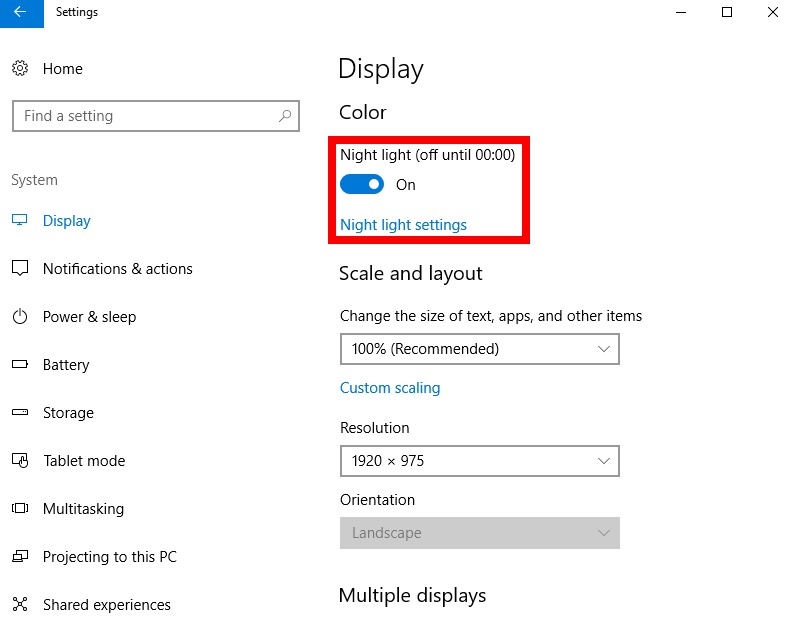
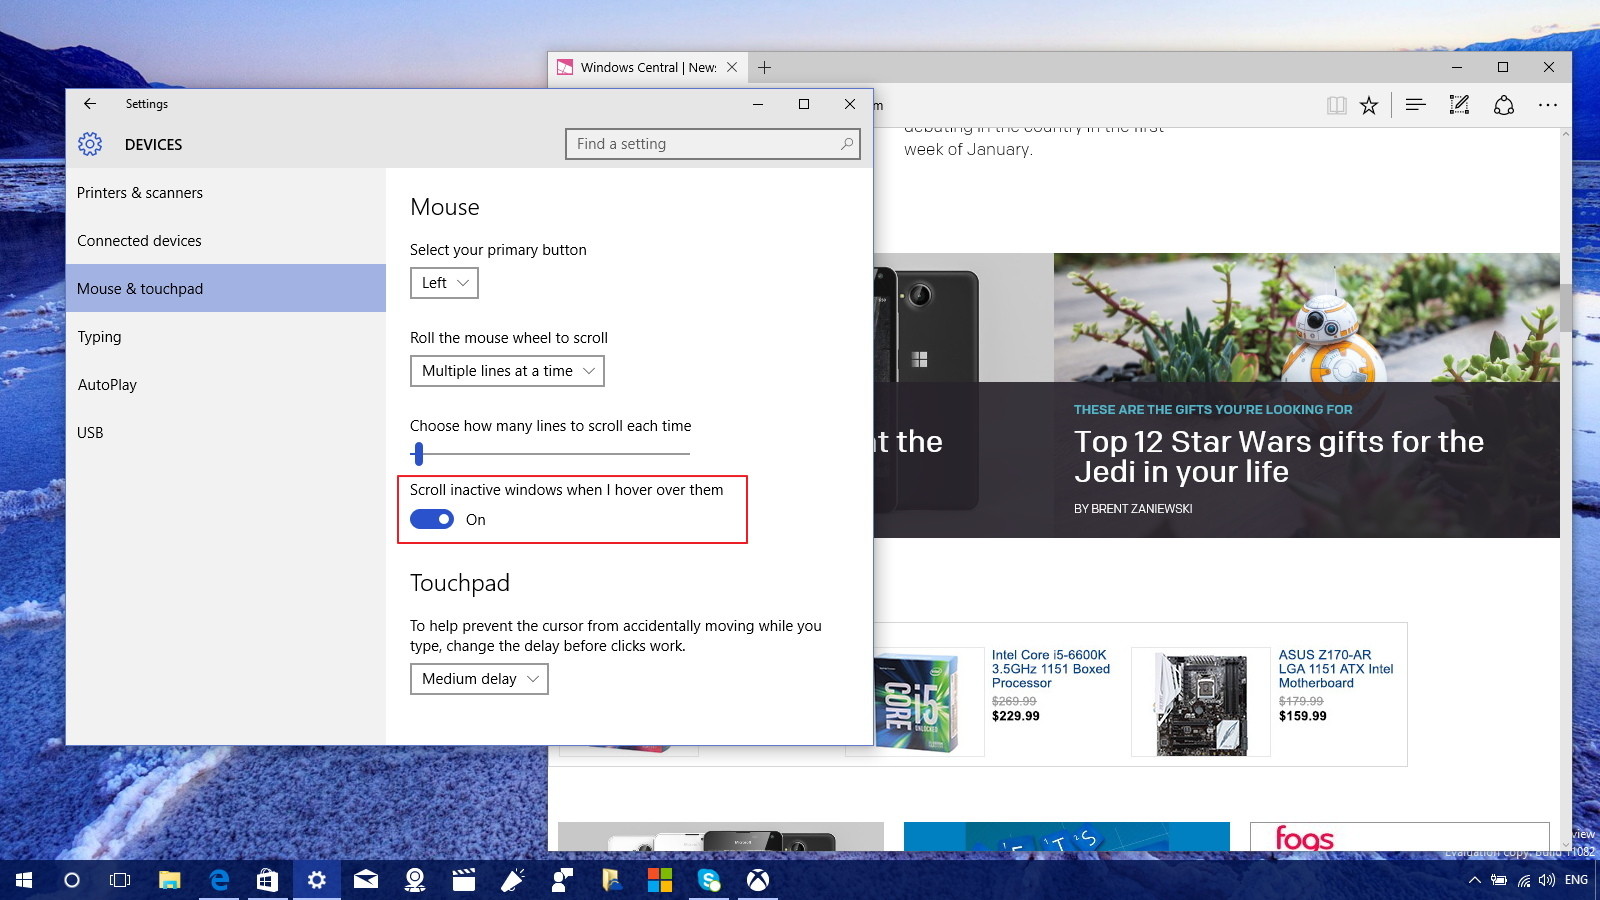
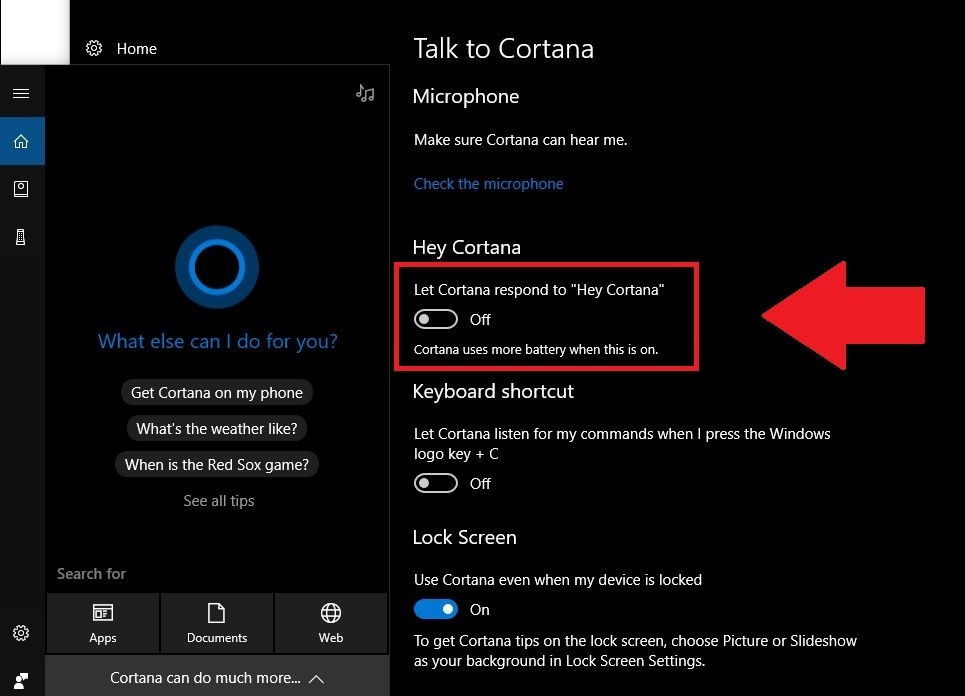
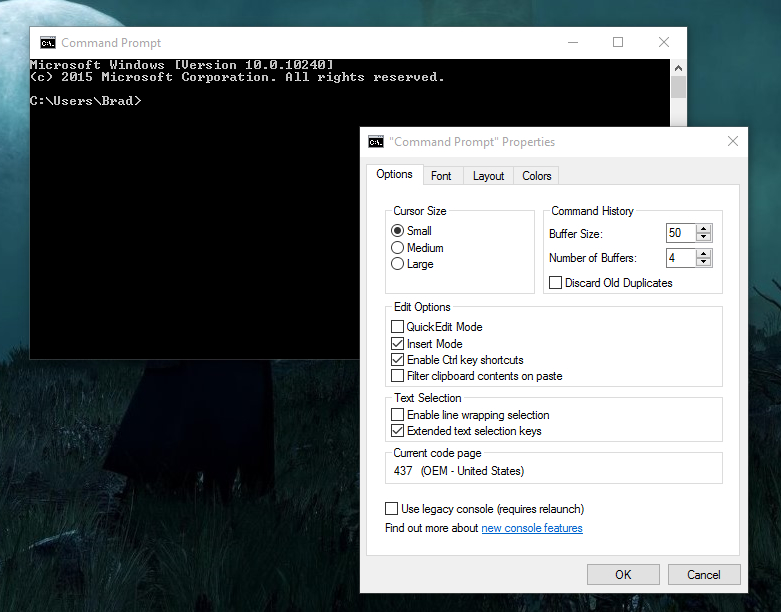
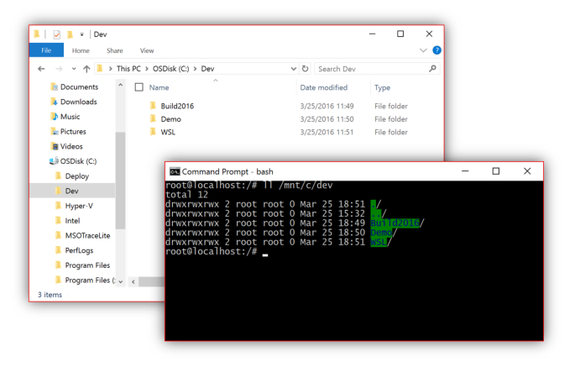
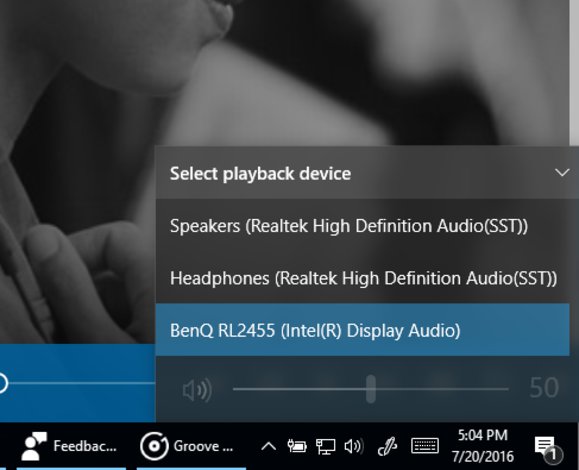

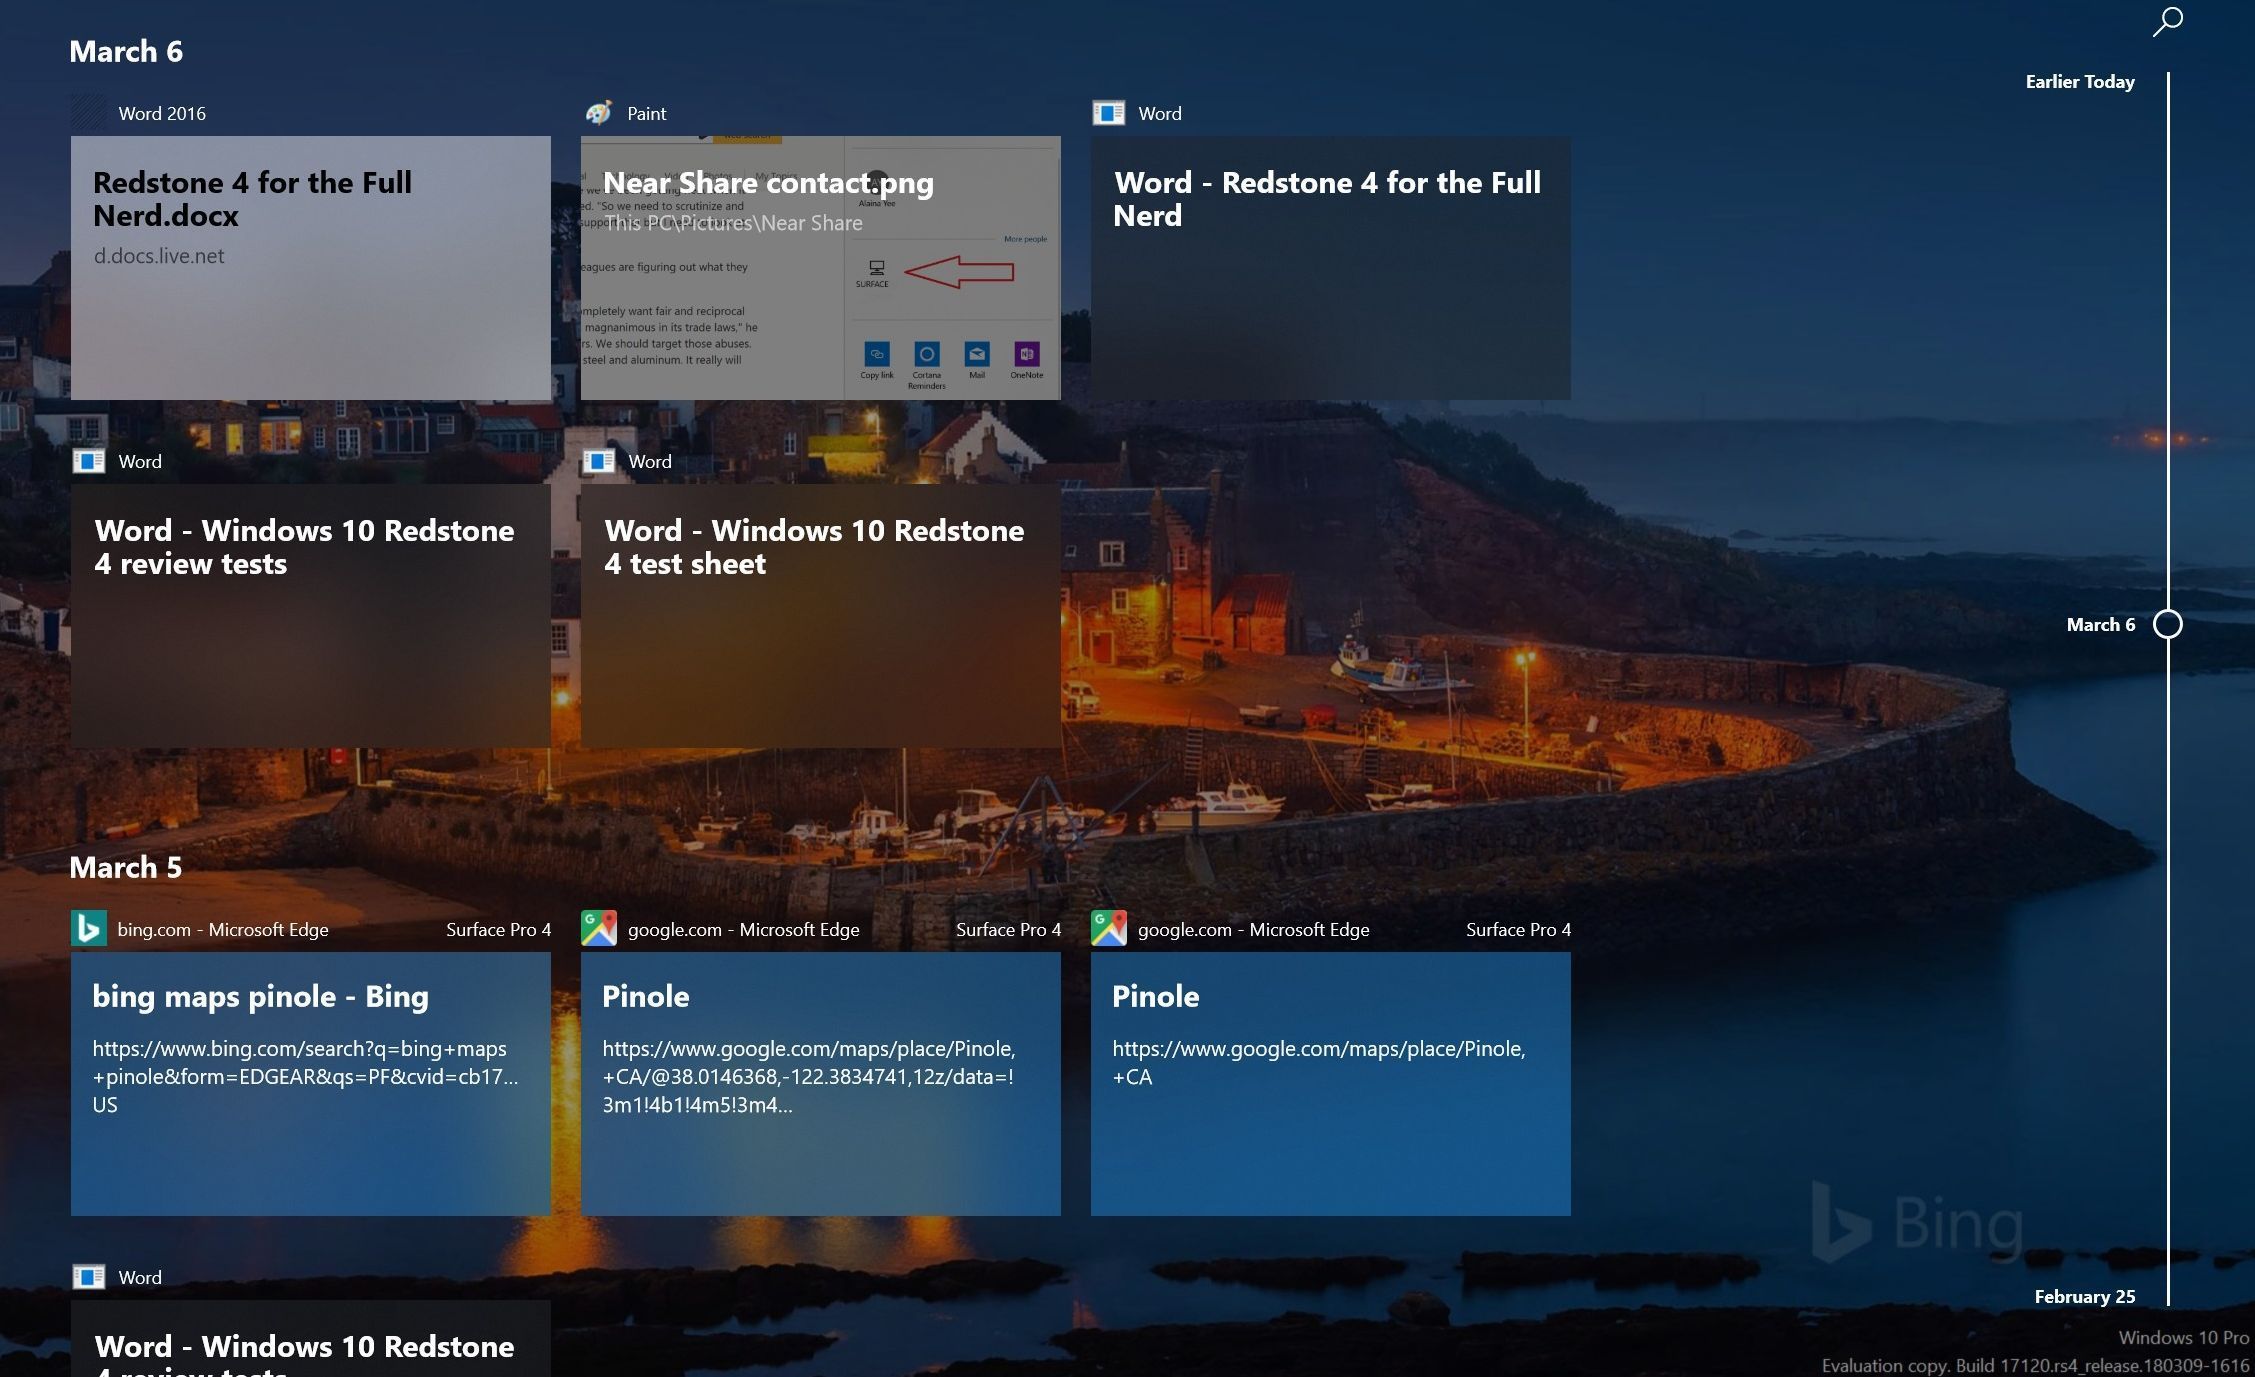
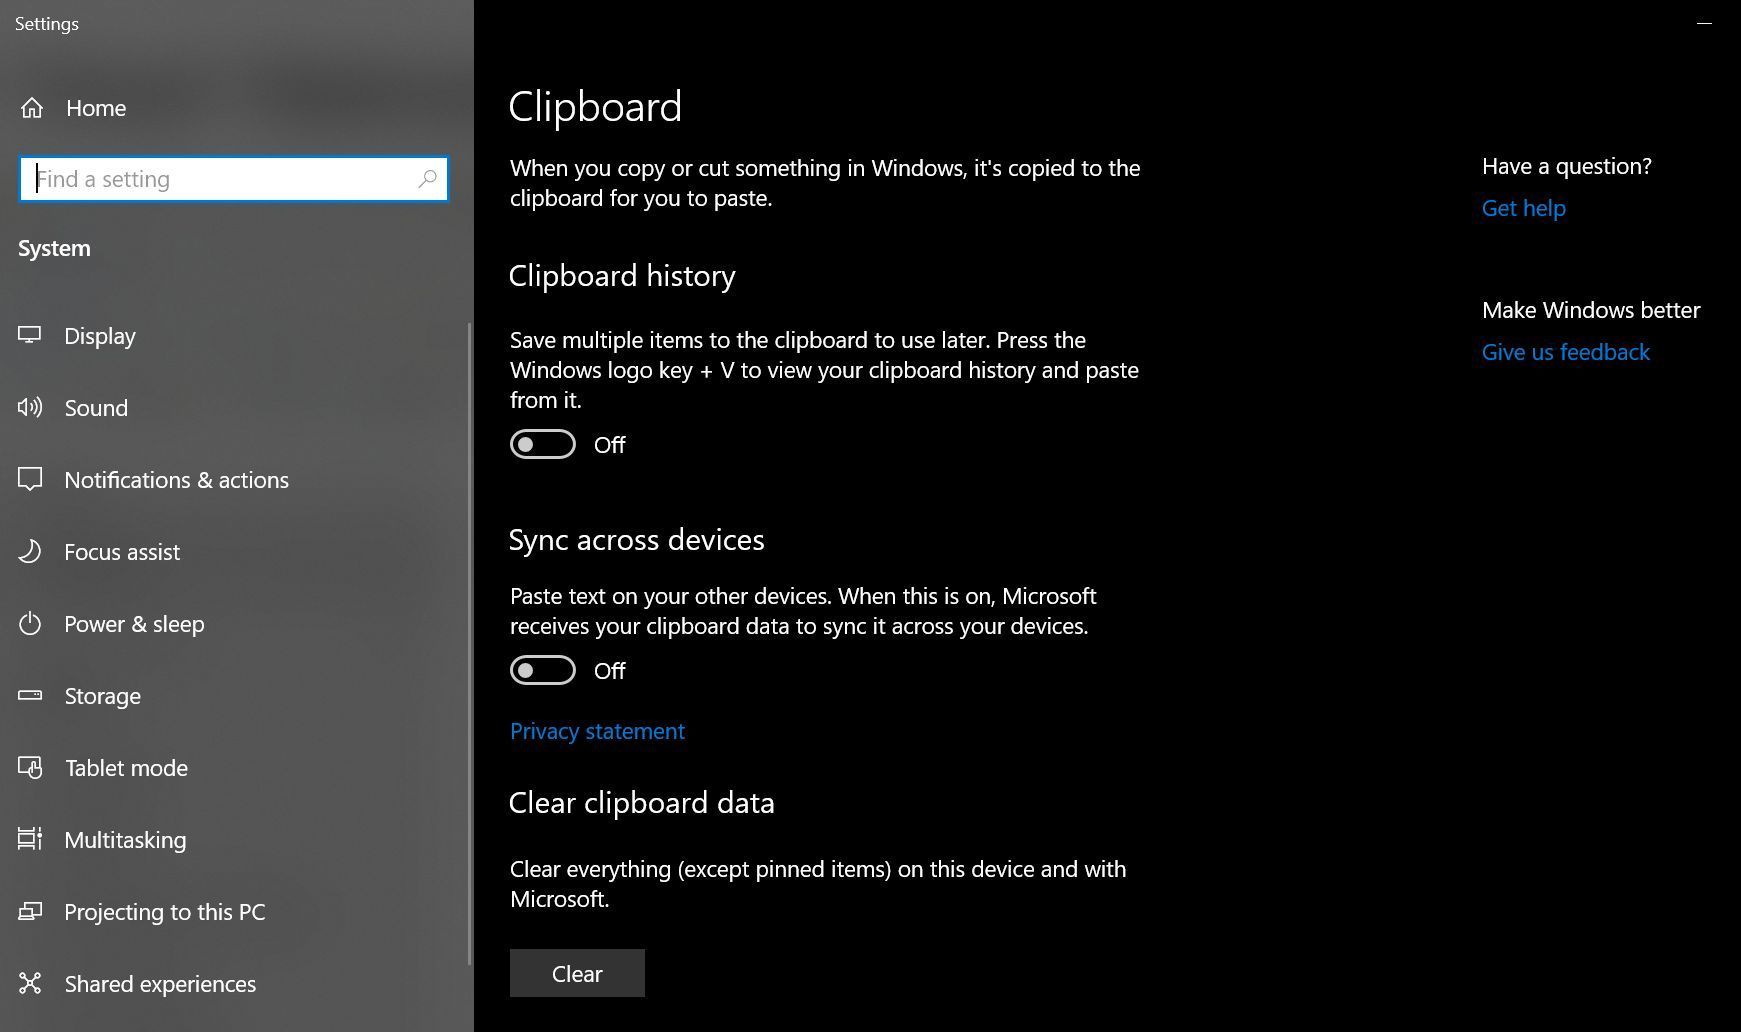
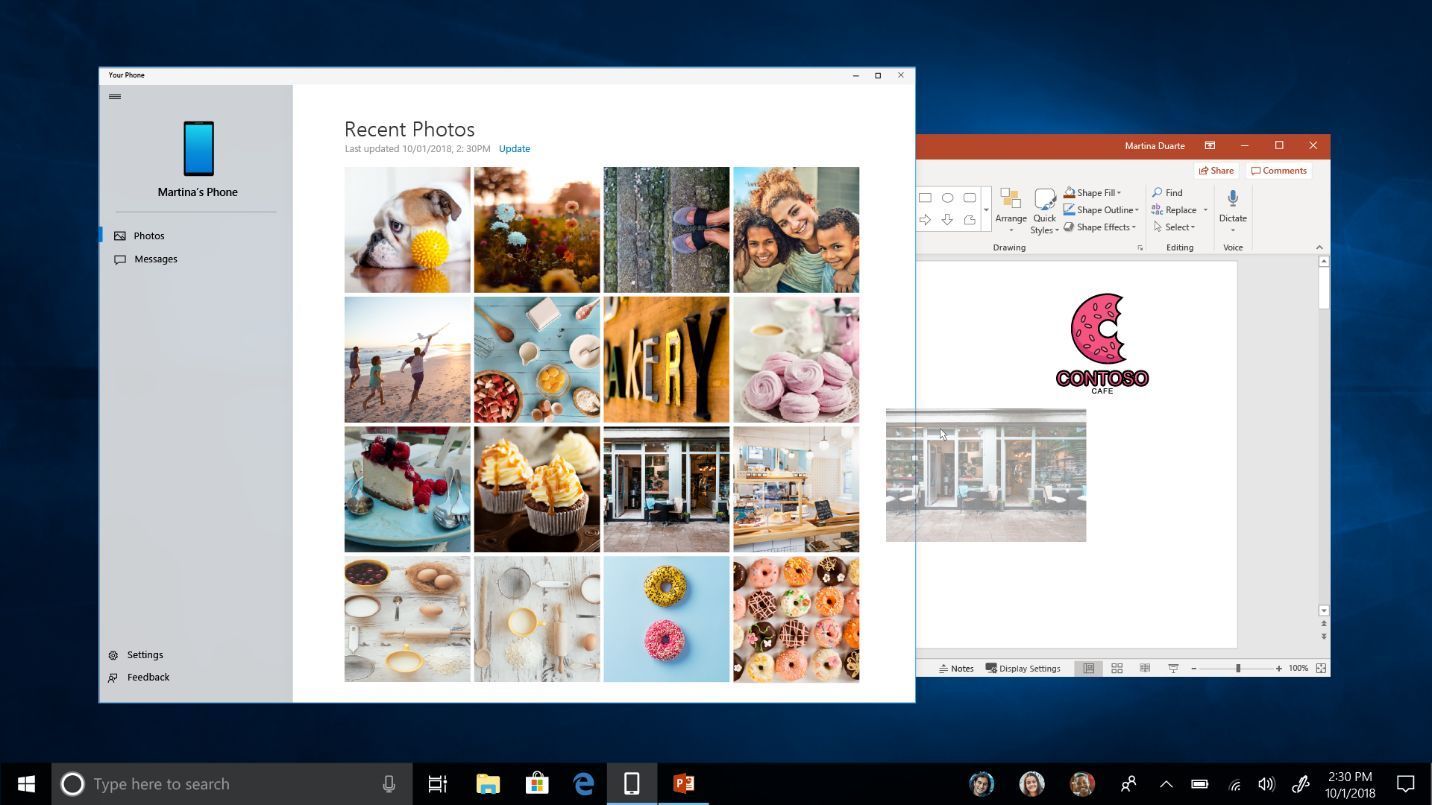
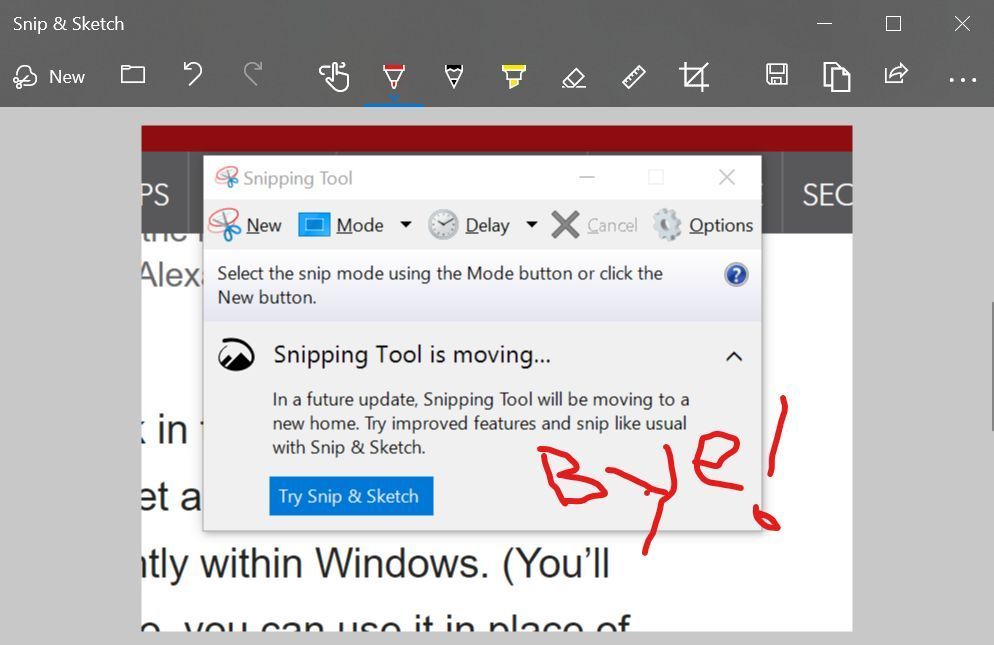
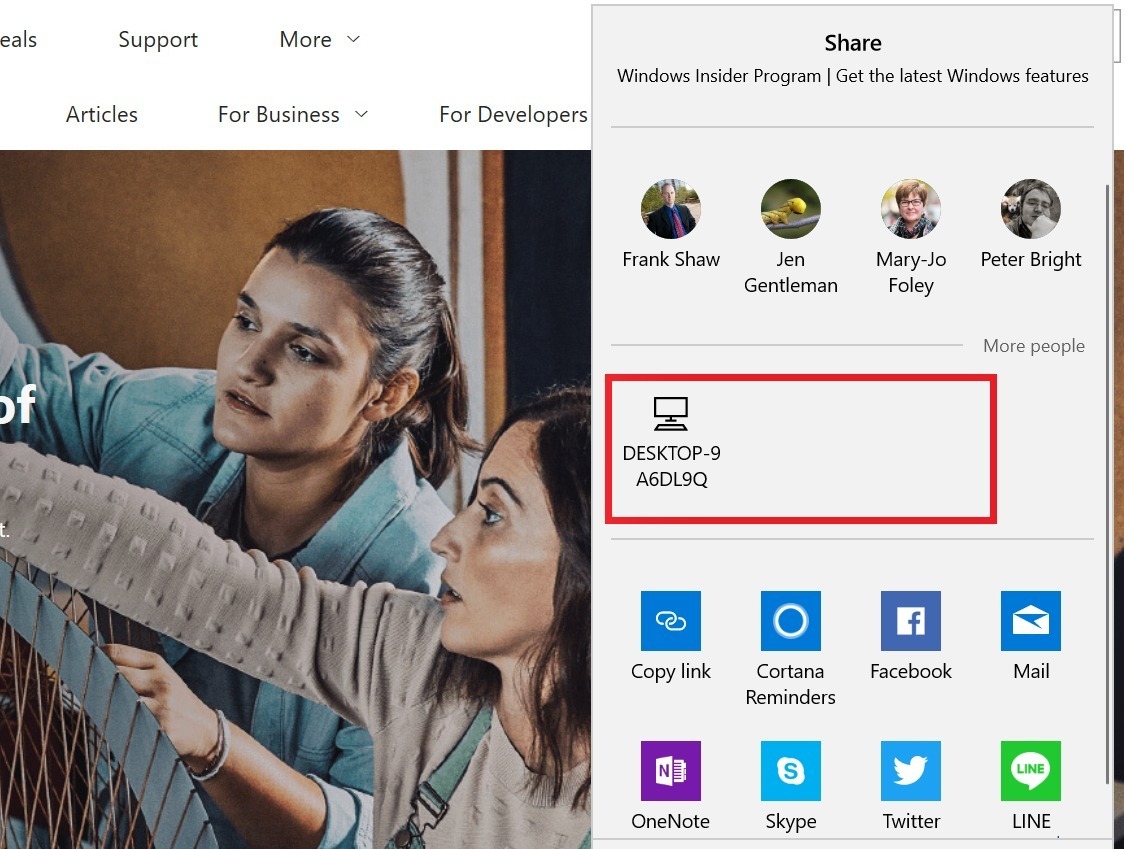
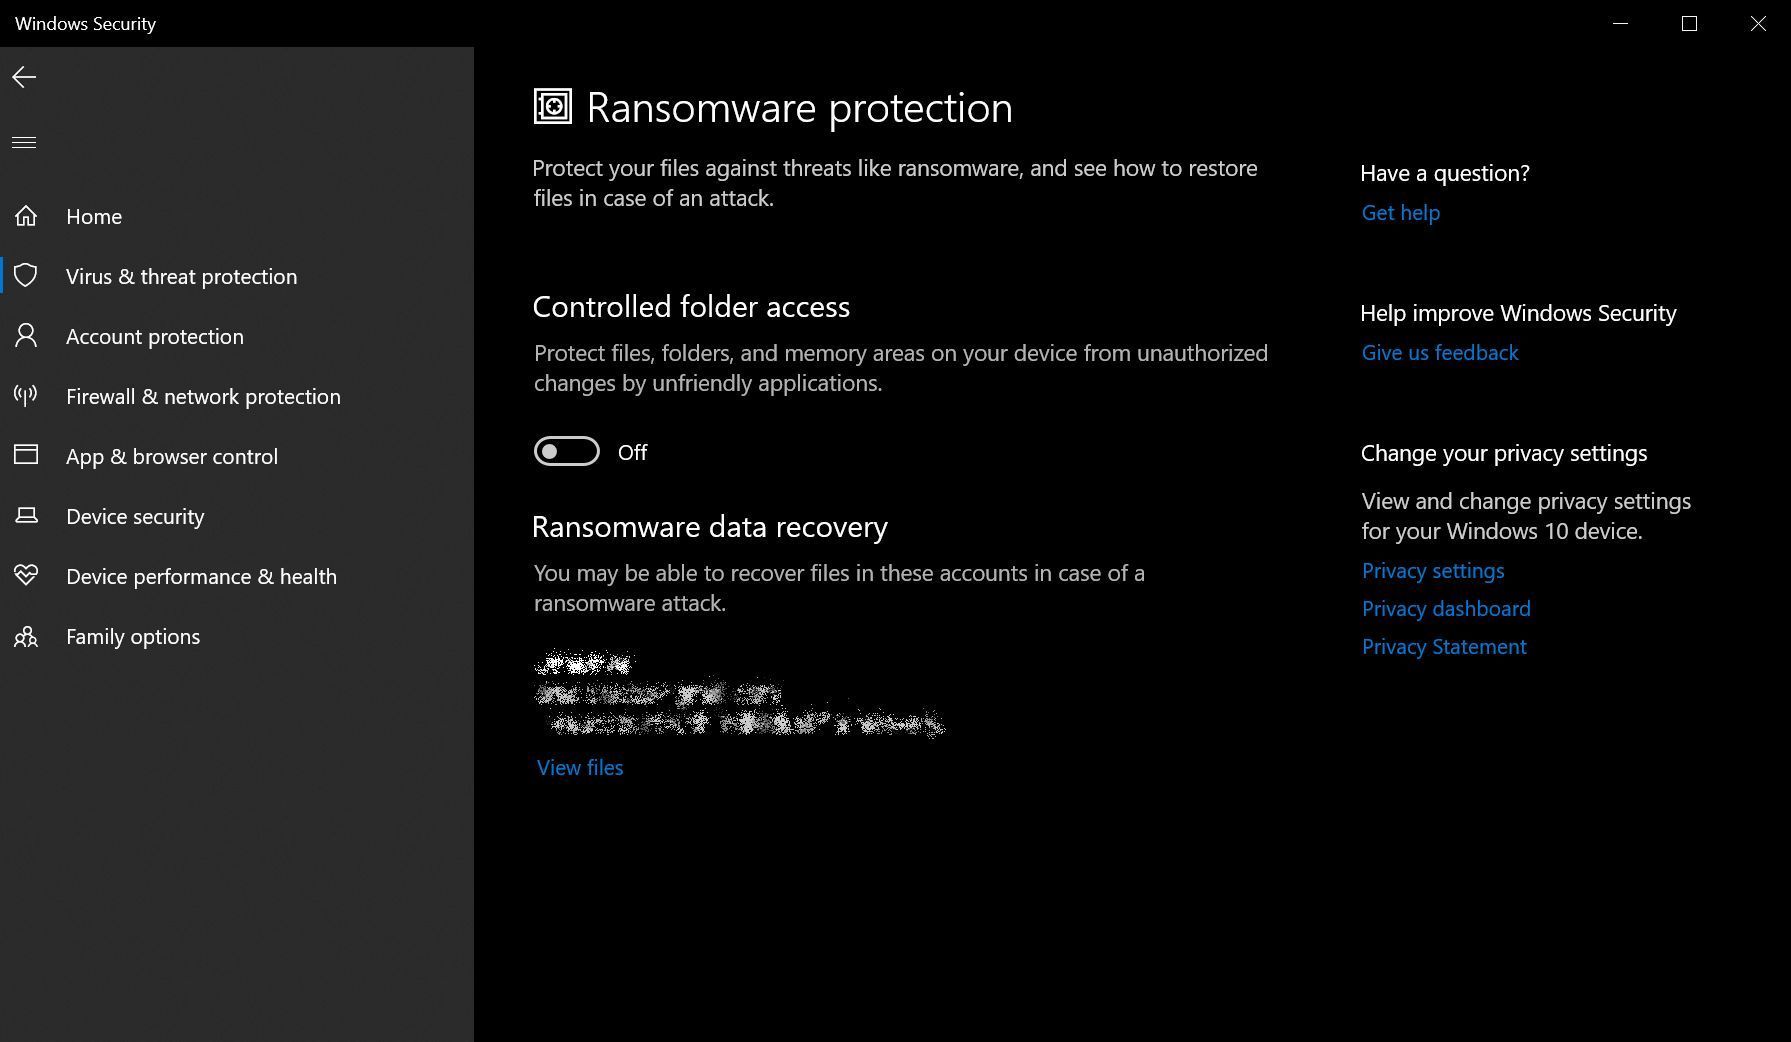
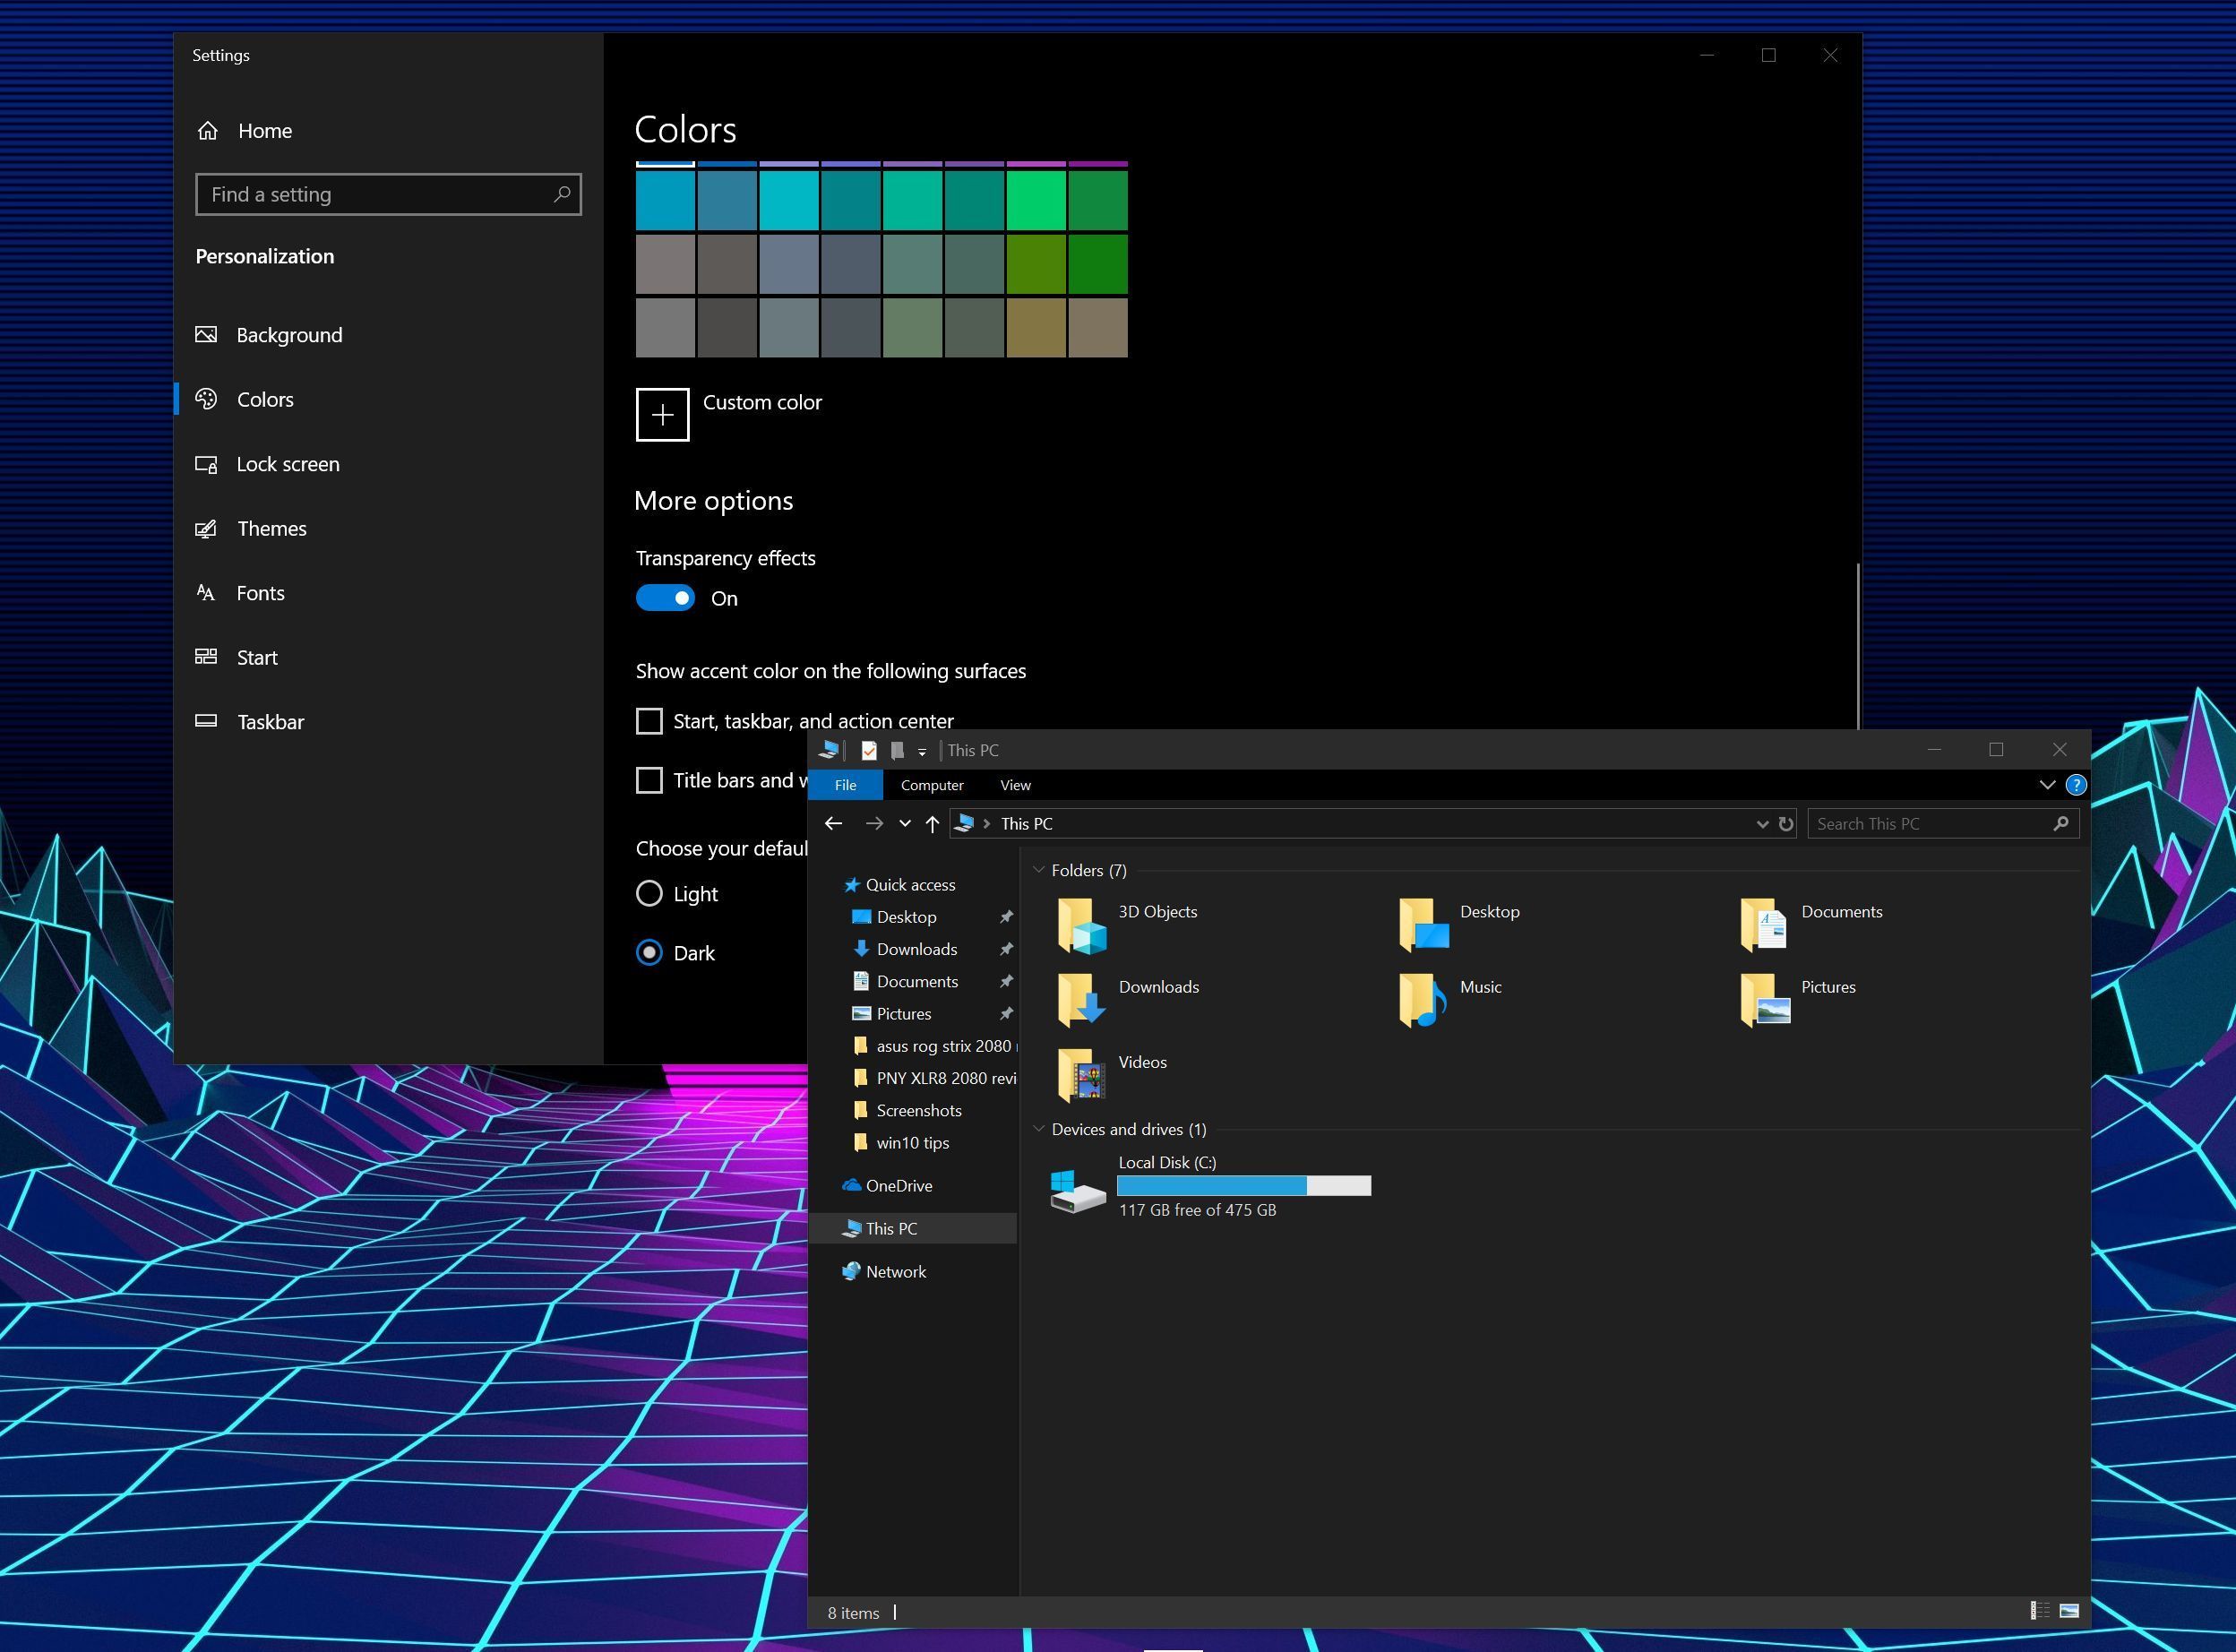
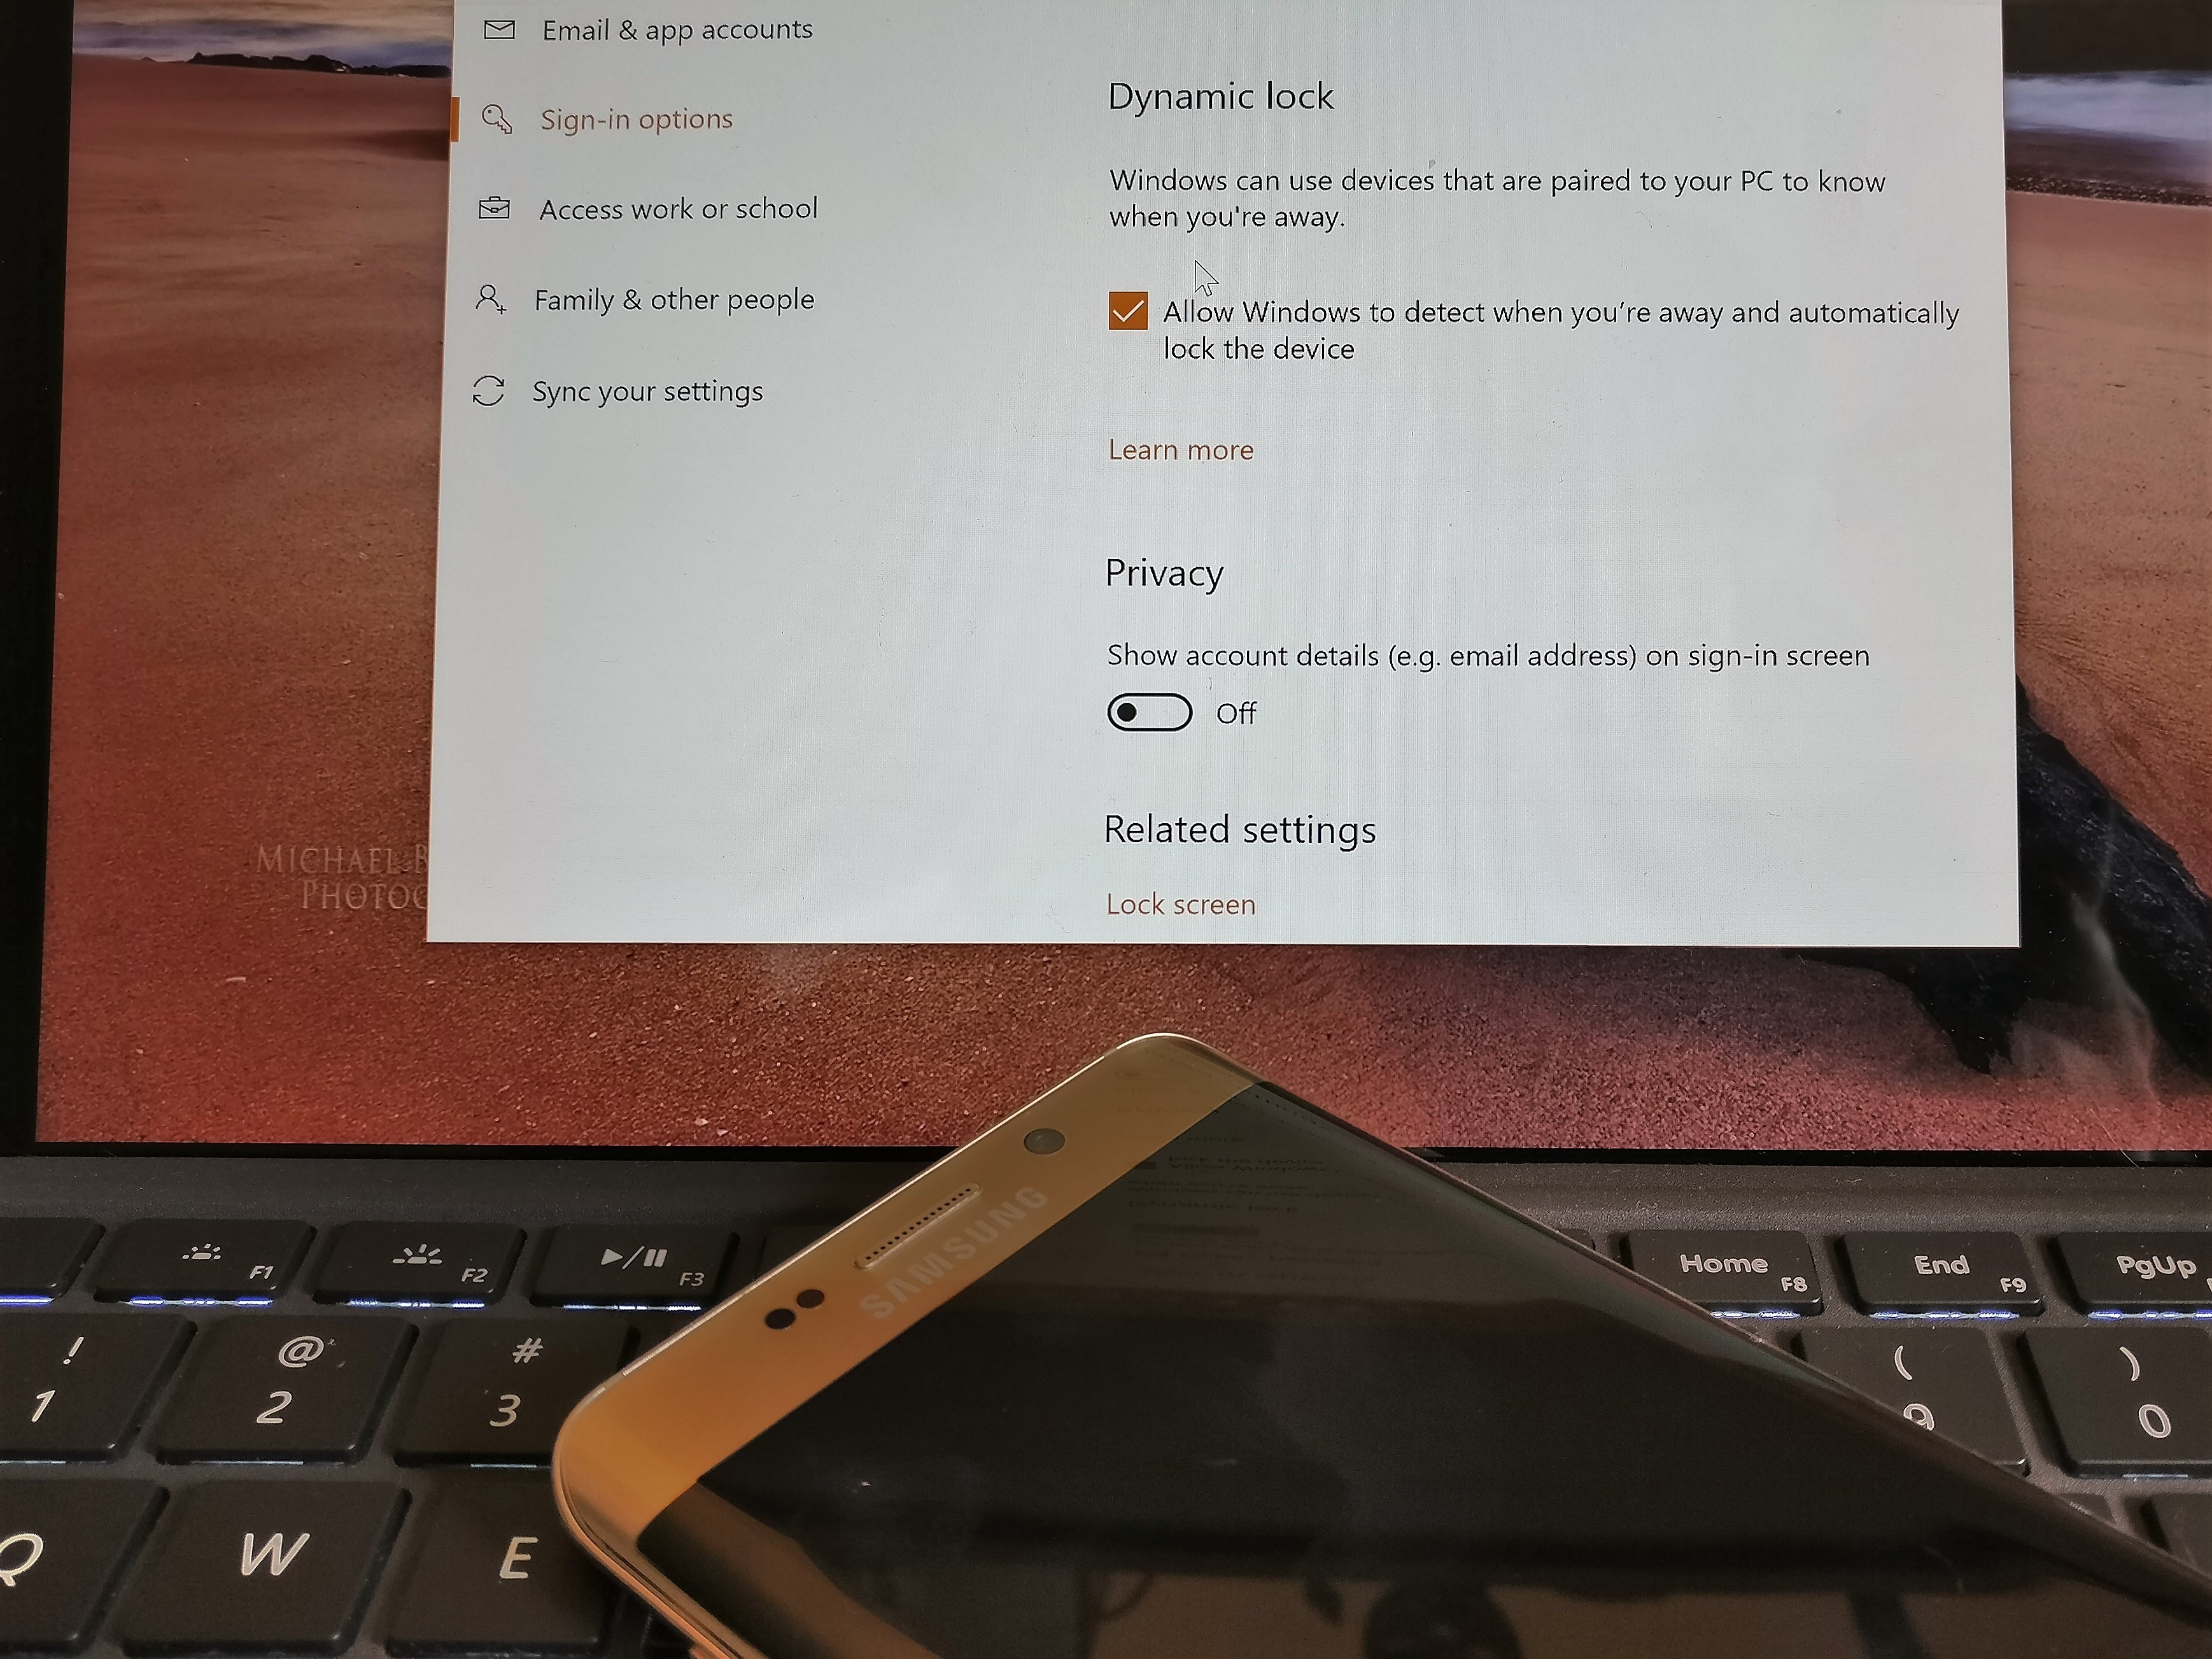
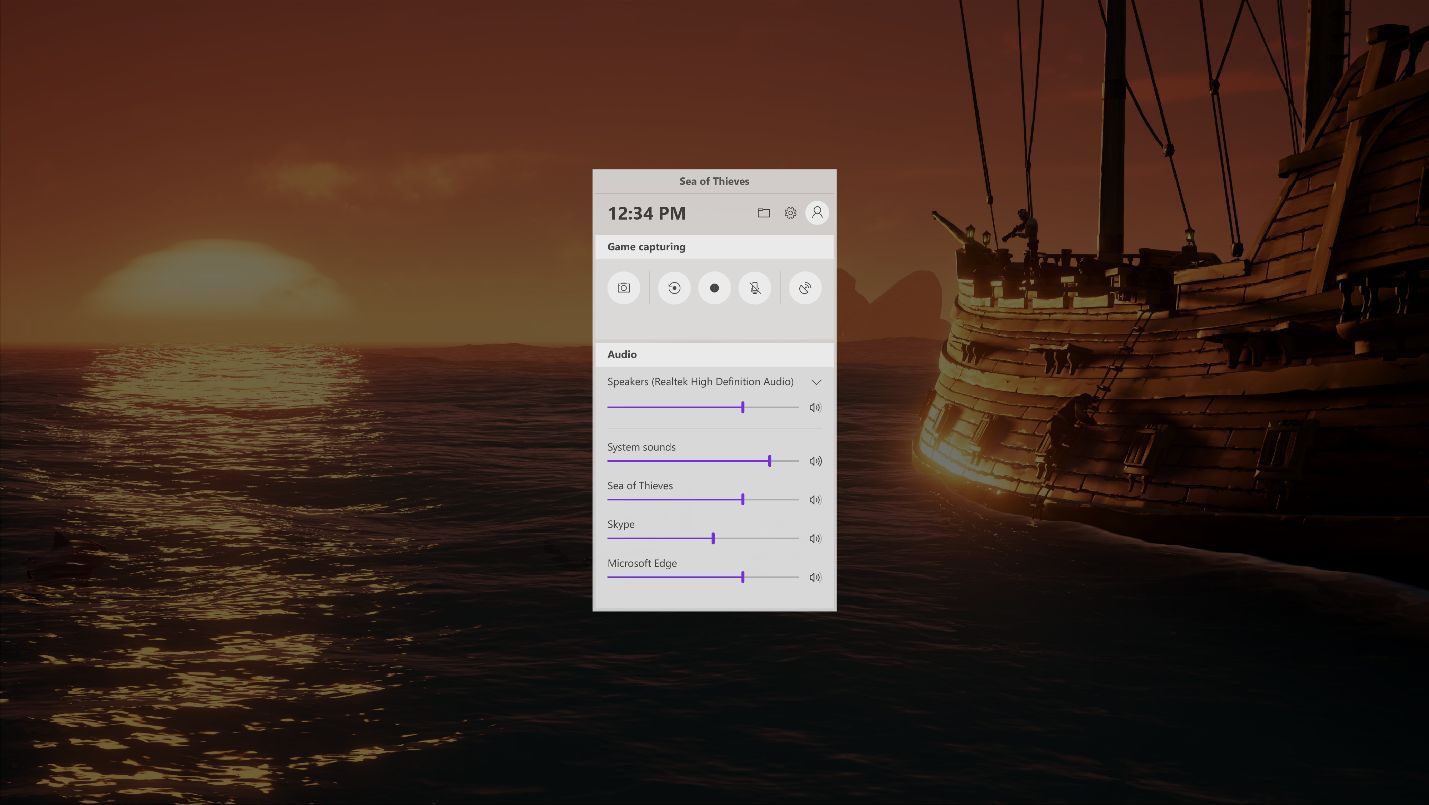
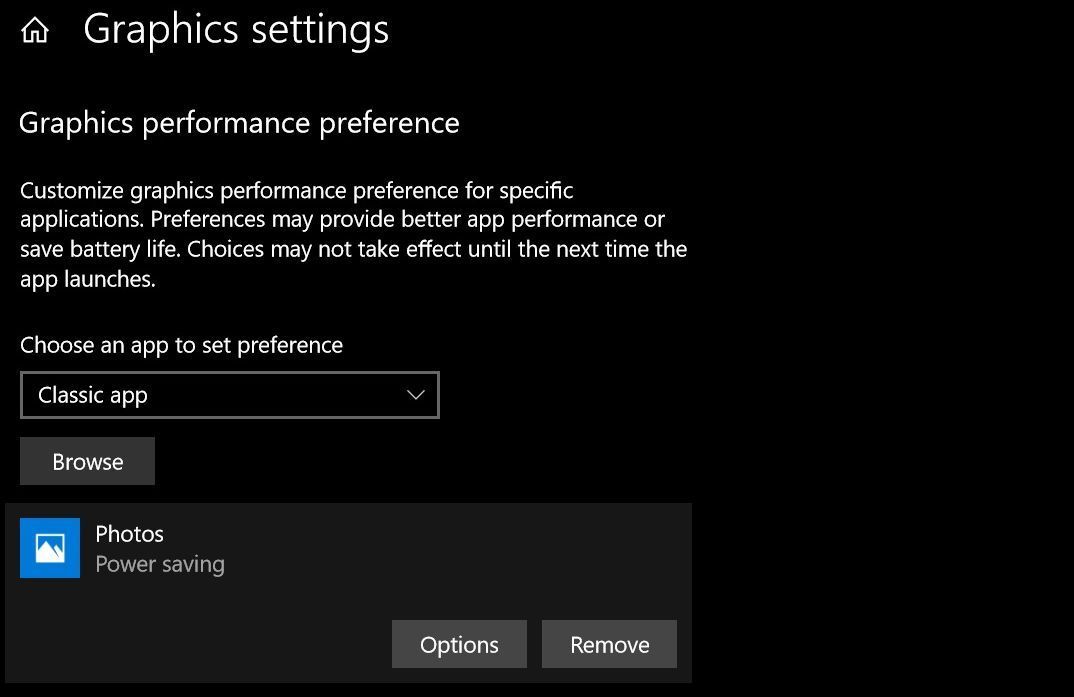
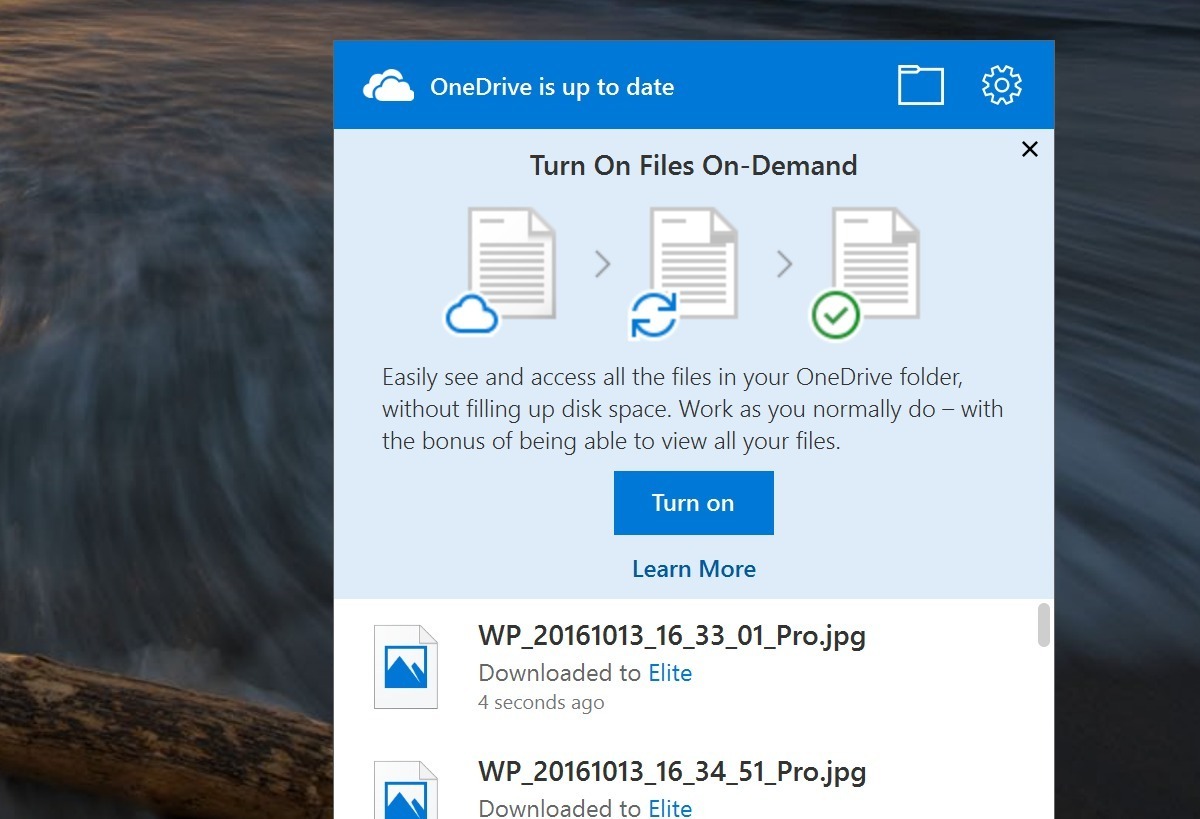
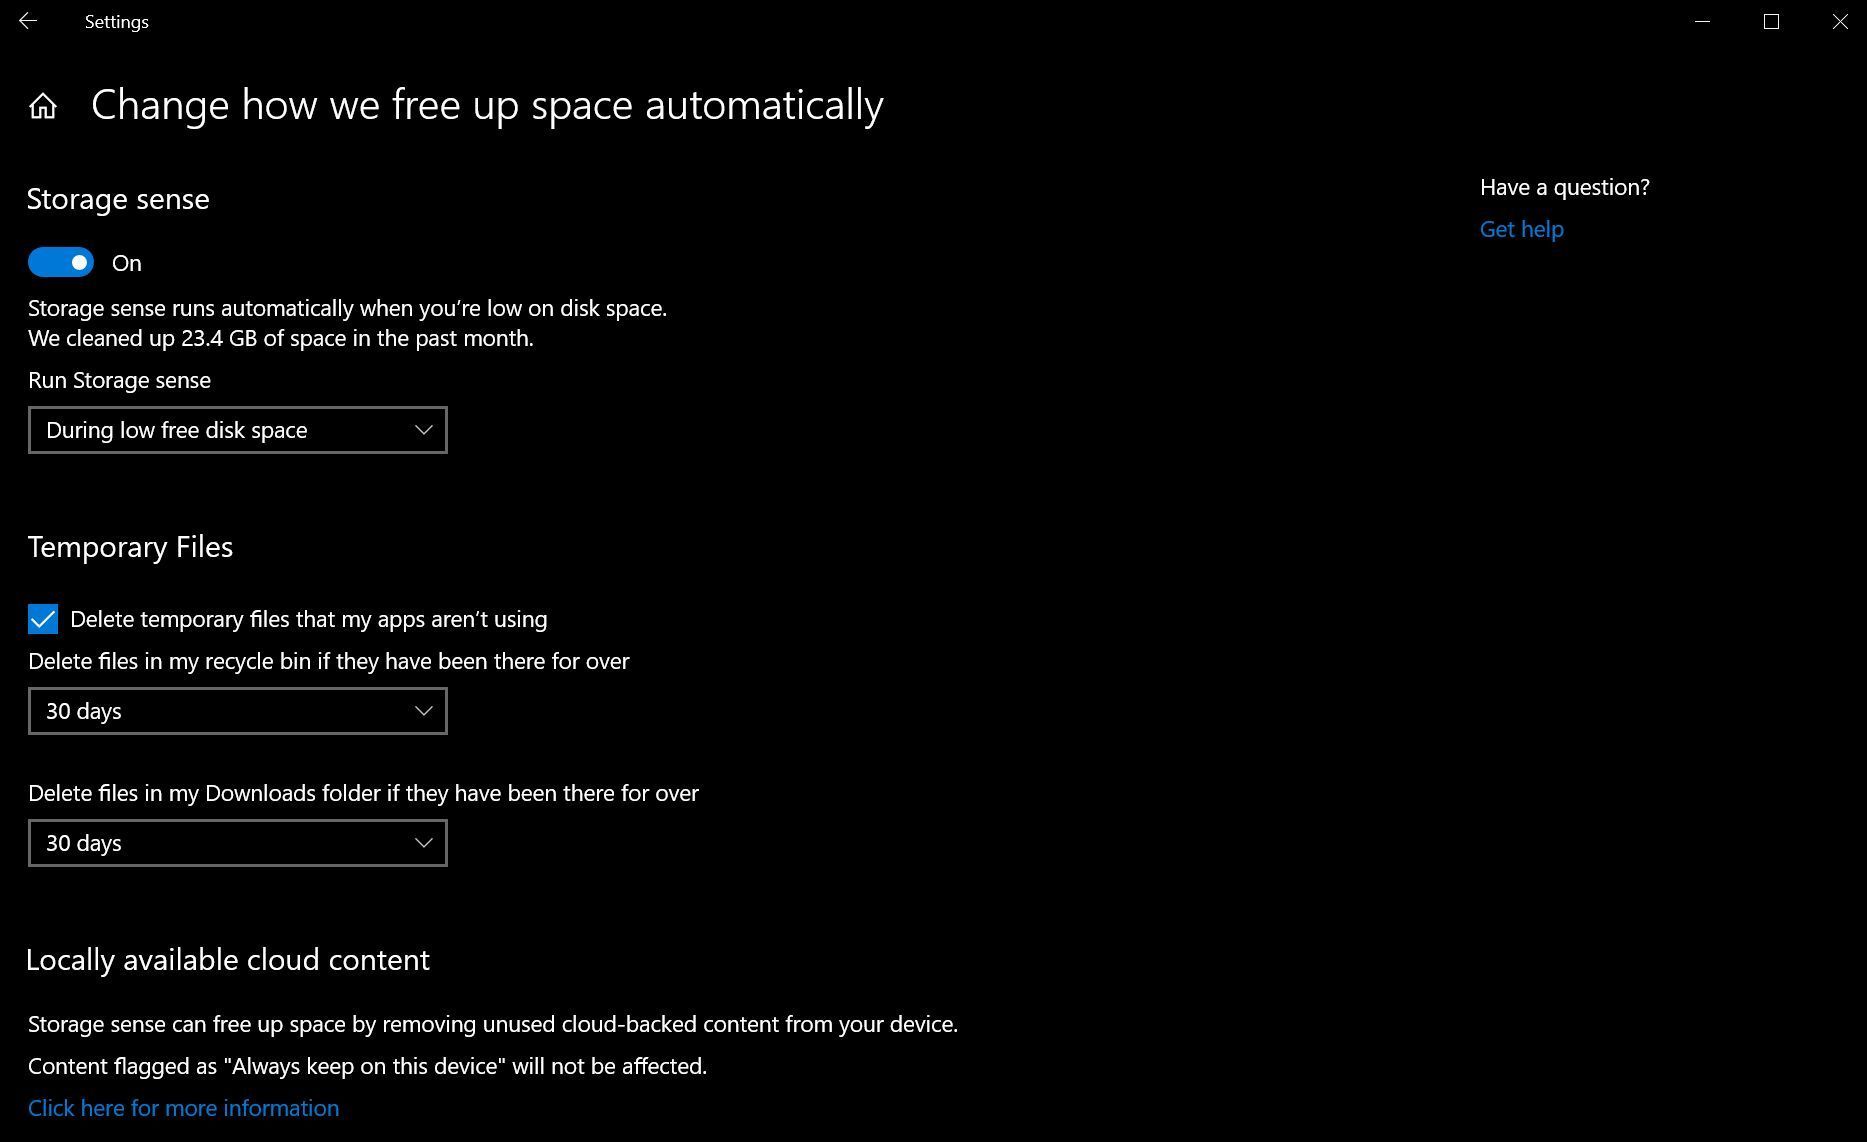
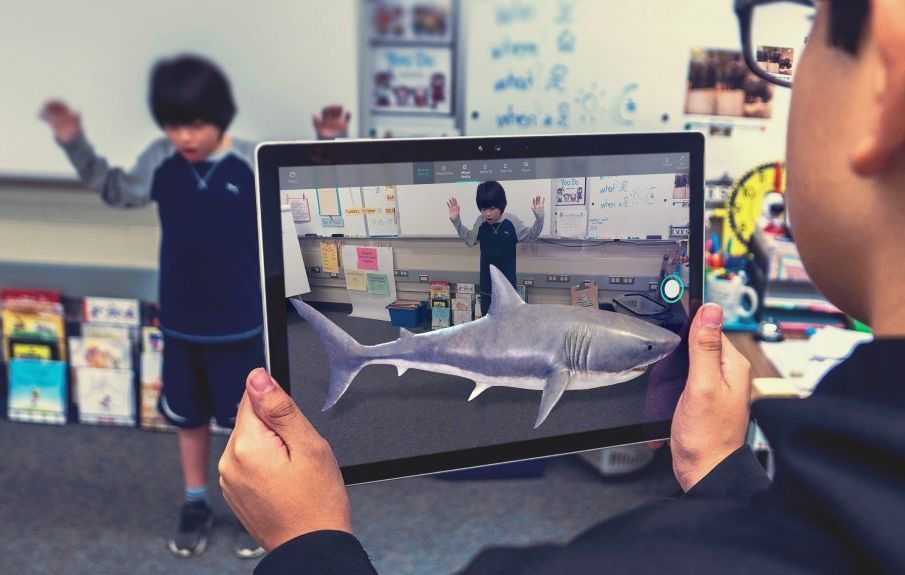
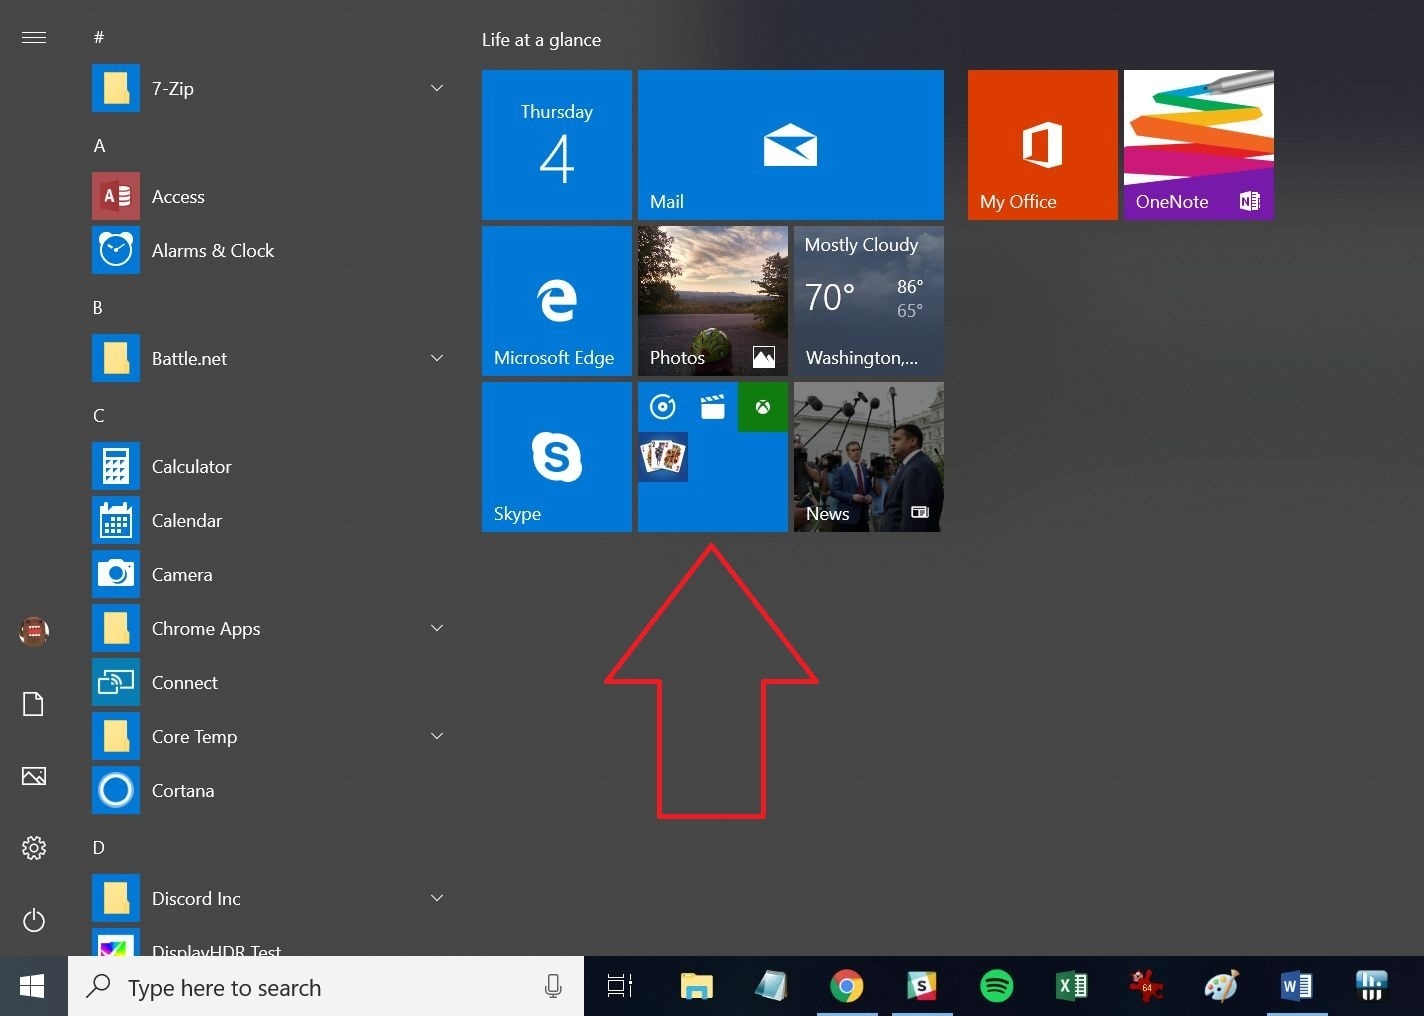
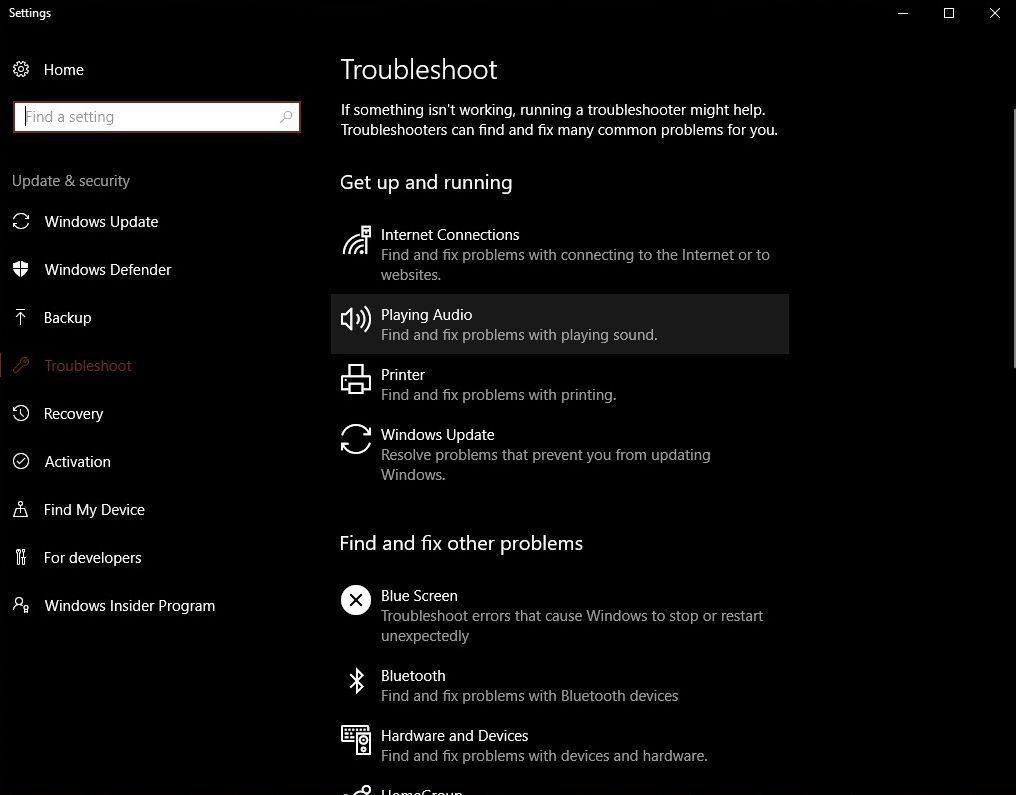
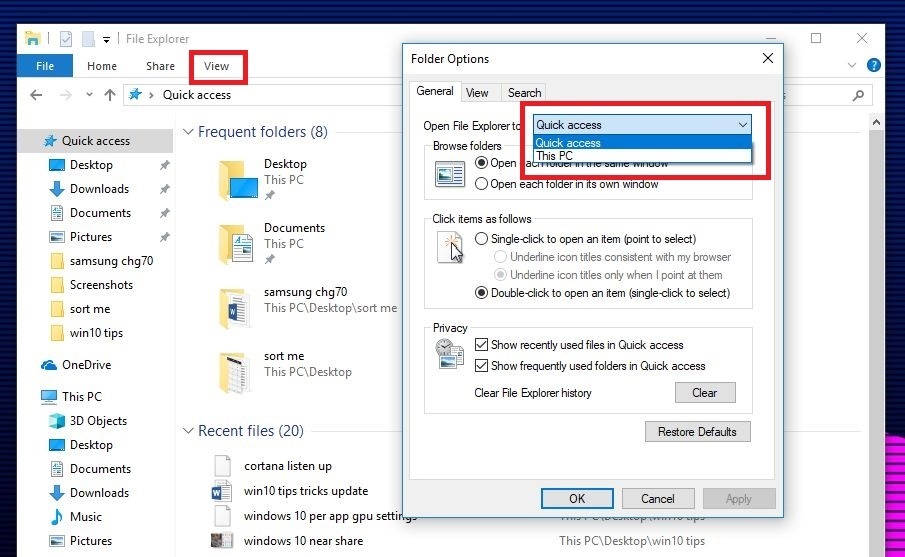
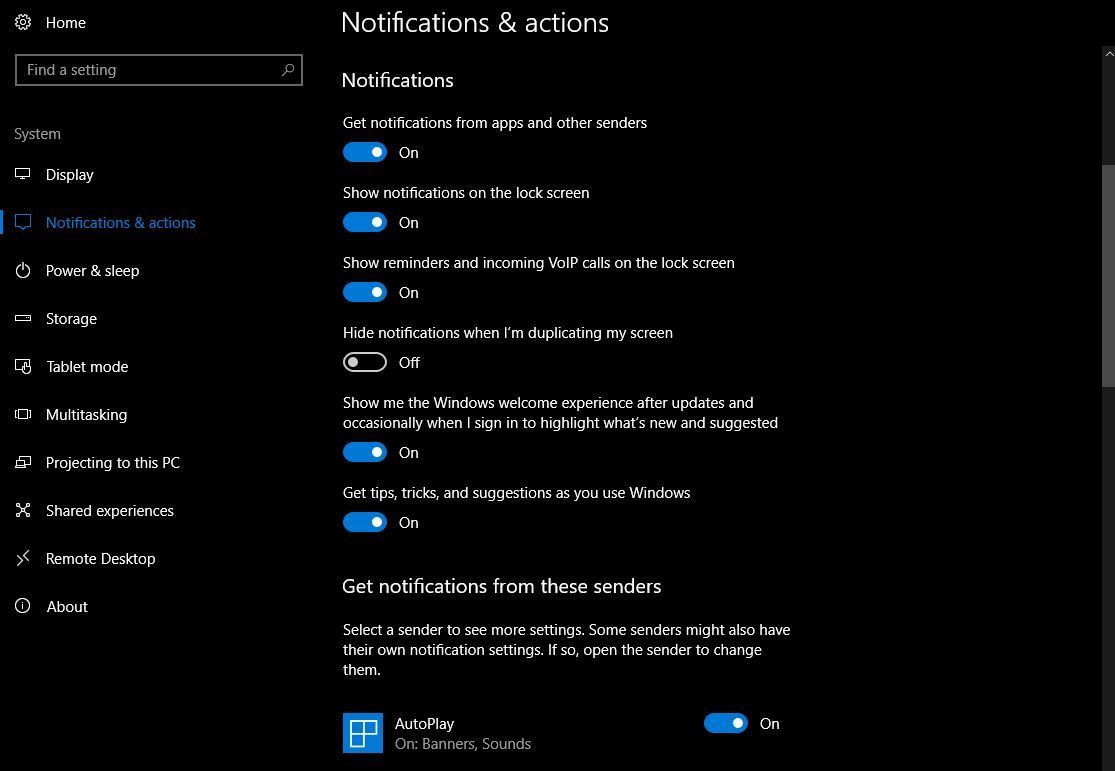
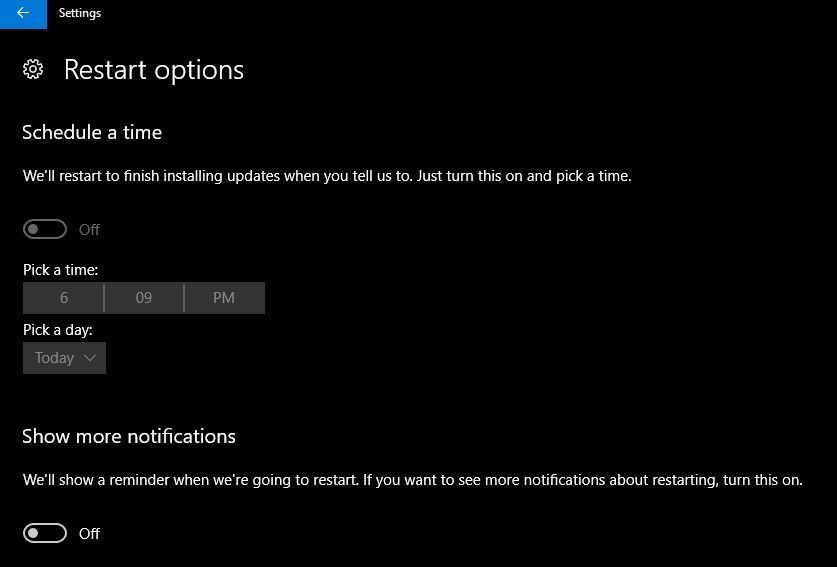
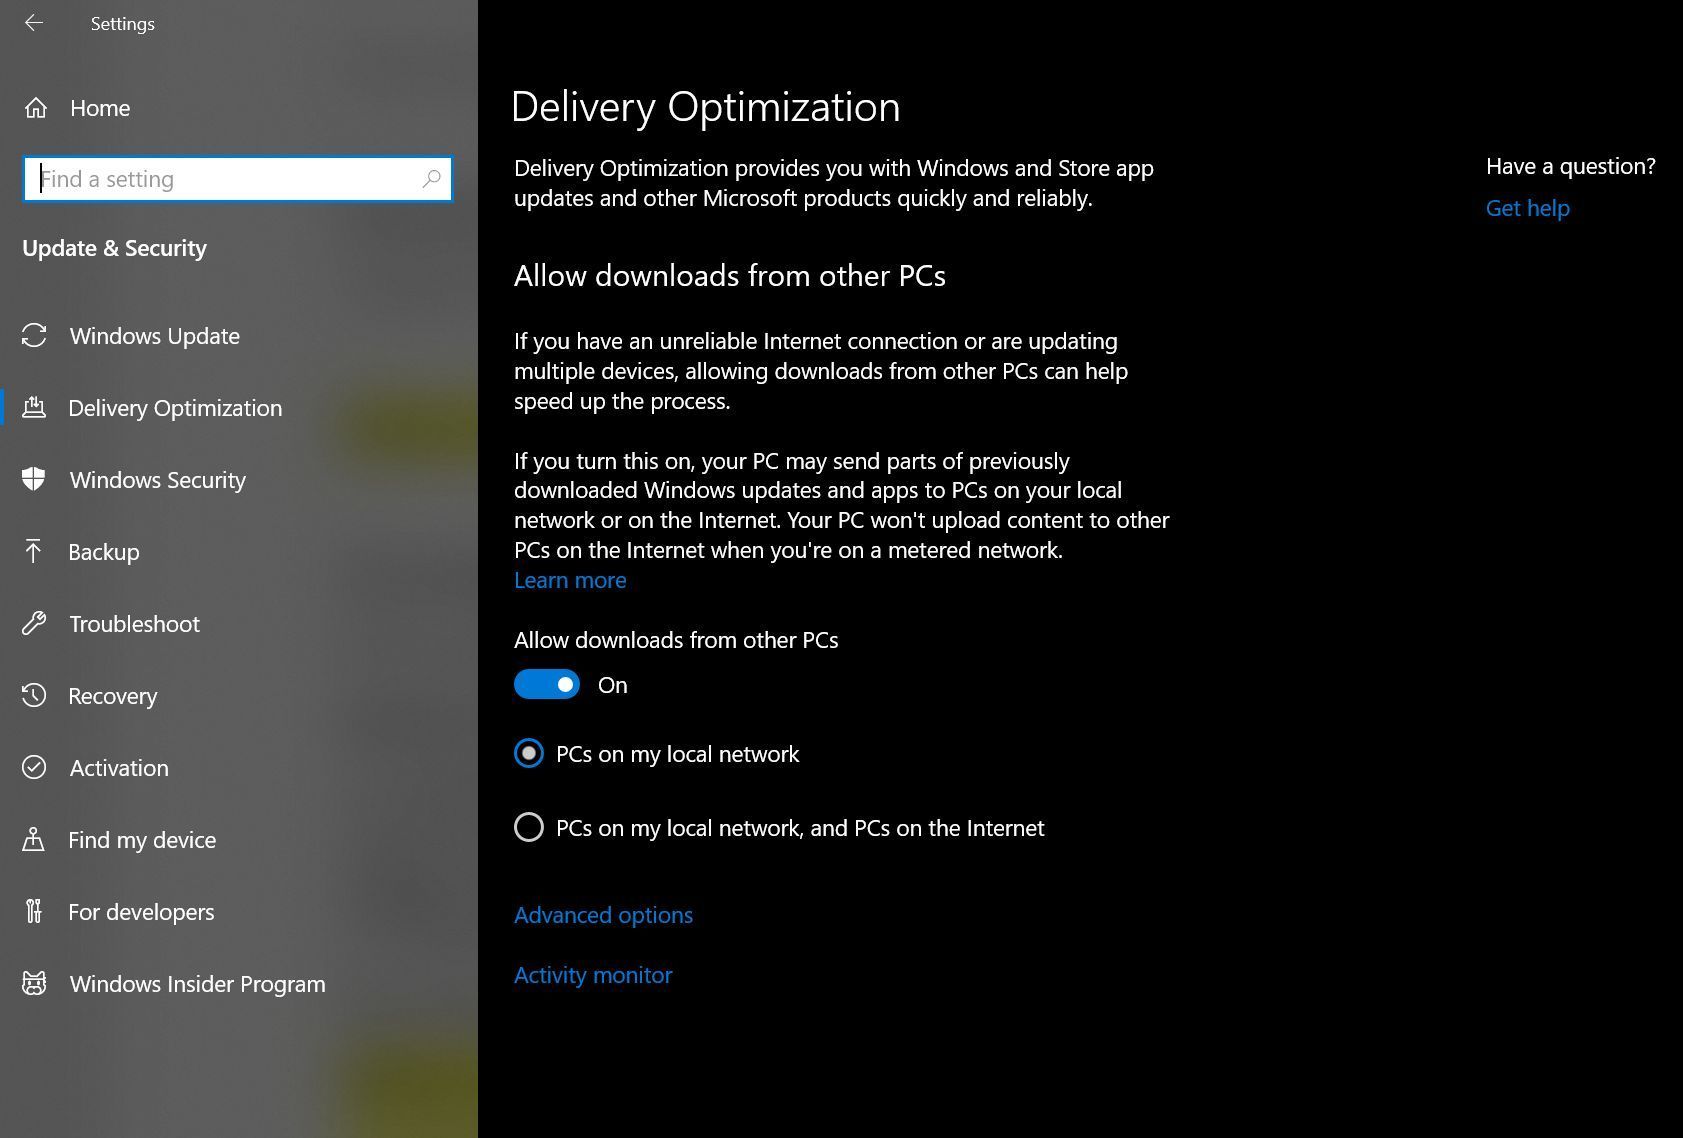

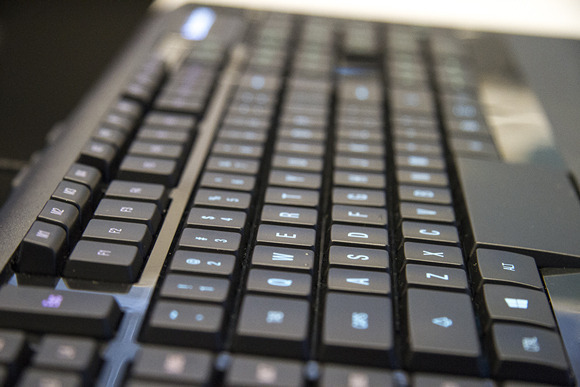
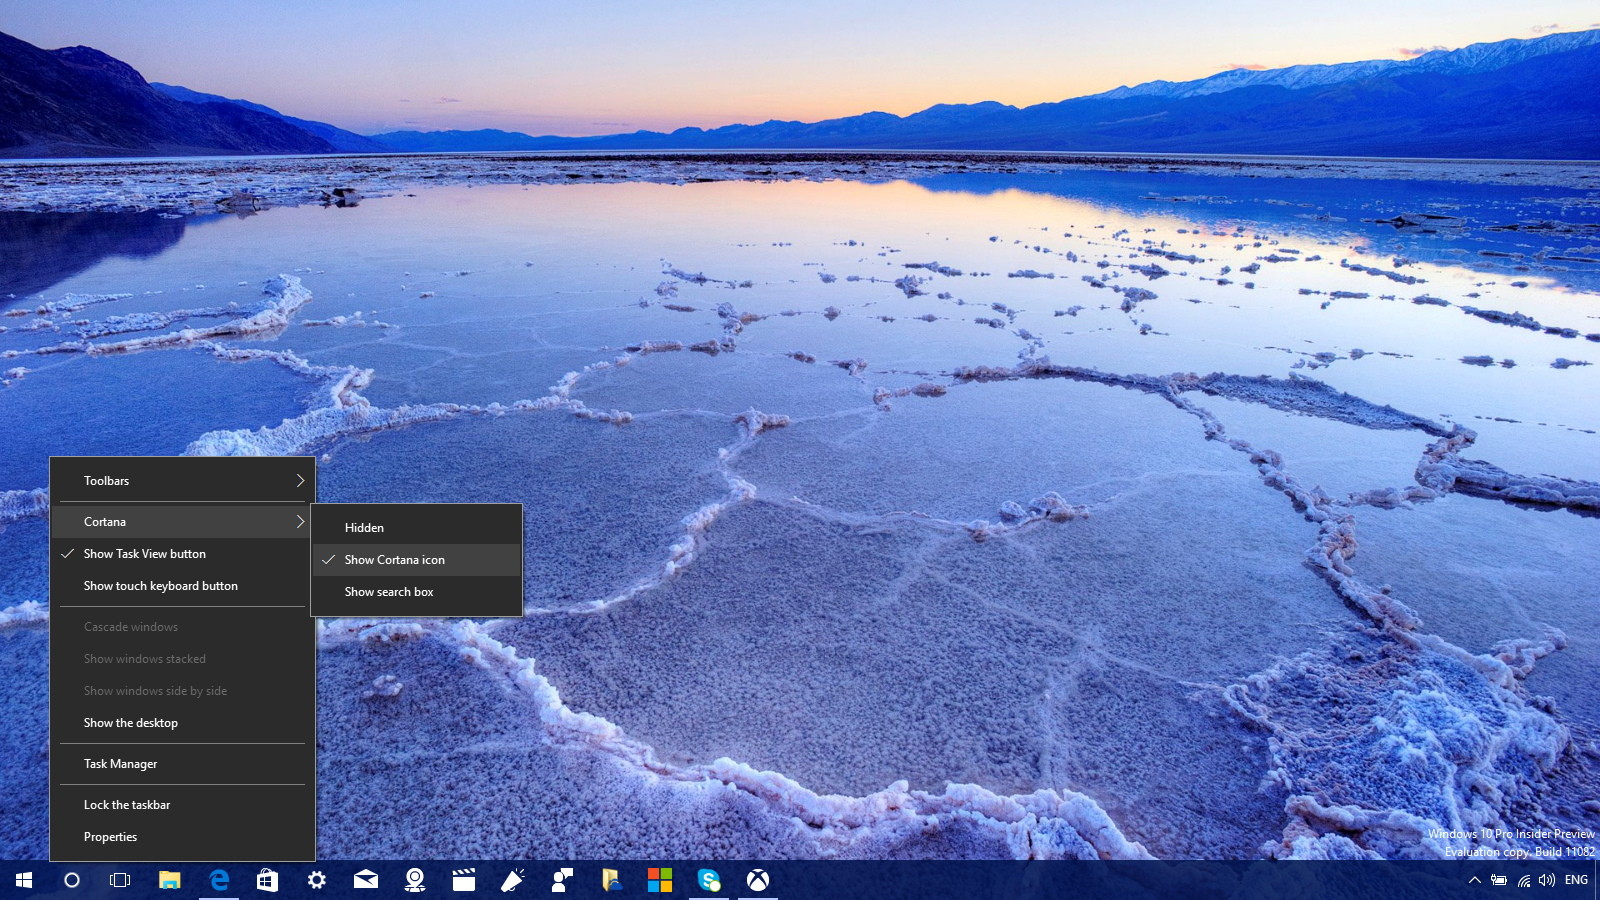




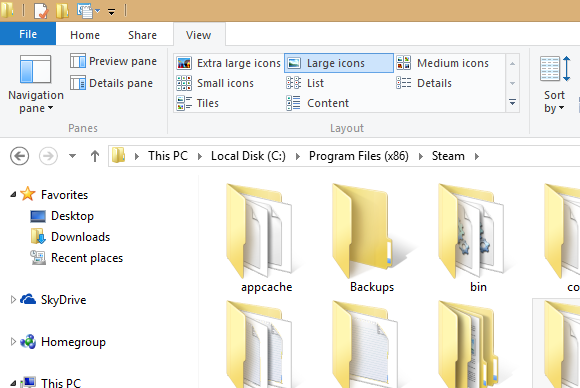
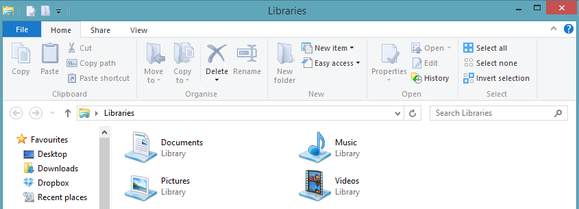
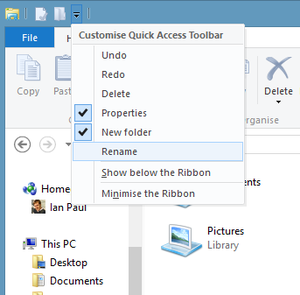

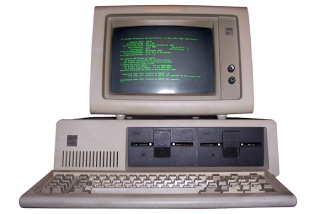














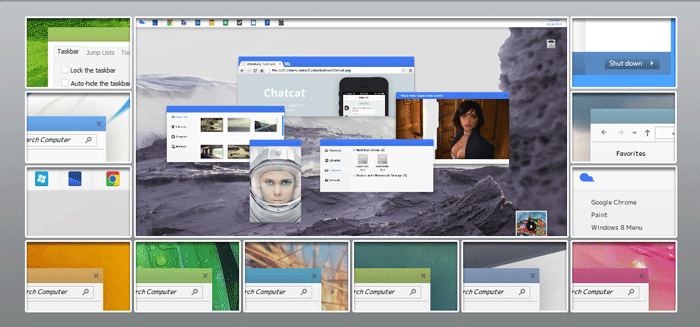

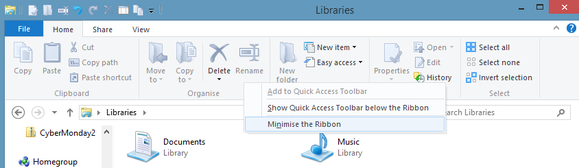
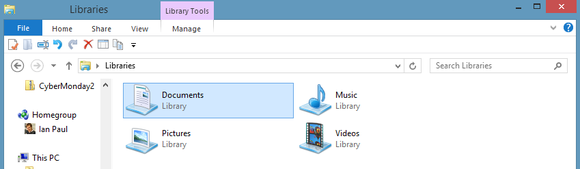
You must be logged in to post a comment.