Android OS is gradually taking it’s place as the mobile king: every tom, dick and harry now own one. This insane increase in consumers has lead to the development of many third-party ‘useful’ Android application.
As a measure intended to shield your Android device from malwares synonymous with most third-party applications, the OS does not accept application unapproved by Google (unapproved applications may be installed but will not work correctly on non-rooted Android devices).
Rooting (or jailbreaking) your Android device gives you unimaginable control over your device, letting you have master control on how your device functions; update the OS, replace the firmware, overclock (or underclock) the processor, customize just about anything.
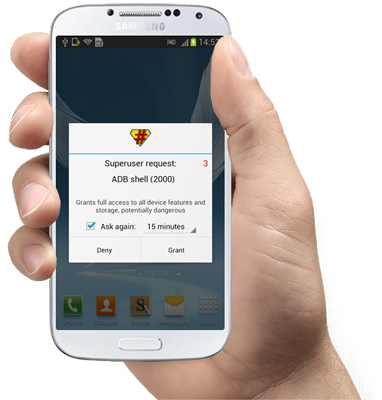
In the past rooting might be an easy “nut to crack” for Mr. tom Mr. dick, but certainly not for Mr. harry. The process was generally complicated and you might just end up in the ‘bricked’ zone with one miscalculated move. In this tutorial, I’m going to show you how to root/jailbreak any Android phone with just 1 click (or maybe 2).
Requirements:
– A healthy Windows PC (Windows XP, 7, 8 or higher).
– You must have Kingo Android Root software installed in your PC. If you don’t have the software, you can download a copy here.
– Your device must be properly charged.
Compatibility Check Up
To begin the rooting process, make sure you have downloaded and installed Kingo Android Root software on your PC: The application will root any (or at least 95%) android device with 1 click but to remain on the safer side, check if your device is compatible with the software.
Enable USB Debugging
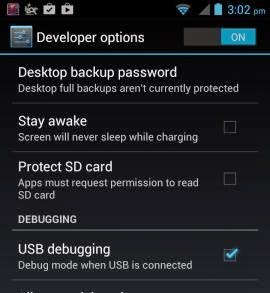
If your device is among the compatible devices, proceed to your device settings and enable USB debugging. If it’s running Android 4.0 or 4.1 follow this steps to enable USB debugging:
GOTO Settings.
Navigate to Developer Options
Tick the box just beside “USB debugging.” (You may need to switch “Developer options” to On before you can do so.)
Follow this steps if your device is running on Android 4.2 and later:
GOTO Settings
Navigate to About Phone
Enter Developer Options
Tick the box next to “USB debugging“.
Then Click OK to save your changes.
Run Kingo Android Root Software
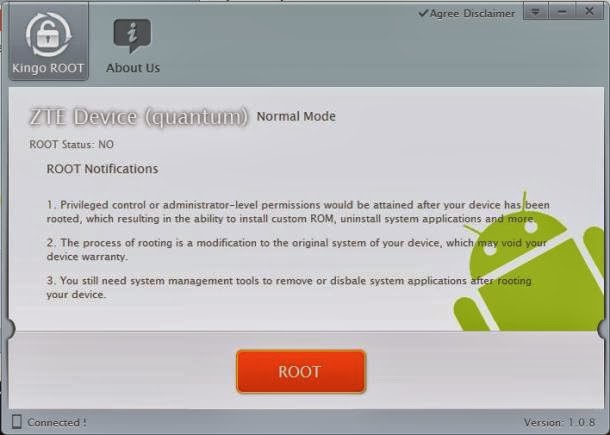
After enabling USB debugging on your device, locate Kingo Android Root icon on your start menu or desktop. Run the application by double clicking on it and connect your device via its USB sync cable. If your device is connected successfully, you should see an indication at the bottom-left corner of the software interface.
1 Click Rooting
Once your device is connected; you are just 1 click away from being the master of your Android phone/tablet. Click ROOT, grab a cup of coffee and watch Kingo Android Root do the rest for you. The whole process is automated and should take up to 2 mins; your device maybe rebooted a couple of times.
Beware: Rooting your Android device will make it open to malware attack, to remain on the safer side; only install applications from trusted sources and websites.
Un-Root your Android
If you decided rooting is just ‘what it is’ you can always sign off by running the Kingo Android Root software on your PC, reconnect your device via USB sync cable and click UNROOT when your device is set.
You can also opt for any of these popular Android UNroot methods instead. They’re best for mostly MTK-powered devices.
Although future generations of PCs are likely to be operated on Android OS with Lenovo’s latest invention, Windows PC and Mac users can still enjoy Android apps without installing Android OS.
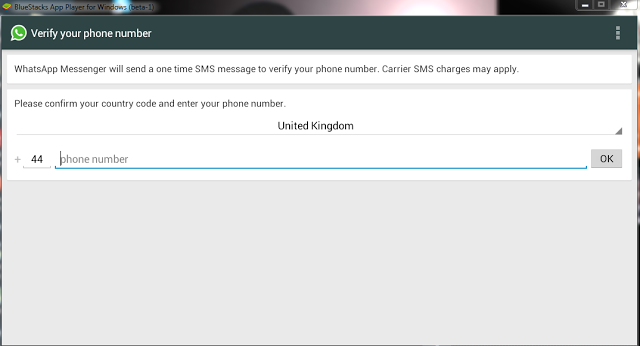
Bluestacks is a free software that allows you to use your favorite Android apps on a Windows PC or Mac. You can download apps like Angry Birds Space, 2go, Whatsapp or BBM to Go directly into Bluestacks, or sync the apps from your phone using the Bluestacks Cloud Connect Android app.
Using Bluestacks is similar to using an Android tablet: It works a bit like a widget. When clicked, the BlueStacks App Player will display the ten apps that have already been pre-installed and application suggestions which can be installed using Google Play Store. You can install more application by clicking on More below the big + sign. Bluestacks can be viewed in minimized or full screen.
Download Bluestacks
To download Bluestacks, proceed to Bluestacks download page, click on the download button that fits your OS description. The Download Now link will download a small installer file to your desktop. Remain online and double-click the installer to proceed with the actual download.
Please note that Bluestacks is currently in beta stage: Beta or prerelease software is not intended for inexperienced users, as the software may contain bugs or may potentially damage your system. I strongly recommend that users exercise caution and save all mission-critical data before installing or using this software.
I have personally tried this software on Windows XP, Windows 7 & Windows 8, the performance is great and it is worth trying!
The introduction of AdBlock Plus add-on has brought about some level of sanity to the nature at which most pages are being rendered. The popular browser add-on is set to extend it’s tentacles a little beyond the blocking of online ads (except for the whitelisted ones) to bringing sanity to popular social networks.
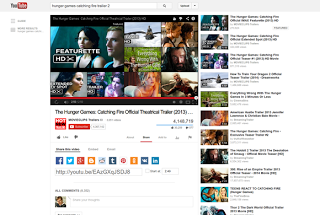
You Tube of late, has been really annoying; prompting ABP’s editorial pen to introduce YouTube Customizer site, a feature that helps you banish all the bits of the video site that annoy you, while keeping the ones you enjoy.
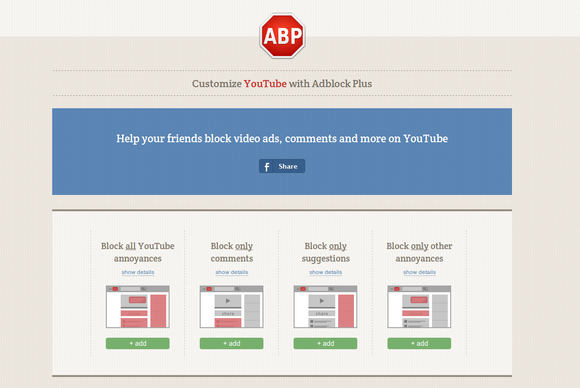
YouTube Customizer site allows you to control which youtube component you want your browser to render. If you’re generally annoyed with the current state of YouTube you can block everything but the video you’re watching. The list of banished items includes comments, suggested videos, featured and recommended videos in the end screen, the sharing tab in the description, in-video annotations, and channel recommendations.
Just for the record, that’s a breathtaking list of YouTube cruft and dumping it all may be a step too far for most of us. What good is YouTube, after all, if you can’t waste the afternoon following an endless stream of recommended videos.
Instead of blocking everything, ABP includes options to only block comments, or only suggestions and recommendations, or only the sharing tab and in-video annotations.
Getting Started
To get started, make sure you have AdBlock Plus installed on your browser. If you do not have the add-on installed on your browser, simply download it by clicking on your browser link below.
You could also block some mixture of the above—for example, blocking comments and annotations but leaving recommendations intact. If you have any YouTube pages open after you add AdBlock’s customizations you may have to refresh the page for your changes to take effect. And if you ever want to return YouTube to the data buffet it once was, check out ABP’s instructions on how to remove your customizations.
Note that your changes only work on the browser where you have AdBlock Plus installed and first added the YouTube filters.
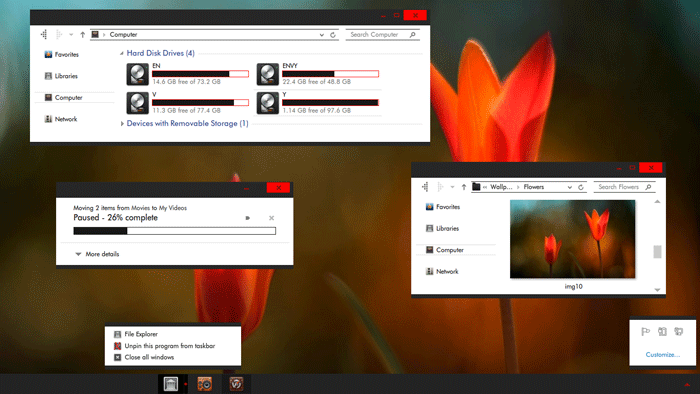
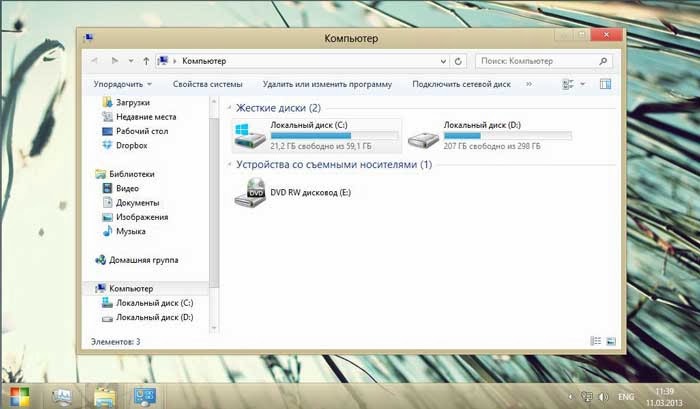
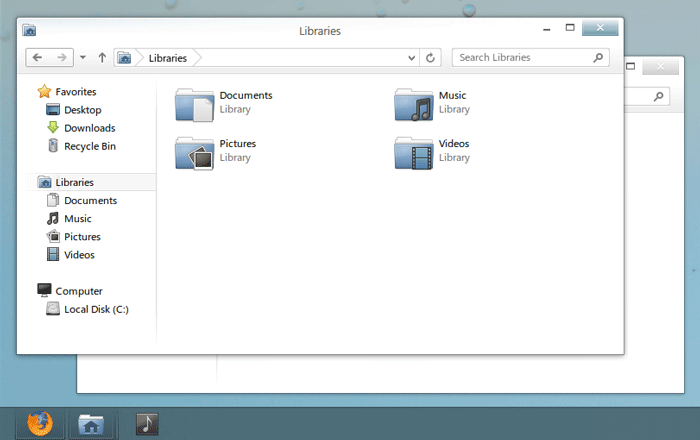
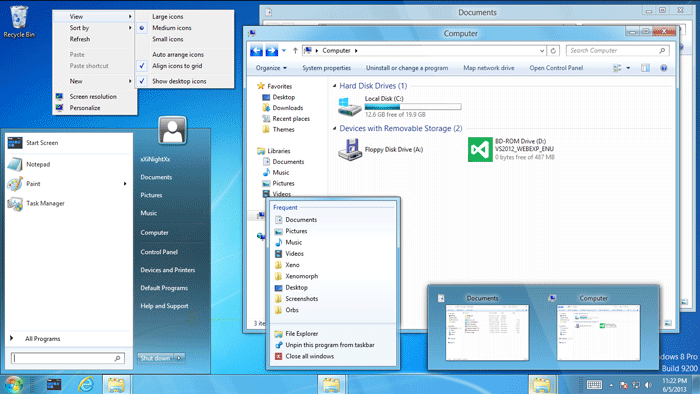
Bill & Microsoft has made many structural changes by implementing Metro UI and Start Screen in Windows 8. But the PC side of Windows 8 has not seen any dramatic changes except the removal of Start Menu and Aero Glass Transparency feature. Windows 8 like Windows 7 and others before them, has a lot of customization features that helps you define an entirely new look for your Windows PC .
Sometimes, the quest for customizing the desktop look can consume a lot of time; so you don’t have to actually customize your windows 8 PC, rather you can download many custom windows 8 themes and use them on your windows 8 PC (Check out 25 best themes for Windows 7) .
Most of these windows 8 themes are the products of talented artists/developers who make these themes available as a free download for everyone . But like most windows programs , windows 8 themes download from un-trusted sites might contain malware in them . So it is always advisable to download windows 8 themes from reputed sources only .
As a tradition that has been laid by the predecessors, Windows 8 does not allow the installation of third-parties themes by default, hence, it is recommended you read How to Install Third-Party Windows 8 Themes before you proceed to the next section of this article.
In this article, we shall consider the top 25 most-outstanding Windows 8 themes you can apply on your desktop.
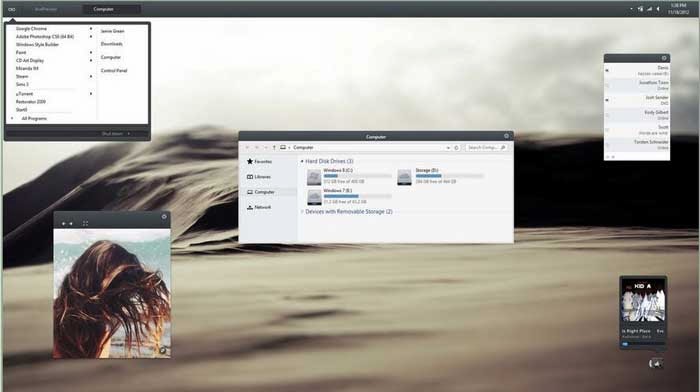
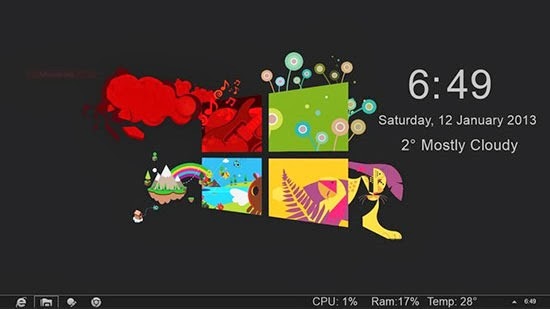
1) Space Blueberries 4.8
Theme Name: Space Blueberries 4.8 OS Version: Windows 8 Artist: Neiio
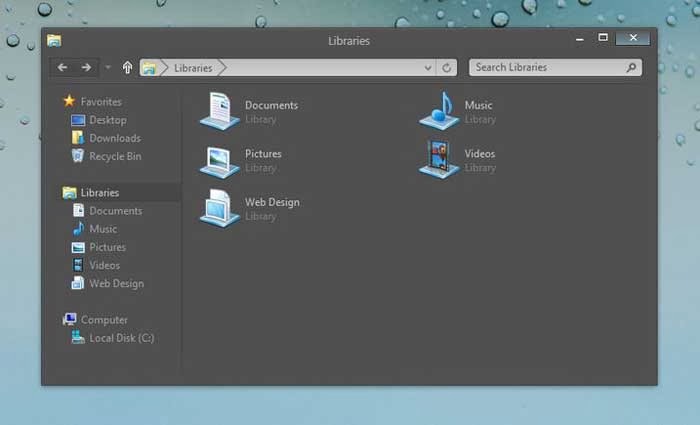
Description: Work is one of the best Windows 8 theme which has glowing dark interface. It gives you breathing space while working on multiple documents.
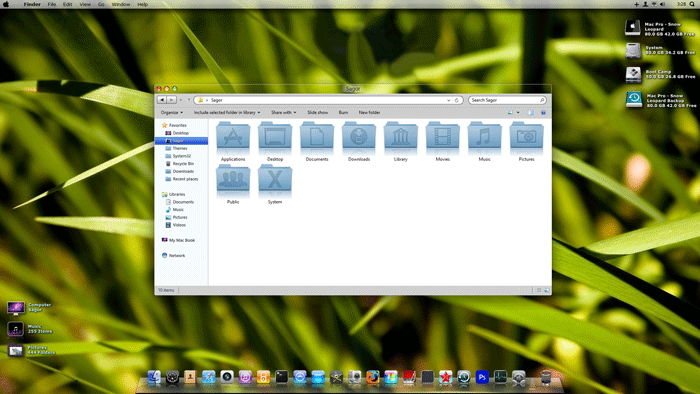
4) Snow Leopard glass
Theme Name: Snow Leopard glass OS Version: Windows 8 Artist: Sagorpbd
Description: Aer08Glow is a port of the default Windows 7 theme with a few modifications. This theme has glow on the caption buttons and 2 styles: one with square corners and one with rounded corners. To use this theme with rounded corners you have to enable Aero Glass Transparency in Windows 8.
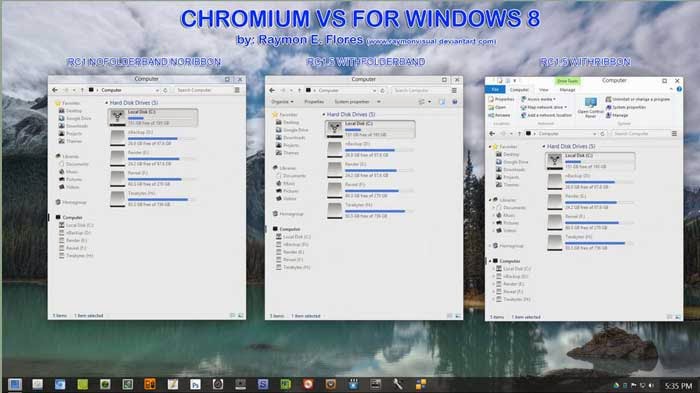
10) Chromium
Theme Name: Chromium OS Version: Windows 8 Artist: Reymonvisual
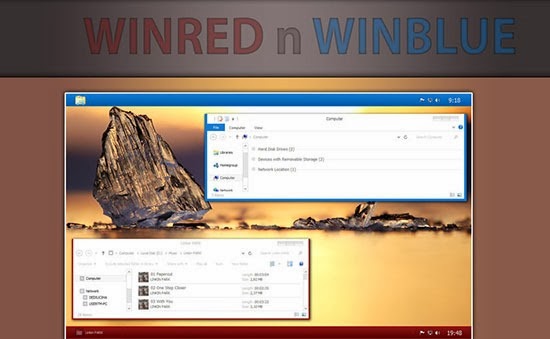
Description: Be greeted by the sweetness of the rising sun every moment your PC is booted. Win Blue n Red Windows 8 theme is the perfect blend for ‘red’ in ‘blue’, with a perfect ‘black’ to see off the dark sides.
15) Different Touch 8
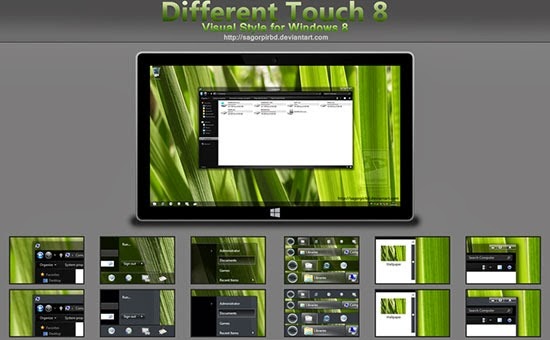
Theme Name: Different Touch 8 OS Version: Windows 8 Artist: Sagorpirbd
Description: Darkness has overshadowed light! The new ‘red’ brightens the appearance of your Windows 8 theme. Gray8 new red is an easy going theme with boundless customization.
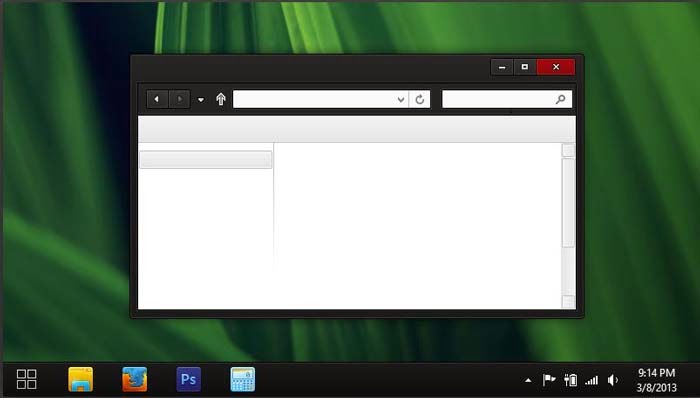
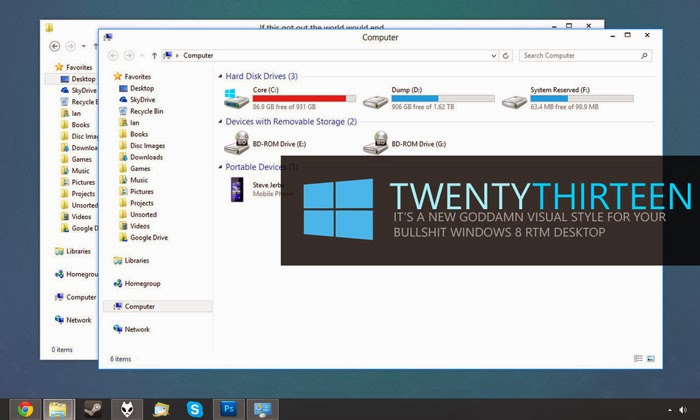
19) Twentythirteen
Theme Name: Twentythirteen OS Version: Windows 8 Artist: sand-and-mercury
Description: Twentythirteen is a new Goddamn visual style for your bullshit Windows 8 RTM desktop.
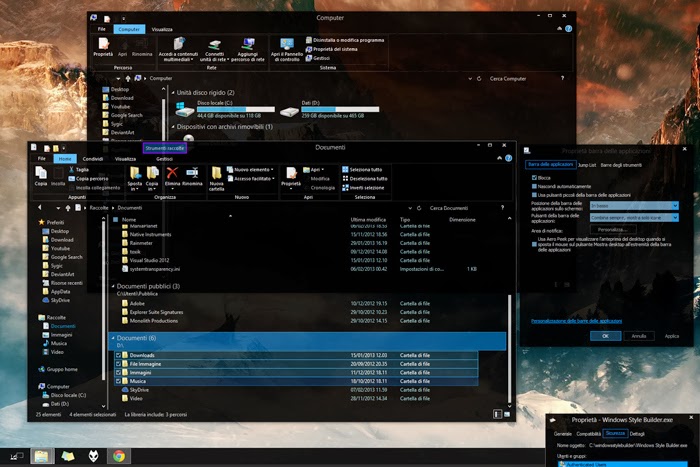
20) Abisso
Theme Name: Abisso OS Version: Windows 8 Artist: Ezio DOWNLOADDescription: Abisso is one word for ‘true transparency’: The Windows 8 theme has a clean dark background with blue color scheme.
21) Elune
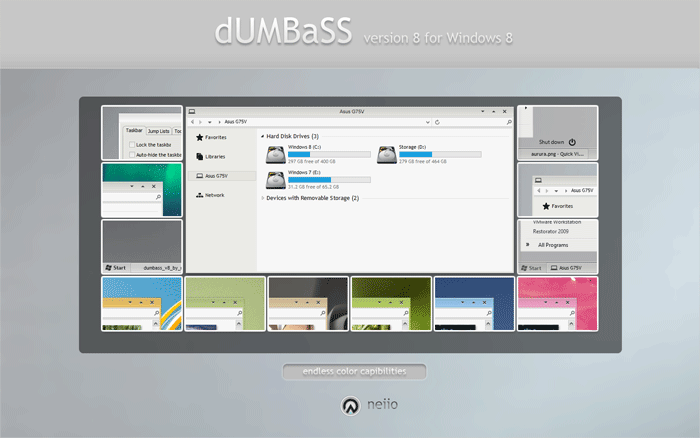
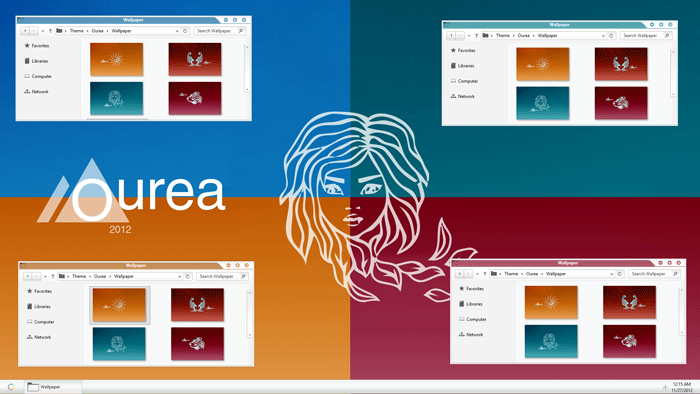
Theme Name: Elune OS Version: Windows 8 Artist: Neiio
Description: Gradually drift away from the original look of Windows 8. With Ourea windows 8 themes; the future is in your hands.
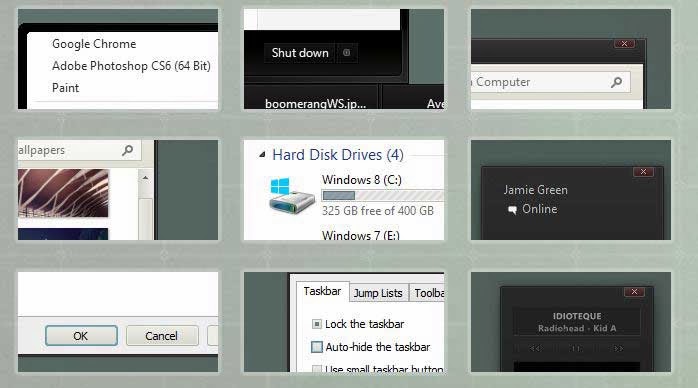
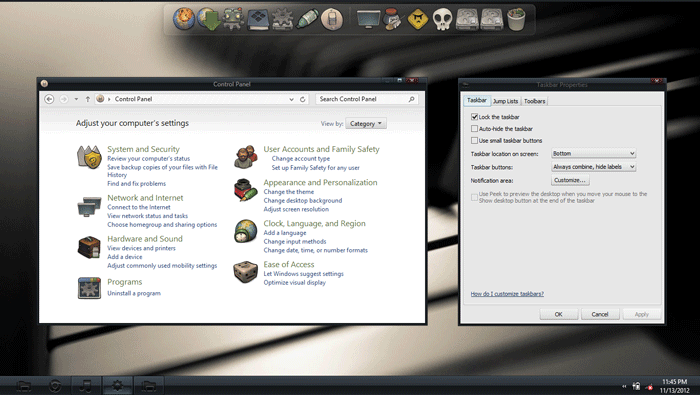
24) Alduin Windows 8 themes
Theme Name: Alduin Windows 8 themes OS Version: Windows 8 Artist: Charleston2378 DOWNLOADDescription: This list cannot be completed without the inclusion of the beautiful work of Charleston. Alduin is a Windows 8 minimalistic theme with deep dark background.
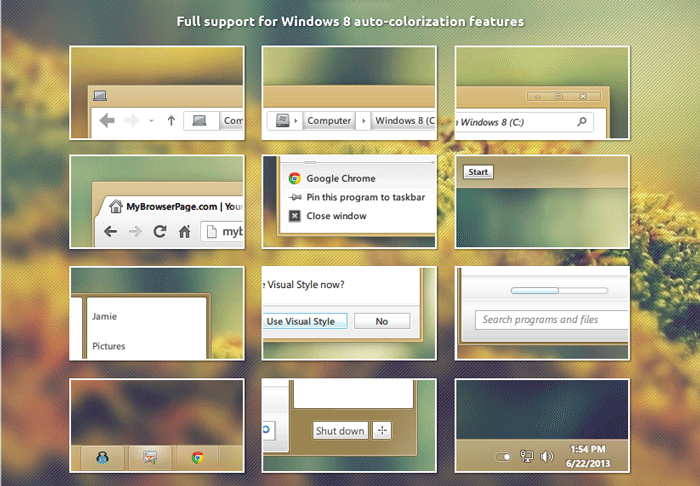
25) Nimbus
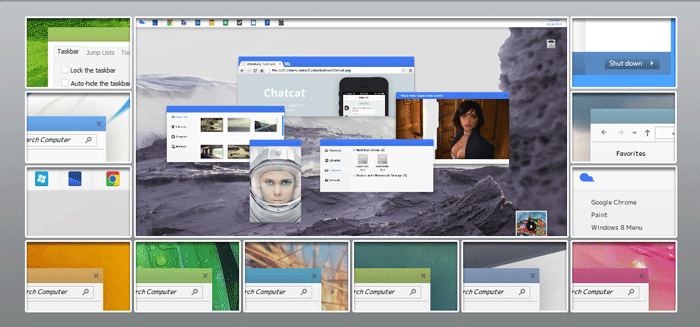
Theme Name: Nimbus OS Version: Windows 8 Artist: Neiio
Description: Closing our list of top 25 elegant Windows 8 themes today is: Nimbus. This theme has an extra-ordinary layout that allows you to choose from various color schemes and background.
Wi-Fi hotspots are nothing more than just a wireless access point, which grants internet accessibility to network devices in various public locations, such as cafes, restaurants, hotels and airports. Schools and businesses are also opting for the Wi-Fi hotspots and using them for their intranet or internet networks. Same Wi-Fi technology is utilized in wireless networks at home. Devices get connected to Wi-Fi hotspots via the use of a Wi-Fi network adapter. In fact, today the latest laptops and computers are designed with built-in adapters. The hotspots that are used in public locations usually require paid subscriptions and credit cards.
Neighborhood cafes, universities and similar places are opting to use the free Wi-Fi hotspots. With this, more and more users are connecting to the public Wi-Fi networks. As a result, security risks are increasing. In fact, Wi-fi hotspots are more like unsecured networks, which provide opportunities for hackers to take complete advantage of the technology. Your personal information is under threat if you access personal account information and passwords while using a public Wi-Fi hotspot. So, prior to using the local internet or WiFi hotspots from a restaurant or a café, do make sure to follow the following rules:
Always keep in mind that these networks are not secured and safe. They are always unsecured network connections. If you have to provide passwords or log onto something, do think twice and keep your guard on.
Make use of built-in security tools, Windows and Mac OS X have. They come with inbuilt features that enable firewall of a user and keep a check of the incoming traffic. The feature only helps to keep the hackers or unethical entities away from your system and personal information.
Disable file sharing.
Keep a tab on padlock. The sites that make use of HTTPS are capable of encrypting your activities. Users doing anything on the sites are confidential. Opt for the padlock, which is present on the address bar. You can also download and install HTTPS Everywhere.
Hackers are capable of retrieving even saved passwords that from your installed keyloggers or Registry. Therefore, try to protect and secure your passwords. Install features like LastPass or similar add-ons, whereby you can store your passwords safely in the cloud.
Hackers use different techniques and gimmicks to lure their victims. They might also use fake networks and grab hold of their victims online. Therefore, check the name of the network or better, ask and confirm the same with the employees of the concerning place.
Bottom line, it is always required to make use of your common sense whenever opting for public Wi-Fi hotspots or networks. If you sense any threat to security, immediately keep your guard on and avoid shopping or doing online activities where sharing personal details is a mandatory.
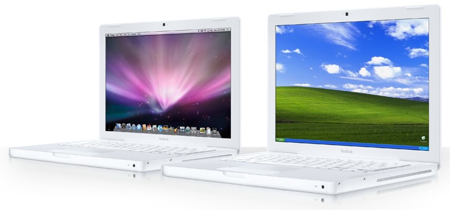
How to install Vista on your Mac: The Complete Walkthrough Using Boot Camp to install Vista on your Mac: The Complete Walkthrough This walkthrough will take you through every step of installing Microsoft Windows Vista on your Intel Mac (running 10.5 or later), using Boot Camp. It will cover a number of possible errors that you may encounter, and how to get around them. Each time I bring up an error I will explain in detail what you’ll need to do to resolve the issue and continue installing Vista. It’s up to you to decide if it’s worth the time and effort (for example, you may need to completely wipe your hard drive clean and restore from a Time Machine backup). It’s also possible that everything will go perfectly smoothly and you’ll wonder why you even needed a guide.
To install Vista on your Mac you will need the following:
All firmware updates installed on your Mac (use Apple Button -> Software Update… to check) A Vista installation DVD (Home Basic, Home Premium, Business or Ultimate) Your OS X Leopard installation DVD At least 10GB of empty hard drive space on your Mac (you can probably get away with less but you’ll have almost no room to install anything other than the OS) An hour and a half if all goes well, up to 5 hours if not Though not absolutely required, it’s a VERY good idea to have a complete and up to date Time Machine backup of OS X – it really came in handy for me Patience, possibly a great deal of it. Having a book handy will also help kill time during the partitioning, installing etc).
Installing Vista via Boot Camp
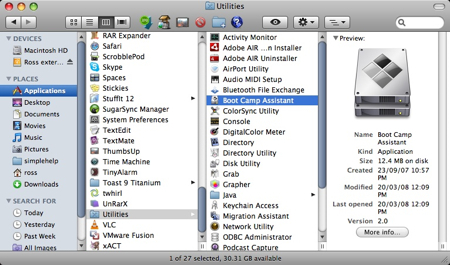
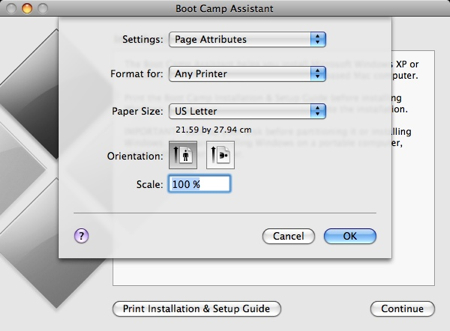
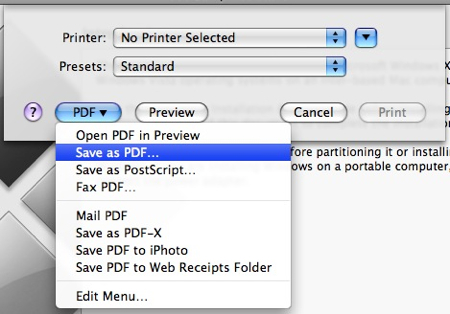
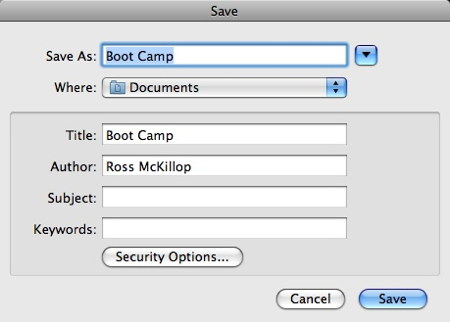
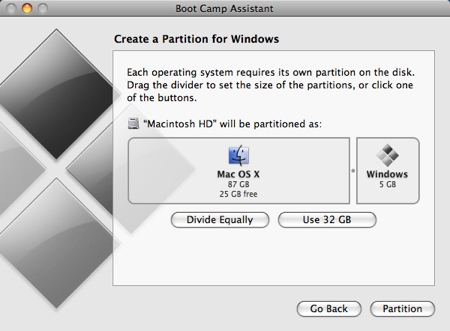
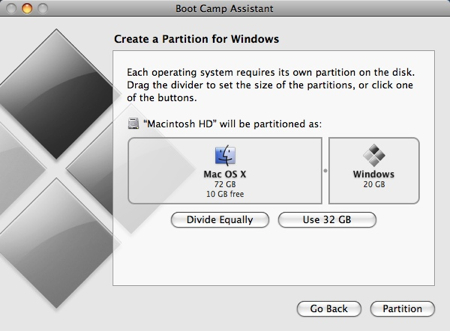
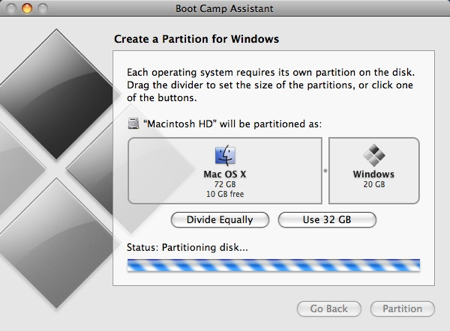
Here goes. First thing – close absolutely every open program you can. That includes those things running in the Apple Menu that you always forget about. Don’t worry about killing the Dock or Dashboard – having those running is fine. Now open a Finder and navigate to Applications -> Utilities and double-click Boot Camp Assistant. It’s not a bad idea to have the Setup Guide handy, just in case you need it. Click the Print Installation & Setup Guide button. Click OK If you have another computer around, and would like to save half a tree (printing the guide will use 20-something pages) – select the PDF button and choose Save as PDF If you don’t want to download my copy, enter the appropriate info (most importantly, the download location so you can find it) and click Save. Transfer the PDF to your other PC/Mac so you can access it while actually installing Vista. Back at the Introduction page of the Boot Camp Assistant, click Continue. Now you have to decide how much space you want to allocate to Windows Vista. You might be able to get away with going as low as 6GB, but I would highly advise against it. You’ll have almost no space left over to install software, and your page file in Windows might cause frequent crashes. I opted for 20GB, which left me with just a bit over 15GB to use after installing Windows Vista Ultimate and upgrading to SP1.
To change the amount of space to dedicate to Vista, click the small divider between Mac OS X and Windows, and drag it to the left. When you’re happy with the amount of space that Vista will have, click Partition. Watch the little status indicator.. and hold your breath that no errors occur. If you’re presented with a Start Windows Installation screen, proceed with step #11 below (and consider yourself very lucky). If you get an error, keep reading.
The most common error is that OS X couldn’t move a file and the partition could not be created. There are a couple of things that could be wrong, and I’ll outline how to fix them from the fastest method to the longest method. Cross your fingers that the fastest one will resolve your problem.
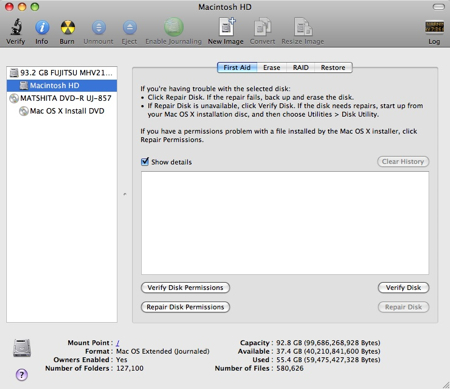
Close out of the Boot Camp Assistant and launch the Disk Utility by selecting Applications -> Utilities -> Disk Utility.
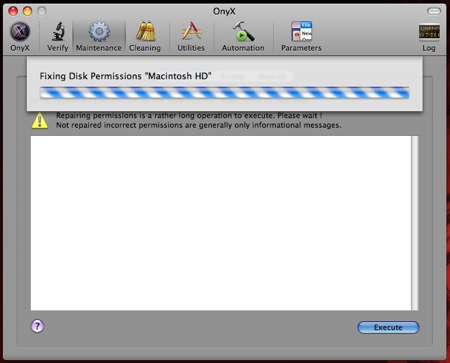
Select your Mac drive, or the partition you were trying to install Boot Camp on (if you have more than one). Click the Verify Disk Permissions button, then the Repair Disk Permissions button. Once that’s done, click the Verify Disk button, then the Repair Disk button if it’s available. Now go back to step #1 and try it all over again (except you don’t need to print out the PDF twice). If you were able to create the partition, excellent, continue with step #11. If you got the same “can’t move file” error, download and install OnyX Once installed, launch it (you’ll probably be prompted for your password) and select the Maintenance tab. Click the Execute button and wait. Once again, go back to step #1 and start all over again. If it worked this time, excellent, proceed to step #11. If it didn’t, you have another couple of choices. Neither is much fun. First, you can purchase defragging software (I’m not aware of any that are free/open source) such as iDefrag and hope that it resolves your problem (it might not). Second – and this is what I opted to do – re-install OS X by formatting the entire drive (all data will be lost), run software update to get all the firmware updates, install Vista via Boot Camp, and then restore OS X from a Time Machine backup. Like I said, not great choices. If you do decide to go the format and re-install route, I’ll outline it with a few more details –
Know that you might lose all of your data. Time Machine could fail, your roommate might decide now would be a good time to smash your backup drive – any number of problems could occur. This is my way of saying that I will NOT be held responsible if this method causes you all kinds of nightmares. With all of that said, it worked perfectly fine for me. Make sure you have a 100% up to date Time Machine backup. Open Time Machine and select Back Up Now. If you opted not to back up certain folders, make sure you have the contents of those folders backed up – or remove them from the “don’t back these folders up” section of Time Machine. Put your OS X Leopard DVD in your DVD drive, and restart your Mac. Hold down the c key as your Mac restarts – this will force your Mac to boot from the DVD rather than the hard drive. Follow the walk-through to install OS X. Make sure you select the “format this drive then install OS X” option Once you’ve re-installed OS X, start your Mac and run the Software Update to make sure everything is up to date. Once completed, you’ll be prompted to reboot. Do so. Once again, run the Boot Camp Assistant. This time you should have no problems at all Carry on with step #11 below, and once you’ve completely finished installing Vista, perform a Time Machine restore. To do so, boot from the OS X DVD (hold down c as your Mac starts up) and from the Utilities menu, select Restore from Time Machine (or something like that, I forget right now). Let Time Machine do its thing (boring, takes forever) and once it’s done, reboot yet again. You’ll finally have a dual boot Mac w/ Vista and OS X.
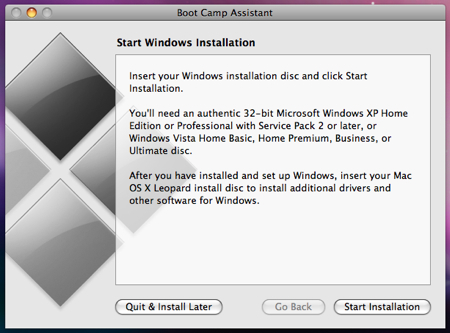
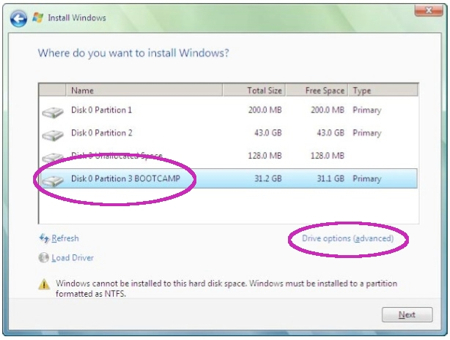
Alright, time to install Vista. Put your Vista DVD in your DVD drive and click Start Installation. A bunch of things will happen on their own. Don’t interfere with them. You’ll eventually land at a screen asking where you want to install Windows. Make sure, and I mean make sure you select the BOOTCAMP partition. Selecting anything else is going to force you to re-install OS X, and unless you have a recent Time Machine backup, you’ll lose all of your data.
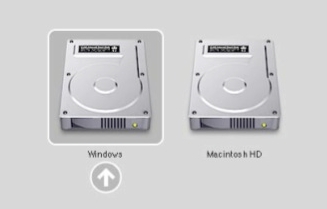
Now click the Drive options (advanced) link/button. Click Format and once it’s done, click OK. Now you can click Next. Now Vista will install. It takes a while and it’s not particularly entertaining. Vista will restart itself at least once during the installation. If by some chance – and this shouldn’t happen – when Vista restarts itself, and you end up back in OS X instead of Vista, restart again and this time hold down the Option key as your Mac starts. You’ll be presented with a number of drive icons to choose from. Double-click the Windows icon.
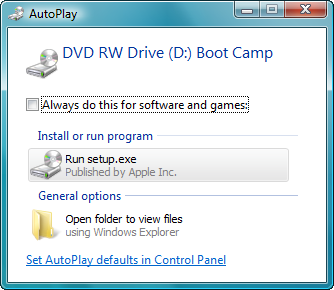
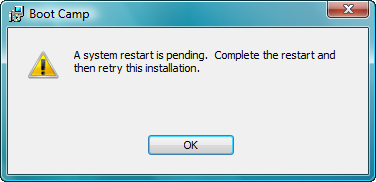
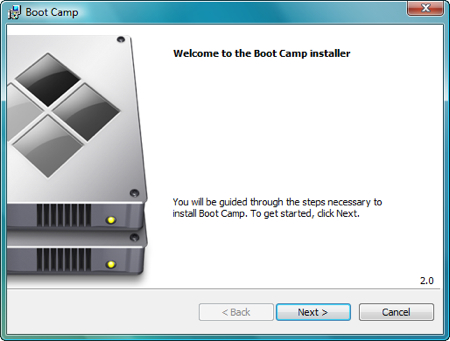
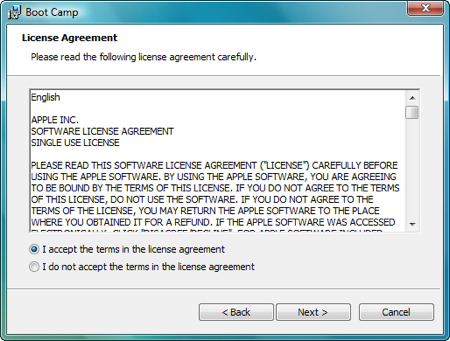
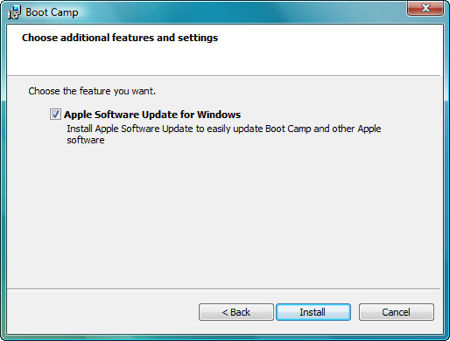
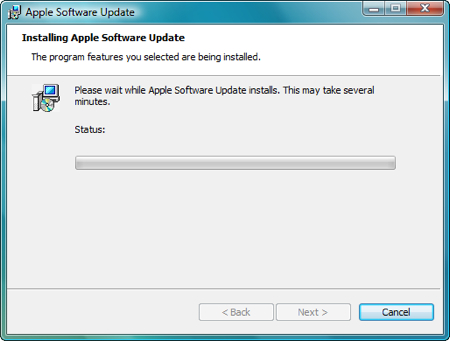
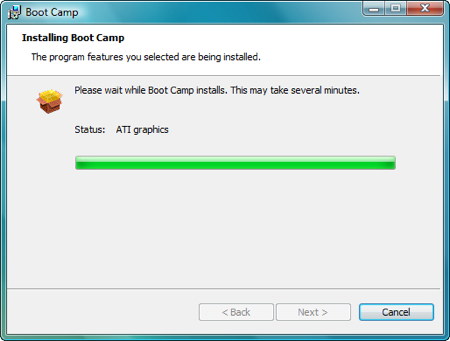
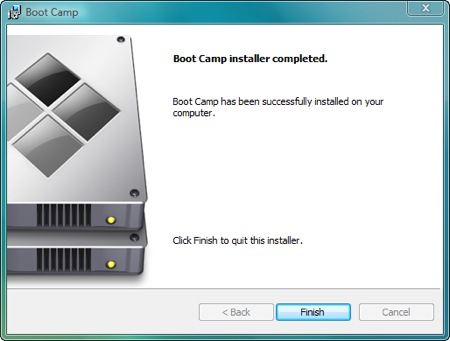
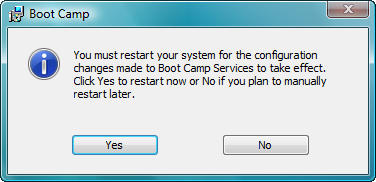
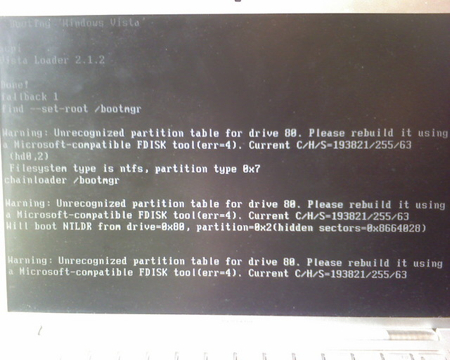
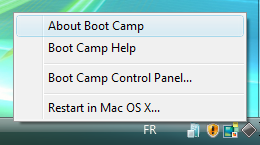
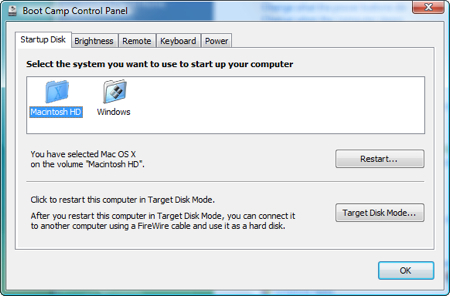
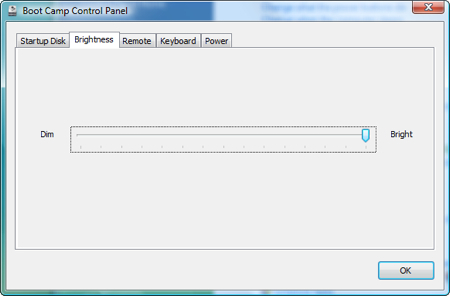
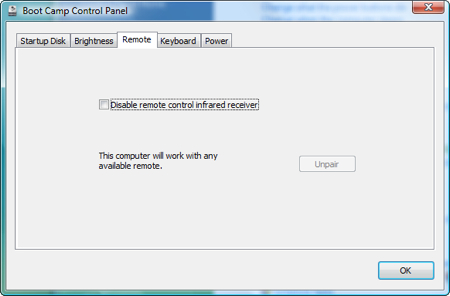
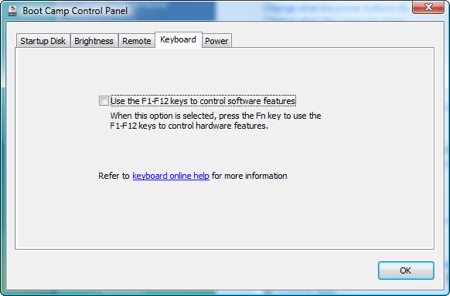
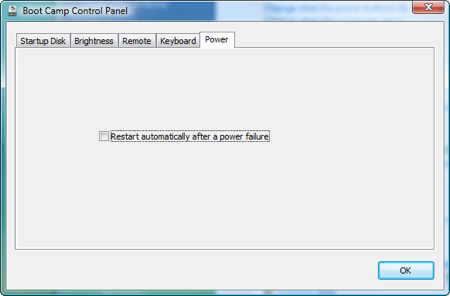
And now Vista has finished installing, you’ve setup your “account” in Vista, and you think you’re done. You’re not. Eject you Vista DVD from your DVD drive (if you have problems ejecting it go to the Computer view in Vista, click once on your DVD drive, and then select the Eject link that will show up in the menu. Now pop in your OS X Leopard DVD. You’ll be prompted “Install or run program” – click the Run setup.exe button. You might be told that a system restart is pending and you can’t install anything yet. I never said this was a short process. Restart your Mac and make sure to boot into Vista. This time when you Run setup.exe you’ll get the “Welcome to the Boot Camp installer” screen. Click Next. Place a check in the “I agree” part, and click Next. Make sure Apple Software Update for Windows is selected, and click Install. Sit back and watch. Don’t interfere. Your screen may flicker, ignore it. Also ignore any pop-ups that might appear in your System tray. Almost done.. And now you’re done. Click Finish. Restart yet again. Note: when Vista boots, you might encounter a couple screens full of error messages (Unrecognized partition table for for drive 80, can’t boot from NTLDR from drive=0×80 etc). Ignore them, and let Vista continue to boot. I have a (bad) camera phone picture of some of the errors below. This time when Vista starts, you’ll notice a new icon in the System tray – it’s the Boot Camp software. Click it once and a pop-up menu will appear.Select Boot Camp Control Panel…. On the first tab, Startup Disk you can select which Operating System you want to boot into by default. Just high-light the one you want – but remember – you can also choose to boot to the other OS by holding down the Option key while your Mac starts. Note: you can also define which OS you want to boot into by default in your Mac. Just select the Startup Disk option in your System Preferences. Click the Brightness tab to adjust – you got it – the screen brightness. Click the Remote tab. From here you can disable or enable the use of a remote infrared receiver. Your choice. Select the Keyboard tab to make some keyboard changes. Boring. And finally, select the Power tab. Do you want to automatically restart after a power failure? Here’s where you decide. When you’re done reviewing all of the Boot Camp Control Panel options, click OK. And one last thing. Remember – no matter which Operating System, Vista or OS X, you decide to have as the one you automatically boot into when your Mac is turned on, you can select the other one by holding down the Option key as your Mac starts.


 Same Wi-Fi technology is utilized in wireless networks at home. Devices get connected to Wi-Fi hotspots via the use of a Wi-Fi network adapter. In fact, today the latest laptops and computers are designed with built-in adapters. The hotspots that are used in public locations usually require paid subscriptions and credit cards.