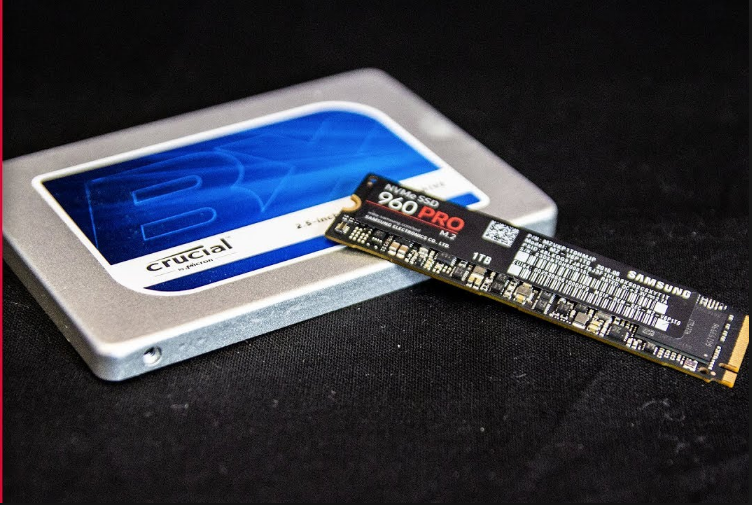
Partitioning hard drives, with a functioning operating system, is carried out using some built-in features. You can partition your hard drive or SSD using the command prompt, Windows disk management or a third party software. However, partitioning a new hard drive or SSD without OS is an entirely different thing. Here you do not have the luxury you have on a fully functioning OS. There is no software installed, you are given a plane slate, with no tools.
Despite the fact that it sounds impossible, Partitioning hard drives or SSDs without OS is actually possible. In this article, we explore a tutorial on how to partition a new SSD or Hard drive without OS.
Please note that for you to partition the hard drive or SSD without OS, you will need a bootable device, to boot the hard drive or SSD without an operating system. In this article, I will demonstrate how to partition a new hard drive or SSD using a bootable device containing windows OS. The steps are listed below.
How to Partition a new SSD or hard drive without OS, During Windows Setup
when installing windows OS, you are provided with the option to manage your hard drive or SSD space. Here you will be able to manage the partitions on your hard drive or SSD. You can create partitions or delete already existing partitions. As already mentioned, you will need a bootable device containing windows OS.
1 Insert the boot device into your computer. If your boot device is a disc, you are required to place it in your CD ROM. If it’s a bootable flash drive, you should plug it to any of the USB ports on your computer.
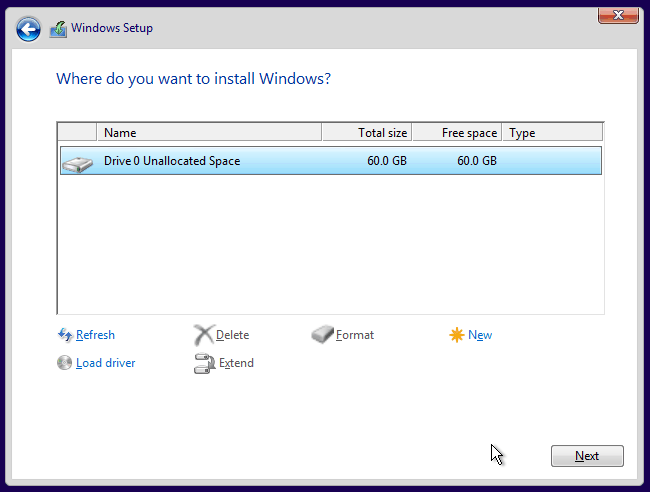
2. Follow all on-screen prompts until you are landed in the page where you can manage your storage space.
3. Once you are on the windows storage management page, press shift+F10 simultaneously to open a command prompt.
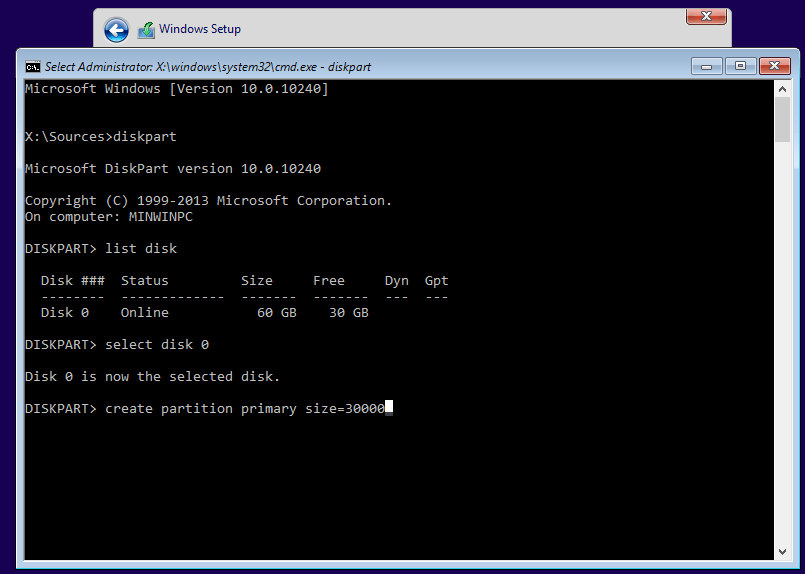
4. Type “diskpart” and press enter
5. At Diskpart>, run a few lines of commands to create a new partition:
List disk
Select disk [disk number]
Create partition primary [size=n]
Disk number and size is dependent on the configuration of your hard drive or SSD. Below is an example of how to use the above command line.
List disk
Select disk 0
Create primary partition size=60000
Note: Creating a partition of 6000MB means you are creating a partition of 60GB and also disk 0 is the name of the default partition that your hard drive or SSD has.
5. Hit enter
Note: You are advised to allocate more than 100GB to your new partition, because Windows update, installed programs, and other system files will keep consuming space on system partition
After you might have successfully carried out all the steps listed above, you will have a well partitioned hard drive. Steps listed above should be followed in order, to prevent complications.
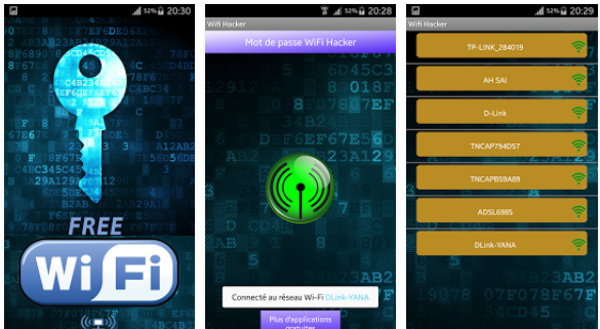
The Internet has over the years metamorphosed into a very essential part of our lives. The internet is a source of information, it keeps us in tune with the happenings in the world. Being absent from the internet for an hour can be very torturing. In this article, we explore a tutorial on how to hack wifi passwords using Android apps. This will help you gain access to wifi networks in your surrounding, without prior knowledge of the password.
1. How To Hack Wi-Fi Password Using Wi-Fi WPS WPA Tester Android App
Seeking to make a quick wifi network hack? The Wi-Fi WPS WPA Tester may just be what you need. The Wi-Fi WPS WPA Tester app works on both rooted and nonrooted devices. Despite its compatibility with non-rooted devices, it requires root access, to hack tougher wifi networks. Steps to hacking Wi-Fi networks using the Wi-Fi WPS WPA Tester app are listed below.
Download and install the Wi-Fi WPS WPA Tester App from the Google Play Store
Launch the Wi-Fi WPS WPA Tester app on your Andriod device
Locate the Wi-Fi connection you wish to hack.
Tap on the Wi-Fi network
Select ”connect” and then select no root methods to hack Wi-Fi password.
Note: If the color of the Lock icon is green, it means the chances of hacking the network is high. Red or Orange color lock indicates the chances of hacking the network is low.
2. How To Hack Wi-Fi Password Using Android Dumper Android App
Still on the topic of how to how to hack wifi passwords using Android apps, Androdumper is a free app that lets use hack Wi-Fi networks seamlessly. Androdumper doesn’t require root access to function. It is available in the Google Play store for downloads. Steps to hacking Wi-Fi networks using the Androdumpper app are listed below.
Download and Install the AndroDumper app from the Google Play Store
Launch the AndroDrumper app on your Android device
Click on the refresh button in the second top left corner of the app. This will allow the app to search for available Wi-Fi connections.
Click on the Wi-Fi network of your choice, and then click on the “Try to connect” button.
Select the hack method. You have the option to choose between Root way or No Root.
Wait for Androiddumper to hack Wi-Fi network
How To Hack Wi-Fi Password Using Android Bcmon Android App
Last but certainly not least, is the Bcmon app. Unlike the already mentioned wifi hacking apps, Bcmon requires root access. It is compatible with rooted devices. Bcmon is a more effective app, in hacking Wi-Fi network. Steps to using the Bcmon app is listed below.
Download and Install the Bcmon app from the Google Play Store
Click on the ” Refresh” icon to view available Wi-Fi network
Click on the desired Wi-Fi network
Navigate to settings and uncheck “use Bcmon” checkbox
Navigate back to the network screen and click the “ok” button to hack the Wi-Fi network
Conclusion: Despite the fact that apps featured in this article are highly recommended, there is a high chance that they won’t be able to hack all the Wi-fi connections you come across. This is due to the different levels of fortification Wi-Fi connections possess. In cases where the Wi-Fi connection security isn’t strong, you should be able to gain access using the apps listed above.
It is no news that Facebook doesn’t allow users to download photo and videos from its platform. Uploading photos and videos may be straightforward, but downloading them is nearly impossible. This has lead to the development of several means of downloading media contents from Facebook.
Most of the methods available today, to download photos and videos from Facebook, requires you to download a browser extension, or you download special software. Downloading these browser extensions and software may be harmful to your computer because most of them come with malware, that can ruin your operating system and make your leak your information.
In this article, we explore a tutorial on how to download facebook videos without using browser extensions. We are going to explore three different methods.
How to Download Facebook Videos without Browser Extensions Using Downvid.net
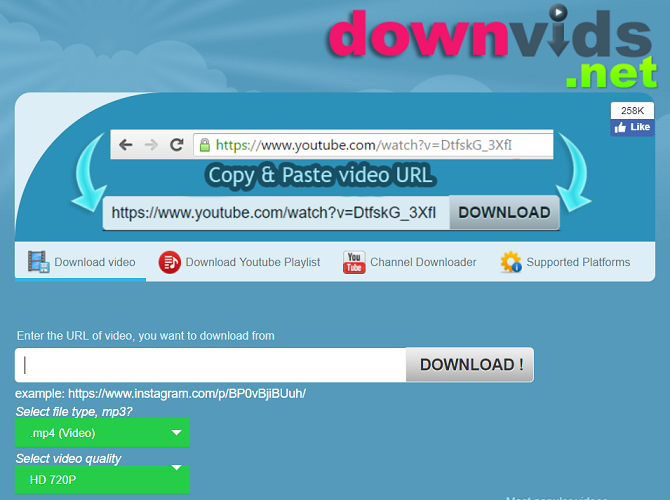
Downvid.net is a website that allows users to download facebook videos, by pasting copied URLs in a special box provided. It features a very simple and minimal interface. Steps to downloading Facebook videos using Downvid.net is listed below.
Log in your facebook account
Navigate to the post containing the facebook video you wish to download
Copy the URL to the post
Launch downvid.net on your computer, using your browser
Paste the link in the box provided
Select the video quality you desire
Click on download
How to Download Facebook Videos without Browser Extensions Using FBDOWN.NET
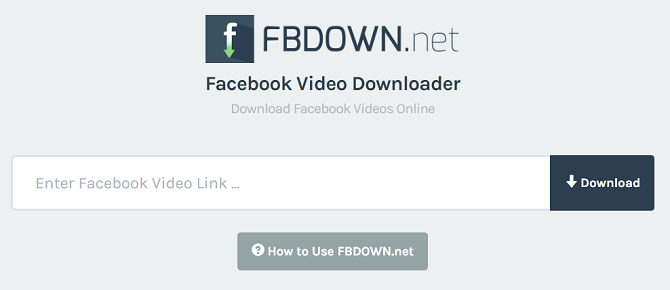
Similar to downvids.net, FBdown.net is another website that allows users to download facebook videos seamlessly. Steps to downloading Facebook videos using this platform are very similar to that of downvids.net. They are listed below.
Log in your facebook account
Navigate to the post containing the facebook video you wish to download
Copy the URL to the post
Launch fbdown.net on your computer, using your browser
Paste the link in the box provided
Select the video quality you desire
Click on download
How to Download Facebook Videos Using Savefrom.NET
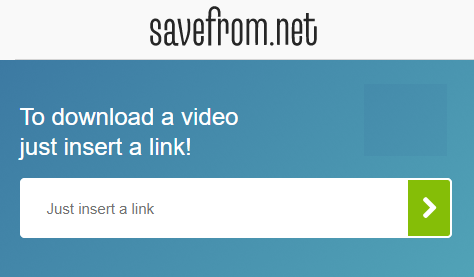
Famous for Youtube video downloads, savefrom.net is yet another platform that lets people download facebook videos easily. It offers a very simple and minimal interface. Similar to the method used in downloading youtube videos on this platform, downloading facebook videos here, requires copying and pasting the Video URL. The steps are listed below.
Log in your facebook account
Navigate to the post containing the facebook video you wish to download
Copy the URL to the post
Launch savefrom.net on your computer, using your browser
Paste the link in the box provided
Select the video quality you desire
Click on download
As you might have already observed in the steps listed in methods presented in this tutorial, downloading Facebook videos with browser extensions, is a straightforward thing. All you have to do is select one of the methods listed here and follow the steps given.
The fact that youtube doesn’t allow users to download videos is not news anymore. This has been the case for a very long time. By prohibiting download of their videos, youtube can monetize their videos. This way users can stream videos, alongside the ads that play before the actual video itself.
Putting aside the awesome streaming service youtube offers, users still desire to download youtube videos directly to their devices, for a lot of obvious reasons. Take for example you wish to start learning java off a java playlist, having to return to previous videos when you forget a particular step, can be very stressful, especially in scenarios where you have a poor internet connection. Hence the need to download youtube videos directly to your device. Downloading the java tutorial videos from youtube will make the whole revision process seamless.
Thanks to thoughtful thinking from a lot of developers around the world, downloading youtube videos has become a reality. In this article, we explore a tutorial, containing three easy ways to downloading youtube videos on your PC. These methods apply to both Windows and MAC computers. Methods are listed below.
Download Youtube videos on PC, Using 4k Video Downloader
1. Visit 4K downloader official website and download the 4k downloader software to your PC, Via this link.. 4K downloader is available on both Windows and MAC platform.
2. Install and launch 4k Video downloader on your PC:
On Windows computers, you are required to double click the setup file and then click yes when prompted. after which you are to follow the on-screen prompts
On MAC, you are also expected to double click the setup file, verify the installation if necessary, and then drag the 4k video downloader icon to the ”Applications folder”, after which you are to follow on-screen prompts.
3. Visit Youtube.com, using the browser on your PC and then navigate to the video you want to download.
4. Copy the URL of the youtube video you wish to download. On windows, you can hold Ctrl+A to copy video URL. While on MAC you are required to hold ⌘ Command+A to copy fully select the URL and then hold Ctrl+C or ⌘ Command+C to copy URL.
5. Launch 4k downloader on your PC: Normally, the 4k downloader automatically opens when you copy a youtube URL. In case it doesn’t open automatically, you are required to launch it by your self. 6. Paste Video link in 4k downloader: To paste the copied youtube video link, you are required to click the ”+” icon covered engrossed on green color. 4k Downloader will then extract the youtube address.
7. Select the video format and video quality you desire. Note: Downloading with a video quality higher than what your PC can resolve is pointless, as you won’t get the true quality of the video. If your PC maxes at 1080p, download 1080p. If your PC maxes at 4k, you can download videos with 4k resolution.
8. Click the download button, and select the folder you want to place the downloaded video.
Download Youtube videos on PC, Convert2MP3
Convert2MP3 is another platform that allows users to download youtube videos to their devices. Unlike the 4K downloader, Convert2MP3 is not an app; it can only be accessed via the website. convert2mp3.com. Steps to downloading Youtube videos on PC using the Convert2MP3 platform is given below:
1. Visit youtube.com on your PC using an internet browser and then navigate to the video you wish to download.
2. Copy the URL of the youtube video you want to download. On windows, you can hold Ctrl+A to copy video URL. While on MAC you are required to hold ⌘ Command+A to copy fully select the URL and then hold Ctrl+C or ⌘ Command+C to copy URL.
4. Paste the video URL in the box provided. To paste a video link, press either Ctrl+V (Windows) or ⌘ Command+V (Mac)
5. Select Mp3 or Mp4. If you desire to convert the video to mp3 format, to be played as audio, you should select mp3 format. If you want to play the youtube video in video format, select the mp4 format.
6. Select video quality. Convert2MP3 video quality maxes at 1080p. You are advised to download the video quality your PC can output.
7. Click the convert button on the right side of the page. The youtube address would be converted to a downloadable MP4 or MP3 file.
8. Click on download and the youtube video will start downloading.
Note: If you the video quality you chose is higher the original video quality of the video or you tried downloading a copyrighted video, the video won’t download. You will be given an error message, before the video finish processing.
Download Youtube videos on PC, VLC Player
1 Visit youtube.com on your PC using an internet browser and then navigate to the video you wish to download
2. Copy the URL of the youtube video you want to download. On windows, you can hold Ctrl+A to copy video URL. While on MAC you are required to press ⌘ Command+A to copy entirely select the URL and then holdCtrl+C or ⌘ Command+C to copy URL.
3. Open VLC player on your PC. In case you have not downloaded VLC player, you can download VLC player from this link. VLC is available on both Windows and MAC OS platform.
4. Open Aa new network stream on your VLC player. Network stream allows users to play content from your web browser in VLC. To access the network stream on your VLC player follow these steps
Windows – Click Media, and then proceed to click Open Network stream
MAC – Click file, and then continue to click open Network
5. Paste the copied URL in the box provided. Paste the video URL in the box provided. To paste a video link, press either Ctrl+V (Windows) or ⌘ Command+V (Mac)
6. Click on the play button below the video. The youtube video will open VLC
7. View codec information. To view codec information, follow these steps:
Windows — Click Tools, and then click Codec Information
MAC click the window and then click on Media Information.
8. Copy the “Location” field. At the bottom of the window, you’ll see a long address that you’ll need to copy:
For Windows — Right-click the “Location” text field, click Select All, and then right-click it again and click Copy.
For MAC — Right-click (or Control-click) the “Location” text field and click Open URL.
9. Open a new browser tab and then paste the copied URL in the URL box and click enter 10. Download the video: To download the video, you are required to the right click the video and click save the video. The video will automatically start downloading as an MP4 on your PC There you have it – a comprehensive tutorial on three ways to download youtube videos on your PC. If you have any questions, feel free to drop them in the comment section below.
In a bid to cut down cables, TVs have over the years metamorphosed into stand-alone gadgets, that feature built-in wireless internet connections, with support for a wide range of apps. A modern television with these features is referred to as a smart TV. A smart TV also let you record shows, take screenshots and access YouTube, Netflix and other movie outlets. Now, the idea of having a smart television sounds great, but having to purchase one, may not be too palatable.
Smart TVs don’t exactly come cheap. If buying a one isn’t part of your budget right now, we have good news for your. You don’t necessarily need to purchase a smart TV to be able to gain access to the features of a smart TV. There are external media players you can use to turn your digital television into a smart television. These media players are also know as TV boxes.
A TV box is a small tech gadget that basically transforms your ordinary digital TV into a smart TV. Most TV these days are already equipped with smart technology, however, these does not completely eradicate the need for a TV box. A TV box can relatively expand the capabilities of your television, turning it into a less powerful version of your computer, or a larger version of your smartphone.
If you are in country where DSTV is supported, you won’t need an additional decoder for the kids room. You can can simply connect to DSTV online via your TV box.
Converting your Digital TV (DTV) into a Smart TV
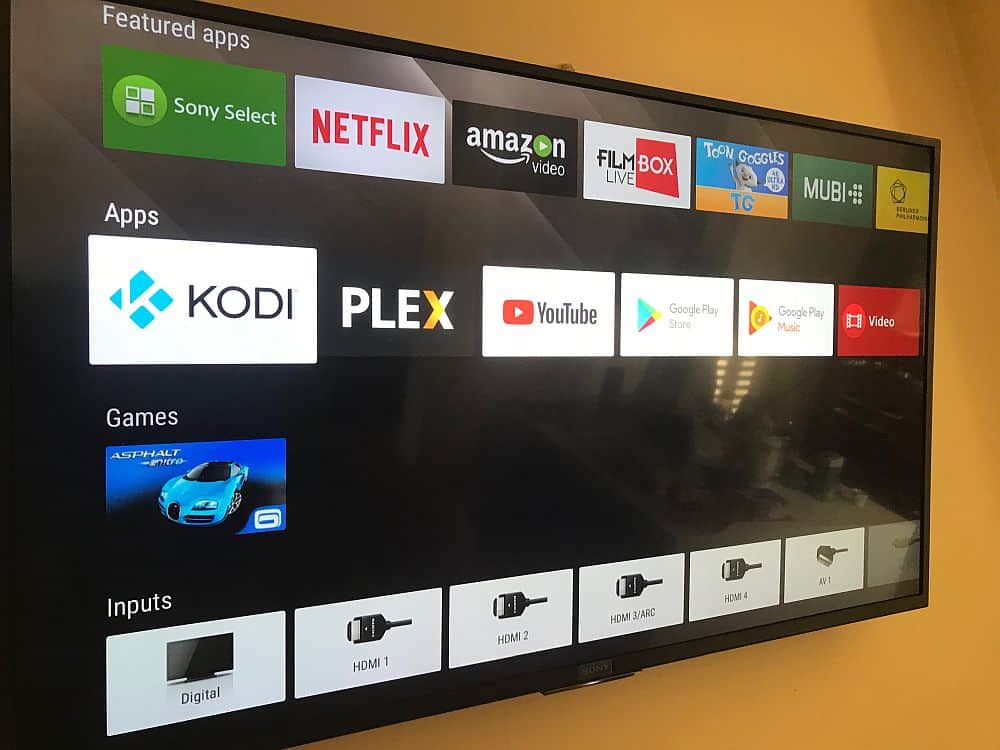
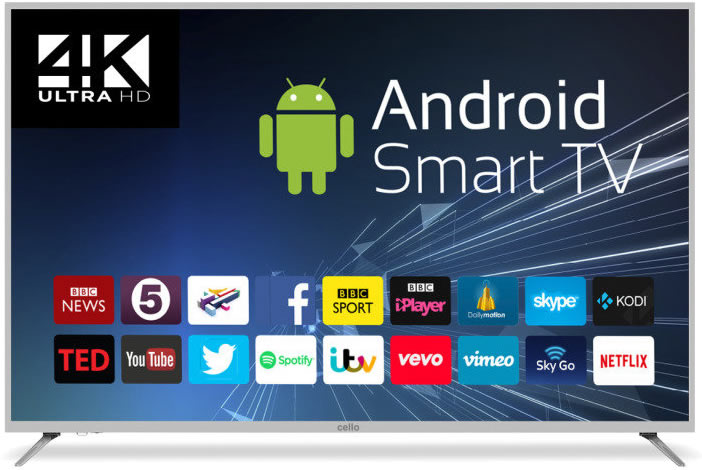
Smart TV with Netflix, YouTube and FilmBox live pre-installed
In this article, we are going to explore the various ways you can convert any Digital TV to a Smart TV using a TV box. While all of these TV boxes run via similar technology, they have different operating systems and thus, different user interfaces. For example, Apple TV runs the mobile iOS format, whereas Fire TV runs off Amazon’s operating system, instantly connecting you with Alexa. Google ChromeCast on the other hand, is powered by a simplified version of Chrome OS.
Using Media Players to Convert DTV to Smart TV
As earlier said, turning a digital TV to a smart TV, can be done using certain external media players otherwise known as TV boxes. These media players are listed below, together with tutorials on how to use them to transform your digital TV to a smart TV.
Using media players such as Apple TV, Fire or ChromeCast is one way of converting your old digital TV into a smart one. However, if these media players are far beyond your reach, there are cheaper alternatives such as using a white label Android TV box. This will be discussed much later in the article.
Note that, most Android TV box or media players require a HDMI port and a HDMI cable. If your TV set doesn’t feature a HDMI port, but instead the traditional yellow red and white port, you can use an HDMI to RCA adapter.
How to Convert any Digital TV to a Smart TV – Using Apple TV
Unarguably, Apple TV is one of the best streaming devices we have today. It is one of the top 3 streaming devices, with others being the Amazon Fire stick and the Google ChromeCast. Apple TV is the only Apple product that isn’t restricted to Apple’s ecosystem.
The TV gadget lets you stream videos, pictures, and music from your digital TV. Apple TV also enables you to buy or rent movies on iTunes. However, you cannot store media files on the Apple TV.
Step 1: Locate the HDMI port on your TV
As earlier mentioned, using a smart media player to convert your digital TV to a smart TV requires the presence of an HDMI port, and also you will need an HDMI cable. You will find HDMI ports on the body of your Digital TV. In case your digital TV doesn’t feature an HDMI port, you can use an HDMI to RCA adapter.
Step 2: Connect Apple TV to your Digital TV
In connecting the Apple TV to your digital TV, you will need to connect one end of the HDMI port to your Digital TV and the other end to your Apple TV. After you might have connected the Apple TV to your digital TV, you are required to power both of them and change your TV’s input to HDMI.
Step 3: Setup Apple TV
immediately you change your TV’s input to HDMI, the Apple TV interface will be displayed. Here you are required to select your language of choice, select a Wi-Fi network and enter a password and download any suggested updates.
Step 4: Use Apple TV as a Smart TV
Once you have completed the steps listed above, you will be presented with a drawer of apps, that include all the top-notch streaming service apps, you will able to stream content from Netflix, Hulu and lots more.
How to Convert any Digital TV to a Smart TV – Using Amazon Fire TV Stick
Amazon Fire Stick is yet another media player that lets you turn your Digital TV into a smart TV. Amazon Fire Stick takes the shape of a pen drive. It is one of those media players that isn’t obvious. Plug it to the HDMI port of your TV, and you will have access to a wide range of streaming services, streaming services that ordinarily won’t be accessed on your digital TV.
As you might have already guessed, the setup of the Amazon Fires Stick is very similar to that of the Apple TV, they both require a functioning HDMI. In case your digital TV doesn’t feature an HDMI port, you can use an HDMI-RCA adapter. Steps to converting your Digital TV using Amazon Fire Stick is listed below:
Step 1: Plug Amazon Fire Stick into HDMI Port Of Your Digital TV
Unlike the Apple TV, Amazon Fire Stick doesn’t require an HDMI cable for connection. As earlier mentioned, the Amazon Fire Stick has the shape of a pen drive. Instead of featuring a USB A or C, the Amazon Fire Stick Features an HDMI connector. So all you need to do for connectivity is plug the Amazon Fire Stick into the HDMI port of your computer.
In case the HDMI port of your TV is located on the rear, and you don’t have enough room for connection since the wall will be obstructing it, you can use an HDMI extension cable. You are required to plug one end of the HDMI cable to your Amazon Fire Stick, while other End will be plugged to your TV.
Step 2: Connect Amazon Fire Stick To A Power Outlet
Apart from featuring an HDMI connector, the Amazon Fire Stick also features a USB port. To power the Amazon Fire Stick, you are required to connect a USB power cord to it’s USB port and connect the other end to the power brick, then finally connect the Power brick to a power outlet. You are also required to place batteries in the remote of the Amazon Fire Stick.
Step 3: Switch To HDMI Input
To gain access to the Amazon TV Fire interface, you will need to switch your TV’s input to HDMI, since the Amazon Fire Stick was connected to the HDMI port of your TV.
Step 4: Setup Amazon Fire Stick
After you must have successfully connected the Amazon Fire Stick to your Digital TV, the next step is to set up the Amazon Fire service. You will be presented with the Amazon Fire interface, as soon as you switch to HDMI output. Here you are required to perform basic tasks before you can start streaming. You will be prompted to press the play/pause button at intervals, you will be required to log in to a wireless network, inputting the password. You are also required to log in your Amazon account. This will ensure This will ensure that you can view your Amazon subscriptions and purchases.
Step 5: Use Amazon Fire Stick As A Smart TV
Once you have completed the steps listed above, and Logged into your Amazon Account, you will be able to view your purchased movies, shows, and games. You will also be presented with a drawer of streaming apps, that you can use to stream content on your Digital TV
How to Convert any Digital TV to a Smart TV using Google ChromeCast
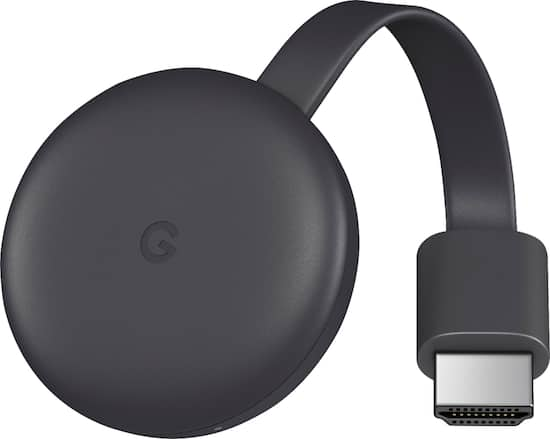
Last but not least, is Google ChromeCast. Google ChromeCast is yet another media player that can turn your Digital TV to a Smart TV. Manufactured by Google, ChromeCast is a media player, that gives you access to many streaming services. Here are the steps to using the ChromeCast to convert your Digital TV to a smart TV.
Step 1: Connect ChromeCast to your TV’s HDMI
Similar to the already mentioned media players; you will need to connect the Google ChromeCast to your digital TV. The ChromeCast comes with an HDMI connector. So all you need to do is locate the HDMI port on your digital TV and connect the ChromeCast HDMI connector. In case your TV doesn’t feature an HDMI port, you can use an HDMI-RCA adapter to connect ChromeCast to your TV
Step 2: Connect ChromeCast To A Power Outlet
ChromeCast comes with a power cable, you can use to power it. All you need to do is to connect the cable to the power port on the ChromeCast and then plug the other end to the USB port on your Digital TV. Please note that the 4k Version of the ChromeCast cannot be powered by a digital TV, you will need a wall socket for connection.
Step 3: Switch To HDMI Input
To gain access to the ChromeCast interface, you will need to switch your TV’s input to HDMI, since the ChromeCast was connected to the HDMI port of your TV.
Step 4: Download Google Home App on your Smartphone
The Google ChromeCast needs a working Google App to function. You are required to download the Google Home App on your smartphone. It is available on both the Android and IOS platform.
Step 4: Setup Google Home App
Launch the Google Home app on your smartphone, click on accept when prompted, you will be taken to the Google Home Page. Click on the devices icon, located on the top-right corner of your screen. Wait for ChromeCast to detect your phone. You will be presented with a confirmation message when ChromeCast recognizes your phone.
Next, you will need to confirm the code on your TV. Once ChromeCast detects your TV, a code will appear on your TV and also on your smartphone. Make sure both codes match. After which you are to tap Yes (iPhone), or I SEE IT (Android).
Now tap continue and then select a wireless network for your ChromeCast. Enter the password and continue. Please note that your smartphone and ChromeCast must be connected to the same network. Follow all other on-screen prompts.
Step 5: Use Your ChromeCast As a Smart TV
Upon completing the steps listed above, you will be able to stream content on your phone, directly on your digital TV. You will also be able to view apps installed on your smartphone
Reading through this article, you must have observed that converting your Digital TV to a smart TV, is a straightforward thing to do. All you have to do is select one these top media players, follow the steps given and you will be home and dry, Streaming media content on your digital TV, as though it was a Smart TV.
If you have any question, regarding this tutorial on how to convert any digital TV to a smart TV, feel free to drop them in the comment section below.
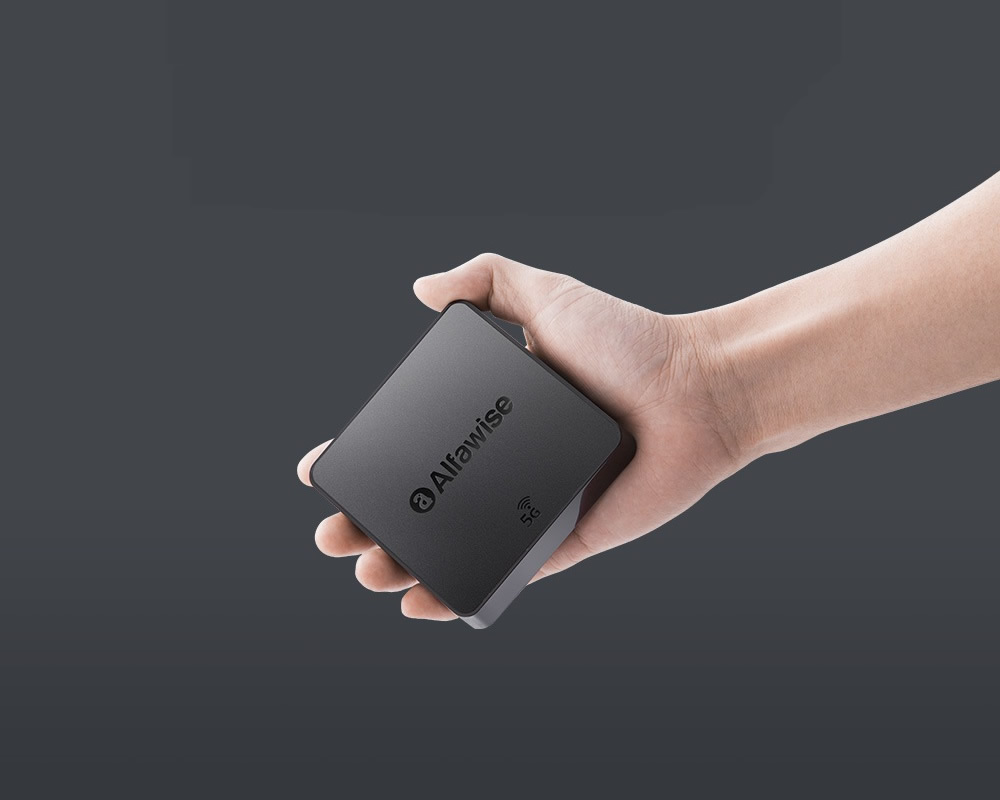
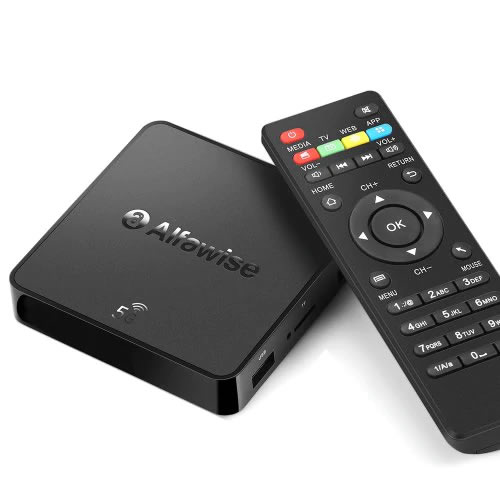
Alfawise A8 Pro Android TV Box
Apple TV, Fire or ChromeCast are the most popular TV boxes in the market. Smaller players like the Alfawise A8 pro device are not so popular but equally effective. It also come way cheaper than most TV box with the same features. The Android TV box comes with both 2.4G and 5G WiFi, provides a faster and more smooth data transmission, which makes it the ideal choice for cord-cutters.
From your A8 Pro Android TV box, you can download apps, watch local TV channels, connect to streaming apps such as Hulu and Netflix. Depending on where you live, you may even be able to connect to premium cable channels at no extra cost, especially if you have installed KODI software.
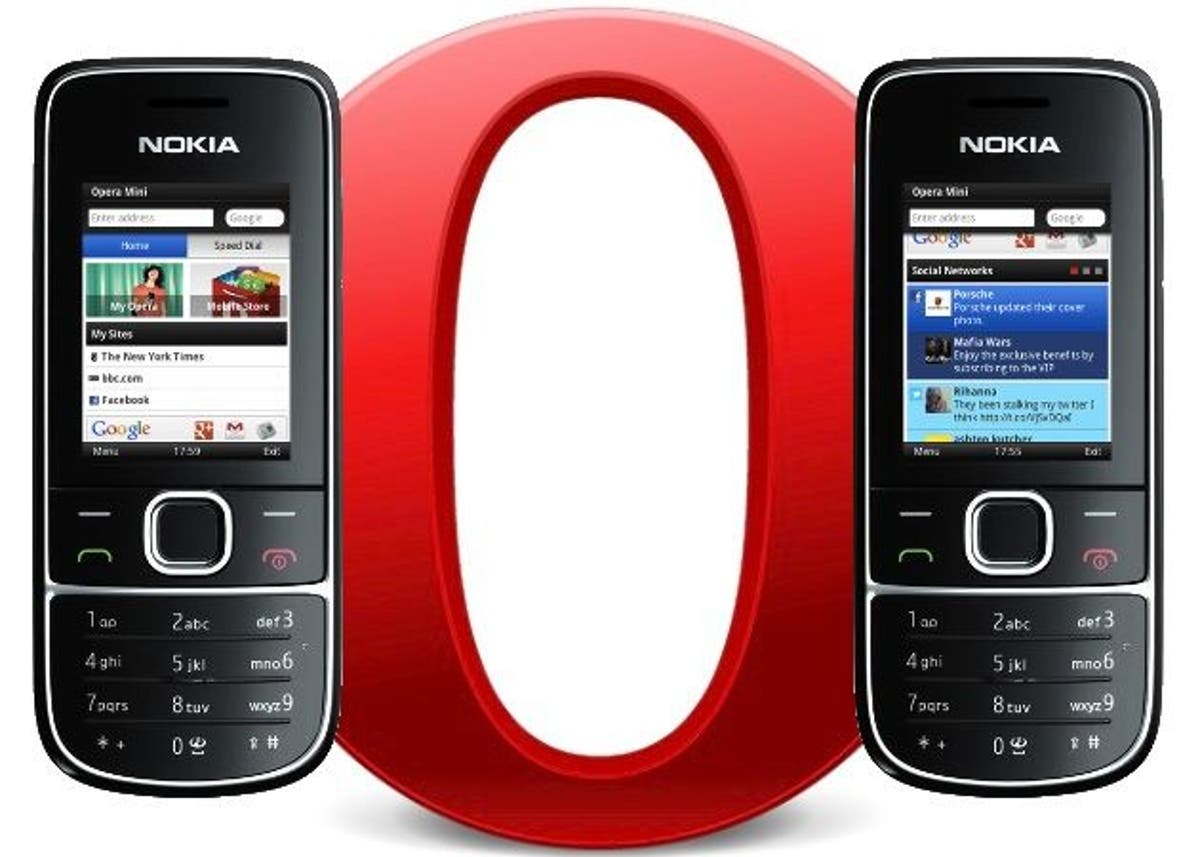
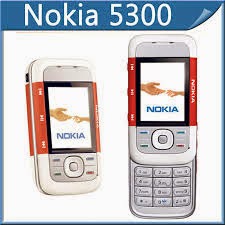
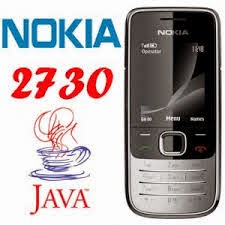
It might interest you to know that you can now configure your java phones using the latest opera mini 5.2 free. examples of java phones are: Nokia C1. Nokia C2, Nokia C3, Nokia 200, Nokia 210 Nokia 2730 Nokia 5300 etc.
* From your phone click on the menu * Click on setting * Select default configuration setting * Chse the Airtel, Etisalat, Mtn, Glo provide file * click on option * Select default that all Open the cast opera mini 5.2 and use these setting on any java phone.
Do you have two accounts for Messaging, tired to log in and out to receive different message?
Have you ever dreamt of having multiple accounts for your favorite game?
Do you have double social accounts for work and personal life,wish them to parallel?
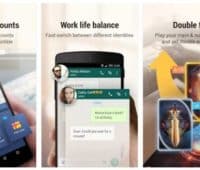
Now Multiple Accounts (2Accounts) is created to fulfill your dream! Multiple Accounts Android application is a portable app that enables you to use more than one WhatsApp, Messenger or Instagram accounts, on your android device. It allows you to use two accounts of one app with only one phone, while data of your main account and second account are in parallel and separate storage.
With Multiple Accounts you can have more than one Facebook Messenger accounts logged in at the same time on your device. If like me, you have more than one phone number and would like to connect with your friends/family on both numbers on WhatsApp account, you are likely to find Multiple Accounts equally handy.
There is no limit to the number of applications you can add. Meaning you can have a two different accounts logged in at the time on your device for Twitter, Google+, Instagram, Messenger, WhatsApp or even your favorite game.
To get the Multi Account app on your android phone, you go to your Play Store or Google Play app on your phone. Then you go to the search dialog box and type in Multi Account and click on the search button.
After clicking on the Enter button, a set of various apps are being displayed. For example, Multiple Accounts: 2 Accounts, Multiple Accounts: Parallel App, Parallel Space, Multi Accounts, just to mention a few.
For this tutorial I recommend Multiple Accounts: 2 Accounts. Select the Multiple Accounts: 2 Accounts, click on install, after it has been installed then you click open.
Add Accounts – WhatsApp, Messenger, etc
Open your Multiple Account app by locating the application icon on your Android device.
Click on the Add button. After clicking on the Add button it shows a list of all your apps on your phone.
Click on the WhatsApp, Messenger, Instagram, any other app you wish to have more than one on your phone.
Now you can use more than one WhatsApp, Messenger, Instagram on your Android device.
This app can also be used for games. You can also have your favorite games on your phone. There are no changes made in your game account.
If you’re starting to dip your toes into creating HD videos then you may find that sometimes the videos that you save in HD don’t actually look that great. For beginners it can be difficult to navigate through some of the technical areas of video settings – but it is necessary to do so if you want to ensure that the videos you save in HD actually turn out well.
Understanding Resolution
Essentially ‘HD’ or ‘High Definition’ is a type of resolution. In turn, resolution is a description of the amount of pixels contained in the video. For example a ‘Full HD’ resolution of 1080p is essentially 1920×1080 would be 1920 pixels wide and 1080 pixels tall.
While the resolution does affect how your videos appear, it is by no means the only factor at work, however. Assuming you’re saving an HD video in HD resolutions and it doesn’t look good then that likely means that there is some other factor that is the culprit.
Looking at the Bitrate and Frame Rate
Aside from resolution, the two big factors that can affect the quality of your videos are its bitrate and frame rate. The frame rate is essentially the number of frames per second that will be displayed on your screen – so the higher it is, the ‘smoother’ your video will appear. Ideally the number to shoot for in terms of frame rate is 60 for the smoothest possible playback supported by most monitors and TVs.
On the other hand, bitrate is a bit harder to understand but is basically the amount of space that can be used for every second of video. As such a higher bitrate will provide a better quality but come at the cost of a much larger file size. If the video isn’t allowed to have enough space to properly display at that resolution then you can expect the quality to be poor.
That is part of why using Movavi Screen Capture Studio for HD video capture is ideal. Not only is it capable of recording HD videos at a high frame rate, but it can also help you to save it easily with presets to automatically optimize your video based on the device or platform that you’re using.
It even includes a complete suite of video editing features so you can cut and combine video segments, enhance the video quality, apply special effects, add audio tracks, and insert customizable text. In short, you should be able to use Movavi Screen Capture Studio to improve your video further.
If you want to create and save HD videos while making sure they look good there is no easier way than by using Movavi Screen Capture Studio. Just give it a try for yourself and see what it can do.
Like Twitter, Facebook (and now, Telegram), the use of usernames makes it easier to find and locate users on the website. However, finding or adding users by username isn’t something very common among mobile messaging apps. WhatsApp allows you to add a username or moreorless, a nickname but people can neither find nor add you with this username – something privacy lovers will appreciate.
Telegram on it’s own right is taking a different path. Since last year the company made it possible for you to add friends by username – without necessarily knowing their phone numbers – on their mobile app.
The advantage of a username is that you can share your contact details for Telegram without revealing your phone number, thus safeguarding some level of privacy. A lot of users has been asking us how to add a username to the app. So, here is a step to step guide:
Add Username on Telegram
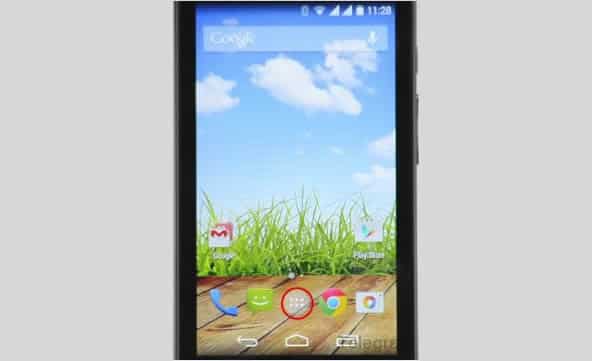
Tap the menu button on your Android screen.
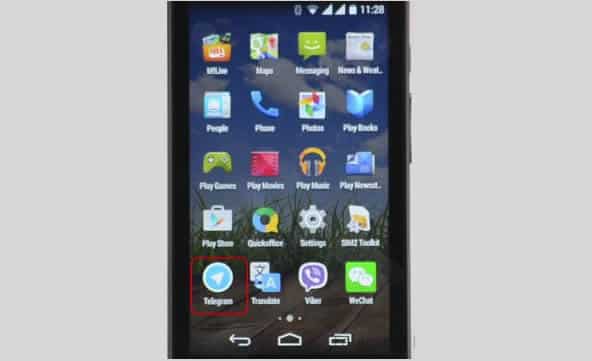
Launch Telegram application.
Tap the Apps button on your Android screen. Locate and launch the Telegram application.
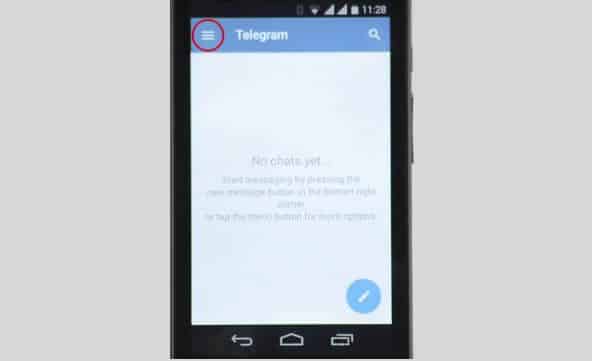
Tap the menu icon on Telegram
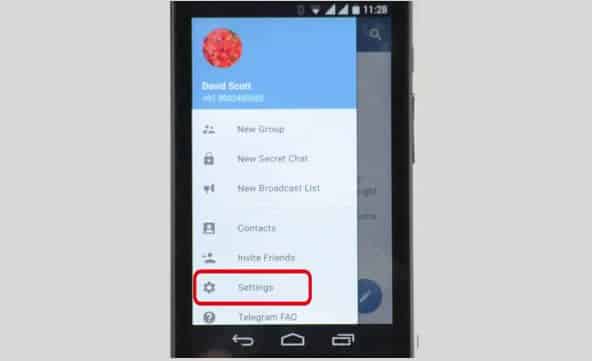
Navigate to Settings
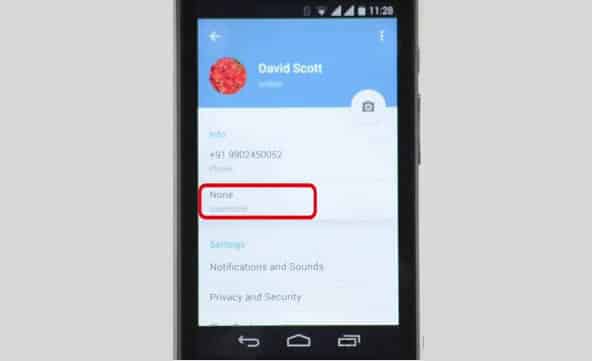
On the Telegram app tap the menu icon (represented with three horizontal lines) and open Settings. Among other options on settings, you will find Username which is set to ‘None‘ by default.
Username is set to ‘None’ by default.
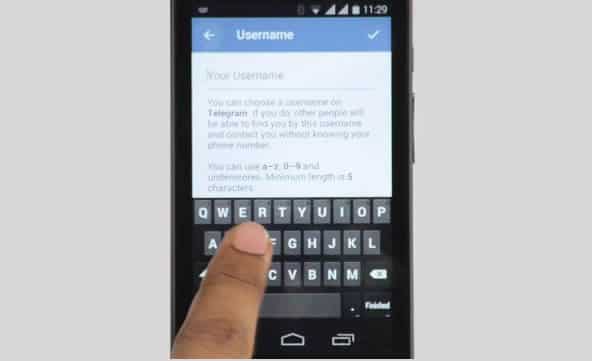
Tap on Username.
Tapping on the Username option will open a page where you can enter or modify your username. Simply enter your desired username on the text input box.
Usernames must be a minimum of five characters — so you can’t make up for losing out on a one-letter Twitter handle here — and can contain letters, numbers and underscores.
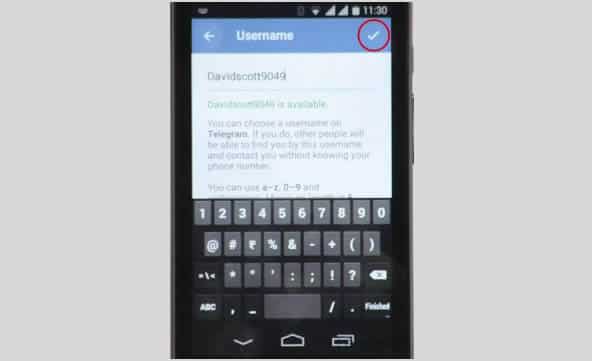
Save your username.
Save your new username by tapping ‘Good’ sign at the top-right side of your screen.
You are also free to change your alias, so long as the new one is not already taken.
How organized is your Windows 10 start menu? Do you have everything you frequently use on the start menu? What about your favorites site? Windows 10 offers tons of choices for desktop programs, and apps from the Windows Store can be useful too. But there are still probably a few key webpages you turn to every day instead of a desktop program or modern UI app.
Wouldn’t it be nice to have those lovely websites available to you on the Windows 10 Start menu? Here’s how to do that.
The Edge way
Microsoft Edge in Windows 10 has pin-to-Start functionality built-in.
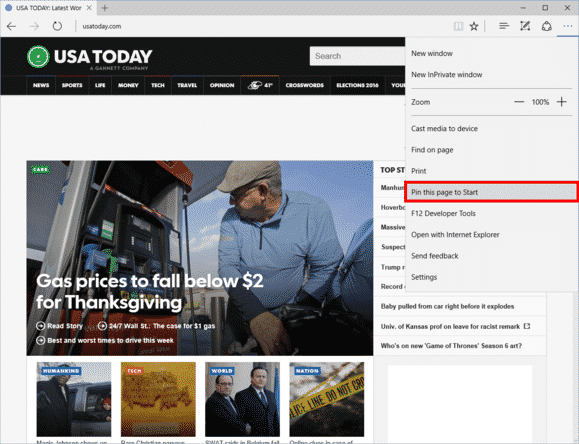
Open Microsoft Edge and then navigate to the page you want to add. In the upper right-hand corner, click the three horizontal dots, and then from the drop down menu select Pin this page to Start. A pop-up window will appear asking you to confirm. Click Yes and you’ll find the site at the bottom of the live tile section in your Start menu.
The downside? This method is that links will only open in Edge. Fortunately, there’s a way around that. If you want links to open in your default browser instead of Edge, you have to use a little bit of trickery, but nothing too complicated.
The non-Edge way
Open Internet Explorer and navigate to the webpage you want to add to Start. For our purposes, let’s say it’s Facebook.
Once you’re on Facebook, right-click in an open space on the site and select Create shortcut from the context menu. IE will then show a pop-up window asking if you want to create a desktop shortcut. Click Yes.
To do the same thing in Chrome and Firefox, go to the address bar and click-and-drag the icon to the left of “http,” and drop it on the desktop. The icon will either be a green lock, a rectangular piece of paper, or a globe.
Pro Tip: In my experience, you’ll generally get better looking icons using Internet Explorer for this step.
Next, right-click the desktop icon you just created and select Copy.
Add to Start
Now type “run” into the Cortana/search box. The top choice should be the Run desktop app.
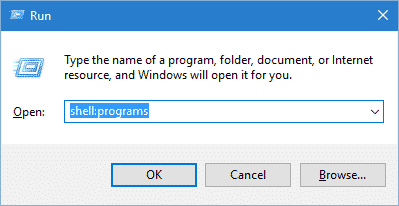
Once Run opens, type inshell:programs, click OK, and an Explorer window will open.
Now just right-click in the main part of that window (be careful not to accidentally open a folder) and selectPaste.
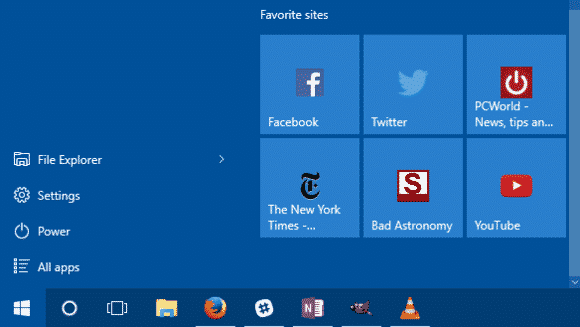
Your website is now in Start but it’s buried in the “All apps” list. To remedy this, just clickStart > All apps and scroll down to the listing in the alphabetical list. Since we’re doing Facebook we’ll look under “F”.
Once you find it, just click-and-drag it onto the live tiles (right) side of the Start menu and you’re done.
After you’ve added your webpages to Start, feel free to delete your shortcuts from the desktop.
If you’d like to take this a step further and add an entire section of websites to Start, check out our earlier tutorial on customizing the Windows 10 Start menu. This will teach you how to group tiles together.
The catch with websites using the non-Edge method is you can’t remove them from Start through the right-click context menu. Instead, you have to type shell:programs into Run and then delete the shortcuts in the Explorer window that opens.
This is something that is almost synonymous with Apple devices. However, this time, Microsoft is taking over the spotlight with their new ‘Find My Device’ feature introduced in November Windows 10 update. The new Microsoft invention is not just for tablets or phones. Any Windows 10 device can take advantage of the new feature, including desktops and laptops.
Although the current version of ‘find my device’ may not take your breath away or have your tablet make a sound, lock itself, erase data, or anything like that when stolen – it’s still a great feature to keep tabs of your device’s location and capture its thief – if needed.
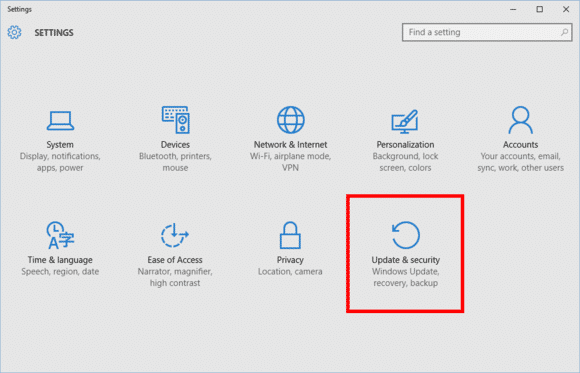
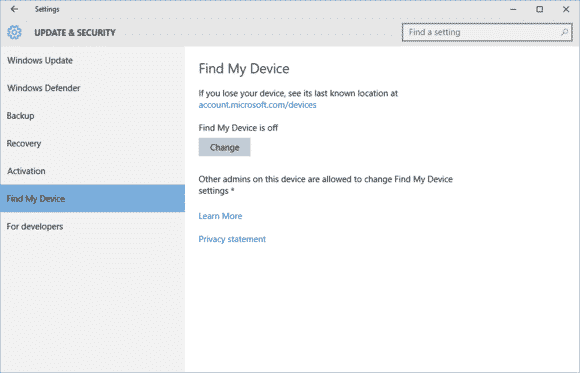
Find My Device is buried under Settings > Update & Security.
To active this feature go to Start > Update & Security > Find My Device.
On this screen you’ll see a big Change button under the heading “Find My Device is off.”
Turn this slider to On and you’re done.
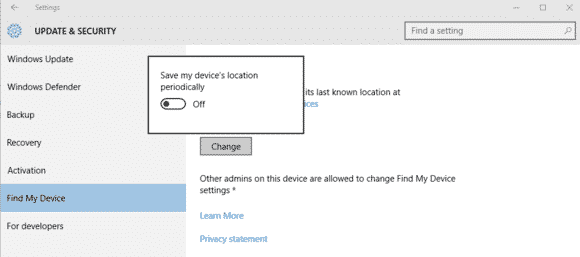
Once you click Change you’ll see a pop-up panel that says “Save my device’s location periodically.” Turn the slider to On and you’re done.
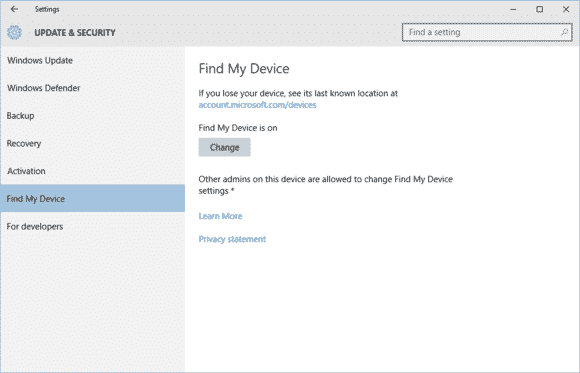
Find My Device is now on.
You should now see that the Find My Device screen has changed to “Find My Device is on” as seen above.
To make sure everything is working, login to account.microsoft.com/devices with your Microsoft account and you should see the name of your PC listed under “Your devices.”
If you don’t know the name of your device, right-click on the Start button and selectSystem. In the Control Panel window that opens you’ll see it under “Computer name.”
If you are a Nigerian studying or residing in any west African country where Glo coverage is available, you can now recharge a Nigerian Glo card in your Glo sim in that country.
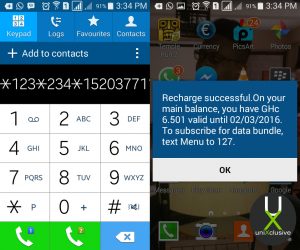
To recharge a Nigerian Glo card on your Ghana line simply dial: *123*234*Recharge Code#
Your old smartphone has a greater destiny than your junk drawer. Believe it or not, you can turn it into, say, a mini-PC or media streamer. Assuming it packs both USB On The Go support (OTG) and a Mobile High-Definition Link (MHL) compatible port, there’s a ton of additional functionality lurking under that its hood. Heck, you can even use a smartphone with a broken screen for this.
Without further ado, here’s how to transform your old smartphone into the brains of an Android-powered PC.
It starts with MHL ports and USB OTG support
Many smartphones from companies like Google, Samsung, LG, HTC, and Sony—among others—ship with MHL ports and have built-in compatibility for USB OTG as well.
The MHL port essentially adds HDMI output capabilities (with 1080p and 7.1-channel digital multi-channel audio support) and remote control functionality to the phone’s micro-USB port—the port you most likely use to charge the phone. USB OTG support gives mobile devices the ability to connect to and work with many different USB peripherals, like storage devices and input devices. Combine the two, and a mobile device with MHL and USB OTG support is capable of connecting to a discrete external display and peripherals like a keyboard or mouse.
You can see where we’re headed here.
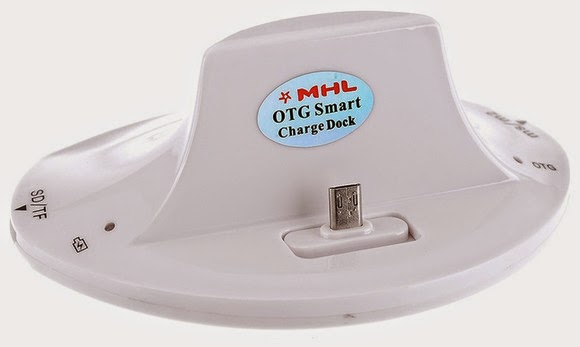
A number of companies have released proprietary “docks” for their mobile devices that leverage both MHL and USB OTG, but they tend to be expensive and work only with one particular device. Some third-party manufacturers have also released near-universal multi-function docks, however, that can be had for only a few bucks.
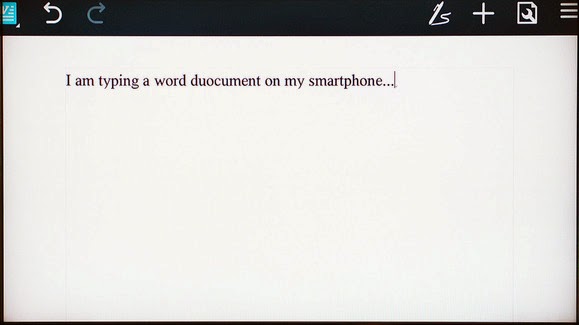
We purchased a VicTsing OTG MHL to HDMI multi-function cradle for only $25. It works with a wide range of devices and offers dual USB ports, a couple of flash card readers, HDMI and audio output, and a charger. By connecting this simple dock to a display and a keyboard and mouse, it can essentially transform a smartphone into a basic Android-powered PC. Throw some Office-style apps on the phone and you’re ready for some actual productivity.
Making the connections
The VicTsing cradle’s port selection.
Using a dock with USB OTB and MHL support is very simple and straightforward. Though we only tested it with a couple of Samsung phones (a Galaxy Note 3 and Galaxy S4) and an HTC phone (an HTC One X), the process and behavior should be similar with compatible devices.
MARCO CHIAPPETTA
The dock has an HDMI output that gets connected to a secondary screen. (A HDMI-to-DVI conversion cable can work if you have a spare monitor laying around). In our tests, both a cheap 1080p monitor and a Toshiba HDTV connected perfectly. The dock also requires power, which comes by way of a standard micro-USB charger; you can connect the included USB cable to a USB port on a TV or monitor, or simply use your phone’s charging cord.
A keyboard and mouse can simply be plugged into the full-sized USB ports. You could use wireless keyboards and mice as well, as long as they use standard USB HID (human interface device) drivers. Multimedia keys and other custom keys on fancier keyboards won’t work.
Once the physical connections are made, ensure the display is configured to use the correct input and simply slide the phone onto the dock, inserting the dock’s male connecter into the phone’s MHL/micro-USB port. When the smartphone is fully connected to the dock, its screen will go dark and output will be sent to the secondary display. Boom! Your old smartphone is now essentially an Android PC. It really is that simple!
On the Samsung smartphones, everything we tried automatically rotated into landscape mode, which made it ideal for multi-media playback or working on office documents.
Getting around
Smartphones with USB OTG and MHL support will typically auto-rotate most content into landscape mode when connected to a secondary display.
Navigating through the various menus on Android can be somewhat clunky when using a keyboard and mouse, but it’s fairly intuitive once you start poking around. Right-clicks act as a back button, while left-clicking behaves like a tap of the touchscreen. Many in-application icons and menus—even the mouse cursor itself—appear oversized on a big screen, but they function as expected.
We wouldn’t trade an actual PC for a smartphone and USB OTG / MHL dock, but for a relatively small investment (especially if you’ve already got the monitor and input devices on hand) you can easily get some work done on one of these setups.
Often, you have heard people tell you, ‘talk is cheap’, and you begin to wonder just how much you have spent on voice calls in the last decade. Here in Ghana, talking and just talking is part of our day to day affairs. Every now and then, we have been cut short in the middle of having a conversation on the phone. You can’t complain, you simply find the nearest kiosk, purchase a credit and continue talking from where you left off.
What if your car broke down in the middle of no-where? Your airtime balance is reading GH¢0.0, you have used your last Pesewas to say farewell to the girl you dropped off? This is where you need to borrow airtime.
The ‘borrow credit’ service in Ghana allows you to take a small loan (in form of airtime) from your network providers and pay back later. With this service, you are guaranteed to never be stranded again as long as you have your cell phone and network coverage in your location.
Even though this offer seems irresistible, the down side is that most network providers like MTN and Vodafone takes back their loan instantly on your next recharge – with Airtel and Tigo, you will need to dial a number to pay back your loan.
Vodafone SOS Credit
Get credit when you need it the most through Vodafone Ghana SOS Credit. Borrow credit when you have less than GHc 1 and pay back the next time you top up. You must be a Vodafone Ghana user for more than 15 days before you can access this service.
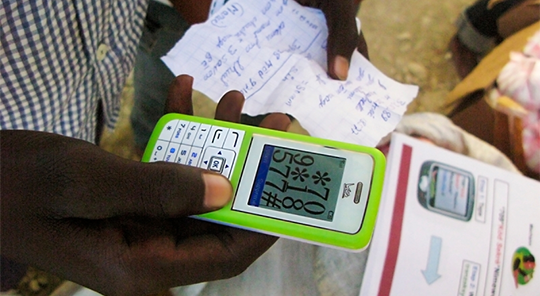
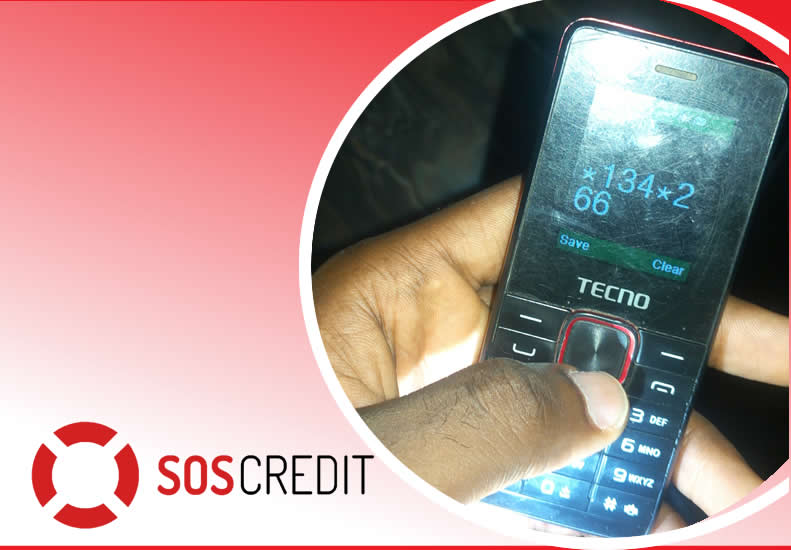
It’s simple! Just dial *505# to borrow credit. You can borrow GHc 2, GHc 5, GHc 10 and GHc 15. A service charge of 10% of the requested credit is charged as commission.
MTN Xtra Time
MTN Xtra Time is a service that allows MTN customers to borrow and use an overdraft amount based on the their spend and the no. of years on MTN. To borrow more talk time on MTN Ghana, dial *506# and select your option.
Glo Borrow Credit
To borrow credit on the Glo Ghana network, simply dial *5321# and select Borrow Credit. Select the amount you want to borrow and send.
Airtel Borrow Me
Dial *130#. A service fee will also be charged on the amount you borrow. You can track your usage of the borrowed credits by dialing *130*10#.
Borrow Credit from TIGO
Dial *188# or call 188 and follow the voice prompt to receive airtime to pay later upon recharge.
Remember you need to pay for your previous loan before requesting a new one!
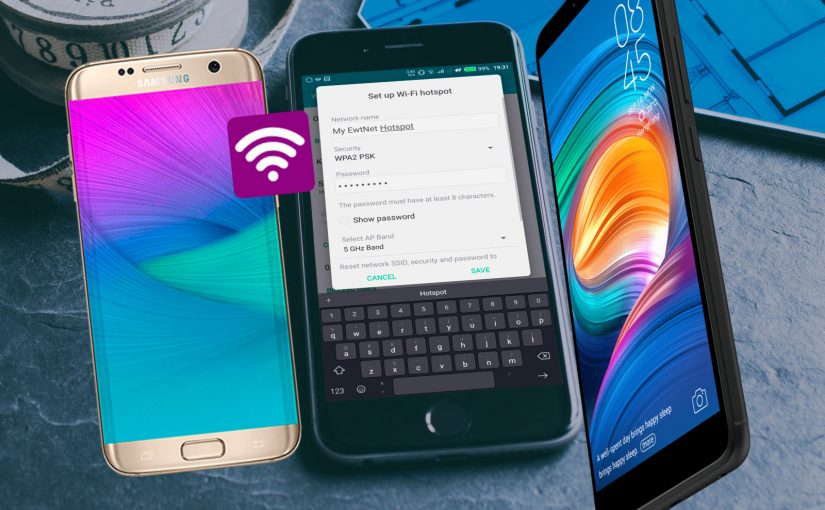
If you don’t have a home internet access, your best bet is to use your Android smartphone to distribute your cellular Internet connection to your other devices. Using our guidelines provided in video, picture gallery and text format you can learn how to configure Wi-Fi hotspot in an Android smartphone.
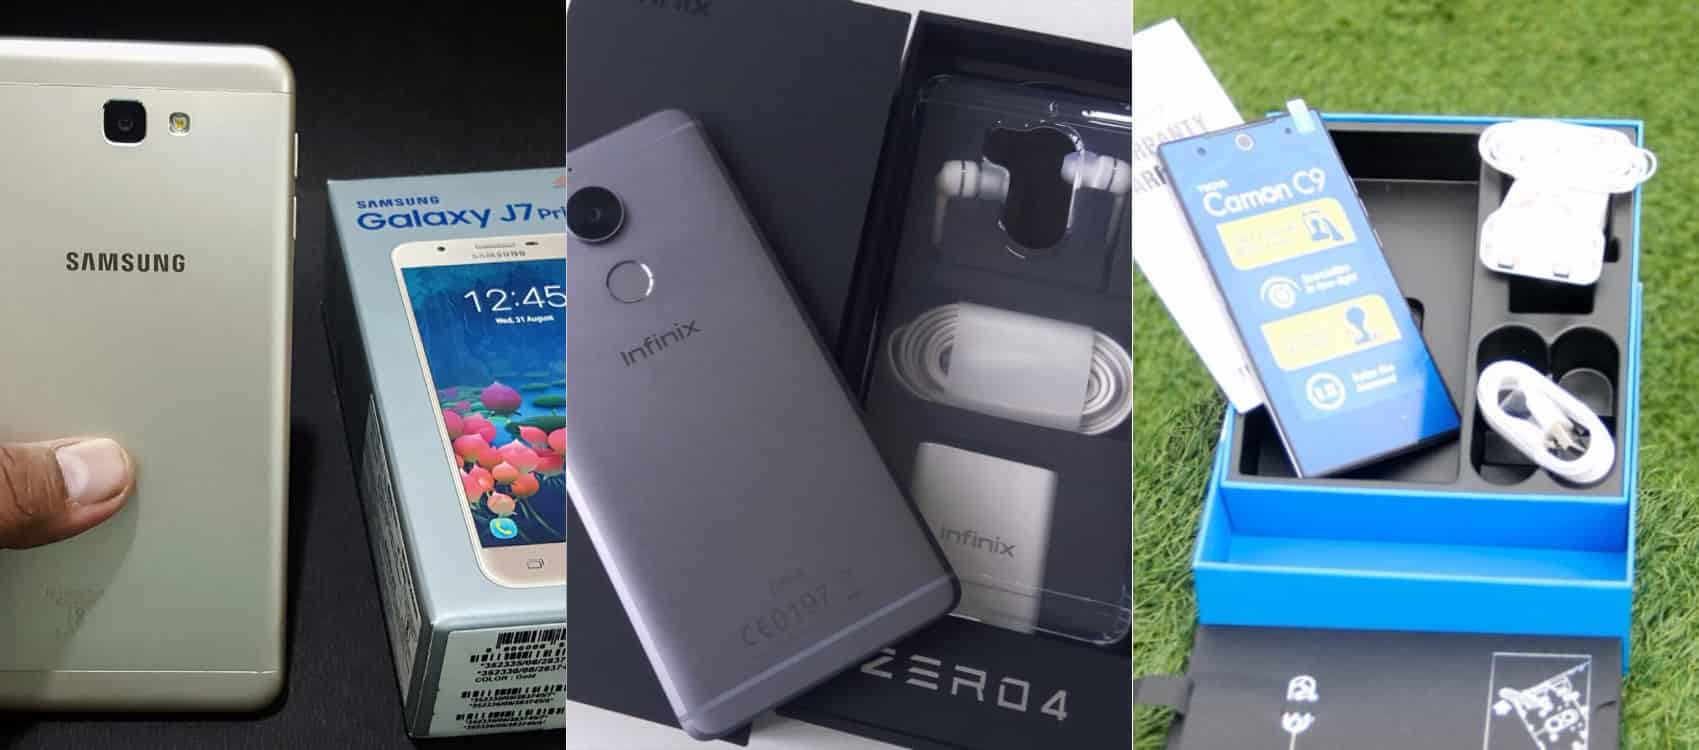
Smartphone usage statistics from Jan-Oct 2014 shows that Android OS is winning the smartphone war in Nigeria. Infinix, Tecno and Samsung smartphones are at the very top of the food chain in Android smartphone usage among Nigerians.
Since most internet users [in Nigeria] access the internet from the mobile data, it makes sense for Android users to get acquainted with the inbuilt portable hotspot facility that comes pre-installed in most Android devices.
Be it on Huawei Y6 Prime 2019, Samsung Galaxy S10+, Infinix Zero 5 or any Android smartphone out there, these guide is ready to get you started with portable hotspot on your device.
Click on any of the formats listed above to access this tutorial in that format.
How to use and configure Wi-fi on Samsung, Teno, Infinix and other Android smart phone?
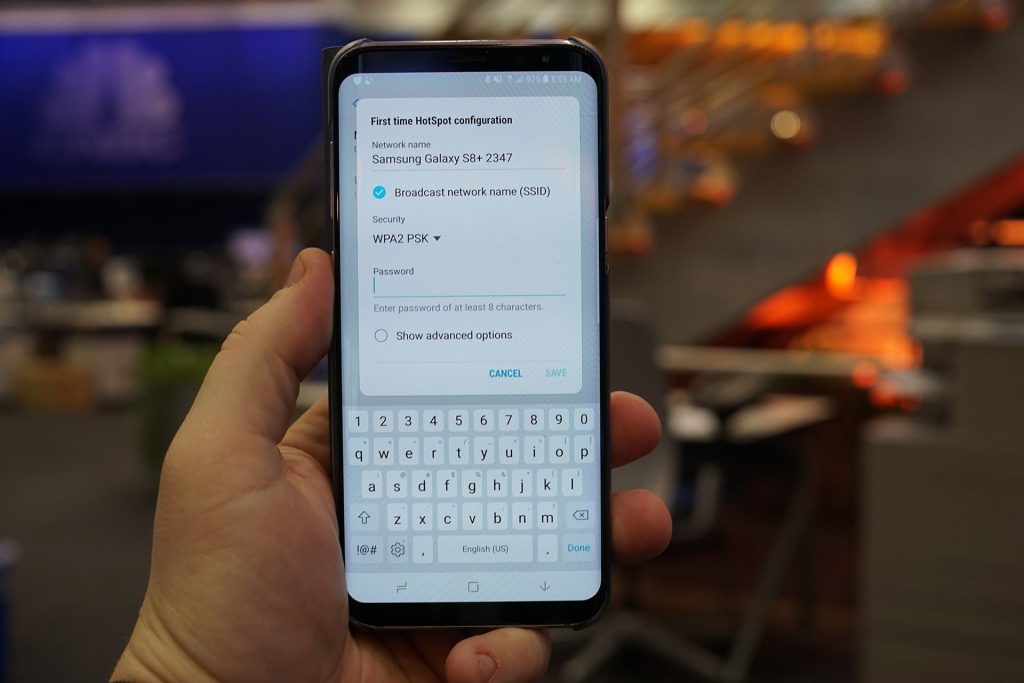
Configure Wi-Fi hotspot on Samsung Galaxy S8
Time needed: 2 minutes
Follow this step to step guide to learn how to configure Wi-Fi Hotspot on your Samsung, Tecno, Infinix and any other Android smartphone.
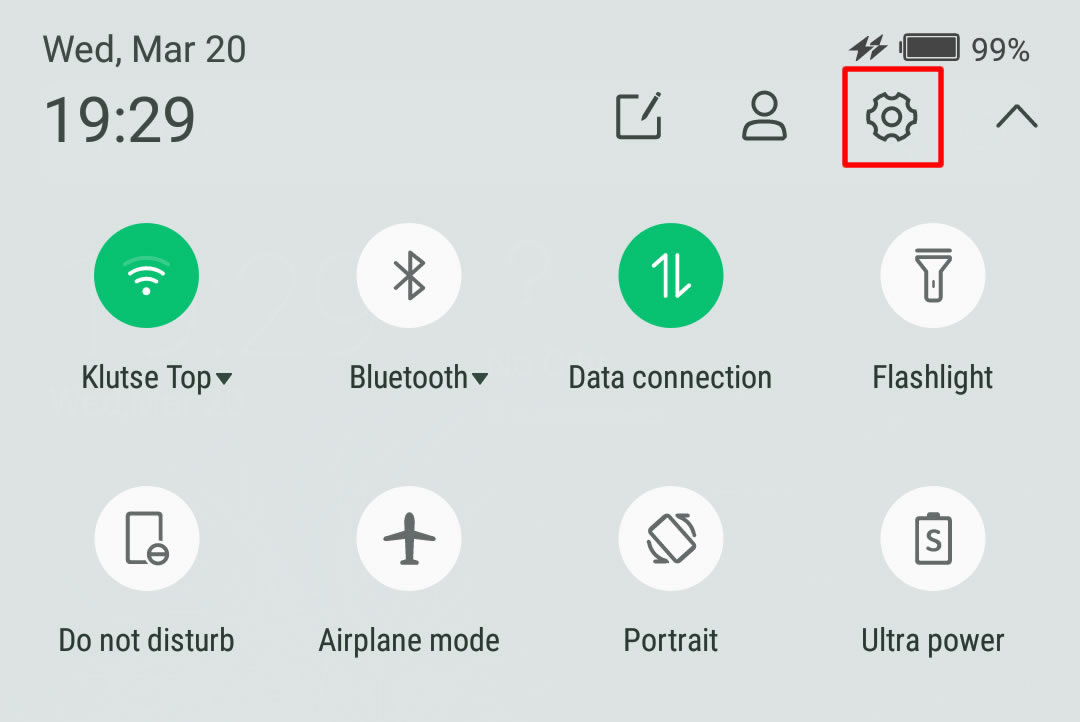
Go to your Android phone’s settings
From the Home screen, tap the Application screens icon > Find and tap Settings.
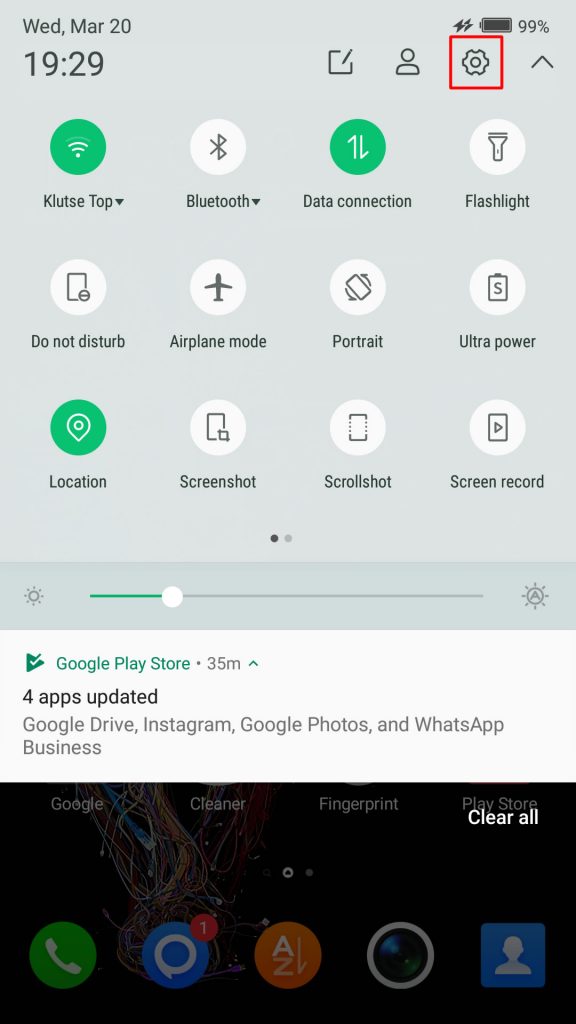
On newer versions of Android, you can simply pull down Android control panel and click on the gear icon.
Wireless & networks settings
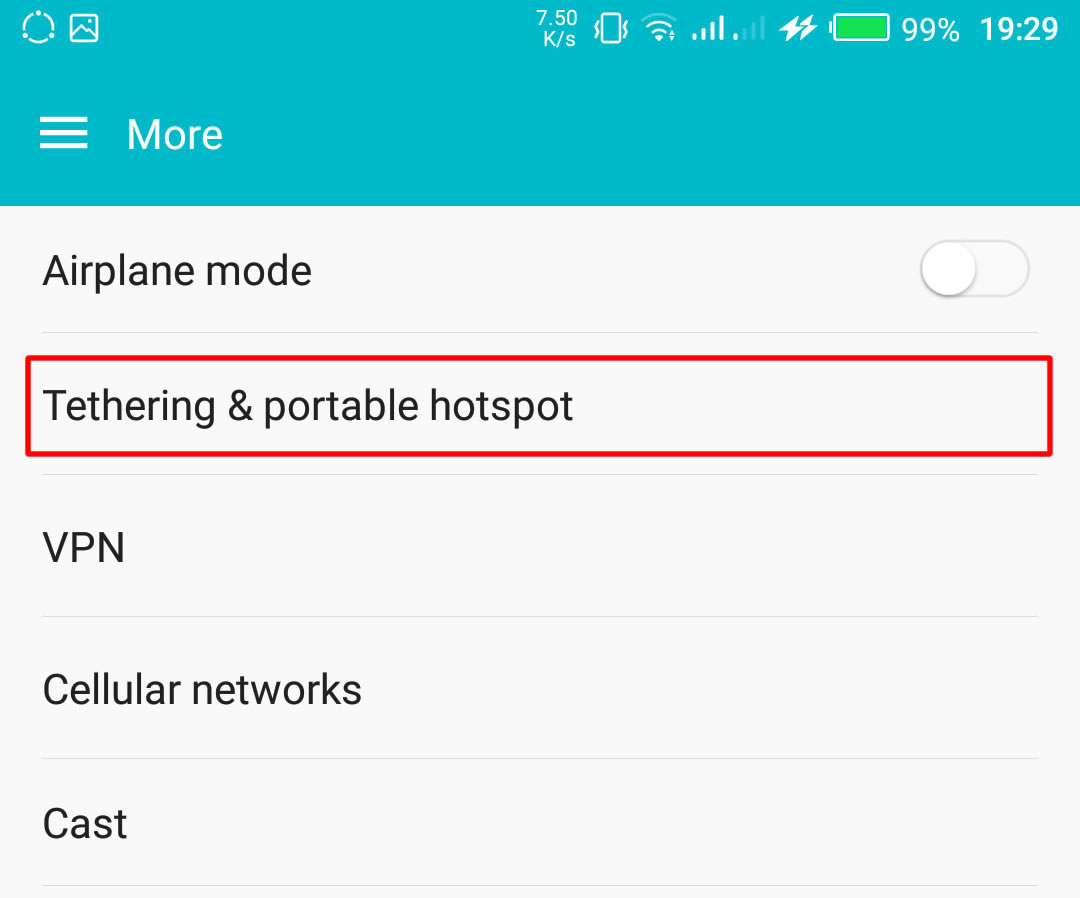
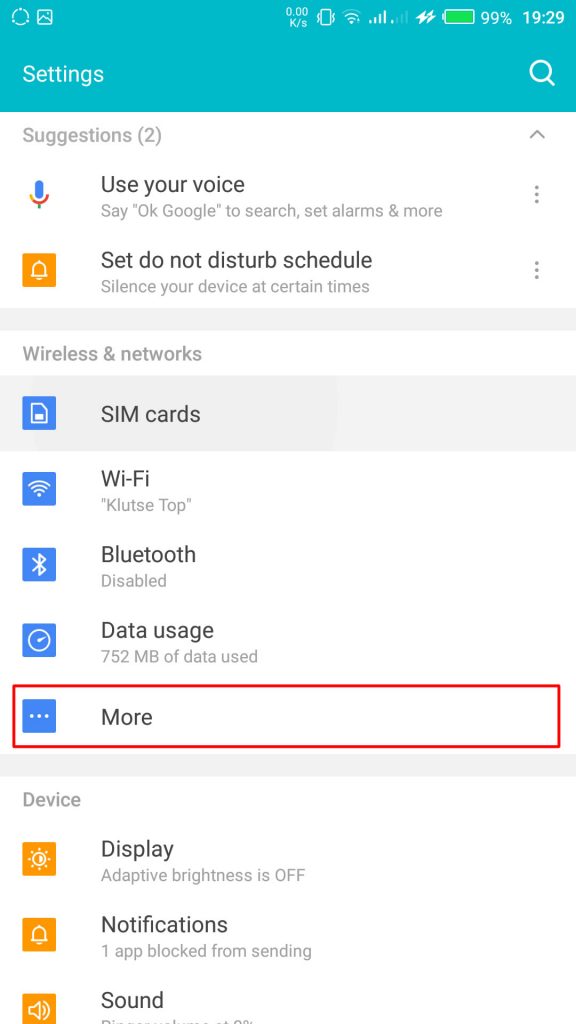
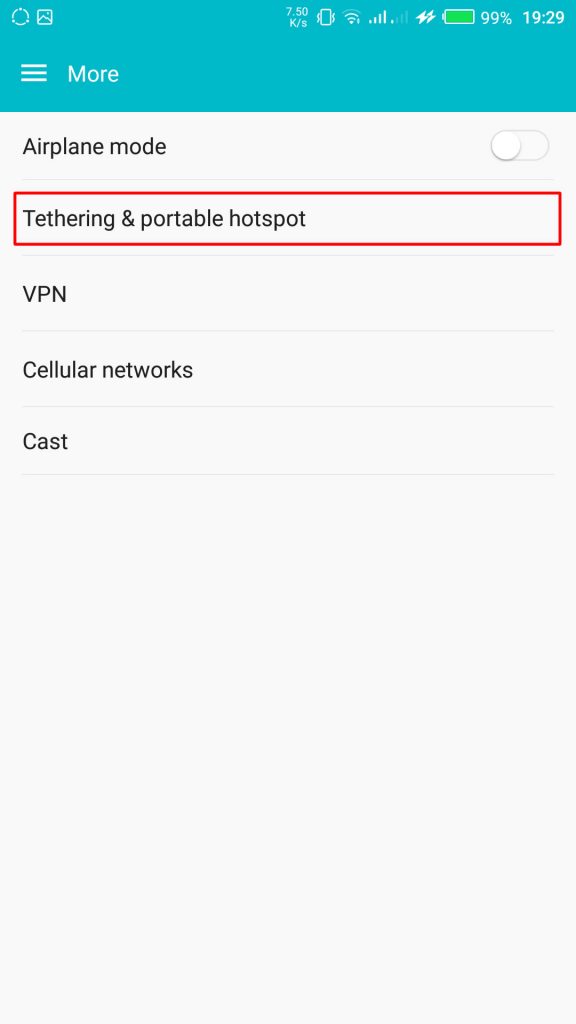
From your Settings screen, locate Wireless & Networks block and tap Tethering & Portable Hotspot. If you can’t find Tethering & portable hotspot on your settings home screen, tap More > Tethering and portable hotspot.
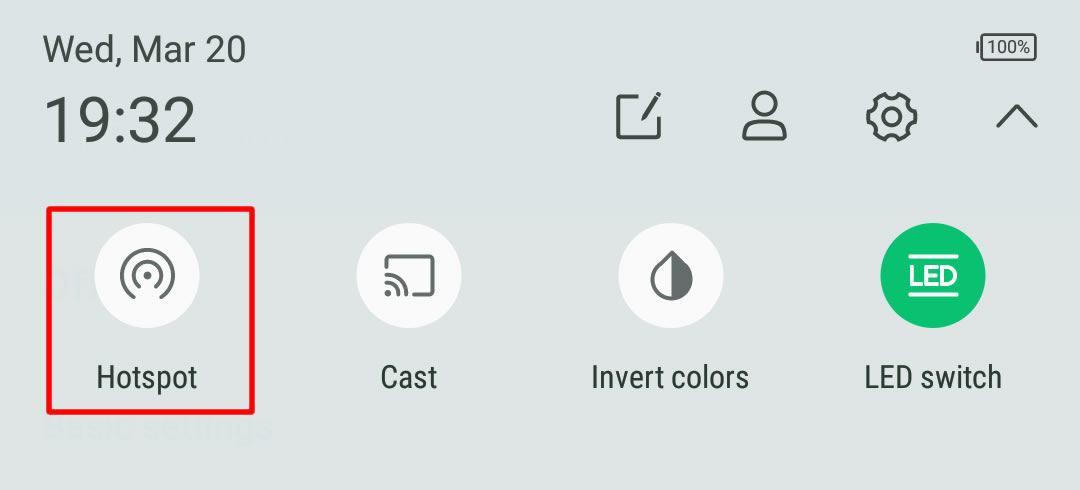
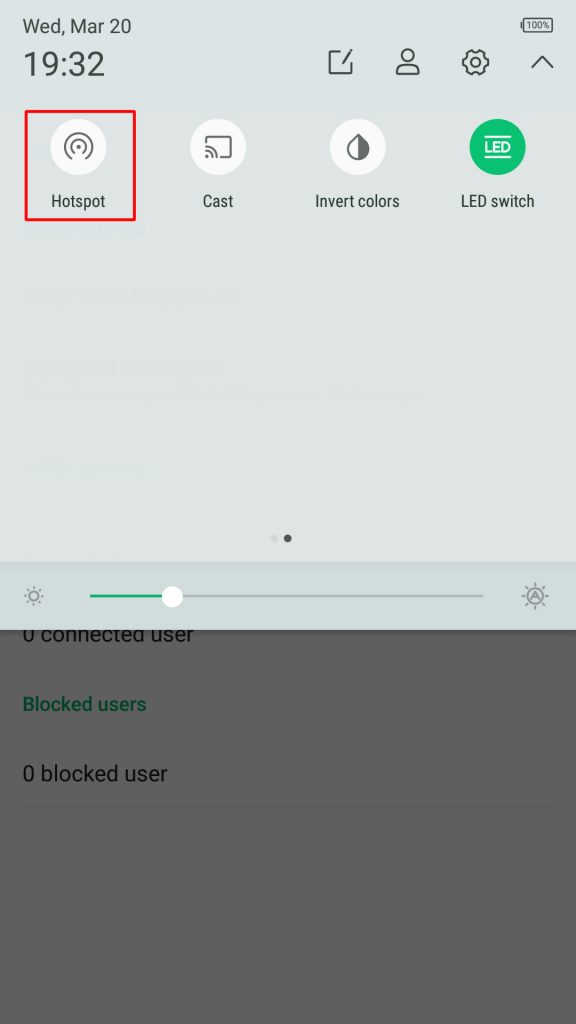
On some version of Android, you can hold the upper screen of your Infinix smartphone or Tecno smartphone and scroll down. Turn “On” hotspot from the menu. You will see a notification requesting you to touch to configure hotspot, just touch the notification.
Configure Wi-Fi Hotspot
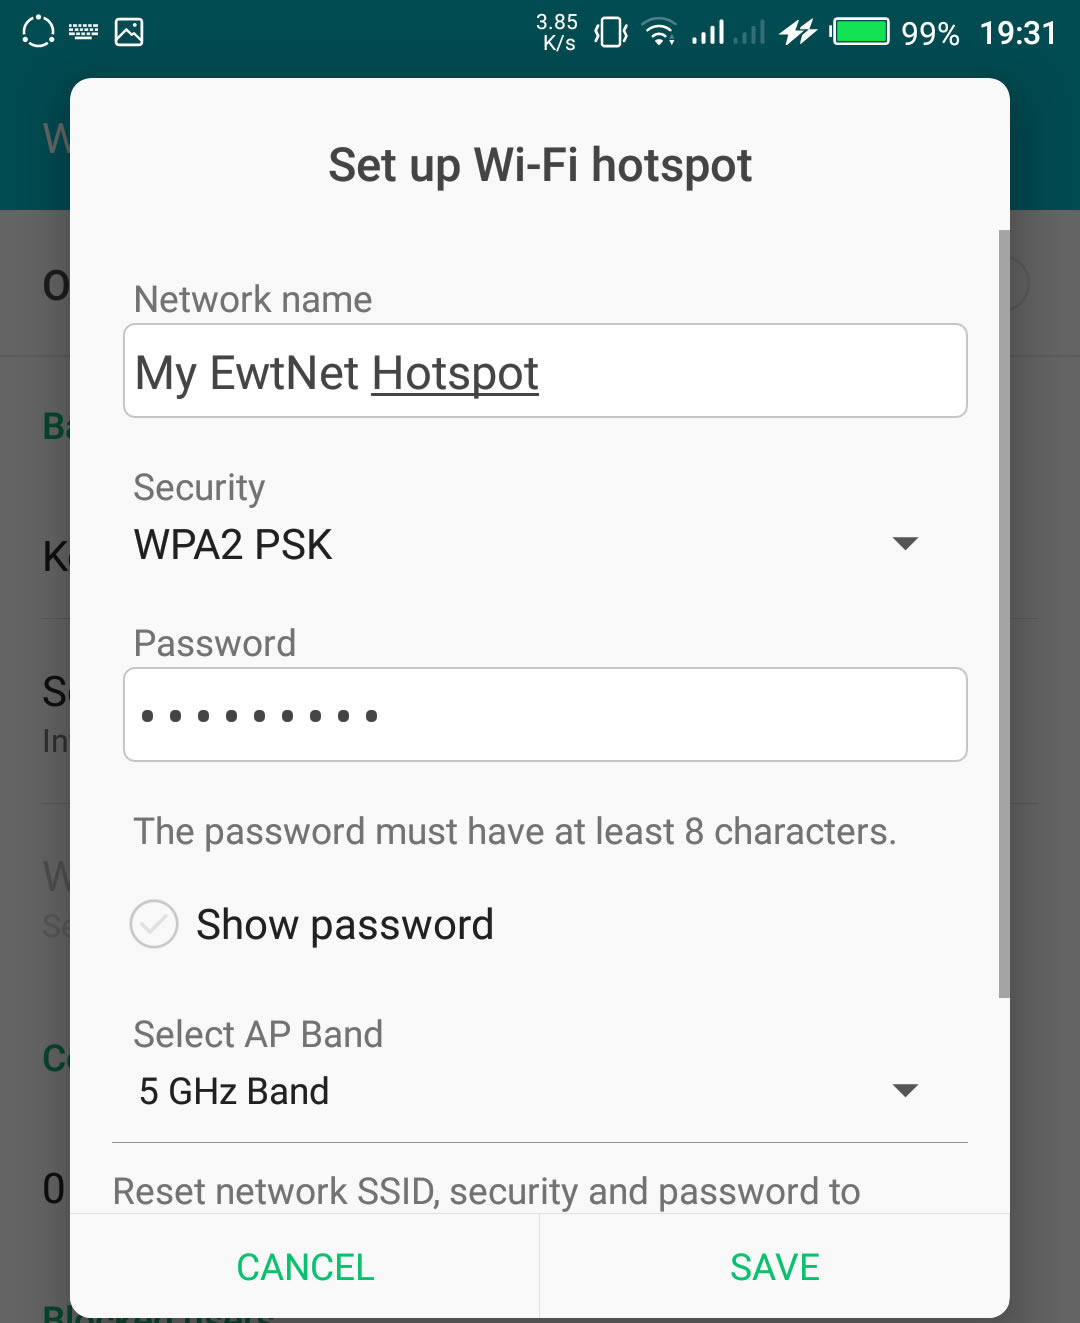
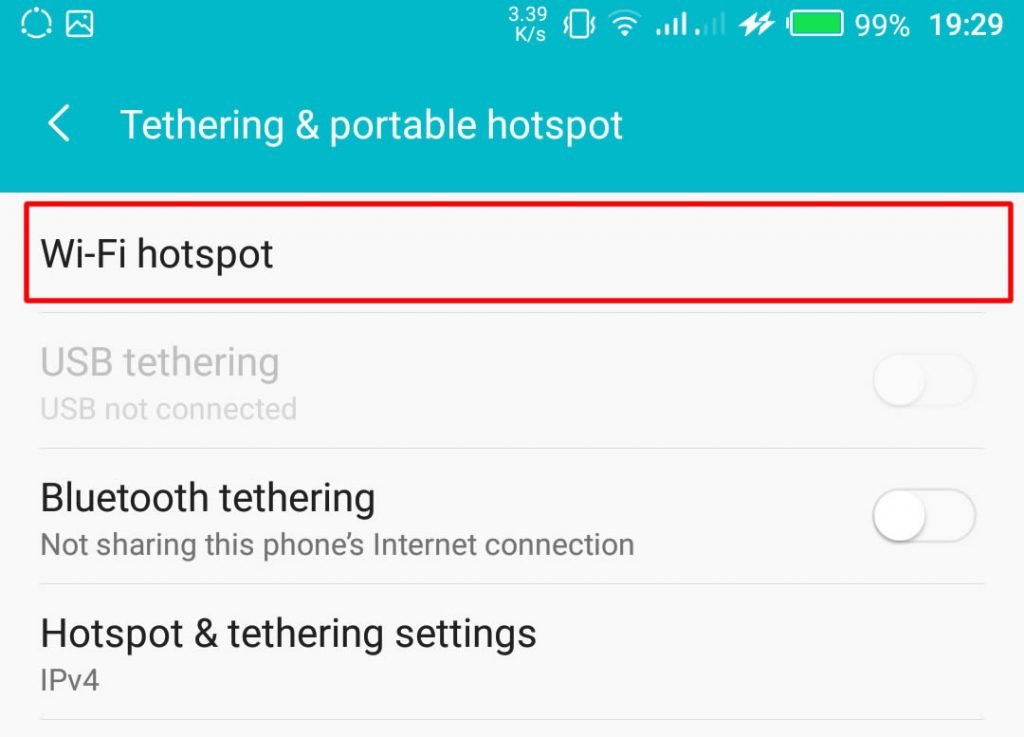
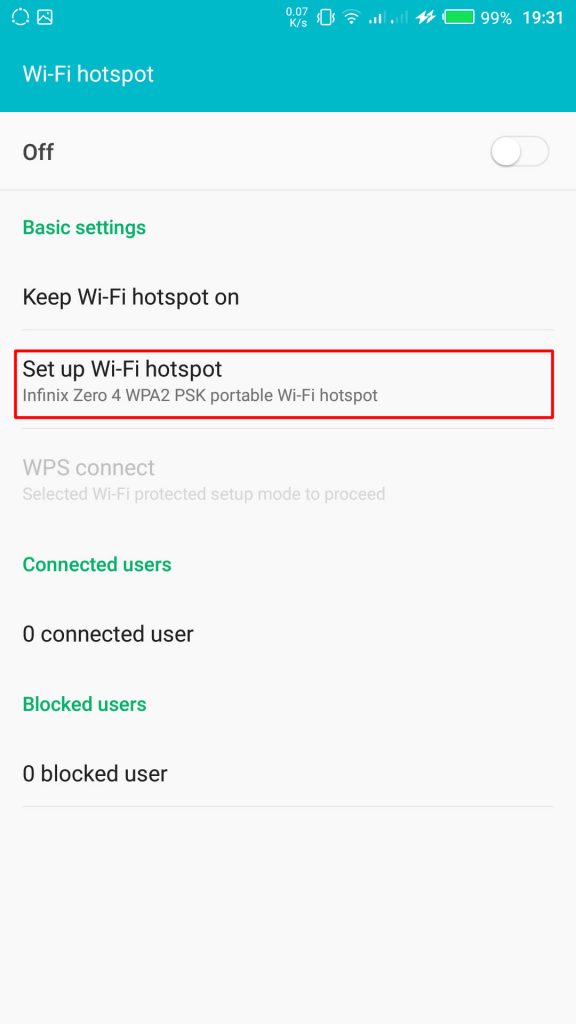
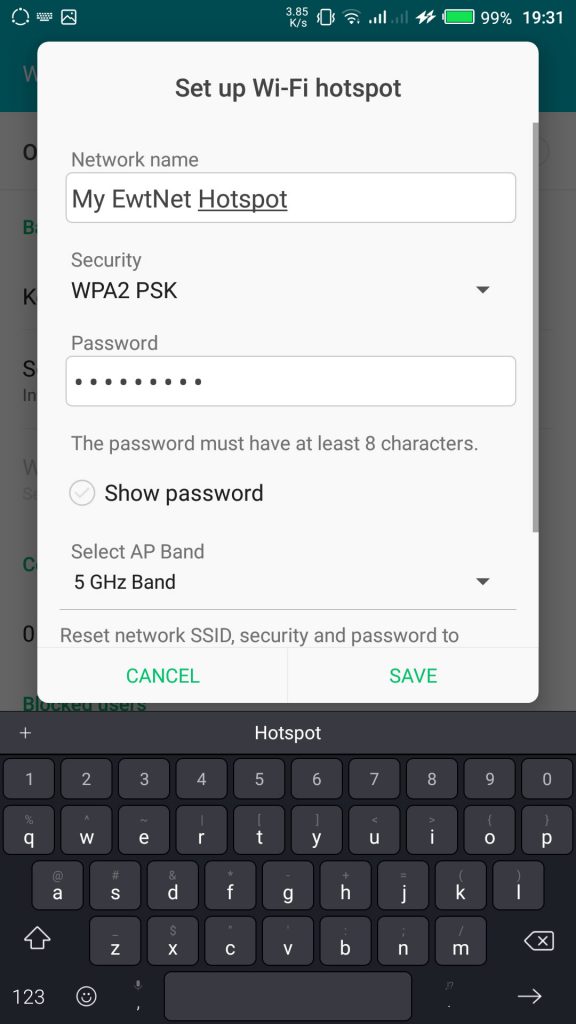
From the Tethering & portable hotspot screen, tap Wi-Fi hotspot and select Set up Wi-Fi hotspot. Here you can set your WIFI’s SSID and security.
The SSID or Network Name is the name of your Wi-Fi connection. Change the name to any name of your choice, the default name is usually “AndroidAp”
You can change the security option, to any of your choice, such as, “Open” which allows any WI-fi enabled device to connect to your smartphone without requesting for a password. While WPA PSK and WPA2 PSK allows you to put your preferred password.
Using Portable Wi-Fi hotspot on Android Smartphones
Your WIFI hotspot is now functional and can be used on basically every Android device that support WiFi connection including, Honor 8X, Infinix Diamond, Tecno Camon 11 Pro, Xiaomi Redmi Go, Tecno phantom and on any PC that has a WiFi adapter.
Turn on your Infinix WLAN hotspot and your laptop WLAN and search for available networks and connect. That’s all you need to configure your WLAN Hotspot and start using your Infinix smartphone to power your laptops and smartphones WLAN, up to multiple devices simultaneously
If you going to use your mobile data on your PC be ready to re-adjust your monthly data budget. Luckily, network providers in Nigeria and Ghana has improved their data offers in recent years.
How to use and configure Wi-Fi on Infinix smartphones in Pictures?
This picture walk-through guides you on how you can set up Wi-Fi hotspot on your Android smartphone using infinix example.
Click on the images to expand and use the arrow keys to browse.
Tap and drag down the top area of your Android phone to open the Android control panel > tap on the gear icon.
From your Settings screen, locate Wireless & Networks block. This is where configure network services like Bluetooth, Wi-Fi and mobile data. Tap More to open more network settings.
From More in Wireless and Networks settings, tap Tethering & Portable Hotspot. This will open the Tethering & Portable hotspot setting screen.
Tap Wi-Fi hotspot to open the hotspot management screen.
Ta Set up Wi-Fi hotspot to configure your Wi-Fi hotspot network name and password.
Here you can set your WIFI’s SSID and security. The SSID or Network Name is the name of your Wi-Fi connection. Change the name to any name of your choice, the default name is usually “AndroidAp”
You can change the security option, to any of your choice, such as, “Open” which allows any WI-fi enabled device to connect to your smartphone without requesting for a password. While WPA PSK and WPA2 PSK allows you to put your preferred password.
Once you’re done, get an Internet plan for your phone, turn on your mobile data and hotspot.
Your WIFI hotspot is now functional and can be used for multiple devices.
After you’re done, all you have to do is turn off the hotspot.
The same techniques will work on all Android devices. Using your mobile data on PC is obviously going to be more costly than Internet to the home bills, you may consider this data subscription plans to make an informed decision.
Video Guide on How to Use and Configure Wi-Fi Hotspot on Android Smartphones
The video demonstration is recorded on Infinix Zero 4 smartphone, but the same procedure is used to configure Wi-Fi hotspot on any Android device.
If you’ve ever wished that the screen on your Android phone or tablet stayed on longer before going to sleep, you’re not alone. Luckily, this can easily be adjusted in the settings with just a few taps. Not only that, you can prevent your Android device from sleeping while it’s charging, too.
The term ‘screen timeout’ refers to the time it takes for your smartphone or tablet to go to sleep (the screen turns off) after you’ve stopped interacting with it. The average screen timeout sits around 30 seconds to one minute, depending on your device. For many users, this is acceptable, but there are times that you might wish that your phone didn’t go to sleep so quickly.
Maybe you’re looking at a recipe on your tablet in the kitchen, your hands are covered in food, and you need to get to the next step. Maybe you’re reading a walkthrough for a video game and just want to glance over to see what to do next without pausing. Here’s how you get your screen to stay on longer.
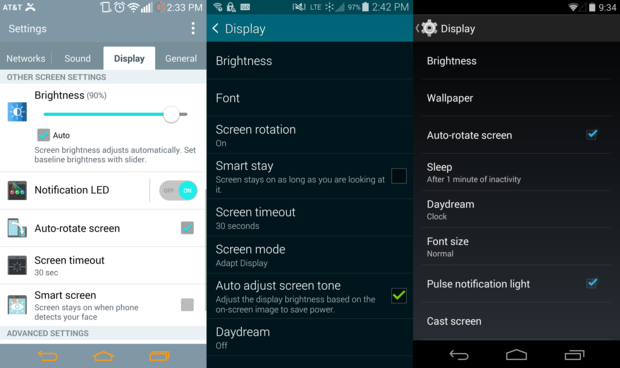
Depending on your phone, the Display Settings can appear in a tab or window, but will you give the same options.
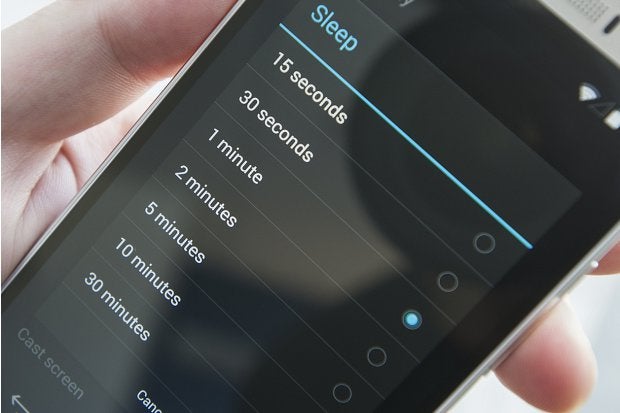
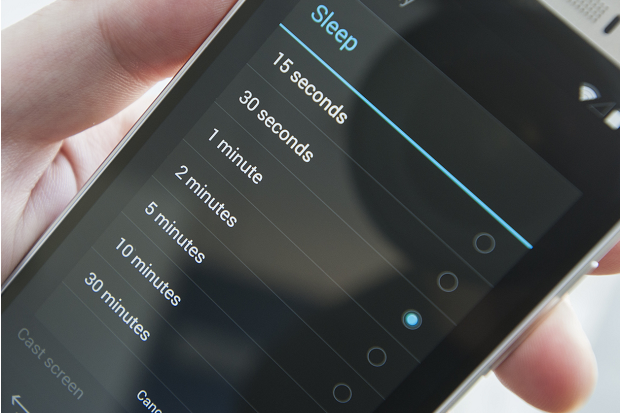
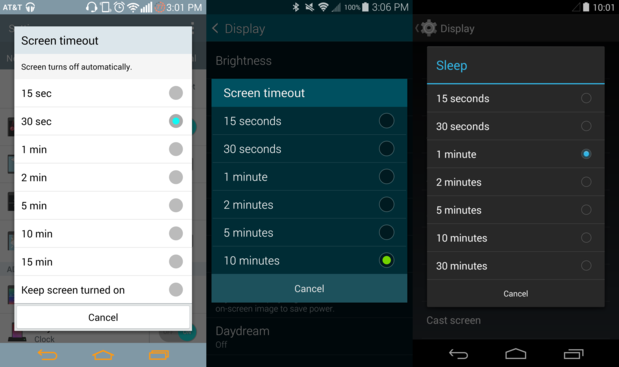
To get started, go to the Settings > Display. In this menu, you’ll find a Screen timeout or Sleep setting. Tapping this will allow you to change the time it takes your phone to go to sleep.
Certain phones offer more screen timeout options.
Select the timeout option that you’d like, and you’re done. Keep in mind that the display is one of the biggest battery hogs on your phone, and a longer screen timeout setting can, and likely will, lead to faster battery drain. Make your phone a night owl while charging
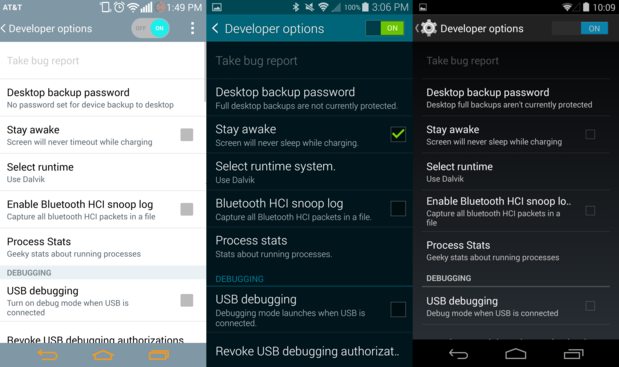
Daydream not good enough for you? Android gives you the option prevent your phone or tablet from sleeping while it’s charging. First, you need to unlock Developer options.
If you check the Stay Awake box in Developer options, the screen will never turn off while its charging unless you press the power button.
Once you have enabled the Developer options, check the Stay awake box to keep your phone from sleeping while you have it plugged in. Of course, pressing the power button will still turn the screen off, just in case you want to get some shut eye at night.
All rights reserved. Blake Stimac — Staff Writer, Greenbot [Image credit: Greenbot]
COMMENT: If you find your Firefox very disappointing and even considering a change, EwtNet is offering you something that might keep you longer on the Mozilla internet browser.
Is your Firefox lagging, hanging or extremely slow to start?
Are you currently thinking of quitting Firefox for good? Here is something that might help you change your mind.
Statistics by W3school shows that Mozilla Firefox has only an average of 28.2% overall desktop users in 2013 while Google Chrome in the same year had an overall average of 52.6% desktop users. Comparing the browsers stats in 2010 Mozilla Firefox comes up with an upper hand with 46.4% of overall desktop users, while Google Chrome can only boast of 15.9%. Meaning that Firefox has lost 18.2 of it’s users to Google Chrome and other browsers since 2010.
If you are the next Mozilla faithful who is planning to Jump ship due to the slow response of your browser, resetting Firefox might change everything.
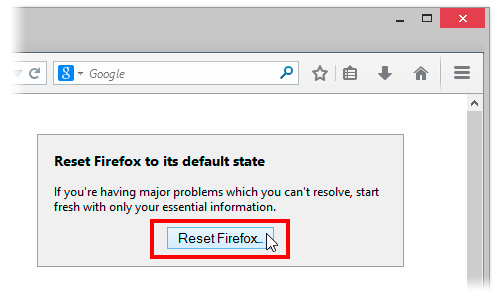
The reset feature fixes many issues by restoring Firefox to its factory default state while saving your essential information like bookmarks and open tabs. All of your Firefox settings and personal information are stored in a profile folder. The reset feature works by creating a new profile folder for you while saving your important data.
Resetting Firefox will remove your Extensions and themes, website-specific preferences, search engines, download history, DOM storage, security settings, download actions, plugin settings, toolbar customizations, user styles and social features.
How to Reset Firefox to It’s Default State
Resetting Firefox can be done through the Troubleshooting information page.
Click the menu button and then click help .
From the Help menu choose Troubleshooting Information.
Click the Reset Firefox button in the upper-right corner of the Troubleshooting Information page.
To continue, click Reset Firefox in the confirmation window that opens.
Firefox will close and be reset. When it’s done, a window will list the information that was imported. Click Finish and Firefox will open.
Another way of accessing the Troubleshooting Information page is by entering about:support in your address bar. Hit enter to bring up the troubleshooting information page. Follow step 3-5 above to reset your browser.
What if Resetting Does Not Work
If after resetting your browser you still find Firefox lazying about, you might consider doing any of the following:
Start Firefox in safe mode to see if there are any changes.
Disable all plugins and extensions one-by-one to see if any took up a lot of memory usage. Firefox memory usage sometimes can reach over 400 Mb
If your browser often lag while watching YouTube videos, try installing a freeware program called Firemin which apparently stops memory leaks when used to launch Firefox.
If none of this worked, the ultimate solution is to wipe Firefox clean from your computer and installing a fresh copy of the application.
Note: It is essential to print these steps or view them in another browser.
Download the latest Desktop version of Firefox from http://www.mozilla.org and save the setup file to your computer.
After the download finishes, close all Firefox windows (click Exit from the Firefox or File menu).
Delete the Firefox installation folder, which is located in one of these locations, by default:
Windows:
C:Program FilesMozilla Firefox
C:Program Files (x86)Mozilla Firefox
Mac:
Delete Firefox from the Applications folder.
Linux:
If you installed Firefox with the distro-based package manager, you should use the same way to uninstall it – see
From the oldest libraries on the Web to the modern book shelves, EwtNet has searched all corners and compiled the most thrilling places virtual bookworms can have a good read and download free E-books
Since the beginning of time men has been searching for one knowledge or the other. Reading is one of the simplest method of acquiring knowledge best known to man. The invention of the Web and various technologies has insured that books can be fully represented in digital media format know as E-book.
Whether you are developer seeking for handouts, a student searching for information or just another book nerd looking for the next great book to sink your teeth into? We have compiled a list of the best shelves to pick your favorite E-book and even more, have a good read without spending a dime.
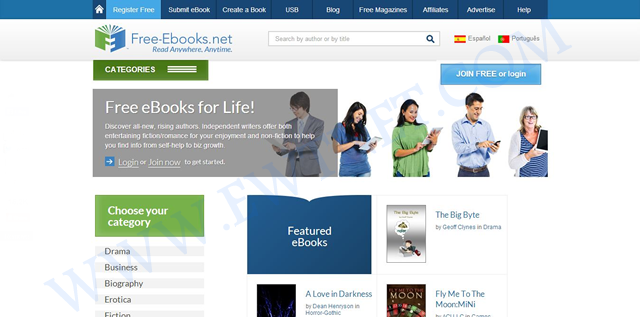
Topping our list today is a free E-book community site Free-Ebook. The site is an online source for free E-book downloads, E-book resources and E-book authors in over 80 categories. Besides free E-books, you also download free magazines or submit your own E-book.
The online e-book library is recommended for everyone, especially to students and fictional book lovers. If you need to get something nice for your kid, you might want to browse through the Children Audio Books category.
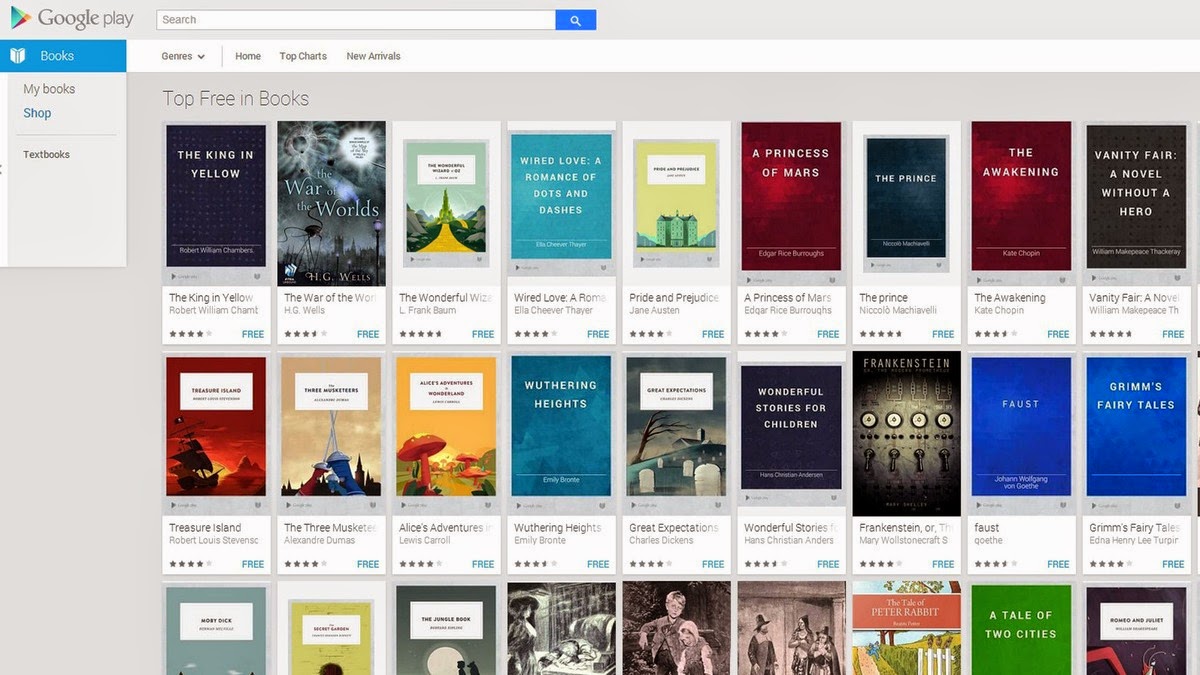
In the midst of stiff competition from other free e-book sites, it will be unfair not to include the Google Book Shelf. The Google eBookstore is a home to tons of premium and free e-books from a variety of genres. You can filter your search to bestsellers, favorite classics and more. Books are available in several formats, and you can also check out ratings and reviews from other users.
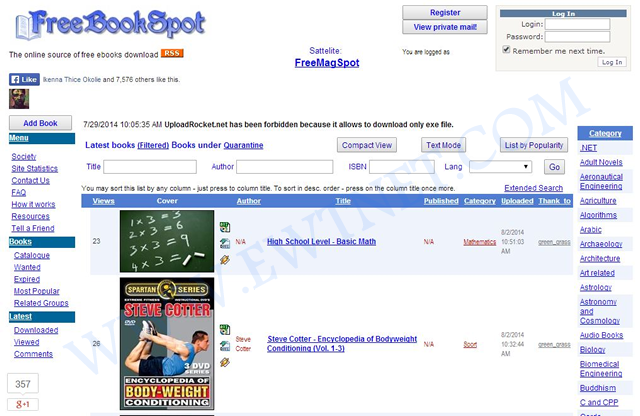
Free Book Spot is a free e-books links library where you can find and download free books in almost any category. Created November 2006, Free Book Spot is one of the oldest e-book library you can come across. The library houses 187,565 e-books in more than 90 categories.
The simplicity of the site makes it easier to navigate through pages and look up e-books using the search box.
If you are looking for tutorial handout on any tech-related subject, Know Free is the shelf you might want to start looking from. No registration or fee is required and has 15 categories.
The Open Library can boast of over 1 million free e-books available on it’s shelves. This library catalog is an open online project of Internet Archive, and allows users to contribute books or make correction to the catalog. You can easily search by the title, author and subject.
One of the unique features of Open Library is the E-book borrowing: Open Library account holders can borrow an eBook from the growing collection of mainly 20th Century titles available now. Each title can be borrowed by one patron at once, and you can read it in a web browser or in Adobe Digital Editions as a PDF or ePub.
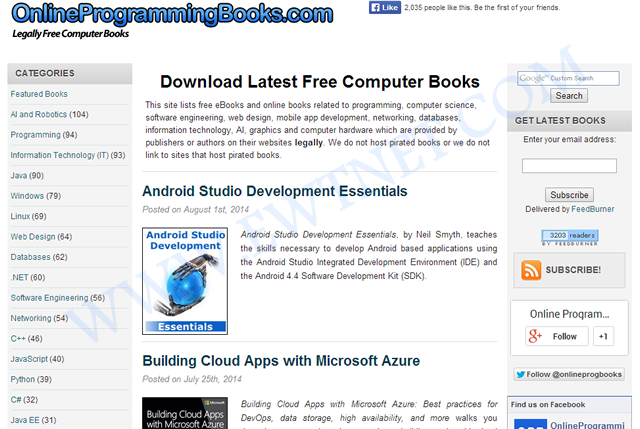
Online Programming Books consists of a huge collection of free online Computer, Programming, Mathematics, Technical Books, Lecture Notes and Tutorials. It is very well categorized by topics, with 92 categories and 1,574+ E-books.
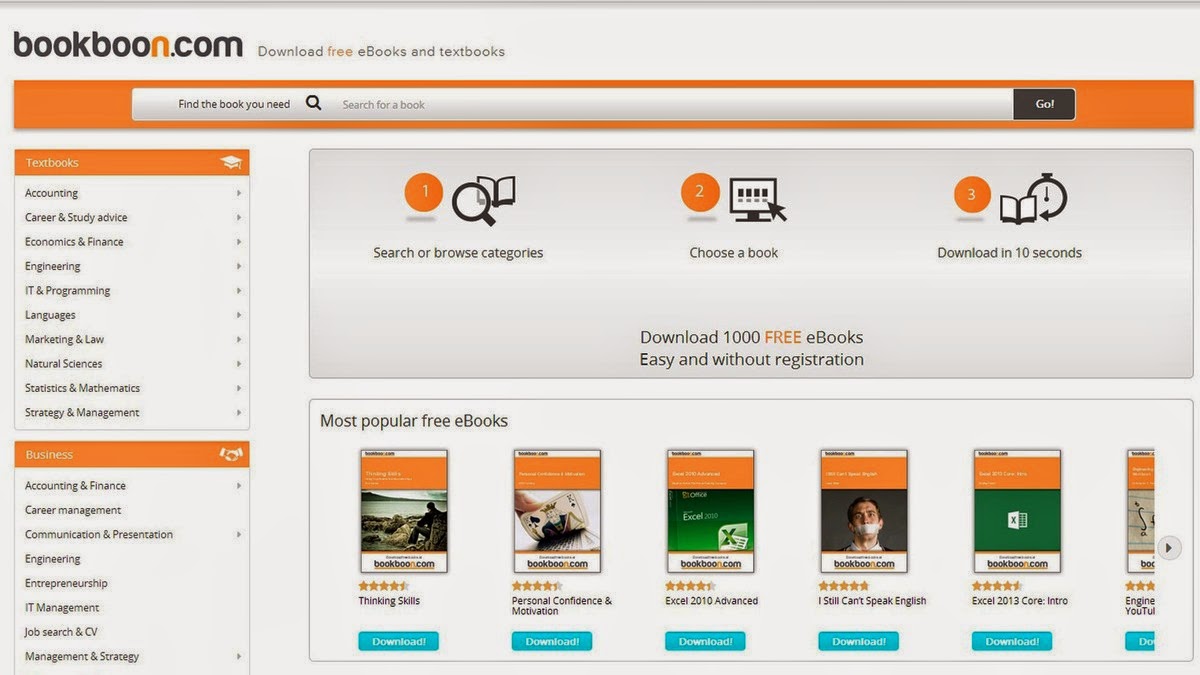
If you are searching for a particular educational textbook or business book BookBoon may come very handy. The site offers more than 1,000 e-books, it’s easy to navigate and best of all, you don’t have to register to download them.
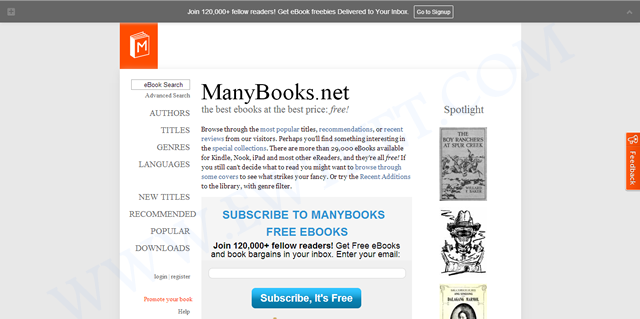
Grouped under authors, titles, languages and genres Many Books houses more than 29,000 E-books for Kindle, Nook, iPad and most other eReaders. The simplified navigation gives you the option to browse by most popular titles, recent reviews, authors, titles, genres, languages and more.
You might find the simplicity of The Online Book Page’s website a bit interesting but it has a list of over 1 million E-books from the web. It is more like an E-book search engine with option for visitors to submit more E-book links to their index.
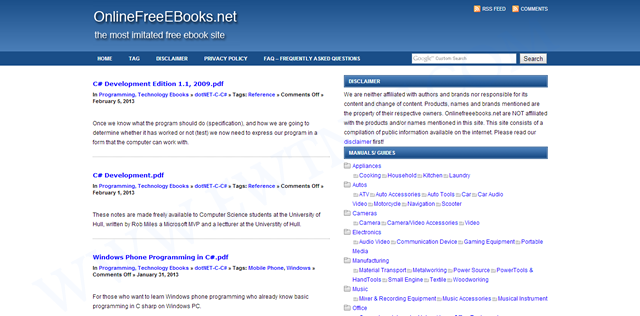
Completing our list of top 10 Online Libraries is the Online Free E-books. The library has 100s of E-books categorized under various tags.
Download/Read Chinese Novels PDFs Free Online
With the rise of Chinese industry in the global economy comes strong appeal for everything China, including novels – which are great, by the way. Chinese novels has the tendency of getting you hooked up and leaving you hanging. This is owing to the original material being in Mandarin and English translation apps charging too much to unlock chapters.
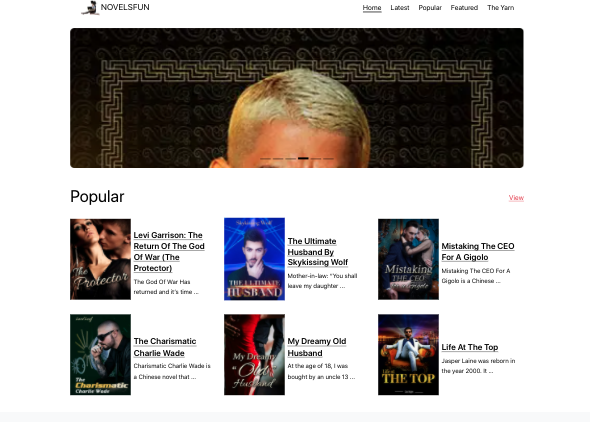
Novels.Fun homepage for reading free Chinese novels online.
Freaking out about creating a good-looking header photo for your Twitter profile?
You’ve probably noticed that striking visual piece in the Twitter profile layout — a full-screen-width banner image, known as a “Header Photo.”
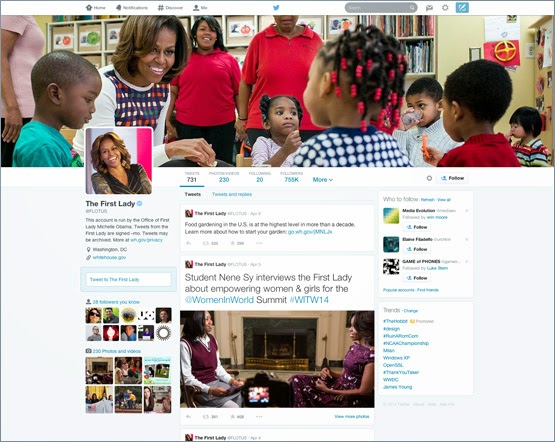
On Tuesday, April 8, 2014, Twitter blessed it’s users with a new profile layout that includes a full-width header photo.
But you may have noticed that not every header photo is a home run …
Following the release of twitter new profile layout “New You” last month, I have compiled a few image recommendations to help you create a header photo that looks professional, makes a great first impression, and markets your brand’s best assets — without violating the Twitter Image Terms.
What’s new about the “new you”?
Background image -out, cover image -in, summarize the new twitter profile look. The new web profile lets you use a larger profile photo, customize your header, show off your best Tweets and more. Other features included to the new look are:
Best Tweets: Tweets that have received more engagement will appear slightly larger, so your best content is easy to find.
Pinned Tweet: Pin one of your Tweets to the top of your page, so it’s easy for your followers to see what you’re all about.
Filtered Tweets: Now you can choose which timeline to view when checking out other profiles. Select from these options: Tweets, Tweets with photos/videos, or Tweets and replies.
Feeling Un-Cosy? 5 Steps to Setup a Branded Twitter Profile
If you are an existing twitter user, you may find your old profile header photo a little bit un-cosy after migrating to the new look. With the background image feature gone from the profile area, the massive space occupied by the header photo becomes your next billboard.
In this article I’m going to show you how to make the most of this massive space in five steps.
1. Abide by Twitter Image Policy
Twitter reserves the right to suspend/terminate your account if you don’t comply to the rules. One of this rules states that “You may not use obscene or pornographic images in either your profile photo, header photo, or user background”. Having that at the back of your mind, let’s proceed to the next step.
2. Map out the exact dimensions and shape
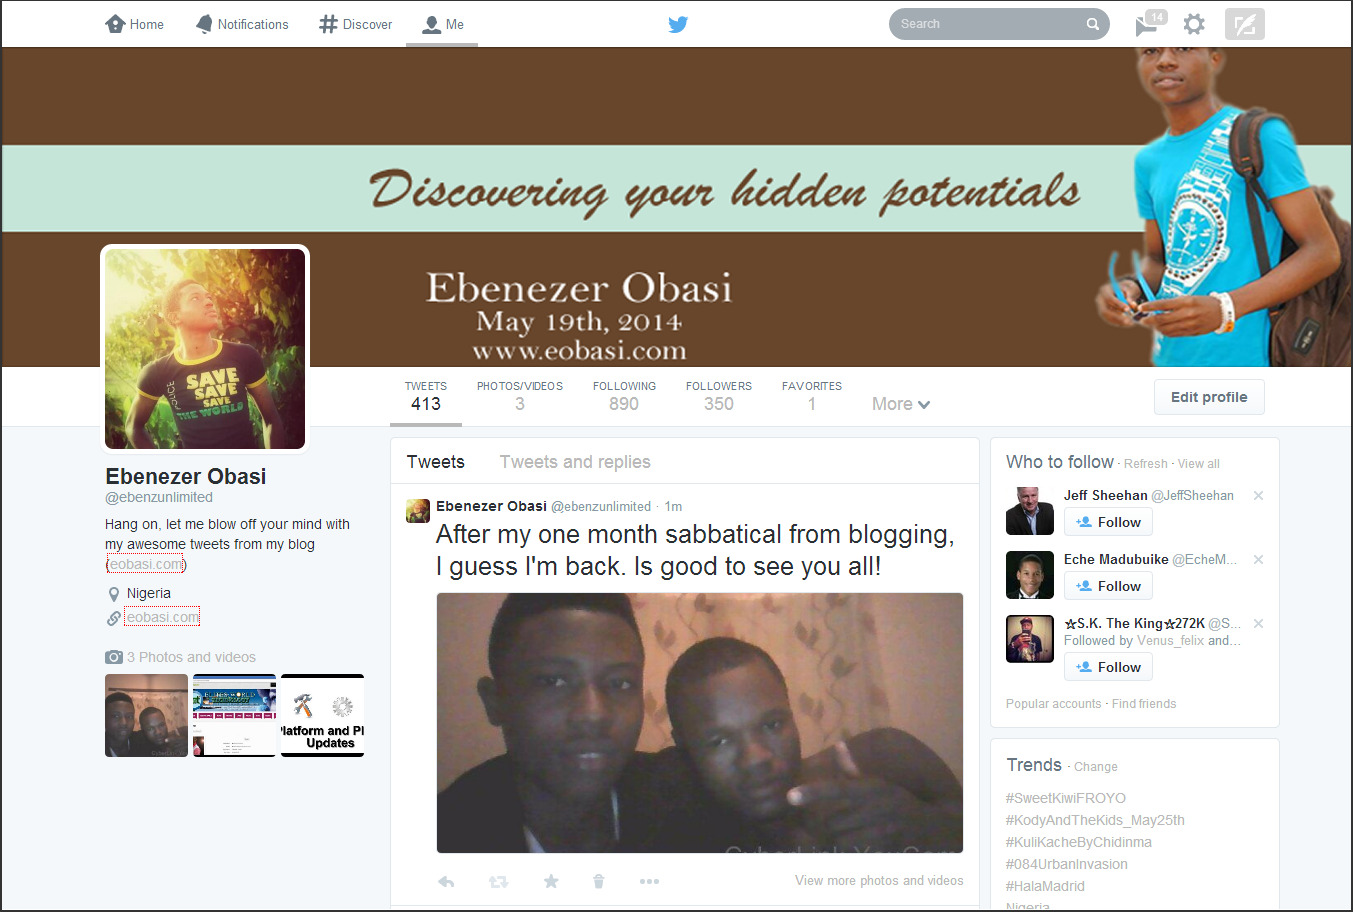
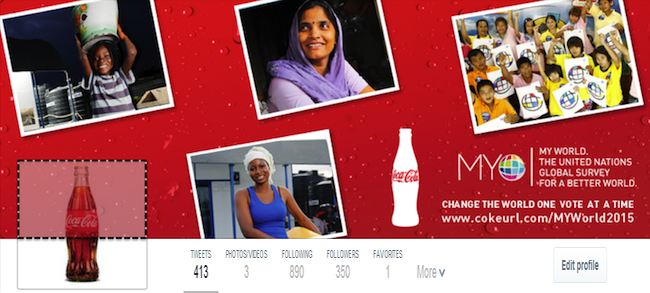
The Twitter header photo is not a common image size, and the rectangular composition includes a cut-out for your profile image in the lower left corner.
This means the best-looking header photos tend to be images that are designed to take advantage of the header photo’s exact size and shape.
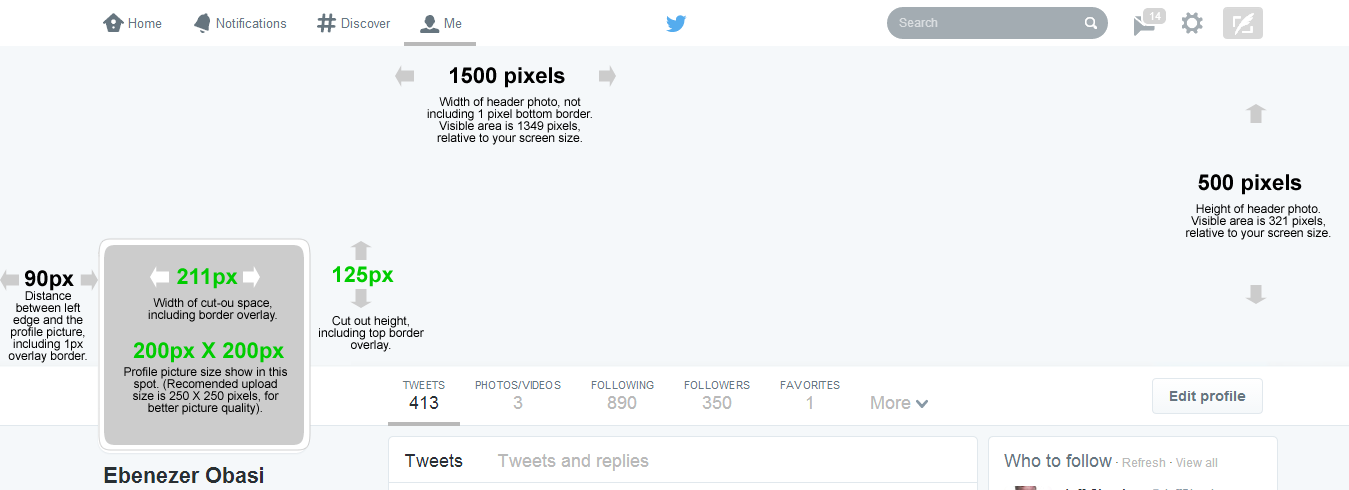
Shape and dimension of Header area. Click to view full image
Detailed measurements:
Official recommended size for Twitter header photo is: 1500 pixels wide by 500 pixels tall.
Profile image cut-out: 211 pixels wide by 125 pixels tall, spaced 90 pixels from the left edge of the header photo.
Profile image size: 200 x 200 pixels, with a recommended image upload size of 250 x 250 pixels. (Note: Larger images can be cropped).
Important tips:
If you upload an image smaller than 1500 x 500, it will be stretched to fit. This will make your image quality appear slightly grainy or distorted. The best practice is to upload an image that’s sized to Twitter’s dimensions.
Screenshot measurements reveal that only 321 pixels are visible from a 500-pixel image upload. The top edge appears to be covered by the Twitter header bar. A test with a 321-pixel tall image became distorted when uploaded, so do upload a 500-pixel tall image even though only the bottom 321 pixels will be visible.
3. Don’t hide content behind your profile picture.
Even though you are granted a massive 1500 pixels by 500 pixels to design a Header Photo doesn’t mean that you have all of that to work with. Because of the way that Profile Image are placed on Twitter profiles, there’s a section of your Header Photo that won’t appear unless you click on it.
Note the area highlighted with dotted lines in the image below: That’s the part of the Header Photo that isn’t immediately visible to your Twitter followers.
The dotted area is not visible unless the viewer clicks on the Header Photo
Unless you are hiding a Christmas tree behind your profile image, it is generally recommended to keep the space clear.
4. Decide contents to include in your header photo
Outside abusive and pornographic contents, Twitter currently does not have any rule limiting users on what kind of contents to display on their profile header image. However, it is the best practice to include only text/image that describe or relates to you.
Use high-quality photographs that are in focus, have balanced color and good lighting, or use photo editing software to optimize your images. You can design an image collage or use one big, beautiful photograph — just keep the cover photo shape in mind when setting up your composition.
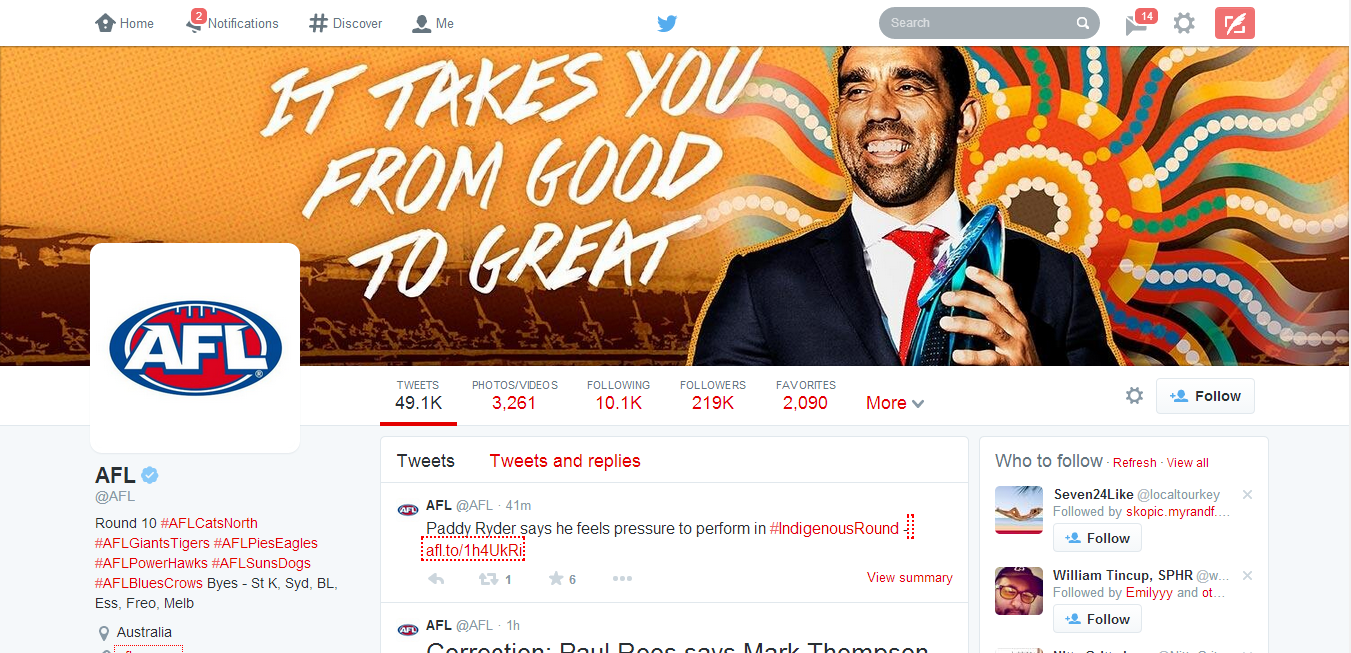
Australian Football League Twitter profile. Notice the powerful text on the Header Photo
Your company logo should appear somewhere, usually in your profile image, in which case it is not needed as an extra graphic in your cover photo. If you plan to include text, consider its placement when selecting images.
Here are a few image content ideas suitable for brands:
Candid photos of customers enjoying your products (be sure to get permission to use their likeness)
Your most popular products
Icons of awards won
Employees in action
Company founders
Store interior or exterior
Branded vector graphic
You might also consider the following type of text to grab your audience attention:
Company tagline or short phrase that explains what your business does
An impactful word that embodies your brand
Inspiring quote
Names of people in your photo
Photographer credits
Image copyrights
5. Upload your profile header header photo
Now is the easy part. Uploading your profile header photo is as simple as ever.
Log in to your Twitter account.
Go to your profile by clicking on “Me” on the twitter main menus.
Just below the header photo area, click on Edit Profile button.
Click on the Camera Icon on Header Photo space and click Upload from the drop down menu
Reposition and scale your header photo by dragging the image and scale bar below it. When done, click Apply.
Finally, save your changes and you are good to go!
Awesome! If you think you did a great job, inspire others by posting your Twitter profile links on the comment section. GoodLuck!
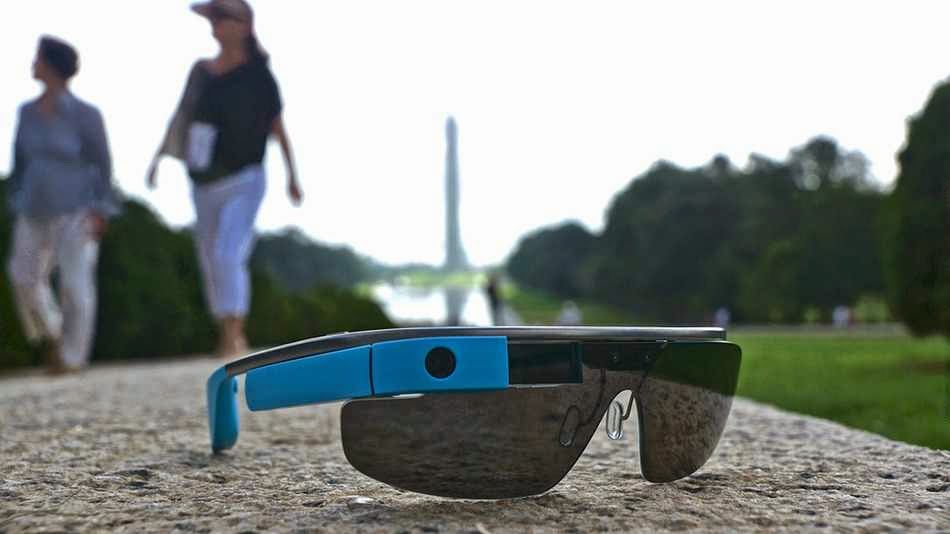
In compliance to Google’s announcement last week, everyone in the U.S. will be able to buy Google Glass today, starting from 9 a.m ET. “Every day, we get requests from those of you who haven’t found a way into the program yet, and we want your feedback too,” the company wrote in a blog post.
Google Glass is not commercially available yet; it’s been available only to Google Glass Explorers — in other words, only through a very limited beta-testing program.
Now, Google is opening up the program and folks in the U.S. will be able to get the Glass for $1500 + tax. Google has apologized to everyone else, saying it’s “just not ready yet to bring Glass to other countries.”
The price is steep, but at least Google will throw in frames or a shade of your choice.
To get the Glass, you need to be 18 years old, and you need to be a U.S. resident with a U.S. shipping address. Then, go to this address today, April 15, at 9am ET. Be fast, as the number of spots available is limited. You can also sign up for a reminder at the same address.
If you are wondering what this pair of glasses will do for you, poke your cursor on this link to find out.





/cdn.vox-cdn.com/uploads/chorus_image/image/58541691/akrales_170919_1976_0104.0.jpg)
/cdn.vox-cdn.com/uploads/chorus_image/image/61618787/Fire_TV_Stick_4K_with_all_new_Alexa_Voice_Remote___Straight.0.jpg)









 and then click help
  .
.


You must be logged in to post a comment.