Your old smartphone has a greater destiny than your junk drawer. Believe it or not, you can turn it into, say, a mini-PC or media streamer. Assuming it packs both USB On The Go support (OTG) and a Mobile High-Definition Link (MHL) compatible port, there’s a ton of additional functionality lurking under that its hood. Heck, you can even use a smartphone with a broken screen for this.
Without further ado, here’s how to transform your old smartphone into the brains of an Android-powered PC.
It starts with MHL ports and USB OTG support
Many smartphones from companies like Google, Samsung, LG, HTC, and Sony—among others—ship with MHL ports and have built-in compatibility for USB OTG as well.
The MHL port essentially adds HDMI output capabilities (with 1080p and 7.1-channel digital multi-channel audio support) and remote control functionality to the phone’s micro-USB port—the port you most likely use to charge the phone. USB OTG support gives mobile devices the ability to connect to and work with many different USB peripherals, like storage devices and input devices. Combine the two, and a mobile device with MHL and USB OTG support is capable of connecting to a discrete external display and peripherals like a keyboard or mouse.
 |
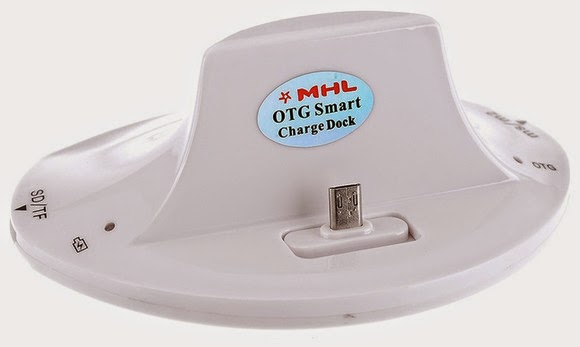
| A multi-function cradle with OTG MHL support is the key to turning your phone into a PC. Here’s the $25 VicTsing OTG MHL to HDMI multi-function cradle we tested. |
You can see where we’re headed here.
A number of companies have released proprietary “docks” for their mobile devices that leverage both MHL and USB OTG, but they tend to be expensive and work only with one particular device. Some third-party manufacturers have also released near-universal multi-function docks, however, that can be had for only a few bucks.
We purchased a VicTsing OTG MHL to HDMI multi-function cradle for only $25. It works with a wide range of devices and offers dual USB ports, a couple of flash card readers, HDMI and audio output, and a charger. By connecting this simple dock to a display and a keyboard and mouse, it can essentially transform a smartphone into a basic Android-powered PC. Throw some Office-style apps on the phone and you’re ready for some actual productivity.
Making the connections
 |
| The VicTsing cradle’s port selection. |
Using a dock with USB OTB and MHL support is very simple and straightforward. Though we only tested it with a couple of Samsung phones (a Galaxy Note 3 and Galaxy S4) and an HTC phone (an HTC One X), the process and behavior should be similar with compatible devices.
 |
| MARCO CHIAPPETTA |
The dock has an HDMI output that gets connected to a secondary screen. (A HDMI-to-DVI conversion cable can work if you have a spare monitor laying around). In our tests, both a cheap 1080p monitor and a Toshiba HDTV connected perfectly. The dock also requires power, which comes by way of a standard micro-USB charger; you can connect the included USB cable to a USB port on a TV or monitor, or simply use your phone’s charging cord.
A keyboard and mouse can simply be plugged into the full-sized USB ports. You could use wireless keyboards and mice as well, as long as they use standard USB HID (human interface device) drivers. Multimedia keys and other custom keys on fancier keyboards won’t work.
Once the physical connections are made, ensure the display is configured to use the correct input and simply slide the phone onto the dock, inserting the dock’s male connecter into the phone’s MHL/micro-USB port. When the smartphone is fully connected to the dock, its screen will go dark and output will be sent to the secondary display. Boom! Your old smartphone is now essentially an Android PC. It really is that simple!
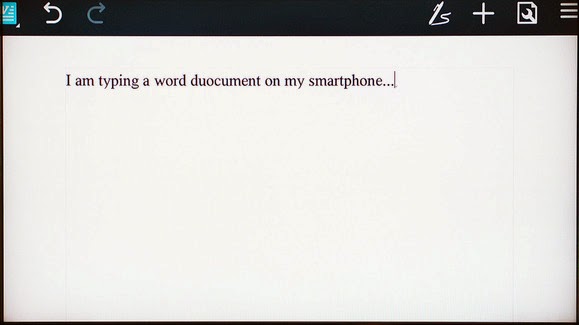
On the Samsung smartphones, everything we tried automatically rotated into landscape mode, which made it ideal for multi-media playback or working on office documents.
Getting around
 |
| Smartphones with USB OTG and MHL support will typically auto-rotate most content into landscape mode when connected to a secondary display. |
Navigating through the various menus on Android can be somewhat clunky when using a keyboard and mouse, but it’s fairly intuitive once you start poking around. Right-clicks act as a back button, while left-clicking behaves like a tap of the touchscreen. Many in-application icons and menus—even the mouse cursor itself—appear oversized on a big screen, but they function as expected.
We wouldn’t trade an actual PC for a smartphone and USB OTG / MHL dock, but for a relatively small investment (especially if you’ve already got the monitor and input devices on hand) you can easily get some work done on one of these setups.