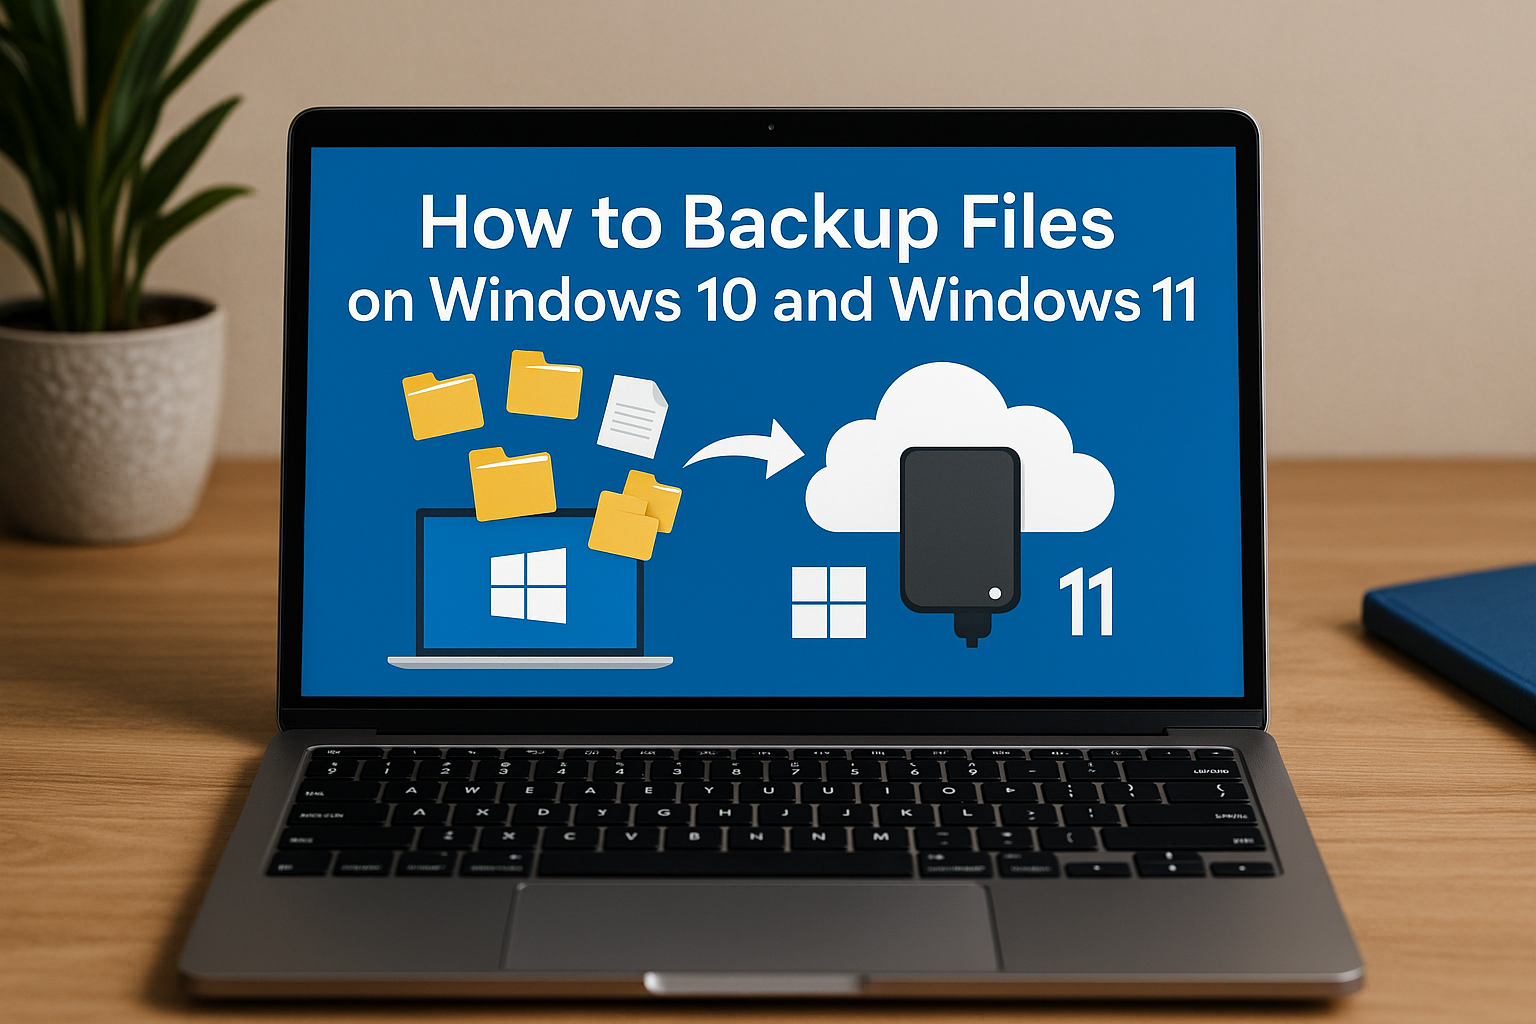
Imagine turning on your computer one day only to find your files, photos, and work are all gone. It happens more often than you think, but it’s easily preventable with the right backup plan. Windows 10 and Windows 11 offer powerful tools to back up everything you care about, whether you use an external drive or cloud storage. This guide will walk you through the easiest ways to set up your backup and secure your digital life.
1. How to Backup Files Using File History (Windows 10 and Windows 11)
File History automatically backs up important folders like Desktop, Documents, Pictures, and Music. It’s an easy-to-use tool that helps you quickly recover files if they get lost or corrupted.
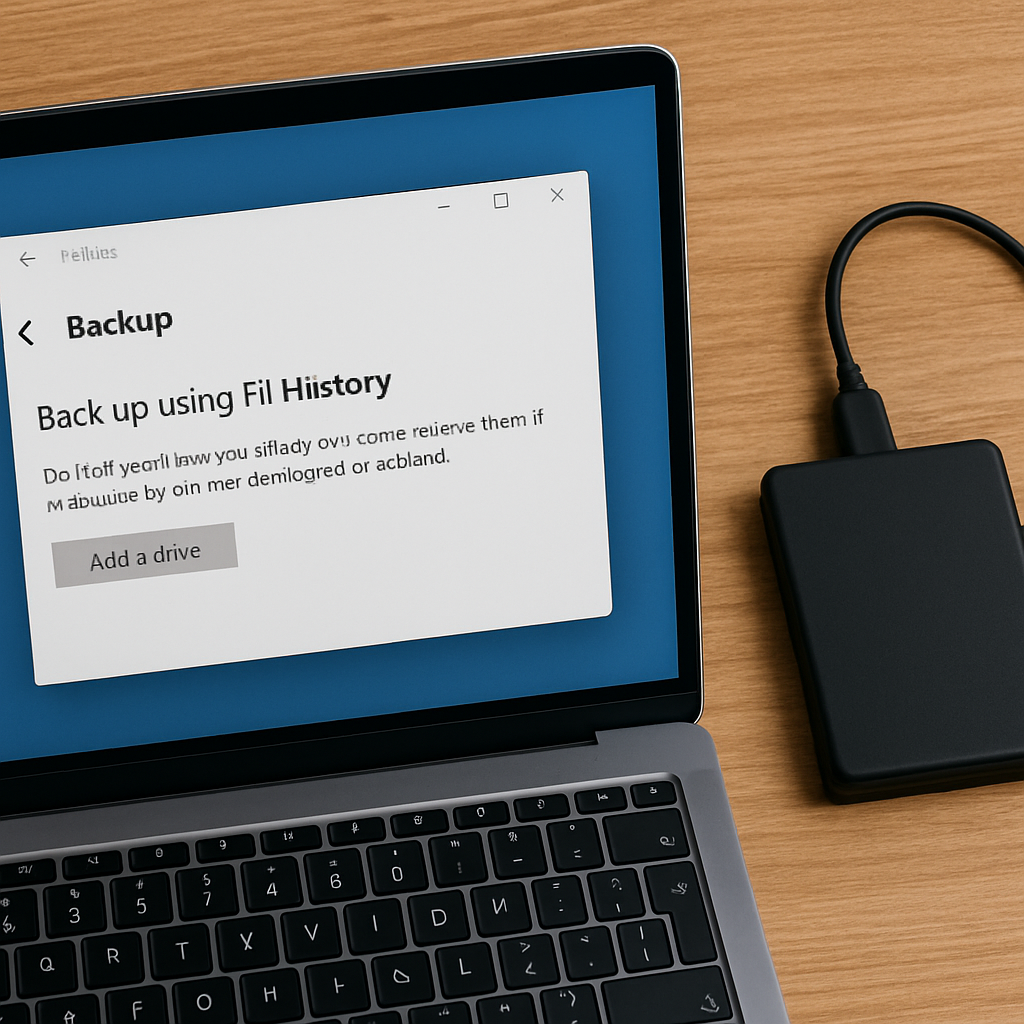
Backup Windows 10 to External Drive
Step 1: Connect an external drive to your PC.
Step 2: Go to Settings > Update & Security > Backup.
Step 3: Click Add a drive and select your external drive.
Step 4: Turn on Automatically back up my files.
Step 5: Click More options to choose which folders to back up and how often.
Backup Windows 11 to External Drive
Step 1: Connect your external drive.
Step 2: Open the Search bar and type File History.
Step 3: Select File History from the search results.
Step 4: Click Select drive and choose your backup drive.
Step 5: Turn on File History to start backing up your files.
Note: Windows 11 limits File History to certain folders. To back up other locations, move files into the default folders.
2. How to Use Windows Backup App
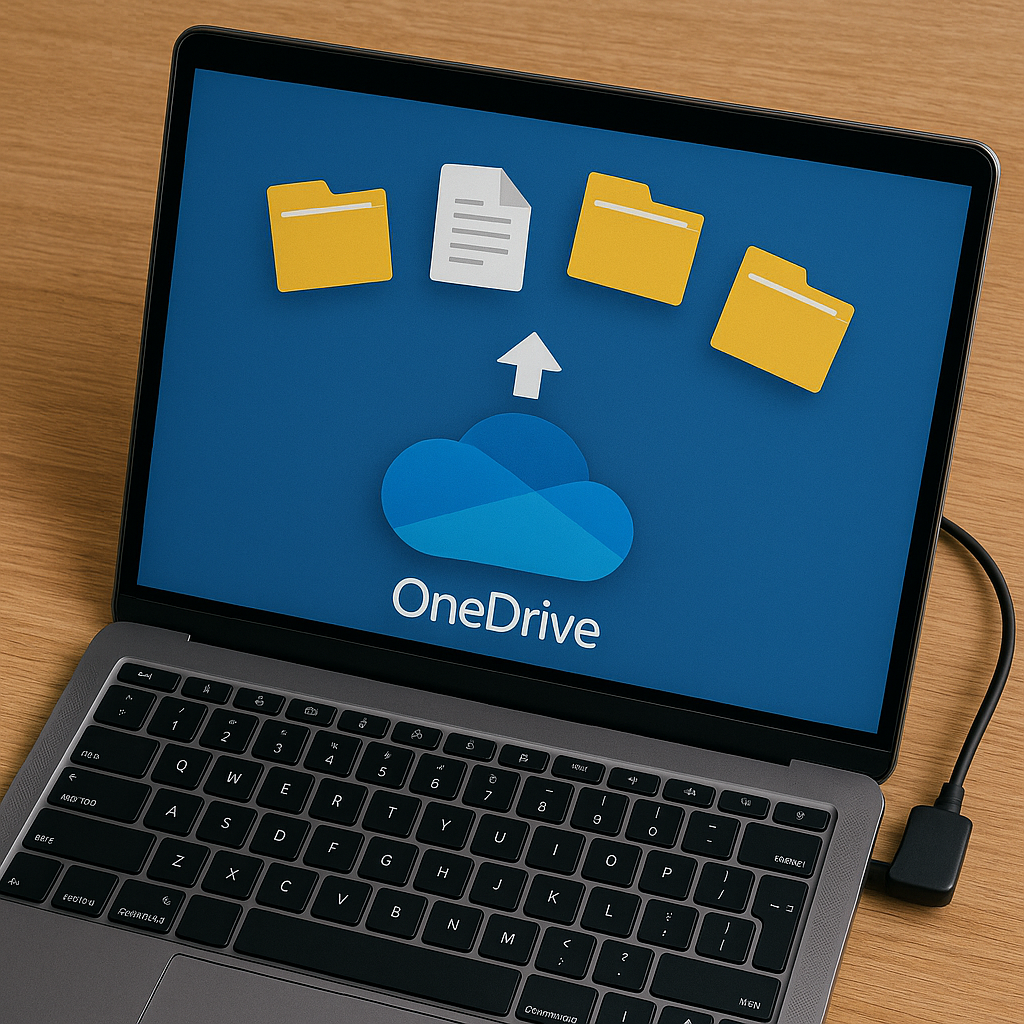
The Windows Backup app lets you back up settings, files, and apps directly to the cloud (OneDrive). It’s a seamless option if you want to ensure your data is accessible from any device.
How to Set Up Windows Backup
Step 1: Open Settings > Accounts > Windows backup.
Step 2: Sign in with your Microsoft account.
Step 3: Turn on the options for:
Remember my apps
Remember my preferences
Back up my files to OneDrive
This makes switching to a new device or recovering files very easy.
3. How to Create a Full System Image Backup (Windows 10/11)
System Image Recovery creates a complete copy of your system, including Windows, settings, apps, and files. It’s a great way to ensure that if your system fails, you can quickly restore everything to its original state.
Create a System Image Backup
Step 1: Connect an external hard drive (formatted as NTFS).
Step 2: Open the Control Panel.
Step 3: Go to Backup and Restore (Windows 7).
Step 4: Click Create a system image on the left.
Step 5: Choose your external drive or network location.
Step 6: Follow the prompts and click Start backup.
Tip: You must create new system images regularly to keep your backup updated. Make sure your drive has enough space to store the image.
4. Best Third-Party Backup Tool Option: EaseUS Todo Backup
For users looking for more flexibility beyond the built-in Windows tools, third-party software like EaseUS Todo Backup can be considered. It offers a variety of features such as:
Backing up individual files, folders, entire partitions, or the full system.
Scheduling automatic backups based on your preferred frequency.
Cloning hard drives for easy migration or upgrades.
Saving backup copies to external drives, cloud services, or network storage (NAS).
EaseUS Todo Backup has both free and paid versions available. Users can explore these options based on their backup needs and preferences.
Frequently Asked Questions (FAQ)
Q: How often should I back up my files on Windows? It’s recommended to set up automatic backups through File History or Windows Backup to back up your files daily or weekly, depending on your needs.
Q: Can I back up my system to a cloud service like OneDrive? Yes, Windows allows you to back up important files to OneDrive using the Windows Backup app. However, a full system backup (like a system image) requires external or network storage.
Q: What’s the difference between File History and System Image Recovery? File History backs up individual files and folders, allowing you to recover previous versions. System Image Recovery creates a complete snapshot of your entire system, including Windows, settings, and apps, which can be restored in case of major system failure.
Capturing stunning aerial images of properties has never been easier. Drones, with their ability to soar high and capture expansive views, have become an essential tool in real estate photography. These unmanned aerial devices combine advanced technology with high-altitude photography, transforming how real estate properties are marketed.
Here are nine essential tips to help you maximise your real estate drone photography journey:
1. Choose the Right Drone for Real Estate
With a multitude of drones available, selecting the best one for real estate photography requires consideration:
Integrated vs. Custom Cameras:Drones with built-in cameras may offer convenience but can have lower resolution. Drones that allow you to attach your own camera, such as a GoPro, might provide superior image quality and flexibility.
Skill Level: Beginners should opt for lightweight, durable drones that are easy to handle and affordable. These models generally have fewer features but are perfect for getting started.
Drone Capabilities: Determine whether you need a drone for indoor or outdoor use, night-time shooting capabilities, or extended range. Choose a drone that aligns with your specific needs.
2. Read the Drone’s Instruction Manual
While it may not be the most exciting task, reading the instruction manual is necessary. It contains important information about your drone’s functions, helping you avoid common pitfalls and allowing you to focus on capturing impressive property shots.
3. Get Familiar with Drone Features
Drones come with a variety of features to enhance your real estate photography:
Smart Mode: Ideal for beginners, this mode stabilises the drone in challenging conditions, ensuring smoother and more professional-looking footage.
Tracking: Use the “follow-me” option to capture dynamic shots of the property or surroundings by keeping the drone focused on a moving subject.
Geofence: This feature restricts the drone’s flight area, helping you stay within safe and legal boundaries.
4. Understand Local Regulations
Drone regulations vary by location. In the USA, for example, UAVs weighing between 0.55 and 55 lbs require FAA registration. Make sure to research and comply with local laws regarding where you can fly your drone to avoid fines and legal issues.
5. Prepare a Pre-Flight Checklist
Before taking off, ensure you’ve covered these checks:
Flight Zone: Verify whether you are flying in a private or public area.
Weather Conditions: Check that the weather is suitable for flying.
Surroundings: Be aware of obstacles and ensure the area is safe for flying.
Battery Life: Ensure all batteries are fully charged.
Camera Settings: Adjust the drone’s camera settings to suit the property’s lighting and composition.
Drone Components: Inspect propellers, motors, and controls for proper function.
6. Drone Training
To avoid accidents, practice flying your drone in a spacious area. This will help you get accustomed to the controls and reduce the risk of damaging your equipment.
7. Master Real Estate Photography Techniques
To capture compelling real estate images, follow these photography principles:
Apply Basics: Use techniques like the rule of thirds and leading lines to enhance your shots.
Look for Patterns: Seek out interesting patterns and symmetry from above to highlight property features.
Keep Compositions Simple: Focus on clean, uncluttered shots that showcase the property effectively.
Utilise Light: Shoot during times of day that create attractive lighting and shadows.
We’re in an era dominated by digital content consumption, and the value of video accessibility and search engine optimization (SEO) cannot be overstated. YouTube, as a leading platform for video sharing and discovery, offers creators a powerful means to reach global audiences. However, ensuring inclusivity, discoverability, and content repurposing hinges on one often overlooked asset—video transcripts.
Primarily, YouTube transcripts provide a textual representation of spoken content which is great for the deaf or hard-of-hearing community and those who prefer reading over watching videos. Transcripts also widen the reach and impact of YouTube videos. It contributes to SEO efforts by indexing written content, which improves the video’s discoverability through search engines. YouTube transcripts are also important for content repurposing, allowing creators to transform video narratives into blog posts, articles, or social media snippets.
Accessibility: Transcripts make videos accessible to those who are deaf or hard of hearing. They also benefit people who prefer reading over watching videos.
SEO Benefits: Transcripts can improve your video’s search engine optimization (SEO), making it easier for people to find your content through search engines.
Content Repurposing: Transcripts allow you to repurpose your video content into blog posts, articles, or social media snippets.
Better Engagement: Viewers can follow along with the transcript, which can help in better understanding and retention of the video content.
YouTube automatically generates captions for many videos using speech recognition technology. While these captions can be a quick way to get a transcript, they are not always accurate, especially with videos that have background noise, multiple speakers, or non-standard accents.
Open the Video: Go to the YouTube video you want the transcript for.
Click on the ‘CC’ (Closed Captions) Button: If the video has automatic captions, this will enable them.
View Transcript: Click on the three dots (more options) below the video and select ‘Open transcript’. This will open a transcript panel next to the video.
Pros:
Quick and easy access.
Available directly on YouTube.
Cons:
Accuracy can be inconsistent, especially with complex language or accents.
Manually transcribing a video involves listening to the video and typing out the spoken words. This method ensures accuracy but can be time-consuming.
How to Manually Transcribe:
Play the YouTube video.
Use a text editor or word processor to type out what you hear.
Pause and rewind the video as needed to ensure accuracy.
Pros:
High accuracy.
Can be tailored to include speaker labels, timestamps, and descriptions of non-verbal sounds.
Cons:
Time-consuming.
Labor-intensive.
Using Transcription Software
Several transcription software tools and services can generate transcripts for YouTube videos. These tools use advanced speech recognition technology to convert spoken words into text. Some popular ones include:
Everybody wants to be on Facebook, Instagram, and Twitter, the platforms companies and businesses use for trendy advertising and marketing. However, investing so much time and effort in platforms that don’t benefit your career is unnecessary. A lot of people overlooked LinkedIn in the past. Ignorant of the many opportunities abundant on this site. There are life-changing opportunities for those looking for jobs, entrepreneurs, startups, investors, or fresh graduates. Here are some pointers on how to use LinkedIn for networking and marketing.
Marketing/Networking on LinkedIn
Just as a strong first impression counts in in-person encounters, so too does having an impressive LinkedIn profile for successful online networking. Before engaging in any LinkedIn networking activity, make sure your profile is complete and optimized.
Build an Impressive LinkedIn Profile
Start by including a professional-looking profile photo, as this has a big influence on profile visibility and interaction. The next detail to add is your headline. Creating an attention-grabbing headline for your LinkedIn page is similar to creating a CV. This title should communicate your areas of expertise and must be professional.
Next is a profile description that will help you build your brand by, outlining your strengths and how you can bring value to potential clients or employers. It’s best to keep the summary brief and simple to read. Include relevant keywords to improve visibility in your area of interest. Avoid copying and pasting information from your CV while summarizing your work history on LinkedIn. Rather, concentrate on experiences that are relevant to your business or your desired career path.
Add reputable recommendations and endorsements to your profile to increase its credibility. You can ask for referrals from people you’ve had good working connections with, such as clients, supervisors, and coworkers. These recommendations build your authority and trustworthiness and even serve as employment references. Getting more recommendations also makes you appear more credible to other users on LinkedIn.
Make Connections
It’s time to interact with other users on LinkedIn after building your professional presence. Refrain from adding connections randomly. Make connections with individuals in the field that you might want to collaborate with in the future or who might offer useful information on your business or career.
When sending a connection request, make sure to add a customized statement and stay away from sending an automatic LinkedIn invitation. You can build connections with your new contact by sending a brief message introducing yourself or outlining your reasons for wanting to connect. By doing this, you’ll avoid giving the impression that you’re just adding things at random to increase your numbers. Remember, potential recruiters on LinkedIn are watching.
As soon as your requests get accepted, you have to start forming personal or professional connections. You can engage their posts, celebrate a milestone, or simply reach out to them. Make an effort to reply to every communication you get on LinkedIn, and don’t ignore people trying to connect. To strengthen and build relationships, ask contacts to meet you offline at an event that’s open to the public.
Create Posts/Join Groups
Posting on LinkedIn is an important part of growing your career. Whatever your niche or industry, always make posts that engage and inform. You can start by writing your thoughts linking to your websites, and reposting pieces from others. As you grow, you can run ads on LinkedIn posts. To help people learn more about you and your business, think about providing a link to your blog to contacts. Provide a link to your subscription pages in your posts to your connections and followers.
Become a member of industry-related LinkedIn groups to get visibility and establish valuable relationships. You may be able to connect with experts in your field if you join many active groups and share your profile. For any LinkedIn group you join to be effective, you will need to participate in them. Engage in and, provide helpful responses to queries. Instead of trying to promote yourself, concentrate on becoming an important group member.
Benefits of LinkedIn for Employees/Businesses/Students/Job Seekers
LinkedIn is a widely used platform for professional networking, offering numerous advantages for those seeking to expand their connections. Firstly, its ubiquity among professionals across the globe provides a direct channel to engage with crucial business contacts who may otherwise remain undiscovered.
Many recruiters and hiring professionals use LinkedIn to find and connect with potential candidates. Users can often see job postings and recruitment-related content on the platform. Like many social media platforms, LinkedIn also allows users to run ads. Members come across sponsored content, job ads, or other promotional material while browsing their feeds. Companies and individuals can use LinkedIn’s advertising services to create targeted campaigns, promoting their products, services, or job opportunities to a specific audience.
Most of LinkedIn members use it for business, not for informal engagements like Twitter. Networking on LinkedIn increases the chances of finding and getting opportunities. A well-constructed profile that includes relevant experiences, accomplishments, endorsements, recommendations, and information improves your professional image. Writing articles, sharing educational links, and participating in thought-provoking conversations in LinkedIn groups are other advantages of using the platform.
LinkedIn serves as a valuable information repository, essentially presenting each user’s profile as a comprehensive resume. This helps you see the backgrounds, abilities, experiences, skills, motivations, and beliefs of potential customers, partners, investors, and other stakeholders. The search tools help to identify prospects and streamline your job search according to your interests.
LinkedIn is not only free but also unrestricted, a feature that allows users to engage with their contacts regardless of work hours or geographical time zones. The potential opportunities that can be found on LinkedIn and from connections are far too many. Everyone looking to secure their business or career should create a LinkedIn account and use it.
Cell C is a big deal in South Africa. Holding the medal for the third-largest cellphone network provider, following MTN and the leading Vodacom. But what’s got people buzzing is their reputation for offering data plans that don’t break the bank. If you’re curious abouthow to buy data on Cell Cto make the most of their irresistible offers, you’re in the right place.
Cell C has partnered with various retail outlets where you can purchase data vouchers with cash, credit, or debit cards. Ask for a Cell C data voucher and enter the code into your phone.
How to Buy Data on Cell C with Airtime
If your Cell C SIM card is loaded with airtime, you can easily convert it into data bundles:
Dial *147# from your Cell C SIM card and opt for “Buy Bundles”.
Navigate to the menu and choose “Data Bundles”.
Pick the data bundle that suits your needs and hit “Buy”.
Select “Airtime” as your preferred payment method.
Follow the prompts to finalize the transaction.
Keep in mind that you can only purchase data bundles with airtime if your Cell C SIM card has enough balance to cover the cost. Regular recharging helps avoid issues like the Cell C SIM card not working.
3 Ways to Buy Data on Cell C
There are three payment methods to buy data on Cell C. You can use the app, on their official website, or via a USSD code. The steps are simple and easy to follow.
Using a USSD Code to Buy Data on Cell C
The most common and user-friendly method involves dialing *147# and pressing send. Afterward, a menu will appear on your screen, including the option “Buy Bundles.” Select this option from various daily, weekly, and monthly bundles. There are even specialized bundles for specific social networks.
Ensure you have enough Cell C airtime balance before selecting if you’re using airtime to buy data on Cell C. The amount will be deducted immediately or declined if your balance is insufficient.
The Cell C App
For smartphone users, the Cell C app simplifies data purchases. Download and install the app from the Android or Apple app stores, and register a profile by adding your phone number. Once done, open the app and choose the “Purchase” option. Specify that you’ll pay via airtime and select the data bundle that suits your needs.
This option is not only for personal use but also convenient for buying data for family and friends using your airtime balance.
Buy from the Website
Visit Cell C’s website on your internet-enabled device. Navigate to the “Recharge” menu, where you’ll find the “Data Bundles” option. Choose the most suitable option for you from the available bundles displayed on the website.
Stay on top of your data usage by checking your balance regularly. Dial *101# or *147# and follow the prompts to check both your data and airtime balances on Cell C.
Why do people download Chrome on Mac? Why do people prefer Google Chrome over Safari?. And why do people download Chrome, to begin with? The answer is simple; Chrome is faster than Safari—Apple’s web browser.
Today, web browsing has become indispensable, whether for shopping, streaming, or reading. However, choosing the right browser for your Mac might not be as simple as you imagined. In terms of user interface, Chrome offers a clean design, fast data syncing, and a vast library of extensions.
While Safari, Apple’s native browser, offers an excellent browsing experience, it may not always meet the diverse needs of users, particularly when it comes to extensions and cross-platform functionality. As a result, many users opt to download Chrome on Mac rather than use Apple’s Safari browser.
Steps to Download Chrome on Mac
Since Chrome doesn’t come pre-installed on a Mac, a manual installation is in order.
Launch Safari by clicking on its icon in the Dock (a blue compass with a red needle).
Visit the Google Chrome page in your browser and initiate the download by clicking “Download Chrome.”
If the download doesn’t commence, locate and click “Download Chrome” in the upper-right corner.
Once the download completes, you’ll find the file in your Mac’s download folder. Click on the Downloads icon, then double-click on googlechrome.dmg. A Downloads icon will also appear at the top-right corner of the Safari window, click on it to access the downloaded file. This action opens up a disk image.
Drag and drop the Google Chrome icon into your Applications folder.
To open Google Chrome, either select the icon from Launchpad or type “Chrome” into Spotlight (Command + Space).
When launching Chrome for the first time, a security prompt will appear, indicating that it was downloaded from the internet. Click “Open” to proceed to sign in to your Google account. Opt to make Chrome your default browser and you’re good to go.
Unlocking your iPhone is usually a breeze with a passcode, Face ID, or Touch ID. Yet, there are situations where you might find yourself locked out. Either because of a forgotten passcode, a disabled iPhone, or a second-hand-bought phone with a lock. Getting locked out of your phone can be incredibly frustrating. There are easy ways to regain access and we’ll show you how to unlock iPhone without passcode or computer.
There are various misconceptions about unlocking an iPhone without a passcode, but using a Calculator or Camera isn’t one of them.
How to Unlock iPhone Without Passcode Using a Computer
One of the ways to unlock iPhone without passcode is by using a computer and entering Recovery Mode. This way, you can restore your iPhone and set up a new passcode, Touch ID, and even Face ID. But first, you must have a compatible Mac or Windows computer(Windows 10 or a later version) and ensure iTunes is installed. You’ll equally need the original cable that came with your iPhone or a compatible alternative to connect it to the computer.
If your iPhone is currently connected to the computer, unplug it. Next, power down your iPhone. Depending on the model, press and hold both the side button and the volume down button until the power off slider appears. Connect your iPhone to your Mac or Windows PC while simultaneously holding the button. Continue holding the button until the recovery mode screen appears on your iPhone, then release.
Locate your iPhone either in the Finder or iTunes on the connected computer. A prompt will appear with the option to Restore or Update, choose Restore. Immediately you do this, the computer will download the necessary software for your iPhone and initiate the recovery process. The download will take up to 15 minutes and after the process is complete, your device will restart and display a setup screen. Then disconnect the iPhone from the computer and set it up.
Unlock iPhone Using iCloud
If you find yourself in a situation where you need to access your iPhone without its passcode, consider using iCloud as an alternative solution to unlock it. It’s important to note that this method will completely wipe everything off your iPhone. Navigate to iCloud.com, sign in using your Apple ID credentials, and locate the “Find iPhone” option. Always ensure that the “Find My” feature is activated before following the next step.
Within the list of devices linked to your iCloud account, select the corresponding model of your iPhone. Then initiate the process by clicking on the “Erase iPhone” option.
How to Unlock iPhone without Password or Computer
Unlocking an iPhone without a passcode becomes necessary when using a computer isn’t feasible. One option is to utilize the Erase iPhone feature, available for iPhones running version 15.2 or later. Just like we mentioned above for iCloud, this feature wipes the data from your iPhone to grant you access.
Enter the passcodes you remember until you’re locked out of the iPhone. If the Erase iPhone button hasn’t yet appeared, persist with entering more passcodes. Once it appears, input your Apple ID password to confirm the erasure. Alternatively, Siri can be used to unlock your iPhone without the need for a computer or password. However, this method mostly works for older iOS versions like 8 to 10.
Start by asking Siri about the current time. Following this, add a new clock and long-press the clock text. Opt to share the text to messages. Then use this action to navigate to the new contact screen and add a new photo to the contact before making your way to the photo library. You can now return to the home screen.
For those who have pre-set Voice Control, it can serve as a way to unlock your iPhone without a passcode. Start by navigating to Settings, then Accessibility, and Voice Control. Enable Voice Control and select Customize Commands to establish a personalized command. This custom command should mirror your lock screen passcode.
iOS 17 Passcode Reset
Should you find yourself unable to input your new passcode for any reason, iOS 17 introduces a handy feature known as Passcode Reset that allows users to use their previous passcode for a period of 72 hours.
If you’ve installed the iOS 17 Beta on your iPhone after five unsuccessful attempts at entering the correct passcode simply tap on “Forgot Passcode.” Then select “Enter Previous Passcode” to input your old passcode, and proceed to set up a new one. With these steps completed, you have successfully reset your iPhone passcode and regained access to your device.
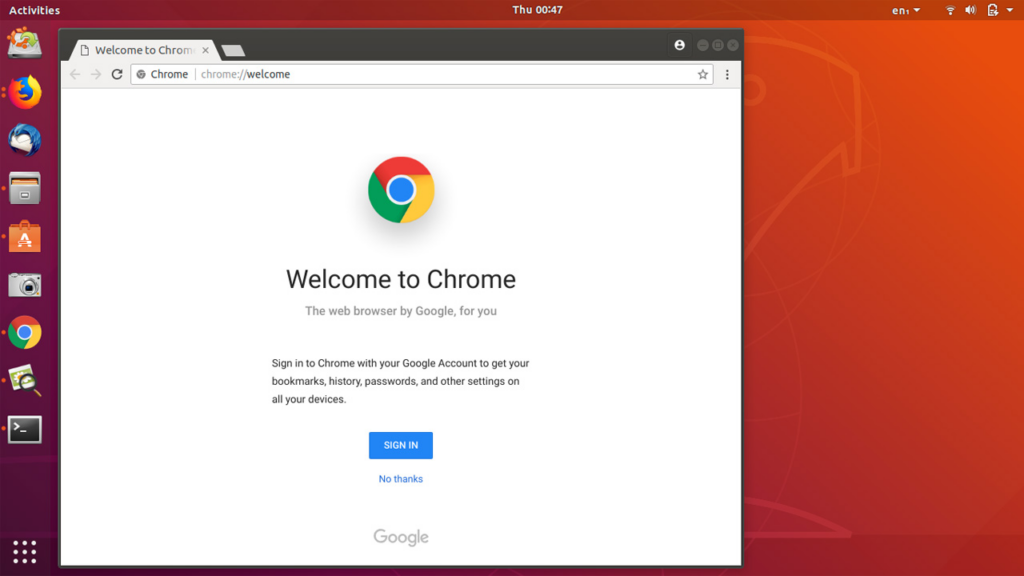
Google Chrome is one of the world’s most widely used and trusted web browsers. Of course, it was developed by one of the world’s most reputable technology companies known for its strong focus on security. However, there’s still a need to be cautious when installing software from unofficial or untrusted sources, as they may not be as secure. The same also applies to Ubuntu. We’ll find out how to install Chrome on Ubuntu.
Introduced in 2004 by the Computer software company, Canonical, Ubuntu is a free open-source, user-friendly Linux-based OS for computers or virtual private servers. It is well suited for cloud computing, servers, desktops, and IoT devices. Ubuntu’s popularity has roots in quite a number of innovative features. One of which is its clean GNOME interface designed for improved system navigation. Ubuntu has high security with checks, AppArmor, and security practices. The OS also runs smoothly on low-end devices, requiring minimal RAM. Unlike closed-source alternatives such as macOS and Windows, Ubuntu is completely free and customizable.
How to Install Chrome on Ubuntu
Ubuntu’s default web browser is Firefox. With each new version of Ubuntu, you’ll find the most up-to-date version of Firefox pre-installed. But, if you prefer using Google Chrome on Ubuntu software OS or any other Ubuntu device, there are two installation options. You can opt for a manual download using the default Firefox browser. Alternatively, you can use the Ubuntu Terminal for a not-so-seamless installation process.
Installing Chrome on Ubuntu via Web Browser
How to Install Chrome on Ubuntu in 2023
Launch the default Firefox web browser in Ubuntu
Go to the official Chrome download page
Locate the Download Chrome button and click on it to download the installation file
Select the version of Chrome for Ubuntu which is the first option (64 bit .deb for Debian/Ubuntu)
Click on Accept and Install
Once downloaded, open the file and double-click to initiate the installation process. Or right-click the file and select Open With Software Center
Click on the green Install button to install Google Chrome for Ubuntu
Enter a password for authentication.
Start Chrome and click on settings in the top-right corner of the screen
In Settings, scroll down and click on Default Applications
Select Google Chrome as the default web browser
Install Chrome on Ubuntu via the Terminal
Open the Ubuntu Terminal with a keyboard shortcut Ctrl+Alt+T
Run the Sudo apt update command to update the package lists to the latest version
Often, if you encounter any technical glitches or issues with any of your devices, one of the go-to and sometimes, effective solution is to reboot. Mobile devices like iPhones lack a direct restart mode compared to their Android counterparts, but we’ve gotten around to simplifying the process of restarting an iPhone for our readers. The piece offers guidance on how to successfully restart an iPhone in the event of any difficulties.
The first thing to do when restarting an iPhone 14 down to iPhone X, press and hold the Down Volume and Side buttons at the same time. The upper Volume button is functional, but using one can mistakenly take a screenshot.
As you press and hold, the power off slider will appear. Release your hold on the Down Volume and side buttons. Then move the slider after releasing the buttons.
Once this is done, wait for about 30 seconds for the iPhone to go off. Then press and hold the same side and volume buttons to restart the iPhone.
iPhone 5, 6, 7, 8, or SE(1st, 2nd, and 3rd Generation)
To restart an iPhone of the above models and generations, first press and hold the Sleep/Wake button. This is the button that turns off the phone and for the iPhone 6 series and later models, the button is on the upper right side. But for the previous iPhone models before the 6 series, the sleep/wake button is on top of the phone.
Depending on the model, once the power off slider appears on the screen, release your hold on the Sleep/Wake button. Then move the slider after releasing the buttons
Once this is done, wait for about 30 seconds for the iPhone to go off. Then press and hold the same sleep and wake buttons to power the iPhone.
We all have those important websites we frequent regularly on web browsers like Google Chrome for online updates. And we employ different methods to keep track of some of the information on these websites for future reference. Since it’ll be stressful committing all the URLs to memory or scribbling them down each time we visit, the most convenient way to save them is by bookmarking.
By bookmarking these websites, Chrome users can easily access them whenever they want, and these bookmarks can be synchronized across multiple devices. While bookmarking these sites on Chrome is a breeze, importing, and exporting bookmarks from google chrome can present a challenge of its own.
Export Chrome Bookmarks
If you wish to transfer your Chrome bookmarks to another computer or browser, you have the option to export it as an HTML file on a Flash or hard drive. OR you can use third-party Google Chrome extensions (available on Chrome Web Store) to share them. Or even transfer bookmarks using Google Collections on the Google app. Another alternative is to send the HTML file as an attachment to your personal email.
Let’s export your bookmarks from Google Chrome as a HTML file:
Open Chrome and access the browser menu by clicking the icon with three dots in the top-right corner.
Navigate to the Bookmarks section in the pop-up menu.
Open the Bookmark Manager by selecting it from the options that pop up.
In the new tab that opens, locate the icon with dots next to the Bookmarks search bar, below the Chrome address bar.
Click on the icon and choose the Export Bookmarks option.
Click on the icon and select the Export Bookmarks option.
Select a name and location you want to save the bookmarks(flash drive, desktop, etc).
Click Save to finalize the process. The bookmarks are saved as HTML files.
Import Bookmarks From Chrome
After successfully following and completing the above steps to export your bookmarks, the next thing is to import those bookmarks you saved as an HTML file into the browser of your choice. It could be Mozilla Firefox, Safari, Brave, Microsoft Edge, etc.
Below are the steps to import Chrome bookmarks:
Open the Google Chrome browser
Locate the menu icon with three dots at the top-right corner of the Chrome window.
From the menu that appears, go to “Bookmarks” and select “Bookmark Manager.”
In the Bookmark Manager, find the three-dot menu icon located next to the search bar, below the Chrome address bar.
Select the three-dot icon, and a drop-down menu will appear.
From the menu, choose “Import Bookmarks” and your computer’s Open File dialog box will pop open.
In the dialog box, navigate to where you saved the HTML file containing your exported bookmarks.
Select the file and hit “Open.” This will initiate the import process, and all your bookmarks will be imported into Chrome.
Podcasts are now a very popular way for people to consume content and stay informed on a wide range of topics. It’s not hard to fathom why. Similar to radio broadcasts, podcasts are cool digital channels of entertainment. The significant difference is that people can listen to podcasts on various platforms, at any time. Consider some of these great pointers below if you’re a beginner fascinated with podcasting and have no idea how to start a podcast.
What Is A Podcast And How Does It Work?
To put it briefly, a podcast is an audio or video file accessible on the web for either streaming or downloading. It is pre-recorded; unlike radio broadcasts, you can listen to or replay podcasts on the go, at work, while cooking, etc. Either on smartphones or computers. Podcasts are episodic and this makes it easy for users to stream them whenever they want. When users also subscribe to podcasts, these episodes can be automatically sent in installments. Immediately a new series is published, they’re distributed to the various platforms the user subscribed to.
Aside from learning, and entertainment, podcasts are great avenues for organizations and entrepreneurs to promote their businesses, services, or products. Brands utilize podcasts to reach and connect with their target audiences as well as to drive engagement.
Who Can Start A Podcast?
Can anyone start a podcast? Yes, anyone can start a podcast. There is no specific group who are assigned the role of podcasting. Neither are there particular layouts, rules, or platforms for podcasting. All that is required is the right physical and digital tools, as well as a platform to host the podcast. You know the old saying ‘go with your guts’? There’s no better place to apply it than podcasting. Those who are interested in starting a podcast don’t require manuals on the kind of topics they wish to talk about. They simply find the topics that fascinate them, choose the podcast equipment, and get weaving.
With that squared away, let’s move on to the various platforms for podcasting, the necessary equipment, and a guide for beginner podcasters.
Podcast Platforms
First, start by knowing the different podcasting platforms for uploading audio or video content. They’re called podcast hosts and allow podcasters to upload and distribute podcast series. Podcast host providers are either freemium or premium. Monetized hosting platforms offer different pricing plans depending on bandwidth, storage, and analytics. And typically provide tools for podcasters to upload, manage, and publish episodes, as well as to generate RSS feeds and statistics on listener engagement. Some of the popular hosting platformsfor podcasts include:
Buzzsprout
PodBean
Captivate
Transistor
Simplecast
Castos
Resonate
Spreaker
Libsyn
SoundCloud
Meanwhile, another platform where podcast listeners search or discover these uploaded podcasts is the podcast directory. After searching for information about desired podcasts, users can subscribe and start listening to their favorite podcasts. Here are examples of podcast directories:
Apple Podcasts
Spotify
Google Podcasts
Stitcher
TuneIn
SoundCloud
YouTube
It is imperative to emphasize that some platforms can be podcast hosts as well as podcast directories. Meaning people can upload on the platform and search or listen to their favorite podcasts at the same time. Examples of podcast platforms that are both hosts and directories are YouTube and SoundCloud. A set of people on YouTube for instance are uploading videos, another group is just there to watch them.
Tech Items You’ll Need To Start A Podcast
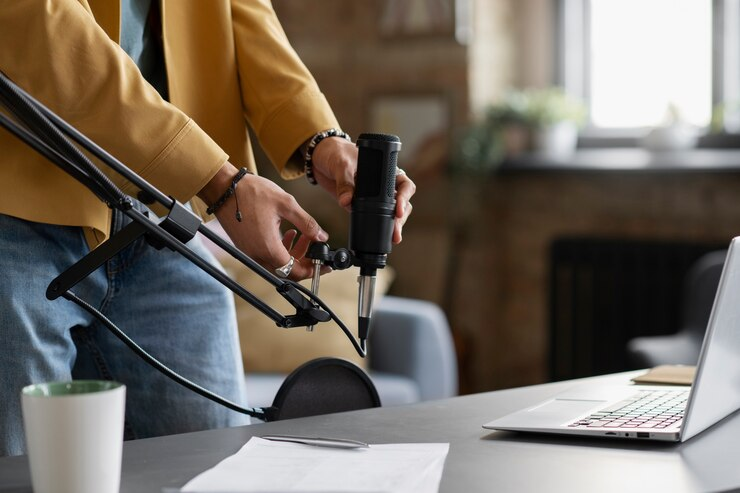
While you don’t need to rob a bank to start a podcast, it’s really important to go for podcast equipment that gives your podcasts good quality. Essentially, there are lots of cool tech items for podcasting, some are physical items, and others are virtual. Depending on your budget, we’ll be reviewing a few of them.
Microphone
A good microphone is the first thing a podcaster will need to start a podcast. There are also a few key factors to consider before purchasing a microphone for podcasting. The audio quality for one; you need a microphone that gives life to your content. People will abandon your podcast if the audio quality is bad.
Another thing to consider is how cost-effective, and easy to use the microphone is. if you get a gizmo that you’re not quite familiar with or that takes a long time to get acquainted with, it’ll end up stressing you. Most microphones are built into a computer and usually can’t capture sounds, which is why beginner podcasters should steer clear of them.
Getting a good microphone depends on your budget or what you hope to achieve with it. There are tons of affordable microphones available in the market for podcasting with good audio quality instead. Here are some of them; Audio-Technica AT2020, Blue Yeti USB Microphone, Rode Procaster, etc.
Headphones
You need a good pair of headphones before you start a podcast. Headphones are important for recording and editing content; you can monitor the audio quality of your podcast and make necessary adjustments. Also, a headphone is great when conducting interviews with guests on your podcasts. Some good headphones for podcasting are Beyerdynamic DT 990 Pro, Sony WH-1000XM4, Sennheiser HD 660 S, Audio-Technica ATH-M50x, Shure SRH440, etc.
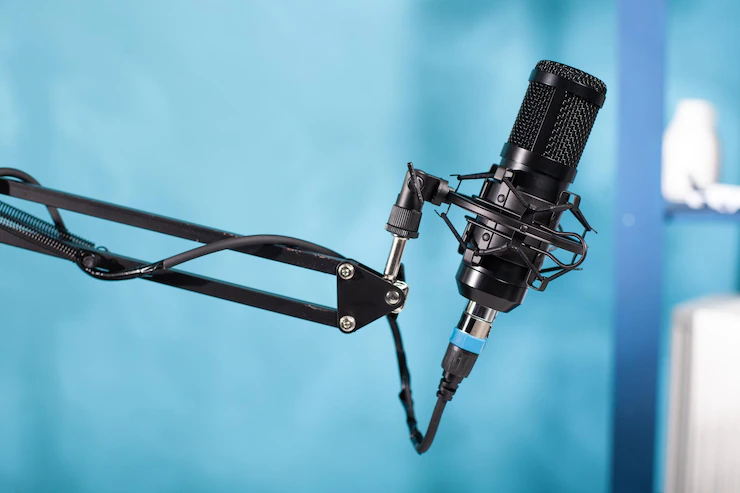
Boom Arm
A boom arm is another cool item you need to start a podcast. It’s an adjustable stand attached to a microphone that swivels in different directions. You can adjust it to the position you want to record your podcast in. The boom arm is also called a boom pole or arm stand.
Shock Mount
A shock mount keeps the microphone steady and prevents external noises, or vibrations when recording. That web-like thing clamped around the microphone in the image above for instance is a shock mount. It comes in different shapes and designs and is designed to hold the mic in place. Some good shock mounts for beginner podcasters include Sabra Som SSM-1, LyxPro MKS1-B Condenser Spider Microphone Shockmount, Rycote 44901 Invision USM, etc.
Pop Filter
Pop filters help to eliminate plosives—the popping sounds you make while recording. They also improve the audio quality of a podcast and are pretty much inexpensive. Most people confuse pop filters with foam balls or foam covers. The difference between a pop filter and a foam ball or cover is that pop filters eliminate harsh popping sounds while a foam ball is a covering that reduces external sounds or vibrations, but it does not remove the plosives. Good pop filters to purchase if you want to start a podcast are Shure PS-6 Popper Stopper, Nady MPF-6, etc.
VideoCamera
Today, podcasts are not just limited to audio only, there are video podcasts as well. This is where a good video camera comes to play. Depending on your budget and the quality of content you wish to produce, you can use camcorders, webcams, DSLR cameras, or even smartphones. There are varieties of video camera brands to choose from such as Sony FDR-AX43, Nikon COOLPIX B500, Panasonic HC-VX981K, etc.
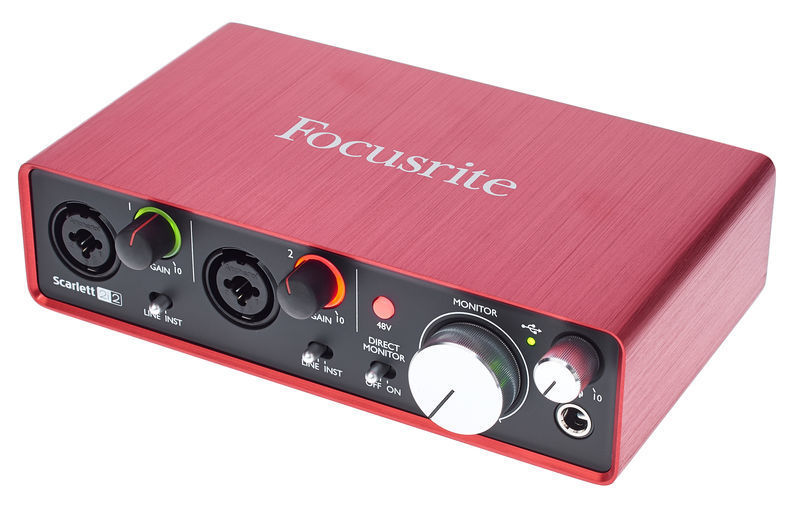
Audio Interface
This device allows you to connect your microphone or other audio equipment to a computer. It has mixing software, a converter, amplifiers, etc that gives your audio better sound quality. Some audio interfaces you can use to start a podcast include Midiplus Smartface II Audio Interface, MOTU 8pre USB, etc.
Recording Software
A Digital Audio Workstation or recording software is great for audio podcasts and helps to record and edit your audio. They come with other cool features and impressive effects that provide better audio quality. There is free and paid recording software available for podcasters. Example Adobe Audition, Audacity, GarageBand, etc.
Lighting
You need a good lighting setup when you’re starting a podcast and in most cases, natural light won’t cut it. You’ll need ring lights, LED lights, 3-point lights, etc. Here are some of the best lighting for video podcasts. For LED light one good option is the Aputure Amaran HR672 LED lighting kit. For the 3-point you can use the CFL lighting kit. And lastly, for ring lights, you might consider the Joby Beamo 12-inch ring Light.
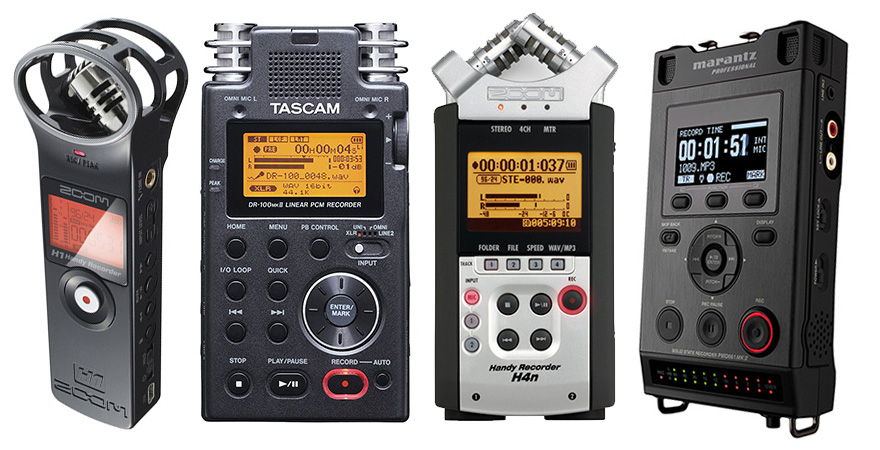
Digital Recorder
Last but not least equipment you’ll need to start an audio podcast is a digital recorder. Some of the affordable ones are ZHKUVE Rechargeable Sound Audio Recorder, DYW Portable Digital Voice Recorder, etc
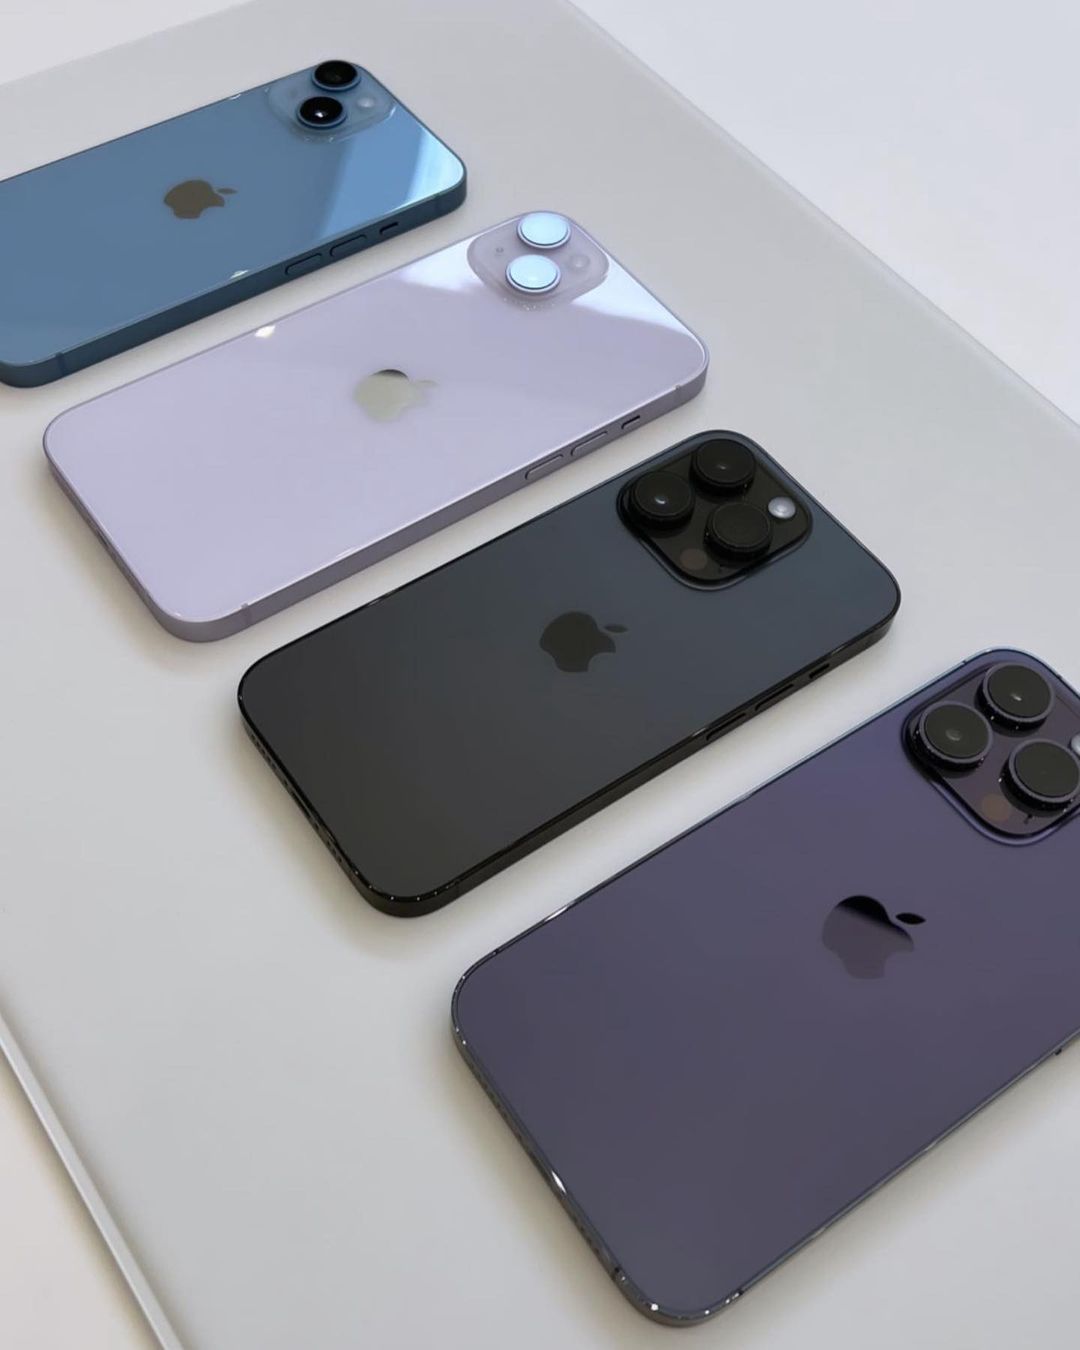
On September 8, 2022, Apple unveiled the new iPhone 14 and iPhone 14 Plus. A next-generation smartdevice with the A15 Bionic chipset, emergency satellite SOS, and crash detection, all integrated with iOS 16 features.
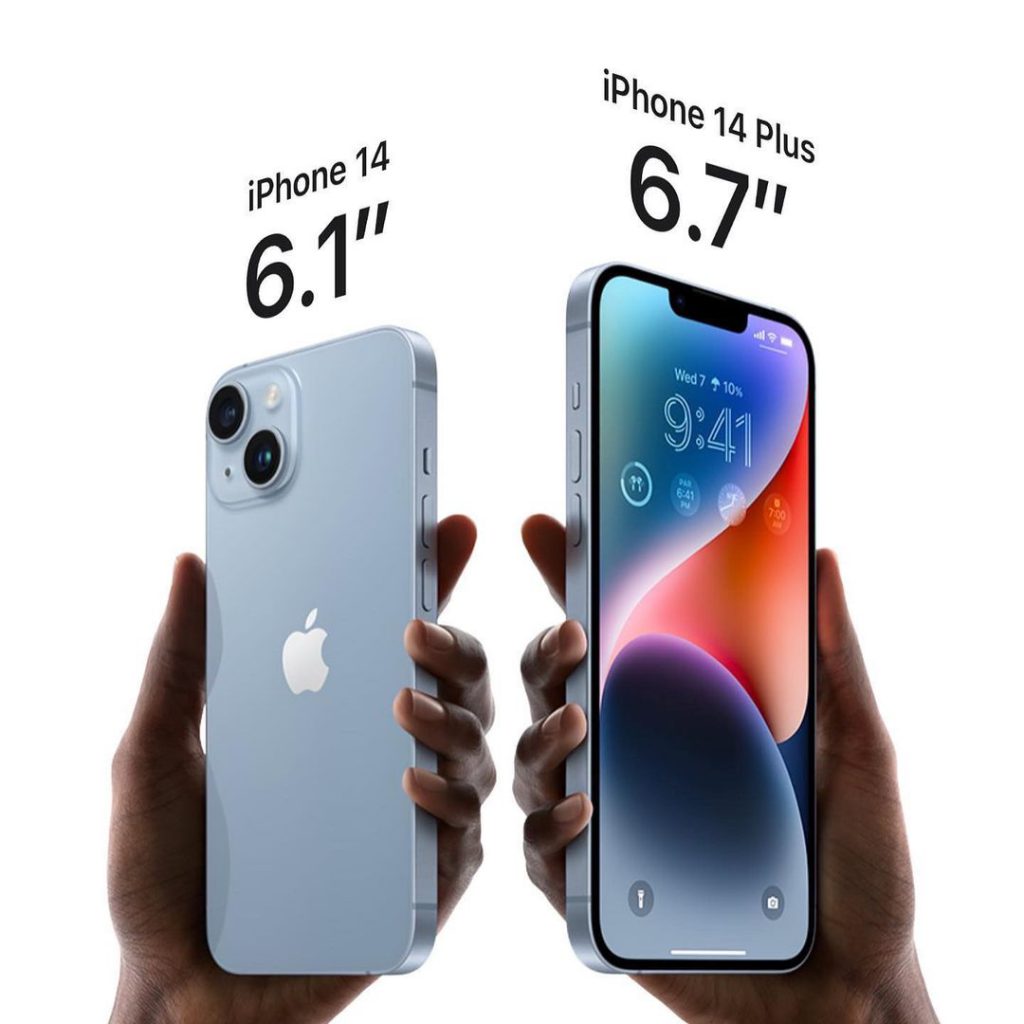
The 6.1″ inch screen and a 6.7” inch larger screen display allow for HDR content. Apple’s iPhone 14 and 14 Plus are available in midnight, blue, starlight, purple and red. Also in 128GB, 256GB, and 512GB storage capacities. The US models of the iPhone also come with an eSIM, meaning there is no physical SIM tray.
In the meantime, the tech community is abuzz with the special iOS 16 features and availability dates of high-end devices across the world. Technophiles worldwide are already pre-ordering iPhone 14 and iPhone 14 Plus. Find out the specifications and features below.
Credit: IG @cellcompanycat
iPhone 14 Emergency SOS Feature
The new safety feature called emergency SOS via satellite is a feature that Apple introduced on both recently unveiled iPhone 14 models. The feature claims to get one in touch with emergency services in areas where there’s no reception.
In dire situations when you’re out of cellular and Wi-Fi coverage, you can send messages via satellites to get the help you need.
How To Use The Emergency SOS Via Satellite Feature
Firstly, to access the emergency SOS feature, an iPhone 14 model is required, alongside an iOS 16 software update.
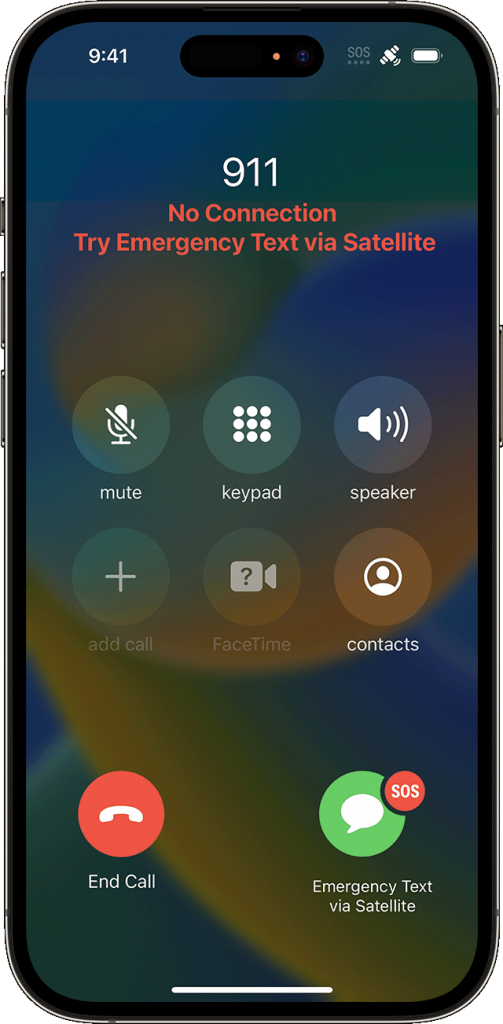
Secondly, try calling emergency services. Another prerequisite to using emergency SOS via satellite is no cellular and Wi-Fi coverage. There has to be an actual disturbance in the network connection before utilizing the emergency feature. Once the above-mentioned details are covered, proceed to;
Tap Emergency Text via Satellite.
Tap Report Emergency.
Answer the necessary emergency questions to provide details about your situation.
You can also choose to notify your emergency contacts regarding the nature of your emergency.
Then follow the onscreen instructions to connect to a satellite.
While the connection is successful, be sure to keep following the onscreen instructions so the message can deliver.
Credit: Apple Inc.
Note that once connected to an emergency service, iPhone 14 starts a text conversation with emergency responders. It goes as far as sharing critical information like your Medical ID and emergency contact information (that’s if you’ve previously set up one). The nature of the emergency, your location, and the remaining battery life of the iPhone will also get to the emergency services.
Which Location Is Emergency SOS via satellite available?
Apple’s emergency satellite feature is only available in the US and Canada as at the launch of the iPhone. This includes Puerto Rico and US Virgin Islands, but not Guam or American Samoa. The feature is equally unavailable on iPhone models that you acquire in China mainland, Hong Kong, or Macao.
iPhone 14 / iPhone 14 Plus Features And Specifications
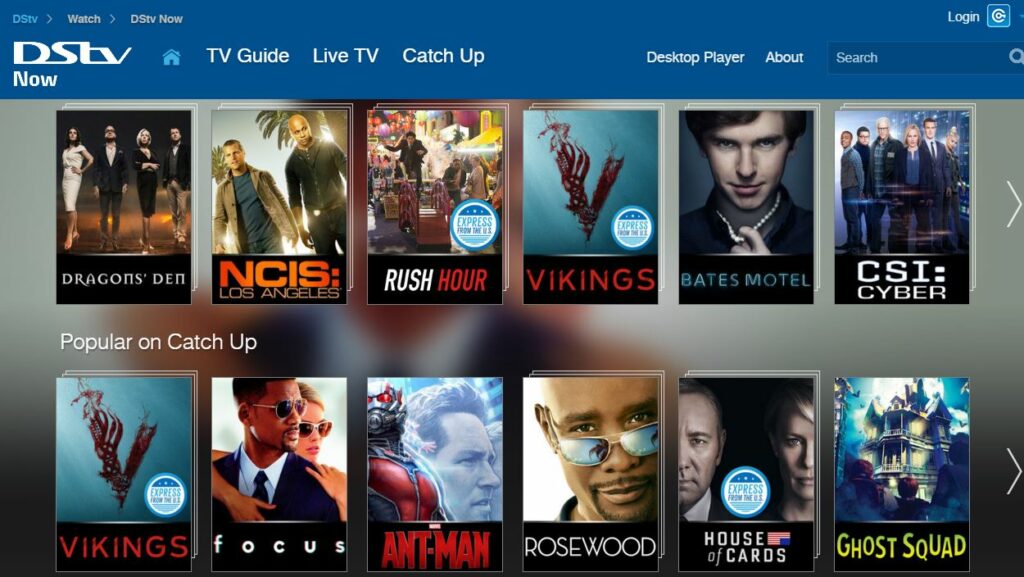
Being able to connect and watch DSTV on your mobile device with your Dstv decoder has a lot of advantages. You will be able to keep up with your favorite programs without being glued to your TV.
Thanks to intuitive thinking, the DSTV Now platform lets DSTV users pair their mobile device, laptop, or smart TV to their DSTV decoders. In this article, we explore a comprehensive tutorial on how to connect your DSTV decoders to your mobile device, laptop, or smart TV using DSTV Now.
Requirements to Connect and Watch DSTV on Your Mobile Device
Before connecting your decoder to your mobile device, laptop, or smart TV, ensure you meet the following requirements:
An active DSTV subscription
The DSTV Now App
An Android device (smartphone or tablet)
Steps to Connect and Watch DSTV on Your Mobile Device
1. Download the DSTV Now App
Visit the Google Play Store or the Apple App Store on your mobile device.
Search for “DSTV Now” and download the app.
2. Register and Sign Up on the DSTV Now Platform
Open the DSTV Now app.
Register for an account if you don’t have one, or sign in if you already do.
3. Insert Your Smart Card Number
Navigate to the settings or account section within the app.
Enter your DSTV smart card number to link your decoder with the app.
Streaming
Once you’ve registered on the DSTV Now platform and inserted your smart card number, you can start streaming. You’ll have access to all the channels included in your DSTV subscription.
Features of the DSTV Now App
Reminder Feature: Syncs with your phone’s reminder app to notify you when your favorite programs begin.
Kid Access Feature: Allows you to set a PIN for certain channels to restrict content you don’t want your kids to watch.
How to connect your DSTV Decoder to your phone
The DSTV Now app has a reminder feature, that syncs up with the reminder app on your phone. It provides you with accurate reminders when the program begins. The DSTV Now app also has a kid access feature that lets you set a pin on certain channels, that contain content you do not want your kids to watch.
There you have it – a comprehensive tutorial on how to connect your DSTV Decoder to your Android device.
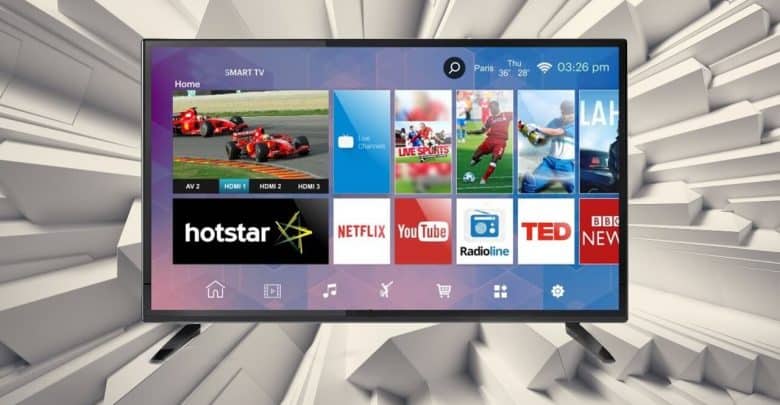
If your TV doesn’t allow you surf the net, stream videos from top streaming services available, feature inbuilt app and play games without a console, chances are that you are using an outdated Television, and your television isn’t smart. Smart TV’s are the latest technological trend. Thanks to thoughtful innovation, you don’t need to spend the extra cash, in purchasing a new Smart TV, in other to gain access to the features mentioned above, there is a way you can convert your old PC to a smart TV, saving you cost. Apart from converting your old PC to a smart TV, in other to save cost, you can also convert any digital TV to a smart TV. In this article, we explore a comprehensive tutorial on how to convert your old PC to a smart TV.
The steps to converting your old PC to smart TV is pretty basic, steps are very easy. Before you can convert your old PC to smart TV, your old PC should be under the HTPC category. Which means it should be a theater personal computer.
A computer that falls in the category of HTPC, is a regular computer with HDMI and audio outputs. These ports help you create a media link between your old pc and your Television. If connected correctly, you will be able to transmit audio and video from your PC to your television seamlessly. This way your old PC will once again gain relevance.
Still on computers under the HTPC category, if your PC falls under the category of HTPC. You will be able to use your computer as a smart TV, allowing you to watch Netflix and Amazon prime videos.
Using your old PC as a smart TV doesn’t actually require much. All you need are moderate specs enough to push your PC without any form of lag. If you currently experience lag on your PC, you are advised to upgrade the RAM and storage of your computer, before proceeding to use your old PC as a smart TV. You would also be needing a strong internet connection, to ensure streaming goes smoothly.
There you have it – a comprehensive tutorial on how to convert your old pc to a smart TV. if you have questions, feel free to drop them in the comment section below.
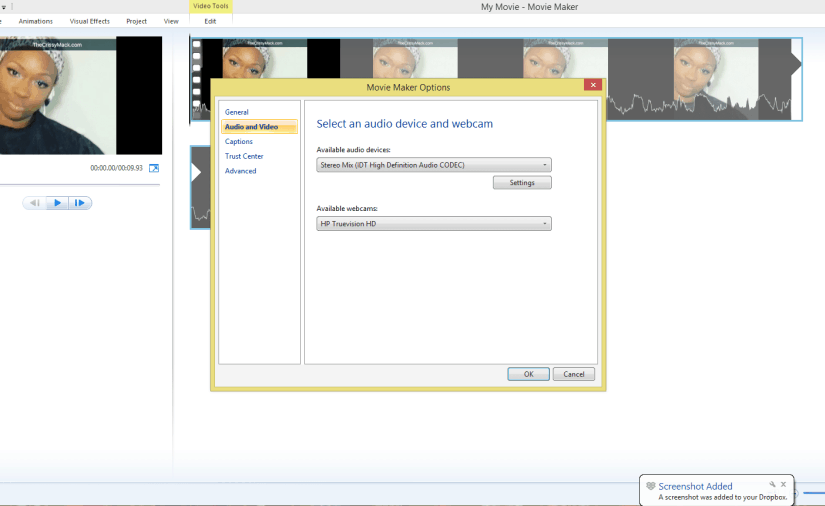
As you might already know, the Windows Movie Maker is a video editing software developed by Microsoft. It lets users create and edit videos, it also lets them publish videos created directly to OneDrive, Facebook, Vimeo, Youtube, and Flickr. The Windows Movie Maker software is very efficient in performing the task it was created for, but just like other software, there are times you experience glitches. In this article, we explore a tutorial on how to fix one of the popular glitches you might experience when using this software. Here you learn how to fix a corrupted video file om Windows Movie Maker.
There is no exact cause facilitating the corruption of videos files on the Windows Movie Maker. Corruption of these video files is caused by different things. Since there exact cause of video corruption, you would have to troubleshoot the problem using different methods, which will be listed in this article. Apart from these methods for troubleshooting video corruption on the Windows Movie Maker, there is third-party software that solves the fixes corrupted video files, with few clicks, we also explore a tutorial on how to fix corrupted video files using this third-party software. Before we dive into the tutorial proper, here is a list of potential facilitators causing Windows Movie Maker videos to get corrupt.
Potential Causes of Movie Maker videos getting corrupted
Corruption in the hard drive
Virus or malware
Faulty video codecs
Outdated video card drivers
Use of unreliable video converter
Media player not supporting Movie Maker video file
Abrupt computer shutdown while saving/working on Movie Maker video
How To Fix A Corrupted Video File on Windows Movie Maker Using Remo Repair MOV Tool
As mentioned earlier, there is third-party software, that helps fix corrupted video files, with just a few simple steps. The Remo Repair MOV tool is an example of such third-party software. Here are the steps to fixing a corrupted video file using the Remo Repair MOV tool:
Download and install Repair MOV software to your Windows machine.
Run the Remo and follow the on-screen
Browse and open your movie file to be repaired as well as a healthy reference file using Healthy File option.
Click Repair option, to begin movie file repair
After the file has been repaired, the tool shows the fixed MOV video file along with its component details. The software also allows you to preview the fixed file using “Preview Repaired File” option.
Save Repaired Movie Maker File using the SAVE REPAIRED FILE option
Troubleshoot: Repair Windows Live Essentials
If you are unable to get access to any third-party video file fixer, you can go ahead to doing manual troubleshooting. The first thing to look out for, when troubleshooting this problem, is Windows live essentials. Corrupt file error messages can
Corrupt file’ error messages can also pop up when your Windows Movie Maker program has corrupted. To fix it repair Windows Live Essentials and then access your video file in Movie Maker to edit.
Steps to repair Windows Live Essentials:
· Press Windows + R Keys to open Run command
· Type Control Panel. Click on OK
· Under Programs, Click on Uninstall a program
· Go to Windows Live Essentials and right click on it
· Click on uninstall/change
· Select option repair all Windows Live Essentials
Repair corrupt videos with VLC Media Player
VLC Media Player can often repair corrupt or damaged video files. You can try this method to fix minor video corruptions while for severely corrupt video files seek Stellar repair software.
Upgrade Your Ram
Setting aside the already mentioned potential causes of corrupt videos, insufficient RAM may also facilitate the corrupt video error. Insufficient RAM facilitates slow computer speeds and can lead to corruption of videos. This holds sway if your videos are stored in MOV or.WMV. You are advised to consider getting a higher RAM.
Install a Codec Pack
An incompatible Codec may also lead to this error. If your media player is using an Incompatible code, the Video will not play. You are advised to install a codec pack on your PC. Here you will video formats, that will make your computer compatible with all file formats.
Update Video Drivers
Out-dated video drivers is another common facilitator of the corrupted video error. There is very high chances that the video won’t play on your computer If your drivers are outdated. So if you have tried all the steps listed above, and none of them worked. There is a high chance, that the problem is caused by outdated drivers.
Be rest assured that one of the fixes listed in this article on how to fix corrupted video file on windows movie maker, will fix the corrupted video file on your computer. All you have to do is test these fixes, one of them is the solution to your problem.
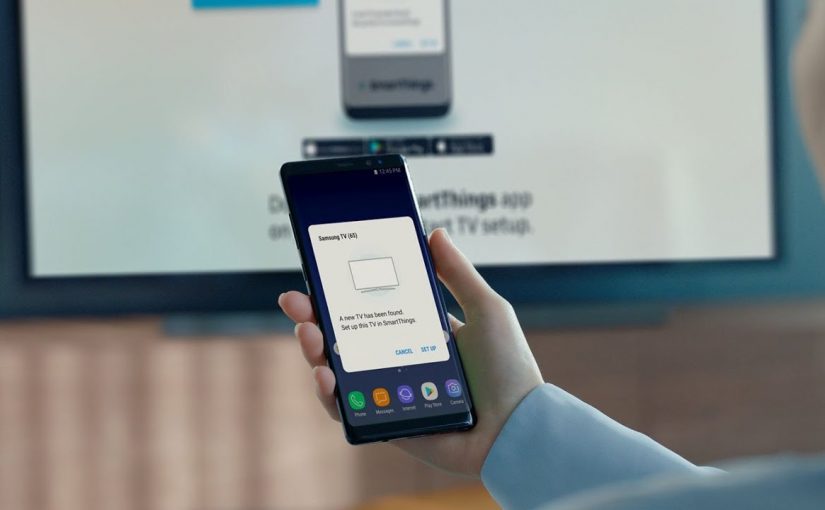
Over the years, there has been an observable increase in the size of a smartphone and tablet display. Smartphones and tablets have grown into gadgets that we can use to entertain ourselves using media content. Despite these observable increase in the size of smartphone and tablet display, there comes a time when you desire to project stuff from your smartphone or tablet display onto a bigger display. In this article, we explore a tutorial on how to connect your mobile phone to a smart TV, allowing you to view contents on your smartphones unto a bigger screen.
In this tutorial, we explore four different methods for connecting your mobile phone to your smart TV. This Tutorial covers how to connect Android mobile phones to smart TV’s and how to connect iPhone’s to smart TV’s.
How To Connect Your Mobile Phone To Your Smart TV Using HDMI Cable
Connecting your smartphone to your smart TV using an HDMI cable, is a universal method of connecting smartphones to a smart TV. It works for both Android and IOS devices. It is a very reliable method to project content from your mobile phone to a smart TV. It lets you transfer both audio and video from the same source.
Some smart TVs feature HDMI 2.1 while others feature HDMI 2.0. The minimum requirement to stream 8K content from your mobile phone to a smart TV is an HDMI 2.0 port.
Smartphones usually do not feature HDMI ports, so you are required to purchase an HDMI to USB C, Micro USB or Lightning ports. You connect one side of the HDMI cable to your smart TV and the other part housing the adapter to your mobile phone.
Connect Your Mobile Phone to Your Smart TV Using USB Cable
Just the way you connect pen drives to your smart TV, you can also connect your mobile phone to your smart TV using USB cables. Smartphones usually come with cables, with one end featuring either a USB A, USB C or lightning and the other end being USB A.
You are required to connect the USB A port to your smart TV and the other end of the cable to your mobile phone. Your smart TV will then read your mobile phone as a storage device. You will be able to view photos, audio files, and video from your mobile phone.
Connect Your Mobile Phone to With Wireless Casting on Android
Casting eliminates cords. Casting lets you connect your mobile phone to your smart TV without using cords. Casting is a process of wireless streaming content from your mobile phone or tablet, by connecting to the same WiFi network as your television.
Some mobile phones come with inbuilt casting features, while other mobile phones require you to download third-party apps. In case your mobile phones need third-party apps, Allcast is a highly recommended app for casting.
Apart from using casting apps on mobile phones, there are streaming devices you can use to add the functionality to your smart TV. Google Chromecast is an example of such streaming devices.
Using Apple Airplay
Similar to casting on Android, Airplay is a feature designed for devices running any OS designed by Apple. It lets you connect your iPhone to your Smart TV wirelessly.
Airplay only works between Apple devices. You are not allowed to wirelessly connect your iPhone to smart TV’s not made by apple. Similar to casting on Android, both the Apple TV and iPhone must be connected to the same network.
There you have it – a comprehensive tutorial connect your phone to your smart TV. If you have questions, feel free to drop them in the comment section below.
i Dual booting Linux with Windows 10 on your PC, means having both operating systems installed on your PC. This process involves you partitioning your hard disk and installing the operating systems on different partitions, This way you will able to use both operating systems on your PC simultaneously. In this article we explore a tutorial on How to Dual Boot Linux with Windows 10 on your PC
Requirements
1. Two USB flash drives or DVD-Rs
Since we will be installing tow operating systems on our computer, you are required to purchase DVDs of both operating systems. You are required to purchase a Windows operating system DVD and a DVD containing the Linux Ubuntu operating system.
Apart from installing the operating systems using DVD, you could also install them from a bootable flash drive, which is a way faster. If your laptop doesn’t support booting from USB, you are advised to install the operating systems using DVDs, as mentioned earlier.
2. A Windows 10 license
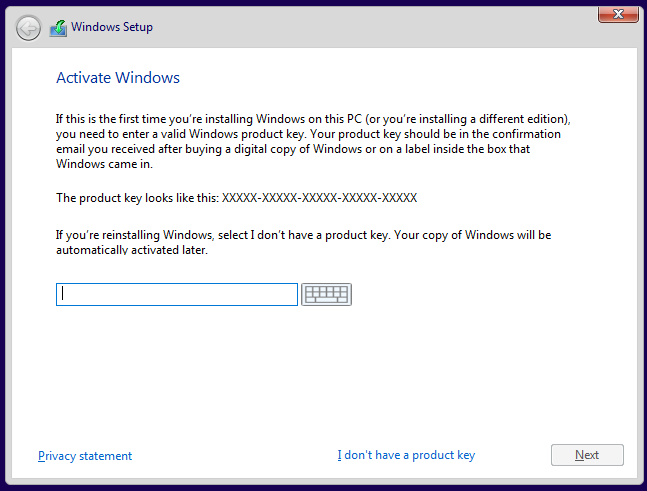
Installing the Windows 10 OS on a computer that didn’t come with Windows 10 OS on default, requires a Windows license key, so if your computer didn’t come with the Windows 10 operating system on default, you will be required to input a license key. If your computer came with the Windows 10 operating system, you won’t be required to input any. The Windows 10 license key, will be provided to you by the retailer.
3. Windows 10 Creation Tool
If you are installing the Windows 10 operating system from a bootable flash drive, you are required to download a windows 10 media creation tool. The Windows 10 media creation tool provides a step by step guide to creating a Windows 10 media on a USB. You can also use to create windows media on DVDs.
4. Etcher Software
Similar to the Windows Media Creation tool, The Etcher software lets you load a Ubuntu media unto a bootable flash drive or DVD. The Etcher software is supported on Linux, MacOS, and Windows.
Please Note that you are required to download the Ubuntu ISO Image, you will load in the bootable flash drive. Once it has been downloaded, you are required to launch the Etcher software, next click on Select image and then point to the already downloaded Ubuntu ISO image downloaded. Now Select your flash drive, from the list of storage locations provided. Click flash and the Etcher software will convert your bootable flash drive, into a Ubuntu installer.
After you have successfully met all the requirements above, purchased or created a bootable device for both operating systems, you proceed to install both operating systems on your computer. The steps to installing the operating system are listed below:
How to Install Windows and Ubuntu on Your PC
Just as a reminder, before we get started with the installation, you should have already created windows installation media, created a Ubuntu installation media and made a backup of your important files.
Creating a dual boot of Linus and Windows OS can be done in two ways. Its either you install the windows 10 OS first, and then using a ubuntu installer to resize the partition and installation will proceed in the empty space. Or you install Ubuntu first and then install the Windows 10 OS in the smaller partition on your hard disk.
Installing Windows
If you already installed Windows OS on your PC, you are required to skip this step and move straight to installing Ubuntu on your PC, otherwise, continue with the steps listed below:
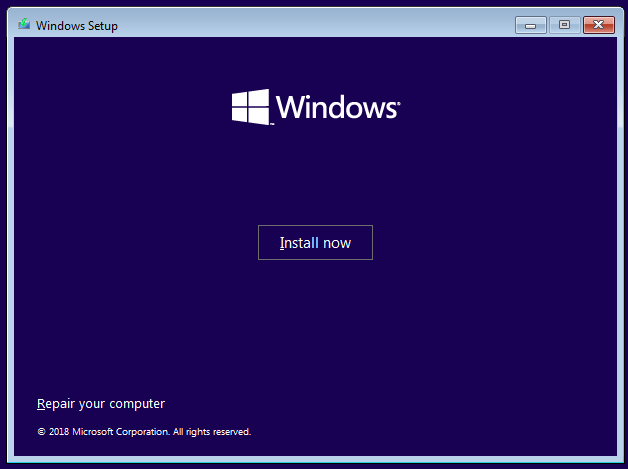
1. Insert the Windows Installation in you have: As mentioned earlier, its either you use a DVD with the Windows 10 OS inside or you use a bootable flash containing windows 10. If you have a windows 10 DVD, insert it in your DVD player, If you have a bootable flash drive, plug it into your USB port and follow the steps below.
2. Click on the boot menu key: PC’s have different boot menu keys, you have to look out for the boot menu key assigned to your PC. The boot menu key is usually displayed on the bottom of your screen when you power your PC on. If you are unable to locate the boot menu key for your computer, you advised to search it on Google, to make things faster.
3. Change Boot order: Changing boot order means changing the device your PC boots, On default, your PC is set to boot from your hard disk. If you using a Windows 10 DVD, you are required to set your PC to boot from your disk drive. If you are booting from a bootable flash drive, you are required to set your PC to boot from the bootable flash drive. IF you don’t know how to do this, you advised to research on Google or contact your manufacturer.
4. Press any key on your keyboard and proceed with the installation: After you might have successfully booted your installation media, you will be prompted to press any key on your keyboard, to proceed with the installation.
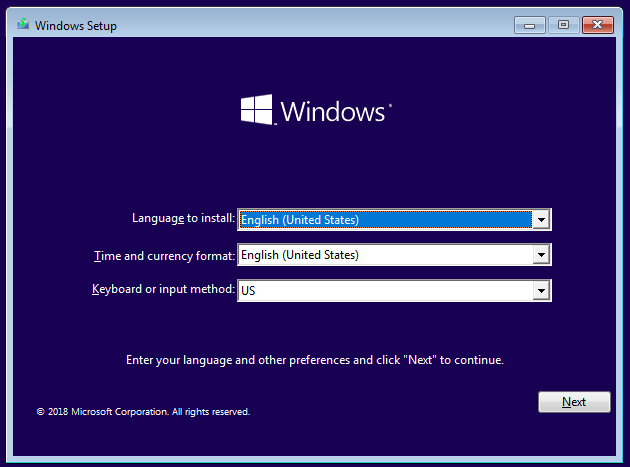
5. Follow the on-screen prompts: You will be presented with different on-screen prompts. Prompts that will require you select your preferred language, inserting your product key and lots more. These are basic steps that do not require any expertise.
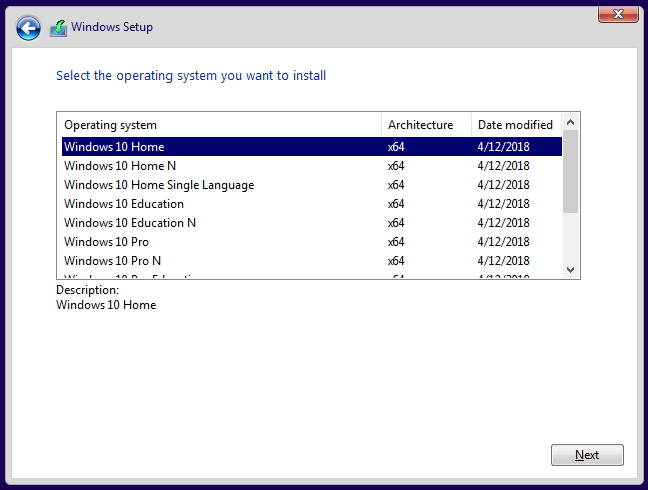
6. Select the version of Windows 10 you wish to install:
During the installation process, you will be required to select the version of Windows 10 you wish to install. Here you will be provided with the option to install windows 10 x64 and Windows 10 x86. Please note that installing windows 10 x86 is the same thing as installing windows 10 32 bit and installing windows 10 x64 is the same thing as installing windows 10 64 bit. Here you will also be required to select windows 10 home, professional and other versions. Please, note that the windows 10 pro is the most powerful version of Windows 10.
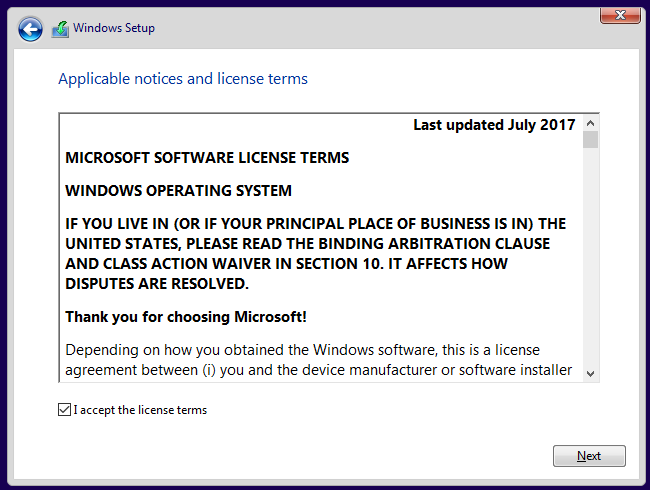
7. Review License terms and click next
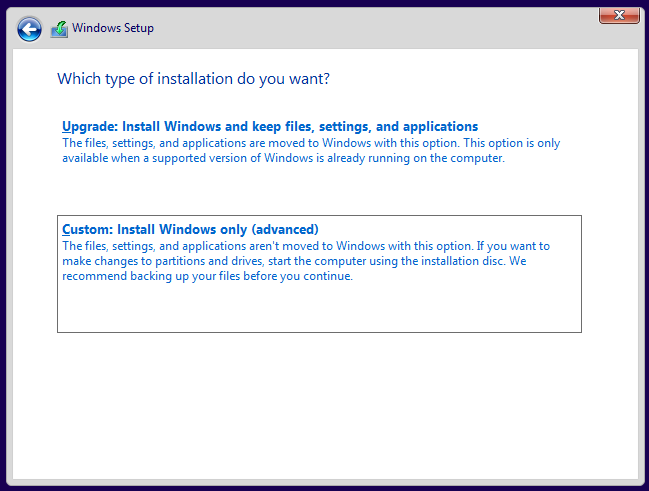
8. Click on custom install: After reading the license information, you are required to select the type of installation you want. You have options to upgrade, keeping all your files or doing a custom advanced install. You are advised to do a custom install. You will able to select the drive you want to install the windows 10 OS.
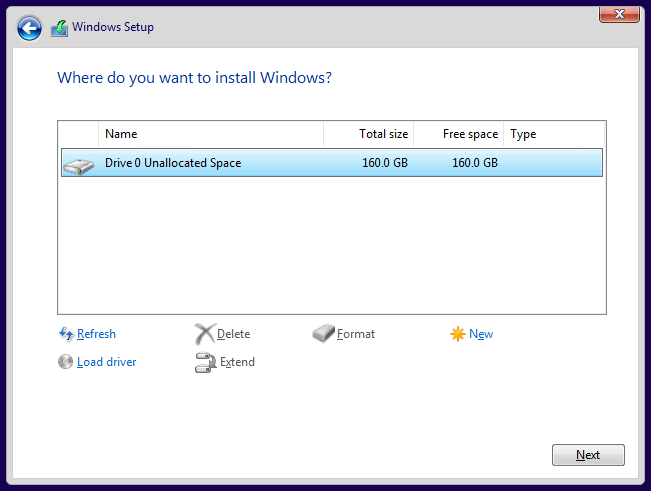
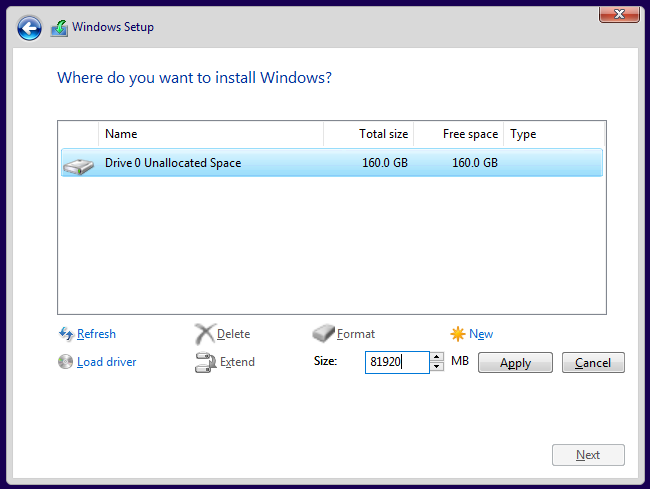
9. Allocate Storage For Installation of Windows 10
Our sample hard drive has not been allocated or partitioned before. If your hard drive isn’t like this or has been partitioned before, you are required to highlight all the partitions and delete them. Your entire hard drive will be unallocated. Click continue to create a new partition.
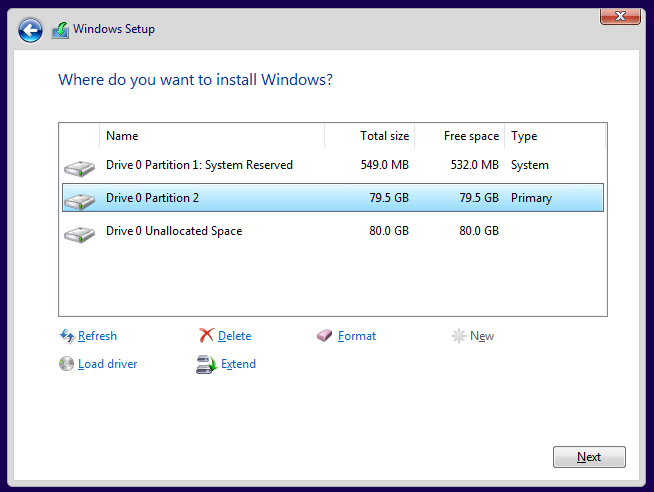
You are advised to create a partition with up to 80GB to accommodate the windows operating system.
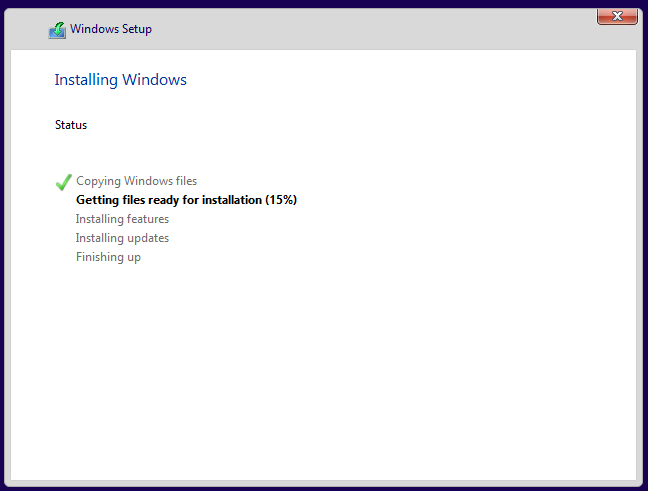
10. Click Next, to confirm partitioning and to begin windows installation.
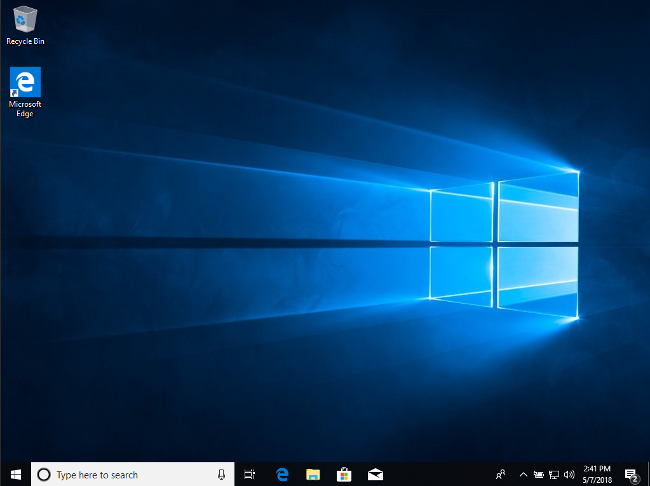
Now that you have successfully installed the Windows 10 operating system on one of the partitions, the next step is to install Ubuntu on your hard drive.
Installing Ubuntu
At this point, we assume you already have the Windows 10 operating system installed on your hard drive. The next step is to install Ubuntu on the other partition you created. Installing Ubuntu will be done using the installation media you created earlier.
1. Insert Installation Media into your Computer: You are to insert the installation media in your computer. If the installation media was created on a DVD, you are to insert it into your CD ROM, if the installation media is on a bootable flash drive, you insert it via your USB port.
2. Click on the boot menu key: PC’s have different boot menu keys, you have to look out for the boot menu key assigned to your PC. The boot menu key is usually displayed on the bottom of your screen when you power your PC on. If you are unable to locate the boot menu key for your computer, you advised to search it on Google, to make things faster.
3. Give priority to Your Installation Media: After you must have successfully entered the boot menu on your computer, the next step is to give priority to your installation media. If you are booting from a DVD plate, you are to give priority to your CD ROM, select boot from CD ROM. If you are booting from a bootable flash drive, you are required to give priority to your flash drive, select boot from flash drive.
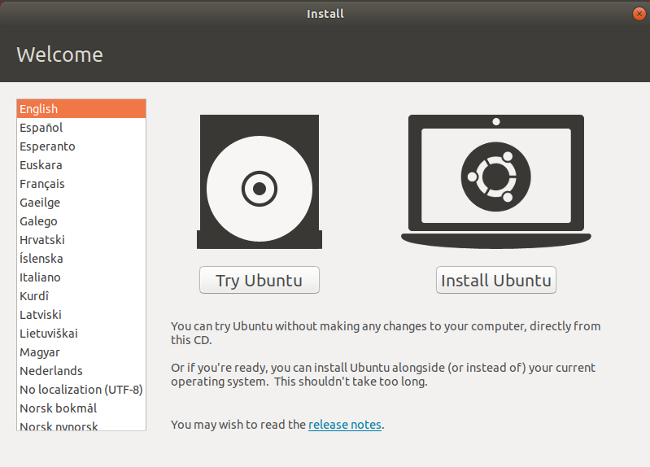
4. Install Ubuntu: After you have successfully prioritized your Boot device, your computer will be booted into the Ubuntu installation interface. Here you are provided with the option to either try ubuntu or install Ubuntu.
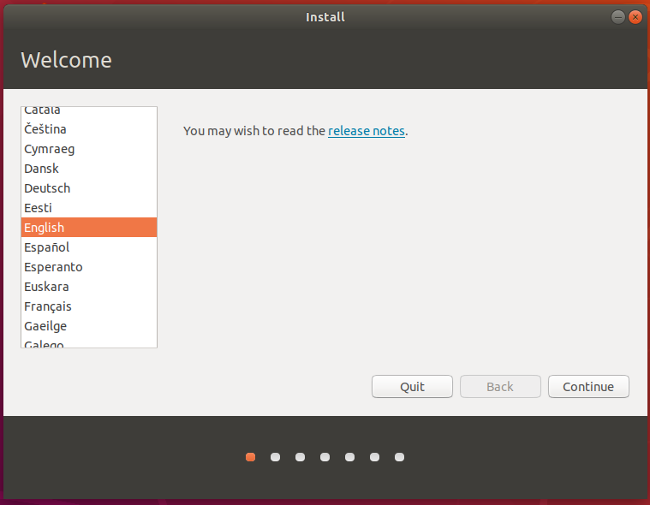
5. Select Your Preferred Language: After you might have clicked the install Ubuntu button, you will be required to select your preferred language. Here you are to select the language you understand.
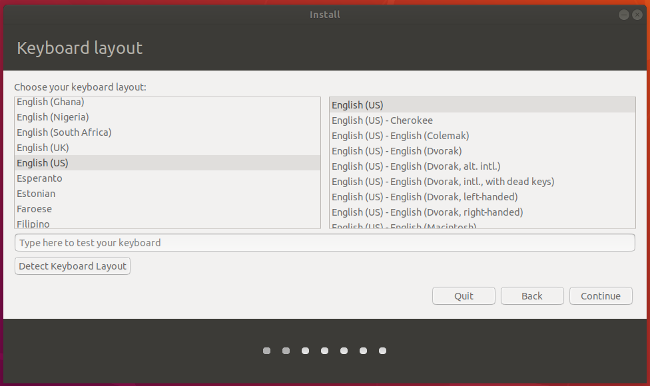
6. Select Your keyboard layout: Despite being an output component of the computer, the layout configuration software plays a huge role, in key placement. Here you have options to choose from the different layout assigned to different languages. After you have selected your preferred keyboard layout, you are advised to click continue.
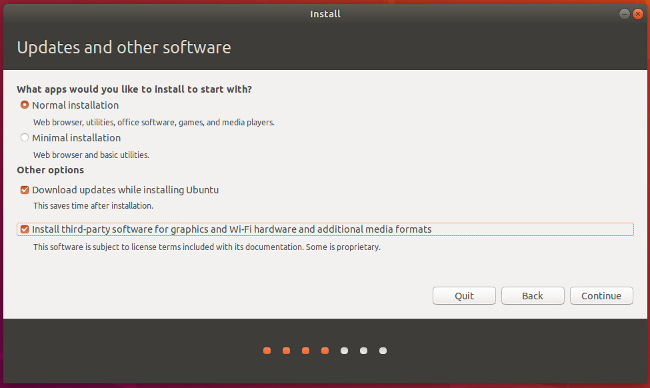
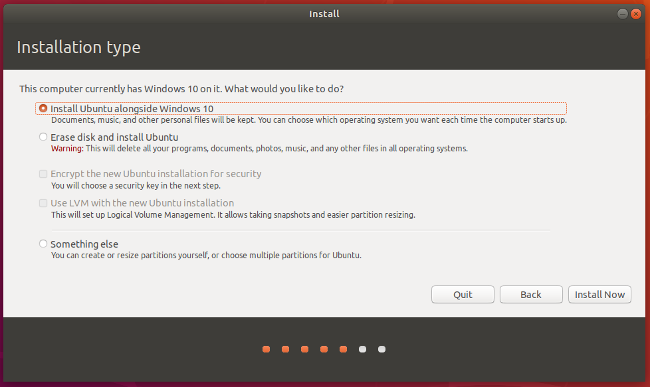
7. Select Installation Type: Installing Ubuntu, you provided with Normal Install Option, as well as Minimal installation option. If you select normal installation, Ubuntu will be installed alongside a web browser, utilities, office software, games, and wallpapers. Minimal Installation installs Ubuntu alongside a web browser and utility software.
8. Install Ubuntu Alongside Windows 10: You are provided with the option to either install Ubuntu alongside Windows 10 or erase the hard disk and install Ubuntu.
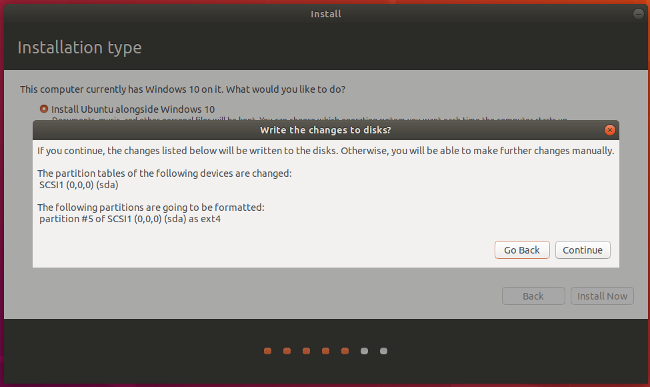
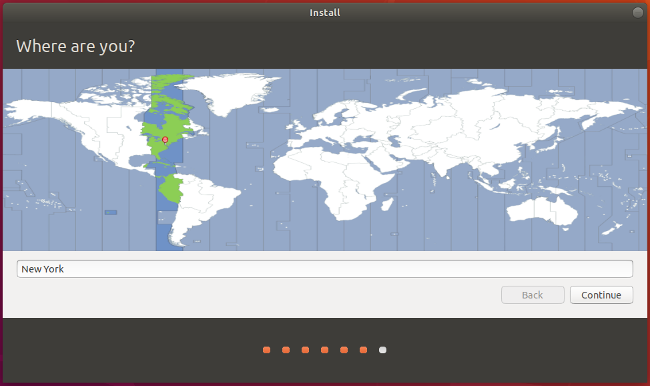
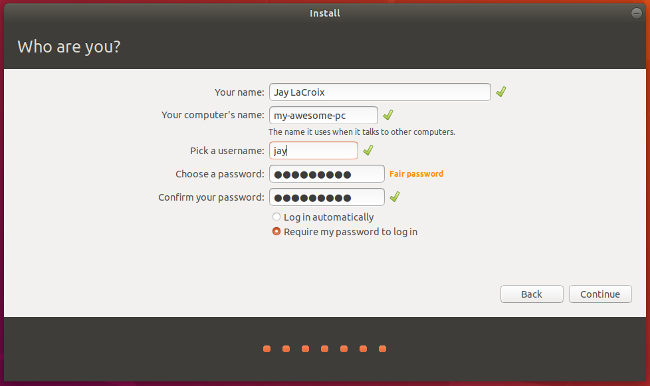
9. Follow in the On-Screen prompts provided: You will be required to confirm Ubuntu installation, select time zone and fill in your Particulars, to setup login security.
10. Reboot Your PC: After you might have successfully installed Ubuntu on your PC, You will be provided with the option to continue testing or restart. You are required to click the restart button, to begin using Ubuntu.
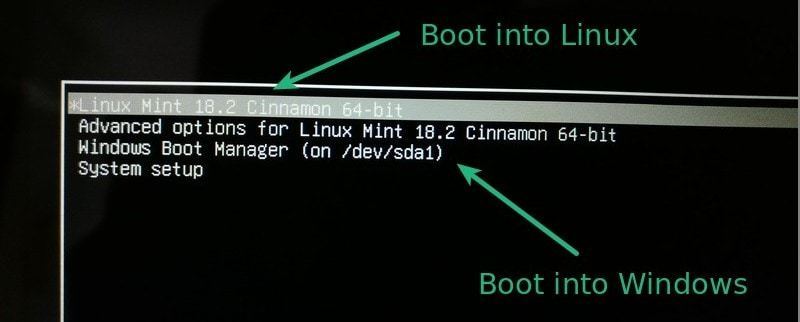
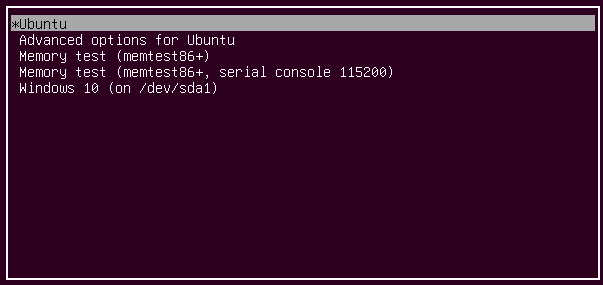
Note: After you might have successfully followed all the steps provided in this tutorial, you will be provided with the dual boot screen, where you will be given the option to either boot into windows or boot into Ubuntu.
There you have it – A complete and comprehensive tutorial on How to Dual Boot Linux with Windows 10 on your PC. If you have questions, feel free to drop them in the comment section below.
The presence of a yellow exclamation mark on your windows connectivity icon means just one thing, your network connection has issues. As simple as resolving it may sound, there may be some occasions where resolving such network issues becomes very difficult. This is where the Network Diagnostics tool comes into play. The network diagnostic helps windows users troubleshoot network problems, and also provides solutions to fixing them. In this article, we explore a tutorial on how to run Windows Network Diagnostics.
The windows diagnostics tool is a highly recommended tool, in troubleshooting fixing the network problem. It is very effective in fixing DNS problems and also helping users find the cause of network termination.
The procedures for using the Windows Network diagnostics tool is a very easy and straight forward. These steps are listed below.
1. Click the start button on your keyboard, and type ”fix network” in the search box provided.
2. From the list of search results provided, click ” Find and fix networking and connection problems “
3. In the Network diagnostics window, click on the advanced option and run the program as an administrator. There is an option to apply repairs automatically here, you tick it if you want repairs to be applied automatically.
4. Choose the type of connection you want to diagnose for troubleshooting and click on the next. here windows will try to locate the network connectivity problem.
Note: Once the problem has been detected by the windows network diagnostics tool, you have the options of solving the problem yourself, contacting Microsoft online support, to get the problem solved remotely or restoring your windows machine to its default settings. You can also seek the help of a local technician, to help you fix the network problem.
There you have it – a complete and comprehensive tutorial on how to run Windows Network Diagnostics. if you have other questions, feel free to drop them in the comment section below.
As a windows OS user, there are times where you will be faced with the unidentified network error. The Error appears sometimes when you try to connect to a network, using your windows machine. There is no actual method of solving this problem, as this Error may be caused by a lot of things. In this article on how to fix unidentified network access on windows, we shall explore a list of troubleshooting steps you should follow when trying to fix this error on your windows machine. This these steps are listed below.
1. Turn Off Airplane Mode
The first step in the troubleshooting process is to disable Airplane mode. As you might already know, Airplane mode when activated, disable all network access, this means you will not be able to access any network on your windows machine. In turn, this may result in the unidentified network no network access error on your windows machine. To turn off the airplane on your windows machine, please follow the steps listed below:
Press Windows key + A. This opens the ‘Action Center’.
Toggle off the airplane mode button.
2. Update Network Card Drivers
Outdated network card drivers could also facilitate the unidentified network error in windows operating system. If you already toggled off the Airplane mode switch, and you are still experiencing the problem, you are advised to update your network card drivers. Steps to update your network card drivers are listed below.
Press Windows + X or right-click on the Start button.
Click on Device Manager to open it.
Look for ‘Network Adapters’ and click on the forward pointing arrow to expand the list. Right click on all the Network drivers and update them one by one.
3. Disable the Security software temporarily
In the quest to giving your computer absolute protection, security software may disable your internet connectivity. This is common with Anti-virus software or Firewall software. In solving the unidentified network error, you also advised troubleshooting your security software, by temporarily disabling it, to see if the problems stop. To disable your security software, you are to right click on the Anti-virus icon located in your system tray icon section. Once you have disabled it, you are to try connecting to a network to see if it worked. If it didn’t, you can continue with the next step in troubleshooting
4. Switch off the Fast Startup feature
Microsoft has been able to make booting on the Windows operating system faster, using the fast startup feature. The fast startup feature is found on a recent version of the Windows operating system. The fast startup features is another facilitator of the unidentified network access error. Having tried the steps listed above, with no positive results, you are advised to turn off the fast startup feature on a windows machine., using the steps listed below:
Search for ‘Power Options’ in the Windows search bar. Open the Power Options window and among the tabs on the left, click on choose what the power button does.
Click on ‘Change settings that are currently unavailable’.
Uncheck ‘Turn on fast startup’. Shut down the system and reboot after 30 seconds.
5. Change your DNS servers
Your current DNS server may just be the reason your windows machine is plagued with the unidentified network access error. To change your DNS servers, follow the steps listed below:
Press Windows + X or right-click on the start button.
Click on ‘Network Connections’.
Right-click on your network connection (Ethernet or Wifi) and click on properties. It might prompt for administrator credentials.
Double-click on Internet Protocol Version 4.
Select ‘Use the following DNS server addresses’ and set but the preferred and alternate DNS server address as follows to use Google Public DNS:
Preferred DNS server: 8.8.8.8
Alternate DNS server: 8.8.4.4
6. Use Command Prompt
Already tried the steps listed above, and nothing seems to be changing, there are some commands you can run in command prompt, to salvage the situation. You are required to try the commands listed below, one by one, one at a time. Once you have successfully ran all the commands, you are to restart your windows machine.
ipconfig /release
ipconfig /renew
netsh winsock reset
netsh int ip reset
ipconfig /flushdns
ipconfig /registerdns
netsh int tcp set heuristics disabled
netsh int tcp set global autotuninglevel=disabled
netsh int tcp set global rss=enabled
netsh int tcp show global
7. Diagnose The Network
The network Diagnose feature, is another handy tool, that helps troubleshoot the problem of your network. You can diagnose the network using the features listed below:
Press Windows + X or right-click on the start button.
Click on ‘Network Connections’.
Right-click on your network connection (Ethernet or Wifi) and click on ‘Diagnose‘. It will start an automatic troubleshooter.
8. Change the Ethernet cable
Tried troubleshooting with the steps already listed above, and nothing seems to be changing? Your Ethernet cable may just be faulty. You are also advised to troubleshoot your ethernet cable. Try using another one. If the problem persists, you can proceed to the next step.
9. Set a static IP address
Press Windows + X or right-click on the start button.
Click on ‘Network Connections’.
Right-click on your network connection (Ethernet or Wifi) and click on properties. It might prompt for administrator credentials.
Double-click on Internet Protocol Version 4.
Select the radio button at ‘Use the following IP address’.
Check the IP address settings for others using the same network as yours and change your settings to the same.
Click OK to save the settings and exit.r
10. Use an external Network Adapter
Your Network chip may just be the facilitator of the problem. Having a faulty network chip on your windows machine can crumble your internet connection, you are advised to troubleshoot your network chip, using an external network adapter.
11. Restart your modem and router
Switch off both your modem and router keeping them physically connected.
Start the modem. Wait for 30 seconds after all the lights turn green.
Start the router.
This is called power-cycling.
12. Upgrade the router firmware
Having an outdated router firmware can also crumble your network connection, leading to the unidentified network error on your windows machine. You are advised to update the firmware on your router and try connecting again.
13. Disable Virtual Network Adapters
Launch Device manager on your windows machine
Navigate to Network Adapters and expand it
Right-click and disable them
14. Run the built-in troubleshooters
Having exhausted the troubleshooting steps listed above, and nothing seems to change, running the built-in troubleshooters on your windows machine, may just be the answer to your problem. Here are the steps to running the built-in troubleshooters on your windows machine. To activate the run box on your windows machine, simply hold windows key and R together i.e windows key + R.
In the run box, you are to run each of the commands independently.
msdt.exe -id NetworkDiagnosticsWeb
To open the Incoming Connections Troubleshooter
msdt.exe -id NetworkDiagnosticsInbound
To open the Network Adapter Troubleshooter:
msdt.exe -id NetworkDiagnosticsNetworkAdapter
Conclusion: Upon troubleshooting your device, with the steps listed in this article on how to fix unidentified network access on windows , there is a high chance you might solve the unidentified error on your windows machine. If the problem persists, you are advised to contact windows support theme or visit a technician.
Partitioning hard drives, with a functioning operating system, is carried out using some built-in features. You can partition your hard drive or SSD using the command prompt, Windows disk management or a third party software. However, partitioning a new hard drive or SSD without OS is an entirely different thing. Here you do not have the luxury you have on a fully functioning OS. There is no software installed, you are given a plane slate, with no tools.
Despite the fact that it sounds impossible, Partitioning hard drives or SSDs without OS is actually possible. In this article, we explore a tutorial on how to partition a new SSD or Hard drive without OS.
Please note that for you to partition the hard drive or SSD without OS, you will need a bootable device, to boot the hard drive or SSD without an operating system. In this article, I will demonstrate how to partition a new hard drive or SSD using a bootable device containing windows OS. The steps are listed below.
How to Partition a new SSD or hard drive without OS, During Windows Setup
when installing windows OS, you are provided with the option to manage your hard drive or SSD space. Here you will be able to manage the partitions on your hard drive or SSD. You can create partitions or delete already existing partitions. As already mentioned, you will need a bootable device containing windows OS.
1 Insert the boot device into your computer. If your boot device is a disc, you are required to place it in your CD ROM. If it’s a bootable flash drive, you should plug it to any of the USB ports on your computer.
2. Follow all on-screen prompts until you are landed in the page where you can manage your storage space.
3. Once you are on the windows storage management page, press shift+F10 simultaneously to open a command prompt.
4. Type “diskpart” and press enter
5. At Diskpart>, run a few lines of commands to create a new partition:
List disk
Select disk [disk number]
Create partition primary [size=n]
Disk number and size is dependent on the configuration of your hard drive or SSD. Below is an example of how to use the above command line.
List disk
Select disk 0
Create primary partition size=60000
Note: Creating a partition of 6000MB means you are creating a partition of 60GB and also disk 0 is the name of the default partition that your hard drive or SSD has.
5. Hit enter
Note: You are advised to allocate more than 100GB to your new partition, because Windows update, installed programs, and other system files will keep consuming space on system partition
After you might have successfully carried out all the steps listed above, you will have a well partitioned hard drive. Steps listed above should be followed in order, to prevent complications.
You must be logged in to post a comment.