To fight off the global pandemic and help COVID-19 patients, Kochi-based Asimov Robotics, a company working under the Maker Village of Kerala start-up mission, has unveiled their innovative robots, which are to be deployed in hospitals to provide assistance to the elderly, disabled, and sick people, especially the COVID-19 patients in isolation wards.
Asimov Robotics claims that “doctors, nurses, and healthcare workers are unable to provide care during disease outbreaks without the risk of getting infected by the quarantined patient. Thus, the aim of the innovation is to prevent the spread of Covid-19 by providing robots to care for the covid-19 patients inside isolation wards.
Sayabot design
Sayabot
The Sayabot is a care-giving robot. The robot has a face and gesture recognition as well as an autonomous navigation capability which allows it to simply navigates in indoor areas.
What makes this particular robot unique is the presence of an NLP (natural language processing), which allows the robot to intelligently converse with humans through voice and text. The robot has dexterous arms and hands that allow the robot to make human-like gestures and interactions.
Unfortunately, the Sayabot design was considered too big to fit in the ICU (Intensive Care Unit), thus hindering healthcare workers during busy hours. Alternatively, a “Karmi-bot” design was created.
“Karmi-bot” design
“Karmi-bot”
This robot design is small, easy to handle, lightweight, has an autonomous remote control, has a detachable container with a self-disinfection facility of used items, self-charging, and can video stream as well as video conference.
The robot is designed with “a tray that can carry both food and medicines and an automatic disinfectant sprayer for cleaning the floor.” The bot can take food and medicines of about 25 kg for 5 patient beds.
Asimov Robotics also added that their robotic innovation will not only cover healthcare but “has a wide array of capabilities that make it work in airports, hotels, education and training, or any human environment.”
With the continual erosion of internet privacy and the rising level of security threats, more people are now turning to virtual private networks. VPNs encrypt your internet traffic, making it invisible to third parties like surveillance agencies, your internet provider, and the network admin. Plus, they protect your devices from hackers and the risks associated with public WiFi networks. Keep reading because https://privacyspark.com/ is going to give you key details on how to stay anonymous online.
How VPNs Work
A VPN (Virtual Private Network) is a channel that allows you
to browse the internet with enhanced security and privacy. It also gives you
the ability to get around content as well as censorship restrictions.
Typically, a VPN works by establishing an encrypted connection between your device or
computer and a VPN server. This encrypted connection is often considered as a
protected ‘tunnel’ through which users can access everything on the internet
while appearing to be in the same location as the server they’re connected to.
This technology gives you a high level of online anonymity, allows you to access everything online without restrictions, and provides you with enhanced security. VPNs will encrypt and secure your online traffic, whilst also unblocking content from various parts of the world.
Without a good VPN, everything you do on the internet is
traceable to your physical location as well as the device you’re using. Every
device which connects to the internet comes with a unique IP address that can
be altered by the VPN server you’re utilizing.
Since most VPN providers have servers located all over the world, you’ll
have access to numerous connection possibilities.
The Benefits
There are many reasons why you may want to consider utilizing
a VPN and these include:
Surfing the internet without exposing your real IP address as
well as your geo-location.
Adding an extra level of privacy and security by encrypting
your online activity.
Preventing your ISP (Internet Service Provider), governments,
third parties, and network administrators from spying on your internet
activities.
Unblocking websites and accessing content that’s restricted
to specific geographic locations.
Bypassing censorship by getting around regional restrictions.
Browsing the internet
with peace of mind.
Protecting yourself from
hackers whenever you’re connected to public WiFI connections in airports,
cafes, and hotels.
Their Legality
VPNs are absolutely legal. They’re designed to help users
protect their online privacy and security. Most businesses are now utilizing
VPNs – and that won’t change any time soon.
Nonetheless, there are few exceptions in places such as the
United Arab Emirates, where the use of virtual private networks is currently
restricted. But still, the laws in these countries don’t outlaw the VPN itself.
Rather, it restricts the use of VPNs to bypass the state censorship efforts.
China and Russia have also attempted to ban certain VPNs- but
these measures typically fail, because of the fact that VPN traffic can be
hidden to appear like regular HTTPS traffic.
Conclusion
VPNs are routinely utilized by businesses across the globe
for network security. Thus, you’ll never witness an outright ban on all VPNs
since they’re absolutely necessary for both businesses as well as individual
security. All you need is to shop around for reputable providers such as NordVPN, VyprVPN, CyberGhost, and
ExpressVPN, who offer reliable products.
With the advancement of the digital world, our data has been digitized too. Now, we have our important data in our phones, laptops, and tablets, etc. Sometimes, we need to convert one format to another and this task can be challenging, time-consuming, and troublesome in the absence of file converters.
If you think that you have to buy numerous file converters for different formats then trust me it’s not like that.
The Top 5 Online Free Converters
There are countless online free file converters are available for every format which you can use without spending money. By being free if you feel, these online converters are not reliable then you are not right. These are not only trust-worthy but also don’t compromise on quality.
Prism Video Converter
It is one of the top online converters which convert video into other formats in an easy way. It is straightforward to use because it has a simple interface. It can convert the videos into many formats within no time.
This online converter converts many files at a time. In the conversion of video files through prism video converter, you can adjust settings such as; compression, resolution, and encoder rates, etc.
It allows the user to change the size of your video and add watermark as well. Text overlay and rotation of the videos are also possible.
This is an easy-to-use online converter which is the right choice for any type of file format. It enables you to convert various formats like
Video
Audio
Images
Documents
PDF
Archive
eBooks, etc.
It is suitable to use in home as well as in office. If you have a lot of data to be converted then you have to purchase its monthly or yearly packages.
Freemake Video Converter
Freemake video converter is also included in the list of the best video converters. It supports many languages to provide convenience to users. It is compatible with Windows operating system.
You can download the videos for conversion for different websites like Facebook, YouTube as well as from your computer. Its process of conversion is not complicated so anyone can use it.
It also offers you some features like editing, resizing, compressing the video, etc. Unprotected DVDs are also ripped by using this free converter.
7-PDF Maker
It is an online converter through which you can convert many formats into PDF like;
Documents
Images
Math
AutoCAD
This file converter is straightforward to use so you can transform your files into PDF without any difficulty. It doesn’t provide you many features but it is an ideal free converter for a compact PDF conversion.
Go4Convert
It is the online converter through which you can convert various formats into EPUB. For example;
Word to EPUB
PDF to EPUB
HTML to EPUB
MOBI to EPUB
Text to EPUB
It gives you the convenience to convert more than one file simultaneously without compromising the quality. In the conversion procedure, all the data, images, graphics, tables, columns, and hyperlinks, etc. are saved.
If your TV doesn’t allow you surf the net, stream videos from top streaming services available, feature inbuilt app and play games without a console, chances are that you are using an outdated Television, and your television isn’t smart. Smart TV’s are the latest technological trend. Thanks to thoughtful innovation, you don’t need to spend the extra cash, in purchasing a new Smart TV, in other to gain access to the features mentioned above, there is a way you can convert your old PC to a smart TV, saving you cost. Apart from converting your old PC to a smart TV, in other to save cost, you can also convert any digital TV to a smart TV. In this article, we explore a comprehensive tutorial on how to convert your old PC to a smart TV.
The steps to converting your old PC to smart TV is pretty basic, steps are very easy. Before you can convert your old PC to smart TV, your old PC should be under the HTPC category. Which means it should be a theater personal computer.
A computer that falls in the category of HTPC, is a regular computer with HDMI and audio outputs. These ports help you create a media link between your old pc and your Television. If connected correctly, you will be able to transmit audio and video from your PC to your television seamlessly. This way your old PC will once again gain relevance.
Still on computers under the HTPC category, if your PC falls under the category of HTPC. You will be able to use your computer as a smart TV, allowing you to watch Netflix and Amazon prime videos.
Using your old PC as a smart TV doesn’t actually require much. All you need are moderate specs enough to push your PC without any form of lag. If you currently experience lag on your PC, you are advised to upgrade the RAM and storage of your computer, before proceeding to use your old PC as a smart TV. You would also be needing a strong internet connection, to ensure streaming goes smoothly.
There you have it – a comprehensive tutorial on how to convert your old pc to a smart TV. if you have questions, feel free to drop them in the comment section below.
As you might already know, the Windows Movie Maker is a video editing software developed by Microsoft. It lets users create and edit videos, it also lets them publish videos created directly to OneDrive, Facebook, Vimeo, Youtube, and Flickr. The Windows Movie Maker software is very efficient in performing the task it was created for, but just like other software, there are times you experience glitches. In this article, we explore a tutorial on how to fix one of the popular glitches you might experience when using this software. Here you learn how to fix a corrupted video file om Windows Movie Maker.
There is no exact cause facilitating the corruption of videos files on the Windows Movie Maker. Corruption of these video files is caused by different things. Since there exact cause of video corruption, you would have to troubleshoot the problem using different methods, which will be listed in this article. Apart from these methods for troubleshooting video corruption on the Windows Movie Maker, there is third-party software that solves the fixes corrupted video files, with few clicks, we also explore a tutorial on how to fix corrupted video files using this third-party software. Before we dive into the tutorial proper, here is a list of potential facilitators causing Windows Movie Maker videos to get corrupt.
Potential Causes of Movie Maker videos getting corrupted
Corruption in the hard drive
Virus or malware
Faulty video codecs
Outdated video card drivers
Use of unreliable video converter
Media player not supporting Movie Maker video file
Abrupt computer shutdown while saving/working on Movie Maker video
How To Fix A Corrupted Video File on Windows Movie Maker Using Remo Repair MOV Tool
As mentioned earlier, there is third-party software, that helps fix corrupted video files, with just a few simple steps. The Remo Repair MOV tool is an example of such third-party software. Here are the steps to fixing a corrupted video file using the Remo Repair MOV tool:
Download and install Repair MOV software to your Windows machine.
Run the Remo and follow the on-screen
Browse and open your movie file to be repaired as well as a healthy reference file using Healthy File option.
Click Repair option, to begin movie file repair
After the file has been repaired, the tool shows the fixed MOV video file along with its component details. The software also allows you to preview the fixed file using “Preview Repaired File” option.
Save Repaired Movie Maker File using the SAVE REPAIRED FILE option
Troubleshoot: Repair Windows Live Essentials
If you are unable to get access to any third-party video file fixer, you can go ahead to doing manual troubleshooting. The first thing to look out for, when troubleshooting this problem, is Windows live essentials. Corrupt file error messages can
Corrupt file’ error messages can also pop up when your Windows Movie Maker program has corrupted. To fix it repair Windows Live Essentials and then access your video file in Movie Maker to edit.
Steps to repair Windows Live Essentials:
· Press Windows + R Keys to open Run command
· Type Control Panel. Click on OK
· Under Programs, Click on Uninstall a program
· Go to Windows Live Essentials and right click on it
· Click on uninstall/change
· Select option repair all Windows Live Essentials
Repair corrupt videos with VLC Media Player
VLC Media Player can often repair corrupt or damaged video files. You can try this method to fix minor video corruptions while for severely corrupt video files seek Stellar repair software.
Upgrade Your Ram
Setting aside the already mentioned potential causes of corrupt videos, insufficient RAM may also facilitate the corrupt video error. Insufficient RAM facilitates slow computer speeds and can lead to corruption of videos. This holds sway if your videos are stored in MOV or.WMV. You are advised to consider getting a higher RAM.
Install a Codec Pack
An incompatible Codec may also lead to this error. If your media player is using an Incompatible code, the Video will not play. You are advised to install a codec pack on your PC. Here you will video formats, that will make your computer compatible with all file formats.
Update Video Drivers
Out-dated video drivers is another common facilitator of the corrupted video error. There is very high chances that the video won’t play on your computer If your drivers are outdated. So if you have tried all the steps listed above, and none of them worked. There is a high chance, that the problem is caused by outdated drivers.
Be rest assured that one of the fixes listed in this article on how to fix corrupted video file on windows movie maker, will fix the corrupted video file on your computer. All you have to do is test these fixes, one of them is the solution to your problem.
Tech Gadgets generally are tools, that makes our everyday tasks seamless. They reduce the stress in carrying out everyday tasks activities. Thanks to technological advancements, there are different gadgets for different fields. In this article, we explore a comprehensive list of must use home and office tech gadgets. Gadgets featured in this list, are gadgets are essentials you will need as a tech enthusiast.
1. Satechi Aluminum Type C USB Clamp
The Satechi Aluminium USB adapter clamps to your computer, providing you with lot more ports in I/O. It makes connecting peripherals to your computer a whole lot easier. You do not have to lean to connect peripherals. The ports on this adapter face the user, making it easy to fix and remove peripherals. The 2017 iMac and iMac Pro models feature additional Thunderbolt slots.
2. Logitech MX Vertical Ergonomic Mouse
The importance of a very ergonomic mouse cannot be overemphasized, it is needed for smooth workflow on your PC, it makes navigation a whole lot Logitech MX vertical ergonomic mouse, takes comfort to a whole new level. This mouse reduces the pain associated with continuous use of a mouse, to the barest minimum. The Logitech MX vertical ergonomic mouse keeps your hand in a natural handshake position, which eliminates the strain caused by using the mouse sideways. With a 4000 DPI, this mouse is a very high precision mouse.
3. Norton Core Router
Having a good router that outputs good wifi Signals for the internet, is very imperative. In this Era of the internet of things, the internet has become very essential in powering a lot of devices that we use today. Whether it’s your home or your office, you are certainly going to need a Wifi router.
Speaking on Wifi Routers, the Norton core router is a highly recommended router. It is one of those WIFI routers, that is very resistant to malware like VPN filter, a malware that has plagued more than half a million routers in more than 50 countries. Apart from being a very powerful router, the Norton core router features a very beautiful and intuitive design, that can easily blend into your surroundings, be it your office or your home.
4. Shinola Power Supply ( 5 Ports)
Be it your office or your home, good power extensions are very important, they let us power ower devices. If you are someone that has a lot of devices with different prongs or connectors, you are certainly going to need an extension with universal ports.
The Shinola power supply is a very good example of the kind of power extension you would want to purchase. It features 5 port + Dual USB ports, which lets you plug your smartphones and other USB using devices, directly to the power supply, which will, in turn, facilitate faster charge.
5. Brookstone Wi-fi Scanner
The Brookstone Wi-Fi scanner is very portable scanner, that lets you scan documents, directly to your PC, via WIFI. Unlike other scanners, the Brookstone Wi-Fi scanner is a very portable scanner, that can be easily transported, it fits into your pocket perfectly. Its portability and size save you a lot of space.
6. Anker Nebula Portable Projector
Over the years, we have witnessed the widespread use of projectors instead of TV. These days people find it super convenient to use projectors instead of conventional television. This Anker projector makes the process a whole lot sweeter. The Anker Nebula projector is a portable projector that can be used anywhere in the home or in the office, provided there is a screen. This projector maxes out at 720p resolution, features 300 ANSI of brightness and DLP Intellibright technology.
7. Beoplay M5 Speaker
A Bluetooth connected speaker is a very important piece of the gadget eco-system of any home or office. At some point, you may just desire to play songs or watch an informative clip, this is where these Bluetooth speakers come in. Instead of searching for AUX cords, you can just connect your devices to these Bluetooth speakers and begin jamming.
The Beoplay M5 is one of those Bluetooth speakers you would want in your office or home, it provides rich sounds, that satisfies the auditory needs of your ears. The M5 Bluetooth speaker was manufactured by Bang & Olufsen’s.
8. Grovemade Walnut Speakers
Looking for a very powerful table speaker, with a design that blends with the furniture of your home or office? The Grovemade speaker may just be what you need. It features an aesthetics that makes you mistake it for carved wood. I was designed by Grovemade and industrial designer Joey Roth, together they worked to harness the acoustic properties of wood to create a full and bright sound. This speaker also features trimmed leather mounts on stainless steel stands.
9. Bose QuietComfort 35 Series II
Generally, headphones are gadgets that convey sounds from their sources to our ears. So if tabletop speakers aren’t your thing, you should look into getting a good Bluetooth headphone. The Bose QuietComfort 35 Series 11 headphone, fondly referred to as the Bose QC35, is one of the most sought after noise canceling headphones we have today. it is a wireless headphone, with up to 20 hours of wireless play time. If you need complete immersion, this headphone may just be what you need.
10. Henge Docks Stone Tethered Laptop Dock
Last but certainly not least, is a gadget designed for Macbook users. The scarcity of ports on Apple MacBooks isn’t news anymore. The Henge Docks stone fixes this problem. It adds a wide range of ports to your Apple Macbook. Here you will find three USB 3.1 ports, Mini DisplayPort, audio, ethernet, power supply, and an SD Card reader.
There you have it – A comprehensive list of must use home and office tech gadgets. If you have other recommendations, feel free to drop them in the comment section below.
There are many smart home product categories, so you can control everything from security cameras to smart lights in your home.
You will find some of these smart home gadgets useful, to solve everyday problems that you run into. Some of them are just for fun.
Cool smart home Gadgets
SmartBell
Smartbell is the high-tech doorbell that lets you video chat with your visitors.When a visitor presses the Smartbell, the unit contacts you on your smartphone (via Wi-Fi) to alert you of someone at the door. You can know the visitor’s information without opening the door.
Because there’s a built-in camera, mic, and speaker, you can activate a real-time video chat between the Smartbell and your phone.
Imagine never being afraid of a knock on your door late at night, wondering whether it’s a friend or stranger? When you have SmartBell, you will know exactly who is your unannounced visitor.
It has real-time audio and visual capabilities. Visitors can make video, voice calls and short-term video recordings.
Features:
HD Viewing
1280*720 HD resolution, 166 degrees super wide-angle lens, all-round view of the scene.
Wireless Signal
No wiring, easy installation, built-in WiFi module, stable transmission, reliable connection, no need to worry about the signal problem caused by too far distance between the doorbell and the client.
Phone Connected
When people enter the sensing range, the device will push the information to the mobile phone at a very high speed, safe and practical. Support WiFi connection, Android IOS APP remote control.
Night Vision
HD infrared night vision 24 hours all day guard. With high-efficiency infrared light compensation, the picture can be clearly seen even at night when the night is dark.
Video Call
The home is in your hand when going out, the mobile phone can remotely wake up and actively view, monitor the home door, press the doorbell to push information, and view it in real time.
Sometimes you are certain something is not quite right at home, but you just can’t put your finger on it. Sure, you could set up a led-bulb with unseen video camera in your home.
This led-bulb, is actually a video camera that can live stream footage directly to your phone or tablet. It screws into your light bulb socket, provides light, and offers a 360-degree panoramic view of your home,office and so on. Bulb Led Can be turn on or turn off by app “V380” Version 5.5.
Feature:
360 degrees panoramic view
Support Motion detection
Advanced e-PTZ on split video.
Simultaneous multi H.264 streams support
for iPhone and Android apps available for remote viewing
Plug and Play smart access without IP setting via routers
Showering has never been so fun. This shower-head lets you stream your favorite music, news or talk radio right in the shower with you.
It holds a portable wireless speaker that pairs wirelessly with Bluetooth(R)-enabled devices to deliver high-quality audio to your shower. The speaker docks directly into the shower-head, so your music is closer than ever when showering. It is easy to install and use.
Main Features:
Wireless speaker delivers 8 to 10 hours of music or talk.
Bluetooth range: 28 – 32 feet.
Include one set of lithium ion battery and USB cable charger.
High-fidelity 3W waterproof speakers.
Bluetooth 3.0
Simulated dual microphone noise reduction.
Pickup technology for background noise cancellation.
The latest audio algorithms, for the best call and music quality.
Day-sight night driving glasses helps reduce the risk of road accidents. This new innovative device prevents you, your friends, and family from late night car accident.
They are lightweight, UV400 anti-reflective and work by reducing the glare that often causes problems when high beam headlights make their way into your line of sight.
They look just like any other pair of glasses, except their lenses are specially designed using Resin to reduce glare, while keeping you safe on the road at the same time.This high-definition lens technology protects you from fatigue and migraine.
You can finally drive in the dark without any problem. See product page for full Specification.
Over the years, there has been an observable increase in the size of a smartphone and tablet display. Smartphones and tablets have grown into gadgets that we can use to entertain ourselves using media content. Despite these observable increase in the size of smartphone and tablet display, there comes a time when you desire to project stuff from your smartphone or tablet display onto a bigger display. In this article, we explore a tutorial on how to connect your mobile phone to a smart TV, allowing you to view contents on your smartphones unto a bigger screen.
In this tutorial, we explore four different methods for connecting your mobile phone to your smart TV. This Tutorial covers how to connect Android mobile phones to smart TV’s and how to connect iPhone’s to smart TV’s.
How To Connect Your Mobile Phone To Your Smart TV Using HDMI Cable
Connecting your smartphone to your smart TV using an HDMI cable, is a universal method of connecting smartphones to a smart TV. It works for both Android and IOS devices. It is a very reliable method to project content from your mobile phone to a smart TV. It lets you transfer both audio and video from the same source.
Some smart TVs feature HDMI 2.1 while others feature HDMI 2.0. The minimum requirement to stream 8K content from your mobile phone to a smart TV is an HDMI 2.0 port.
Smartphones usually do not feature HDMI ports, so you are required to purchase an HDMI to USB C, Micro USB or Lightning ports. You connect one side of the HDMI cable to your smart TV and the other part housing the adapter to your mobile phone.
Connect Your Mobile Phone to Your Smart TV Using USB Cable
Just the way you connect pen drives to your smart TV, you can also connect your mobile phone to your smart TV using USB cables. Smartphones usually come with cables, with one end featuring either a USB A, USB C or lightning and the other end being USB A.
You are required to connect the USB A port to your smart TV and the other end of the cable to your mobile phone. Your smart TV will then read your mobile phone as a storage device. You will be able to view photos, audio files, and video from your mobile phone.
Connect Your Mobile Phone to With Wireless Casting on Android
Casting eliminates cords. Casting lets you connect your mobile phone to your smart TV without using cords. Casting is a process of wireless streaming content from your mobile phone or tablet, by connecting to the same WiFi network as your television.
Some mobile phones come with inbuilt casting features, while other mobile phones require you to download third-party apps. In case your mobile phones need third-party apps, Allcast is a highly recommended app for casting.
Apart from using casting apps on mobile phones, there are streaming devices you can use to add the functionality to your smart TV. Google Chromecast is an example of such streaming devices.
Using Apple Airplay
Similar to casting on Android, Airplay is a feature designed for devices running any OS designed by Apple. It lets you connect your iPhone to your Smart TV wirelessly.
Airplay only works between Apple devices. You are not allowed to wirelessly connect your iPhone to smart TV’s not made by apple. Similar to casting on Android, both the Apple TV and iPhone must be connected to the same network.
There you have it – a comprehensive tutorial connect your phone to your smart TV. If you have questions, feel free to drop them in the comment section below.
In this article, we explore a comprehensive tutorial featuring procedures to change wireless security on a laptop. Here we explore inevitable steps to take in changing the security/password of a wi-fi router using your laptop. You would also learn how to change your Wi-fi router’s security type here. The steps taken are listed below.
1. Open Your Router’s Configuration Page
You can access your Router configuration page if your laptop is connected to the router. You can connect your laptop to your router using an Ethernet cable or The Router password. In a situation where you have forgotten the password, using an Ethernet cable is preferable because you will not be required to input any password.
After you might have connected your laptop to your router, you are to input the IP address on your browser, to gain access to its software platform. The Standard Router Addresses are 192.168.1.1, 192.168.0.1, 192.168.2.1, or 10.0.1.1(Apple) or 10.0.0.1. Enter any of these Addresses and hit enter.
If you find it difficult to access your Router’s software platform using the already mentioned IP addresses, you can source for the exact I using the command prompt. Once Command prompt is opened, type ipconfig and hit enter. Now look for active connection in the list and find your Router Default Gateway address. The Default Gateway is your Router’s IP address.
If you are still finding difficult to source for your Router’s gateway address, you advised to reset your router for about 30 seconds, to restore it back to factory settings. After which you are to look up the default address for your Router’s model and enter it into your browser URL box
2. Enter Your Router’s Username and Password
Apart from the normal connection password, you are required to input a special username and password, to gain access to the admin platform. Please note that the default Username for most routers is “admin” or “userAdmin” and the default password is “admin”, “password” or your current Wi-Fi’s password. If you changed your the username and password before now, you are required to input the one you enrolled.
3. Open The Wireless Section
Once you have successfully gained entry to your Router’s software platform using your browser, you ate presented with different tabs that perform different functions. Since you want to change your Router’s wireless security, you are required to click on the Wireless tab.
4. Change the password
By now you should be in the Wireless tab on your Router’s admin page. In the Wireless tab, Look for the box labeled “Password”, “Passphrase” or “Shared Key”. Some Routers require you re-enter the admin password, for confirmation. You are advised to create a very strong password, featuring letters, numbers, and symbols.
5. Change Your Security Type
Please note that there are three main types of wireless encryption: WEP, WPA, and WPA2. If you desire the most secured network, you are required to make use of WPA2. Using this network type, you may experience problems connecting to older devices. If you run into these problems, you are advised to switch to WPA.
6. Change Your Network Name
If you desire to have a unique Router name, you have the option to set a unique name here. This will make discovery very easy, you won’t have to guess your Router’s name, in a situation where they are many similar Routers in the same space.
7. Save your Settings
After you might have successfully carried out all the steps listed above, the next step will be to save the changes you made to the security setting. This way all changes made will take effect. The save button is usually located on the top or bottom of the page. Locate it and click on it to save changes. You can now go ahead to test the new password.
There You have it – a comprehensive list of procedures to change wireless security on a laptop. If you have any questions, feel free to drop them in the comment section below.
WhatsApp has added a new feature that will stop people from automatically adding you to groups.
The Facebook-owned company will now allow you to block randoms from adding you to annoying group chats and spare you from unnecessary notifications.
This new privacy feature is to give users more control over how they use group chats. Who is able to add them to a group and more importantly, who can’t.
How to enable this new WhatsApp feature
To enable it, go to Settings in your app, then tap Account > Privacy > Groups and select one of three options: “Nobody”, “My Contacts”, or “Everyone”.
“Nobody” means you’ll have to approve joining every group to which you’re invited, and “My Contacts” means only users you have in your address book can add you to groups.
In those cases, the person adding you to a group will be prompted to send a private invite through an individual chat, giving you the choice of joining the group. You will have three days to accept the invite before it expires.
With these new features, users will have more control over the group messages they receive. These new privacy settings will begin rolling out to some users starting today and will be available worldwide in the coming weeks to those using the latest version of WhatsApp. A statement from whatsApp official site.
The term ” Gaming Laptop” is used to describe laptops with very powerful hardware, that allows users to play high-end games, do intense video editing, as well as other power-intensive tasks. Despite the fact that Gaming Laptops feature High-end specs, the fact that they usually feature poor battery life is unarguable. This fact is attributed to the power consumed by their high-end components. Despite the fact that most gaming laptops have been characterized by poor battery life, there are some gaming laptops that feature impressive battery life, despite their power consuming components. In this article, we explore a comprehensive list of best gaming laptops with strong battery life .
1. Dell Inspiron 15 7000
Seeking for a very good gaming laptop, that features a long-lasting battery and an affordable price, the Dell Inspiron 15 7000 may just be the laptop you have been looking for. It houses all the essentials you will need for gaming, without being too flashy.
The Inspiron 15 7000 features an Intel Core i5-73000 processor, 8GB RAM, 256GB SSD, 1TB hard drive storage and an Nvidia GTX 1060 graphics card, with 6GB of VRAM. These specs put together makes the Inspiron 15 7000 a very awesome laptop to game on, and also an excellent machine for video editing and graphics design. In addition, the Inspiron 15 7000 is VR ready. You can buy from Amazon or Jumia ng.The Inspiron 15 7000 features a battery rated for 7 and a half hours.
2. Acer Predator Helios 300
The Helios 300, is a laptop that offers powerful hardware for gaming, without sacrificing battery life. It was designed to allow gamers game for long without plugging their power brick into an outlet. It lets users game on the go.
The Helios 300 features an Intel Core i7-700 Processor, 16GB RAM, 256GB SSD, A Nvidia GTX 1060 graphics card. The Helios 300 is VR ready, allowing you to play VR titles. These specs put together allows users to play favorite games seamlessly. You also have the option of increasing Ram and storage, to suit your needs. Buy from Amazon or Jumia ng.The Helios 300 offers 8 hours of battery life.
3. MSI GS65 THIN
The MSI GS65 thin is a gaming laptop that provides users with an entirely different feeling. Unlike most gaming laptops, the MSI GS65 offers a more professional look. It is one of those gaming laptops you can take into a conference room, without looking odd.
It features a relatively thin chassis that makes carriage easy. The MSI GS65 features an 8th gen core-i7 processor, 16GB RAM, 1 TB HDD, 512GB SSD, an Nvidia GTX 1060 MAX Q graphics card. This Graphics card allows MSI to achieve a lot using a thin chassis, avoiding overheating problems. With the MSI GS65 you are getting 5 hours 40 minutes of battery life.
4. GIGABYTE AERO 15X
Still, on the topic of best gaming laptops with a strong battery, the Aero 15X is yet another awesome gaming laptop that offers an impressive battery life. The Aero 15X is one of those gaming laptops that offers excellent gaming hardware, without sacrificing battery life.
The Aero 15X is powered by an Intel Core – i7 87050H, 16GB of RAM, 512GB SSD, an Nvidia GTX 1070 max Q graphics card. The Aero 15X features a 144 Hz 4k display, that makes gameplay smoother. The Aero 15X features a 94WH battery, which will power it up to 10 hours.
5. Razer Blade Stealth 13.3
Razer is one of the highly sought after brands we have today when it comes to gaming laptop choice. Their products have shown high efficiency, in offering quality gaming experience, allowing gamers to game seamlessly. The Razer Blade stealth 13.3 is no exception.
The Razer blade stealth 13.3 was built to allow gamers to game on the Go, without being restricted by the size and weight of the laptop or Battery life. The Razer blade stealth 13.3 is a 13-inch laptop that is powered by a 7th gen intel processor Core – i7, 8GB Ram, 256 SSD. The Balde stealth 13.3 offers approximately 8 hours of battery life.
6. Acer Nitro 5
Last but not least, the Acer Nitro 5 is yet another highly recommended gaming laptop with a strong battery. It is another stealth gaming laptop, that fits into a conference room and works excellently
The Acer Nitro 5 is powered by an Intel Core i5-7300HQ processor, A Nvidia 1050Ti graphics card with 5GB of VRAM, 8GB of DDR4 RAM and 256GB SSD. It features a 15.6-inch display with a screen resolution of 1920 X 1080 resolution. The Acer Nitro 5 features a 48WH battery.
There you have it – a comprehensive list of best gaming laptops with strong battery life. As already mentioned these laptops offer quality gaming hardware without sacrificing excellent battery life.
Smart TVs generally are advanced television sets, that possess more functions when compared to ordinary TV sets. Xiaomi Mi smart TV 4 is one of the Smart TVs that allow users surf the internet, allow the installation of apps supported on the OS they feature, and most importantly smart TVs allow users to stream content from a wide range of streaming services available today. In the presence of these smart TV essentials, it is very obvious that purchase facilitators have gone beyond screen size and resolution.
But if you have a digital TV and you want to convert it to a smart TV, you can check out on how to go about it.
In this article on what to watch out when buying your Smart TV set, we look at the different parameters to look out for when purchasing a Smart TV. These parameters determine the power of a Smart TV. These parameters are listed below.
Size (screen resolution)
One obvious detail you should consider is your preferred screen resolution (size) of a smart TV which most of the time is affected by your budget. Most standard Tv sets come with a 3840 by 2160pixel resolution and a screen is made up of dots or pixels and the more the pixel, the sharper the screen displays detail. The 3840 X 2160pixels is a 4k display or an ultra HD display. Please note that if you desire to enjoy 4k resolution in its full glory, you will need a larger inches smart TV.
The Fact that Ultra HD resolution A.K.A 4K resolution has become a standard is unarguable. Major streaming platforms today support 4K streaming, Streaming platforms like Netflix, Amazon Video including Youtube support 4k Streaming. This indicates the importance of having a Smart TV. In a bid to future proof your Smart TV, you are strongly advised to purchase a Smart TV with support for 4K content.
Display Technology
For display technology, we have two good options: the LED LCD and OLED l. You must note that the OLED screen technology is more expensive compared to LED LCD but the good thing is they are both use the same technology for LED illumination but their graphics are tweaked differently and that gives an advantage over the other depending on your choice and your budget
Software platform
The main difference between Smart TV’s and Ordinary TV’s is software. Smart TV feature a software platform not present in ordinary TV’s. The software platform featured on Smart TV’s make all their features come alive. Just picture a Smart TV, as a big tablet on your wall. A big tablet, that doesn’t make calls, but can be used to access the internet, play media files and stream media content from streaming platforms available.
Just the way tablets, smartphones, and laptops have different operating system, Smart TVs have different operating systems. Samsung Smart TVs feature the Tizen operating system, LG smart TVs feature WEB OS, the list goes on and on. When purchasing a smart TV, you should make sure the operating system on the Smart TV, has support for major streaming platforms, and also have a wide range of supported apps.
Refresh Rate
The refresh rate is a parameter that describes how many times per second a picture is refreshed on your screen. The refresh rate is expressed in Hertz (Hz). Please note that the standard refresh rate is 60 Hertz. Having a Smart Tv with a low refresh rate, usually output blurry images, in scenes of rapidly moving objects.
A Smart TV with 60 Hertz refresh rate won’t give you the very best, but you are gonna be satisfied, as long as you do not set your eyes on a Smart Tv with refresh rate more than 60 Hertz.
Some Smart TV’s feature High-Frame Rate support (HFR). Smart TVs with HFR have higher frame rates, and also added support for content higher than 60Hz. If your money isn’t a constraint, I advise you for TVs with HFR support. Also, you should take note of TVs with effective frame rates. Effective frame rate means the actual frame rate is half the stated frame rate. If a Smart TV has an effective frame rate of 60Hz, it means you will be able to stream content with 30 frames per seconds.
HDMI and Connections
Availability of connection ports is another important parameter, you should pay attention to when purchasing a Smart TV. Apart from being able to stream content, surf the internet, A good Smart TV should feature a generous amount of ports, for connections. These ports allow users to connect Speakers, decoders, game console and lots more. A good Smart TV should also feature an HDMI port, for the connection of external streaming devices. Make sure the HDMI ports on the Smart TV, is HDMI 2.0, and also make sure the Smart TV has at least 4 HDMI ports.
As already mentioned, if you desire to purchase a Smart TV, you should consider the parameters listed above. Take note of the minimum requirements for each parameter. You shouldn’t purchase Smart TVs with specs lower than the mentioned.
i Dual booting Linux with Windows 10 on your PC, means having both operating systems installed on your PC. This process involves you partitioning your hard disk and installing the operating systems on different partitions, This way you will able to use both operating systems on your PC simultaneously. In this article we explore a tutorial on How to Dual Boot Linux with Windows 10 on your PC
Requirements
1. Two USB flash drives or DVD-Rs
Since we will be installing tow operating systems on our computer, you are required to purchase DVDs of both operating systems. You are required to purchase a Windows operating system DVD and a DVD containing the Linux Ubuntu operating system.
Apart from installing the operating systems using DVD, you could also install them from a bootable flash drive, which is a way faster. If your laptop doesn’t support booting from USB, you are advised to install the operating systems using DVDs, as mentioned earlier.
2. A Windows 10 license
Installing the Windows 10 OS on a computer that didn’t come with Windows 10 OS on default, requires a Windows license key, so if your computer didn’t come with the Windows 10 operating system on default, you will be required to input a license key. If your computer came with the Windows 10 operating system, you won’t be required to input any. The Windows 10 license key, will be provided to you by the retailer.
3. Windows 10 Creation Tool
If you are installing the Windows 10 operating system from a bootable flash drive, you are required to download a windows 10 media creation tool. The Windows 10 media creation tool provides a step by step guide to creating a Windows 10 media on a USB. You can also use to create windows media on DVDs.
4. Etcher Software
Similar to the Windows Media Creation tool, The Etcher software lets you load a Ubuntu media unto a bootable flash drive or DVD. The Etcher software is supported on Linux, MacOS, and Windows.
Please Note that you are required to download the Ubuntu ISO Image, you will load in the bootable flash drive. Once it has been downloaded, you are required to launch the Etcher software, next click on Select image and then point to the already downloaded Ubuntu ISO image downloaded. Now Select your flash drive, from the list of storage locations provided. Click flash and the Etcher software will convert your bootable flash drive, into a Ubuntu installer.
After you have successfully met all the requirements above, purchased or created a bootable device for both operating systems, you proceed to install both operating systems on your computer. The steps to installing the operating system are listed below:
How to Install Windows and Ubuntu on Your PC
Just as a reminder, before we get started with the installation, you should have already created windows installation media, created a Ubuntu installation media and made a backup of your important files.
Creating a dual boot of Linus and Windows OS can be done in two ways. Its either you install the windows 10 OS first, and then using a ubuntu installer to resize the partition and installation will proceed in the empty space. Or you install Ubuntu first and then install the Windows 10 OS in the smaller partition on your hard disk.
Installing Windows
If you already installed Windows OS on your PC, you are required to skip this step and move straight to installing Ubuntu on your PC, otherwise, continue with the steps listed below:
1. Insert the Windows Installation in you have: As mentioned earlier, its either you use a DVD with the Windows 10 OS inside or you use a bootable flash containing windows 10. If you have a windows 10 DVD, insert it in your DVD player, If you have a bootable flash drive, plug it into your USB port and follow the steps below.
2. Click on the boot menu key: PC’s have different boot menu keys, you have to look out for the boot menu key assigned to your PC. The boot menu key is usually displayed on the bottom of your screen when you power your PC on. If you are unable to locate the boot menu key for your computer, you advised to search it on Google, to make things faster.
3. Change Boot order: Changing boot order means changing the device your PC boots, On default, your PC is set to boot from your hard disk. If you using a Windows 10 DVD, you are required to set your PC to boot from your disk drive. If you are booting from a bootable flash drive, you are required to set your PC to boot from the bootable flash drive. IF you don’t know how to do this, you advised to research on Google or contact your manufacturer.
4. Press any key on your keyboard and proceed with the installation: After you might have successfully booted your installation media, you will be prompted to press any key on your keyboard, to proceed with the installation.
5. Follow the on-screen prompts: You will be presented with different on-screen prompts. Prompts that will require you select your preferred language, inserting your product key and lots more. These are basic steps that do not require any expertise.
6. Select the version of Windows 10 you wish to install:
During the installation process, you will be required to select the version of Windows 10 you wish to install. Here you will be provided with the option to install windows 10 x64 and Windows 10 x86. Please note that installing windows 10 x86 is the same thing as installing windows 10 32 bit and installing windows 10 x64 is the same thing as installing windows 10 64 bit. Here you will also be required to select windows 10 home, professional and other versions. Please, note that the windows 10 pro is the most powerful version of Windows 10.
7. Review License terms and click next
8. Click on custom install: After reading the license information, you are required to select the type of installation you want. You have options to upgrade, keeping all your files or doing a custom advanced install. You are advised to do a custom install. You will able to select the drive you want to install the windows 10 OS.
9. Allocate Storage For Installation of Windows 10
Our sample hard drive has not been allocated or partitioned before. If your hard drive isn’t like this or has been partitioned before, you are required to highlight all the partitions and delete them. Your entire hard drive will be unallocated. Click continue to create a new partition.
You are advised to create a partition with up to 80GB to accommodate the windows operating system.
10. Click Next, to confirm partitioning and to begin windows installation.
Now that you have successfully installed the Windows 10 operating system on one of the partitions, the next step is to install Ubuntu on your hard drive.
Installing Ubuntu
At this point, we assume you already have the Windows 10 operating system installed on your hard drive. The next step is to install Ubuntu on the other partition you created. Installing Ubuntu will be done using the installation media you created earlier.
1. Insert Installation Media into your Computer: You are to insert the installation media in your computer. If the installation media was created on a DVD, you are to insert it into your CD ROM, if the installation media is on a bootable flash drive, you insert it via your USB port.
2. Click on the boot menu key: PC’s have different boot menu keys, you have to look out for the boot menu key assigned to your PC. The boot menu key is usually displayed on the bottom of your screen when you power your PC on. If you are unable to locate the boot menu key for your computer, you advised to search it on Google, to make things faster.
3. Give priority to Your Installation Media: After you must have successfully entered the boot menu on your computer, the next step is to give priority to your installation media. If you are booting from a DVD plate, you are to give priority to your CD ROM, select boot from CD ROM. If you are booting from a bootable flash drive, you are required to give priority to your flash drive, select boot from flash drive.
4. Install Ubuntu: After you have successfully prioritized your Boot device, your computer will be booted into the Ubuntu installation interface. Here you are provided with the option to either try ubuntu or install Ubuntu.
5. Select Your Preferred Language: After you might have clicked the install Ubuntu button, you will be required to select your preferred language. Here you are to select the language you understand.
6. Select Your keyboard layout: Despite being an output component of the computer, the layout configuration software plays a huge role, in key placement. Here you have options to choose from the different layout assigned to different languages. After you have selected your preferred keyboard layout, you are advised to click continue.
7. Select Installation Type: Installing Ubuntu, you provided with Normal Install Option, as well as Minimal installation option. If you select normal installation, Ubuntu will be installed alongside a web browser, utilities, office software, games, and wallpapers. Minimal Installation installs Ubuntu alongside a web browser and utility software.
8. Install Ubuntu Alongside Windows 10: You are provided with the option to either install Ubuntu alongside Windows 10 or erase the hard disk and install Ubuntu.
9. Follow in the On-Screen prompts provided: You will be required to confirm Ubuntu installation, select time zone and fill in your Particulars, to setup login security.
10. Reboot Your PC: After you might have successfully installed Ubuntu on your PC, You will be provided with the option to continue testing or restart. You are required to click the restart button, to begin using Ubuntu.
Note: After you might have successfully followed all the steps provided in this tutorial, you will be provided with the dual boot screen, where you will be given the option to either boot into windows or boot into Ubuntu.
There you have it – A complete and comprehensive tutorial on How to Dual Boot Linux with Windows 10 on your PC. If you have questions, feel free to drop them in the comment section below.
The presence of a yellow exclamation mark on your windows connectivity icon means just one thing, your network connection has issues. As simple as resolving it may sound, there may be some occasions where resolving such network issues becomes very difficult. This is where the Network Diagnostics tool comes into play. The network diagnostic helps windows users troubleshoot network problems, and also provides solutions to fixing them. In this article, we explore a tutorial on how to run Windows Network Diagnostics.
The windows diagnostics tool is a highly recommended tool, in troubleshooting fixing the network problem. It is very effective in fixing DNS problems and also helping users find the cause of network termination.
The procedures for using the Windows Network diagnostics tool is a very easy and straight forward. These steps are listed below.
1. Click the start button on your keyboard, and type ”fix network” in the search box provided.
2. From the list of search results provided, click ” Find and fix networking and connection problems “
3. In the Network diagnostics window, click on the advanced option and run the program as an administrator. There is an option to apply repairs automatically here, you tick it if you want repairs to be applied automatically.
4. Choose the type of connection you want to diagnose for troubleshooting and click on the next. here windows will try to locate the network connectivity problem.
Note: Once the problem has been detected by the windows network diagnostics tool, you have the options of solving the problem yourself, contacting Microsoft online support, to get the problem solved remotely or restoring your windows machine to its default settings. You can also seek the help of a local technician, to help you fix the network problem.
There you have it – a complete and comprehensive tutorial on how to run Windows Network Diagnostics. if you have other questions, feel free to drop them in the comment section below.
As a windows OS user, there are times where you will be faced with the unidentified network error. The Error appears sometimes when you try to connect to a network, using your windows machine. There is no actual method of solving this problem, as this Error may be caused by a lot of things. In this article on how to fix unidentified network access on windows, we shall explore a list of troubleshooting steps you should follow when trying to fix this error on your windows machine. This these steps are listed below.
1. Turn Off Airplane Mode
The first step in the troubleshooting process is to disable Airplane mode. As you might already know, Airplane mode when activated, disable all network access, this means you will not be able to access any network on your windows machine. In turn, this may result in the unidentified network no network access error on your windows machine. To turn off the airplane on your windows machine, please follow the steps listed below:
Press Windows key + A. This opens the ‘Action Center’.
Toggle off the airplane mode button.
2. Update Network Card Drivers
Outdated network card drivers could also facilitate the unidentified network error in windows operating system. If you already toggled off the Airplane mode switch, and you are still experiencing the problem, you are advised to update your network card drivers. Steps to update your network card drivers are listed below.
Press Windows + X or right-click on the Start button.
Click on Device Manager to open it.
Look for ‘Network Adapters’ and click on the forward pointing arrow to expand the list. Right click on all the Network drivers and update them one by one.
3. Disable the Security software temporarily
In the quest to giving your computer absolute protection, security software may disable your internet connectivity. This is common with Anti-virus software or Firewall software. In solving the unidentified network error, you also advised troubleshooting your security software, by temporarily disabling it, to see if the problems stop. To disable your security software, you are to right click on the Anti-virus icon located in your system tray icon section. Once you have disabled it, you are to try connecting to a network to see if it worked. If it didn’t, you can continue with the next step in troubleshooting
4. Switch off the Fast Startup feature
Microsoft has been able to make booting on the Windows operating system faster, using the fast startup feature. The fast startup feature is found on a recent version of the Windows operating system. The fast startup features is another facilitator of the unidentified network access error. Having tried the steps listed above, with no positive results, you are advised to turn off the fast startup feature on a windows machine., using the steps listed below:
Search for ‘Power Options’ in the Windows search bar. Open the Power Options window and among the tabs on the left, click on choose what the power button does.
Click on ‘Change settings that are currently unavailable’.
Uncheck ‘Turn on fast startup’. Shut down the system and reboot after 30 seconds.
5. Change your DNS servers
Your current DNS server may just be the reason your windows machine is plagued with the unidentified network access error. To change your DNS servers, follow the steps listed below:
Press Windows + X or right-click on the start button.
Click on ‘Network Connections’.
Right-click on your network connection (Ethernet or Wifi) and click on properties. It might prompt for administrator credentials.
Double-click on Internet Protocol Version 4.
Select ‘Use the following DNS server addresses’ and set but the preferred and alternate DNS server address as follows to use Google Public DNS:
Preferred DNS server: 8.8.8.8
Alternate DNS server: 8.8.4.4
6. Use Command Prompt
Already tried the steps listed above, and nothing seems to be changing, there are some commands you can run in command prompt, to salvage the situation. You are required to try the commands listed below, one by one, one at a time. Once you have successfully ran all the commands, you are to restart your windows machine.
ipconfig /release
ipconfig /renew
netsh winsock reset
netsh int ip reset
ipconfig /flushdns
ipconfig /registerdns
netsh int tcp set heuristics disabled
netsh int tcp set global autotuninglevel=disabled
netsh int tcp set global rss=enabled
netsh int tcp show global
7. Diagnose The Network
The network Diagnose feature, is another handy tool, that helps troubleshoot the problem of your network. You can diagnose the network using the features listed below:
Press Windows + X or right-click on the start button.
Click on ‘Network Connections’.
Right-click on your network connection (Ethernet or Wifi) and click on ‘Diagnose‘. It will start an automatic troubleshooter.
8. Change the Ethernet cable
Tried troubleshooting with the steps already listed above, and nothing seems to be changing? Your Ethernet cable may just be faulty. You are also advised to troubleshoot your ethernet cable. Try using another one. If the problem persists, you can proceed to the next step.
9. Set a static IP address
Press Windows + X or right-click on the start button.
Click on ‘Network Connections’.
Right-click on your network connection (Ethernet or Wifi) and click on properties. It might prompt for administrator credentials.
Double-click on Internet Protocol Version 4.
Select the radio button at ‘Use the following IP address’.
Check the IP address settings for others using the same network as yours and change your settings to the same.
Click OK to save the settings and exit.r
10. Use an external Network Adapter
Your Network chip may just be the facilitator of the problem. Having a faulty network chip on your windows machine can crumble your internet connection, you are advised to troubleshoot your network chip, using an external network adapter.
11. Restart your modem and router
Switch off both your modem and router keeping them physically connected.
Start the modem. Wait for 30 seconds after all the lights turn green.
Start the router.
This is called power-cycling.
12. Upgrade the router firmware
Having an outdated router firmware can also crumble your network connection, leading to the unidentified network error on your windows machine. You are advised to update the firmware on your router and try connecting again.
13. Disable Virtual Network Adapters
Launch Device manager on your windows machine
Navigate to Network Adapters and expand it
Right-click and disable them
14. Run the built-in troubleshooters
Having exhausted the troubleshooting steps listed above, and nothing seems to change, running the built-in troubleshooters on your windows machine, may just be the answer to your problem. Here are the steps to running the built-in troubleshooters on your windows machine. To activate the run box on your windows machine, simply hold windows key and R together i.e windows key + R.
In the run box, you are to run each of the commands independently.
msdt.exe -id NetworkDiagnosticsWeb
To open the Incoming Connections Troubleshooter
msdt.exe -id NetworkDiagnosticsInbound
To open the Network Adapter Troubleshooter:
msdt.exe -id NetworkDiagnosticsNetworkAdapter
Conclusion: Upon troubleshooting your device, with the steps listed in this article on how to fix unidentified network access on windows , there is a high chance you might solve the unidentified error on your windows machine. If the problem persists, you are advised to contact windows support theme or visit a technician.
Partitioning hard drives, with a functioning operating system, is carried out using some built-in features. You can partition your hard drive or SSD using the command prompt, Windows disk management or a third party software. However, partitioning a new hard drive or SSD without OS is an entirely different thing. Here you do not have the luxury you have on a fully functioning OS. There is no software installed, you are given a plane slate, with no tools.
Despite the fact that it sounds impossible, Partitioning hard drives or SSDs without OS is actually possible. In this article, we explore a tutorial on how to partition a new SSD or Hard drive without OS.
Please note that for you to partition the hard drive or SSD without OS, you will need a bootable device, to boot the hard drive or SSD without an operating system. In this article, I will demonstrate how to partition a new hard drive or SSD using a bootable device containing windows OS. The steps are listed below.
How to Partition a new SSD or hard drive without OS, During Windows Setup
when installing windows OS, you are provided with the option to manage your hard drive or SSD space. Here you will be able to manage the partitions on your hard drive or SSD. You can create partitions or delete already existing partitions. As already mentioned, you will need a bootable device containing windows OS.
1 Insert the boot device into your computer. If your boot device is a disc, you are required to place it in your CD ROM. If it’s a bootable flash drive, you should plug it to any of the USB ports on your computer.
2. Follow all on-screen prompts until you are landed in the page where you can manage your storage space.
3. Once you are on the windows storage management page, press shift+F10 simultaneously to open a command prompt.
4. Type “diskpart” and press enter
5. At Diskpart>, run a few lines of commands to create a new partition:
List disk
Select disk [disk number]
Create partition primary [size=n]
Disk number and size is dependent on the configuration of your hard drive or SSD. Below is an example of how to use the above command line.
List disk
Select disk 0
Create primary partition size=60000
Note: Creating a partition of 6000MB means you are creating a partition of 60GB and also disk 0 is the name of the default partition that your hard drive or SSD has.
5. Hit enter
Note: You are advised to allocate more than 100GB to your new partition, because Windows update, installed programs, and other system files will keep consuming space on system partition
After you might have successfully carried out all the steps listed above, you will have a well partitioned hard drive. Steps listed above should be followed in order, to prevent complications.
The Internet has over the years metamorphosed into a very essential part of our lives. The internet is a source of information, it keeps us in tune with the happenings in the world. Being absent from the internet for an hour can be very torturing. In this article, we explore a tutorial on how to hack wifi passwords using Android apps. This will help you gain access to wifi networks in your surrounding, without prior knowledge of the password.
1. How To Hack Wi-Fi Password Using Wi-Fi WPS WPA Tester Android App
Seeking to make a quick wifi network hack? The Wi-Fi WPS WPA Tester may just be what you need. The Wi-Fi WPS WPA Tester app works on both rooted and nonrooted devices. Despite its compatibility with non-rooted devices, it requires root access, to hack tougher wifi networks. Steps to hacking Wi-Fi networks using the Wi-Fi WPS WPA Tester app are listed below.
Download and install the Wi-Fi WPS WPA Tester App from the Google Play Store
Launch the Wi-Fi WPS WPA Tester app on your Andriod device
Locate the Wi-Fi connection you wish to hack.
Tap on the Wi-Fi network
Select ”connect” and then select no root methods to hack Wi-Fi password.
Note: If the color of the Lock icon is green, it means the chances of hacking the network is high. Red or Orange color lock indicates the chances of hacking the network is low.
2. How To Hack Wi-Fi Password Using Android Dumper Android App
Still on the topic of how to how to hack wifi passwords using Android apps, Androdumper is a free app that lets use hack Wi-Fi networks seamlessly. Androdumper doesn’t require root access to function. It is available in the Google Play store for downloads. Steps to hacking Wi-Fi networks using the Androdumpper app are listed below.
Download and Install the AndroDumper app from the Google Play Store
Launch the AndroDrumper app on your Android device
Click on the refresh button in the second top left corner of the app. This will allow the app to search for available Wi-Fi connections.
Click on the Wi-Fi network of your choice, and then click on the “Try to connect” button.
Select the hack method. You have the option to choose between Root way or No Root.
Wait for Androiddumper to hack Wi-Fi network
How To Hack Wi-Fi Password Using Android Bcmon Android App
Last but certainly not least, is the Bcmon app. Unlike the already mentioned wifi hacking apps, Bcmon requires root access. It is compatible with rooted devices. Bcmon is a more effective app, in hacking Wi-Fi network. Steps to using the Bcmon app is listed below.
Download and Install the Bcmon app from the Google Play Store
Click on the ” Refresh” icon to view available Wi-Fi network
Click on the desired Wi-Fi network
Navigate to settings and uncheck “use Bcmon” checkbox
Navigate back to the network screen and click the “ok” button to hack the Wi-Fi network
Conclusion: Despite the fact that apps featured in this article are highly recommended, there is a high chance that they won’t be able to hack all the Wi-fi connections you come across. This is due to the different levels of fortification Wi-Fi connections possess. In cases where the Wi-Fi connection security isn’t strong, you should be able to gain access using the apps listed above.
Android Apps to watch full TV episodes: Over the years, smartphones have managed to make our lives easier than they were before their existence. It has made us independent of a lot of things. For example, before smartphones and tablets existed, the only option we had to watch movies was our Television set. We had to stay glued to them until the movie ended. Thanks to smartphones, we can now watch movies on the Go using our smartphones. This has made leisure time a lot better.
This article explores a comprehensive list of the best Android apps to watch TV episodes. These apps allow users to stream their favorite TV episodes on their smartphones. These apps are listed below.
1. Showbox Apps
Looking to watch full TV episodes on your Android device? Showbox may just be the app you have been searching for. Despite not be available in the Google PlayStore, Showbox is unarguably one of the most used media and video stream apps available on the Android platform.
Showbox lets users stream movies and TV series for free on their Android device. There are no hidden charges, you don’t have to pay any monthly or annual fee. Apart from allowing users stream media content, Showbox also lets users download movies and TV series to be watched later. Showbox offers movies and TV series in high definition quality, giving uses crisp and clear content to stream. As earlier mentioned, the Showbox app is not available in the Google Play store for download, to download the Showbox app, click here
2. Netflix Android Apps
Netflix is undoubtedly the most popular streaming platform we have today. From Movies to TV Episodes, Netflix is the most sought after app streaming app we have today. Despite offering a subscription for service, the top-notch content they have set them apart from others.
The Netflix app bears a very intuitive interface, designed to make navigation as easy as possible. Locating your favorite movies is as easy as possible here. Chances of you running out of content to watch is very low here because Netflix is loaded with a lot of exciting contents to stream. The Netflix app can be downloaded from the Google Play Store.
3. Stremio
Stremio offers a platform for users to stream movies, TV series and TV shows directly on their smartphone. The Stremio app features a very intuitive interface, making navigation very easy. It was designed to help users find their favorite movies easily.
Stremio lets users streaming videos from a lot of services, which includes the popular ones we are familiar with. Example of such services includes Netflix, iTunes, HBO, Youtube, Twitch and lots more. With support for these streaming services, you are assured of seamless streaming of movies, series and lots more.
4. Tubi
Tubi is a legal streaming service, that allows users stream movies, TV series on their Android smartphones, without having to pay any fee. Tubi services are absolutely free of charge. You are not required to pay any monthly fee or annual fee. It’s simple, select the movie you want to watch, and start streaming.Streaming with Tubi, you are offered content from Comedy, Drama, Kiddies show, Korean movies, Anime, British series and lots more. Tubi is constantly updated, delivering the latest content to its users. The Tubi app is available for downloads on the Google Play store.
5. iFlix
iFlix is an Android app, designed to provide top-notch streaming experience to users. iFlix houses loads of exciting and popular TV Series and moves, for free streaming. If you desire to continue watching your favorite TV episodes on the go, iFlix is the app you need.
It also has a section that lets you discover new movies, TV series and lots more. Unlike the already mentioned apps, iFlix requires a pay a monthly fee, to enjoy streaming. The iFlix app is available on the Google Play store for downloads.
6. Showmax
Still on the topic of best Android Apps to watch full Tv episodes, Showmax is yet another awesome app, that allows users to stream TV episodes and movies on their Android devices. Showmax offers a huge selection of TV show, TV episodes, kids shows and documentaries for a monthly fee. It is supported on devices running Android operating system, including Android TV.
Apart from streaming, Showmax also allows users to download movies to their devices, to be watched later. Showmax features a bandwidth capping feature that reduces data consumption when streaming. The Showmax app is available on the Google Play store for downloads.
7. Amazon Prime Video
Amazon Prime Video lets you stream and download popular movies and TV shows, including Amazon exclusives, like the Grand tour, The Man in the High Castle, and Emmy award winner Tumble Leaf and lots more. This app also lets you stream content from special channels like HBO, SHOWITIMEm STARZ, and CINEMAX. The Amazon prime video app is available for downloads on the Google Play Store.
8. ZEE5
ZEE5 is a streaming app dedicated to providing the best from Bollywood. ZEE5 lets users stream TV shows, Web series, International shows, Acclaimed plays, from the comfort of their smartphones. ZEE5 features over 80 live TV channels and 00,000+ hours of video content.
Video content on the ZEE5 Video content dubbed in 5 languages including Hindi, Bengali, Malayalam, Tamil, and Telugu. Apart from allowing users stream media content, ZEE5 also allows users to download content for offline viewing. The ZEE5 app can be downloaded from the Google Play Store.
9. SnagFilms
SnagFilms is yet another app that lets users stream movies and TV episodes from the comfort of their Android smartphones. Snagfilm is a free app. All movies and TV episodes featured in their library can be accessed for free, without paying any subscription fee.
Snagfilm features over 5,000 Independent movies, TV Shows and documentaries. In their library, you will find content under comedy, action-filled and documentaries categories. The Snagfilms can be downloaded from the Google Play Store.
10. IROKOtv
Last but not least, is is the IROKO TV app. IROKO TV is a Nigerian based channel, that offers content from Nigeria’s media sector.
IROKO TV serves users with the best from Nollywood, and Nigerian TV series. You will also find Ghanian Films and TV series here. Apart from allowing users stream content via the internet, IROKO TV also lets users download content to be viewed offline. The IROKO TV app can be downloaded from the Google PlayStore.
There you have it – The best Android Apps to watch full Tv episodes. If you have other favorites, feel free to drop them in the comment section below.
Famous for its smartphones, Xiaomi is a technology company that offers so much for so little. This fact has played a significant role in the success of their company. Price tags featured on their products facilitate questions, regarding the price worth of products from other manufacturers. Still Speaking on offering so much for so little, the Xiaomi Mi smart tv 4, is an example of products manufactured by Xiaomi, that provides so much, for a price tag not relative. The TV is Xiaomi’s first foray into the smart TV market. For a newbie in the Smart TV market, Xiaomi isn’t doing poorly at all.
The smart TV meets all the requirements of a modern TV, that suits its generation. It features a modern design, as well as top-notch hardware specs and software, that facilitates top-notch user experience.
In this article, we explore the features, specs, and pricing of the Mi TV, giving you a clearer insight into why the Xiaomi Mi smart tv 4 is a must-have.
Xiaomi TV Build
As earlier mentioned, it was designed to meet all the requirements of a modern smart TV. It features a very modern design that is going to keep you staring. With a thickness of 4.9 mm, the Xiaomi Mi 4 is a fragile device. The Smart TV 4 claimed the Red Dot Award last year for having a thickness of 4.9 mm.
Having a thickness of 4.9mm doesn’t limit the ports of the Xiaomi Mi smart Tv 4. The Xiaomi 4 comes with a good number of ports for connectivity. The Xiaomi smart tv 4 features three HDMI ports, two USB A ports, one of them is a USB 3.0 port, the other is not. Still on ports, the Xiaomi Mi 4 smart Tv features port for audio video input, Ethernet port, and an Antenna port.
To provide users with an immersive experience when streaming, the Xiaomi Mi smart tv 4 features an integrated Mi TV bar with ten speakers a subwoofer and two wireless rear satellite speakers. It also supports Dolby Atmos audio technology with two up-firing speakers for an unbeatable audio experience.
Xiaomi Mi Smart TV 4 Display
The Xiaomi Mi Smart TV features a 55 inch 4k HDR 10-bit display panel, with a screen resolution of 3840 x 2160. The display has a 60Hz refresh rate, with a response time of 8ms. To feat into the modern smart TV market, this smart tv features a near bezels display, the bezels on this tv is very thin, it’s difficult to see to when watching content on it. The Xiaomi Mi Smart TV blends into your surrounding, creating the illusion that its a wallpaper.
Xiaomi Mi Smart TV 4 Hardware Specs
Being a smart TV, you should expect all the essentials needed for streaming and functioning of supported apps. The Xiaomi Mi smart tv does justice to that.
The Xiaomi Mi Smart TV is powered by a 64-bit quad-core Mlogic processor, a Mali-T830 MP2 GPU, 2GB RAM, and 8GB of Ram. The Xiaomi Mi Smart TV 4 features blue 4.0 with low energy, 2GHz / 5GHz wifi for internet connectivity.
Software / Interface
The primary reason Smart TVs were created, is to provide users with a powerful TV software, that allows users to stream content, use supported apps and surf the net. The ease using these features is hinged on the type of software the TV features and the fluidity of the interface.
The Xiaomi Mi TV 4 features on the PatchWall interface. The PatchWall interface is an Android-based user-interface, that does away with a lot of Android essentials. This TV doesn’t come with Google PlayStore and Youtube and doesn’t support them. The PatchWall interface was designed to be as fluid as possible, doing away with all the features that slow down Android-based Smart TV.
Launching the home screen on the PatchWall UI, you are presented with a tile interface for the channels. When you search for a show, you are provided with the content, as well as information on when scheduled shows will be aired. The patchWall UI also suggests contents based on your viewing habits.
Remote Control
Just like any TV would, the Xiaomi Smart TV 4 does come with remote control. I am giving you remote access to the TV. The Remote features minimalistic buttons that are very easy to understand. This is similar to what we get on most high-end TVs today. On the remote, you will find the standard Android Home, Return and menu button. You will also find volume controller buttons, the Navigation button, and the power button. This remote connects to the TV through Bluetooth. It allows you to control the TV, without directly pointing the remote at it. Apart from being able to control this smart TV, this remote can control your Set Top Box, Mi Android Box, and some other devices.
Conclusion
Despite being a foray, the Xiaomi Mi Smart TV 4 actually packs a lot of impressive features, from its display to hardware specs, to software, there is hardly a thing you would miss when using this smart TV. Although it doesn’t measure shoulders with the top smart TVs we have today, with a price tag for Rs 39,999, the Xiaomi Mi Smart TV 4 is a good buy, with excellent value for the money.
It is no news that Facebook doesn’t allow users to download photo and videos from its platform. Uploading photos and videos may be straightforward, but downloading them is nearly impossible. This has lead to the development of several means of downloading media contents from Facebook.
Most of the methods available today, to download photos and videos from Facebook, requires you to download a browser extension, or you download special software. Downloading these browser extensions and software may be harmful to your computer because most of them come with malware, that can ruin your operating system and make your leak your information.
In this article, we explore a tutorial on how to download facebook videos without using browser extensions. We are going to explore three different methods.
How to Download Facebook Videos without Browser Extensions Using Downvid.net
Downvid.net is a website that allows users to download facebook videos, by pasting copied URLs in a special box provided. It features a very simple and minimal interface. Steps to downloading Facebook videos using Downvid.net is listed below.
Log in your facebook account
Navigate to the post containing the facebook video you wish to download
Copy the URL to the post
Launch downvid.net on your computer, using your browser
Paste the link in the box provided
Select the video quality you desire
Click on download
How to Download Facebook Videos without Browser Extensions Using FBDOWN.NET
Similar to downvids.net, FBdown.net is another website that allows users to download facebook videos seamlessly. Steps to downloading Facebook videos using this platform are very similar to that of downvids.net. They are listed below.
Log in your facebook account
Navigate to the post containing the facebook video you wish to download
Copy the URL to the post
Launch fbdown.net on your computer, using your browser
Paste the link in the box provided
Select the video quality you desire
Click on download
How to Download Facebook Videos Using Savefrom.NET
Famous for Youtube video downloads, savefrom.net is yet another platform that lets people download facebook videos easily. It offers a very simple and minimal interface. Similar to the method used in downloading youtube videos on this platform, downloading facebook videos here, requires copying and pasting the Video URL. The steps are listed below.
Log in your facebook account
Navigate to the post containing the facebook video you wish to download
Copy the URL to the post
Launch savefrom.net on your computer, using your browser
Paste the link in the box provided
Select the video quality you desire
Click on download
As you might have already observed in the steps listed in methods presented in this tutorial, downloading Facebook videos with browser extensions, is a straightforward thing. All you have to do is select one of the methods listed here and follow the steps given.






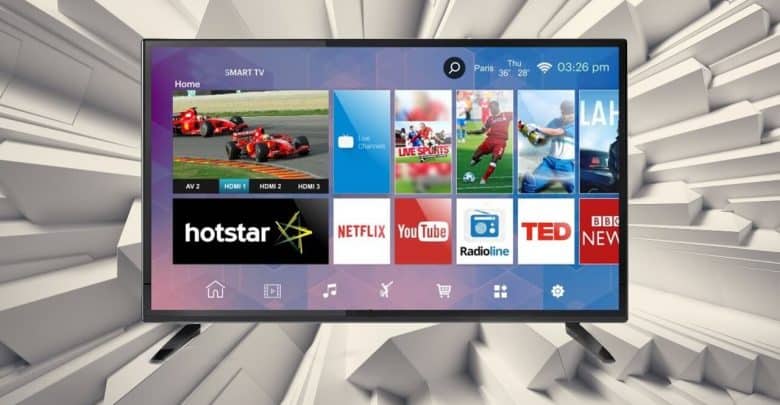
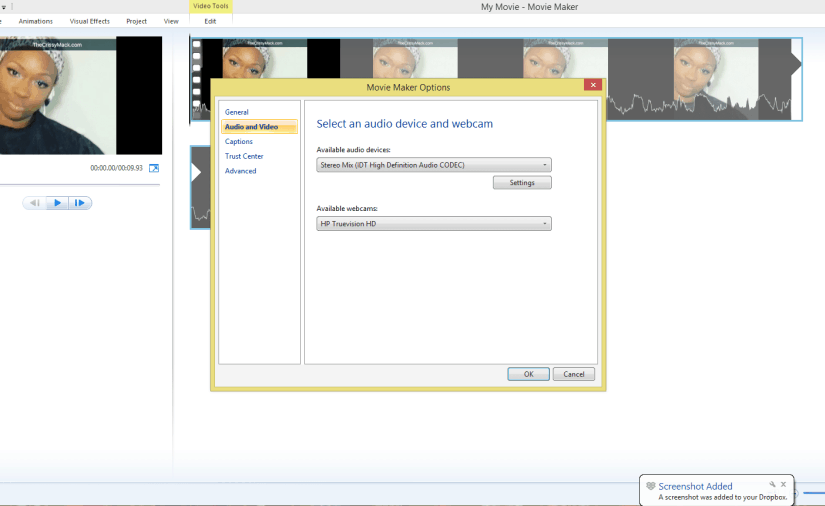

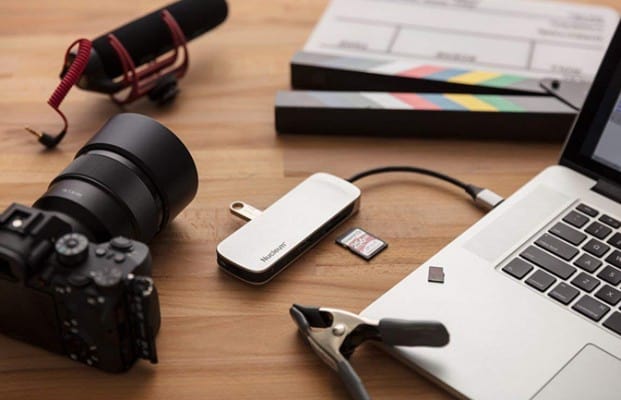
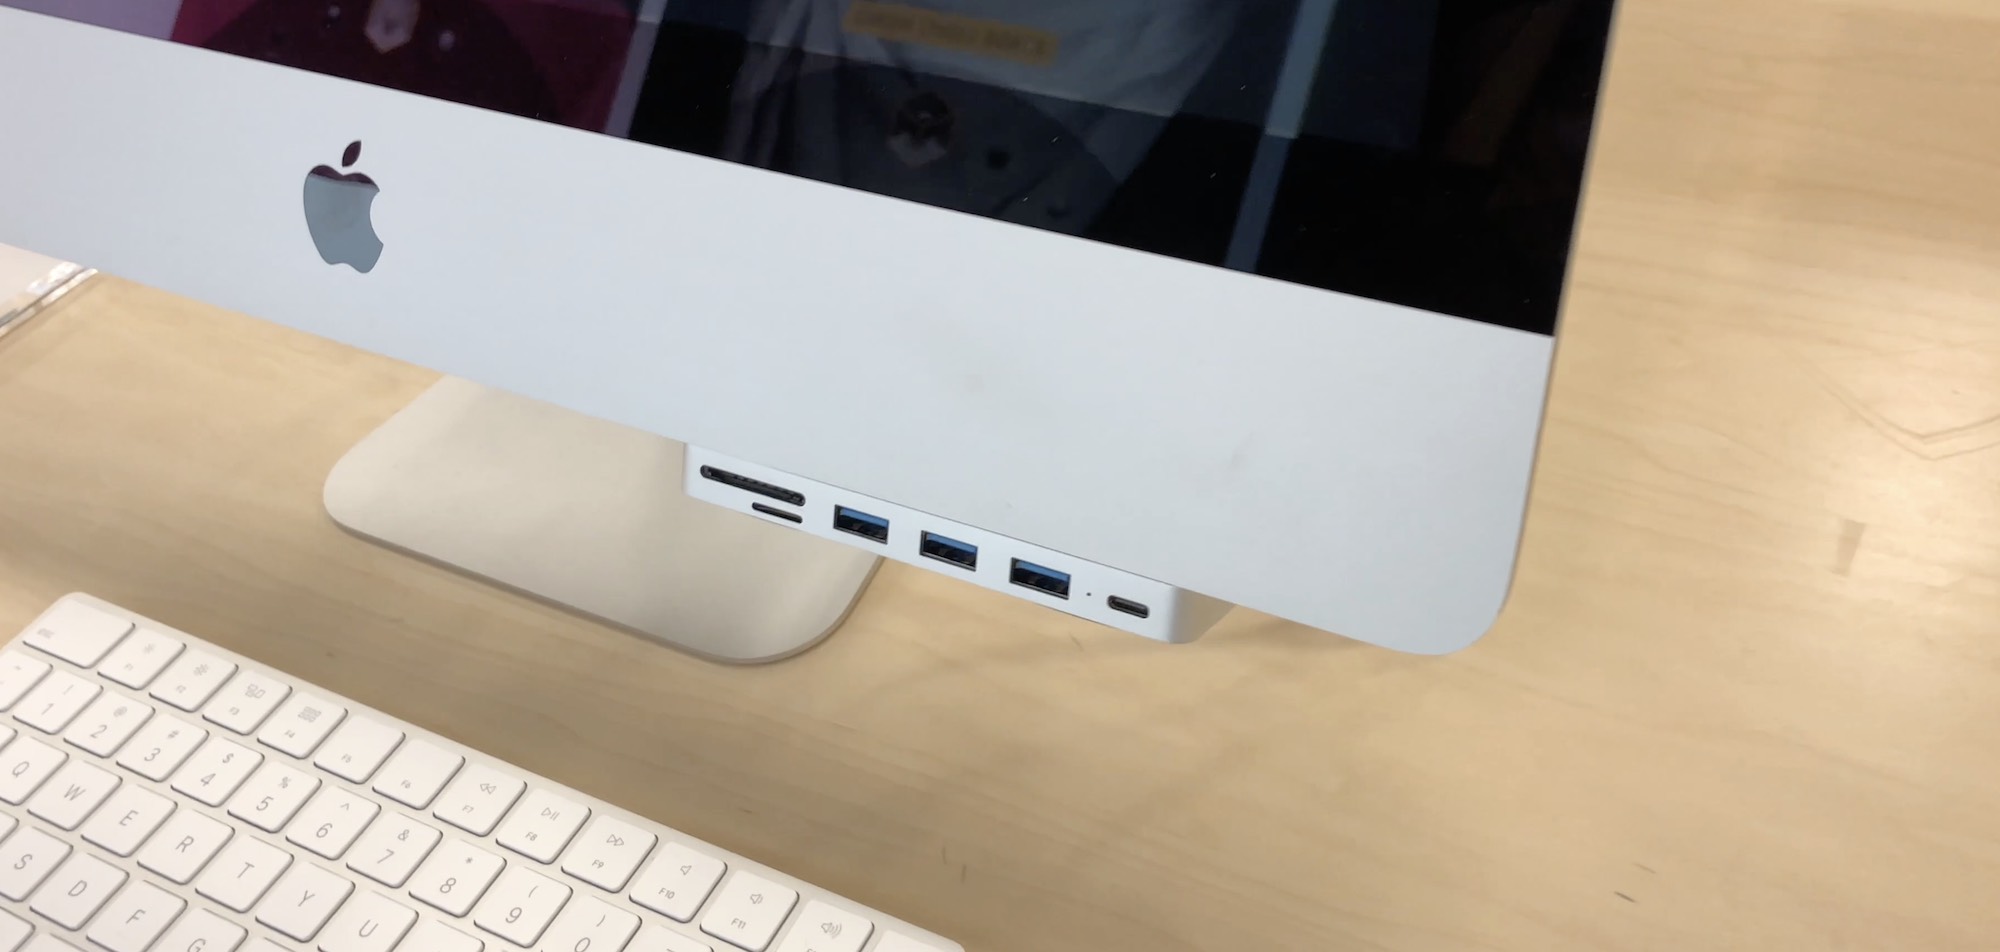

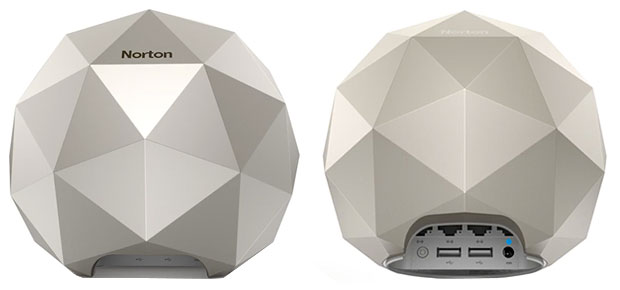

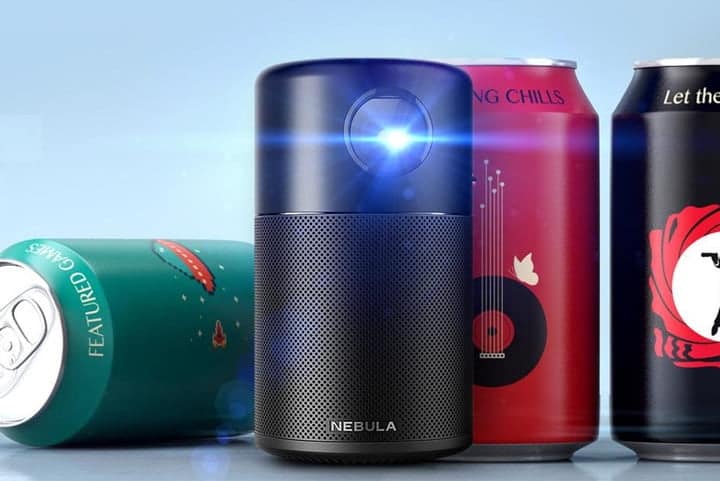
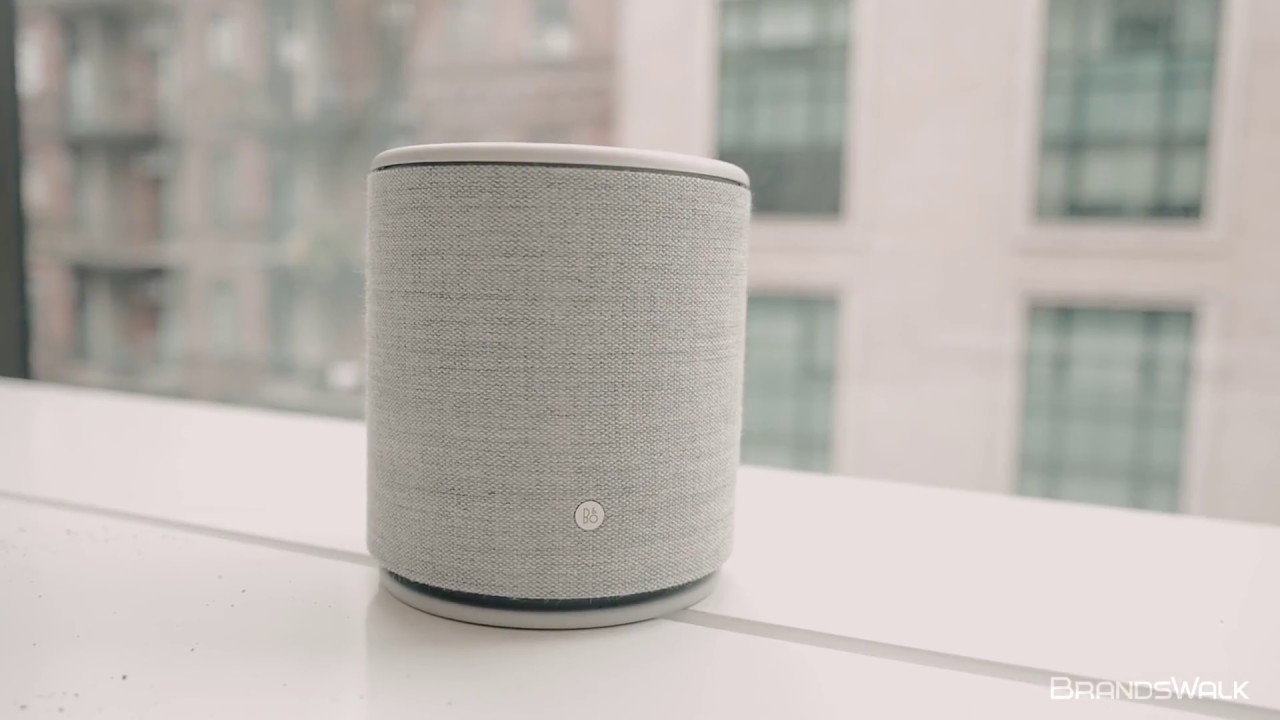


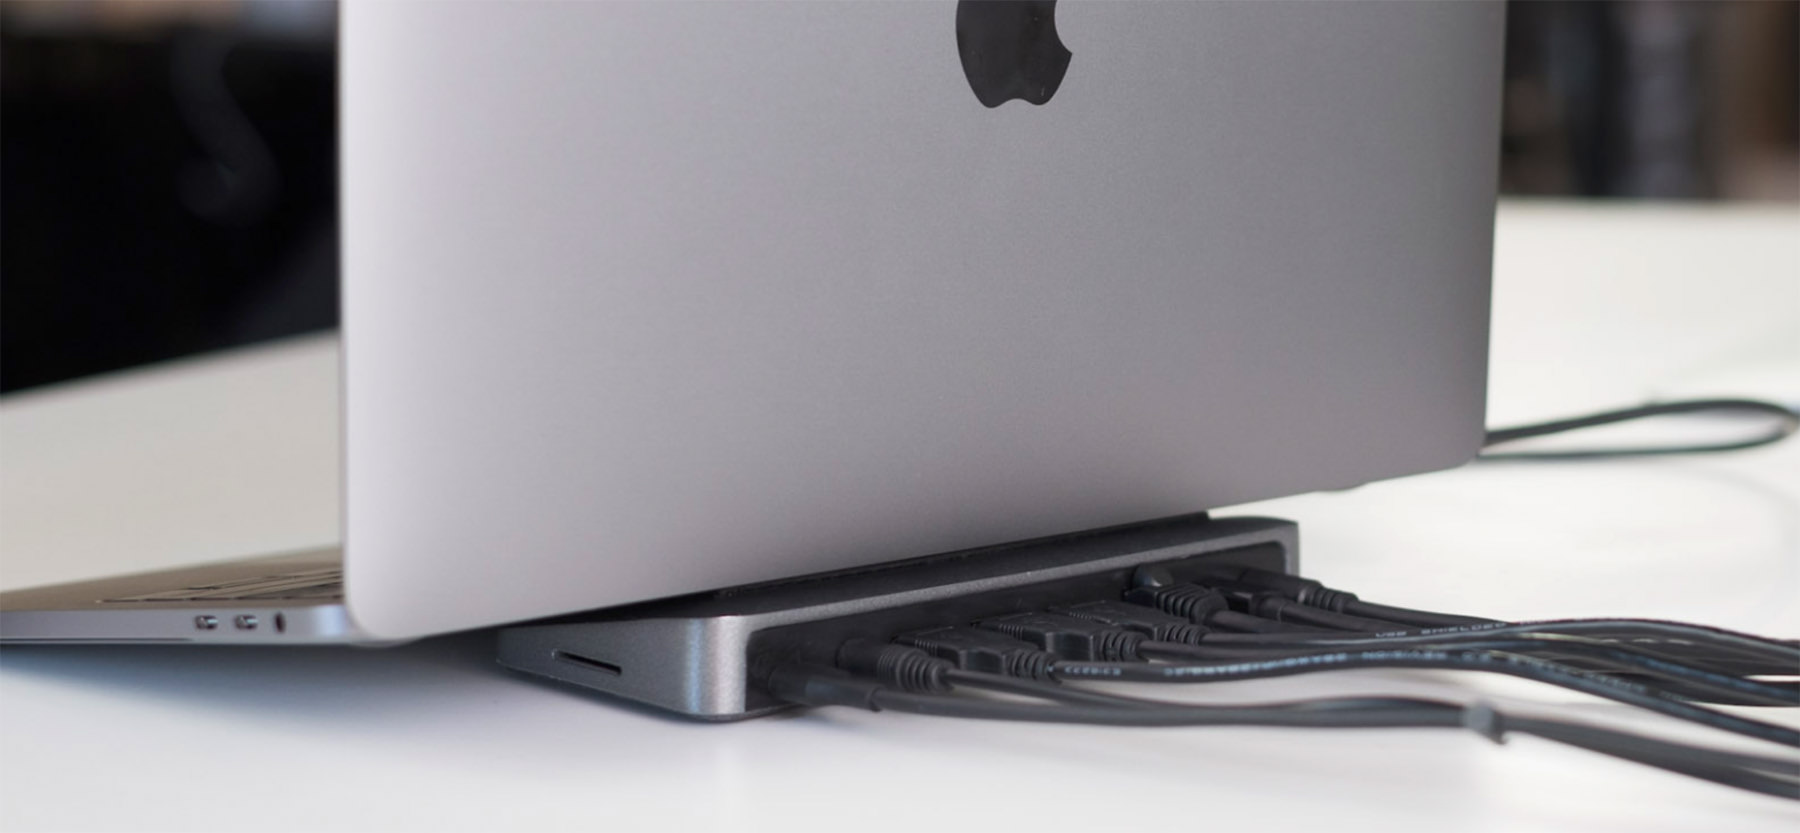
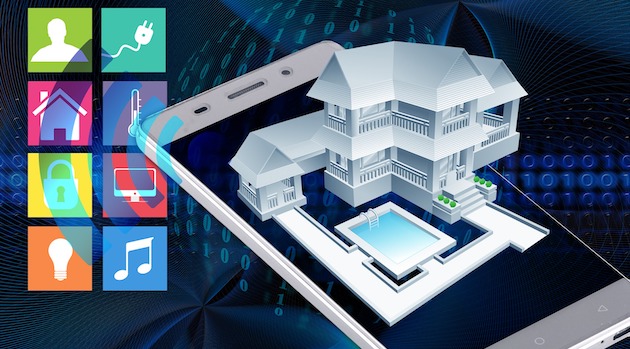

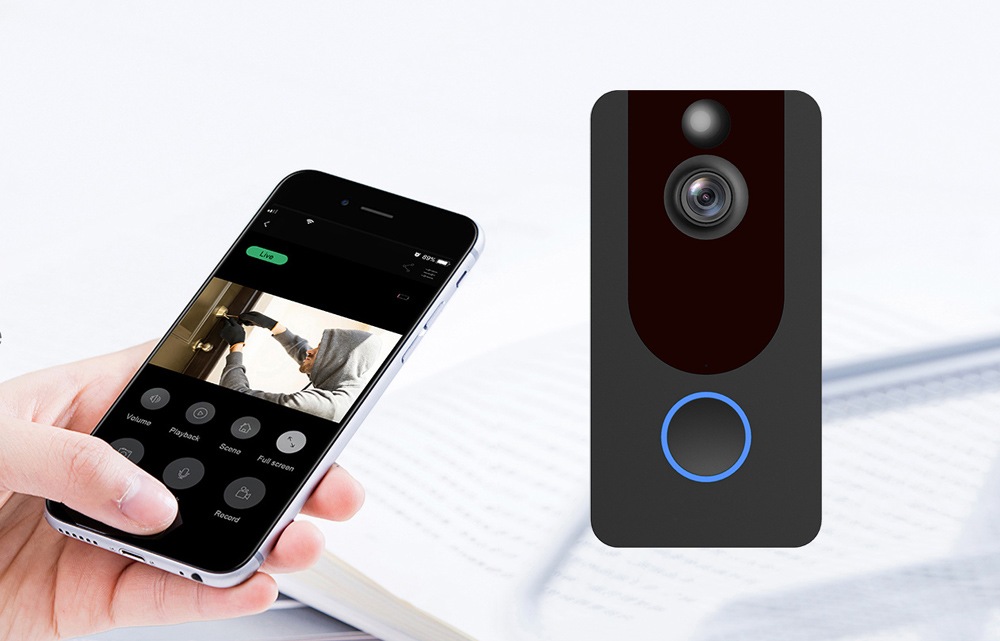

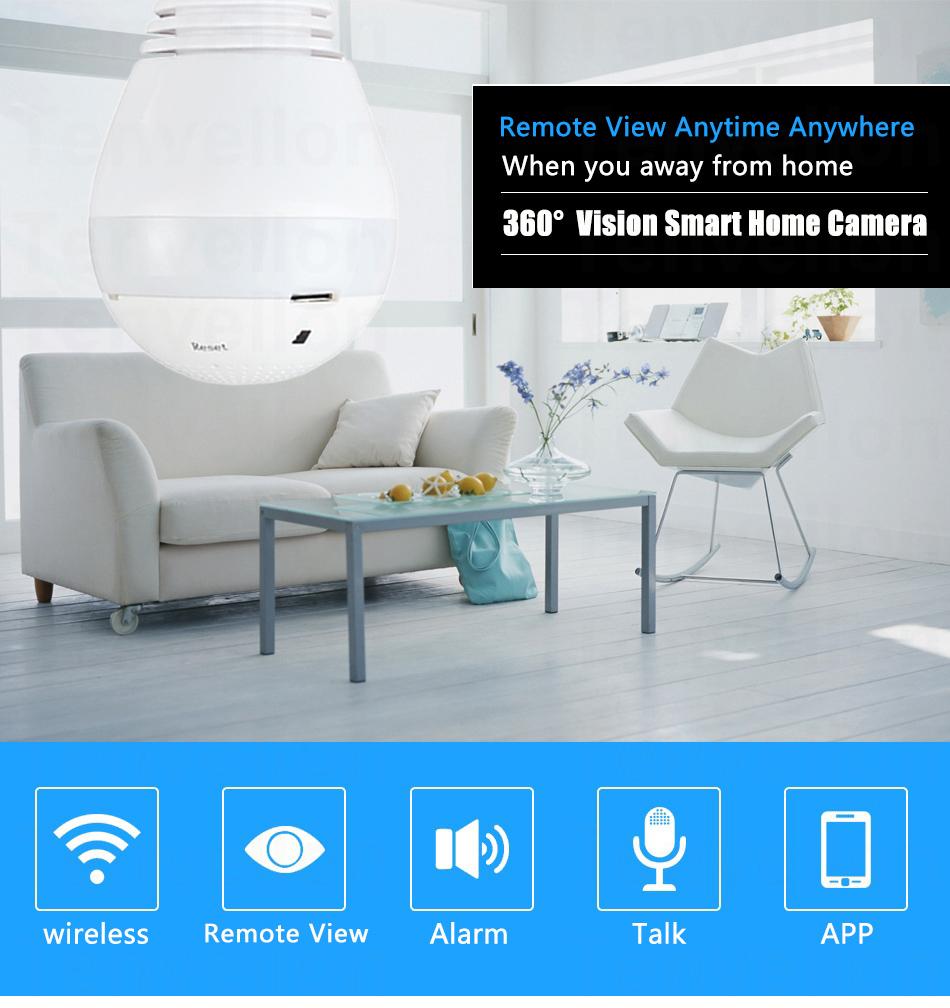



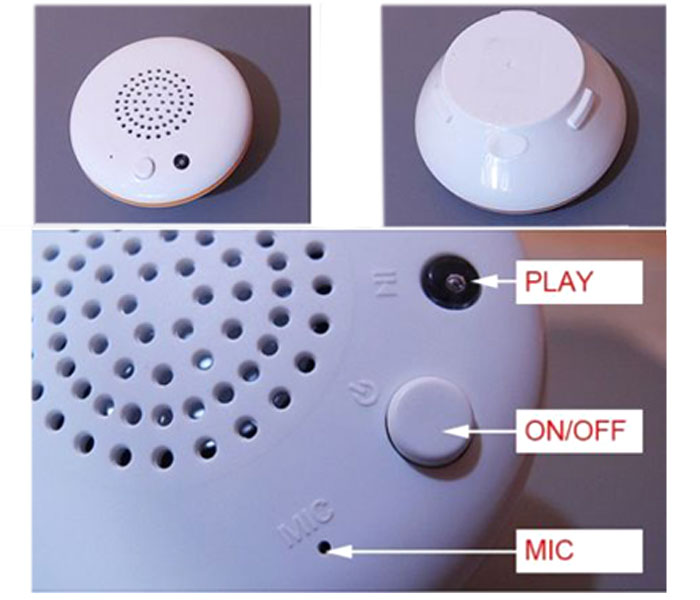
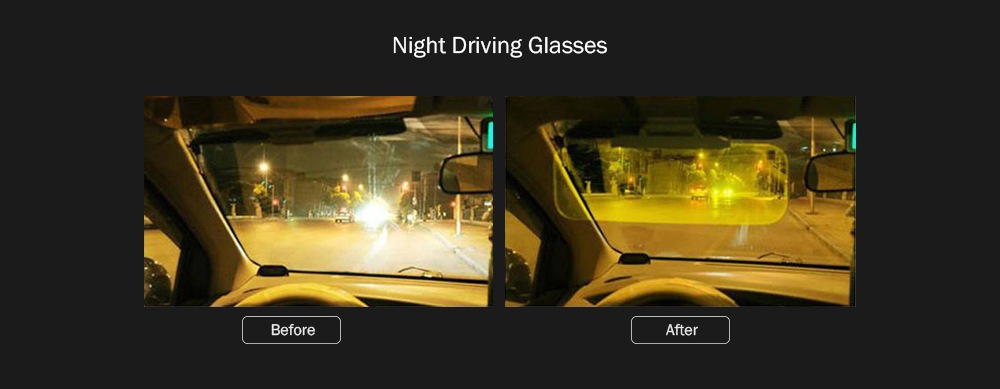


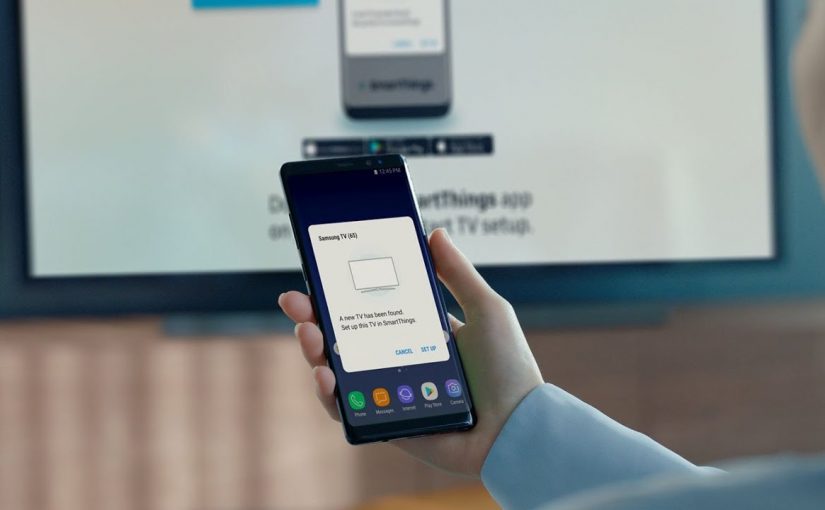

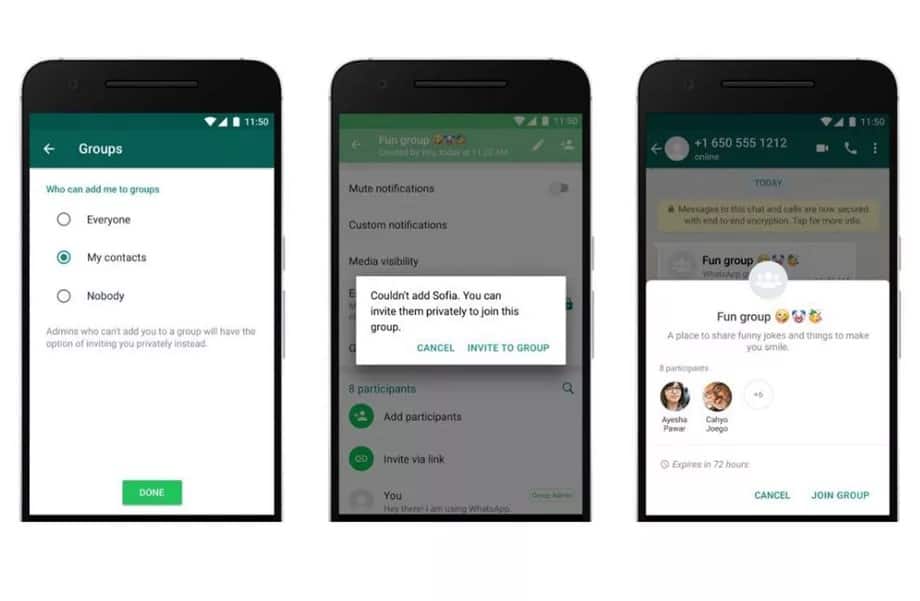
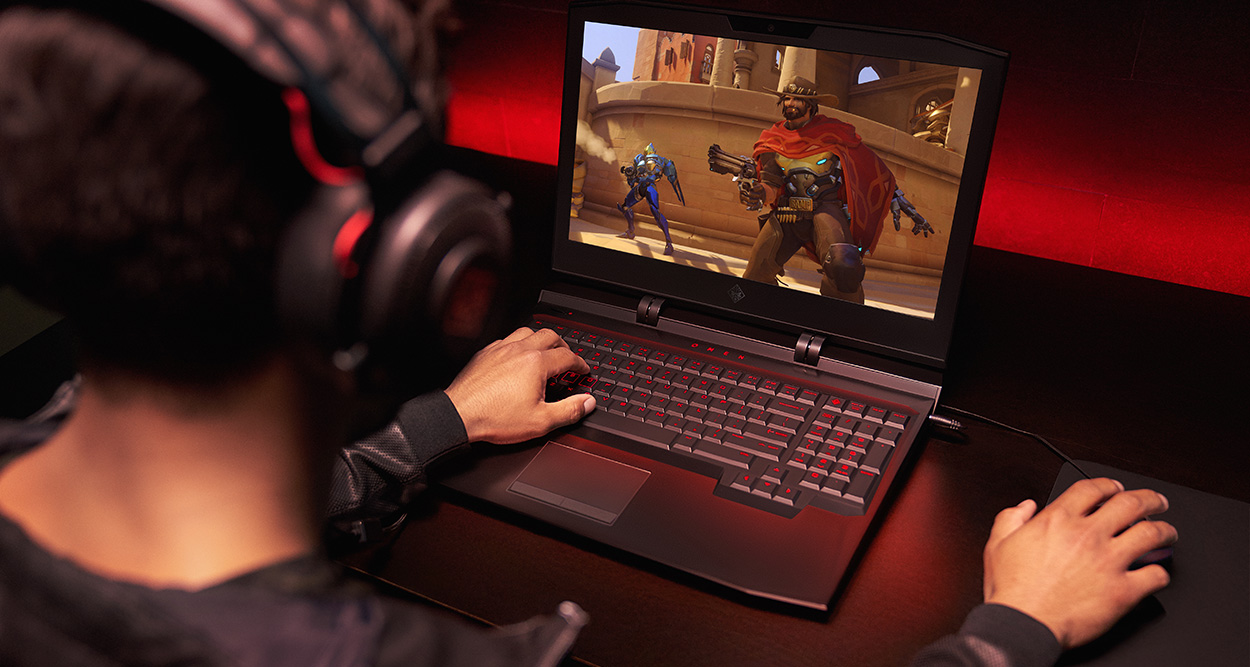


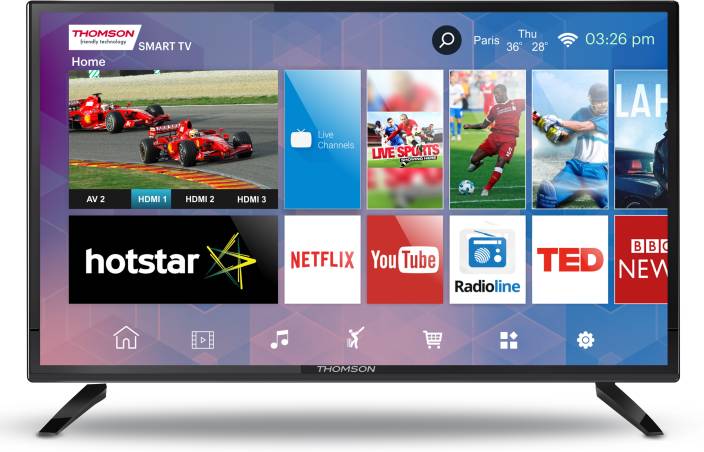
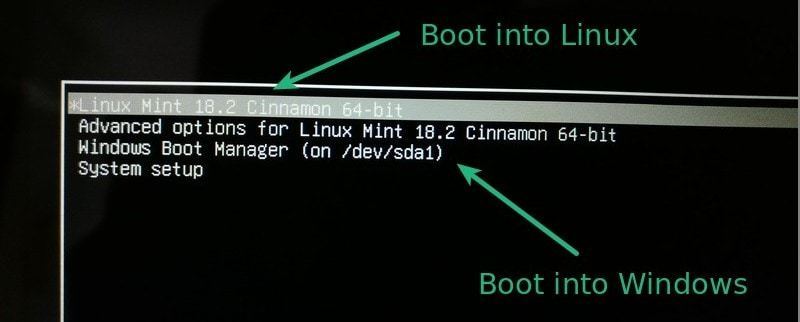
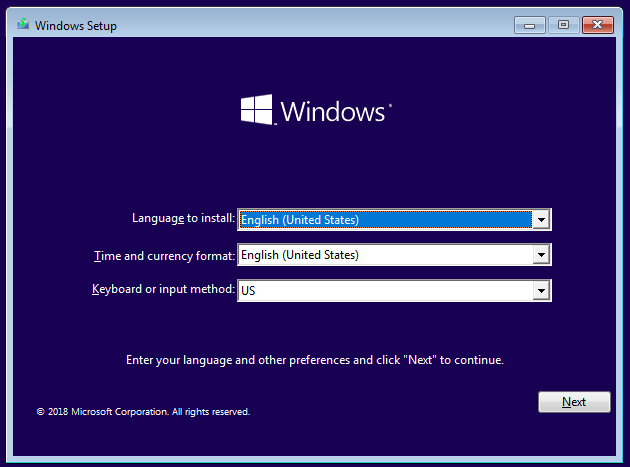
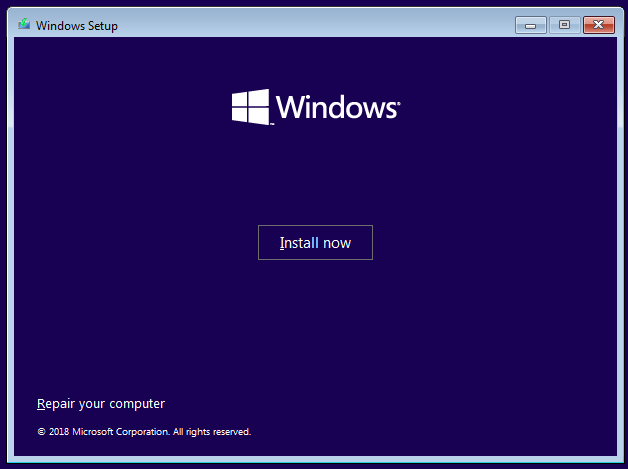
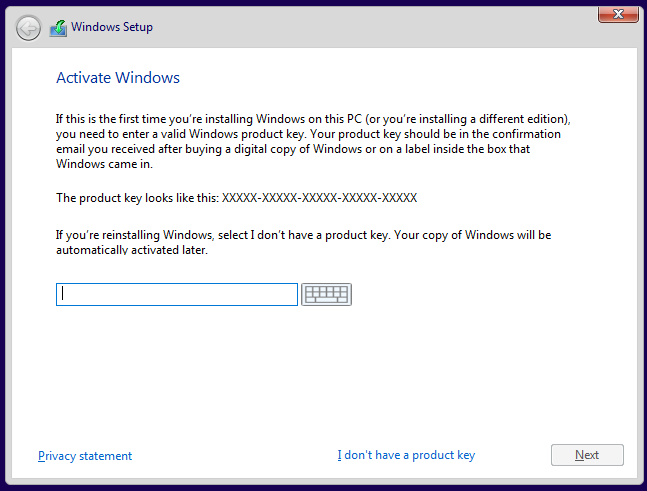

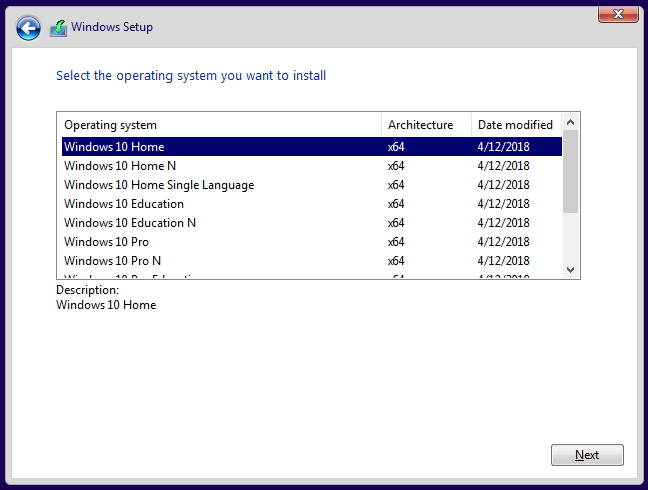
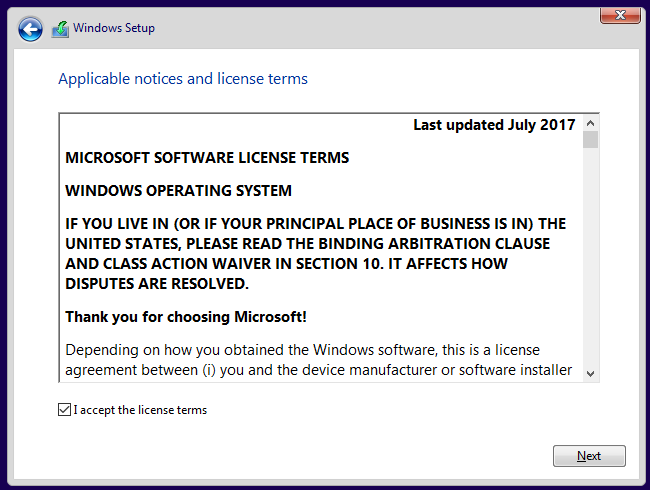
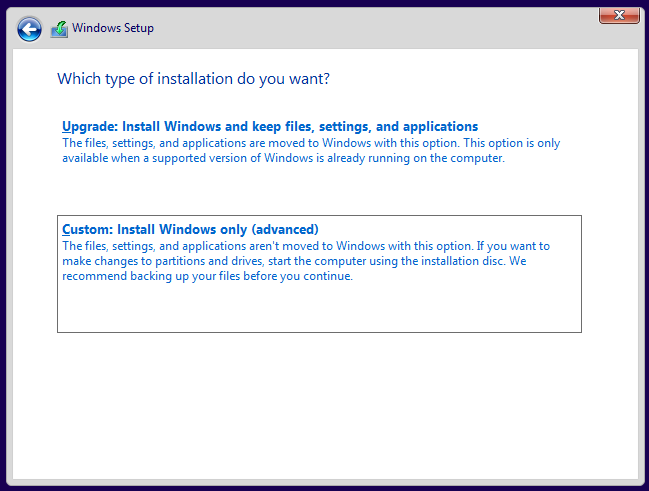
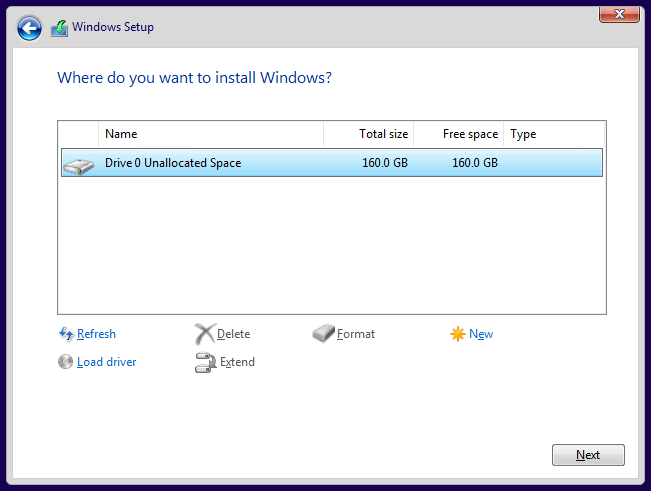
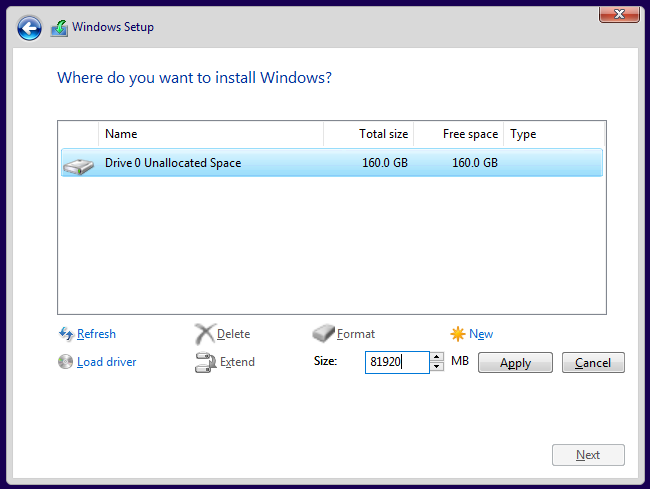

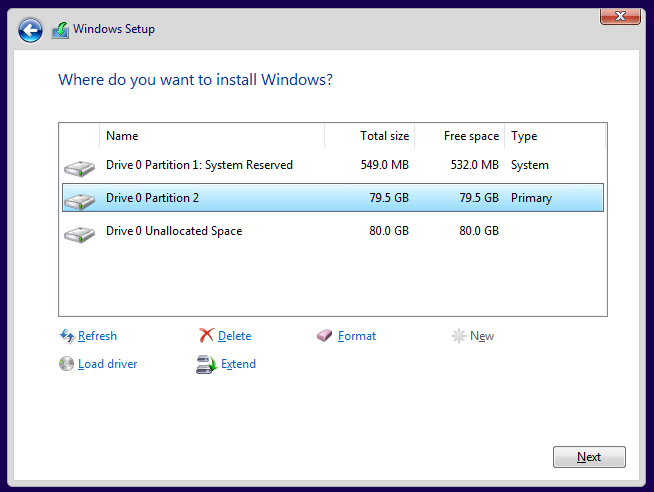
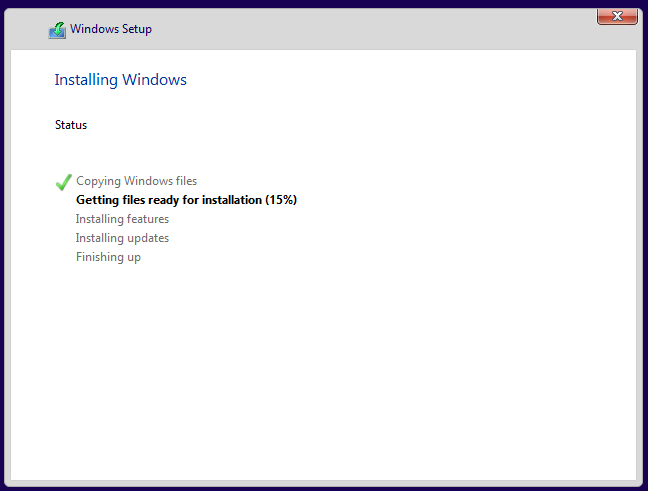
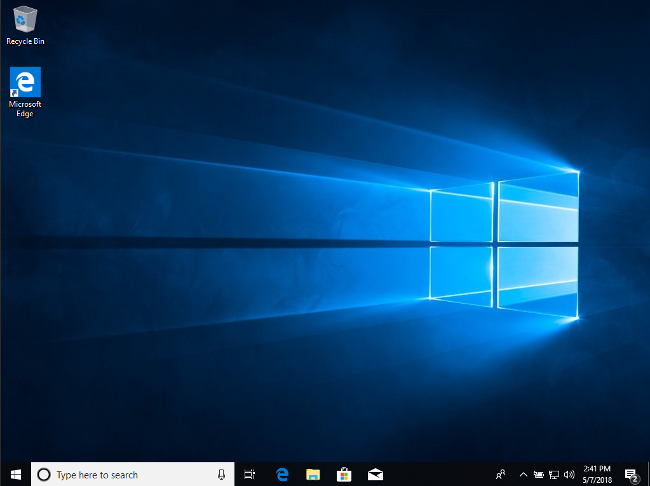

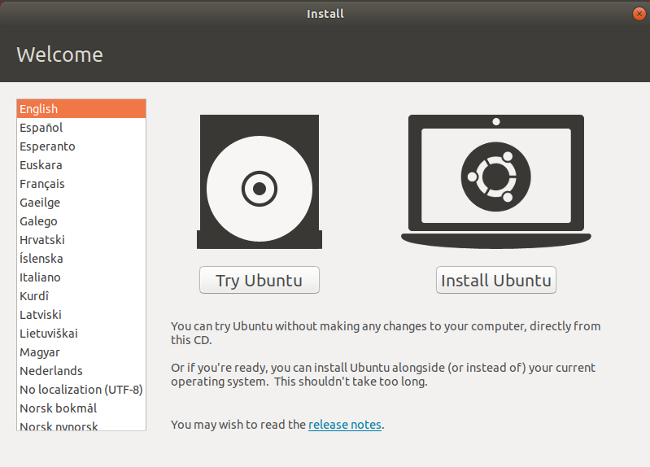
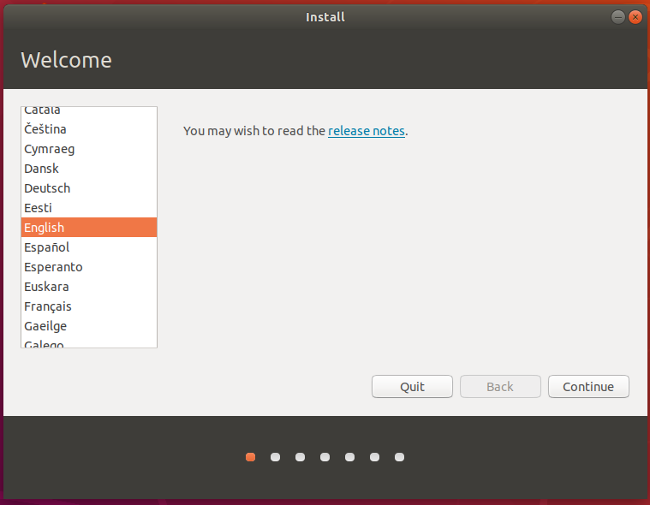
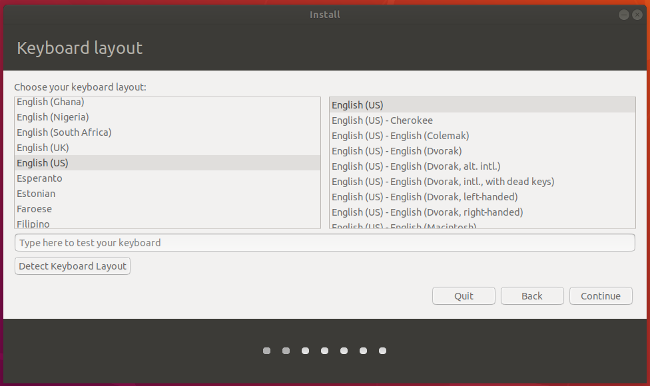
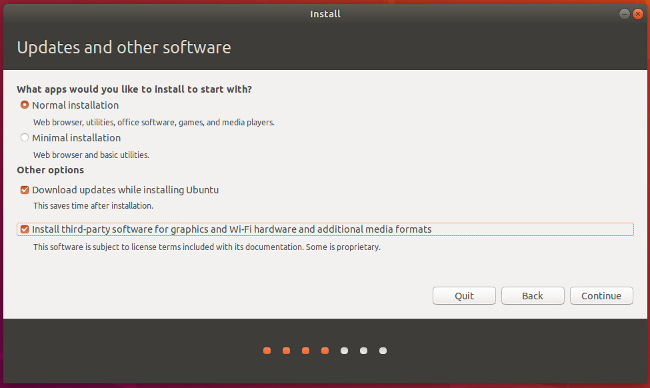

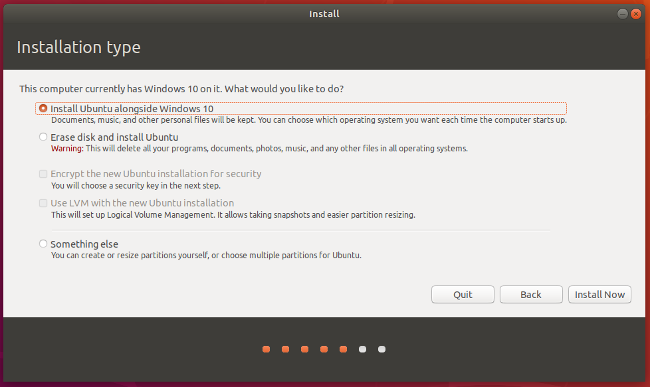

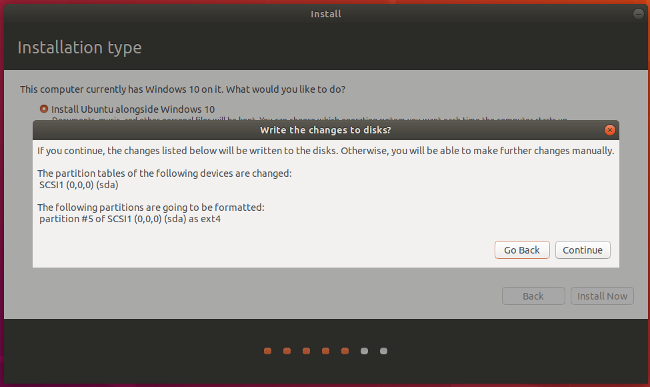
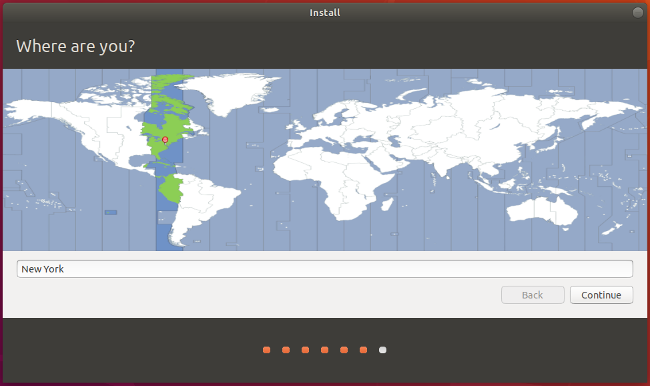
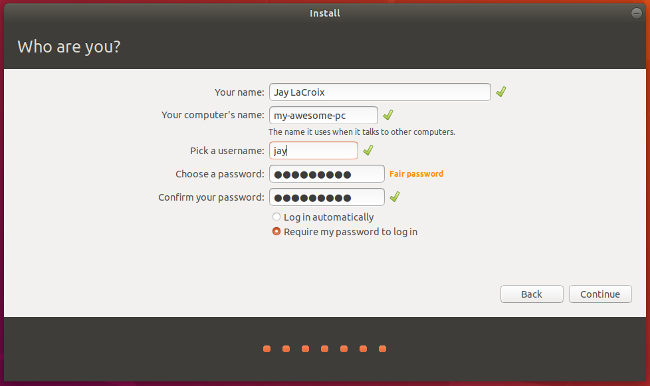

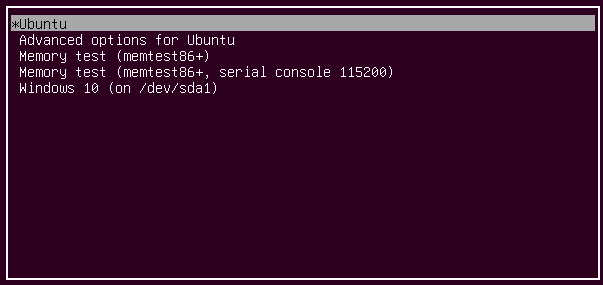


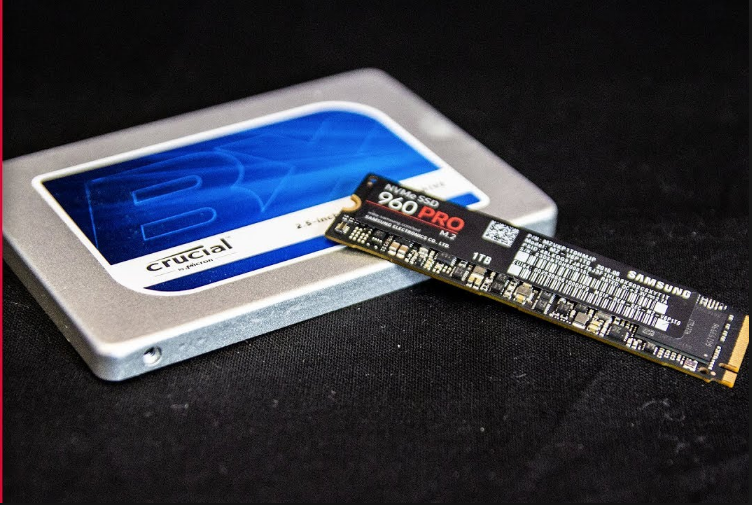
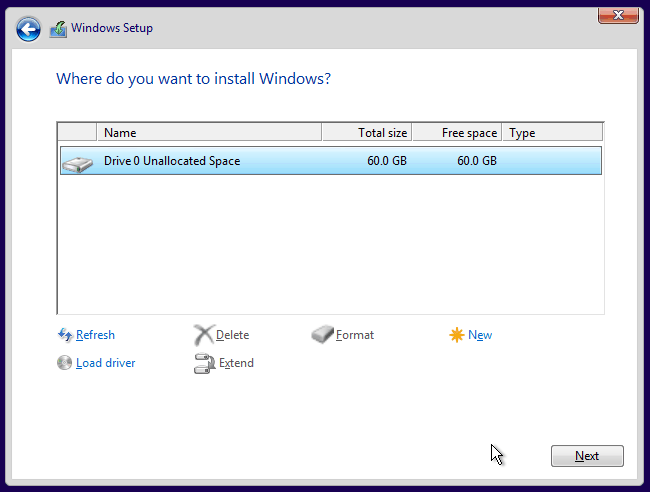

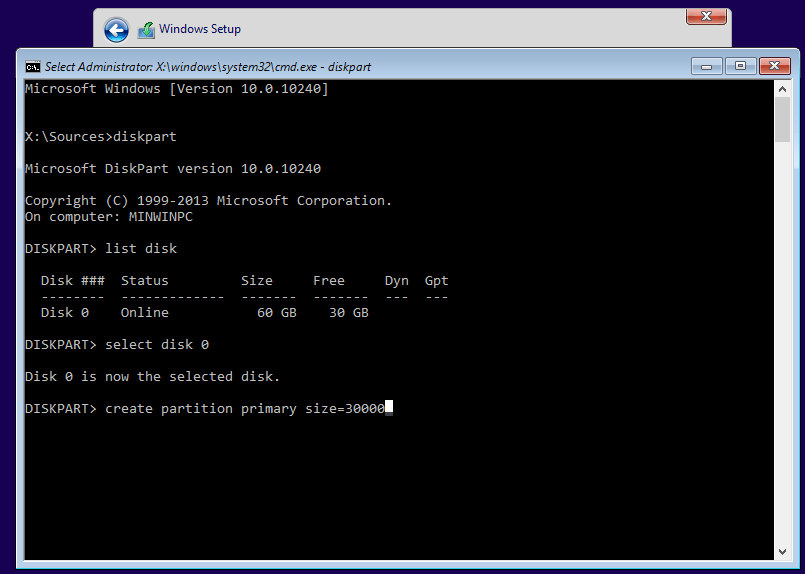
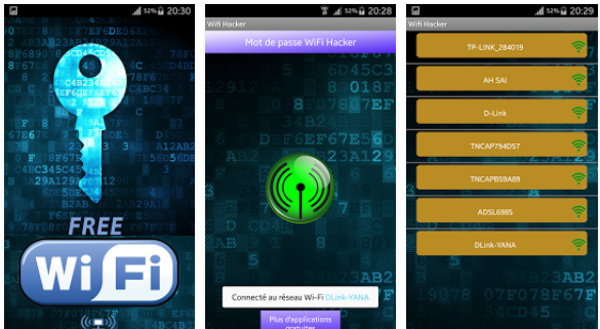


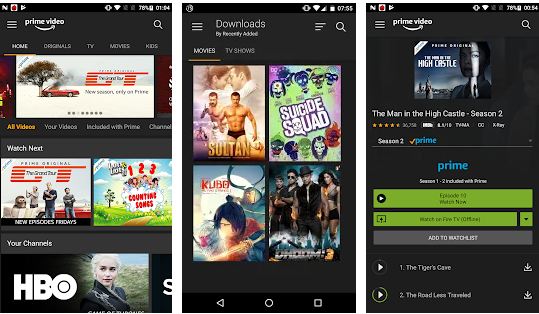


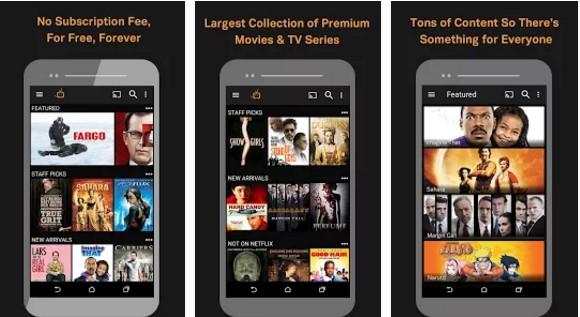
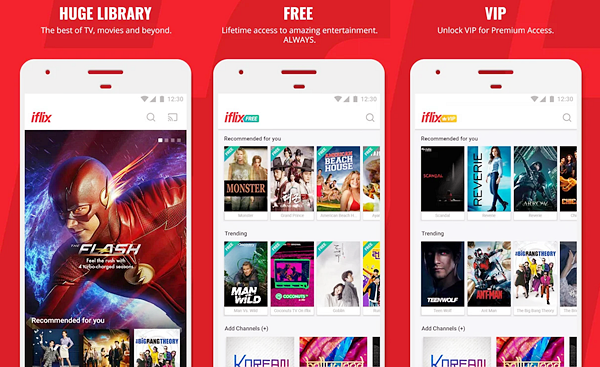


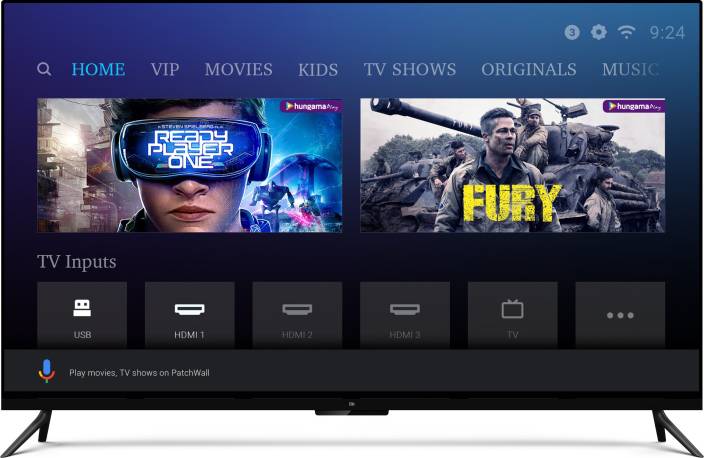
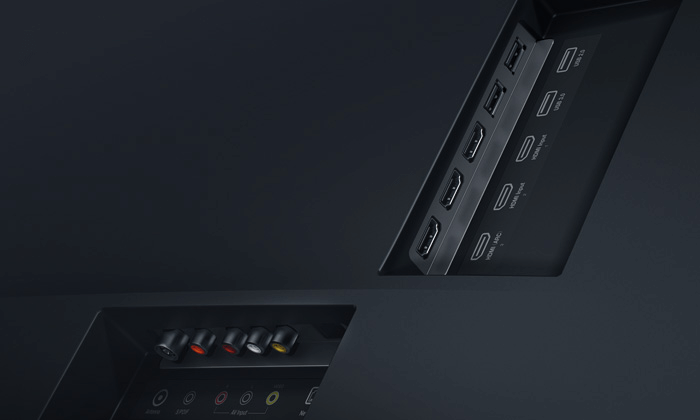
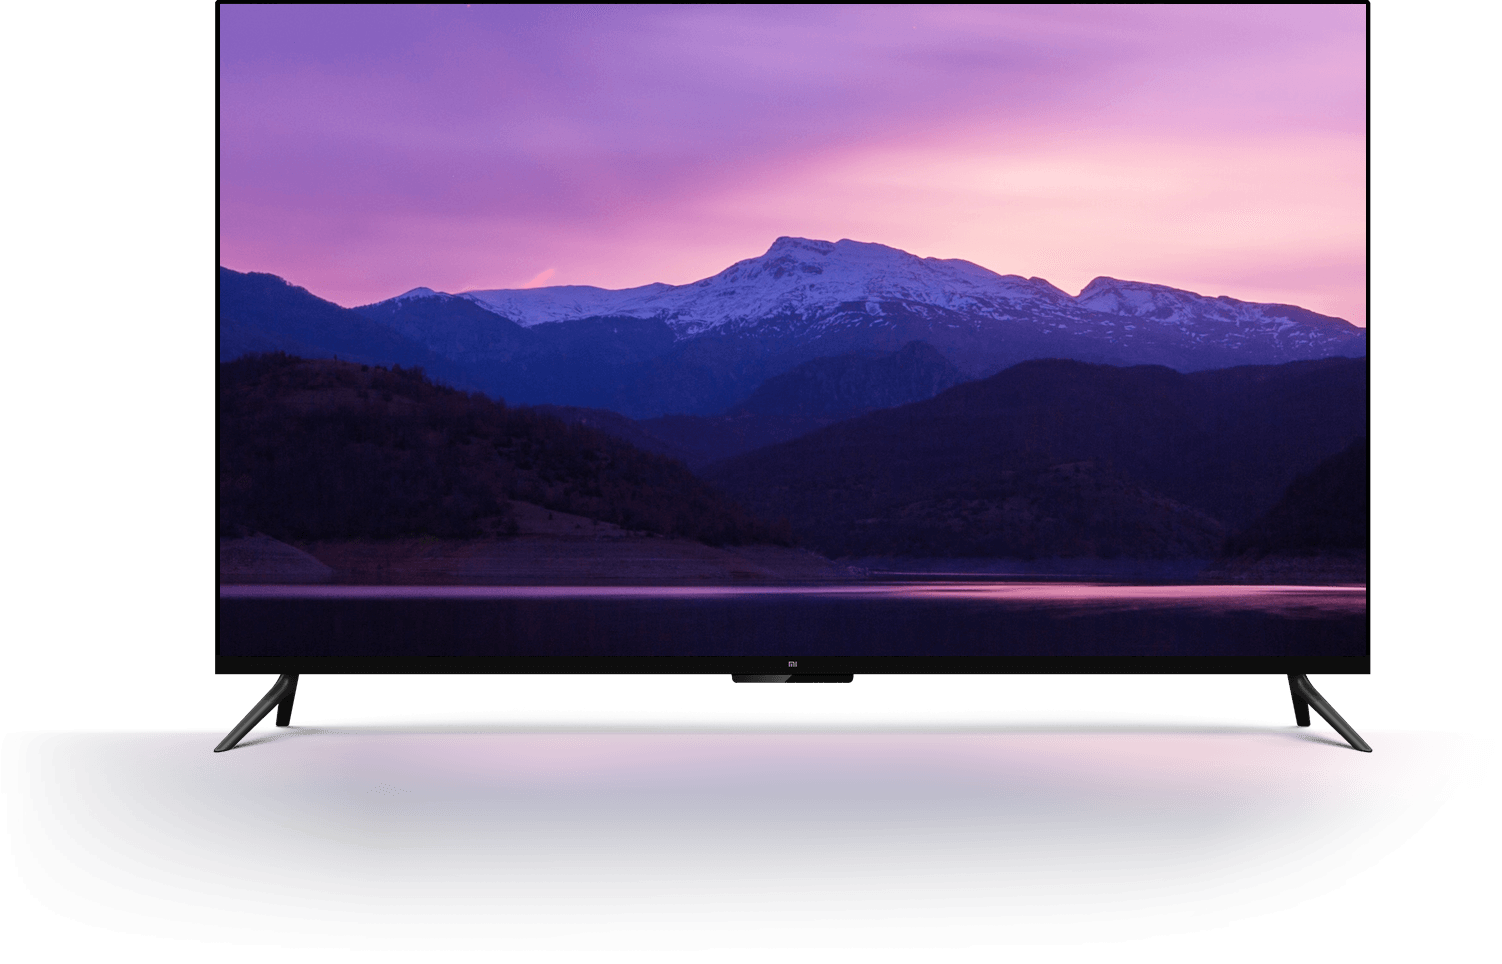
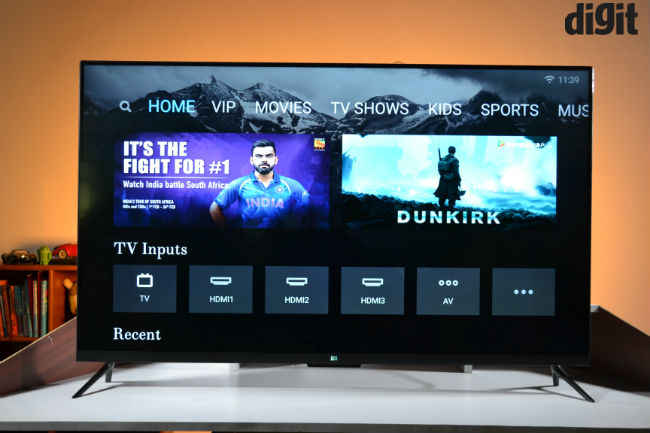
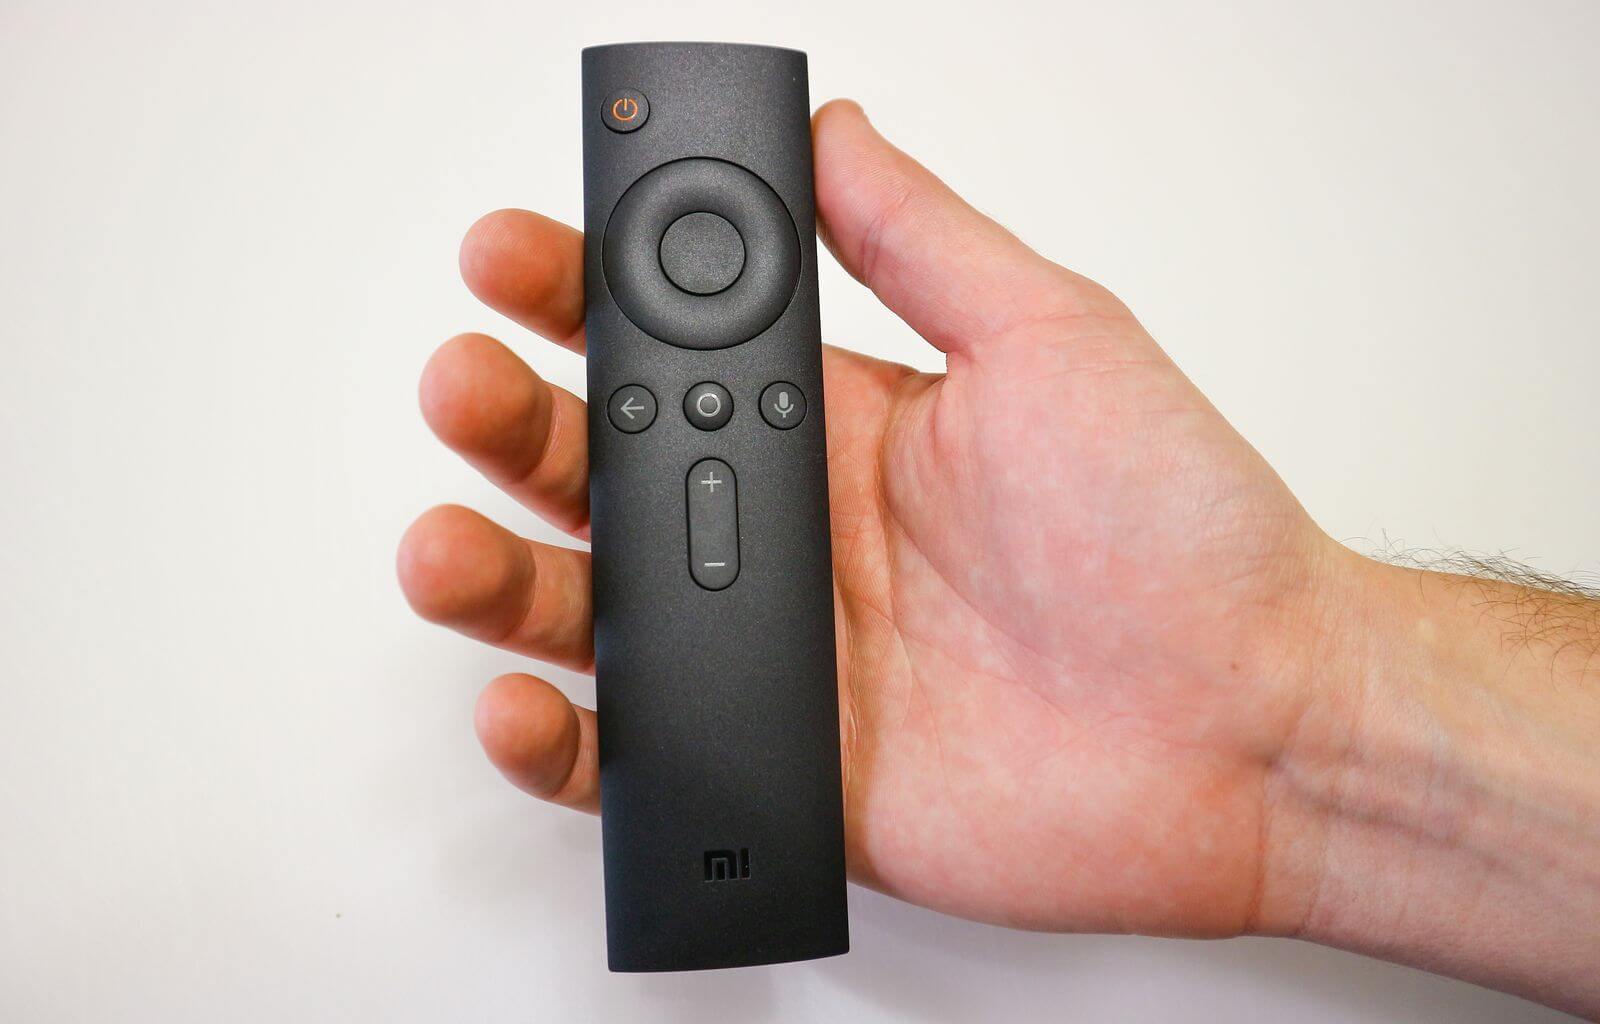

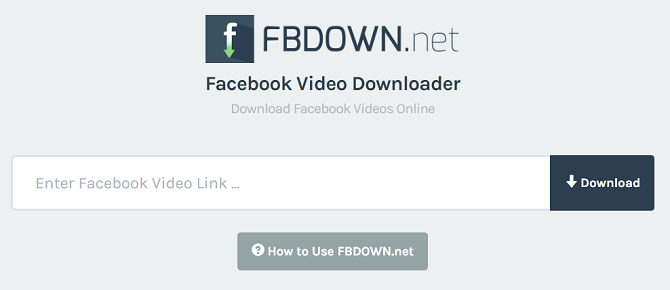

You must be logged in to post a comment.