Imagine turning on your computer one day only to find your files, photos, and work are all gone. It happens more often than you think, but it’s easily preventable with the right backup plan. Windows 10 and Windows 11 offer powerful tools to back up everything you care about, whether you use an external drive or cloud storage. This guide will walk you through the easiest ways to set up your backup and secure your digital life.
1. How to Backup Files Using File History (Windows 10 and Windows 11)
File History automatically backs up important folders like Desktop, Documents, Pictures, and Music. It’s an easy-to-use tool that helps you quickly recover files if they get lost or corrupted.
Backup Windows 10 to External Drive
Step 1: Connect an external drive to your PC.
Step 2: Go to Settings > Update & Security > Backup.
Step 3: Click Add a drive and select your external drive.
Step 4: Turn on Automatically back up my files.
Step 5: Click More options to choose which folders to back up and how often.
Backup Windows 11 to External Drive
Step 1: Connect your external drive.
Step 2: Open the Search bar and type File History.
Step 3: Select File History from the search results.
Step 4: Click Select drive and choose your backup drive.
Step 5: Turn on File History to start backing up your files.
Note: Windows 11 limits File History to certain folders. To back up other locations, move files into the default folders.
2. How to Use Windows Backup App
The Windows Backup app lets you back up settings, files, and apps directly to the cloud (OneDrive). It’s a seamless option if you want to ensure your data is accessible from any device.
How to Set Up Windows Backup
Step 1: Open Settings > Accounts > Windows backup.
Step 2: Sign in with your Microsoft account.
Step 3: Turn on the options for:
Remember my apps
Remember my preferences
Back up my files to OneDrive
This makes switching to a new device or recovering files very easy.
3. How to Create a Full System Image Backup (Windows 10/11)
System Image Recovery creates a complete copy of your system, including Windows, settings, apps, and files. It’s a great way to ensure that if your system fails, you can quickly restore everything to its original state.
Create a System Image Backup
Step 1: Connect an external hard drive (formatted as NTFS).
Step 2: Open the Control Panel.
Step 3: Go to Backup and Restore (Windows 7).
Step 4: Click Create a system image on the left.
Step 5: Choose your external drive or network location.
Step 6: Follow the prompts and click Start backup.
Tip: You must create new system images regularly to keep your backup updated. Make sure your drive has enough space to store the image.
4. Best Third-Party Backup Tool Option: EaseUS Todo Backup
For users looking for more flexibility beyond the built-in Windows tools, third-party software like EaseUS Todo Backup can be considered. It offers a variety of features such as:
Backing up individual files, folders, entire partitions, or the full system.
Scheduling automatic backups based on your preferred frequency.
Cloning hard drives for easy migration or upgrades.
Saving backup copies to external drives, cloud services, or network storage (NAS).
EaseUS Todo Backup has both free and paid versions available. Users can explore these options based on their backup needs and preferences.
Frequently Asked Questions (FAQ)
Q: How often should I back up my files on Windows? It’s recommended to set up automatic backups through File History or Windows Backup to back up your files daily or weekly, depending on your needs.
Q: Can I back up my system to a cloud service like OneDrive? Yes, Windows allows you to back up important files to OneDrive using the Windows Backup app. However, a full system backup (like a system image) requires external or network storage.
Q: What’s the difference between File History and System Image Recovery? File History backs up individual files and folders, allowing you to recover previous versions. System Image Recovery creates a complete snapshot of your entire system, including Windows, settings, and apps, which can be restored in case of major system failure.
Are you on the lookout for the best YouTube ad blocker? Then this post is exactly what you need.
YouTube is one of the most popular online video-sharing platforms in the world, with over 2.1 billion monthly active users. Giving creators, artists, and businesses the opportunity to promote and grow their audience. It also presents students with inexhaustible streams of information. The cherry on the cake? It’s completely free to watch and upload content on YouTube.
Yet, YouTube video ads and pop-ups can be ridiculously frustrating. Viewers find it difficult to stream content on YouTube without irksome ads flying all over their screens. It slows traffic, increases data usage, and makes you susceptible to online threats, spear phishing, and other malware.
Below, we compiled a detailed list of some of the best YouTube ad blockers to aid your free streaming on YouTube and protect your device from trackers.
Best Ad Blocker for YouTube on Android, Mac, And iOS
1. AdBlock
AdBlock is an open-source software that gives users control over unwanted YouTube ads and pop-ups. With over 60 million users worldwide, it blocks third-party trackers and enhances privacy.
Key features include:
Custom ad blocking rules with filters, whitelists, and dark mode.
Advanced privacy protection against malicious ads, scams, and phishing sites.
Ad substitution—replace ads with images of animals, objects, or landscapes.
Cross-device compatibility, working on Android, iOS, and 40+ languages.
2. AdGuard
As the name implies, AdGuard blocks incredibly annoying ads and pop-ups on browsers and apps, particularly YouTube. It works by enabling a safe, web-browsing experience for users. AdGuard equally allows users high-level privacy protection from online malware and other threats harmful to their computers, networks, or servers.
Here are some key features of the AdGuard for YouTube ad-free experience:
AdGuard is available on Android and iOS, going as far as offering compatibility with various other platforms such as Chrome Extension, Windows, and Mac.
The YouTube ad blocker protects its users’ data from web trackers, consequently preventing personal information from being disseminated to unwanted sites.
One significant benefit of AdGuard is that it filters adult content via parental control options that limit children’s exposure to unsuitable content.
AdGuard also maintains web page functionality, ensuring pages load faster and limit traffic.
3. Luna
Luna is one of the top-rated mobile ad blockers, designed to block YouTube ads and pop-ups across apps and browsers without compromising user safety.
Key features include:
Broad compatibility, blocks ads on Spotify, Instagram, Reddit, Facebook, TikTok, Snapchat, Chrome, Firefox, and more.
Data-efficient browsing for a smoother experience.
Full support for Android and iOS, with both Wi-Fi and cellular data connections.
4. Adblock Plus
Adblock Plus is a free, open-source ad blocker designed to enhance the web browsing experience by eliminating video ads, pop-ups, and flashing banners.
Key features include:
Faster page loading by blocking intrusive ads.
Protection from online trackers, scams, and malware.
Selective ad blocking allows support for non-intrusive ads that help websites generate revenue.
Compatibility with desktop browsers and Android devices.
5. Ghostery
Ghostery is a powerful YouTube ad blocker designed specifically for Mozilla Firefox. It helps users eliminate unwanted ads, videos, and pop-ups, creating a smoother and distraction-free browsing experience.
Beyond ad blocking, Ghostery enhances web page speed and offers robust protection against spear phishing, spoofing, and other cyber threats.
Key Features:
Customizable ad blocking – Choose which ads to block.
AI-powered filtering for smarter, more efficient protection.
Advanced privacy protection & anti-tracking to safeguard personal data.
6. StopAd
For those searching for the best YouTube ad blocker, StopAd is a powerful solution that does exactly what its name suggests—completely stops ads. Beyond YouTube, it blocks intrusive ads across various streaming platforms, ensuring a seamless viewing experience.
Compatible with iOS, Mac, and Android, StopAd offers:
Full ad blocking – Eliminates all ad URLs, scans CSS, and filters HTML codes.
Robust web protection – Shields against ID theft, bank phishing, and online scams.
7. YouTube AdBlock
YouTube AdBlock is a dedicated ad blocker for Microsoft Edge, designed to eliminate ads, prevent scams, and reduce data usage while browsing. This Edge-exclusive extension not only blocks all types of YouTube ads but also protects users from third-party tracking, spear phishing, and spoofing attempts.
Key features include:
Unlimited YouTube ad-blocking for a seamless viewing experience.
Enhanced privacy protection to prevent tracking activities.
Cross-platform installation authorization for multiple operating systems.
30-day money-back guarantee for subscribers.
8. Total Adblock
Total Adblock is the ultimate YouTube ad blocker, designed to eliminate intrusive ads, pop-ups, alerts, and auto-play ads instantly. Available as a Chrome extension, it provides seamless browsing by blocking unwanted distractions on YouTube and other platforms.
Key features include:
Advanced ad blocking – Removes ads, notifications, and third-party trackers.
Award-winning antivirus – Enhances security against malware and online threats.
Faster browsing – Improves page load speed for a smoother experience.
Customizable filters – Allows users to tailor acceptable ads for better control.
Compatible with multiple browsers and social media platforms like Facebook, Total Adblock ensures a secure and ad-free browsing experience.
9. AdBlocker Ultimate
AdBlocker Ultimate is a top-tier YouTube ad blocker designed to eliminate ads, pop-ups, and notifications for an uninterrupted browsing experience. While it’s highly rated for iOS devices, it also supports Android and Windows, offering robust protection against phishing, malware, hackers, and other online threats.
Key features include:
Cross-platform compatibility – Available for iOS, Android, and Windows.
Browser extension support – Works on Chrome, Firefox, Opera, and more.
Advanced security – Blocks intrusive ads while safeguarding against cyber threats.
Custom whitelisting – Allows users to personalize ad preferences for trusted sites.
With AdBlocker Ultimate, users enjoy safer, faster, and ad-free browsing across devices.
Finding the best YouTube ad blocker depends on your device and browsing preferences. Whether you need a mobile ad blocker for YouTube, a fast YouTube pop-up blocker, or advanced privacy protection, these top-rated options ensure an ad-free, secure, and smooth streaming experience.
A catastrophic wildfire erupted in Los Angeles on Tuesday evening, tearing through the inland foothills northeast of the city and leaving widespread destruction in its path. Casualties have been reported as the fast-moving flames engulfed homes, vehicles, and vegetation, forcing over 30,000 residents to evacuate in a desperate rush to safety.
The Los Angeles Fire Department Chief, Kristin Crowley, confirmed the devastating toll while hundreds of firefighters battled the blaze from both air and ground. Crews worked tirelessly in steep terrain to carve firebreaks and slow the fire’s relentless advance.
Families Recount Their Journey to Safety in the Los Angeles Wildfire
Witnesses described terrifying moments as embers rained down, turning neighborhoods into fiery infernos. “It looked far away—then suddenly, it was upon us,” Gary, a resident of Sea Ridge, told KTLA. Roads turned into gridlocks with flames on both sides, leaving some evacuees to flee on foot.
Despite the chaos, stories of resilience have emerged. Families helped each other escape, and communities are rallying together to support those displaced. “In times like this, we see the best of humanity,” said Pacific Palisades resident Andrew Hires, who helped neighbors pack their belongings before fleeing the flames.
For those who have made it to safety, what comes next? This is a time to lean on community resources and support systems. Local shelters are offering temporary housing, while aid groups are mobilizing to provide food, water, and clothing.
Have you checked in with loved ones or reached out to friends who may be affected? Even a small act of kindness can make a significant difference in moments like these. Survivors are encouraged to access counseling services to process the trauma and take small, hopeful steps toward rebuilding.
Steps to Protect Yourself Against Wildfires
Wildfires are a harsh reminder of the importance of preparedness and proactive measures. Here’s a step-by-step guide to help communities and individuals protect themselves and minimize risks:
1. Create Fire-Safe Zones Around Your Home
Clear Vegetation: Remove dry leaves, branches, and dead plants near your home to reduce fire fuel.
Plant Fire-Resistant Vegetation: Opt for plants with high moisture content and low resin.
Maintain Defensible Space: Keep at least 30 feet of clear space around your home to act as a buffer.
Store Combustible Materials Safely: Keep firewood and flammable items far from your house.
2. Prepare Your Home for Wildfire Resistance
Install Ember-Resistant Vents: Prevent embers from entering your home through openings.
Install Smart Smoke Alarms: The best smart smoke alarms for modern homes offer real-time notifications and alerts directly to your phone, allowing you to take immediate action no matter where you are. These alarms can detect smoke, fire, and carbon monoxide, giving you an early warning to evacuate or take safety measures.
Upgrade Windows: Use tempered glass windows that are more resistant to heat.
Seal Gaps: Ensure roofs, gutters, and eaves are sealed to avoid ember penetration.
Use Fire-Resistant Materials: Consider metal roofs or fiber-cement siding for extra protection.
3. Develop an Emergency Plan
Identify Safe Exits: Know multiple evacuation routes in case of emergencies.
Pack Emergency Kits: Include essentials like water, non-perishable food, medications, important documents, and flashlights.
Establish a Communication Plan: Ensure all family members know how to stay in touch during emergencies.
Practice Evacuations: Regularly rehearse evacuation plans with your household.
Monitor Weather Conditions: Stay aware of red flag warnings and high-wind advisories.
Listen to Authorities: Follow instructions from emergency services promptly during a wildfire.
5. Collaborate as a Community
Participate in Fire Safety Programs: Join or organize local fire-prevention initiatives.
Support Local Firefighters: Advocate for funding and resources for fire departments.
Create Firebreaks Together: Work with neighbors to clear vegetation and create communal safety zones.
6. Advocate for Government Action
Strengthen Emergency Systems: Push for improved wildfire alert systems and response mechanisms.
Promote Policy Changes: Support legislation that prioritizes wildfire prevention and management.
Invest in Research: Encourage investments in technology and strategies to predict and control wildfires effectively.
By taking these steps, we can collectively reduce the risk of wildfires and ensure that future disasters cause less destruction and loss. Let’s commit to learning from this tragedy and building a safer tomorrow.
We stand with the survivors and all affected by this tragedy, offering our deepest empathy and support as they navigate the road to recovery.
Have you ever encountered a problem where your Windows PC won’t boot or crashes repeatedly?. This kind of situation can be extremely exasperating, especially if you’re in the middle of very important tasks. Fortunately, Windows 10 and 11 come with a built-in feature called “Safe Mode” that can help you troubleshoot or fix these sorts of issues. Here in this article, we’re going to cover the Safe Mode for Windows 10/11 PC booting options that put some computing magic right at your fingertips.
What does Safe Mode do on a Computer?
Typically, when a PC is powered up, it loads numerous drivers that enable the computer’s operating system to interact with various hardware devices and software applications. But when a computer is booted up in Safe Mode, only a few essential drivers that the computer needs to operate are loaded. They include the mouse drivers, keyboard drivers, and display drivers.
Device drivers or drivers as they are commonly referred to are software programs that allow the operating system to properly interact with the hardware components. Such as printers, motherboards, graphics cards, network adapters, ports, sound cards, and other external peripherals connected to the computer. Without device drivers, the operating system may not be able to adequately run these devices.
Safe mode is a substitute way to fire up your laptop by utilizing just the necessary programs for running it. Booting into Safe Mode in Windows 10/11 is necessary when your notice that your PC’s OS constantly fails to start up or crashes and you can’t seem to identify the underlying cause. There may be a number of different reasons why this is happening. Such as viruses or malware, corrupt files, or other unidentified issues. What Safe Mode does on your computer is to enable you to recognize and rectify the issue.
How to Boot Your PC in Safe Mode for Windows 10/11
Starting a Windows PC in Safe Mode disables all unnecessary programs and drivers which might reduce some features and functionalities. Such as reduced graphics performance, the computer running slowly, or the absence of security features. A few applications may not function properly, with the computer screen resolution appearing different than usual.
Booting your PC in Safe Mode for Windows 10/11 can be accomplished through three different methods, each of which is contingent on the computer’s existing condition. They are all relatively straightforward; via Settings, Sign-in screen, or through a Blank Screen. Although accessing Safe Mode through the blank screen is the most challenging and is normally required for PCs that have encountered very serious issues and need to be restarted numerous times.
Here are the 3 ways to start your PC in Safe Mode in Windows 10/11:
Start Safe Mode via Settings
Navigate to the Start button and select Settings
Select System, then Recovery
Click on ‘Advanced Startup’
A prompt will appear ‘We will reboot your device, so save your work’
Select the Restart Now option
After the reboot, select the ‘Choose an option prompt
Click on Troubleshoot then select Advanced options
Once a screen with options pops up, select Startup Settings then hit the Restart button.
How to Start Safe Mode via Sign-in Screen
Locate the ‘Start’ Menu
Click on the Power button at the bottom right of the menu
Press and hold down the ‘Shift’ key
While holding down the Shift key, hit the Restart button
And wait for the computer to reboot.
Once it restarts, select the ‘Choose an option prompt
Click on Troubleshoot then select Advanced options
Once a screen with options pops up, select Startup Settings then hit the Restart button.
Safe Mode for Windows 10/11 via Blank Screen
Press and hold down the power button for 10 seconds to turn off your PC.
Press the power button to restart.
Once Windows has started, repeat the previous steps twice (press and hold for 10 secs to turn on, then restart again).
After turning off and restarting the computer for the third time, the computer will restart into Automatic Repair.
Select Advanced options for winRE(Windows Recovery Environment).
Then select the ‘Choose an option prompt
Click on Troubleshoot then select Advanced options
Once a screen with options pops up, select Startup Settings then hit the Restart button.
There you go, how to boot into safe mode in Windows 10/11 whenever your PC is having startup glitches, or constantly crashing.
On September 15, 2022, news of the Figma Acquisition By Adobe broke the internet. Dylan Field, the Co-founder and CEO of Figma, publicly announced on Twitter its procurement by Computer software company Adobe Inc.
Figma is a collaborative web application/tool for UI and UX designers, including designers of all ages, geographies, and levels of experience, for interface design.
Figma Logo Credit: Geeky Nigeria
It was launched on 27 September 2016 with unarguably one of the most excellent design, prototyping, and code-generation tools.
The Figma design tool is web-centric, but there are desktop versions for both Windows and Mac OS. What makes this design tool spectacular is that it allows for live, real-time collaboration. Meaning, team members can all log into a design at the same time and simultaneously make changes to it.
Figma collaborative interface allows designers work on a project at the same time credit: pexels.com
According to Dylan Field, Figma’s acquisition by Adobe was an opportunity to make design and developer tools more collaborative and accessible.
Dylan also stated that the acquisition was to accelerate the growth and innovation of the Figma platform with access to Adobe’s technology, expertise and resources in the creative space.
Dylan Field, CEO Figma
The newly acquired Figma web application will experience expert incorporation of imaging, photography, illustration, video, 3D and font technology. As well as a re-imagination of the best creative tools within the Figma technology stack.
The merger and acquisition which cost approximately $20 billion in cash and stock will keep Figma operating autonomously. Dylan will continue serving as CEO, reporting to David Wadhwani. David is the executive vice president and chief business officer of Digital Media at Adobe. While the entire Figma team will report to the former Figma CEO.
David Wadhwani Adobe
Adobe Inc., in a press release also made emphasis on how the merger would re-imagine the future of creativity, advance product design and empower the designer and developer community.
Windows Media Player is the one of the default softwares which comes with all the windows operating systems like windows 7, XP, Vista, 98. It is the default application in windows for playing videos & audio but it has certain limitations too. So, I am going to share some of the best alternatives of windows media player which you can use at free of cost for playing your audio & videos.
1.VLC media player
VLC media player is a free and open source media player and multimedia framework. It is a cross-platform media player, with versions for Microsoft Windows, Mac OS X, GNU, Linux, BeOS, MorphOS, BSD, Solaris, iOS and eComStation.The toolbars are fully customizable, so you can have only the buttons you need in the interface, there are AirTunes streaming, and there’s better integration in Gtk environments. A a wide range of video and audio formats can be played, including OGG, MP2, MP3, MP4, DivX, HD codecs like AES3, Raw Dirac, and even support for playing back zipped files. Download
2. Media Player Classic
Media Player Classic (MPC) is a compact media player for 32-bit and 64-bit Microsoft Windows a lightweight Media Player. This single player easily replaces the four or five video players installed on most systems. The Media Player Classic is available in many different languages (English, Belarusian, Catalan, Portuguese (Brazilian), Mandarin Chinese, Czech, Dutch, French, German, Hungarian, Italian, Japanese, Korean, Polish and more).This program also plays most audio formats.Media Player Classic also easily loads and plays DVDs. We liked how you can easily increase or decrease playback speed. Download
3.Winamp
Winamp is the one of the most famous and widely used media player designed for Windows, Linux and Android. Winamp supports music playback using MP3, MIDI, MOD, MPEG-1 audio layers 1 and 2, AAC, M4A, FLAC, WAV and WMA. Winamp was one of the first common music players on Windows to support playback of Ogg Vorbis by default.Winamp have ability to sync non-DRMed files to your PC from your device, an optional new interface layout and a built-in browser for media discovery.Winamp have playlist options to make playlists while playing media another effective feature it have inbuilt equalizer setting. Winamp has thousands of skins and plug-ins that allow you to change the look-and-feel of the player, as well as add new features.If you want MP3 encoding and full-speed CD burning, you have to shell out $19.95 for the Pro version. Download
4.RealPlayer
RealPlayer is a cross-platform media player by RealNetworks that plays a number of multimedia formats including MP3, MPEG-4, QuickTime, Windows Media, and multiple versions of proprietary RealAudio and RealVideo formats.RealPlayer for Windows already had most of that down, offering a sweeping array of features, from one-click video downloading to automatic transcoding to social network sharing.The latest version of the software adds even more devices to the ever-expanding list of compatible handsets. Plus, RealPlayer now shows USB-connected smartphones and cameras inside the library in the main app window, allowing users to quickly and easily transfer content to the devices via drag-and-drop. It have hundreds of Plug-ins. Download
5.ALL Player
ALL Player is a most popular program for watching movies with matching subtitles freeware media player. Unlike other media players, it does not use Windows Media Player to play media, but rather asks DirectX directly. The amazing features, Detection of missing codecs needed to open a media file, Integration with a reader (a speech synthesizer) for subtitles reading, Intelligent subtitles, in which the time they are displayed is dependent on how fast users can read them, Password protection of media, Creating a menu, Automatically downloading subtitles from the internet, Downloading video files from YouTube, Playlists. ALL Player is available in different languages (English, Polish, Russian, German, French, Spanish, Czech, Chinese, Hungarian, Italian, Portuguese, Slovak and more). Download
As you might already know, the Windows Movie Maker is a video editing software developed by Microsoft. It lets users create and edit videos, it also lets them publish videos created directly to OneDrive, Facebook, Vimeo, Youtube, and Flickr. The Windows Movie Maker software is very efficient in performing the task it was created for, but just like other software, there are times you experience glitches. In this article, we explore a tutorial on how to fix one of the popular glitches you might experience when using this software. Here you learn how to fix a corrupted video file om Windows Movie Maker.
There is no exact cause facilitating the corruption of videos files on the Windows Movie Maker. Corruption of these video files is caused by different things. Since there exact cause of video corruption, you would have to troubleshoot the problem using different methods, which will be listed in this article. Apart from these methods for troubleshooting video corruption on the Windows Movie Maker, there is third-party software that solves the fixes corrupted video files, with few clicks, we also explore a tutorial on how to fix corrupted video files using this third-party software. Before we dive into the tutorial proper, here is a list of potential facilitators causing Windows Movie Maker videos to get corrupt.
Potential Causes of Movie Maker videos getting corrupted
Corruption in the hard drive
Virus or malware
Faulty video codecs
Outdated video card drivers
Use of unreliable video converter
Media player not supporting Movie Maker video file
Abrupt computer shutdown while saving/working on Movie Maker video
How To Fix A Corrupted Video File on Windows Movie Maker Using Remo Repair MOV Tool
As mentioned earlier, there is third-party software, that helps fix corrupted video files, with just a few simple steps. The Remo Repair MOV tool is an example of such third-party software. Here are the steps to fixing a corrupted video file using the Remo Repair MOV tool:
Download and install Repair MOV software to your Windows machine.
Run the Remo and follow the on-screen
Browse and open your movie file to be repaired as well as a healthy reference file using Healthy File option.
Click Repair option, to begin movie file repair
After the file has been repaired, the tool shows the fixed MOV video file along with its component details. The software also allows you to preview the fixed file using “Preview Repaired File” option.
Save Repaired Movie Maker File using the SAVE REPAIRED FILE option
Troubleshoot: Repair Windows Live Essentials
If you are unable to get access to any third-party video file fixer, you can go ahead to doing manual troubleshooting. The first thing to look out for, when troubleshooting this problem, is Windows live essentials. Corrupt file error messages can
Corrupt file’ error messages can also pop up when your Windows Movie Maker program has corrupted. To fix it repair Windows Live Essentials and then access your video file in Movie Maker to edit.
Steps to repair Windows Live Essentials:
· Press Windows + R Keys to open Run command
· Type Control Panel. Click on OK
· Under Programs, Click on Uninstall a program
· Go to Windows Live Essentials and right click on it
· Click on uninstall/change
· Select option repair all Windows Live Essentials
Repair corrupt videos with VLC Media Player
VLC Media Player can often repair corrupt or damaged video files. You can try this method to fix minor video corruptions while for severely corrupt video files seek Stellar repair software.
Upgrade Your Ram
Setting aside the already mentioned potential causes of corrupt videos, insufficient RAM may also facilitate the corrupt video error. Insufficient RAM facilitates slow computer speeds and can lead to corruption of videos. This holds sway if your videos are stored in MOV or.WMV. You are advised to consider getting a higher RAM.
Install a Codec Pack
An incompatible Codec may also lead to this error. If your media player is using an Incompatible code, the Video will not play. You are advised to install a codec pack on your PC. Here you will video formats, that will make your computer compatible with all file formats.
Update Video Drivers
Out-dated video drivers is another common facilitator of the corrupted video error. There is very high chances that the video won’t play on your computer If your drivers are outdated. So if you have tried all the steps listed above, and none of them worked. There is a high chance, that the problem is caused by outdated drivers.
Be rest assured that one of the fixes listed in this article on how to fix corrupted video file on windows movie maker, will fix the corrupted video file on your computer. All you have to do is test these fixes, one of them is the solution to your problem.
i Dual booting Linux with Windows 10 on your PC, means having both operating systems installed on your PC. This process involves you partitioning your hard disk and installing the operating systems on different partitions, This way you will able to use both operating systems on your PC simultaneously. In this article we explore a tutorial on How to Dual Boot Linux with Windows 10 on your PC
Requirements
1. Two USB flash drives or DVD-Rs
Since we will be installing tow operating systems on our computer, you are required to purchase DVDs of both operating systems. You are required to purchase a Windows operating system DVD and a DVD containing the Linux Ubuntu operating system.
Apart from installing the operating systems using DVD, you could also install them from a bootable flash drive, which is a way faster. If your laptop doesn’t support booting from USB, you are advised to install the operating systems using DVDs, as mentioned earlier.
2. A Windows 10 license
Installing the Windows 10 OS on a computer that didn’t come with Windows 10 OS on default, requires a Windows license key, so if your computer didn’t come with the Windows 10 operating system on default, you will be required to input a license key. If your computer came with the Windows 10 operating system, you won’t be required to input any. The Windows 10 license key, will be provided to you by the retailer.
3. Windows 10 Creation Tool
If you are installing the Windows 10 operating system from a bootable flash drive, you are required to download a windows 10 media creation tool. The Windows 10 media creation tool provides a step by step guide to creating a Windows 10 media on a USB. You can also use to create windows media on DVDs.
4. Etcher Software
Similar to the Windows Media Creation tool, The Etcher software lets you load a Ubuntu media unto a bootable flash drive or DVD. The Etcher software is supported on Linux, MacOS, and Windows.
Please Note that you are required to download the Ubuntu ISO Image, you will load in the bootable flash drive. Once it has been downloaded, you are required to launch the Etcher software, next click on Select image and then point to the already downloaded Ubuntu ISO image downloaded. Now Select your flash drive, from the list of storage locations provided. Click flash and the Etcher software will convert your bootable flash drive, into a Ubuntu installer.
After you have successfully met all the requirements above, purchased or created a bootable device for both operating systems, you proceed to install both operating systems on your computer. The steps to installing the operating system are listed below:
How to Install Windows and Ubuntu on Your PC
Just as a reminder, before we get started with the installation, you should have already created windows installation media, created a Ubuntu installation media and made a backup of your important files.
Creating a dual boot of Linus and Windows OS can be done in two ways. Its either you install the windows 10 OS first, and then using a ubuntu installer to resize the partition and installation will proceed in the empty space. Or you install Ubuntu first and then install the Windows 10 OS in the smaller partition on your hard disk.
Installing Windows
If you already installed Windows OS on your PC, you are required to skip this step and move straight to installing Ubuntu on your PC, otherwise, continue with the steps listed below:
1. Insert the Windows Installation in you have: As mentioned earlier, its either you use a DVD with the Windows 10 OS inside or you use a bootable flash containing windows 10. If you have a windows 10 DVD, insert it in your DVD player, If you have a bootable flash drive, plug it into your USB port and follow the steps below.
2. Click on the boot menu key: PC’s have different boot menu keys, you have to look out for the boot menu key assigned to your PC. The boot menu key is usually displayed on the bottom of your screen when you power your PC on. If you are unable to locate the boot menu key for your computer, you advised to search it on Google, to make things faster.
3. Change Boot order: Changing boot order means changing the device your PC boots, On default, your PC is set to boot from your hard disk. If you using a Windows 10 DVD, you are required to set your PC to boot from your disk drive. If you are booting from a bootable flash drive, you are required to set your PC to boot from the bootable flash drive. IF you don’t know how to do this, you advised to research on Google or contact your manufacturer.
4. Press any key on your keyboard and proceed with the installation: After you might have successfully booted your installation media, you will be prompted to press any key on your keyboard, to proceed with the installation.
5. Follow the on-screen prompts: You will be presented with different on-screen prompts. Prompts that will require you select your preferred language, inserting your product key and lots more. These are basic steps that do not require any expertise.
6. Select the version of Windows 10 you wish to install:
During the installation process, you will be required to select the version of Windows 10 you wish to install. Here you will be provided with the option to install windows 10 x64 and Windows 10 x86. Please note that installing windows 10 x86 is the same thing as installing windows 10 32 bit and installing windows 10 x64 is the same thing as installing windows 10 64 bit. Here you will also be required to select windows 10 home, professional and other versions. Please, note that the windows 10 pro is the most powerful version of Windows 10.
7. Review License terms and click next
8. Click on custom install: After reading the license information, you are required to select the type of installation you want. You have options to upgrade, keeping all your files or doing a custom advanced install. You are advised to do a custom install. You will able to select the drive you want to install the windows 10 OS.
9. Allocate Storage For Installation of Windows 10
Our sample hard drive has not been allocated or partitioned before. If your hard drive isn’t like this or has been partitioned before, you are required to highlight all the partitions and delete them. Your entire hard drive will be unallocated. Click continue to create a new partition.
You are advised to create a partition with up to 80GB to accommodate the windows operating system.
10. Click Next, to confirm partitioning and to begin windows installation.
Now that you have successfully installed the Windows 10 operating system on one of the partitions, the next step is to install Ubuntu on your hard drive.
Installing Ubuntu
At this point, we assume you already have the Windows 10 operating system installed on your hard drive. The next step is to install Ubuntu on the other partition you created. Installing Ubuntu will be done using the installation media you created earlier.
1. Insert Installation Media into your Computer: You are to insert the installation media in your computer. If the installation media was created on a DVD, you are to insert it into your CD ROM, if the installation media is on a bootable flash drive, you insert it via your USB port.
2. Click on the boot menu key: PC’s have different boot menu keys, you have to look out for the boot menu key assigned to your PC. The boot menu key is usually displayed on the bottom of your screen when you power your PC on. If you are unable to locate the boot menu key for your computer, you advised to search it on Google, to make things faster.
3. Give priority to Your Installation Media: After you must have successfully entered the boot menu on your computer, the next step is to give priority to your installation media. If you are booting from a DVD plate, you are to give priority to your CD ROM, select boot from CD ROM. If you are booting from a bootable flash drive, you are required to give priority to your flash drive, select boot from flash drive.
4. Install Ubuntu: After you have successfully prioritized your Boot device, your computer will be booted into the Ubuntu installation interface. Here you are provided with the option to either try ubuntu or install Ubuntu.
5. Select Your Preferred Language: After you might have clicked the install Ubuntu button, you will be required to select your preferred language. Here you are to select the language you understand.
6. Select Your keyboard layout: Despite being an output component of the computer, the layout configuration software plays a huge role, in key placement. Here you have options to choose from the different layout assigned to different languages. After you have selected your preferred keyboard layout, you are advised to click continue.
7. Select Installation Type: Installing Ubuntu, you provided with Normal Install Option, as well as Minimal installation option. If you select normal installation, Ubuntu will be installed alongside a web browser, utilities, office software, games, and wallpapers. Minimal Installation installs Ubuntu alongside a web browser and utility software.
8. Install Ubuntu Alongside Windows 10: You are provided with the option to either install Ubuntu alongside Windows 10 or erase the hard disk and install Ubuntu.
9. Follow in the On-Screen prompts provided: You will be required to confirm Ubuntu installation, select time zone and fill in your Particulars, to setup login security.
10. Reboot Your PC: After you might have successfully installed Ubuntu on your PC, You will be provided with the option to continue testing or restart. You are required to click the restart button, to begin using Ubuntu.
Note: After you might have successfully followed all the steps provided in this tutorial, you will be provided with the dual boot screen, where you will be given the option to either boot into windows or boot into Ubuntu.
There you have it – A complete and comprehensive tutorial on How to Dual Boot Linux with Windows 10 on your PC. If you have questions, feel free to drop them in the comment section below.
The presence of a yellow exclamation mark on your windows connectivity icon means just one thing, your network connection has issues. As simple as resolving it may sound, there may be some occasions where resolving such network issues becomes very difficult. This is where the Network Diagnostics tool comes into play. The network diagnostic helps windows users troubleshoot network problems, and also provides solutions to fixing them. In this article, we explore a tutorial on how to run Windows Network Diagnostics.
The windows diagnostics tool is a highly recommended tool, in troubleshooting fixing the network problem. It is very effective in fixing DNS problems and also helping users find the cause of network termination.
The procedures for using the Windows Network diagnostics tool is a very easy and straight forward. These steps are listed below.
1. Click the start button on your keyboard, and type ”fix network” in the search box provided.
2. From the list of search results provided, click ” Find and fix networking and connection problems “
3. In the Network diagnostics window, click on the advanced option and run the program as an administrator. There is an option to apply repairs automatically here, you tick it if you want repairs to be applied automatically.
4. Choose the type of connection you want to diagnose for troubleshooting and click on the next. here windows will try to locate the network connectivity problem.
Note: Once the problem has been detected by the windows network diagnostics tool, you have the options of solving the problem yourself, contacting Microsoft online support, to get the problem solved remotely or restoring your windows machine to its default settings. You can also seek the help of a local technician, to help you fix the network problem.
There you have it – a complete and comprehensive tutorial on how to run Windows Network Diagnostics. if you have other questions, feel free to drop them in the comment section below.
As a windows OS user, there are times where you will be faced with the unidentified network error. The Error appears sometimes when you try to connect to a network, using your windows machine. There is no actual method of solving this problem, as this Error may be caused by a lot of things. In this article on how to fix unidentified network access on windows, we shall explore a list of troubleshooting steps you should follow when trying to fix this error on your windows machine. This these steps are listed below.
1. Turn Off Airplane Mode
The first step in the troubleshooting process is to disable Airplane mode. As you might already know, Airplane mode when activated, disable all network access, this means you will not be able to access any network on your windows machine. In turn, this may result in the unidentified network no network access error on your windows machine. To turn off the airplane on your windows machine, please follow the steps listed below:
Press Windows key + A. This opens the ‘Action Center’.
Toggle off the airplane mode button.
2. Update Network Card Drivers
Outdated network card drivers could also facilitate the unidentified network error in windows operating system. If you already toggled off the Airplane mode switch, and you are still experiencing the problem, you are advised to update your network card drivers. Steps to update your network card drivers are listed below.
Press Windows + X or right-click on the Start button.
Click on Device Manager to open it.
Look for ‘Network Adapters’ and click on the forward pointing arrow to expand the list. Right click on all the Network drivers and update them one by one.
3. Disable the Security software temporarily
In the quest to giving your computer absolute protection, security software may disable your internet connectivity. This is common with Anti-virus software or Firewall software. In solving the unidentified network error, you also advised troubleshooting your security software, by temporarily disabling it, to see if the problems stop. To disable your security software, you are to right click on the Anti-virus icon located in your system tray icon section. Once you have disabled it, you are to try connecting to a network to see if it worked. If it didn’t, you can continue with the next step in troubleshooting
4. Switch off the Fast Startup feature
Microsoft has been able to make booting on the Windows operating system faster, using the fast startup feature. The fast startup feature is found on a recent version of the Windows operating system. The fast startup features is another facilitator of the unidentified network access error. Having tried the steps listed above, with no positive results, you are advised to turn off the fast startup feature on a windows machine., using the steps listed below:
Search for ‘Power Options’ in the Windows search bar. Open the Power Options window and among the tabs on the left, click on choose what the power button does.
Click on ‘Change settings that are currently unavailable’.
Uncheck ‘Turn on fast startup’. Shut down the system and reboot after 30 seconds.
5. Change your DNS servers
Your current DNS server may just be the reason your windows machine is plagued with the unidentified network access error. To change your DNS servers, follow the steps listed below:
Press Windows + X or right-click on the start button.
Click on ‘Network Connections’.
Right-click on your network connection (Ethernet or Wifi) and click on properties. It might prompt for administrator credentials.
Double-click on Internet Protocol Version 4.
Select ‘Use the following DNS server addresses’ and set but the preferred and alternate DNS server address as follows to use Google Public DNS:
Preferred DNS server: 8.8.8.8
Alternate DNS server: 8.8.4.4
6. Use Command Prompt
Already tried the steps listed above, and nothing seems to be changing, there are some commands you can run in command prompt, to salvage the situation. You are required to try the commands listed below, one by one, one at a time. Once you have successfully ran all the commands, you are to restart your windows machine.
ipconfig /release
ipconfig /renew
netsh winsock reset
netsh int ip reset
ipconfig /flushdns
ipconfig /registerdns
netsh int tcp set heuristics disabled
netsh int tcp set global autotuninglevel=disabled
netsh int tcp set global rss=enabled
netsh int tcp show global
7. Diagnose The Network
The network Diagnose feature, is another handy tool, that helps troubleshoot the problem of your network. You can diagnose the network using the features listed below:
Press Windows + X or right-click on the start button.
Click on ‘Network Connections’.
Right-click on your network connection (Ethernet or Wifi) and click on ‘Diagnose‘. It will start an automatic troubleshooter.
8. Change the Ethernet cable
Tried troubleshooting with the steps already listed above, and nothing seems to be changing? Your Ethernet cable may just be faulty. You are also advised to troubleshoot your ethernet cable. Try using another one. If the problem persists, you can proceed to the next step.
9. Set a static IP address
Press Windows + X or right-click on the start button.
Click on ‘Network Connections’.
Right-click on your network connection (Ethernet or Wifi) and click on properties. It might prompt for administrator credentials.
Double-click on Internet Protocol Version 4.
Select the radio button at ‘Use the following IP address’.
Check the IP address settings for others using the same network as yours and change your settings to the same.
Click OK to save the settings and exit.r
10. Use an external Network Adapter
Your Network chip may just be the facilitator of the problem. Having a faulty network chip on your windows machine can crumble your internet connection, you are advised to troubleshoot your network chip, using an external network adapter.
11. Restart your modem and router
Switch off both your modem and router keeping them physically connected.
Start the modem. Wait for 30 seconds after all the lights turn green.
Start the router.
This is called power-cycling.
12. Upgrade the router firmware
Having an outdated router firmware can also crumble your network connection, leading to the unidentified network error on your windows machine. You are advised to update the firmware on your router and try connecting again.
13. Disable Virtual Network Adapters
Launch Device manager on your windows machine
Navigate to Network Adapters and expand it
Right-click and disable them
14. Run the built-in troubleshooters
Having exhausted the troubleshooting steps listed above, and nothing seems to change, running the built-in troubleshooters on your windows machine, may just be the answer to your problem. Here are the steps to running the built-in troubleshooters on your windows machine. To activate the run box on your windows machine, simply hold windows key and R together i.e windows key + R.
In the run box, you are to run each of the commands independently.
msdt.exe -id NetworkDiagnosticsWeb
To open the Incoming Connections Troubleshooter
msdt.exe -id NetworkDiagnosticsInbound
To open the Network Adapter Troubleshooter:
msdt.exe -id NetworkDiagnosticsNetworkAdapter
Conclusion: Upon troubleshooting your device, with the steps listed in this article on how to fix unidentified network access on windows , there is a high chance you might solve the unidentified error on your windows machine. If the problem persists, you are advised to contact windows support theme or visit a technician.
Developing Interfaces for websites and mobile apps requires a lot of planning and strategizing. The designer is tasked with the job of creating a standard workflow, that the developers can work with. This is where wireframes come into play.
Wireframes are visual representations of what is going to be displayed on the website or the mobile app being developed. Wireframes make UI/UX designs easy to understand. Wireframes can best be described as a map to the UI design.
Wireframe tools are essential in developing good wireframes. They make developing wireframes very easy. For beginners, most wireframe tools feature templates that make developing wireframes easy, and for the professional, they are presented with a clean slate to create their wireframes.
In this article, we explore a list of best wireframe tools for windows devices. As already mentioned, these wireframe tools make developing wireframes seamless. The list of wireframes are listed below:
1. Template Toaster
Template toaster offers a very intuitive interface, that allows UI designers to create explainable wireframes. It helps designers create awesome wireframes from scratch, using a wide range of fonts and styling options. Apart from letting you create your own wireframe tools from scratch, Template roaster features responsive mockups with the easy learning curve. Template roster houses a feature that lets you directly upload wireframes created to the server, after which you can ask the client to view. Template roaster costs $49
2. InVision
InVision is a cloud-based wireframe tool, designed to help users develop top-notch wireframes for UI/UX projects. For starters, lets users create a clickable prototype, that gives the UI design life. It lets users create Wireframes from scratch, it features drag and drops functionality, that makes moving images and sketches very easy. The InVision wireframe houses a feature that lets designers create links to their wireframes, allowing other designers to view it and share thoughts. The InVision wireframe tools have plans that range from $15 per month to $99 per month.
3. Moqups
Moqups is yet another web-based wireframe tool that designed for UI/UX designers to create top-notch wireframes for presentations. Apart from being web-based. The Moqups wireframe tool is available as an app on Windows, Android, iOS, and MAC OS. The Moqups wireframe tool houses a drag and drop feature that allows designers to move characters. It also features already made templates, plenty of styling and fonts for design, integrated stencil kits and lots more. Using this tool, you will need to pay a premium fee, that ranges from $13 to $19 per month.
4. WifreFrame.CC
Wireframe.cc provides a very clean and minimal interface for UI/UX designers to design engaging wireframes. Unlike other wireframe tools, Wireframe.cc doesn’t feature many icons or taskbar, everything is kept minimal. Wireframe.cc gives you the flexibility to draw whatever you feel like. Wireframe.cc features a great number of stencils to choose from, it also lets users create permalinks to their designs, allowing designers to share their work with other designers or clients.
5. MockPlus
Mockplus is one of the most sought after wireframe tools today. This fact is facilitated by a lot of obvious reasons. Mockplus houses feature professional UI designers seek. Mockplus lets designers create previews of their UI/UX designs. MockPlus has over 200 components and more than 3000 icons with easy drag and drop facility. Mockplus doesn’t require any knowledge of coding. All you have to do is drag and drop. As might have already guessed, MockPlus doesn’t come cheap; you are required to pay $199.
6. Axure RP
Seeking to give your client a representation of your UI work so far. Axure RP is a wireframe tool that let’s create interactive prototypes and static wireframes. It lets you illustrate your web or mobile application map. The Axure Wireframe tool is available on both Windows and MacOS. It features drag and drop functionality, lets you test prototype on mobile devices. The Axure RP wireframe tool can be used to create High fidelity results so that the end results can be tested via a realistic prototype.
7. Balsamiq Mockup
Still, on the topic of best wireframe tools for windows, Balsamiq mockup is yet another wireframing tool designed for UI designers running windows operating system. It lets UI designers create wireframes seamlessly. It provides users with the same original feeling of sketching with a pencil, only in a digital environment. The Balasmiq wireframe tool features drag and drop function, it allows users to print the prototypes and run the online user stats. The Balasmiq wireframe tool costs $89.
8. Justinmind
The JustinMind Wireframe tool is yet another awesome wireframe tool. It was designed to help designers create awesome wireframes seamlessly. The JustinMind Wireframe tool lets users create operational or Clickable mockup. The JustinMind Wireframe tool is available on Windows, MacOS, Android, and iOS platforms. It houses over 500 web and mobile widgets, over 1500 UI elements for iOS, Android and Web. The JustinMind Wireframe tool costs $19.
9. Fluid UI
Fluid UI is an open-source wireframe designer tool designed to help UI designers develop wireframes that depict his or plans for an app or website to be designed. Fluid UI is one of the few wireframe tools that make use of the latest technologies like HTML5, Javascript and CSS.
The FluidUI wireframe tool features a browser-based prototyping tool, features three paid plans, to meet the needs of a lot of UI designers. Fluid UI gives designers the freedom to test wireframes on any device
10. Proto.io
Last but not least, Proto.io is a wireframe tool that helps designers present sketches showing the pathways of the UI/UX they are currently working on. It allows designers give clients an insight into their plans.
The Proto.io wireframe tool is available on both Windows and MAC operating systems. Apart from being available on both platforms, Proto.io can also be accessed via the web. The porto.io wireframe tool features four paid plans. It provides a high fidelity interaction experience, suitable for working with complex logic and structure. It allows designers to test the prototype on mobile devices, and also make changes there. Porto.io has a massive library of UI elements. It also lets users import sketches and can be synced with Dropbox.
There you have it – The best wireframe tools for windows devices. If you have any other recommendations, feel free to drop them in the comment section below. we would love to hear from you.
Installed software not designed for your laptop? Did you install a wrong driver on your laptop? Or did you mistakenly delete one of the important programs your laptop came with? Any of these will certainly affect the proper functioning of your laptop. Things like this happen to us sometimes. Events like this usually call for one thing, and that is resetting your laptop computer.
In this article, we explore a tutorial on how to reset a laptop, restoring it to factory settings. This tutorial covers procedures on how to reset laptops running windows and MAC OS back to their factory settings.
How To Reset/Restore A Laptop Running Windows Operating System Back To Factory Settings
Before you go ahead to formatting your windows laptop, please be aware that resetting your windows laptop will wipe out all your installed programs and files on your windows laptop. Using an external hard drive is a very secure way to back up your files. Once you have backup your files, you can proceed to reset your windows laptop using the steps listed below.
There is no autonomy when it comes to resetting windows laptops; there are several methods that can be employed in resetting a windows laptop. These methods are listed below.
How To Reset A windows Laptop, Using Built-In Reset Option On Windows 10
On your windows laptop, Navigate through settings > Update & Security > Recovery.
Under “Reset this PC” click on get started
You will be presented with the option to keep files, or remove everything. Select your preferred option. Keeping your files will reset your windows laptop to default, keeping your files and uninstalling your installed apps. The ” Remove Everything option,” remove resets your windows laptop, completely wiping your computer, remove all files and installed apps.
Please Note that click the ”Erase Everything” option, will provide you with another set of options to choose from. You will be asked to select between Removing everything or remove files and clean drives. Selecting the latter will securely erase your hard drive, making it impossible to do any form of recovery.
4. Once you have selected the option of your choice, you can proceed to click the reset button.
How To Reset A windows Laptop, ” Fresh Start” Option in Windows 10
As earlier mentioned, there are different ways to re-setting your windows laptop. Using the Fresh Start option is another method. Steps to be followed when using this method are listed below:
On your windows laptop, Navigate through Settings > Update & security > Recovery page
Click the link ”Learn how to start fresh with a clean installation of windows” you will find it at the bottom of the page. You will be directed to windows defender security center. Click on Get started to proceed.
Note: Using the fresh start option, your files will be retained. There no option to remove all files. Also note that using the fresh start option, the latest version of windows will be automatically be downloaded on your windows laptop. Fresh start option reinstall all bloatware and keeps some of your settings intact.
Reinstall Using A Windows Installation Media
Using Windows 7 or later, this method is for you. The methods mentioned above is available on Windows 8 and above. If you use windows 7 or lower, you can reset your windows laptop using windows installation media.
What is windows installation media? Windows installation media is an ISO file burnt into a pen drive or DVD. Windows installation media allows you re-install windows from scratch, provided you have a product key.
How To Reset/Restore A Laptop Running MAC OS Back To Factory Settings
Unlike Windows operating system, re-setting laptops running MAC OS is a lot easier. There is autonomy here, as there is only one method of getting it done. The steps are listed below:
Note: Please be aware that re-setting your MAC Book will completely wipe your hard drive, no file will be left, and all settings will be restored to default. Backup your files if need be.
Hold Down Command and R keys on your keyboard, and turn on your MAC Book. Let
both keys go, when te Apple Logo pops up
Select Langauge and click the arrow facing right to continue
Select Disk utility and continue
Select your startup disk. Startup disk is named Macintosh HD by default
Click the erase button
From the drop-down menu, Select MAC OS Extended and click erase.
click done and the exit window
Connect to wifi
Select Reinstall MacOS
Click on continue and click agree
Select boot disk and click on Install
wait for the installation to complete
Note: Your MAC Book is will restart several times during the installation. You shouldn’t be bothered, as it is normal for it to reboot.
There you have it – a comprehensive tutorial on how to reset a laptop. As you might have already observed, re-setting a laptop isn’t as difficult as most people claim, all you have to do is follow the steps listed above. If you have any question, feel free to drop them in the comment section below.
When you are planning to install Windows 10, Windows 8.1 or Windows 7 on a PC, one of the requirements involves creating media to boot your computer into the setup wizard. This is especially true if you are performing a fresh installation of Windows. In which case, your boot options are DVDs and USB drives.
Since most PC these days hardly come with an in-built DVD drive, your options are further limited to either using an external DVD drive or a USB flash drive.
A lot of people, including me, will favor using a USB flash drive to install Windows 10. However, if you have newer hardware, it’s likely that you’re using Unified Extensible Firmware Interface (UEFI), instead of the legacy Basic Input/Output System (BIOS). If this is the case, you also have to ensure that the bootable media supports the firmware type before you can proceed with the installation.
How is UEFI different from BIOS?
The BIOS will soon be dead: Intel has announced plans to completely replace it with UEFI on all their chipsets by 2020. But what is UEFI, and how is it different from the BIOS we’re all familiar with?
Both UEFI and BIOS are low-level software that starts when you boot your PC before booting your operating system, but UEFI is a more modern solution, supporting larger hard drives, faster boot times, more security features, and—conveniently—graphics and mouse cursors.
Fortunately, if your device features a UEFI firmware, you have multiple ways to create a USB bootable media to install Windows 10, Windows 8.1 or Windows 7. You can use the Media Creation Tool, which is an easy-to-use utility made by Microsoft that downloads and copies the installation files onto a removable drive with support UEFI and BIOS. Or you can use WinToFlash, which is a freely available third-party tool that allows you to quickly create a media with support for UEFI firmware.
In this guide, we’ll try to walk you through the steps to create a bootable USB flash drive with support for both BIOS and UEFI. First we will try without a software, this should work for Windows 10, Windows 8.1 & Windows 7. However, some BIOS may not recognize your USB flash drive as a boot media, using the Media Creation Tool or WinToFlash software will resolve this.
You can always fall back to our troubleshooting guides should you encounter any problems while creating your bootable USB flash drive.
What you need
Before you begin, make sure you have an internet connection if you don’t already have a copy of the Windows OS install in a DVD, .iso or in a folder. You should also have sufficient data storage available on a computer, USB or external drive for the download. Other requirements may include:
A copy of the Windows OS install .iso, in a folder or DVD. You can use this page to download a disc image (ISO file) that can be used to update or install Windows 10, Windows 8.1 or Windows 7. The image can also be used to create installation media using a USB flash drive or DVD. Windows software download is free on the Microsoft OS download page but you might need to purchase a license for usage.
A blank USB flash drive with at least 5GB (or 4GB for Windows 8.1 and below) free space. This drive will be formatted, so make sure it doesn’t contain any important files.
Technician PC – Windows PC that you’ll use to format the USB flash drive
Destination PC – A PC that you’ll install Windows on
Boot Windows from your USB flash drive
Having met all the requirements above, any of the three methods below will get you a bootable USB flash drive. Make sure to pay close attention and ask any questions you may have on the comment section.
One of the most important thing to watch out for is the storage capacity of your USB flash drive. Windows 10 October release will require your flash drive to have at least 5GB storage capacity.
Also, if you are using a modern PC and your device features a UEFI firmware, you will need to format your USB flash drive using FAT32 file system which has a file size limit of 4GB. The Windows image file (sources/install.wim) in Windows 10 October release exceeds this limit.
Step 1 – Format the drive and set the primary partition as active
Connect the USB flash drive to your technician PC.
Open Disk Management: Right-click on Start and choose Disk Management.
Format the partition: Right-click the USB drive partition and choose Format. Select the FAT32 file system to be able to boot either BIOS-based or UEFI-based PCs.
Set the partition as active: Right-click the USB drive partition and click Mark Partition as Active.
Step 2 – Copy Windows Setup to the USB flash drive
Use File Explorer to copy and paste the entire contents of the Windows product DVD or ISO to the USB flash drive.
Step 3 – Install Windows 10 / Windows 8.1 / Windows 7 to the new PC
Connect the USB flash drive to a new PC.
Turn on the PC and press the key that opens the boot-device selection menu for the computer, such as the Esc/F10/F12 keys. Select the option that boots the PC from the USB flash drive.
Windows Setup starts. Follow the instructions to install Windows.
Remove the USB flash drive.
How to create a Windows 10, 8 & 7 UEFI boot media using WinToFlash Software
WinToFlash creates a bootable USB with any modern Windows Desktop [PHOTO CREDIT: EBENEZER OBASI]
If for some reasons, copying Windows through file explorer didn’t work, you can use the WinToFlash tool to create an installation media with UEFI support. Of course, the Windows Media Creation Tool will equally work if your target is to install Windows 10 on a PC. However, it’s faster to use this tool if your already have a copy of the Windows OS install in a DVD, .iso or in a folder.
To create a Windows install media with support for UEFI, connect a USB flash drive with at least 5GB (or 4GB for Windows 8.1 and below) of space, and then use these steps:
Step 1 – Download & Install WinToFlash Software.
Download the free lite edition of WinToFlash from the official website. Under “Download,” click Lite edition Setup Download.
After download is complete, open your download path and double-click the Novicorp WinToFlash Lite [The Bootable USB Creator] x.x.x Setup.exe file to launch the installation wizard.
Follow the installation wizard to install WinToFlash on your PC.
Step 2 – Set Windows source and destination media
After installation, click on the Novicorp WinToFlash icon from your desktop to launch the WinToFlash tool and install Windows 10 OS and below from your USB Flash Drive.
From the application start screen, click Windows Setup Bootable USB Wizard. Select the installation source of the Windows, if you have downloaded an ISO file or loading from a folder.
Startup screen of WinToFlash tool. Select Windows Setup Bootable USB Wizard to load a single OS to your boot media.
Specify Windows source path or file. If your OS is in a CD or extracted from image to a folder, go with the first option. Select the second option if the Windows software is an ISO image or archive.
Click next to setup your Windows source and destination path.
The ‘Windows files path‘ specifies the path to the Windows installation files on your PC. This can be an ISO – archive or folder – CD path, depending on your selection on the previous screen.
Use the ‘USB drive’ drop-down to select the media you want to make bootable.
Step 3 – Wrapping things up
Click next and review all parameters. Make sure that you have chosen the right USB drive.
Ensure that you have chosen the right media to avoid wiping important files from your flash drive.
Complete settings by confirming to wipe USB flash drive and accepting WinToFlash terms (click on the images below to expand).
After completing the steps, the WinToFlash tool will create a bootable media, which you can then use to install Windows 10 on devices using UEFI.
How to create a Windows 10 UEFI boot media using Media Creation Tool
If you’re planning to upgrade or install a fresh copy of Windows 10 on a system using BIOS or UEFI, you can use the Media Creation Tool to create a compatible bootable media. Just insert a USB flash drive with at least 5GB of storage to your computer, and then use these steps:
Under “Create Windows 10 installation media,” click the Download tool now button.
Click the Save button.
Click the Open folder button.
Double-click the MediaCreationToolxxxx.exe file to launch the utility.
Click the Accept button to agree to the Microsoft terms.
Select the Create installation media (USB flash drive, DVD, or ISO file) for another PC option.
Click the Next button.
Select the correct language, architecture, and edition of Windows 10 if the default selection doesn’t reflect the desired options.
Quick Tip: Under “Architecture,” you can select the Both option to create a bootable media that will work for devices using 64-bit and 32-bit processors. Also, if you’re unable to change these settings, make sure to clear the Use the recommended options for this PC option.
Click the Next button.
Select the USB flash drive option. (If you don’t see the drive, click the Refresh drive list option.)
Click the Next button.
Select the removable drive from the list.
Click the Next button. Once you’ve completed these steps, the wizard will download the Windows 10 installation files, and it’ll create the bootable media with support for UEFI as well as legacy BIOS.
Troubleshooting Windows 10, 8 & 7 Boot Media
UEFI systems cannot boot from NTFS and instead the device needs to be formatted with FAT32 which has a 4GB maximum size. If copy fails, it’s likely that the install.wim file on the media is larger than this file size limit. The solution is to split the WIM into multiple files using DISM.
Split the Windows image
Split a Windows image (.wim) file into a set of smaller (.swm) files. Use this procedure when you’re installing Windows from media that can’t handle the Windows image file size, for example:
DVDs (A standard single-sided DVD stores 4.7GB).
USB keys formatted as FAT32. FAT32 is required to boot many modern (UEFI-based) PCs, but has a maximum file size of 4GB.
Split the file
Mount your Windows distribution ISO.
Launch Windows Command Prompt. The quickest and easiest way to do that is to type “CMD” into your Windows search box.
Right click on the resulting “Command Prompt” and “Run as Administrator”.
Copy everything except the Windows image file (sourcesinstall.wim) to the USB drive. Either drag from the mounted ISO and drop on the flash drive, or use the command below:
robocopy D: E: /s /max:3800000000
Where D: is the mounted ISO and E: is the USB flash drive.
Split the Windows image file into smaller files, and put the smaller files onto the USB drive:
C:sourcesinstall.wim is the name and the location of the image file that you want to split.
C:sourcesinstall.swm is the destination name and the location for the split .swm files. The first split .swm file is named install.swm file. The file names for the next files include numbers, for example, install2.swm file, install3.swm file, and so on.
3700 is the maximum size in MB for each of the split .swm files to be created. Kepp the size of the files below 4000 (4GB) to avoid getting the error 87 (invalid parameters) error.
Note, Windows Setup automatically installs from this file, so long as you name it install.swm.
Windows 10 comes with a lot of amazing features but not all of them are readily available. Let’s dig a little deeper and unveil new tweaks, tricks and features that will change the way you use your PC.
With it being free, and Microsoft pushing the update to users, most of you probably already have migrated to Windows 10. Its constantly evolving nature means fresh features arrive twice per year, and with all the new goodies come a legion of new tweaks and tricks—some of which unlock powerful functionality hidden to everyday users. Others simply let you mold the Windows 10 experience into the shape you see fit. Here are some of the most useful tweaks, tricks, and tips that we are able to put together.
However, you need to brace yourself as some of these may break as the operating system evolves given Microsoft’s new “Windows as a service” mentality. The idea is to keep this page updated overtime to reflect the OS’s current status.
Activate Windows 10 Night Light
If you use an iPhone, iPad or macOS system you may use the built-in blue light feature ‘Night Shift’.
The Night Light feature you’ll find in Windows 10 is pretty much Night Shift for Windows.
Night Light makes the screen warmer in the evenings as it reduces the amount of blue light emitted.
Various scientific studies show that exposure to blue light in the evening makes it harder to fall asleep because (like all artificial light) it affects the circadian rhythms that manage our body clock.
Once preserve of late-night caffeine fuelled coders and over-worked, under-fed writers, screen temperature features have since become mainstream. Google’s Android and ChromeOS operating systems have one, as do iOS and macOS from Apple, and Microsoft’s Windows 10.
Like those features, Windows 10 Night Light automatically warms the temperature of your display after sunset. This makes your laptop screen or PC monitor easier on your eyes and reduces disruption to your circadian rhythm, helping it to tick along nicely.
In the morning, your display returns to its regular settings.
Night Light is a system feature; you do not need to install a separate application like Flux to use it. This makes it very easy to automatically adjust the screen temperature in Windows 10.
Night Light for Ubuntu will automatically adjust the amount of blue light your monitor or laptop display emits based on your location and the time of day.
These features are said to help reduce eye strain by adjusting your screen’s color temperature during after-dark computing sessions. That makes it easier to fall asleep when you’re done.
To activate Night Light, head to Settings > System > Display. Once you’ve done so, open the feature’s settings to fine-tune its behavior.
Scroll any window even when they’re inactive
It used to be that Windows only allowed you to scroll active windows. Now in Windows 10, you can set an option to scroll both active and inactive windows by just hovering with the mouse cursor over a window.
This feature is not a ground-breaking Windows 10 hack or tweak but it comes quite handy when time is in essence and your need to peek through your to-do list.
Windows 10 inactive scroll feature is enabled by default, but if it’s not, go to Settings > Devices > Mouse & touchpad, and make sure to enable the Scroll inactive windows when I hover over them option.
Find the hidden images
The lock screen and logon screen have some really cool images, which as it turns out, by default both rotate AND change.
It may seems Microsoft has a CDN that updates these images based on what you click that you like or not. Want to save one or more of those images for future use? Here’s where they are hiding!
Open Explorer and browse to:
%localappdata%PackagesMicrosoft.ContentDeliveryManager_[custom string of characters]LocalStateAssets
Copy all of the files to a new directory.
Open a command prompt in that directory.
Run this command ren . *.png and [enter]
Browse through them and find the ones you like!
Make Cortana’s ears perk up
Cortana’s finally made the leap to the PC in Windows 10, assuming many of the operating system’s search functions and dishing out just as much sass as the Windows Phone version. But by default, she doesn’t listen for your commands. But by default, she doesn’t listen for your commands.
If you’d like to be able to just shout commands at your PC, launch Cortana by clicking the search field in the taskbar and select the three-lined options menu in the upper-left corner. Select Settings for the list, then simply enable the “Let Cortana respond when you say ‘Hey Cortana’” option. You’ll need an active microphone for this to work, of course.
While you’re poking around Cortana’s options, you can dive into the Notebook menu to fine-tune exactly what personal data Microsoft’s digital assistant can access. Remember, however, that like Google Now, Cortana’s effectiveness is directly related to how much she knows about you.
Enabling Cortana on the Windows lock screen lets you use voice commands to view and edit your schedule at a glance. It’s pretty handy! To turn on the feature, open Cortana and head to “Cog” icon > Settings > Use Cortana even when my device is locked.
Secret, powerful new command line tools
Windows 10 packs a slew of nifty new command line features, including—hallelujah!—the ability to copy and paste inside the command prompt with Crtl + C and Crtl + V.
To activate the goodies, open the command prompt. Right-click its title bar, then select Properties. You can find and enable the new features under the Edit Options section of the Options tab.
Bash comes to Windows
If you got all hot and bothered over the ability to use keyboard shortcuts to paste text in the Command Prompt, wait until you get a load of this.
The Windows 10 Anniversary Update added the full, legendary Bash shell to Microsoft’s operating system, thanks to a partnership with Canonical, the company that guided Ubuntu Linux’s development. And it’s running natively, without virtual machines or containers. With the right tricks, you can even use Bash to run graphic Linux applications or even the Unity desktop itself right inside Windows—though those unintended features are definitely limited. Look for Ubuntu, Fedora, and SUSE Linux entries in the Windows Store to start using Bash in Windows.
Windows 10 Audio Source Switching
Windows 10’s in-taskbar volume controls pack a niche, yet nifty touch: selectable sources. Clicking the audio device name in the volume controls summons a list of all connected audio outputs, meaning you can switch from your headphones to your speakers and back again without having to dive into the Control Panel. Yay!
The April 2018 Update added more granular audio options to the Settings app too, breaking them away from the Control Panel even further.
Activate Windows 10 Spatial Sound
That’s not the only audio trick lurking within Windows 10. Windows Sonic for Headphones offers a virtual surround sound format that can make the audio coming from your headset feel more lush and atmospheric. The effectiveness of the feature varies depending on your gear and how sensitive you are towards audio cues.
To activate Windows Sonic, right-click the speaker/audio icon in the system tray on the right side of your task bar, then select Spatial sound (none). In the window that opens, click the drop-down menu and select Windows Sonic for Headphones. Click , then OK, and you’re done!
Windows Timeline
Timeline helps you pick up where you left off. Clicking the Task View button in the taskbar or pressing Windows Key + Tab summons the feature, which displays a—you guessed it—time line of your activity in supported apps, stretching back over the past. Even more handily, Microsoft lets you group related apps together into “Activities” in Timeline, so that when you open that week-old budget document, for example, the presentations and websites you referenced at the time can be easily summoned as well. This even syncs across devices, so it could be especially useful if you use multiple PCs.
The fly in the ointment: Only a limited number of apps work with Timeline currently, though Microsoft offers tools for developers to bake in support. That includes Office, Adobe’s Creative Cloud, and native Windows 10 apps like News and Maps, but Microsoft Edge is the only compatible browser. Bummer. You can deactivate Timeline by heading to Settings > Privacy > Activity History.
Cloud clipboard
Windows 10’s copy and paste functionality has been hit and miss for years, but now you can deploy that bugginess across multiple PCs with cloud clipboard—a genuinely useful feature introduced in the October 2018 Update. Head to Start > Settings > System > Clipboard and enable “Sync across devices” to start copying data on one PC and pasting it on another PC.
While you’re in this menu, enabling “Clipboard history” lets you save multiple items to the clipboard so you can use them again later. Nifty stuff.
Your Phone
Want to tie your phone and PC closer together? Download Microsoft’s Your Phone companion app for Android, and link it to your PC using the new Your Phone app from the Microsoft Store.
Your Phone lets you open, view, copy, and share photos that you took on your phone, as well as send and reply to texts right on your PC. There’s an iOS version as well, but it’s much, much more limited.
Snip & Sketch
The firmly entrenched Snipping Tool within Windows is finally getting replaced and upgraded. The October 2018 Update added Snip & Sketch, a new tool that lets you select a portion of the screen to copy when you press Windows + Shift + S. After doing so, the selected screenshot will be copied to your clipboard, so you can paste it into any image editing software—including the standalone Snip & Sketch app, which lets you annotate and share your marked-up images.
Near Share
Near Share makes it easy to share files and URLs with local PCs over the air, negating the need for flash drives or chat apps to pass something along. If you open the Share interface in Microsoft Edge or File Explorer, you’ll see PCs with Nearby Sharing enabled appear as an option if you have the April 2018 Update installed. Recipients receive a pop-up notification when something is sent. Think of it as an alternative to Apple’s Airdrop, albeit one without any mobile support.
To use Near Share, your computer needs both Bluetooth and Wi-Fi working, and you’ll have to enable the Nearby Sharing option in Settings before you can start using it. Transfer speeds were pretty slow and Bluetooth-like in our tests, so you may still want to resort to alternative means to pass especially large files around. Microsoft says the feature automatically chooses to use Wi-Fi or Bluetooth depending on what’s available, and what’s faster.
Ransomware protection
Ransomware is a growing problem. It infects PCs, encrypts your files, and holds everything hostage until you pay a ransom—hence the name. The best defense against ransomware is frequent backups and strong security software, but Windows 10 now includes basic protection right in your operating system.
Controlled Folder Access “protects your files and folders from unauthorized changes by unfriendly applications.” Your Documents, Pictures, Movies, and Desktop folders are protected by default, though you can block other folders manually or whitelist trusted software to access your locked-down info. You can tweak Controlled Folder Access by opening the Windows Security app (formerly Windows Defender), heading to the Virus & threat protection tab, and clicking the “Manage ransomware protection” link at the bottom.
Dark theme
If you love dark themes, you love dark themes. Light themes sear your eyeballs. Fortunately, Windows 10 now supports a dark theme.
Head to Start > Settings > Personalization > Color and select the “dark” option under “Choose your default app mode.” The Windows 10 October 2018 Update extended the dark theme to include File Explorer, too. Enjoy!
Enable Windows 10 Dynamic Lock
Say goodbye to Windows + L. Dynamic Lock is a handy feature that pairs your PC with your phone over Bluetooth, then automatically locks your computer when you wander away from it.
To start using it, marry the two devices in Control Panel > Hardware and Sound > Devices and Printers, then activate Dynamic Lock at Settings > Account > Sign-in options.
Game Bar
If you’re into playing around on your PC, Windows 10’s Game Bar—summoned by pressing Windows + G in-game—holds all sorts of nifty extras. It’s always been able to take screenshots or videos of gameplay clips, but as of the Windows 10 Creators Update, the Game Bar also offers easy-peasy Beam game streaming and the intriguing Game Mode, which can improve performance on resource-limited systems. The October 2018 Update overhauled the interface yet again, adding inline volume controls.
The Game Bar’s handy even if you don’t actually play, as it can be used to record video of any app—not just games. Windows 10 also has a dedicated Gaming section in its Start menu Settings to let you tinker with options, including Xbox networking and parental controls.
Per-app GPU management
The Windows 10 April 2018 Update added the ability to tell Windows which graphics hardware—discrete or integrated—to use when you open specific apps. It sounds niche, but the feature could prove pretty helpful if you’ve got a gaming laptop and want it to last longer.
By default, booting up a game switches over to discrete graphics, which use a lot more energy than the graphics cores integrated in Intel chips and AMD Ryzen APUs. But a lot of indie and retro games play just fine on integrated graphics. With Windows 10’s per-app GPU management, you can manually tell the system to stick to the more power-efficient option for games that don’t need the extra oomph.
Go to Settings > Display, then click the Graphics settings link at the very bottom of the page to start tinkering.
OneDrive Files on Demand
It’s back, huzzah! OneDrive Files on Demand resurrects Windows 8.1’s “placeholder” feature for the cloud storage service baked into Windows 10. OneDrive Files on Demand shows all of the files you have stored in OneDrive in a folder on your PC, but they’re just pointers synced with the cloud—not actually files installed on your PC. Unless you want them to be. You can select which files and folders to make available locally.
Storage Sense
Over time, your PC can quietly fill with needless junk without your even realizing it, as the Recycle Bin and temporary files suck up your storage. Storage Sense helps combat the creep. Head to Settings > System > Storage and enable the Storage Sense option to have Windows start automatically clearing out unneeded temporary files, and deleting any files in your Recycle Bin over 30 days old. You can tweak those options using the Change how we free up space link underneath the option.
The October 2018 Update added the ability to have Storage Sense send long-untouched files from anywhere on your computer to your OneDrive cloud storage, freeing up space on your hard drive. It could be a useful addition if you’re close to filling up your local storage, but keep an eye on your available OneDrive space—cloud storage isn’t free. Fortunately, the feature includes granular controls.
Mixed Reality
The Fall Creators Update added “Mixed Reality” to Windows 10. The most obvious use for it is in the legion of new Windows Mixed Reality headsets, but you can check out the benefits even if you don’t have one of those. The Mixed Reality Viewer app lets you drag digital 3D objects you’ve created in the Paint 3D app into the real world, using the combined might of your device’s camera and display. It’s not really augmented reality since you can’t interact with the objects, but it’s closer to “Mixed Reality” than the headsets are.
Somewhat related, the nifty Story Remix tool in the Photos app lets you add fantastic 3D animations to videos you’ve captured, among many other talents. It’s pretty sweet!
Start menu folders
What’s old is new again: You can create basic Start menu folders in Windows 10, organizing Live Tiles into clusters. Simply drag your Start menu apps on top of each other to create folders that expand when clicked on. As of the October 2018 Update, you can now name the folders you create, but you have to expand it open to see the option.
Troubleshooting, troubleshot
The Windows 10 Creators Update added a helpful touch for distressed PC users. The operating system’s consolidated all of its troubleshooting tools in a single location: Home > Update & Security > Troubleshoot. If you run into trouble, run there first.
Turn off File Explorer’s Quick Access view
When you open File Explorer in Windows 10, it defaults to a new Quick Access view that shows your most frequently accessed folders and recently viewed files. I love it, personally, but if you’d rather File Explorer defaulted to the “This PC” view found in Windows 8, here’s how.
Open File Explorer, then select View > Options from the Ribbon. A Folder Options window will open. Click the “Open File Explorer” drop-down menu at top, then select the “This PC” option. Click OK and you’re done!
Manage notifications
Windows 10’s Action Center houses and manages the notifications spawned by your system’s various apps. You might not want every Windows Store app you install barking at you all the time, however, or maybe you don’t want to see any notifications while you’re in presentation mode. You might just want to silent the annoying ads that the Get Office app spawns. Fortunately, those are easy to tweak.
To tinker with you your notification settings, head to Start menu > Settings > Systems > Notifications and actions. Individual Windows Store apps, like the Mail app, tend to have more granular notification options in the Settings menus inside the apps themselves.
Schedule your restarts
This is wonderful. If you’ve got pending updates that require you to reboot your PC, Windows 10 will allow you to schedule a specific time for it to do so. Finally!
Open the Settings option in the Start menu, then head to Updates and Recovery > Windows Update > Restart options to see the scheduling screen above.
Get Windows updates from other sources
But the Windows Update upgrades don’t end there. Windows 10 introduces a new option that lets you download updates using peer-to-peer technology, rather than Microsoft directly. It could help you get that hot security patch faster when everybody’s hammering Microsoft’s dedicated servers, or save you bandwidth in a computer-crowded house—just download the new patch once from Microsoft, then share it among the PCs under your care.
To tinker with the setting, head to Start > Settings > Update & Recovery > Delivery Optimization. By default, “Get updates from more than one place” is enabled and configured to grab updates from PCs on both your local network and the Internet at large. If you don’t like the idea of your PC using your bandwidth to share Windows Updates with strangers, be sure to disable it. If you leave it active, the “Advanced options” link lets you fine-tune how Windows uses your network to download and share updates, as you can see above.
Seize control of Windows Updates
While the ability to schedule installation times for updates is very welcome indeed, not everyone is happy about the way Windows 10 handles patches—specifically, that you can’t refuse them. Windows 10 Pro users—but not Windows 10 Home users—can delay downloading updates for some time, but eventually, Microsoft will force them on you.
There are some actions you can take to exert control over your Windows Update experience, however. Most notably, if you’re using Wi-Fi for connectivity, you can set Windows 10’s Wi-Fi connections as metered to download updates when you’d like to, rather than when Microsoft wants you to. The Active Hours feature lets you tell Windows specific times not to install updates. And if you ever encounter a borked update that refuses to play nice with your PC, Microsoft’s released a tool that allows you to choose individual updates so they won’t be downloaded again.
Those workarounds aren’t a replacement for being able to manually choose the Windows Update you’d like to install, but they should help ease the sting a little, at least.
Fresh keyboard shortcuts!
Windows 10 packs a handful of fresh keyboard shortcuts, all tied to newfound abilities inside the revamped operating system. There are many more than we can list here, so head over to our guide to Windows 10’s keyboard shortcuts to learn all about them. If you really want to get fancy, augment those hotkeys with Windows 10’s new touchpad gestures for true shortcut mastery.
Declutter your taskbar
Two of Windows 10’s standout features are its Cortana search integration and newly added virtual desktop support—but they claim a sizeable chunk of your taskbar. If you don’t care about either (or don’t mind using Windows key + Tab to leap through virtual desktops) you can reclaim that onscreen real estate.
Everything starts by right-clicking an empty section of your taskbar. Select Cortana, and choose to Show Cortana icon only. You can also remove the Cortana and Task View buttons from the same Taskbar menu.
Thank You!
We feel the need to thank you following through with this long episode of top 30 Windows 10 trick, tips and tweaks. The article doesn’t stop here; share your ideas with us on the comment section.
If you really want to get fancy, augment those hotkeys and use Windows 10 like a ninja, try new Windows 10 touchpad gestures for laptop.
Microsoft changed Windows for the better when it introduced trackpad gestures in Windows 8. The new gestures made controlling your PC a far more fluid experience, helping you get things done more efficiently without the need for mouse-like buttons at the top of the touch area.
In Windows 10, Microsoft improved on Windows 8’s foundation. Beyond integrating existing gestures, the company added new touch controls and dumped items that wouldn’t make any sense in Windows 10, like swiping in from the right edge for the Charms bar (since Windows 10 doesn’t have a Charms bar).
The only requirement for using these gestures is that you have a precision touchpad, so some older laptops won’t be able to use them.
If you’re not sure if your touchpad supports gestures, open the Settings app and go to Devices > Mouse & touchpad. Under the “Touchpad” heading it will say “Your PC has a precision touchpad” if you can swipe and tap instead of clicking.
Select an item: Tap on the touchpad
Scroll: Place two fingers on the touchpad and slide horizontally or vertically
Zoom in and out: Place two fingers on the touchpad and pinch in or stretch out.
Right-click: Tap the touchpad with two fingers, or press on the bottom right corner
Open Task View: Place three fingers on the touchpad and swipe up (away from you).
Show desktop: Place three fingers on the touchpad and swipe down (towards you). Reverse the movement to get all your windows to return.
Switch between open windows: Place three fingers on the touchpad and swipe right or left (this is the same as pressing Alt + Tab).
Drag an open window: Double-tap and then drag from the title bar
Open Cortana: Tap the touchpad with three fingers. If you’d rather this gesture opened Action Center instead, you can change this default in Settings > Devices > Mouse & touchpad.
How organized is your Windows 10 start menu? Do you have everything you frequently use on the start menu? What about your favorites site? Windows 10 offers tons of choices for desktop programs, and apps from the Windows Store can be useful too. But there are still probably a few key webpages you turn to every day instead of a desktop program or modern UI app.
Wouldn’t it be nice to have those lovely websites available to you on the Windows 10 Start menu? Here’s how to do that.
The Edge way
Microsoft Edge in Windows 10 has pin-to-Start functionality built-in.
Open Microsoft Edge and then navigate to the page you want to add. In the upper right-hand corner, click the three horizontal dots, and then from the drop down menu select Pin this page to Start. A pop-up window will appear asking you to confirm. Click Yes and you’ll find the site at the bottom of the live tile section in your Start menu.
The downside? This method is that links will only open in Edge. Fortunately, there’s a way around that. If you want links to open in your default browser instead of Edge, you have to use a little bit of trickery, but nothing too complicated.
The non-Edge way
Open Internet Explorer and navigate to the webpage you want to add to Start. For our purposes, let’s say it’s Facebook.
Once you’re on Facebook, right-click in an open space on the site and select Create shortcut from the context menu. IE will then show a pop-up window asking if you want to create a desktop shortcut. Click Yes.
To do the same thing in Chrome and Firefox, go to the address bar and click-and-drag the icon to the left of “http,” and drop it on the desktop. The icon will either be a green lock, a rectangular piece of paper, or a globe.
Pro Tip: In my experience, you’ll generally get better looking icons using Internet Explorer for this step.
Next, right-click the desktop icon you just created and select Copy.
Add to Start
Now type “run” into the Cortana/search box. The top choice should be the Run desktop app.
Once Run opens, type inshell:programs, click OK, and an Explorer window will open.
Now just right-click in the main part of that window (be careful not to accidentally open a folder) and selectPaste.
Your website is now in Start but it’s buried in the “All apps” list. To remedy this, just clickStart > All apps and scroll down to the listing in the alphabetical list. Since we’re doing Facebook we’ll look under “F”.
Once you find it, just click-and-drag it onto the live tiles (right) side of the Start menu and you’re done.
After you’ve added your webpages to Start, feel free to delete your shortcuts from the desktop.
If you’d like to take this a step further and add an entire section of websites to Start, check out our earlier tutorial on customizing the Windows 10 Start menu. This will teach you how to group tiles together.
The catch with websites using the non-Edge method is you can’t remove them from Start through the right-click context menu. Instead, you have to type shell:programs into Run and then delete the shortcuts in the Explorer window that opens.
This is something that is almost synonymous with Apple devices. However, this time, Microsoft is taking over the spotlight with their new ‘Find My Device’ feature introduced in November Windows 10 update. The new Microsoft invention is not just for tablets or phones. Any Windows 10 device can take advantage of the new feature, including desktops and laptops.
Although the current version of ‘find my device’ may not take your breath away or have your tablet make a sound, lock itself, erase data, or anything like that when stolen – it’s still a great feature to keep tabs of your device’s location and capture its thief – if needed.
Find My Device is buried under Settings > Update & Security.
To active this feature go to Start > Update & Security > Find My Device.
On this screen you’ll see a big Change button under the heading “Find My Device is off.”
Turn this slider to On and you’re done.
Once you click Change you’ll see a pop-up panel that says “Save my device’s location periodically.” Turn the slider to On and you’re done.
Find My Device is now on.
You should now see that the Find My Device screen has changed to “Find My Device is on” as seen above.
To make sure everything is working, login to account.microsoft.com/devices with your Microsoft account and you should see the name of your PC listed under “Your devices.”
If you don’t know the name of your device, right-click on the Start button and selectSystem. In the Control Panel window that opens you’ll see it under “Computer name.”
Ars Technica ran benchmarks on November 13th of the Steam Machine, against Windows 10. The result was pretty much the fresh operating system processing gaming much faster than the machine meant for a couch-convenient PC gaming experience. The two systems are relatively close when it comes to the mechanics for gaming, but the Steam Machine was found to lag way behind the new Microsoft operating system when it came to real gameplay. You could end up losing frames and detail of graphics depending on which game you’re playing on the SteamOS versus Windows 10, according to the tests.
The tests were run with a playable, modest setup: a dual-core 3GHz Pentium with an old GeForce GTX 660; which could pose a problem when handling more major and demanding games.
The SteamOS’ foundation is based on Linux, which is an operating system not well fitted with custom video cards/specialized gaming cards unlike Windows and Mac Pro systems. The implementations of the software is simply keeping the hardware from excelling to its true potential, and that could change with a little bit of refinement and fine-tuning from Valve.
Until that time comes, we’ll stick with sitting at our computer desks for our PC experience.
On November 11th, 2015, “TH 2” was released for Windows 10 users to download and install. Basically, TH 2 (using the abbreviation for the Windows 10 nickname ‘Threshold‘) is the first big update for the still in-development OS. The update came with an abundance of things, for both the personal user, and DEFINITELY for enterprise users. So, given this I figured it would be appropriate to share a condensed rambling of my experience with Windows 10 so far.
Using their Media Creation Tool, I downloaded and installed the first release version of Windows 10 onto my then Windows 8.1 HP laptop, excited to see all of the new features it boasted. I grabbed it sometime near the ending of July or beginning of August. After the semi-painful several hours it took to download and install, I was ready to become a user! Here I am now in November, and at the moment, I feel…slightly impressed.
Don’t let my words fool you to think I dislike the operating system – trust me when I say Windows 10 is definitely one of my favorites of the Windows Family! I was also very excited for its free download release and was super excited to setup my personalization, settings, and Start Menu. However, after having plenty of time to be more than acquaintances with the OS (and with the TH 2 update), I’ve began to realize that, at the moment, my personal experience with Windows 10 Home has fallen a bit short of my own expectations.
Since I like to discuss negatives (well, these or more less “personal opinions” rather than “cons”) and then the positives, I will do just that; and since I’ve had a good deal to experience with the system, I’ll try my best to condense the experience report.
1 – Start Menu & Taskbar
The crux of Windows 10 was the return of our beloved Windows Start Menu. However, Microsoft was changing the game up by mixing in their Live Tiles for the Windows Store Apps to be placed in up to 3 columns on the right side of menu. It was all great, and worked quite well. Design options are well fitted, and since TH 2, the context menus for changing up your Live Tiles are grand. But on the technical side, I find myself feeling slightly encumbered by the Start Menu. Simply put, it has its glitches and little bugs, but the one that caught me the most is that amount of time it takes for my machine to open this awesome and modern menu up. About 0.90 seconds approximately. As for the taskbar, it still has that pesky universal problem of sometimes keeping hovered icons focused on even without your mouse hovered over it.
2 – Windows Store Apps
This is pretty much my other problem with my Windows 10 experience so far. The Windows Store offers a bunch of apps, no doubt; unfortunately only a good handful of them here and there and designed nicely and work with the system and its available APIs and standards. But the recurring problem I have here is one I’ve had since standard Windows 8. A lot of the time, apps from the app store like to either 1)close themselves immediately (and not just close, but end their own program and task(s)) and/or 2)be unresponsive (especially when communicating with servers).
3 – Windows Search
The new search has Cortana so you can search (and now even Send Text Messages!) with your voice. It’s all great and good. However, Cortana still stands for some good improvements, and the actual search stands for some major improvements.
So, out of everything, those three points are the ones that have caused the most hindrance on my experience as a whole. There are other little things I come across sometimes that takes some small jabs to that ‘hype’ I had for Windows 10 as a whole, but they’re easy to look over.
On the flip side, I still love Windows 10 so far, and love the TH 2 update. It is my favorite Windows OS to date, and it DOES have so much goodies with it. The whole Start Menu and Live Tiles, despite their usual buginess, are great altogether! And while I don’t use the feature, Cortana and the voice commands are very convenient for quick search, note taking, emailing, events, and even calling/sending texts. Faster boot times are something that is great, along with improved programs performance, virtual desktops, an activity center, and tablet mode – Windows 10 is definitely a budding operating system.
The improved performance has helped me boost my productivity, though I will not lie when I say that the discovery of Flow Free and a third-party reddit app has held me accountable to some good procrastination. So, at the moment I recommend upgrading to Windows 10 if you have 8.1/8/7 if you want to try it out while the update is still free. If you end up disliking it, they give you a one-month use on their rollback tool to switch back onto your old OS.
Make sure to follow EWT Net for more news and blog posts related to Microsoft, and Windows 10!
Microsoft is doing a great job in the mobile world and the operating System at large.
Today, IDC reported that Android and iOS controlled 96.3 percent of the mobile market in 2014. But Microsoft is always making a go up effort in their new strategy.That means that Microsoft’s Windows 10 strategy, which will see a single operating system stretch from the smallest to the largest screens, is starting in many ways from scratch.
It’s worth keeping in mind how quickly Windows 10’s market share will grow inside of the Windows Phone universe — given that Microsoft will provide free upgrades to a majority of Windows Phone owners whose phones can make the jump, Windows 10 could quickly become the majority platform in the Windows Phone universe. Microsoft’s developer gambit is that it will bring a huge chunk of the Windows 7, 8, 8.1, and Phone 8.1 universe under the 10 aegis in rapid order, creating a massive base for developers to sell into.
Fun game: What is Windows 10’s mobile market share inside of Windows Phone at the end of the year, and what is its tally among the larger smartphone market at year’s end?
Regardless, this new data marks the start of market adoption for Windows 10 on smartphones. Charge of the Light Brigade, or start of a new era? We’ll find out soon.
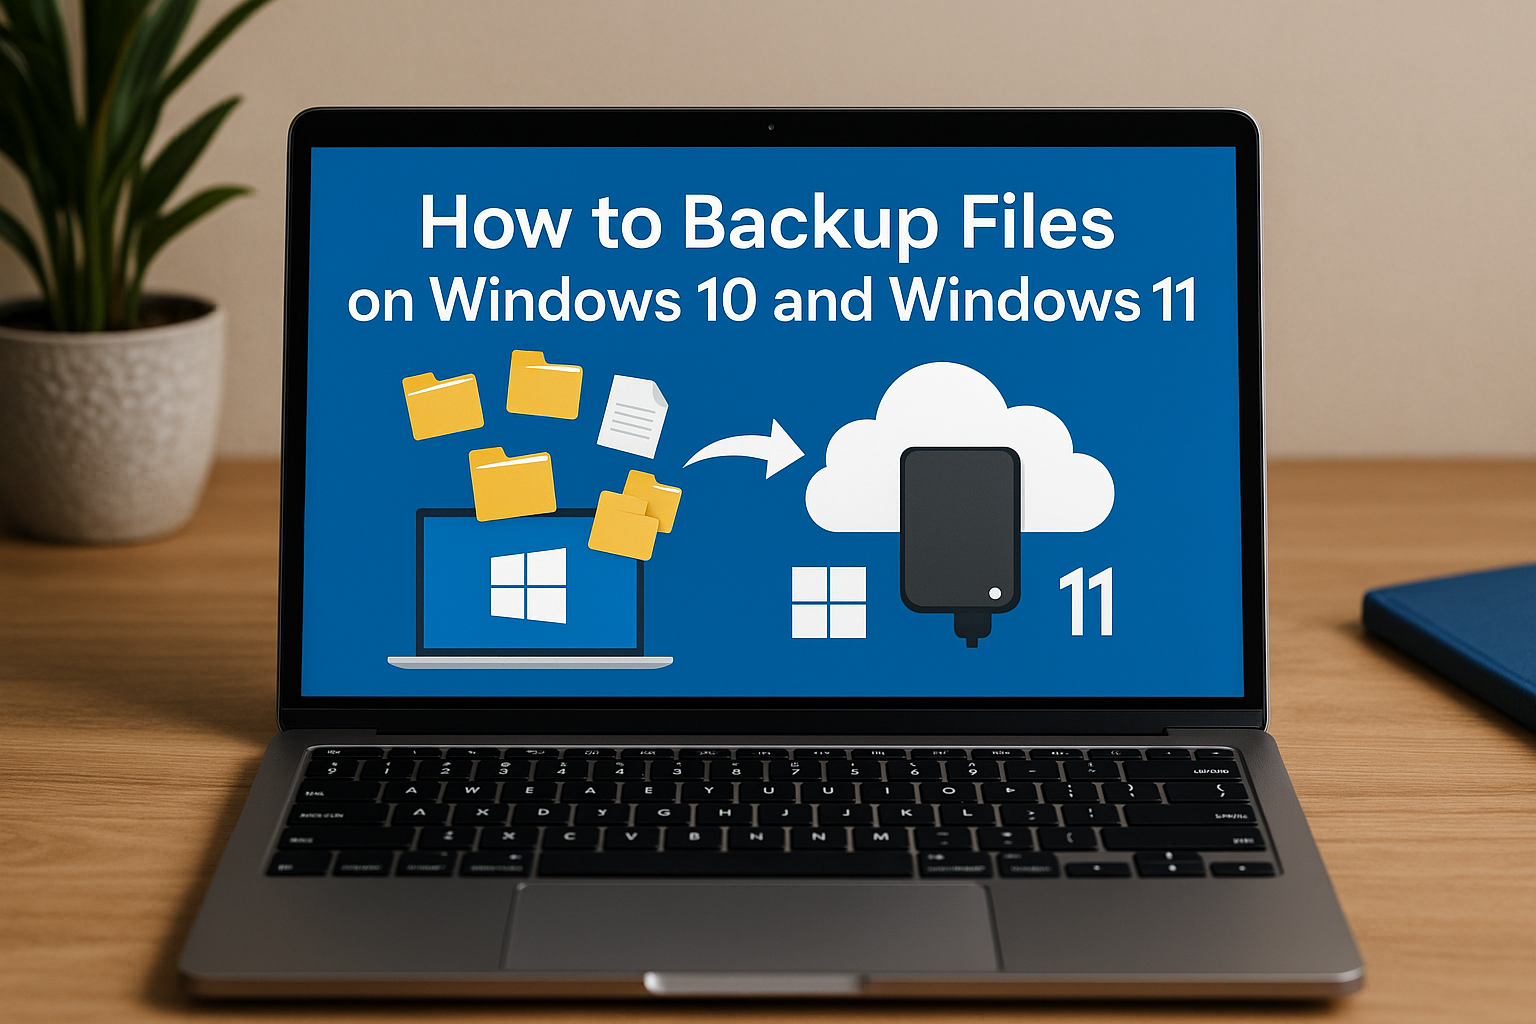
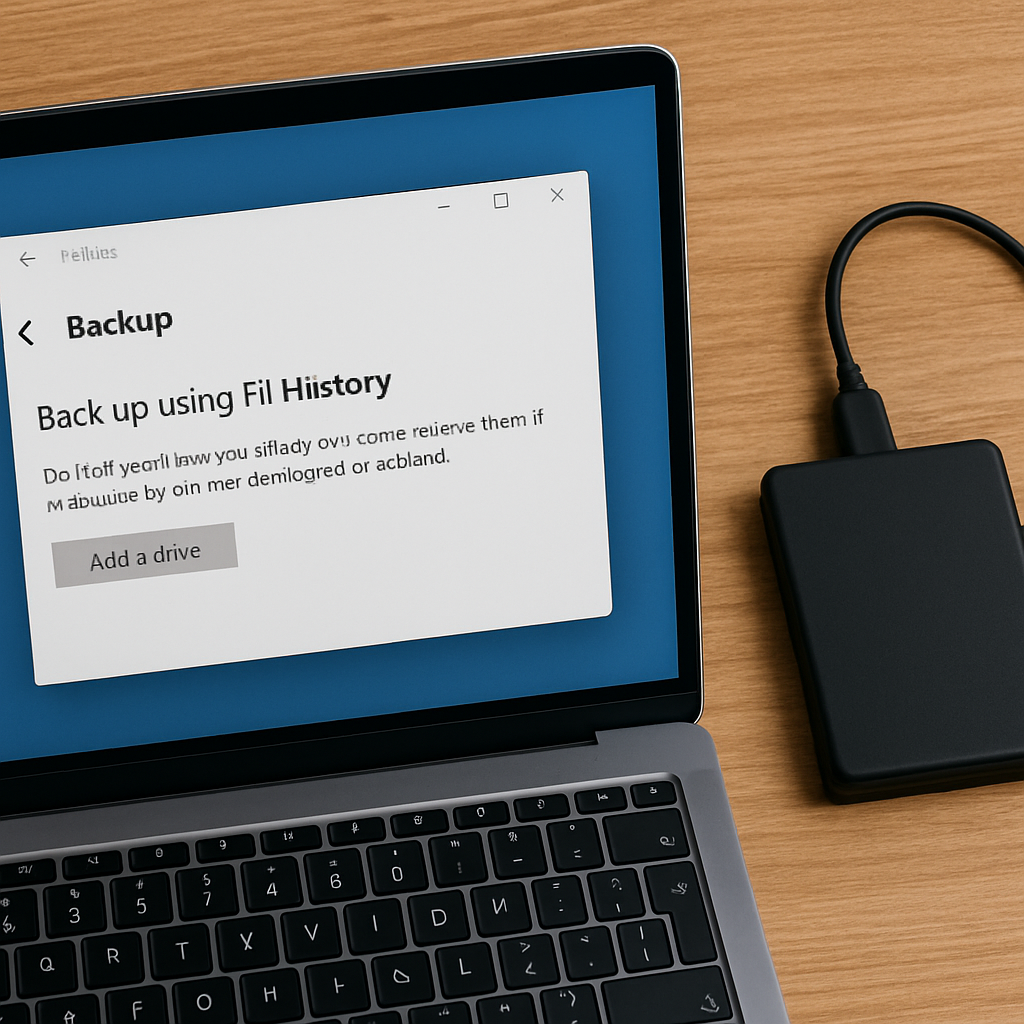
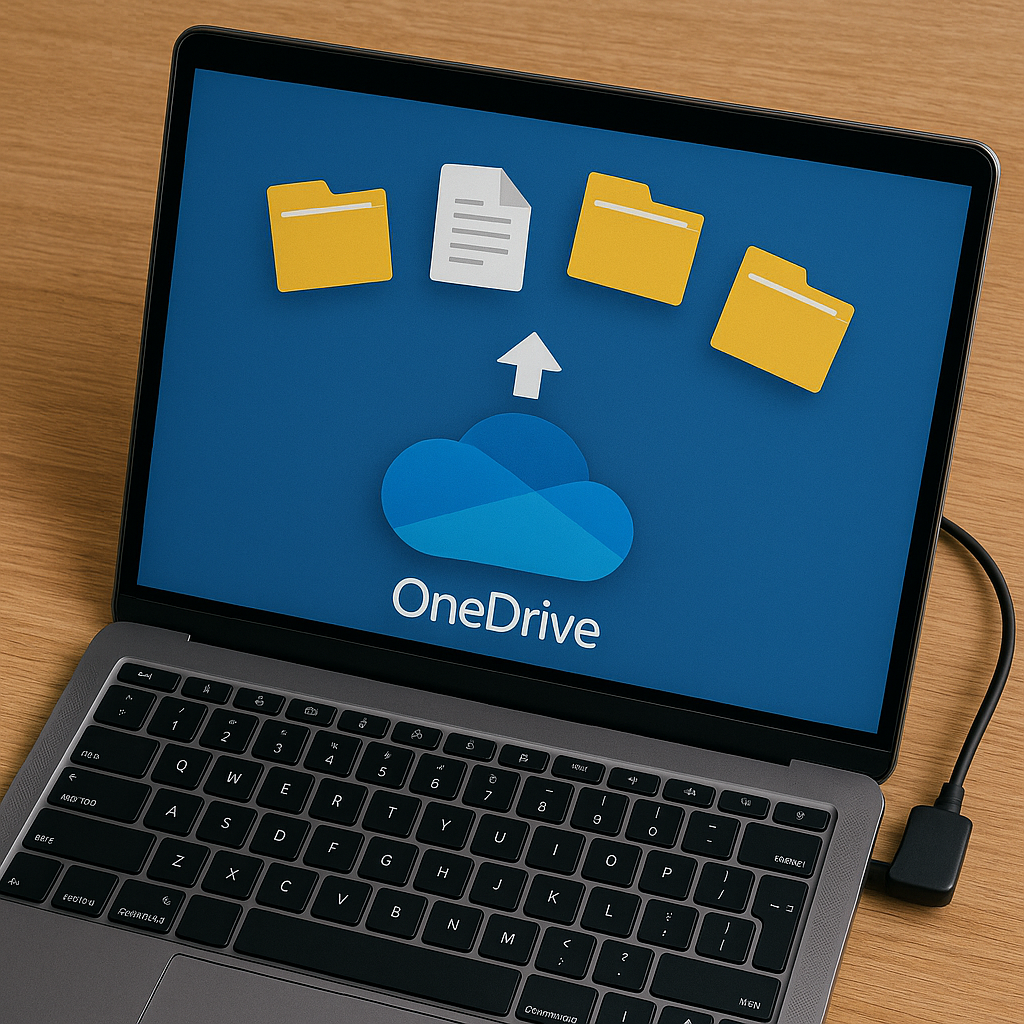







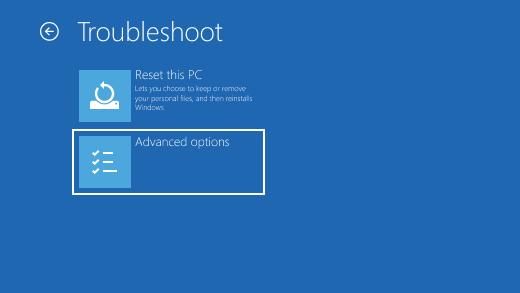






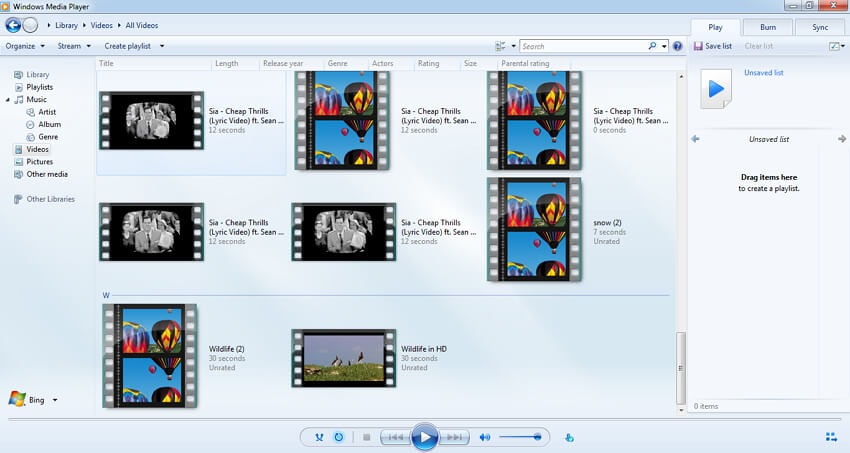

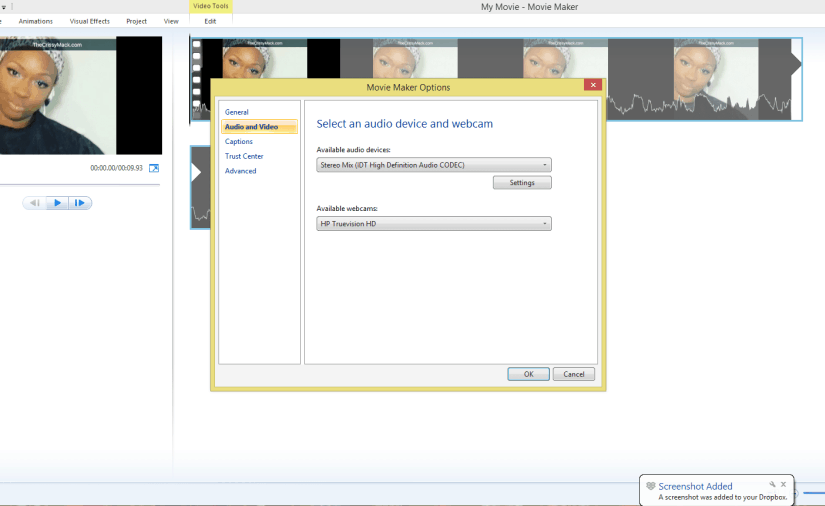

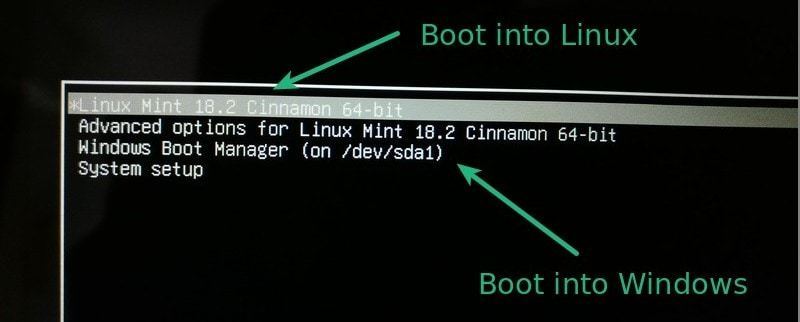
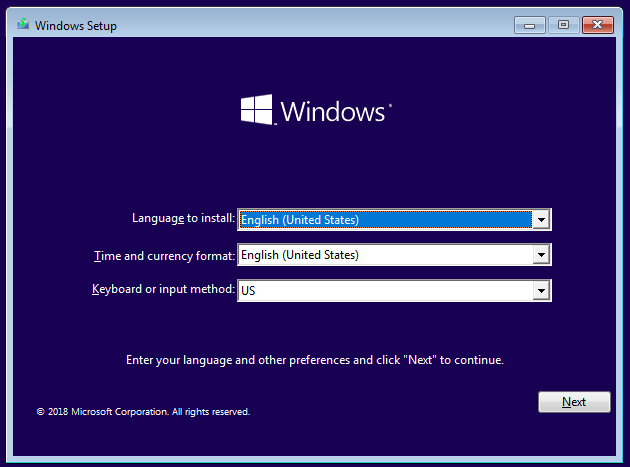
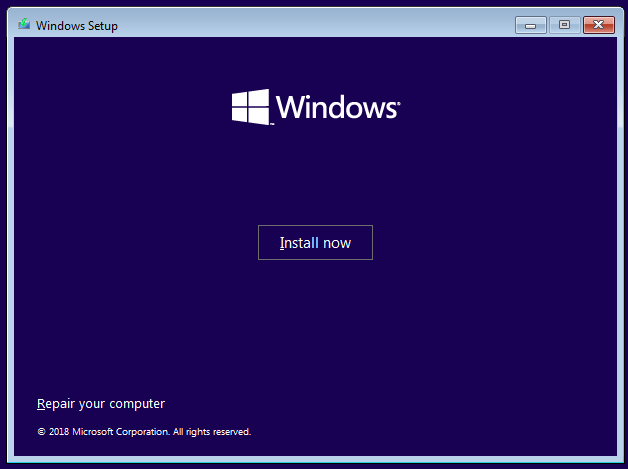
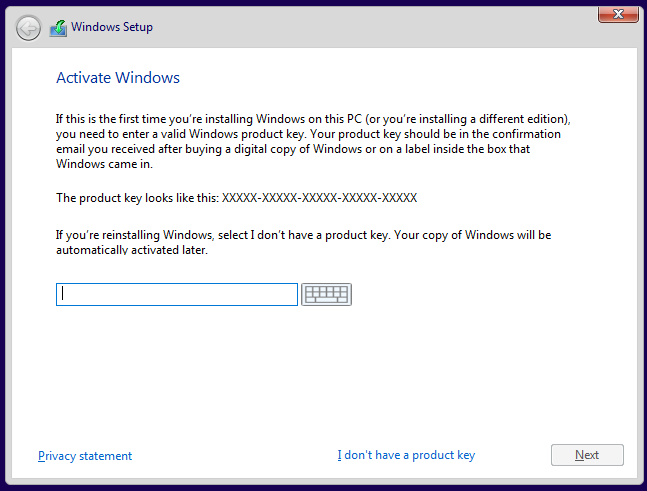

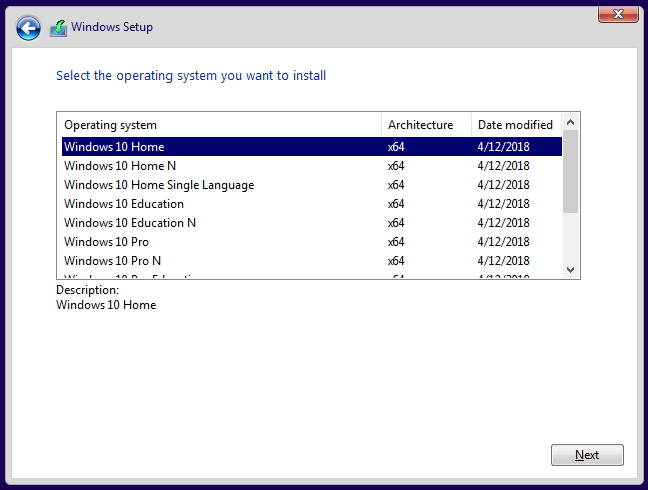
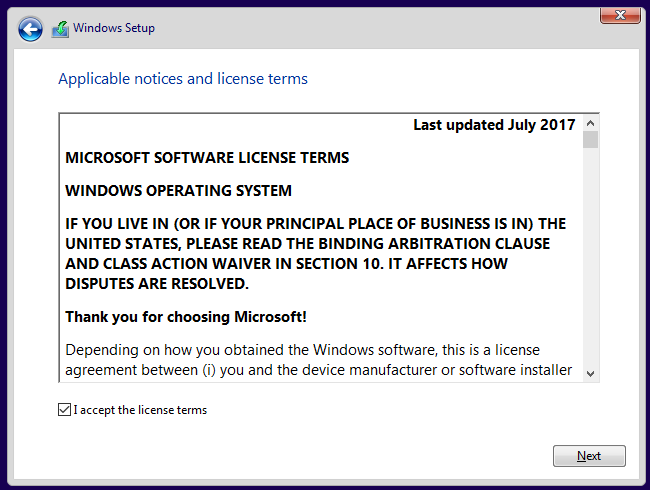
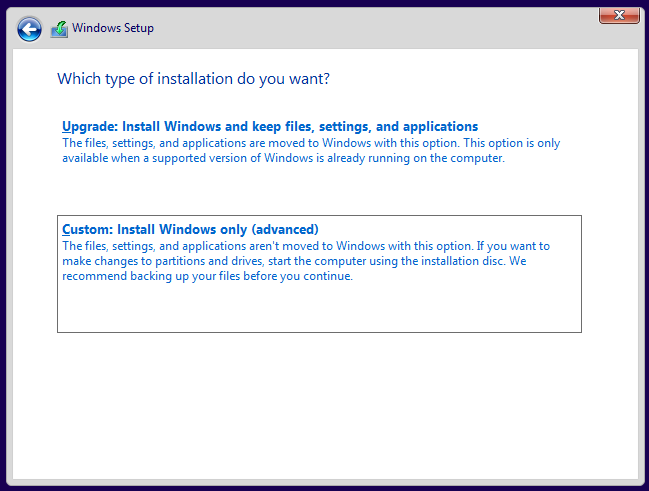
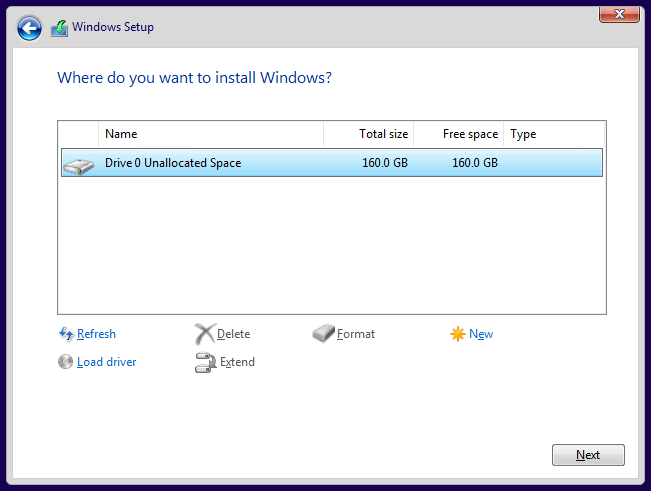
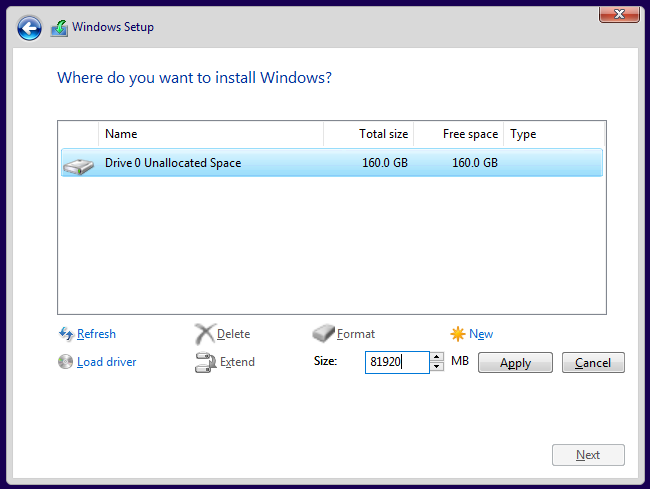

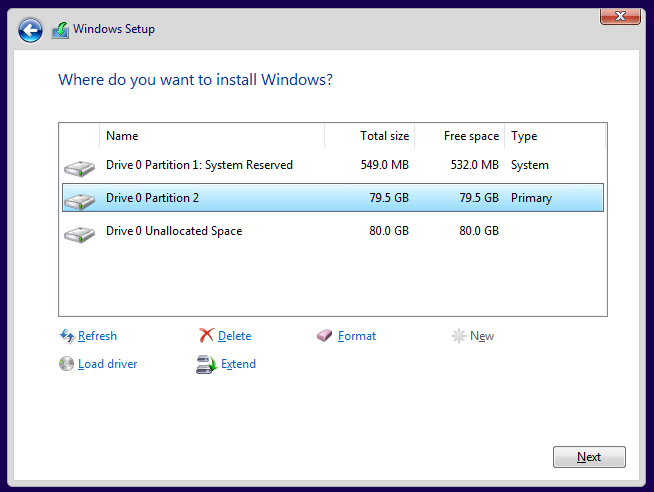
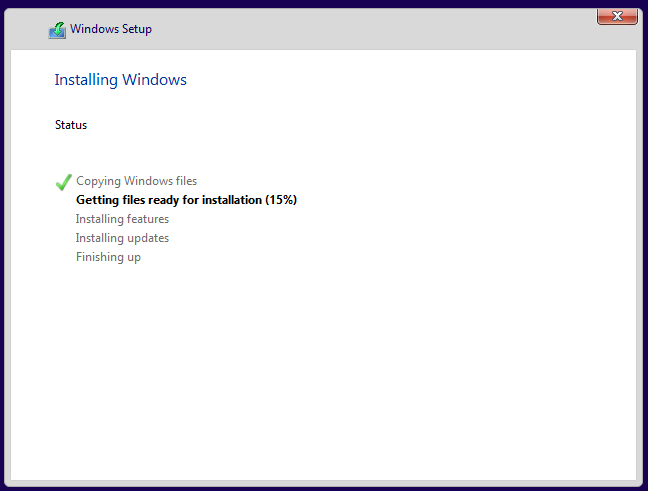
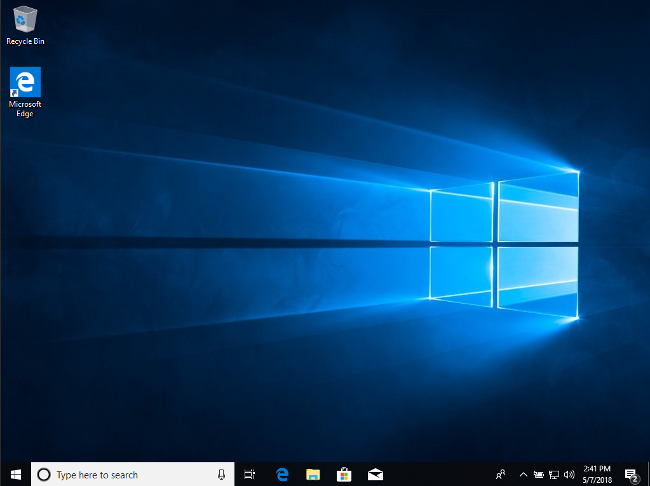

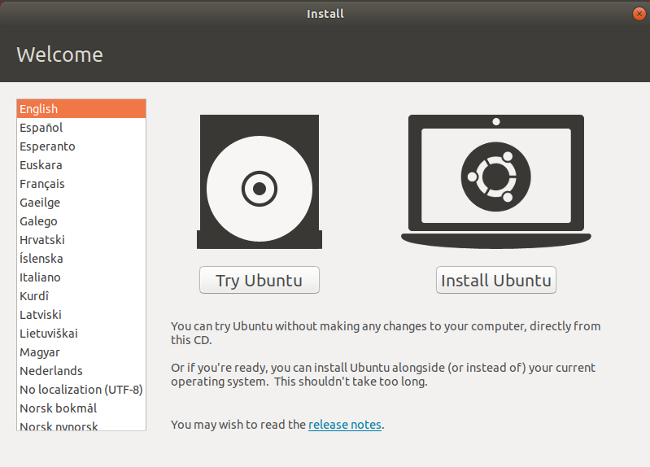
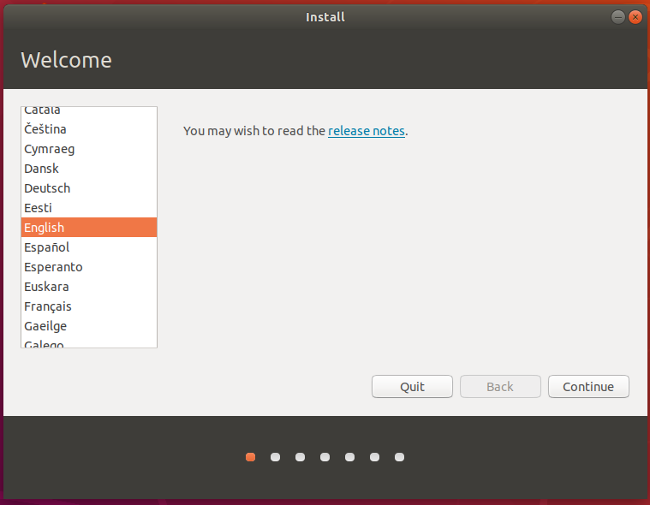
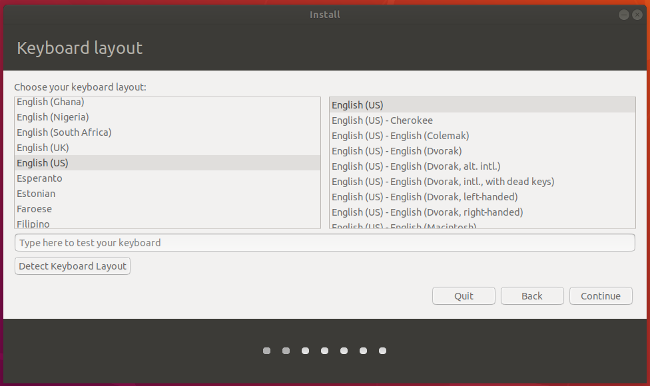
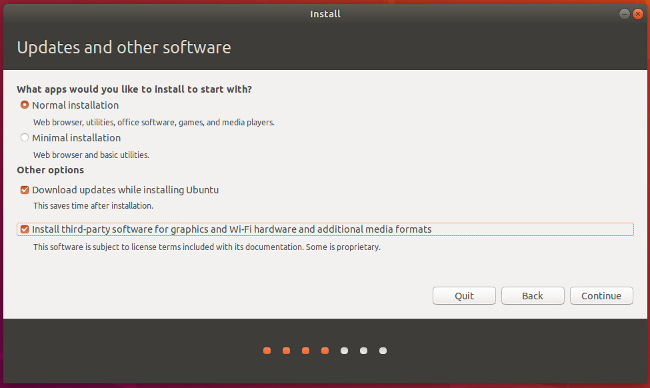

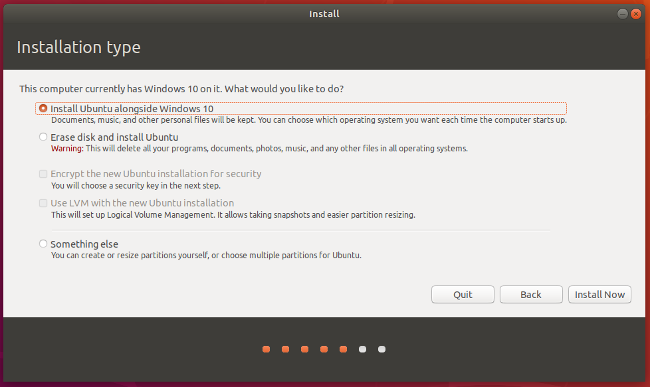

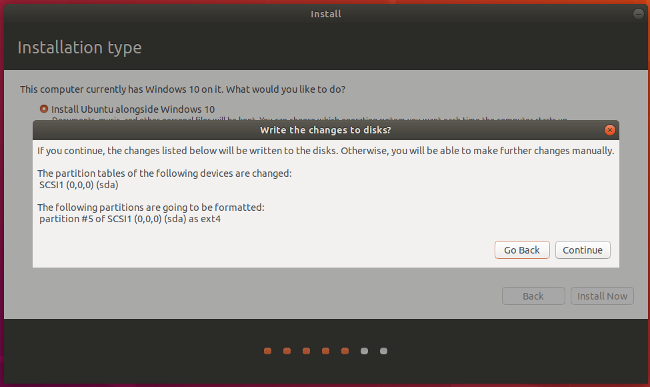
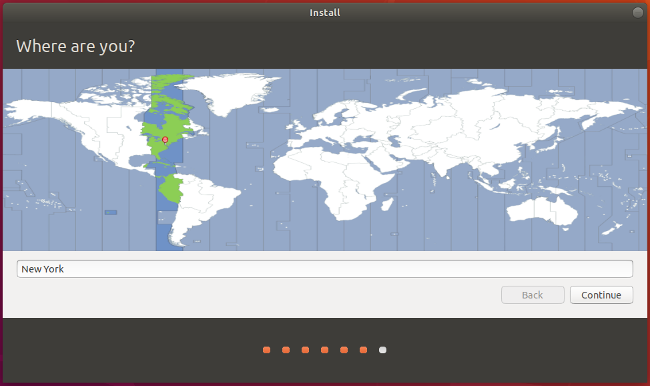
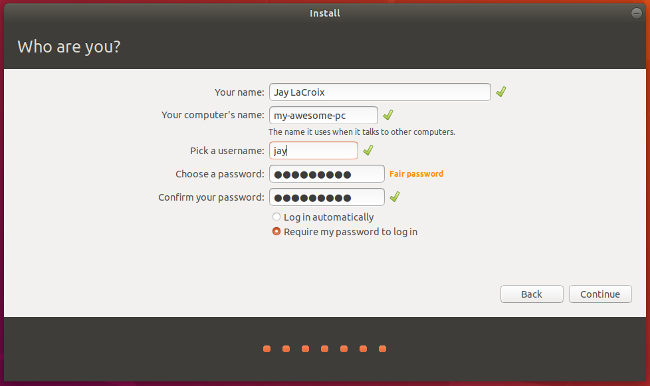

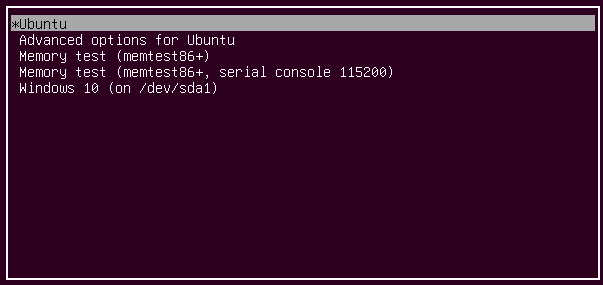



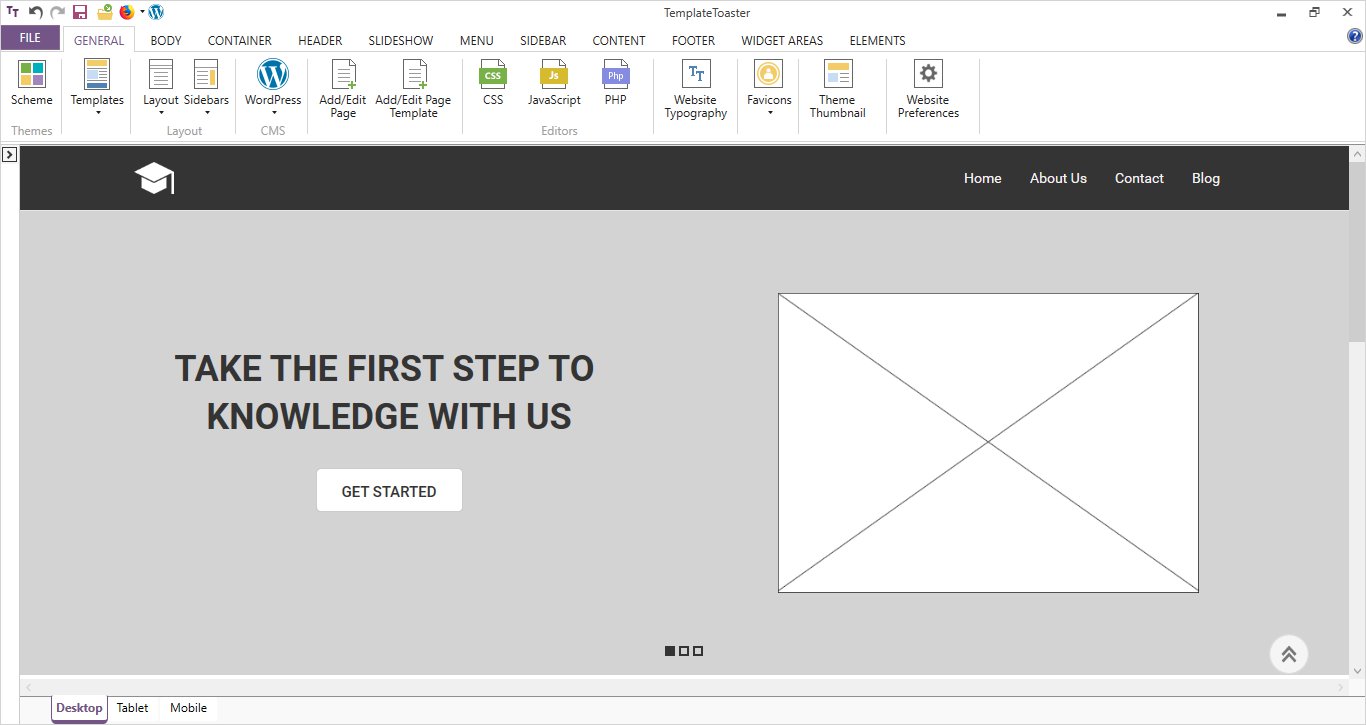


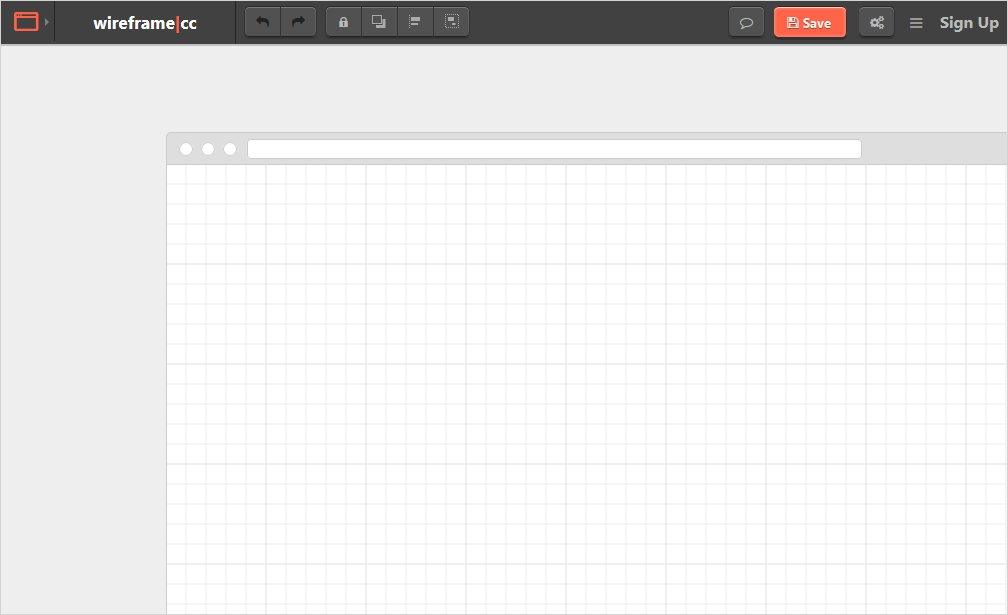

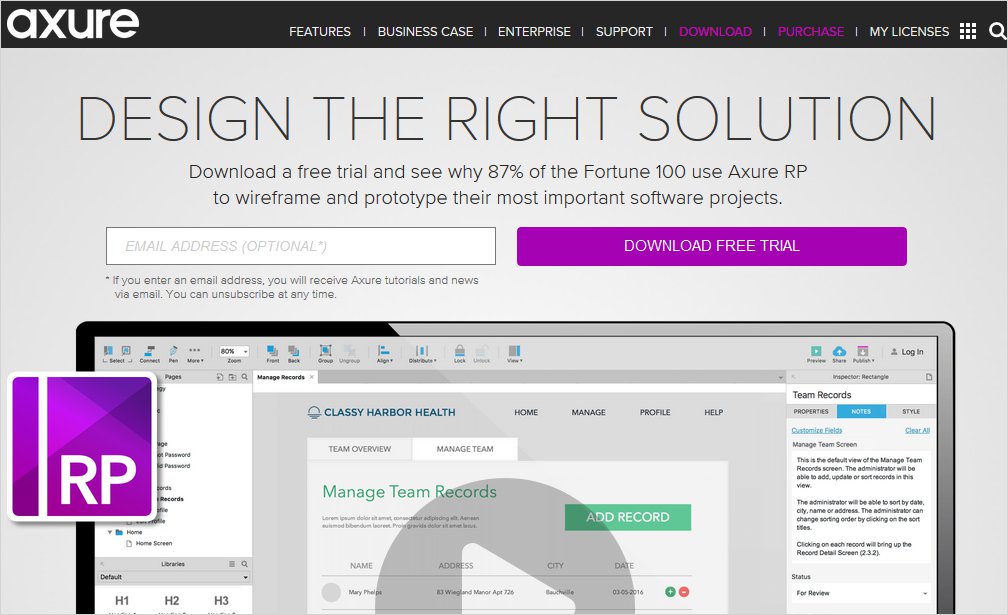



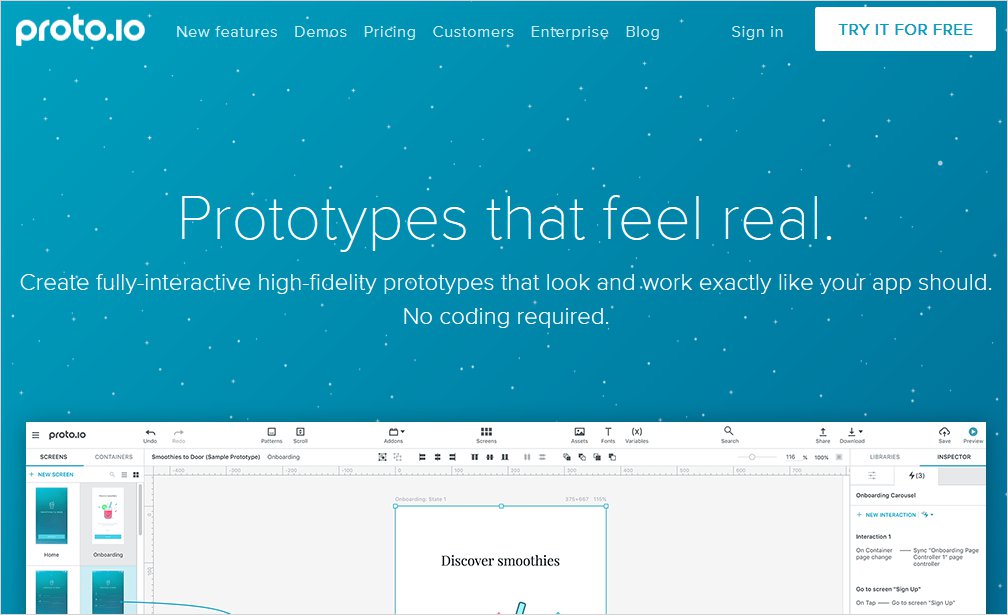
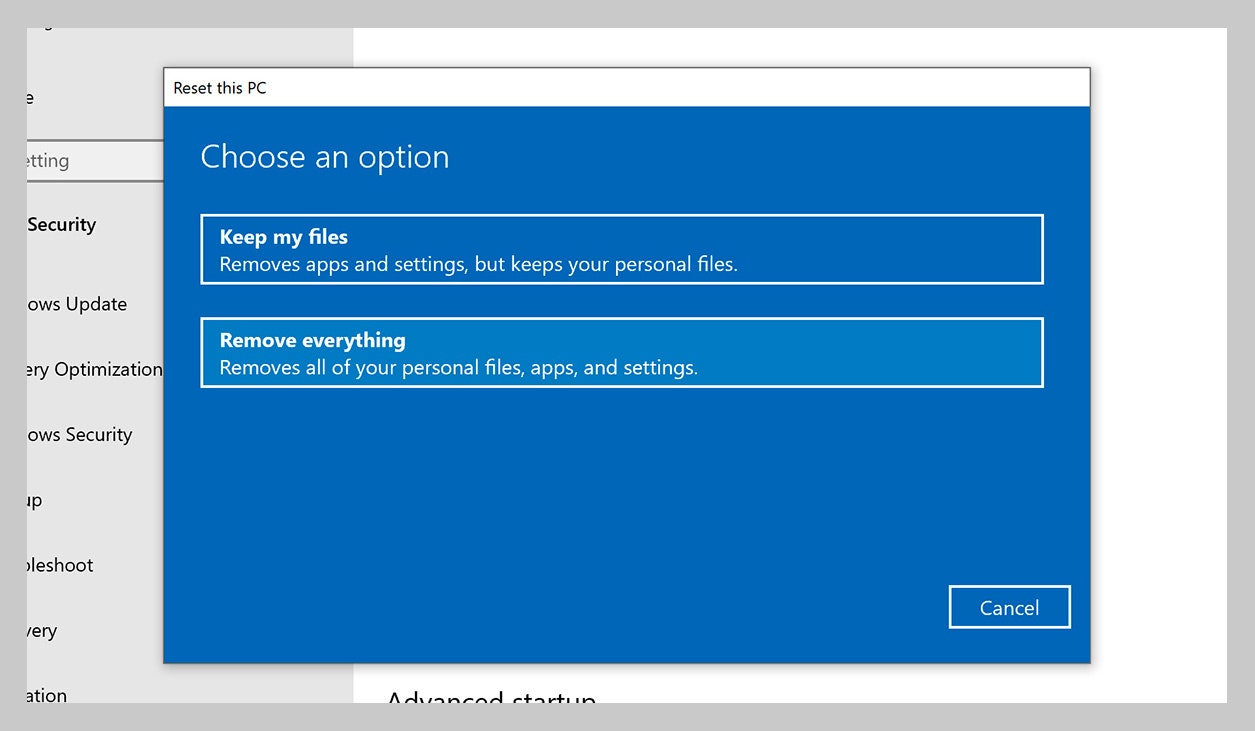
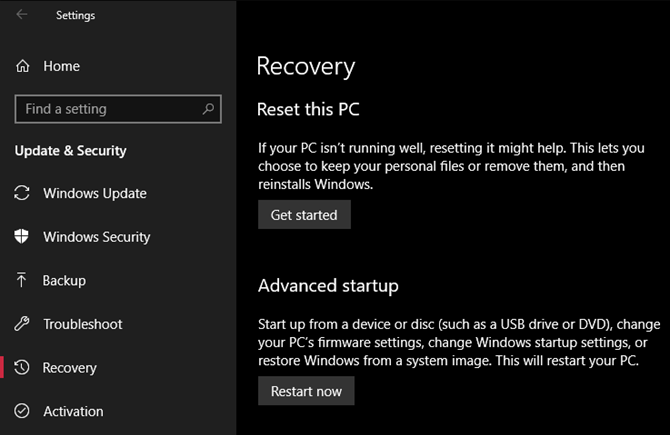
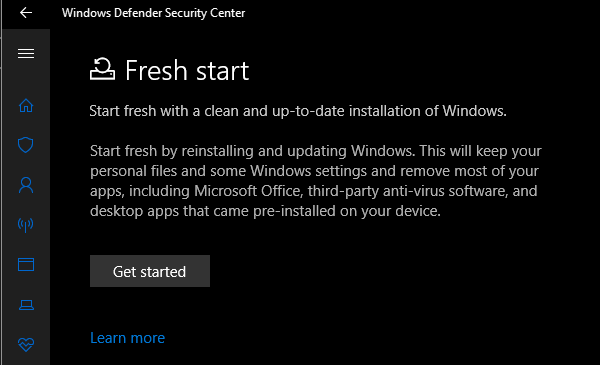

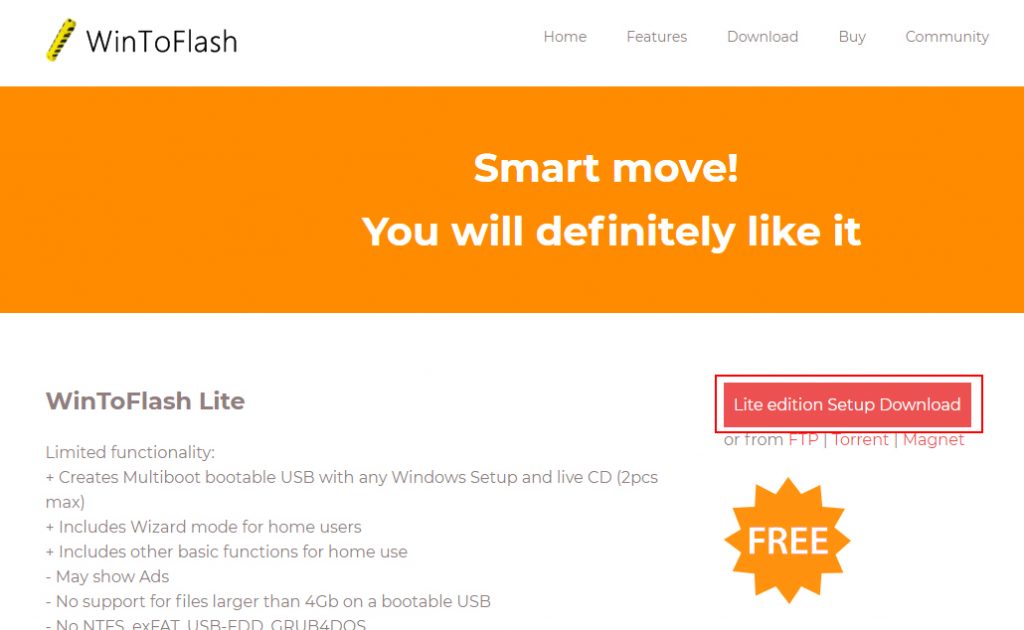
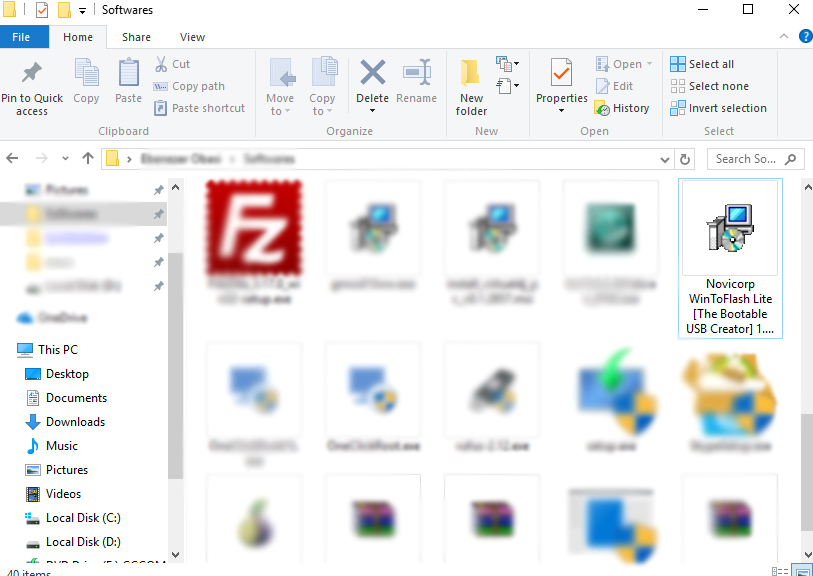
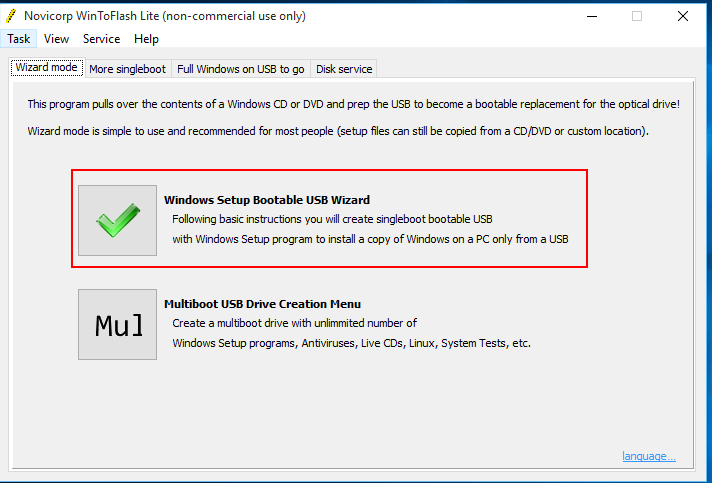
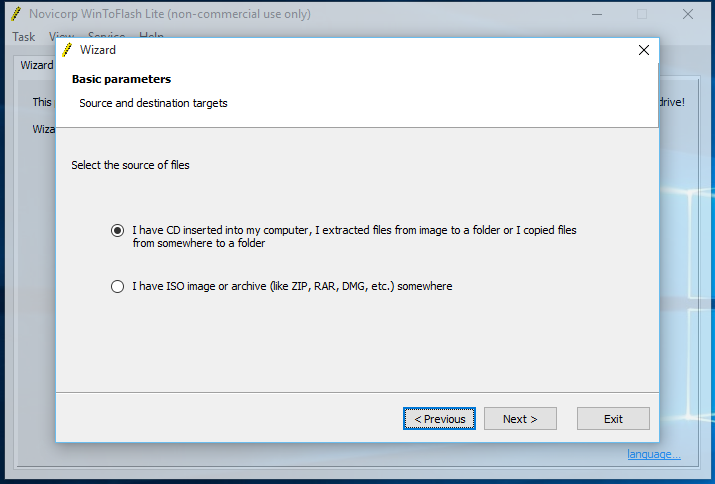
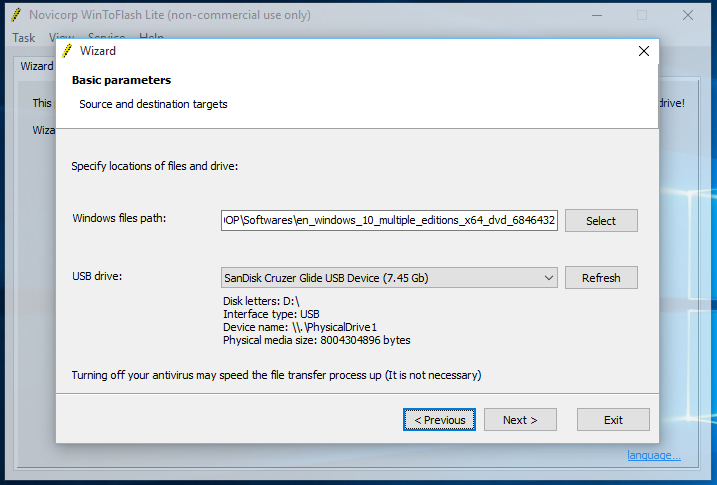
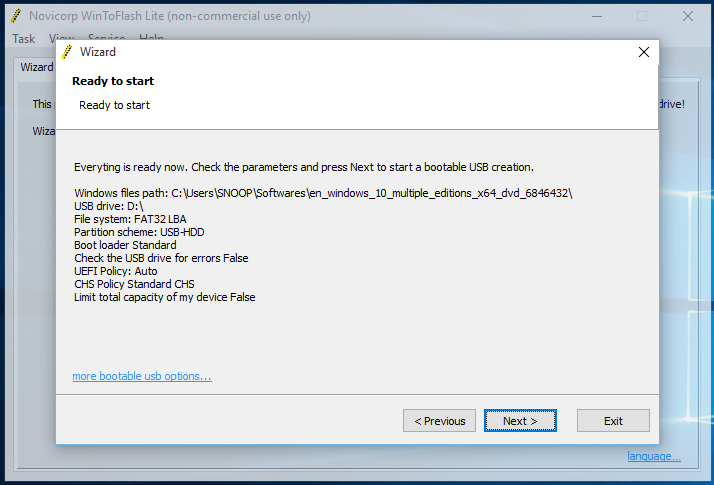
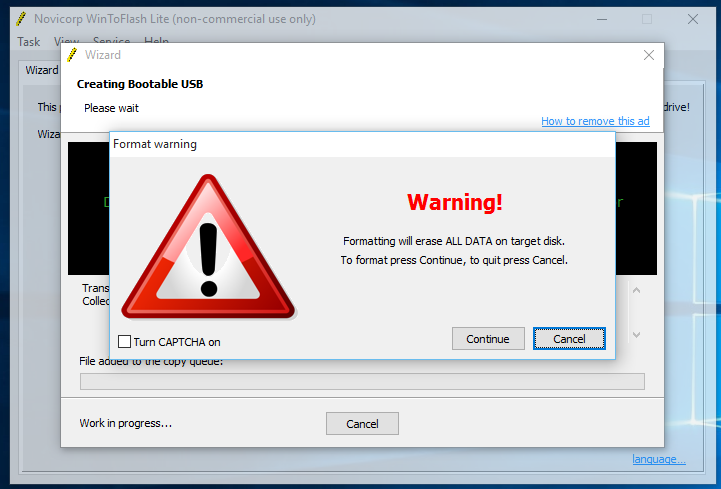
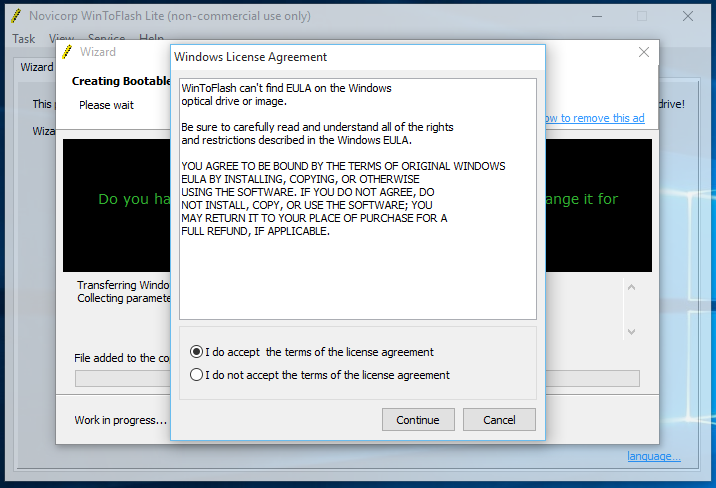
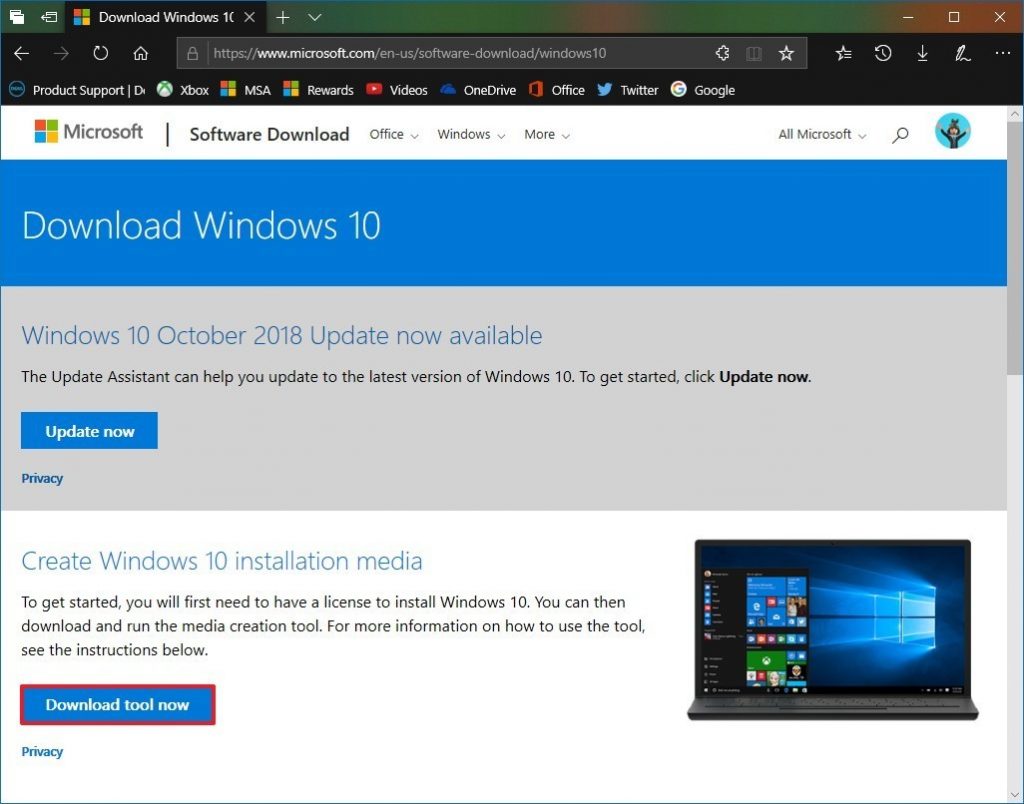
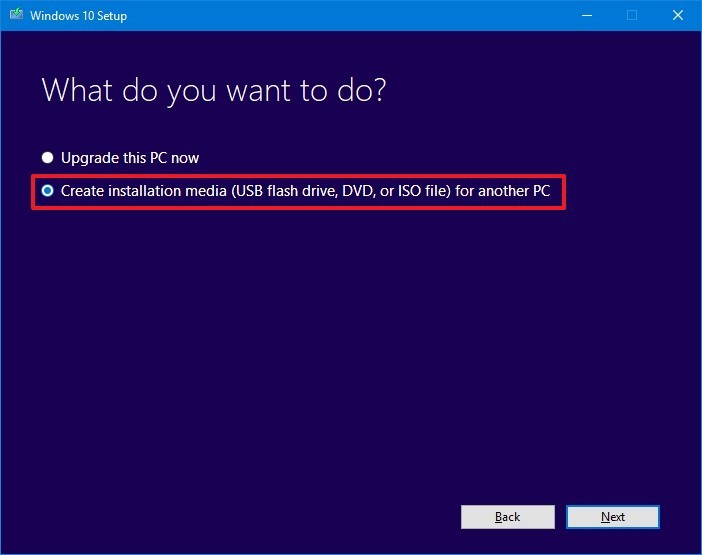
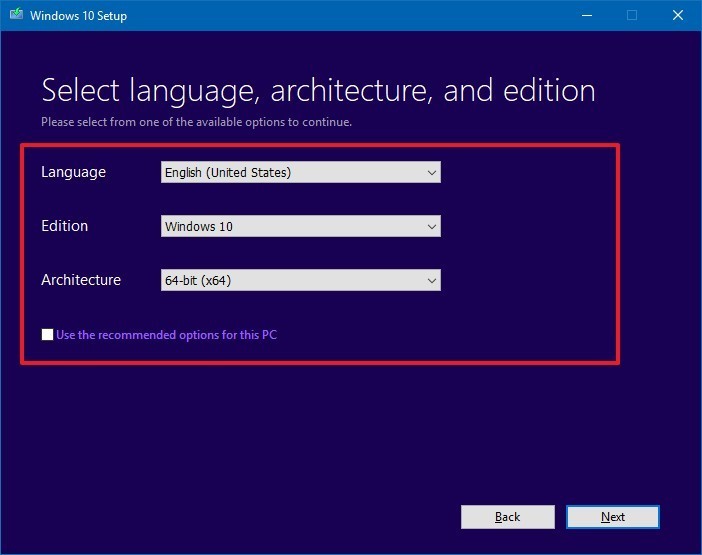
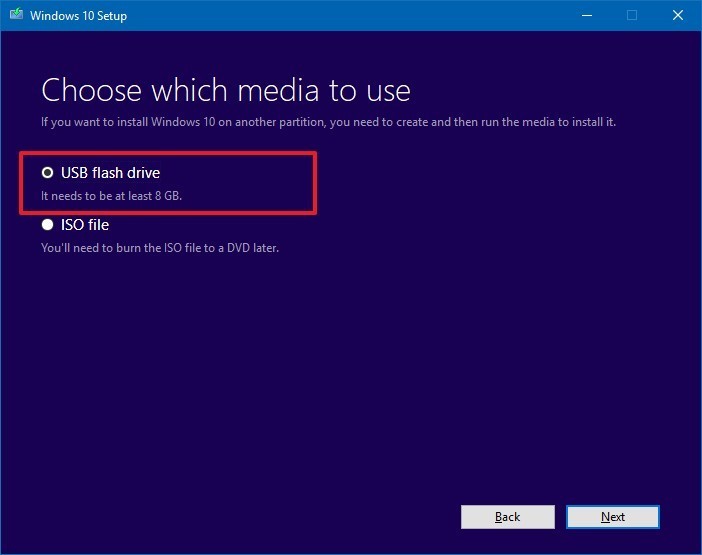
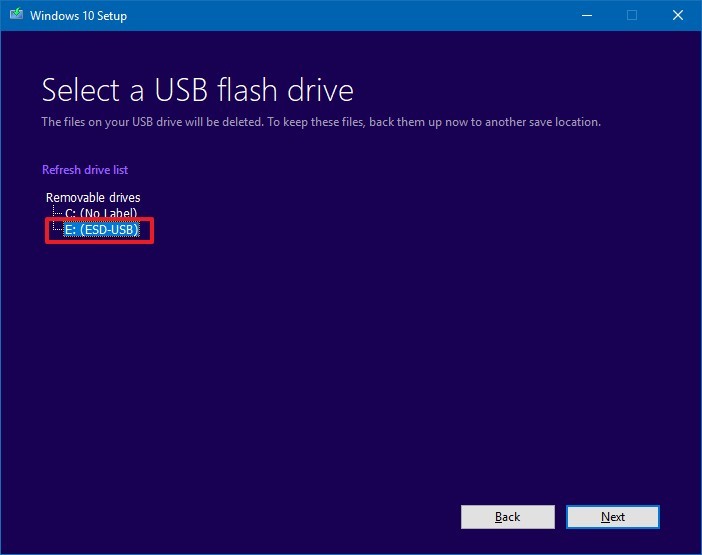


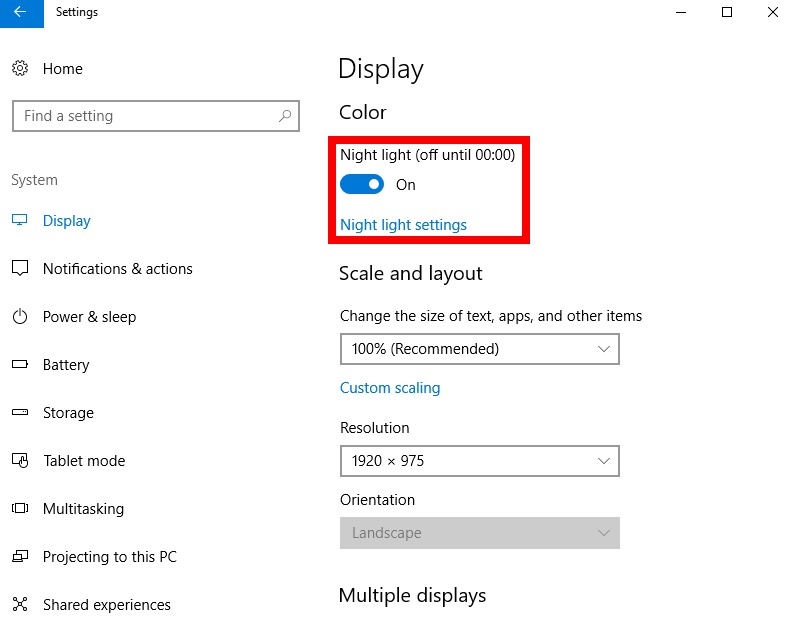
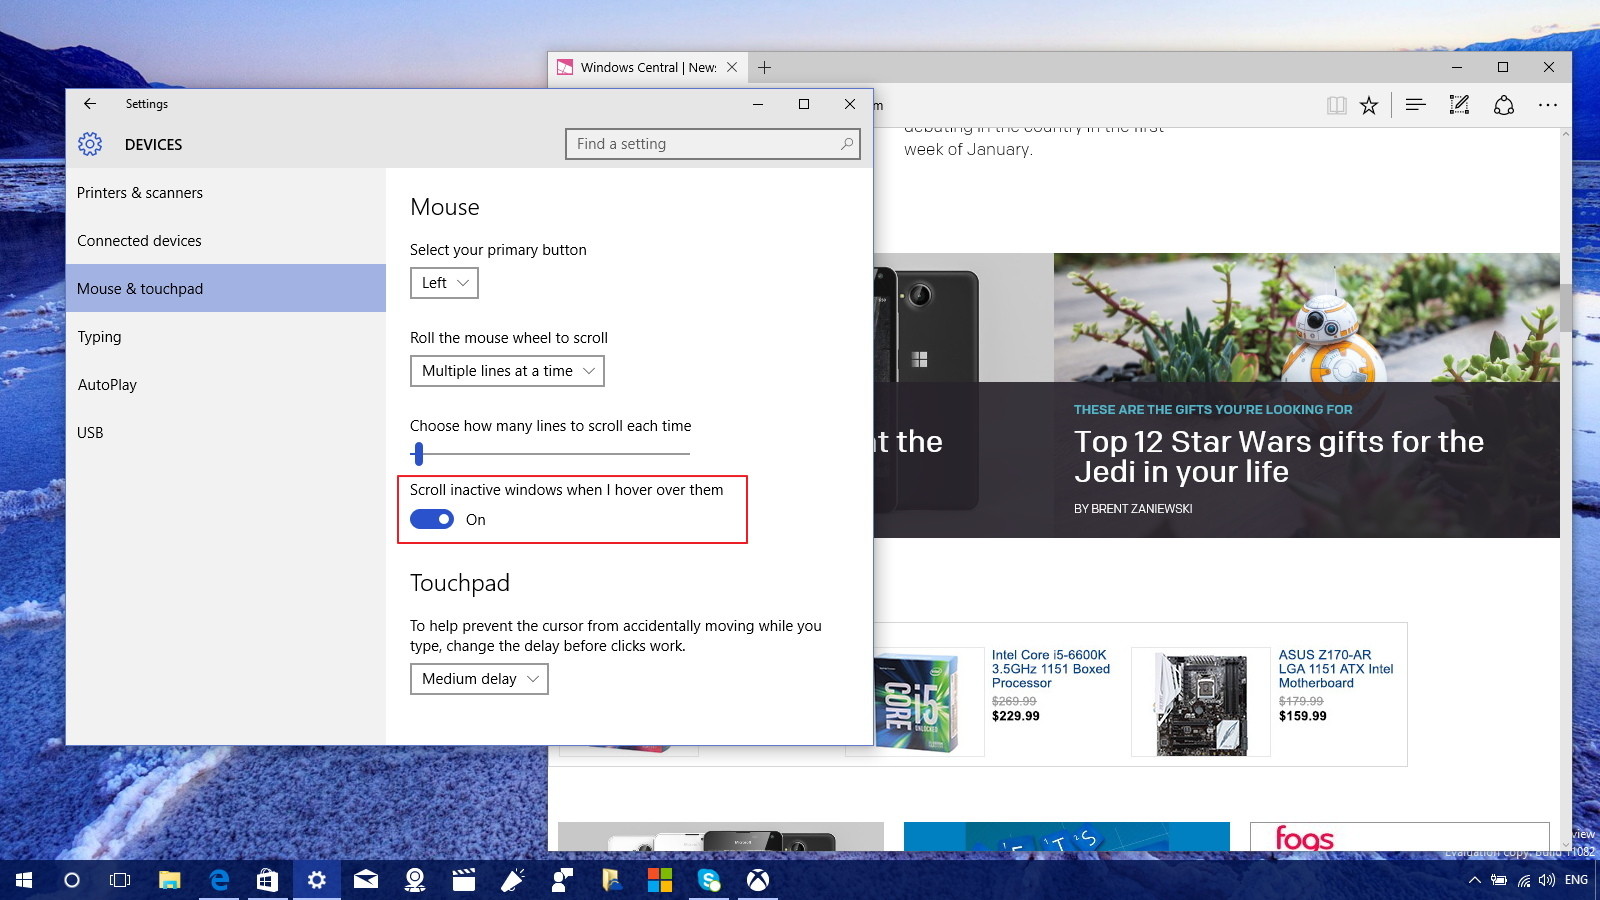
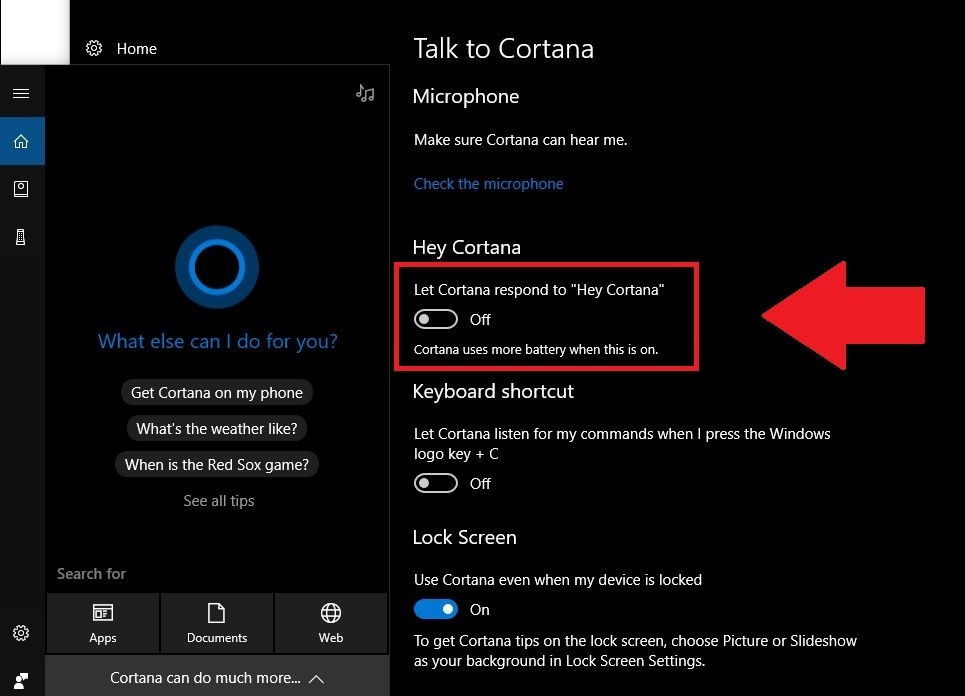
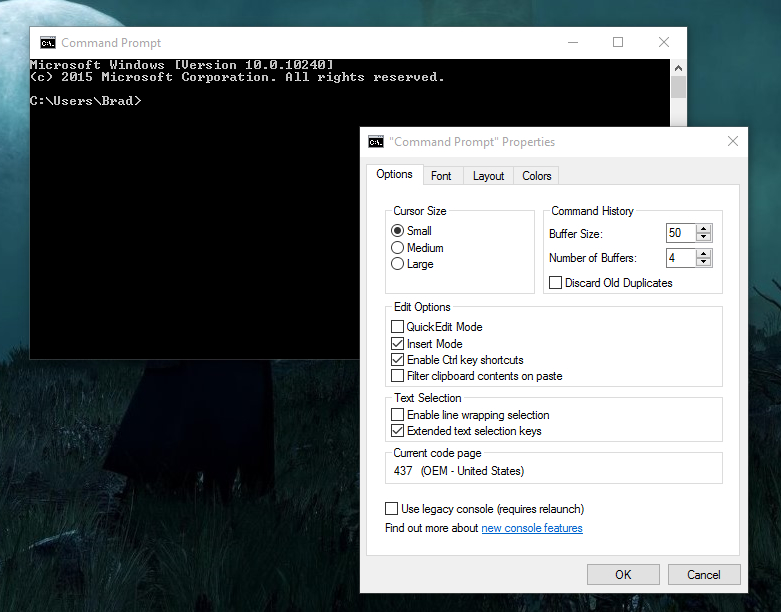
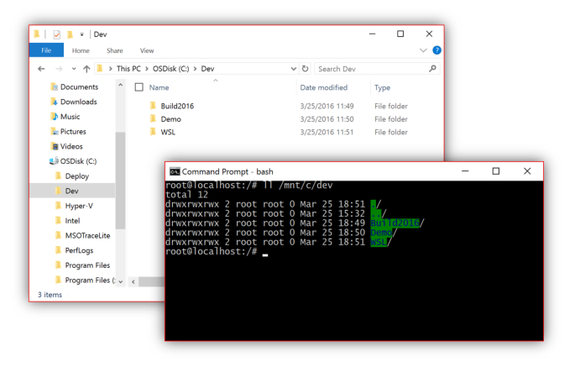
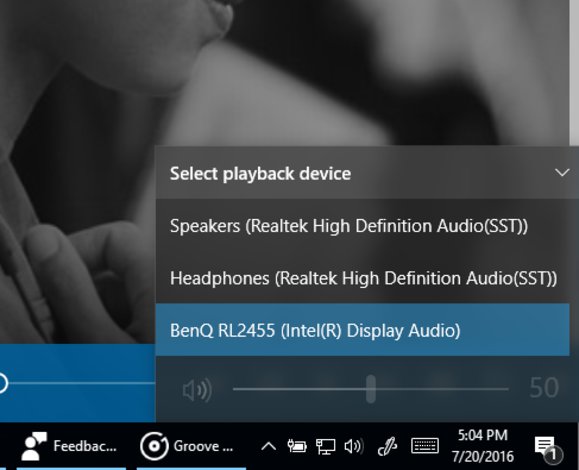

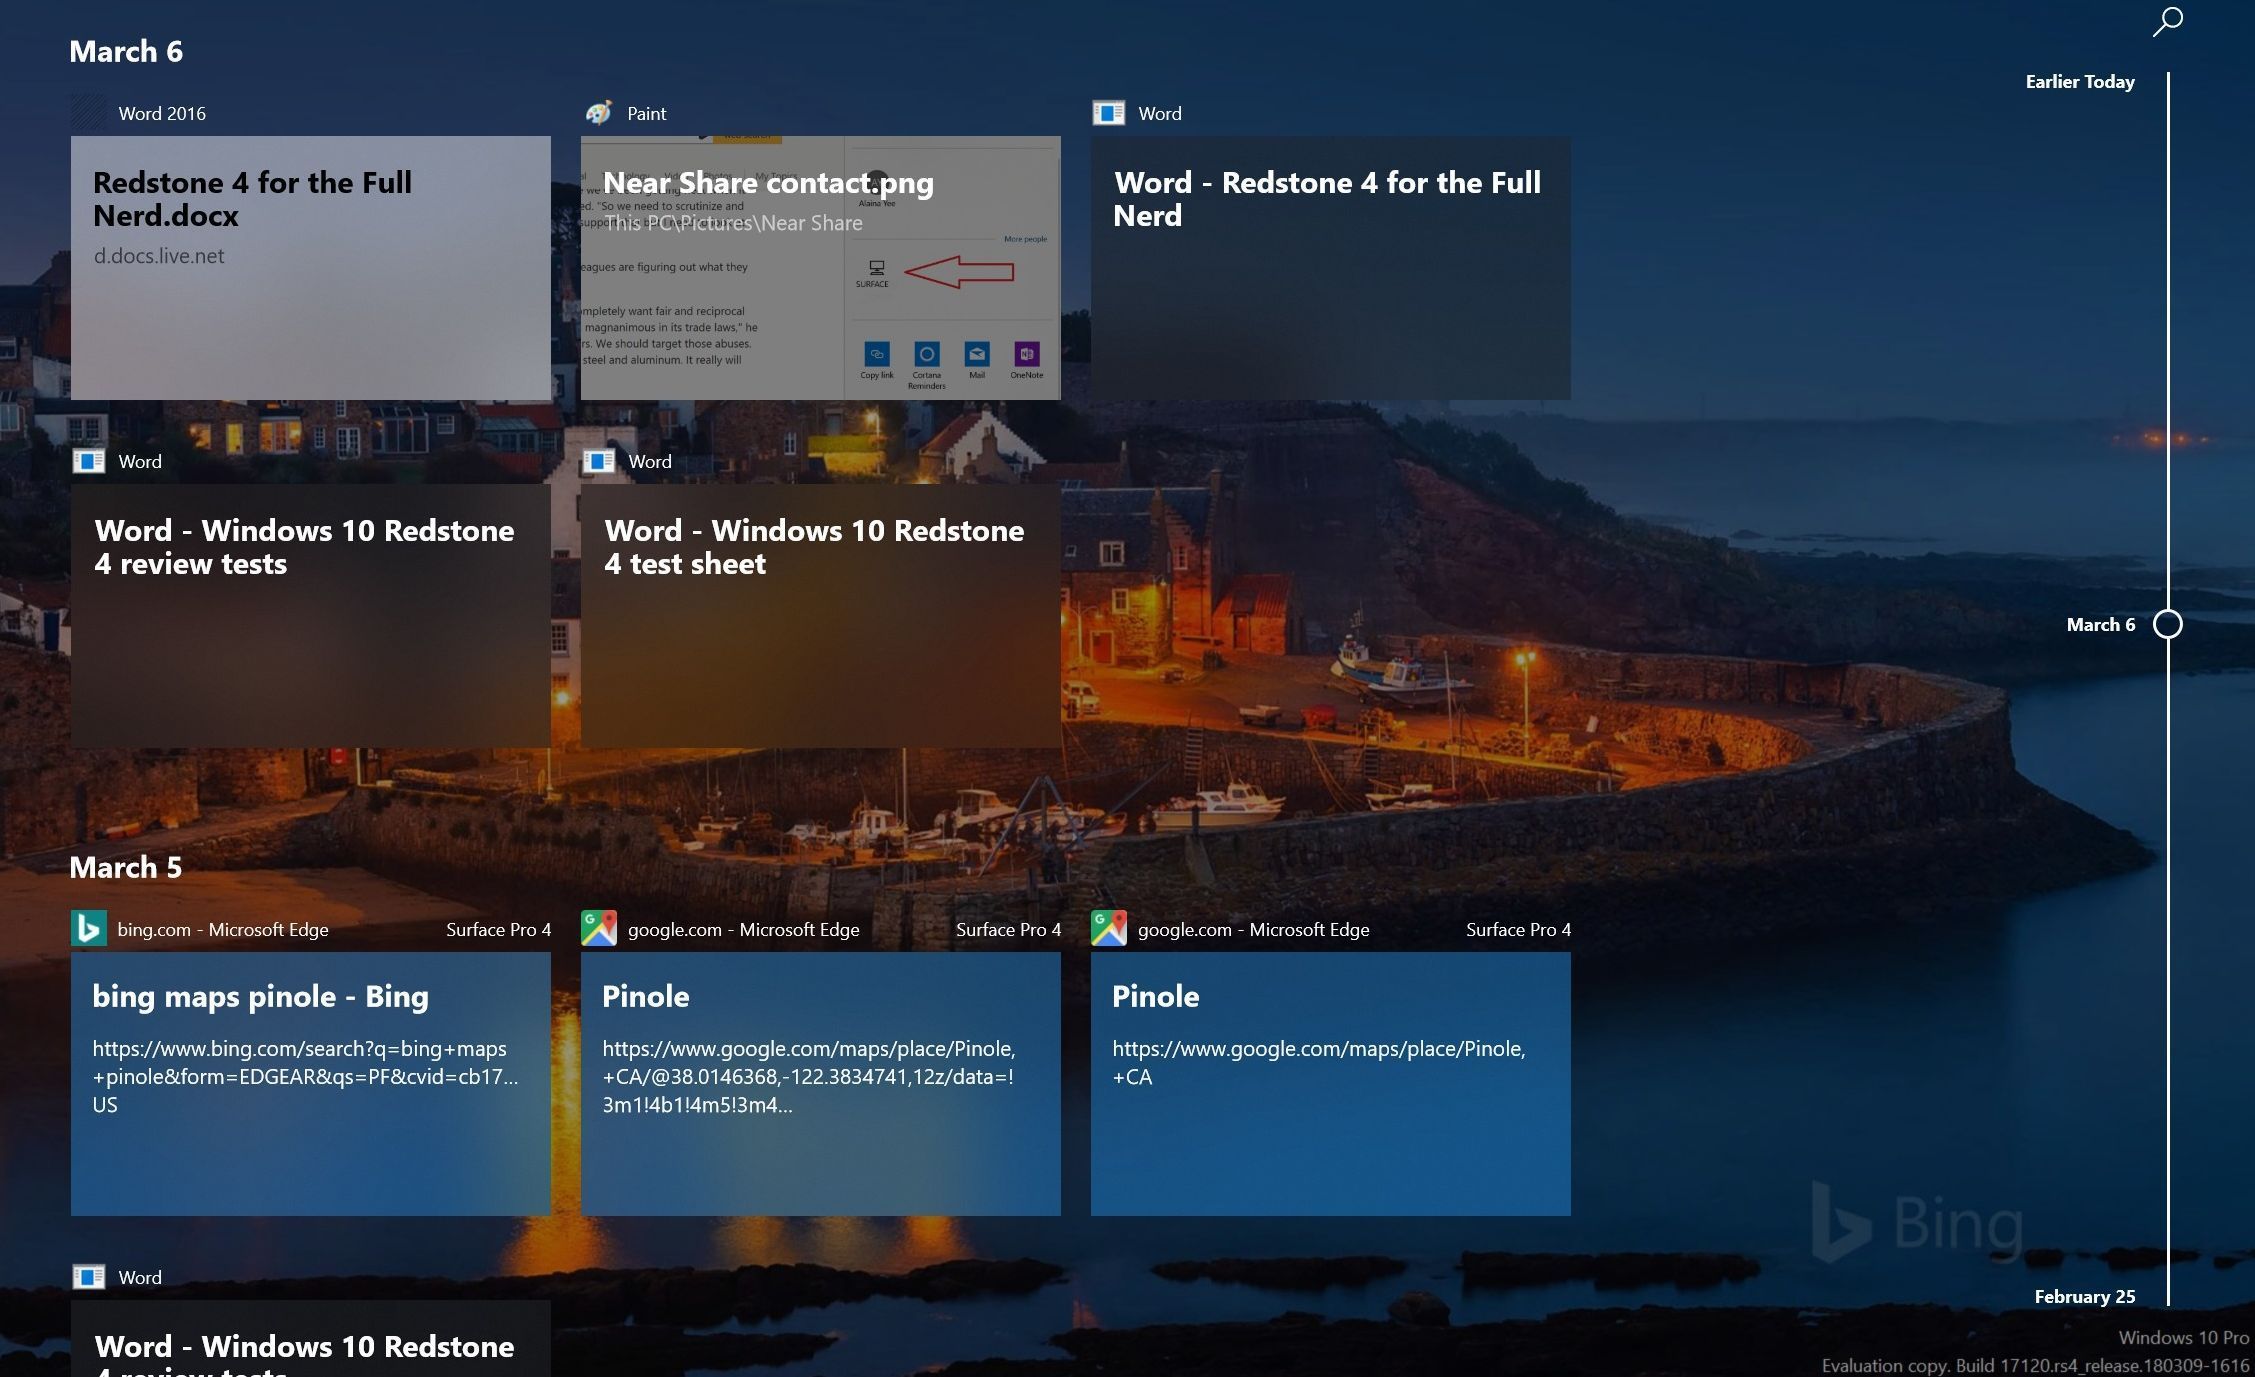
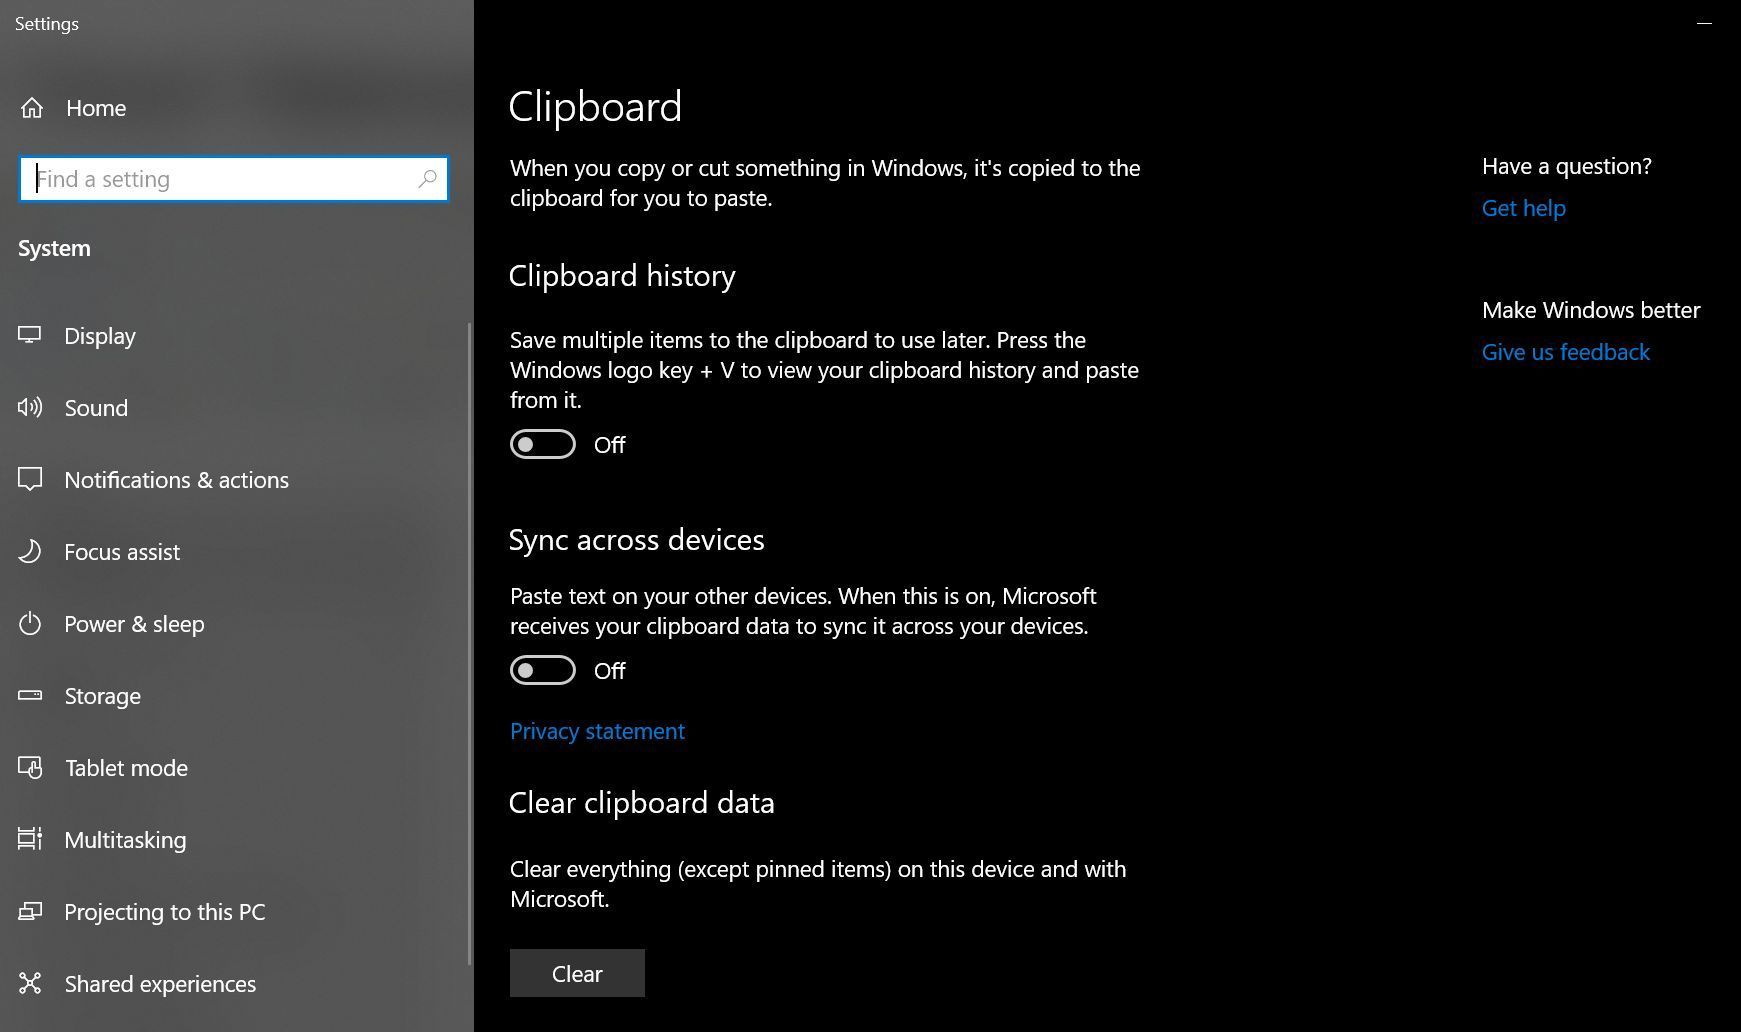
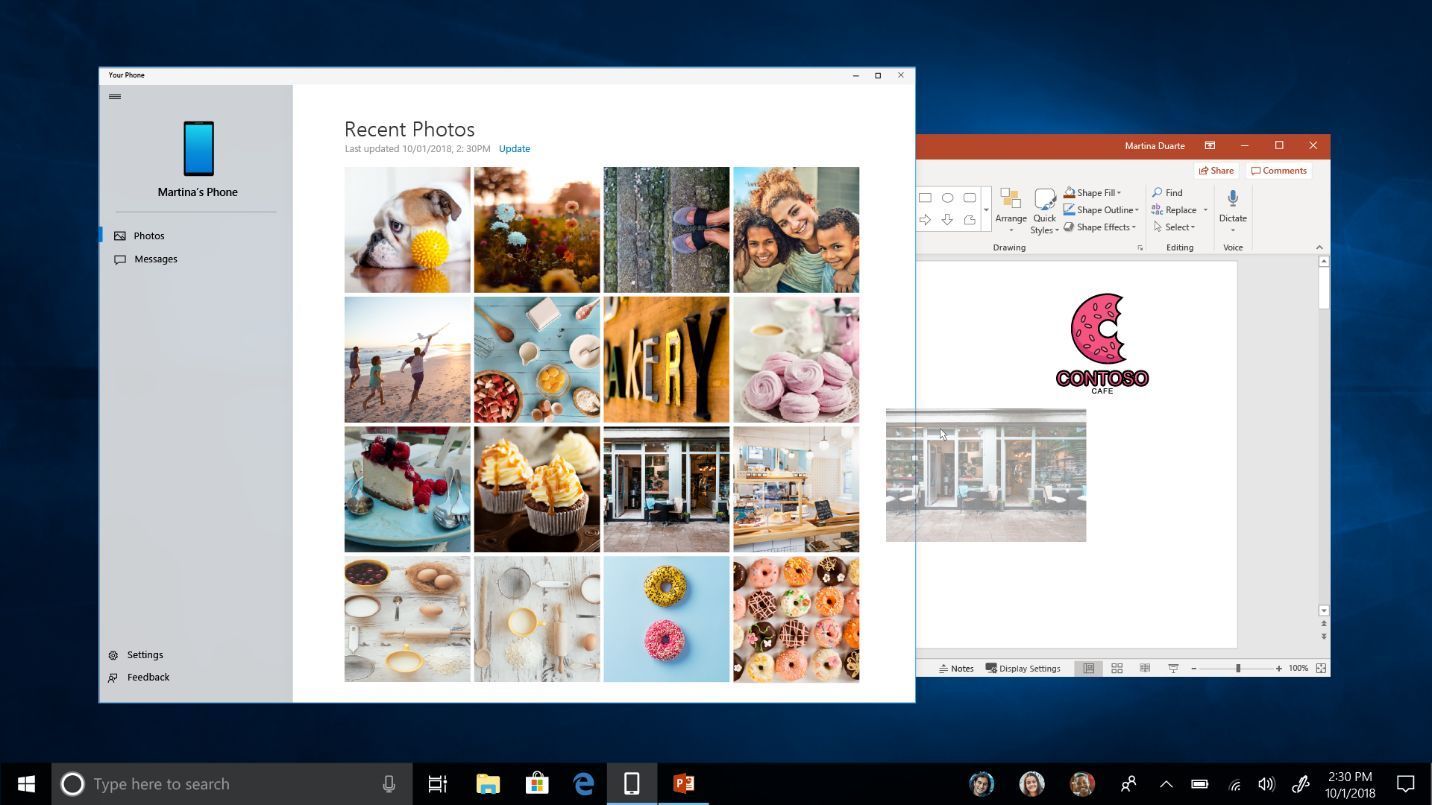
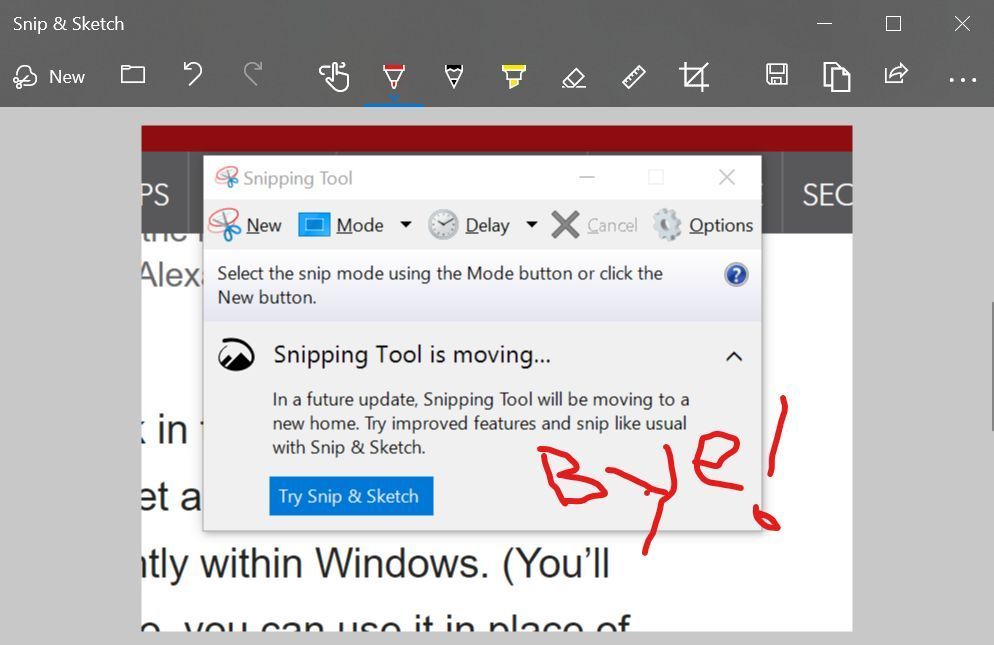
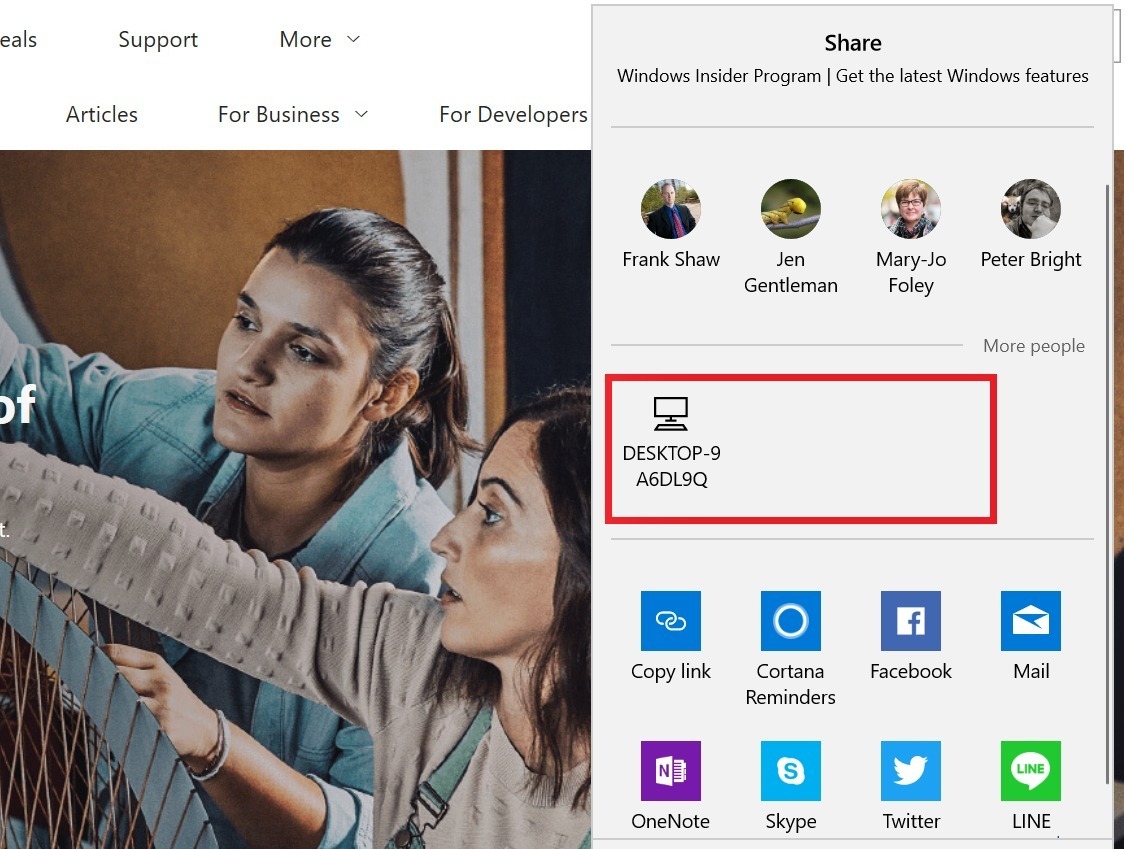
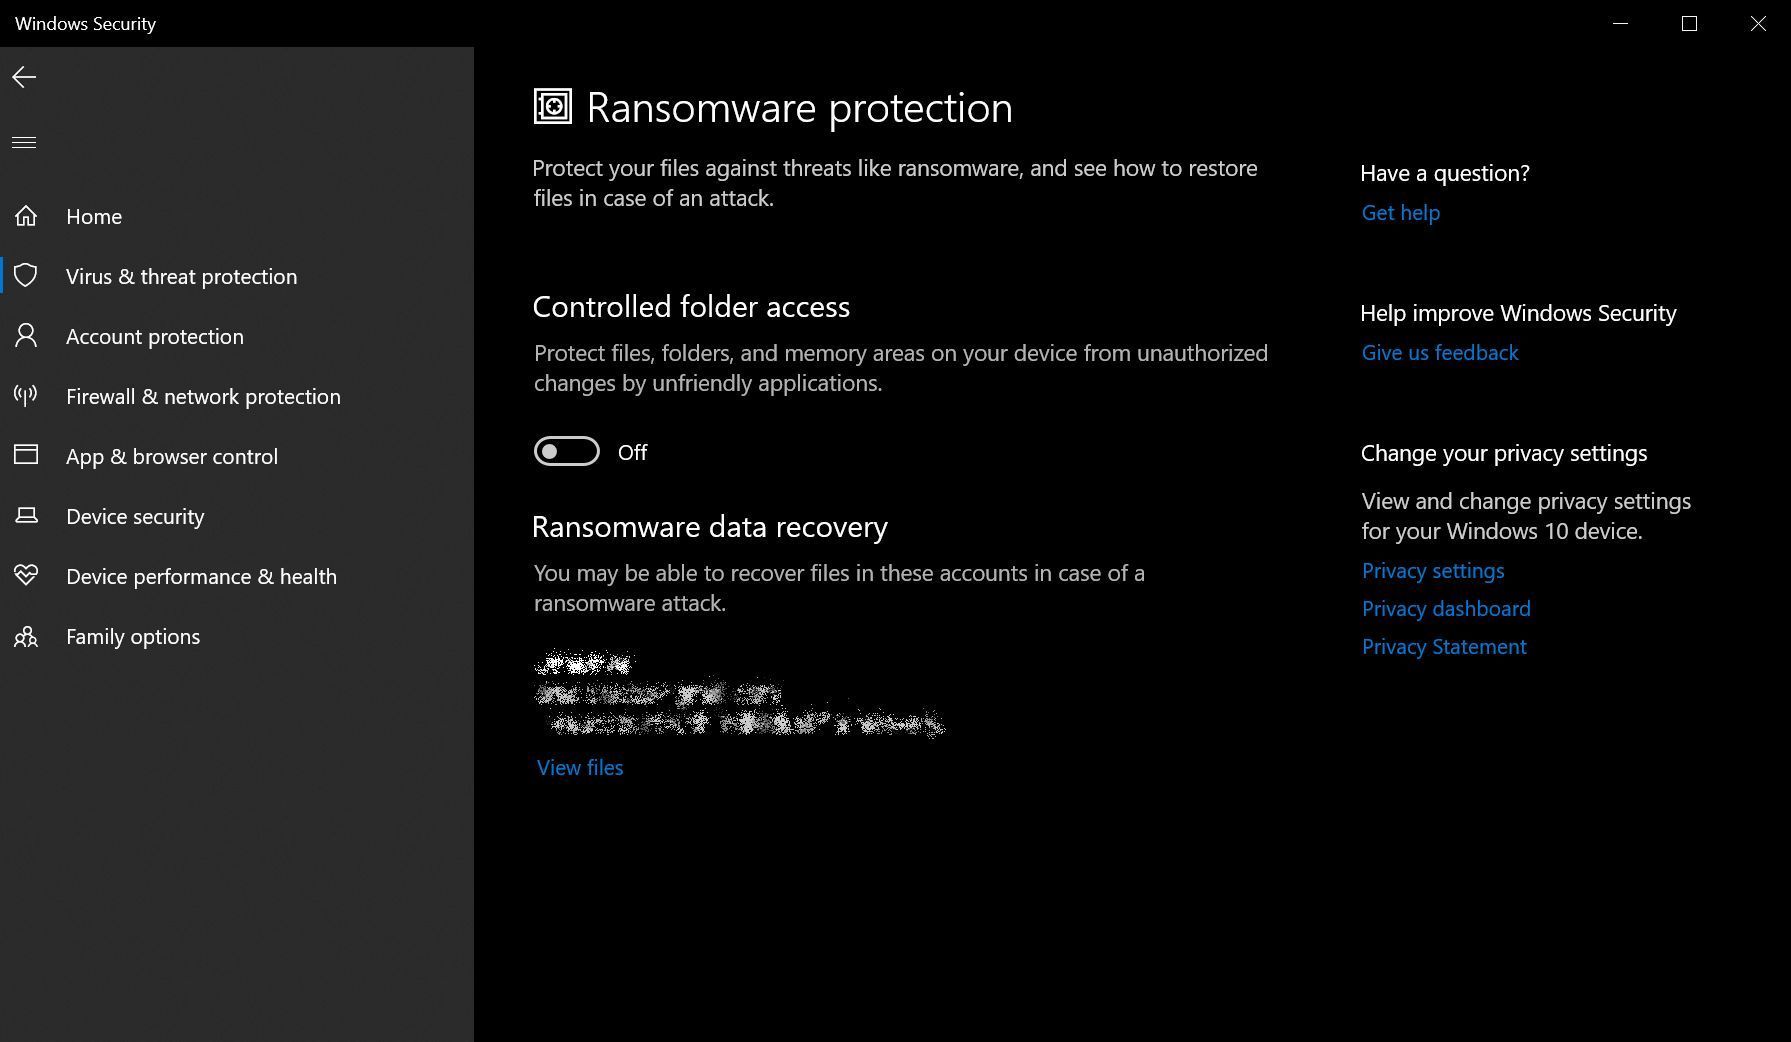
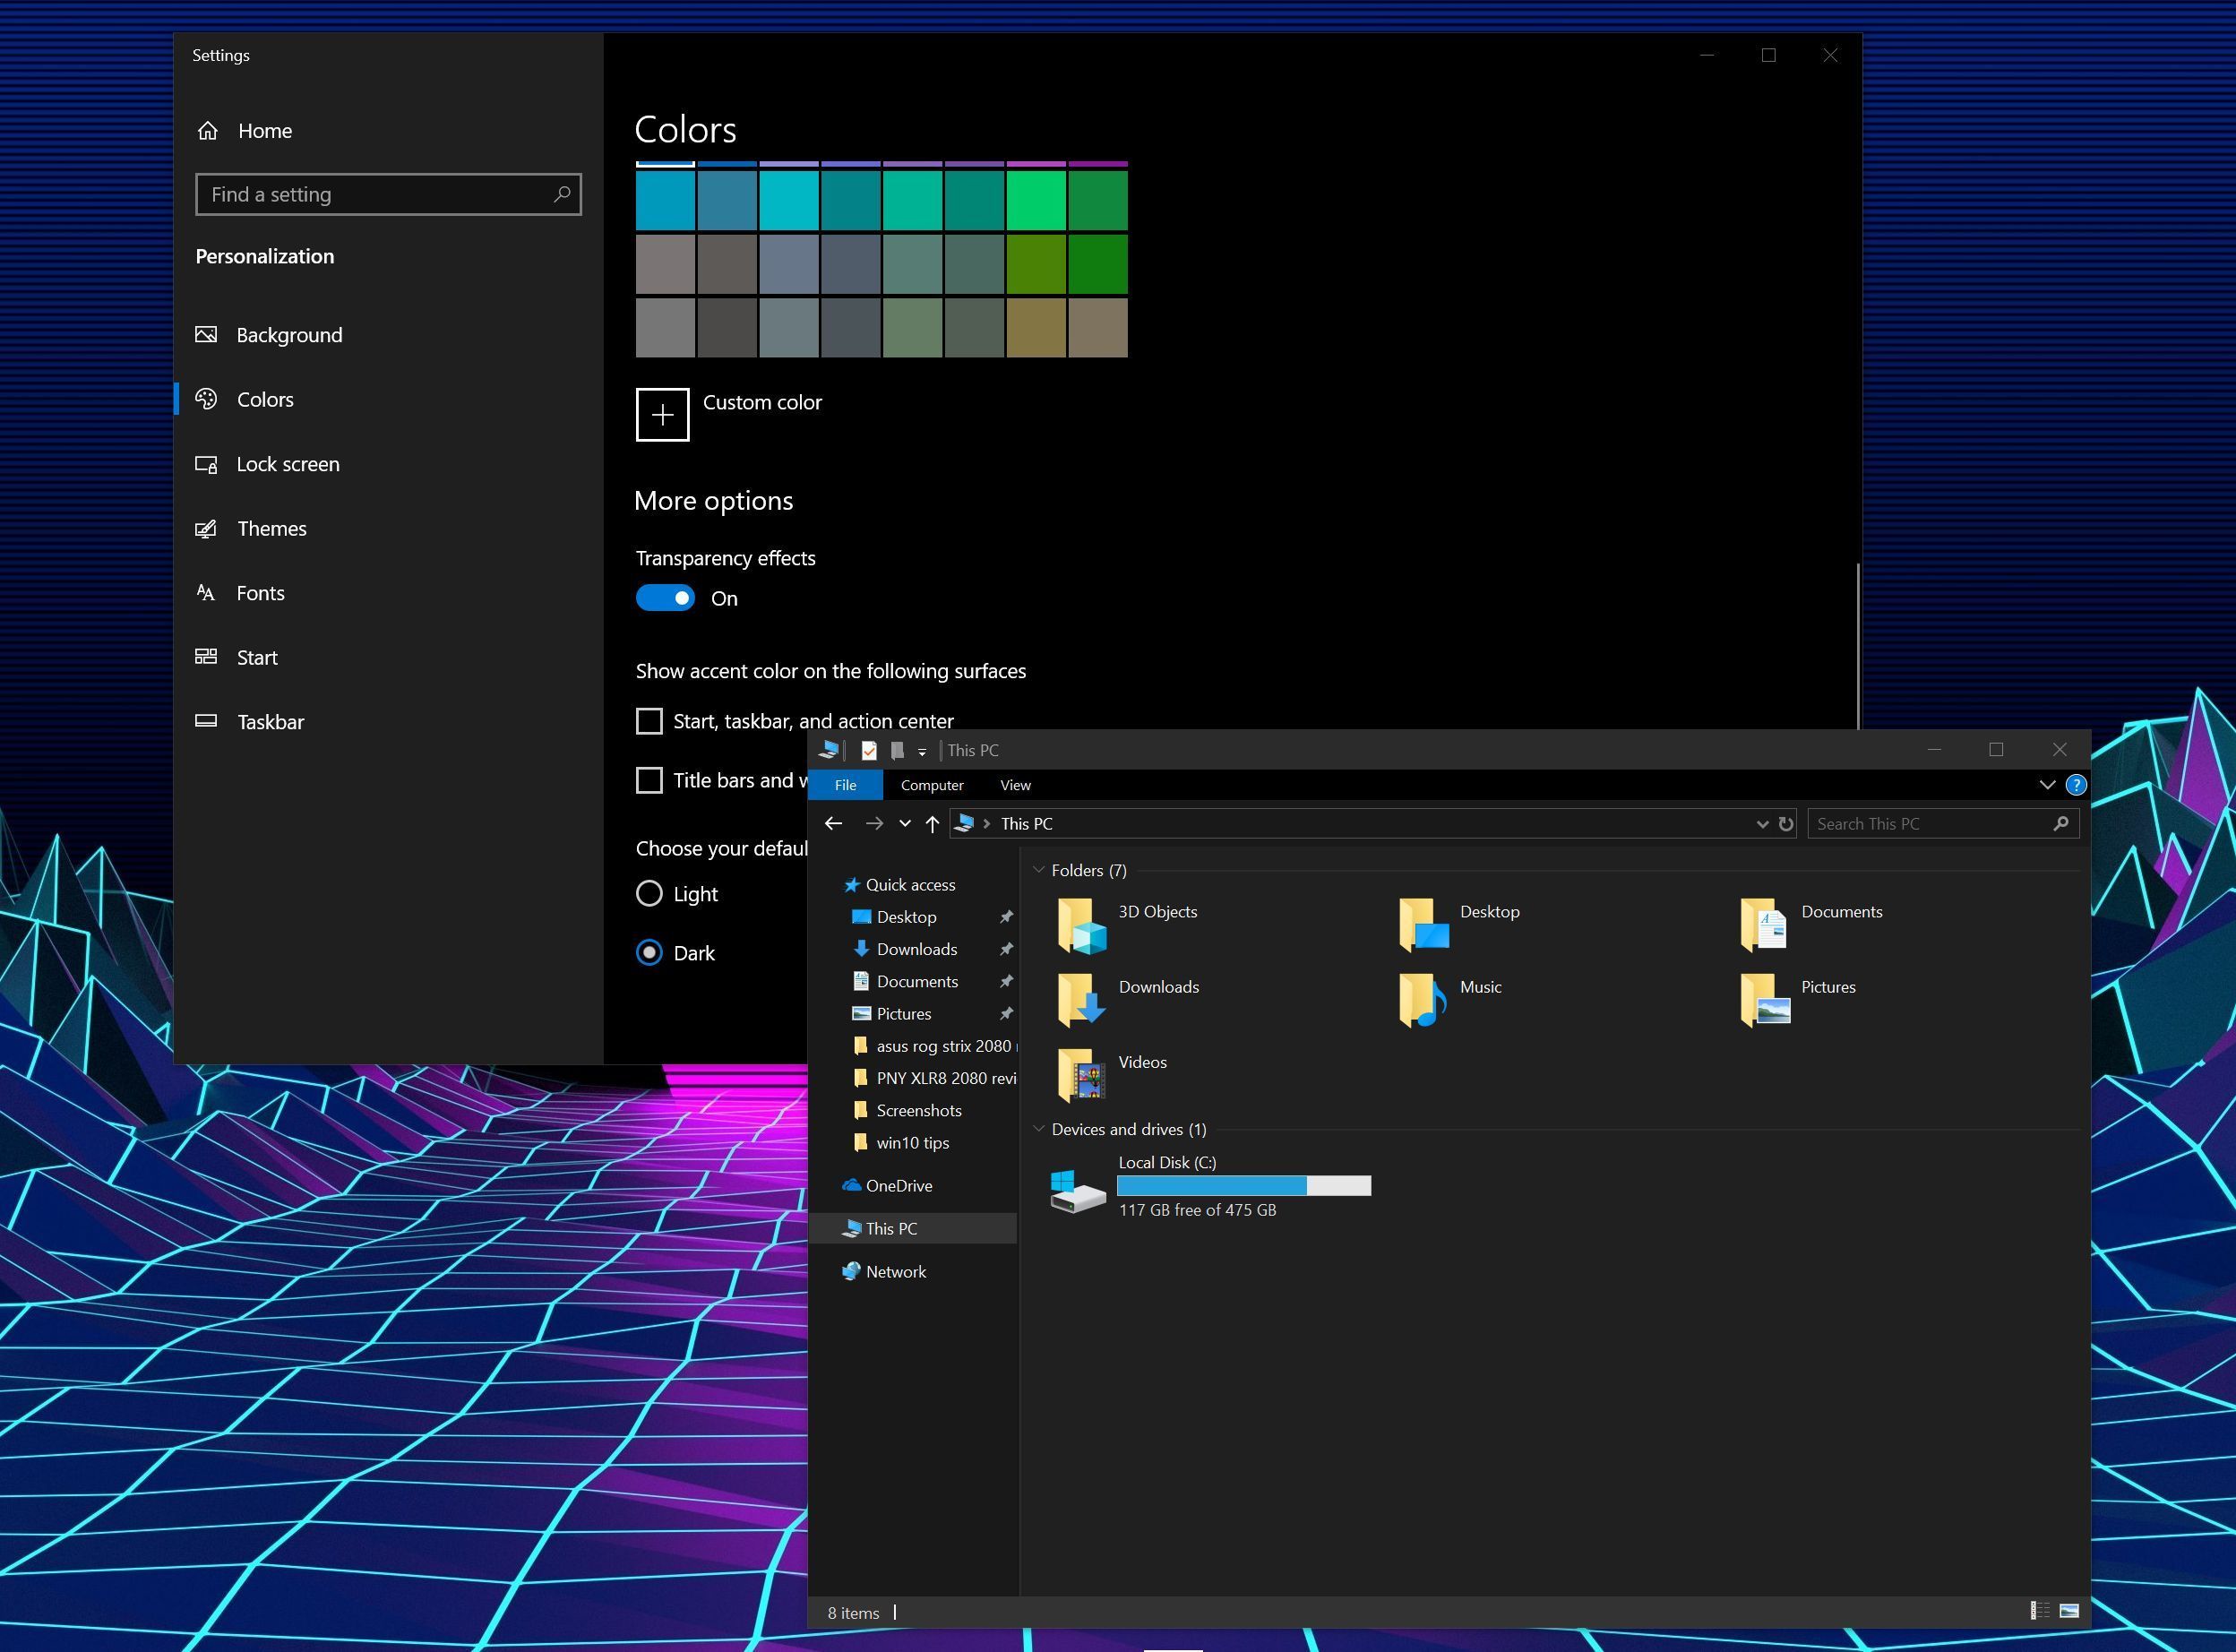
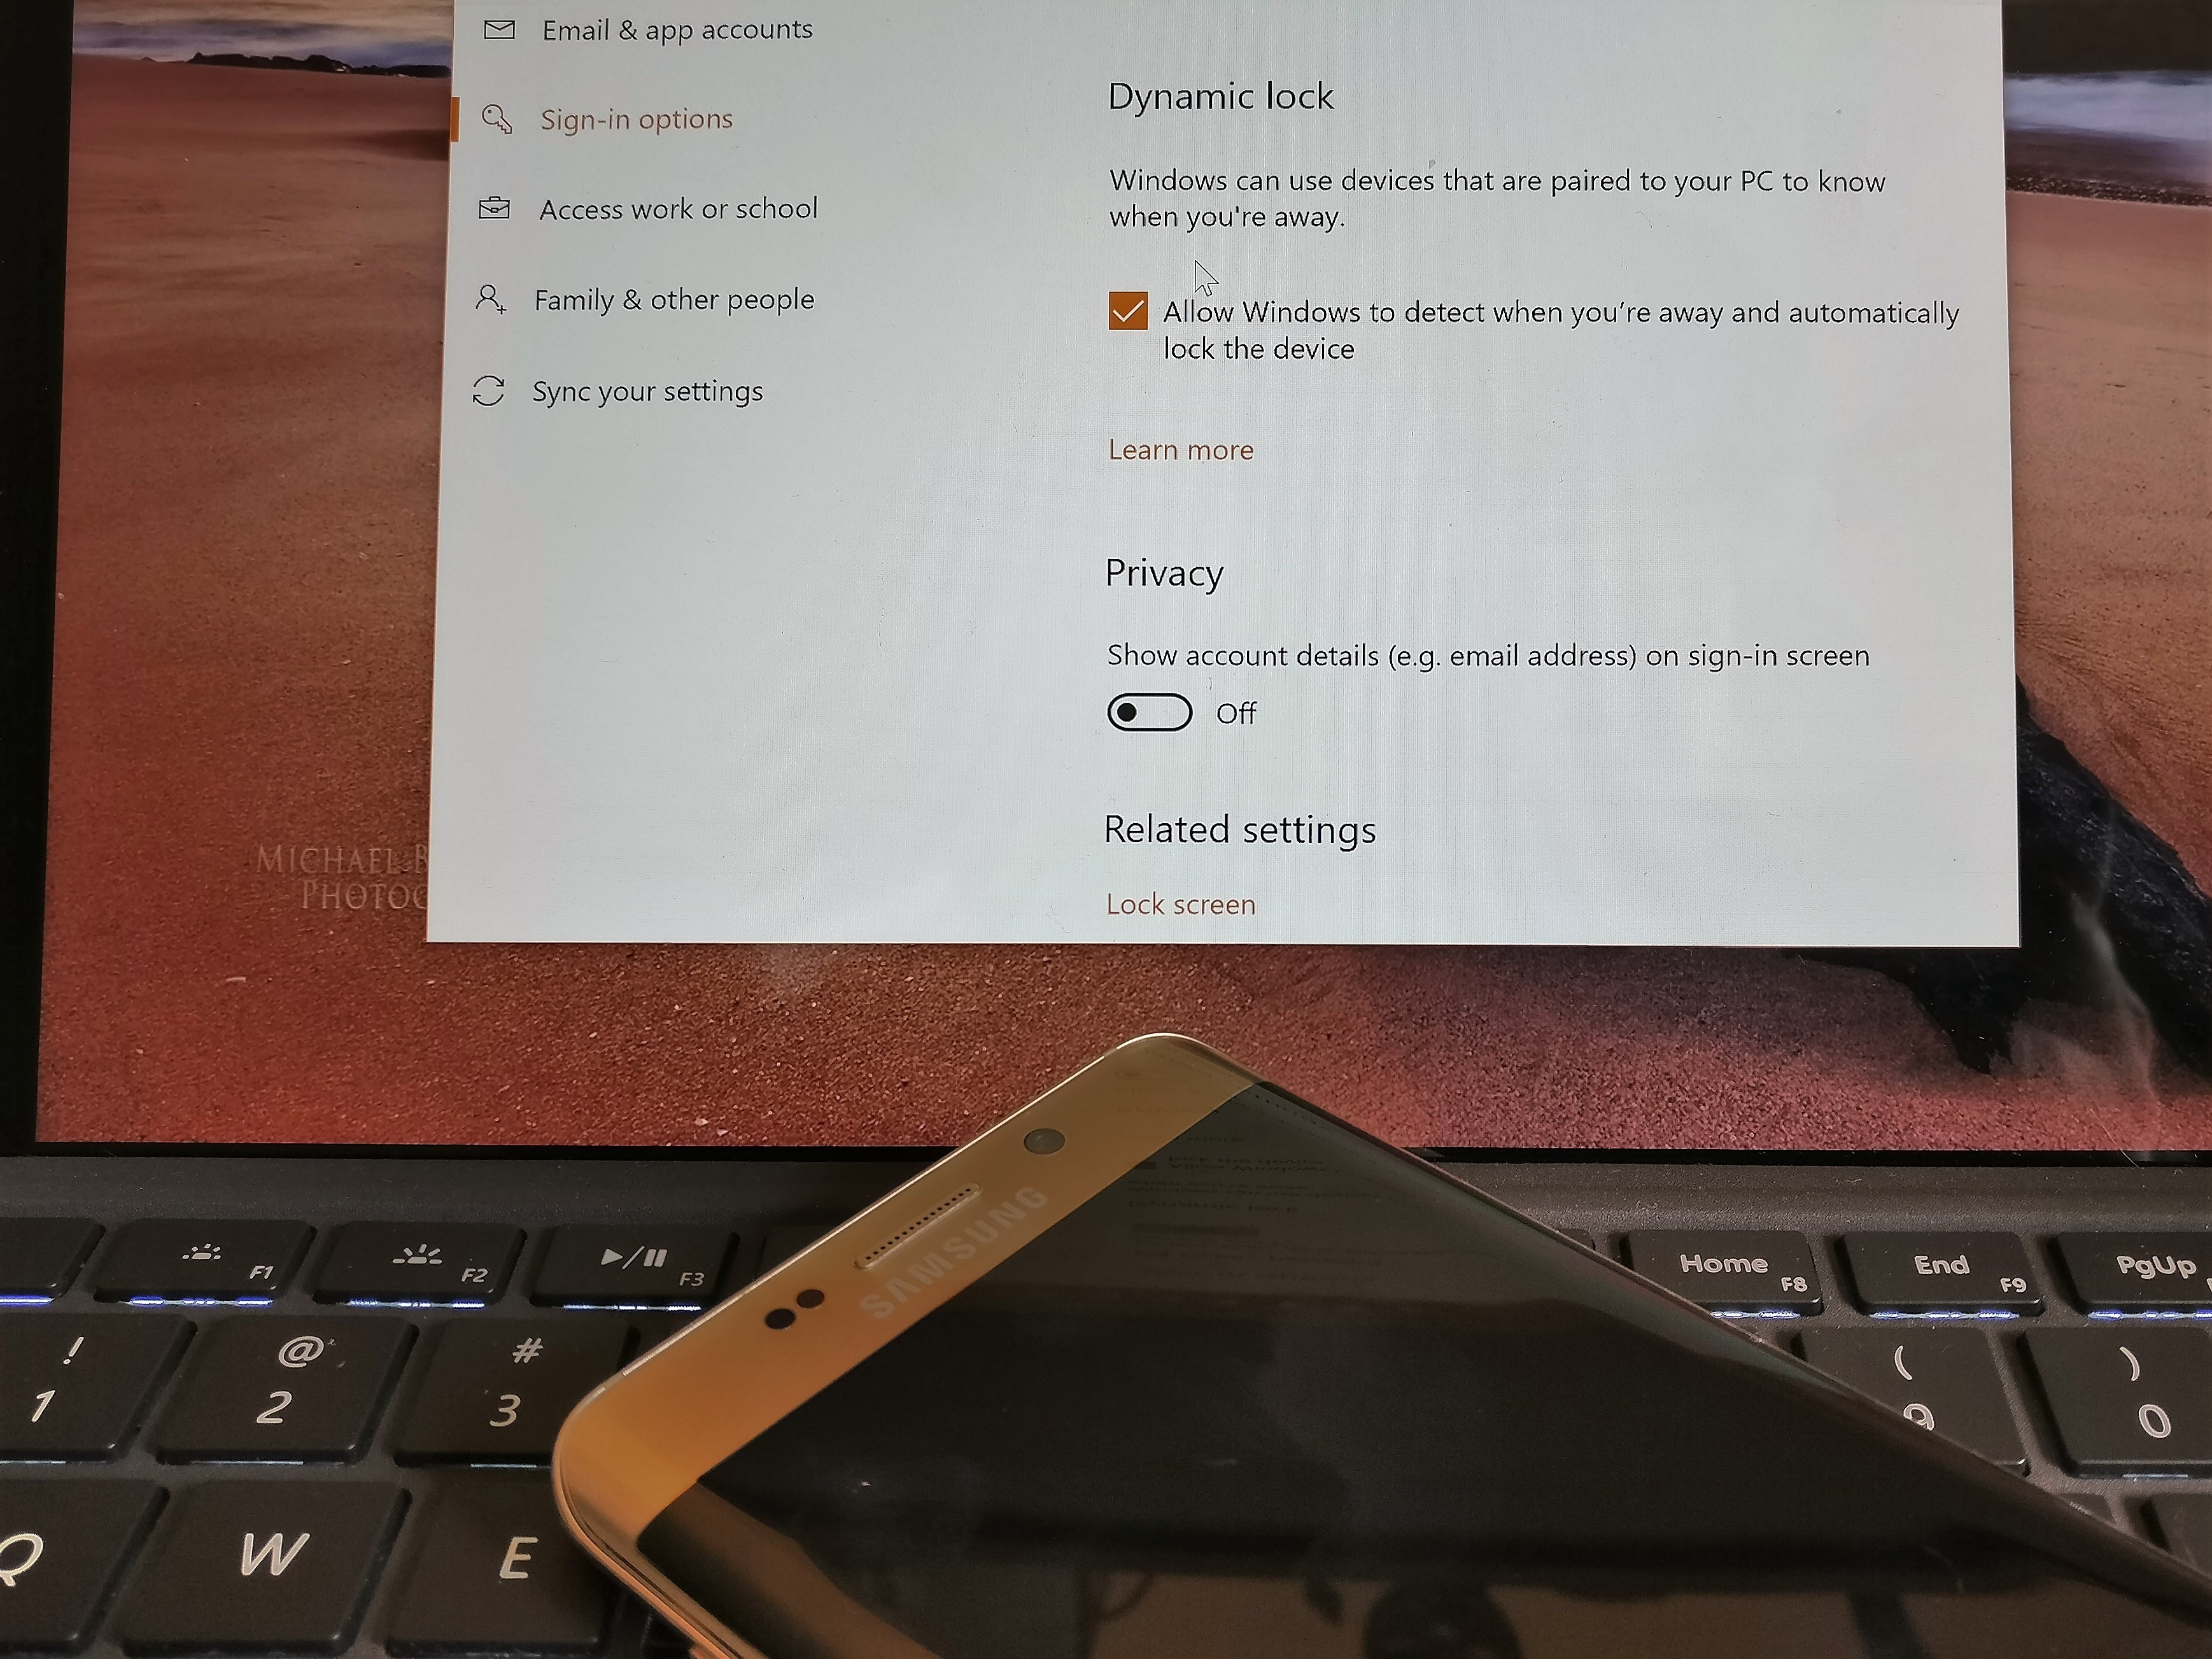
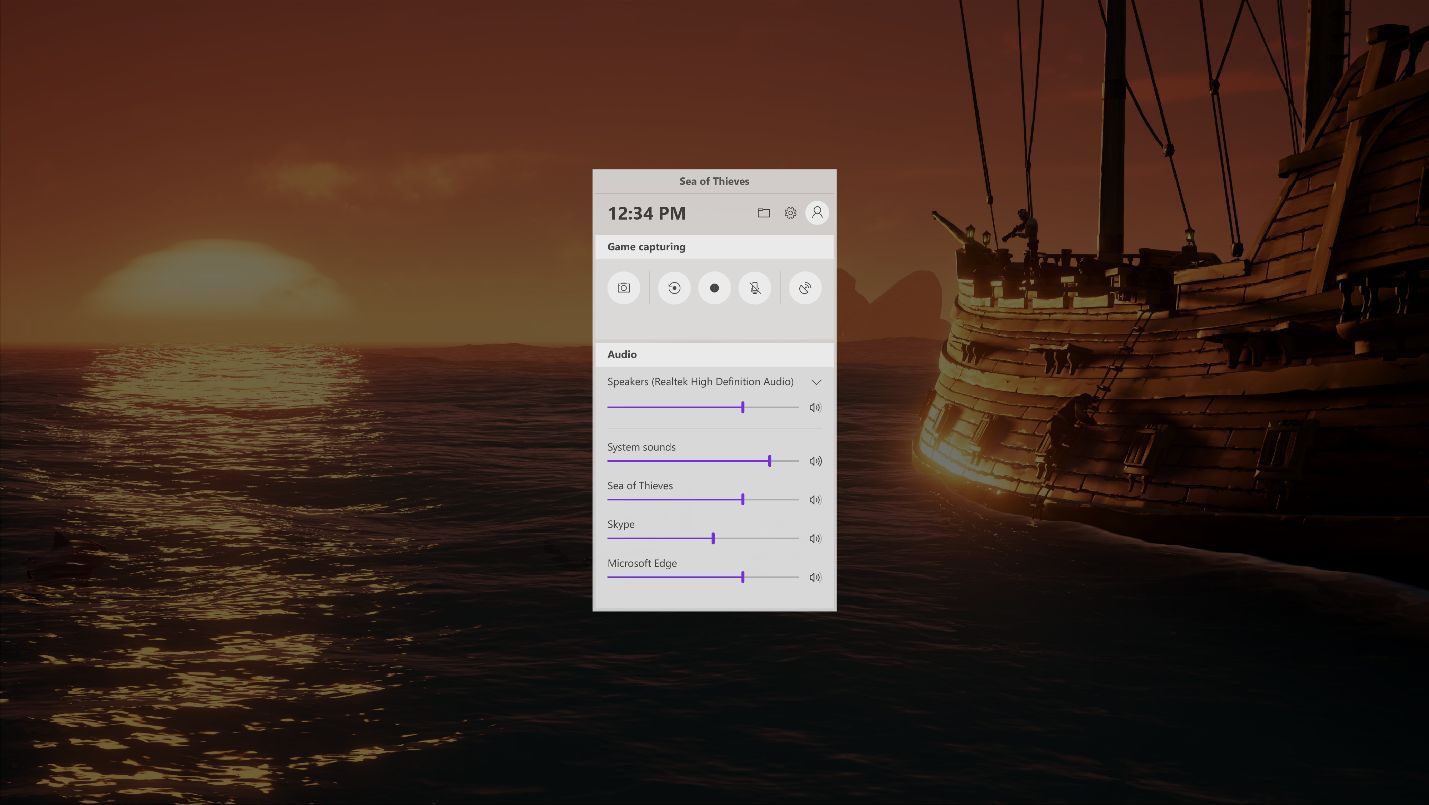
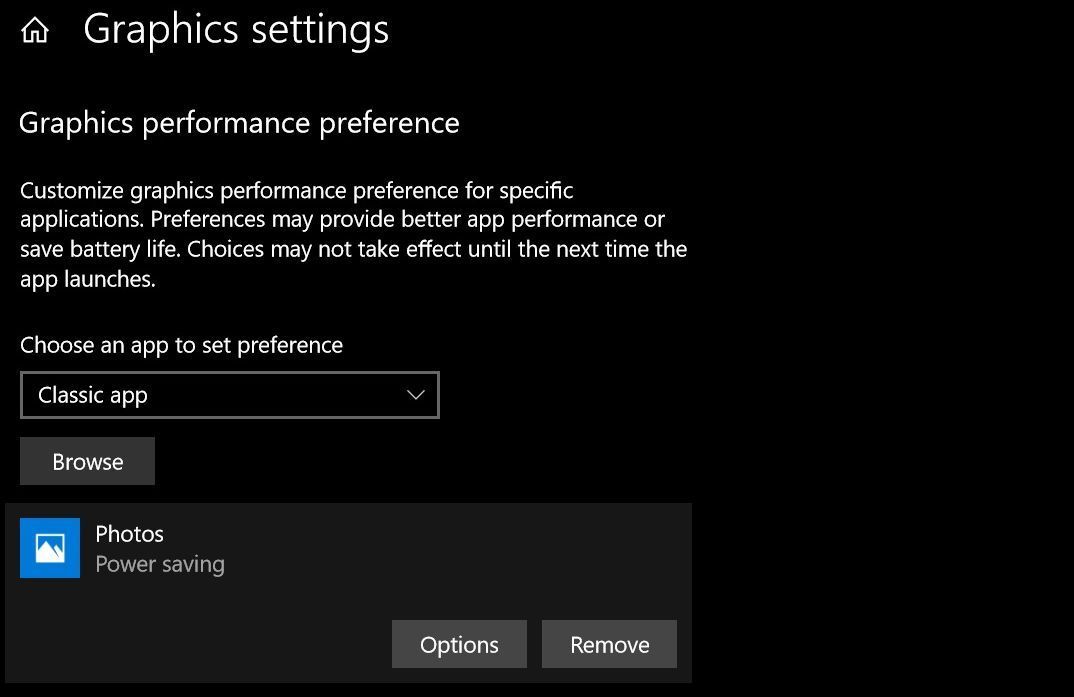
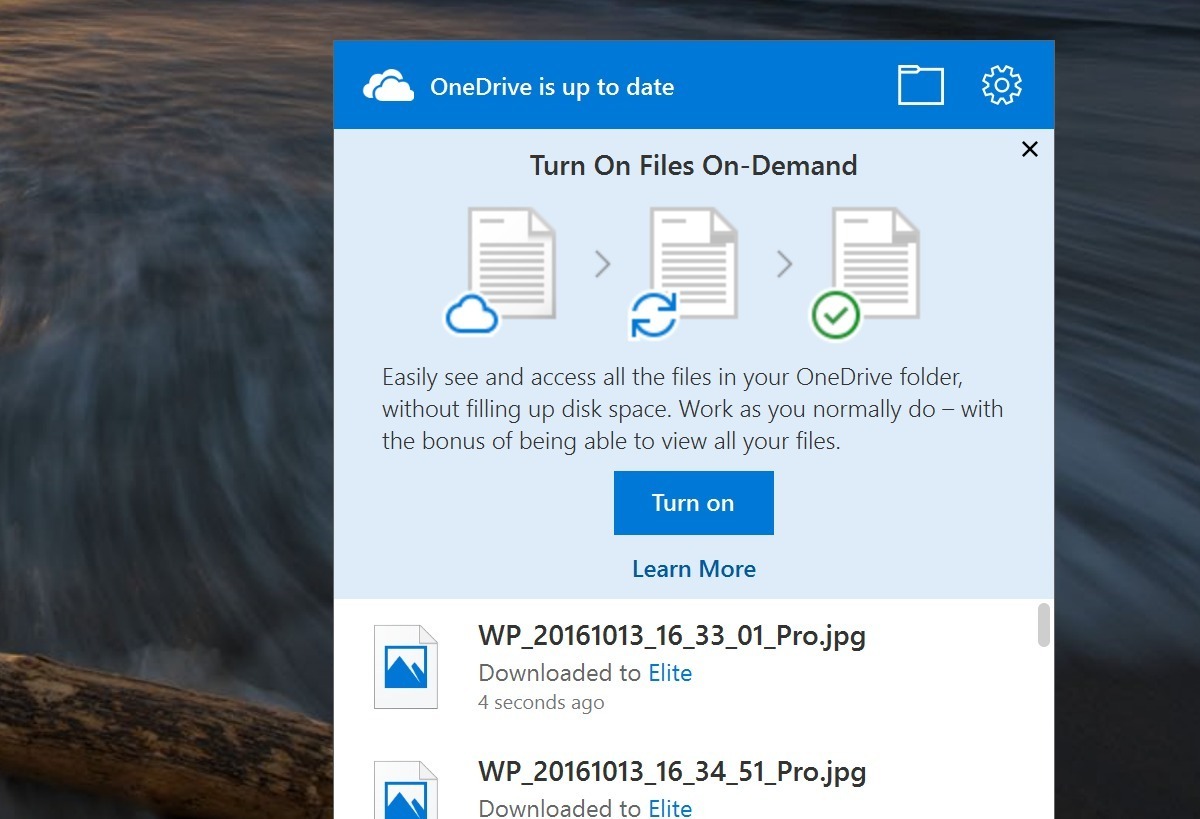
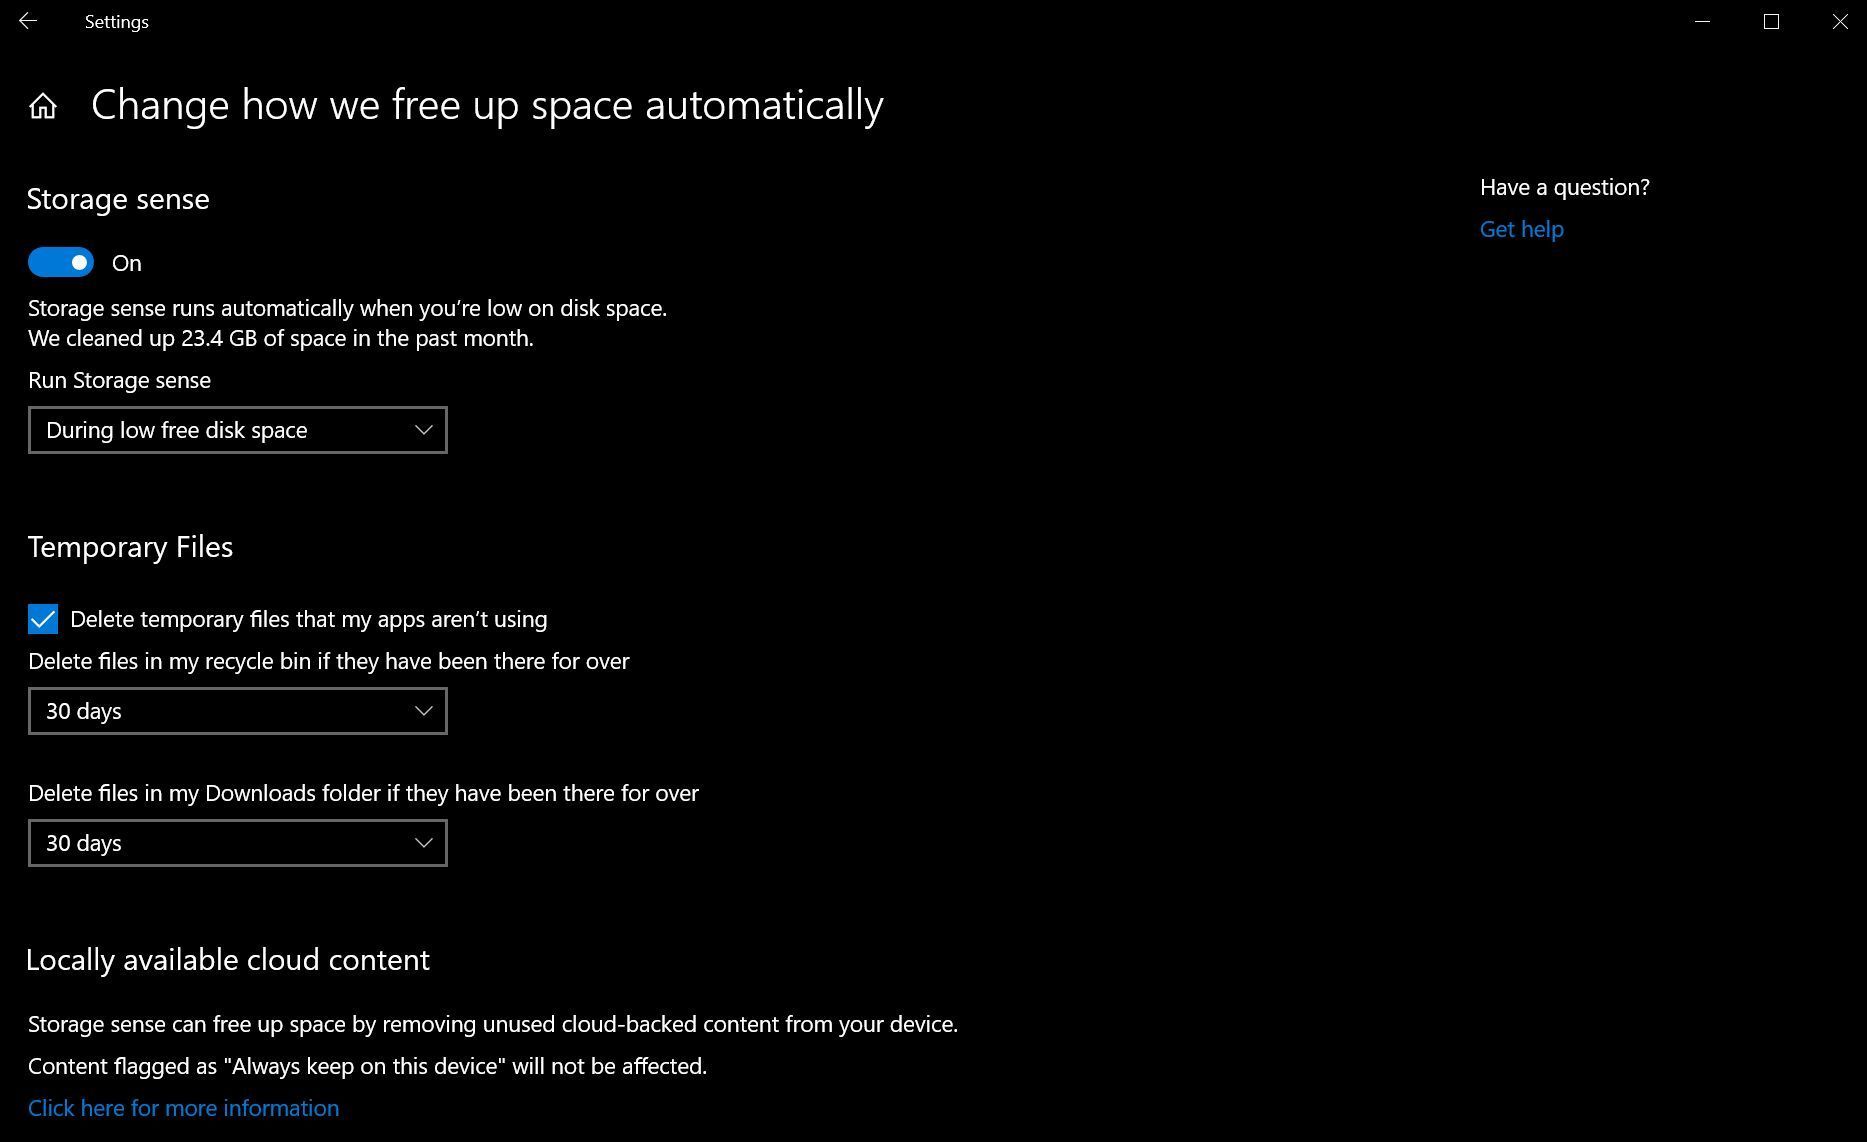
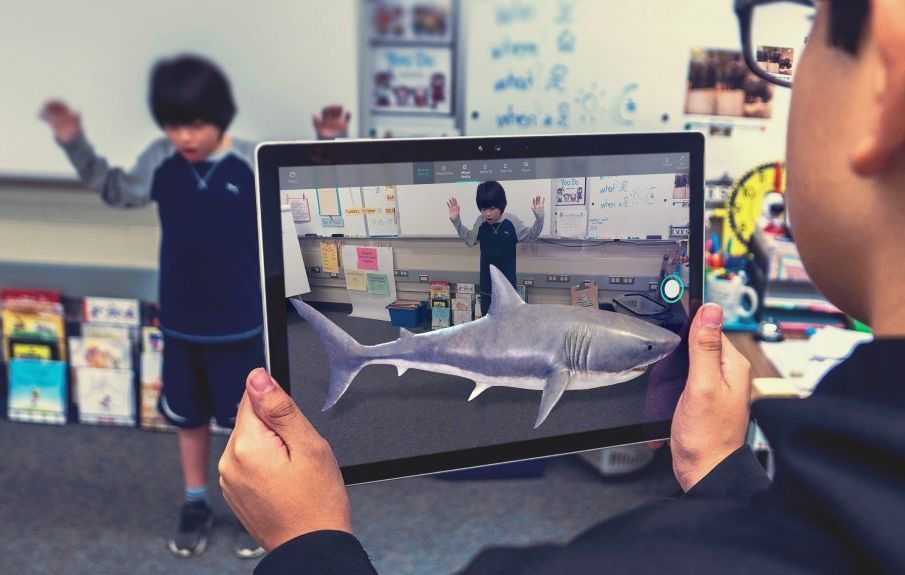
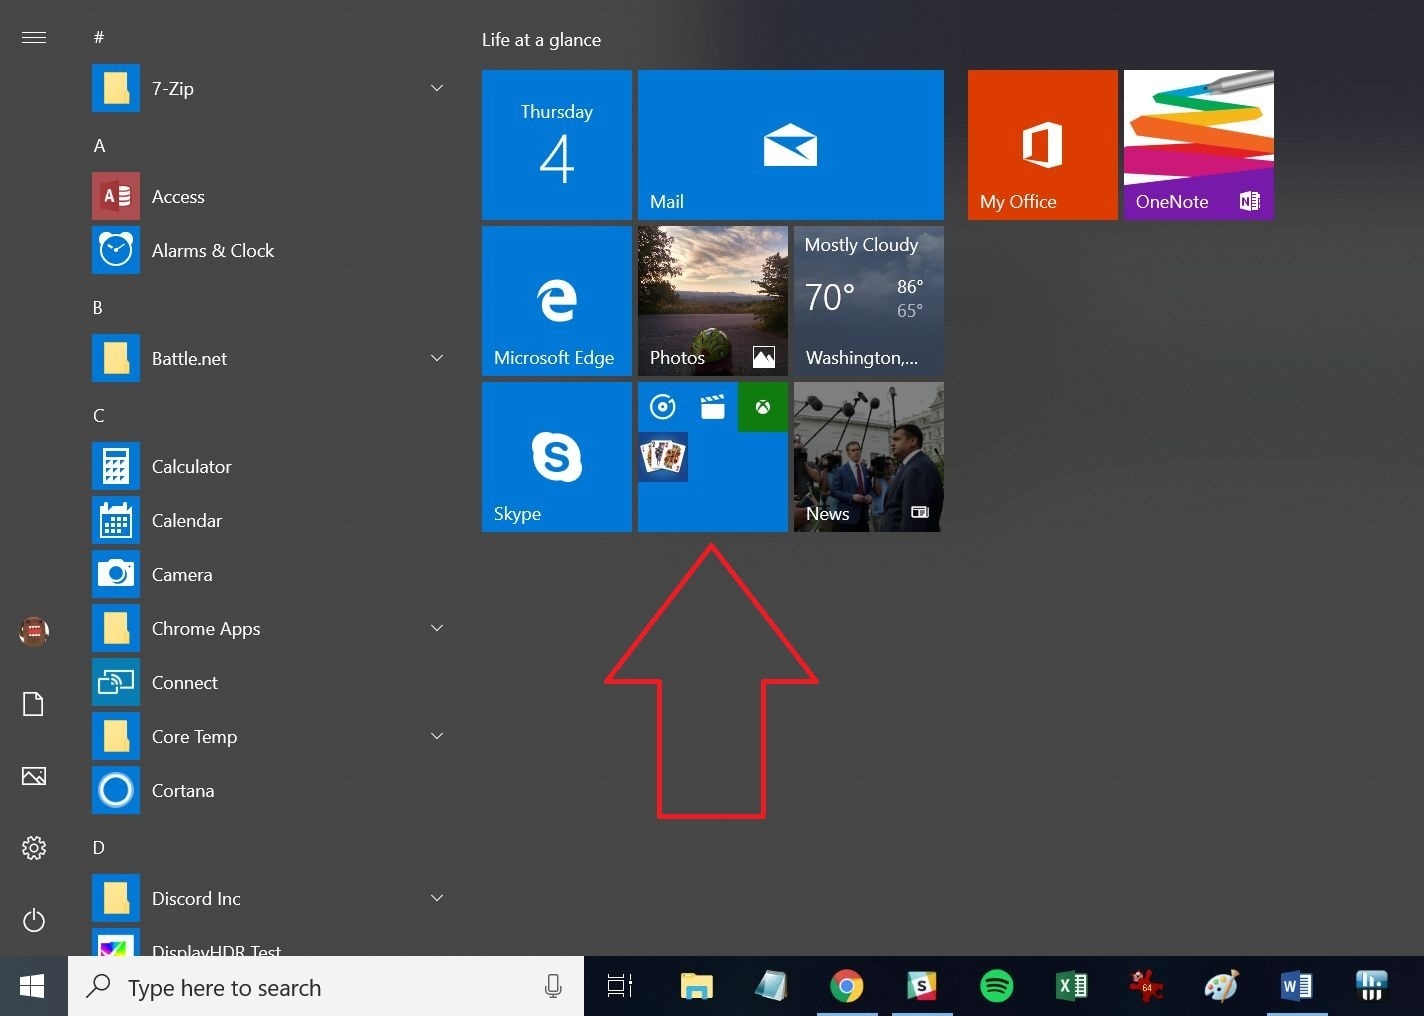
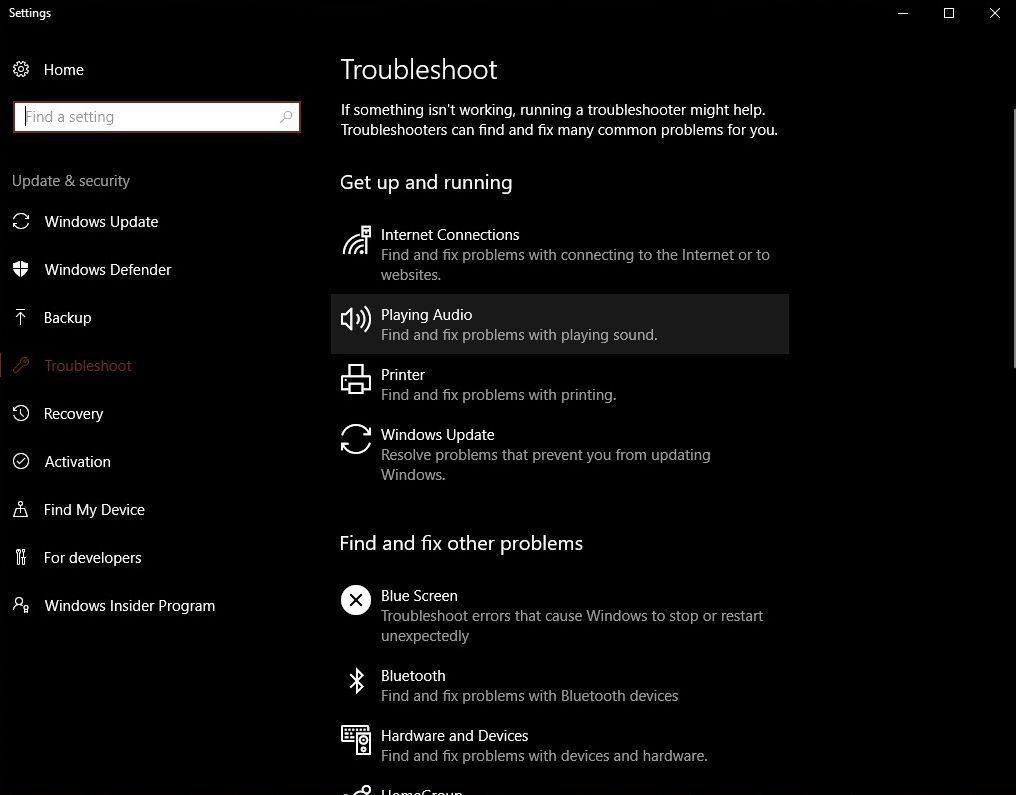
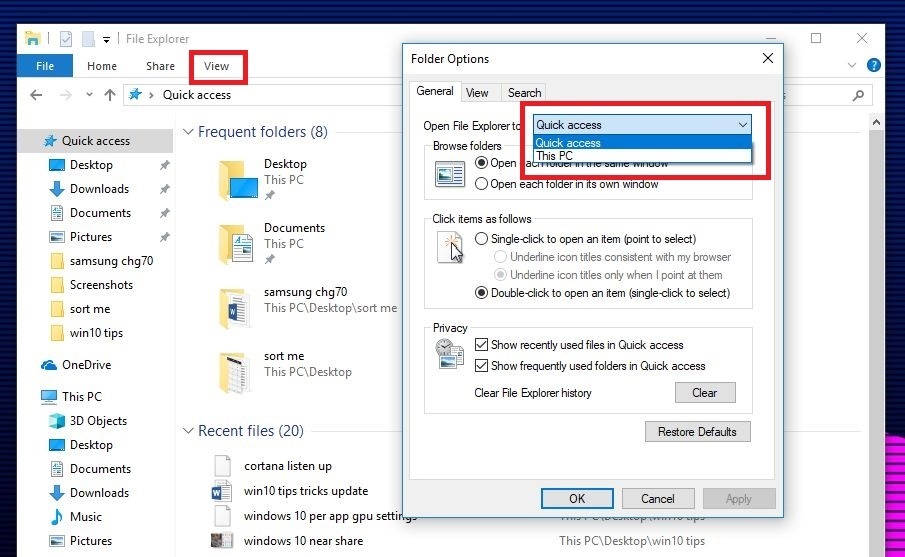
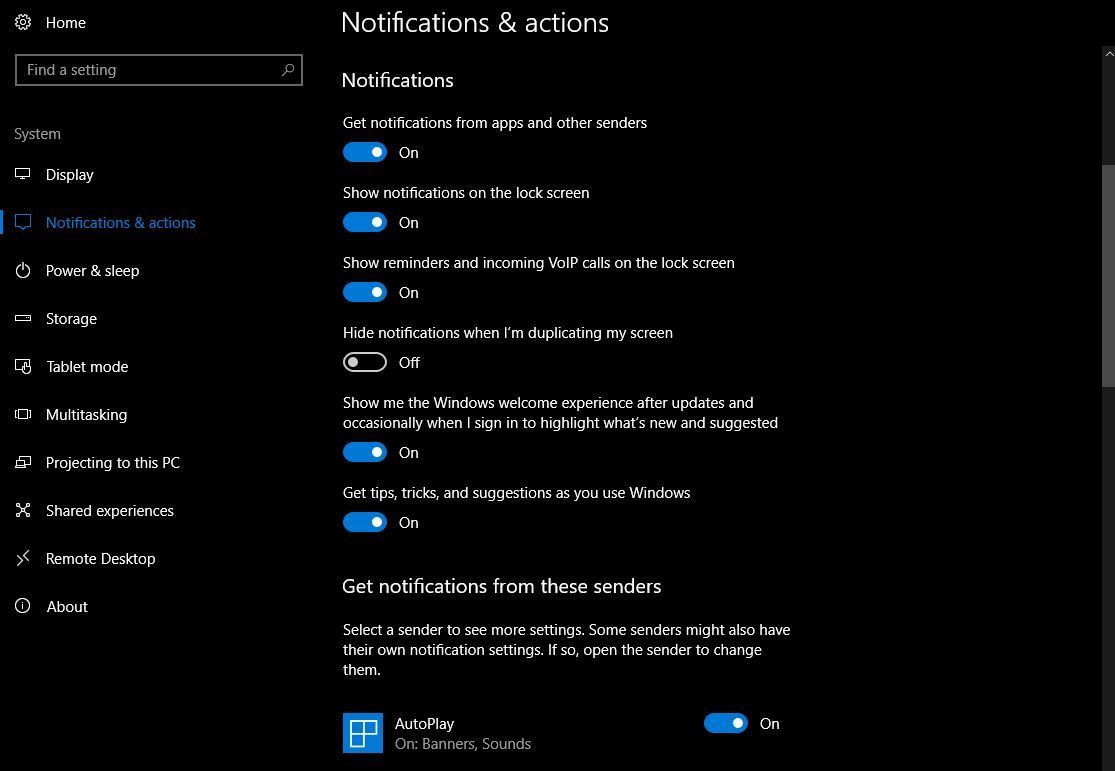
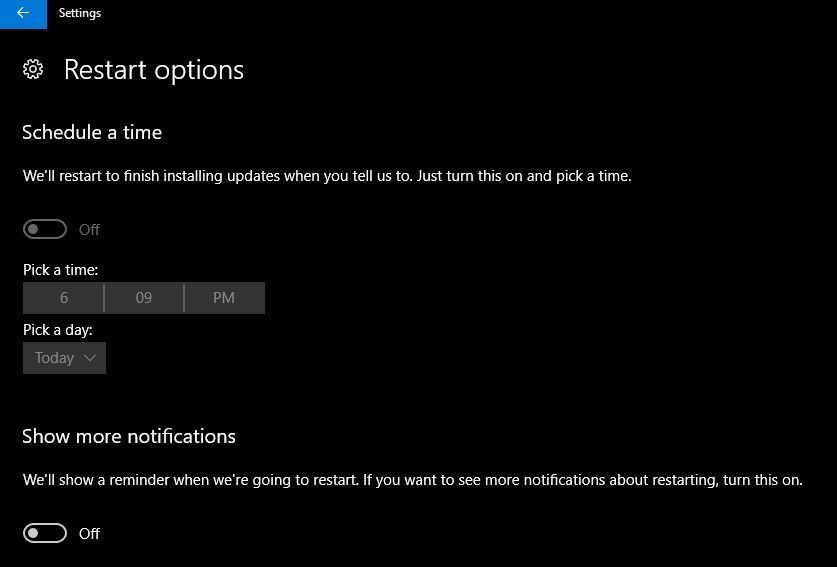
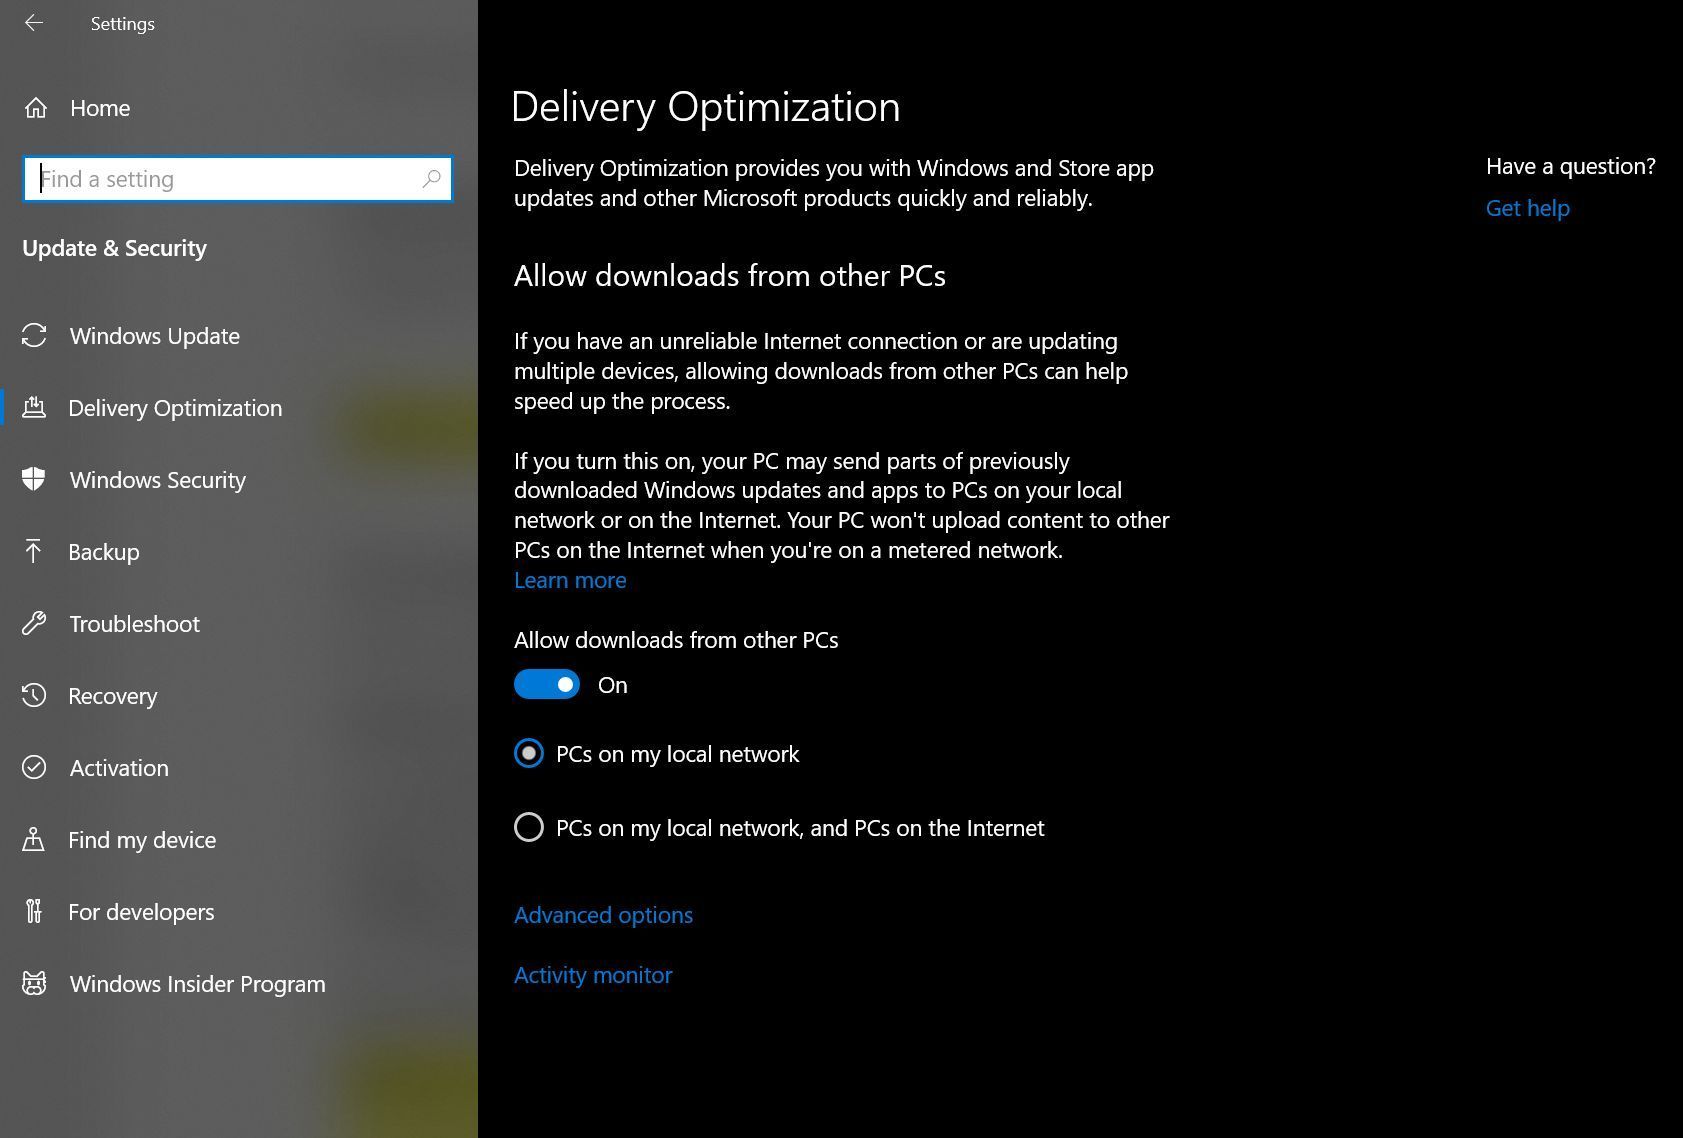

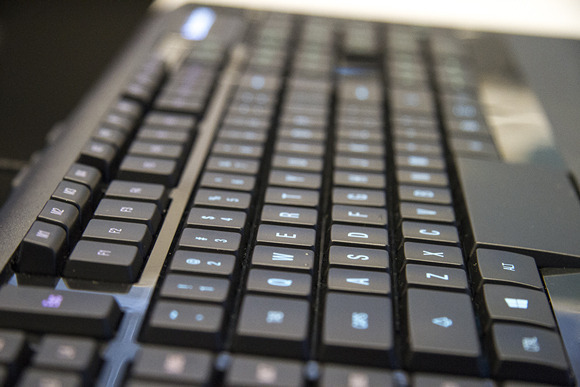
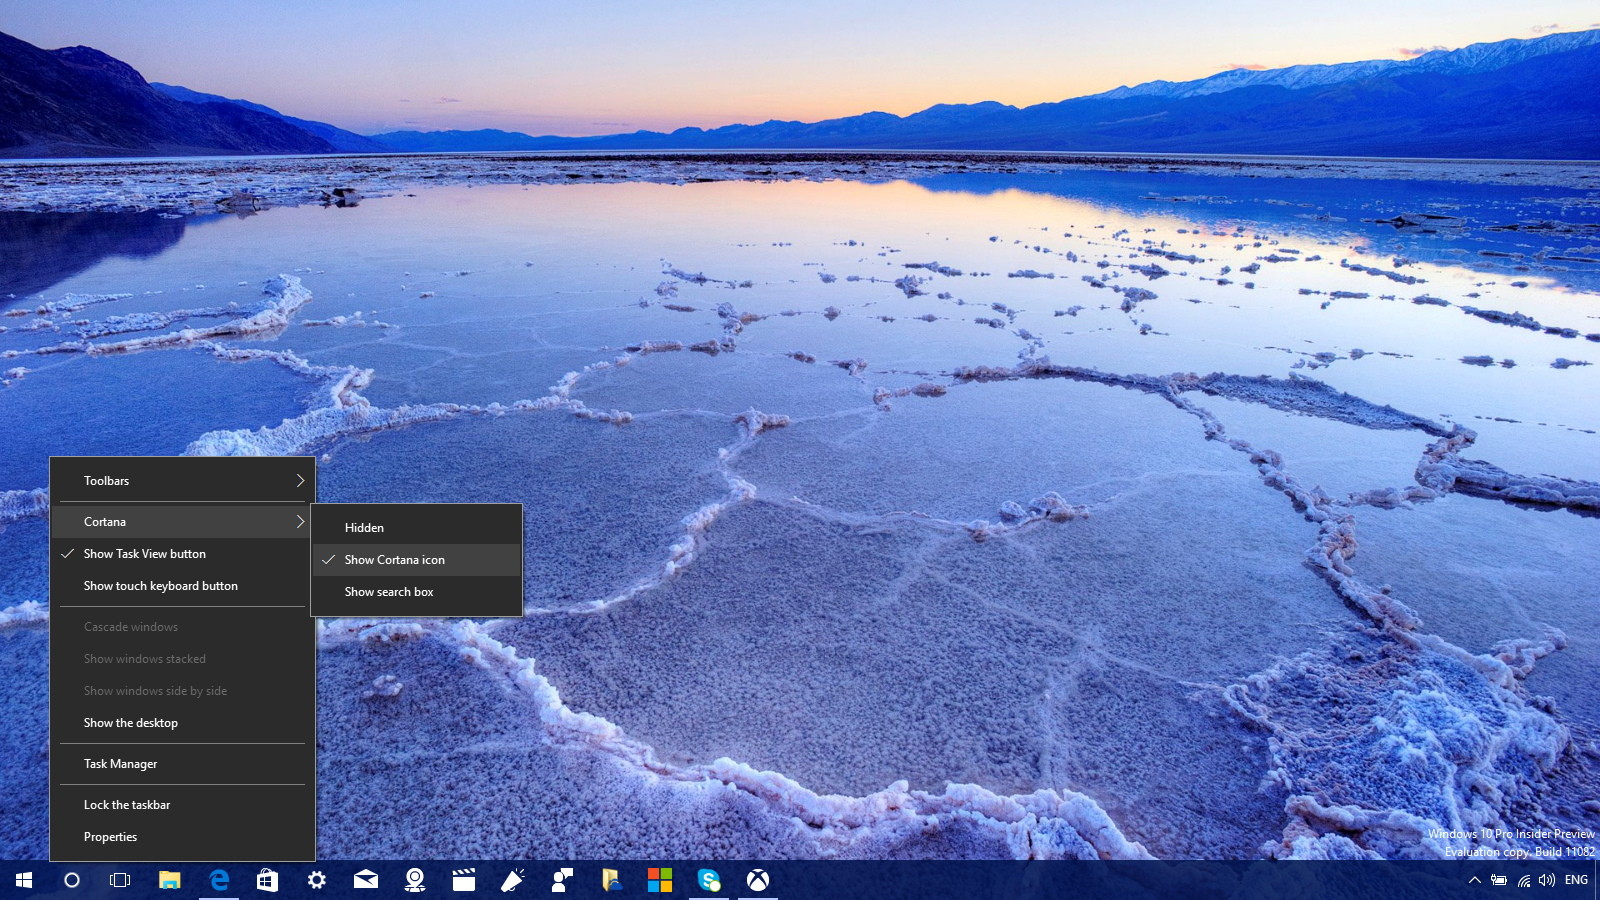
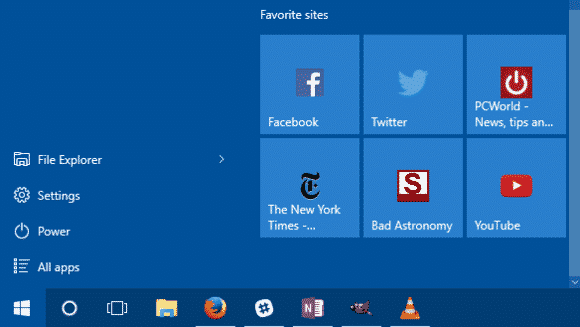
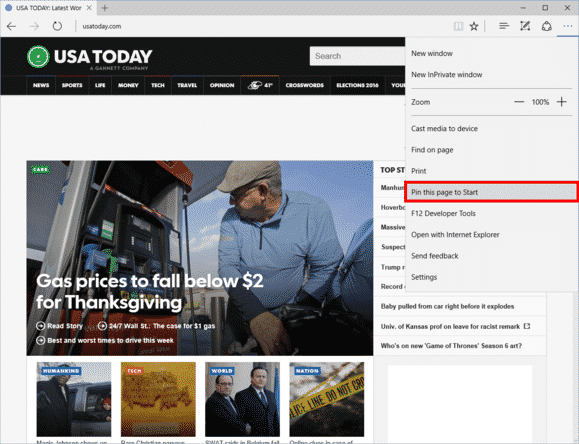
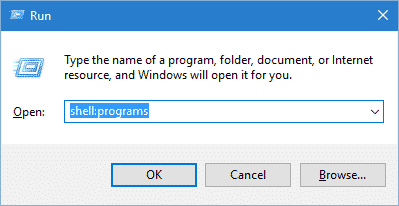
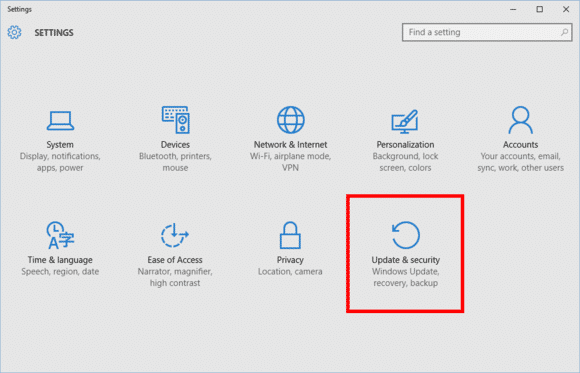
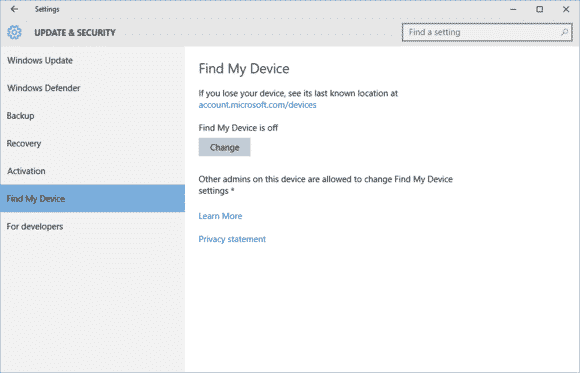
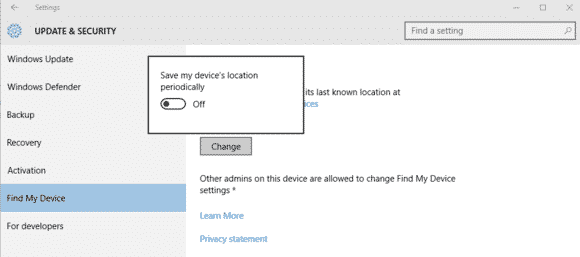
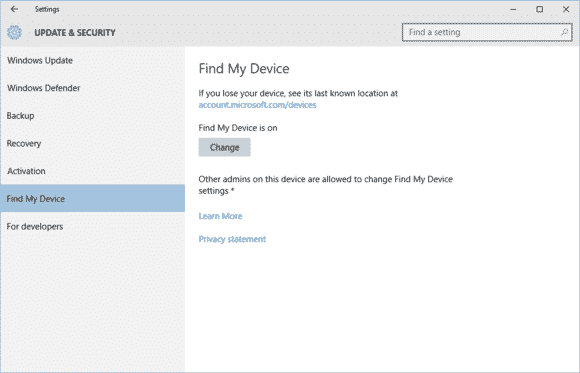
![My [condensed] experience with Windows 10 so far…](https://ewtnet.com/wp-content/uploads/2015/11/windows-10-logo.jpg)
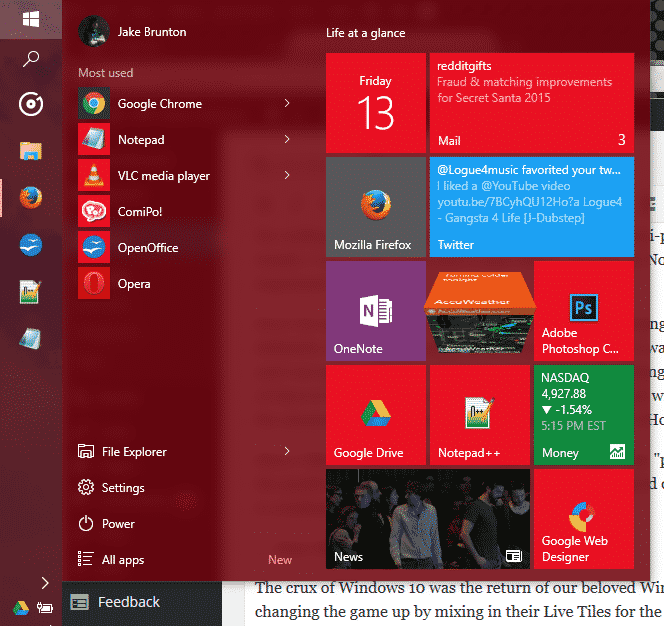
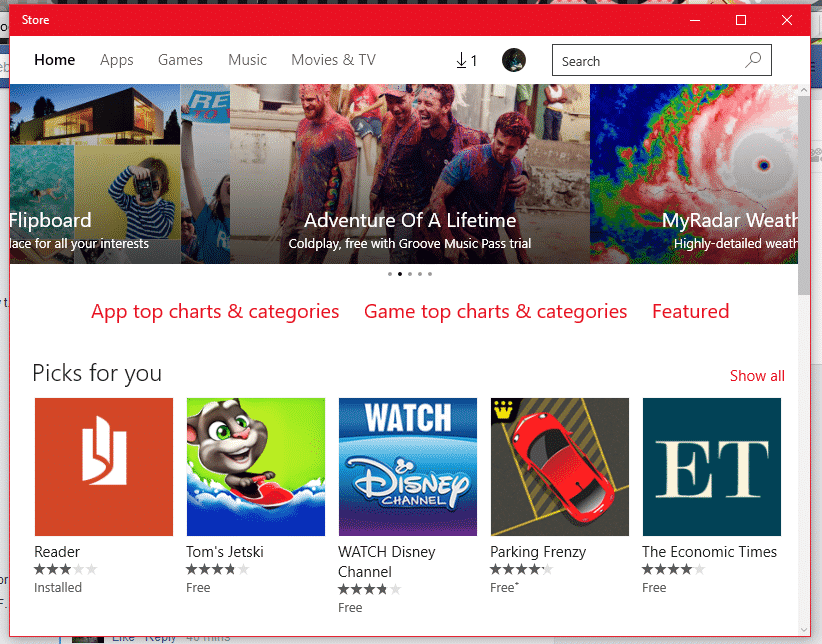
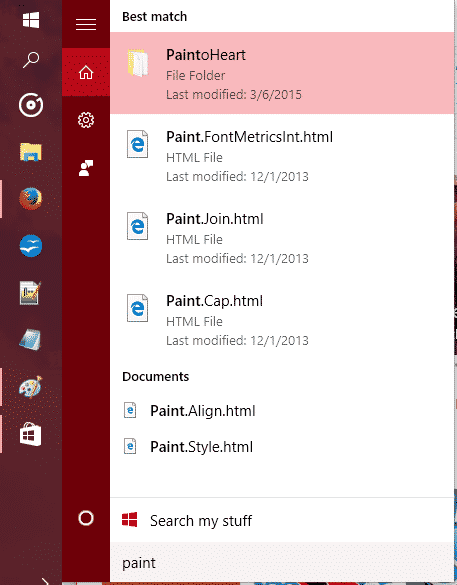
You must be logged in to post a comment.