Being able to connect and watch DSTV on your mobile device with your Dstv decoder has a lot of advantages. You will be able to keep up with your favorite programs without being glued to your TV.
Thanks to intuitive thinking, the DSTV Now platform lets DSTV users pair their mobile device, laptop, or smart TV to their DSTV decoders. In this article, we explore a comprehensive tutorial on how to connect your DSTV decoders to your mobile device, laptop, or smart TV using DSTV Now.
Requirements to Connect and Watch DSTV on Your Mobile Device
Before connecting your decoder to your mobile device, laptop, or smart TV, ensure you meet the following requirements:
An active DSTV subscription
The DSTV Now App
An Android device (smartphone or tablet)
Steps to Connect and Watch DSTV on Your Mobile Device
1. Download the DSTV Now App
Visit the Google Play Store or the Apple App Store on your mobile device.
Search for “DSTV Now” and download the app.
2. Register and Sign Up on the DSTV Now Platform
Open the DSTV Now app.
Register for an account if you don’t have one, or sign in if you already do.
3. Insert Your Smart Card Number
Navigate to the settings or account section within the app.
Enter your DSTV smart card number to link your decoder with the app.
Streaming
Once you’ve registered on the DSTV Now platform and inserted your smart card number, you can start streaming. You’ll have access to all the channels included in your DSTV subscription.
Features of the DSTV Now App
Reminder Feature: Syncs with your phone’s reminder app to notify you when your favorite programs begin.
Kid Access Feature: Allows you to set a PIN for certain channels to restrict content you don’t want your kids to watch.
How to connect your DSTV Decoder to your phone
The DSTV Now app has a reminder feature, that syncs up with the reminder app on your phone. It provides you with accurate reminders when the program begins. The DSTV Now app also has a kid access feature that lets you set a pin on certain channels, that contain content you do not want your kids to watch.
There you have it – a comprehensive tutorial on how to connect your DSTV Decoder to your Android device.
40 Firefox Extensions: Firefox is one of the best browsers at this time which is being used by thousands of peopleheir default browser. one of the great perks of Firefox is that there are tons of extensions present that enhance the user experience. These extensions are either used for time saving, quick browsing, and for best user experience. Basically Firefox extensions are small add-ons that add new functionality to Mozilla, which makes it more popular among the users. Today on internet roughly 30% of the users are using Firefox Extensions, which is next to IE. There are a lot of extensions present on the internet but here i am going to show the best collection of Firefox extension which on my experience, are very handy to use it in our daily surfing.
Video Download Helper Firefox Extension
The Download Helper gives you an easy way to download and convert Web videos from hundreds of YouTube-like sites. This works also for audio and picture galleries. Download
No Script
The best security you can get in a web browser. Allow active content to run only from sites you trust, and protect yourself against XSS and Clickjacking attacks. Download
Adblock Plus
Annoyed by adverts? Troubled by tracking? Bothered by banners? Install Adblock Plus now to regain control of the internet and change the way that you view the web. Download
FlashGot
Download all the links, movies and audio clips of a page at the maximum speed with a single click, using the most popular, lightweight and reliable external download managers. Download
Greasemonkey Firefox Extensions
Customize the way a web page displays or behaves, by using small bits of JavaScript. Download
Personas Plus
Free, easy-to-install “skins” for Firefox Extensions. Choose from over 180,000 cool designs, including art from Harry Potter and Bob Marley. Join over 8 million people from around the world who are asking themselves: “What Will My Browser Wear Today?” Download
FoxTab
3D in your browser! FoxTab brings innovative 3D functionality to your Firefox. Download
Easy You Tube Video Downloader Firefox Extensions
Easiest You tube video downloader ever, single click non-intrusive direct download buttons for FLV, 3GP, MP3, MP4, 720p HD and 1080p Full-HD qualities. Download
Download Statusbar Firefox Extensions
View and manage downloads from a tidy status bar without the download window getting in the way of your web browsing. Download
I’m Translator
Online Translator performs real-time translation for Albanian, Arabic, Bulgarian, Catalan, Chinese (Simp.), Chinese (trad.), Croatian, Czech, Danish, Dutch, English, Estonian, Filipino, Finnish, French, Galician, German, Greek, Hebrew, Hindi, Hungarian, Indonesian, Italian, Japanese, Korean, Latvian, Lithuanian, Maltese, Norwegian, Polish, Portuguese, Romanian, Russian, Serbian, Slovak, Slovenian, Spanish, Swedish, Thai, Turkish, Ukrainian, Vietnamese languages and their combinations. Download
Web of Trust – Safe Browsing Tool
Firefox Extensions: Web of Trust is the leading website reputation rating tool and one of Mozilla’s most popular add-ons. Our safe surfing tool uses an intuitive traffic-light style rating system to help you see which websites are trusted when you search, surf and shop online. Download
Stylish
User styles are themes for web sites. User styles empower your browsing experience by letting you customize web sites. Take out irrelevant content, change colors, or completely redesign the entire site. You can even use user styles as themes on the interface of Firefox, Thunderbird, and SeaMonkey themselves. Download
Xmarks Sync
Xmarks is the #1 bookmarking add-on. It takes only a moment to get up and running with Xmarks. After you install the add-on, click on the notification to set up Xmarks and start backing up and synchronizing your bookmarks. Install Xmarks on each computer you use, and it seamlessly integrates with your web browser and keeps your bookmarks safely backed up and in sync Download
Ant Video Downloader and Player
With the Ant.com Video Downloader, you can download video from Youtube or any other streaming site. Rare are the sites you will not be able to download from. We have integrated a flash video player too, so that you can play your files immediately. Download
Web Developer
The Web Developer extension adds various web developer tools to a browser. Download
Speed Dial
With Speed Dial, you can easily access your most used websites. To show the Speed Dial tab, use the Speed Dial button (which can be added to the toolbar), or enter “chrome://speeddial/content” in your location bar. Download
Firefox Sync
Free browser add-on that lets you stay in sync with your Firefox. Access your history, passwords, bookmarks and even open tabs across all your devices. Download
Foxy Proxy Standard
Foxy Proxy is an advanced proxy management tool that completely replaces Firefox’s limited proxying capabilities. It offers more features than Switch Proxy, Proxy Button, Quick Proxy, xyz proxy, Proxy Tex, Tor Button, etc. Download
Fire FTP
Fire FTP is a free, secure, cross-platform FTP/SFTP client for Mozilla Firefox which provides easy and intuitive access to FTP/SFTP servers Download
Tab Mix Plus
Tab Mix Plus enhances Firefox’s tab browsing capabilities. It includes such features as duplicating tabs, controlling tab focus, tab clicking options, undo closed tabs and windows, plus much more. It also includes a full-featured session manager with crash recovery that can save and restore combination of opened tabs and windows. Download
Fastest Fox – Browse Faster
Save time by speeding up repetitive tasks. Get faster, parallelized downloads, see definitions, auto-load the next page, improve searching, and more. Fastest Fox will dramatically enhance your productivity! Download
Flash Video Downloader (You Tube Downloader)
Flash Video Downloader helps you to download flash video (.flv) from You Tube, Daily motion, Break.com and other 200+ video sharing websites in one click. You can download, mp4 (iPod), avi and other media formats. Flash games download available. Download
Cooliris
The Cooliris 3D Wall — The fastest and most stunning way to browse photos and videos from the Web or your desktop. Effortlessly scroll an infinite “3D Wall” of content from Facebook, Google, YouTube, Flickr, and more. Even watch TV shows & movies. Download
AddThis
With one click, AddThis enables you to instantly share and bookmark web pages, blogs, news, photos, videos, and any other content to the most popular destinations. And it’s free! Download
Screengrab
Firefox Extensions: Screengrab! saves webpages as images, It will capture what you can see in the window—the entire page, just a selection, a particular frame, basically it saves webpages as images – either to a file or to the clipboard. It captures Flash too! Download
Cool Previews
Browse faster — Preview links and images without leaving your current page or tab. Just mouse over any link, and a separate preview window appears to show you the content. (TIP: Mouse over subsequent links while the preview window is still open!) Download
iacros for Firefox
i Mros was designed to automate the most repetitious tasks on the web. If there’s an activity you have to do repeatedly, just record it in i Macros. The next time you need to do it, the entire macro will run at the click of a button! With i Macros, you can quickly and easily fill out web forms, remember passwords, create a web mail notifier, download information from other sites, scrape the Web (get data from multiple sites), and more Download
PDF Download
Use PDF Download to do whatever you like with PDF files on the Web. Regain control and eliminate browser problems, view PDFs directly in Firefox as HTML, and use the all-new Web-to-PDF toolbar to save and share Web pages as high-quality PDF files. Download
Element Hiding Helper for Adblock Plus
You simply select the element you want to hide and then choose which attributes of this element should be taken into account when hiding it in the future. The element hiding rule is generated and added automatically. Download
YouTube to MP3
Adds links to convert and download Youtube, MyVideo, Clipfish, Sevenload, Dailymotion, MySpace videos as MP3 files. This addon uses the free service of Video2mp3.net. Download
Similar Web
The easiest way to find the best websites on the Internet! As you browse the internet, find the most interesting related sites on the web by similarity and category and get the latest articles and buzz on every website you visit. Download
Stumble Upon
Stumble Upon helps you discover great websites that match your interests. Simply click the Stumble button and see the best websites. There are over 500 topics to choose from, and, the more you use it, the better your recommendations become! Download
Forecast fox Weather
Get international weather forecasts from AccuWeather.com and display them in any toolbar or status bar with this highly customizable and unobtrusive extension. Download
Bit Defender Quick Scan
The quickest way to find out if your computer is infected! BitDefender QuickScan is a very fast antivirus scanner, able to determine in a matter of seconds (up to 1-2 minutes on first-time scans) if a system is infected with malware. Download
Read It Later
Save pages to read later with just one click. When you have time, access your reading list from any computer or phone, even without an internet connection Download
Addon Fox
Automatically install the best Firefox addons! Includes over one hundred hand-picked addons from the following categories: Customization, Downloads, Fun, Languages, Media, Programming, Security, Privacy, Social, and Visual. Easily choose which addons you want and get them installed all at once. Download
Google Shortcuts
Display all Google services as buttons or as a space-saving dropdown menu next to your address bar. Reach services like Gmail, Google reader, Google maps, Google calendar, and many more in a single click from your browser Download
Image Zoom
Easily zoom in, zoom out, fit image to screen or set custom zoom on individual images within a web page. All this can be done by using the context menu or a combination of mouse buttons and scroll wheel. Handy to see the finer details of smaller pics or to make very large pics fit within your screen. Download
1-Click You Tube Video Download
You Tube download in a single click. Download You Tube videos in FLV, 3GP and MP4 (both High Definition and iPod compatible High-Quality). The simplest You Tube Video Downloader for all You Tube Flash sites, period. Download
Fire Download
The Fire Download extension for Firefox and Wyzo lets you manage and accelerate your web downloads up to 10x faster! With Fire Download, download acceleration is seamlessly displayed within the downloads window. Try the ultimate download accelerator! Download
Over the years, there has been an observable increase in the size of a smartphone and tablet display. Smartphones and tablets have grown into gadgets that we can use to entertain ourselves using media content. Despite these observable increase in the size of smartphone and tablet display, there comes a time when you desire to project stuff from your smartphone or tablet display onto a bigger display. In this article, we explore a tutorial on how to connect your mobile phone to a smart TV, allowing you to view contents on your smartphones unto a bigger screen.
In this tutorial, we explore four different methods for connecting your mobile phone to your smart TV. This Tutorial covers how to connect Android mobile phones to smart TV’s and how to connect iPhone’s to smart TV’s.
How To Connect Your Mobile Phone To Your Smart TV Using HDMI Cable
Connecting your smartphone to your smart TV using an HDMI cable, is a universal method of connecting smartphones to a smart TV. It works for both Android and IOS devices. It is a very reliable method to project content from your mobile phone to a smart TV. It lets you transfer both audio and video from the same source.
Some smart TVs feature HDMI 2.1 while others feature HDMI 2.0. The minimum requirement to stream 8K content from your mobile phone to a smart TV is an HDMI 2.0 port.
Smartphones usually do not feature HDMI ports, so you are required to purchase an HDMI to USB C, Micro USB or Lightning ports. You connect one side of the HDMI cable to your smart TV and the other part housing the adapter to your mobile phone.
Connect Your Mobile Phone to Your Smart TV Using USB Cable
Just the way you connect pen drives to your smart TV, you can also connect your mobile phone to your smart TV using USB cables. Smartphones usually come with cables, with one end featuring either a USB A, USB C or lightning and the other end being USB A.
You are required to connect the USB A port to your smart TV and the other end of the cable to your mobile phone. Your smart TV will then read your mobile phone as a storage device. You will be able to view photos, audio files, and video from your mobile phone.
Connect Your Mobile Phone to With Wireless Casting on Android
Casting eliminates cords. Casting lets you connect your mobile phone to your smart TV without using cords. Casting is a process of wireless streaming content from your mobile phone or tablet, by connecting to the same WiFi network as your television.
Some mobile phones come with inbuilt casting features, while other mobile phones require you to download third-party apps. In case your mobile phones need third-party apps, Allcast is a highly recommended app for casting.
Apart from using casting apps on mobile phones, there are streaming devices you can use to add the functionality to your smart TV. Google Chromecast is an example of such streaming devices.
Using Apple Airplay
Similar to casting on Android, Airplay is a feature designed for devices running any OS designed by Apple. It lets you connect your iPhone to your Smart TV wirelessly.
Airplay only works between Apple devices. You are not allowed to wirelessly connect your iPhone to smart TV’s not made by apple. Similar to casting on Android, both the Apple TV and iPhone must be connected to the same network.
There you have it – a comprehensive tutorial connect your phone to your smart TV. If you have questions, feel free to drop them in the comment section below.
i Dual booting Linux with Windows 10 on your PC, means having both operating systems installed on your PC. This process involves you partitioning your hard disk and installing the operating systems on different partitions, This way you will able to use both operating systems on your PC simultaneously. In this article we explore a tutorial on How to Dual Boot Linux with Windows 10 on your PC
Requirements
1. Two USB flash drives or DVD-Rs
Since we will be installing tow operating systems on our computer, you are required to purchase DVDs of both operating systems. You are required to purchase a Windows operating system DVD and a DVD containing the Linux Ubuntu operating system.
Apart from installing the operating systems using DVD, you could also install them from a bootable flash drive, which is a way faster. If your laptop doesn’t support booting from USB, you are advised to install the operating systems using DVDs, as mentioned earlier.
2. A Windows 10 license
Installing the Windows 10 OS on a computer that didn’t come with Windows 10 OS on default, requires a Windows license key, so if your computer didn’t come with the Windows 10 operating system on default, you will be required to input a license key. If your computer came with the Windows 10 operating system, you won’t be required to input any. The Windows 10 license key, will be provided to you by the retailer.
3. Windows 10 Creation Tool
If you are installing the Windows 10 operating system from a bootable flash drive, you are required to download a windows 10 media creation tool. The Windows 10 media creation tool provides a step by step guide to creating a Windows 10 media on a USB. You can also use to create windows media on DVDs.
4. Etcher Software
Similar to the Windows Media Creation tool, The Etcher software lets you load a Ubuntu media unto a bootable flash drive or DVD. The Etcher software is supported on Linux, MacOS, and Windows.
Please Note that you are required to download the Ubuntu ISO Image, you will load in the bootable flash drive. Once it has been downloaded, you are required to launch the Etcher software, next click on Select image and then point to the already downloaded Ubuntu ISO image downloaded. Now Select your flash drive, from the list of storage locations provided. Click flash and the Etcher software will convert your bootable flash drive, into a Ubuntu installer.
After you have successfully met all the requirements above, purchased or created a bootable device for both operating systems, you proceed to install both operating systems on your computer. The steps to installing the operating system are listed below:
How to Install Windows and Ubuntu on Your PC
Just as a reminder, before we get started with the installation, you should have already created windows installation media, created a Ubuntu installation media and made a backup of your important files.
Creating a dual boot of Linus and Windows OS can be done in two ways. Its either you install the windows 10 OS first, and then using a ubuntu installer to resize the partition and installation will proceed in the empty space. Or you install Ubuntu first and then install the Windows 10 OS in the smaller partition on your hard disk.
Installing Windows
If you already installed Windows OS on your PC, you are required to skip this step and move straight to installing Ubuntu on your PC, otherwise, continue with the steps listed below:
1. Insert the Windows Installation in you have: As mentioned earlier, its either you use a DVD with the Windows 10 OS inside or you use a bootable flash containing windows 10. If you have a windows 10 DVD, insert it in your DVD player, If you have a bootable flash drive, plug it into your USB port and follow the steps below.
2. Click on the boot menu key: PC’s have different boot menu keys, you have to look out for the boot menu key assigned to your PC. The boot menu key is usually displayed on the bottom of your screen when you power your PC on. If you are unable to locate the boot menu key for your computer, you advised to search it on Google, to make things faster.
3. Change Boot order: Changing boot order means changing the device your PC boots, On default, your PC is set to boot from your hard disk. If you using a Windows 10 DVD, you are required to set your PC to boot from your disk drive. If you are booting from a bootable flash drive, you are required to set your PC to boot from the bootable flash drive. IF you don’t know how to do this, you advised to research on Google or contact your manufacturer.
4. Press any key on your keyboard and proceed with the installation: After you might have successfully booted your installation media, you will be prompted to press any key on your keyboard, to proceed with the installation.
5. Follow the on-screen prompts: You will be presented with different on-screen prompts. Prompts that will require you select your preferred language, inserting your product key and lots more. These are basic steps that do not require any expertise.
6. Select the version of Windows 10 you wish to install:
During the installation process, you will be required to select the version of Windows 10 you wish to install. Here you will be provided with the option to install windows 10 x64 and Windows 10 x86. Please note that installing windows 10 x86 is the same thing as installing windows 10 32 bit and installing windows 10 x64 is the same thing as installing windows 10 64 bit. Here you will also be required to select windows 10 home, professional and other versions. Please, note that the windows 10 pro is the most powerful version of Windows 10.
7. Review License terms and click next
8. Click on custom install: After reading the license information, you are required to select the type of installation you want. You have options to upgrade, keeping all your files or doing a custom advanced install. You are advised to do a custom install. You will able to select the drive you want to install the windows 10 OS.
9. Allocate Storage For Installation of Windows 10
Our sample hard drive has not been allocated or partitioned before. If your hard drive isn’t like this or has been partitioned before, you are required to highlight all the partitions and delete them. Your entire hard drive will be unallocated. Click continue to create a new partition.
You are advised to create a partition with up to 80GB to accommodate the windows operating system.
10. Click Next, to confirm partitioning and to begin windows installation.
Now that you have successfully installed the Windows 10 operating system on one of the partitions, the next step is to install Ubuntu on your hard drive.
Installing Ubuntu
At this point, we assume you already have the Windows 10 operating system installed on your hard drive. The next step is to install Ubuntu on the other partition you created. Installing Ubuntu will be done using the installation media you created earlier.
1. Insert Installation Media into your Computer: You are to insert the installation media in your computer. If the installation media was created on a DVD, you are to insert it into your CD ROM, if the installation media is on a bootable flash drive, you insert it via your USB port.
2. Click on the boot menu key: PC’s have different boot menu keys, you have to look out for the boot menu key assigned to your PC. The boot menu key is usually displayed on the bottom of your screen when you power your PC on. If you are unable to locate the boot menu key for your computer, you advised to search it on Google, to make things faster.
3. Give priority to Your Installation Media: After you must have successfully entered the boot menu on your computer, the next step is to give priority to your installation media. If you are booting from a DVD plate, you are to give priority to your CD ROM, select boot from CD ROM. If you are booting from a bootable flash drive, you are required to give priority to your flash drive, select boot from flash drive.
4. Install Ubuntu: After you have successfully prioritized your Boot device, your computer will be booted into the Ubuntu installation interface. Here you are provided with the option to either try ubuntu or install Ubuntu.
5. Select Your Preferred Language: After you might have clicked the install Ubuntu button, you will be required to select your preferred language. Here you are to select the language you understand.
6. Select Your keyboard layout: Despite being an output component of the computer, the layout configuration software plays a huge role, in key placement. Here you have options to choose from the different layout assigned to different languages. After you have selected your preferred keyboard layout, you are advised to click continue.
7. Select Installation Type: Installing Ubuntu, you provided with Normal Install Option, as well as Minimal installation option. If you select normal installation, Ubuntu will be installed alongside a web browser, utilities, office software, games, and wallpapers. Minimal Installation installs Ubuntu alongside a web browser and utility software.
8. Install Ubuntu Alongside Windows 10: You are provided with the option to either install Ubuntu alongside Windows 10 or erase the hard disk and install Ubuntu.
9. Follow in the On-Screen prompts provided: You will be required to confirm Ubuntu installation, select time zone and fill in your Particulars, to setup login security.
10. Reboot Your PC: After you might have successfully installed Ubuntu on your PC, You will be provided with the option to continue testing or restart. You are required to click the restart button, to begin using Ubuntu.
Note: After you might have successfully followed all the steps provided in this tutorial, you will be provided with the dual boot screen, where you will be given the option to either boot into windows or boot into Ubuntu.
There you have it – A complete and comprehensive tutorial on How to Dual Boot Linux with Windows 10 on your PC. If you have questions, feel free to drop them in the comment section below.
As a windows OS user, there are times where you will be faced with the unidentified network error. The Error appears sometimes when you try to connect to a network, using your windows machine. There is no actual method of solving this problem, as this Error may be caused by a lot of things. In this article on how to fix unidentified network access on windows, we shall explore a list of troubleshooting steps you should follow when trying to fix this error on your windows machine. This these steps are listed below.
1. Turn Off Airplane Mode
The first step in the troubleshooting process is to disable Airplane mode. As you might already know, Airplane mode when activated, disable all network access, this means you will not be able to access any network on your windows machine. In turn, this may result in the unidentified network no network access error on your windows machine. To turn off the airplane on your windows machine, please follow the steps listed below:
Press Windows key + A. This opens the ‘Action Center’.
Toggle off the airplane mode button.
2. Update Network Card Drivers
Outdated network card drivers could also facilitate the unidentified network error in windows operating system. If you already toggled off the Airplane mode switch, and you are still experiencing the problem, you are advised to update your network card drivers. Steps to update your network card drivers are listed below.
Press Windows + X or right-click on the Start button.
Click on Device Manager to open it.
Look for ‘Network Adapters’ and click on the forward pointing arrow to expand the list. Right click on all the Network drivers and update them one by one.
3. Disable the Security software temporarily
In the quest to giving your computer absolute protection, security software may disable your internet connectivity. This is common with Anti-virus software or Firewall software. In solving the unidentified network error, you also advised troubleshooting your security software, by temporarily disabling it, to see if the problems stop. To disable your security software, you are to right click on the Anti-virus icon located in your system tray icon section. Once you have disabled it, you are to try connecting to a network to see if it worked. If it didn’t, you can continue with the next step in troubleshooting
4. Switch off the Fast Startup feature
Microsoft has been able to make booting on the Windows operating system faster, using the fast startup feature. The fast startup feature is found on a recent version of the Windows operating system. The fast startup features is another facilitator of the unidentified network access error. Having tried the steps listed above, with no positive results, you are advised to turn off the fast startup feature on a windows machine., using the steps listed below:
Search for ‘Power Options’ in the Windows search bar. Open the Power Options window and among the tabs on the left, click on choose what the power button does.
Click on ‘Change settings that are currently unavailable’.
Uncheck ‘Turn on fast startup’. Shut down the system and reboot after 30 seconds.
5. Change your DNS servers
Your current DNS server may just be the reason your windows machine is plagued with the unidentified network access error. To change your DNS servers, follow the steps listed below:
Press Windows + X or right-click on the start button.
Click on ‘Network Connections’.
Right-click on your network connection (Ethernet or Wifi) and click on properties. It might prompt for administrator credentials.
Double-click on Internet Protocol Version 4.
Select ‘Use the following DNS server addresses’ and set but the preferred and alternate DNS server address as follows to use Google Public DNS:
Preferred DNS server: 8.8.8.8
Alternate DNS server: 8.8.4.4
6. Use Command Prompt
Already tried the steps listed above, and nothing seems to be changing, there are some commands you can run in command prompt, to salvage the situation. You are required to try the commands listed below, one by one, one at a time. Once you have successfully ran all the commands, you are to restart your windows machine.
ipconfig /release
ipconfig /renew
netsh winsock reset
netsh int ip reset
ipconfig /flushdns
ipconfig /registerdns
netsh int tcp set heuristics disabled
netsh int tcp set global autotuninglevel=disabled
netsh int tcp set global rss=enabled
netsh int tcp show global
7. Diagnose The Network
The network Diagnose feature, is another handy tool, that helps troubleshoot the problem of your network. You can diagnose the network using the features listed below:
Press Windows + X or right-click on the start button.
Click on ‘Network Connections’.
Right-click on your network connection (Ethernet or Wifi) and click on ‘Diagnose‘. It will start an automatic troubleshooter.
8. Change the Ethernet cable
Tried troubleshooting with the steps already listed above, and nothing seems to be changing? Your Ethernet cable may just be faulty. You are also advised to troubleshoot your ethernet cable. Try using another one. If the problem persists, you can proceed to the next step.
9. Set a static IP address
Press Windows + X or right-click on the start button.
Click on ‘Network Connections’.
Right-click on your network connection (Ethernet or Wifi) and click on properties. It might prompt for administrator credentials.
Double-click on Internet Protocol Version 4.
Select the radio button at ‘Use the following IP address’.
Check the IP address settings for others using the same network as yours and change your settings to the same.
Click OK to save the settings and exit.r
10. Use an external Network Adapter
Your Network chip may just be the facilitator of the problem. Having a faulty network chip on your windows machine can crumble your internet connection, you are advised to troubleshoot your network chip, using an external network adapter.
11. Restart your modem and router
Switch off both your modem and router keeping them physically connected.
Start the modem. Wait for 30 seconds after all the lights turn green.
Start the router.
This is called power-cycling.
12. Upgrade the router firmware
Having an outdated router firmware can also crumble your network connection, leading to the unidentified network error on your windows machine. You are advised to update the firmware on your router and try connecting again.
13. Disable Virtual Network Adapters
Launch Device manager on your windows machine
Navigate to Network Adapters and expand it
Right-click and disable them
14. Run the built-in troubleshooters
Having exhausted the troubleshooting steps listed above, and nothing seems to change, running the built-in troubleshooters on your windows machine, may just be the answer to your problem. Here are the steps to running the built-in troubleshooters on your windows machine. To activate the run box on your windows machine, simply hold windows key and R together i.e windows key + R.
In the run box, you are to run each of the commands independently.
msdt.exe -id NetworkDiagnosticsWeb
To open the Incoming Connections Troubleshooter
msdt.exe -id NetworkDiagnosticsInbound
To open the Network Adapter Troubleshooter:
msdt.exe -id NetworkDiagnosticsNetworkAdapter
Conclusion: Upon troubleshooting your device, with the steps listed in this article on how to fix unidentified network access on windows , there is a high chance you might solve the unidentified error on your windows machine. If the problem persists, you are advised to contact windows support theme or visit a technician.
The Internet has over the years metamorphosed into a very essential part of our lives. The internet is a source of information, it keeps us in tune with the happenings in the world. Being absent from the internet for an hour can be very torturing. In this article, we explore a tutorial on how to hack wifi passwords using Android apps. This will help you gain access to wifi networks in your surrounding, without prior knowledge of the password.
1. How To Hack Wi-Fi Password Using Wi-Fi WPS WPA Tester Android App
Seeking to make a quick wifi network hack? The Wi-Fi WPS WPA Tester may just be what you need. The Wi-Fi WPS WPA Tester app works on both rooted and nonrooted devices. Despite its compatibility with non-rooted devices, it requires root access, to hack tougher wifi networks. Steps to hacking Wi-Fi networks using the Wi-Fi WPS WPA Tester app are listed below.
Download and install the Wi-Fi WPS WPA Tester App from the Google Play Store
Launch the Wi-Fi WPS WPA Tester app on your Andriod device
Locate the Wi-Fi connection you wish to hack.
Tap on the Wi-Fi network
Select ”connect” and then select no root methods to hack Wi-Fi password.
Note: If the color of the Lock icon is green, it means the chances of hacking the network is high. Red or Orange color lock indicates the chances of hacking the network is low.
2. How To Hack Wi-Fi Password Using Android Dumper Android App
Still on the topic of how to how to hack wifi passwords using Android apps, Androdumper is a free app that lets use hack Wi-Fi networks seamlessly. Androdumper doesn’t require root access to function. It is available in the Google Play store for downloads. Steps to hacking Wi-Fi networks using the Androdumpper app are listed below.
Download and Install the AndroDumper app from the Google Play Store
Launch the AndroDrumper app on your Android device
Click on the refresh button in the second top left corner of the app. This will allow the app to search for available Wi-Fi connections.
Click on the Wi-Fi network of your choice, and then click on the “Try to connect” button.
Select the hack method. You have the option to choose between Root way or No Root.
Wait for Androiddumper to hack Wi-Fi network
How To Hack Wi-Fi Password Using Android Bcmon Android App
Last but certainly not least, is the Bcmon app. Unlike the already mentioned wifi hacking apps, Bcmon requires root access. It is compatible with rooted devices. Bcmon is a more effective app, in hacking Wi-Fi network. Steps to using the Bcmon app is listed below.
Download and Install the Bcmon app from the Google Play Store
Click on the ” Refresh” icon to view available Wi-Fi network
Click on the desired Wi-Fi network
Navigate to settings and uncheck “use Bcmon” checkbox
Navigate back to the network screen and click the “ok” button to hack the Wi-Fi network
Conclusion: Despite the fact that apps featured in this article are highly recommended, there is a high chance that they won’t be able to hack all the Wi-fi connections you come across. This is due to the different levels of fortification Wi-Fi connections possess. In cases where the Wi-Fi connection security isn’t strong, you should be able to gain access using the apps listed above.
Android Apps to watch full TV episodes: Over the years, smartphones have managed to make our lives easier than they were before their existence. It has made us independent of a lot of things. For example, before smartphones and tablets existed, the only option we had to watch movies was our Television set. We had to stay glued to them until the movie ended. Thanks to smartphones, we can now watch movies on the Go using our smartphones. This has made leisure time a lot better.
This article explores a comprehensive list of the best Android apps to watch TV episodes. These apps allow users to stream their favorite TV episodes on their smartphones. These apps are listed below.
1. Showbox Apps
Looking to watch full TV episodes on your Android device? Showbox may just be the app you have been searching for. Despite not be available in the Google PlayStore, Showbox is unarguably one of the most used media and video stream apps available on the Android platform.
Showbox lets users stream movies and TV series for free on their Android device. There are no hidden charges, you don’t have to pay any monthly or annual fee. Apart from allowing users stream media content, Showbox also lets users download movies and TV series to be watched later. Showbox offers movies and TV series in high definition quality, giving uses crisp and clear content to stream. As earlier mentioned, the Showbox app is not available in the Google Play store for download, to download the Showbox app, click here
2. Netflix Android Apps
Netflix is undoubtedly the most popular streaming platform we have today. From Movies to TV Episodes, Netflix is the most sought after app streaming app we have today. Despite offering a subscription for service, the top-notch content they have set them apart from others.
The Netflix app bears a very intuitive interface, designed to make navigation as easy as possible. Locating your favorite movies is as easy as possible here. Chances of you running out of content to watch is very low here because Netflix is loaded with a lot of exciting contents to stream. The Netflix app can be downloaded from the Google Play Store.
3. Stremio
Stremio offers a platform for users to stream movies, TV series and TV shows directly on their smartphone. The Stremio app features a very intuitive interface, making navigation very easy. It was designed to help users find their favorite movies easily.
Stremio lets users streaming videos from a lot of services, which includes the popular ones we are familiar with. Example of such services includes Netflix, iTunes, HBO, Youtube, Twitch and lots more. With support for these streaming services, you are assured of seamless streaming of movies, series and lots more.
4. Tubi
Tubi is a legal streaming service, that allows users stream movies, TV series on their Android smartphones, without having to pay any fee. Tubi services are absolutely free of charge. You are not required to pay any monthly fee or annual fee. It’s simple, select the movie you want to watch, and start streaming.Streaming with Tubi, you are offered content from Comedy, Drama, Kiddies show, Korean movies, Anime, British series and lots more. Tubi is constantly updated, delivering the latest content to its users. The Tubi app is available for downloads on the Google Play store.
5. iFlix
iFlix is an Android app, designed to provide top-notch streaming experience to users. iFlix houses loads of exciting and popular TV Series and moves, for free streaming. If you desire to continue watching your favorite TV episodes on the go, iFlix is the app you need.
It also has a section that lets you discover new movies, TV series and lots more. Unlike the already mentioned apps, iFlix requires a pay a monthly fee, to enjoy streaming. The iFlix app is available on the Google Play store for downloads.
6. Showmax
Still on the topic of best Android Apps to watch full Tv episodes, Showmax is yet another awesome app, that allows users to stream TV episodes and movies on their Android devices. Showmax offers a huge selection of TV show, TV episodes, kids shows and documentaries for a monthly fee. It is supported on devices running Android operating system, including Android TV.
Apart from streaming, Showmax also allows users to download movies to their devices, to be watched later. Showmax features a bandwidth capping feature that reduces data consumption when streaming. The Showmax app is available on the Google Play store for downloads.
7. Amazon Prime Video
Amazon Prime Video lets you stream and download popular movies and TV shows, including Amazon exclusives, like the Grand tour, The Man in the High Castle, and Emmy award winner Tumble Leaf and lots more. This app also lets you stream content from special channels like HBO, SHOWITIMEm STARZ, and CINEMAX. The Amazon prime video app is available for downloads on the Google Play Store.
8. ZEE5
ZEE5 is a streaming app dedicated to providing the best from Bollywood. ZEE5 lets users stream TV shows, Web series, International shows, Acclaimed plays, from the comfort of their smartphones. ZEE5 features over 80 live TV channels and 00,000+ hours of video content.
Video content on the ZEE5 Video content dubbed in 5 languages including Hindi, Bengali, Malayalam, Tamil, and Telugu. Apart from allowing users stream media content, ZEE5 also allows users to download content for offline viewing. The ZEE5 app can be downloaded from the Google Play Store.
9. SnagFilms
SnagFilms is yet another app that lets users stream movies and TV episodes from the comfort of their Android smartphones. Snagfilm is a free app. All movies and TV episodes featured in their library can be accessed for free, without paying any subscription fee.
Snagfilm features over 5,000 Independent movies, TV Shows and documentaries. In their library, you will find content under comedy, action-filled and documentaries categories. The Snagfilms can be downloaded from the Google Play Store.
10. IROKOtv
Last but not least, is is the IROKO TV app. IROKO TV is a Nigerian based channel, that offers content from Nigeria’s media sector.
IROKO TV serves users with the best from Nollywood, and Nigerian TV series. You will also find Ghanian Films and TV series here. Apart from allowing users stream content via the internet, IROKO TV also lets users download content to be viewed offline. The IROKO TV app can be downloaded from the Google PlayStore.
There you have it – The best Android Apps to watch full Tv episodes. If you have other favorites, feel free to drop them in the comment section below.
Famous for its smartphones, Xiaomi is a technology company that offers so much for so little. This fact has played a significant role in the success of their company. Price tags featured on their products facilitate questions, regarding the price worth of products from other manufacturers. Still Speaking on offering so much for so little, the Xiaomi Mi smart tv 4, is an example of products manufactured by Xiaomi, that provides so much, for a price tag not relative. The TV is Xiaomi’s first foray into the smart TV market. For a newbie in the Smart TV market, Xiaomi isn’t doing poorly at all.
The smart TV meets all the requirements of a modern TV, that suits its generation. It features a modern design, as well as top-notch hardware specs and software, that facilitates top-notch user experience.
In this article, we explore the features, specs, and pricing of the Mi TV, giving you a clearer insight into why the Xiaomi Mi smart tv 4 is a must-have.
Xiaomi TV Build
As earlier mentioned, it was designed to meet all the requirements of a modern smart TV. It features a very modern design that is going to keep you staring. With a thickness of 4.9 mm, the Xiaomi Mi 4 is a fragile device. The Smart TV 4 claimed the Red Dot Award last year for having a thickness of 4.9 mm.
Having a thickness of 4.9mm doesn’t limit the ports of the Xiaomi Mi smart Tv 4. The Xiaomi 4 comes with a good number of ports for connectivity. The Xiaomi smart tv 4 features three HDMI ports, two USB A ports, one of them is a USB 3.0 port, the other is not. Still on ports, the Xiaomi Mi 4 smart Tv features port for audio video input, Ethernet port, and an Antenna port.
To provide users with an immersive experience when streaming, the Xiaomi Mi smart tv 4 features an integrated Mi TV bar with ten speakers a subwoofer and two wireless rear satellite speakers. It also supports Dolby Atmos audio technology with two up-firing speakers for an unbeatable audio experience.
Xiaomi Mi Smart TV 4 Display
The Xiaomi Mi Smart TV features a 55 inch 4k HDR 10-bit display panel, with a screen resolution of 3840 x 2160. The display has a 60Hz refresh rate, with a response time of 8ms. To feat into the modern smart TV market, this smart tv features a near bezels display, the bezels on this tv is very thin, it’s difficult to see to when watching content on it. The Xiaomi Mi Smart TV blends into your surrounding, creating the illusion that its a wallpaper.
Xiaomi Mi Smart TV 4 Hardware Specs
Being a smart TV, you should expect all the essentials needed for streaming and functioning of supported apps. The Xiaomi Mi smart tv does justice to that.
The Xiaomi Mi Smart TV is powered by a 64-bit quad-core Mlogic processor, a Mali-T830 MP2 GPU, 2GB RAM, and 8GB of Ram. The Xiaomi Mi Smart TV 4 features blue 4.0 with low energy, 2GHz / 5GHz wifi for internet connectivity.
Software / Interface
The primary reason Smart TVs were created, is to provide users with a powerful TV software, that allows users to stream content, use supported apps and surf the net. The ease using these features is hinged on the type of software the TV features and the fluidity of the interface.
The Xiaomi Mi TV 4 features on the PatchWall interface. The PatchWall interface is an Android-based user-interface, that does away with a lot of Android essentials. This TV doesn’t come with Google PlayStore and Youtube and doesn’t support them. The PatchWall interface was designed to be as fluid as possible, doing away with all the features that slow down Android-based Smart TV.
Launching the home screen on the PatchWall UI, you are presented with a tile interface for the channels. When you search for a show, you are provided with the content, as well as information on when scheduled shows will be aired. The patchWall UI also suggests contents based on your viewing habits.
Remote Control
Just like any TV would, the Xiaomi Smart TV 4 does come with remote control. I am giving you remote access to the TV. The Remote features minimalistic buttons that are very easy to understand. This is similar to what we get on most high-end TVs today. On the remote, you will find the standard Android Home, Return and menu button. You will also find volume controller buttons, the Navigation button, and the power button. This remote connects to the TV through Bluetooth. It allows you to control the TV, without directly pointing the remote at it. Apart from being able to control this smart TV, this remote can control your Set Top Box, Mi Android Box, and some other devices.
Conclusion
Despite being a foray, the Xiaomi Mi Smart TV 4 actually packs a lot of impressive features, from its display to hardware specs, to software, there is hardly a thing you would miss when using this smart TV. Although it doesn’t measure shoulders with the top smart TVs we have today, with a price tag for Rs 39,999, the Xiaomi Mi Smart TV 4 is a good buy, with excellent value for the money.
Viruses on Android devices may not be common, but they do exist. Spotting viruses on Android devices may be very difficult for some, but to the enlightened, it is a straightforward thing. When Your Android device is infected, Your Android device begins to malfunction. Browsing through the web, you begin to see add pop-ups, you may; It to porn sites on different occasions. These are some of the signs that a virus has infected your Android device.
Clearing viruses for Android device, you are provided two options. Its either you perform a full system wipe, or you make use of an Antivirus app, to treat the viruses. Using Antivirus apps is a more natural option. There are many Antivirus apps available in the Google PlayStore today. In this article, we explore a comprehensive list of best free antivirus applications for Android devices.
1. Kaspersky
Kaspersky is unarguably one of the best and also one of the most used Antivirus applications we have today. A lot of apparent reasons facilitates this fact. The Kaspersky Antivirus app helps users keep their Android devices safe from Malware and viruses. Kaspersky lets users can use their Android devices for Malware and Viruses free of charge. Upgrading to its premium package, Kaspersky provides real-time protection, anti-theft, anti-phishing, and an app locker. Kaspersky Also features a call filter, find my phone feature and lots more. The Kaspersky app can be downloaded from the Google Play Store.
2. Avast Mobile Security
Avast mobile security is yet another famous Antivirus app. Over the years, the Avast Mobile security app has been able to build a reputation for itself. The Avast mobile security app lets users scan their smartphone for dangerous or infected apps and trojans. Avast antivirus provides total protection against spyware and viruses.
Unlike the Kaspersky antivirus app, Avast mobile security offers all its essential feature for free. Although Avast offers its features for free, it features in-app purchases. These in-app purchases remove ads and provide users with the app lock feature, ass well sim security, camera tap and lots more. The Avast mobile security app can be downloaded from the Google Play Store.
3. Bitdefender Antivirus Free
Bitdefender Antivirus is an app designed to secure your Android devices from all malware and Antiviruses. Bitfender makes use of cloud scanning technology, to offer users top-notch security on their Android devices. Bitdefender Antivirus is one of the Antivirus apps that don’t slow down or drain your battery when functioning.
Still, on the features of Bitdefender Antivirus, it features an Integrated VPN for accessing blocked websites, features a smart unlock for unlocking apps when connected to trusted wifi, it features web protection for scanning adware, malware when browsing. The Bitdefender Antivirus app can be downloaded from the Google PlayStore.
4. Norton Security & Anti-Virus
Famous for its efficiency in detecting malware and spyware, and Viruses, Norton Security is yet another credible Antivirus app for Android devices. Apart from detecting and treating viruses, Norton security can also be used to find missing Android devices. You can use the app to trigger an alarm on the lost device remotely. You can also use this app to remotely lock the missing device, to prevent data theft.
Still, on the features of the Norton Security app, It can be used to scan wi-fi connections, allowing you to detect unsecured wi-fi connections. Norton security can be used for safe Search for flagging unsafe websites during browsing, It can also be used as a call blocker, to block spam and unwanted calls.
5. Sophos Mobile Security
Sophos Mobile security is yet another free Antivirus application that offers all the essentials for free. Sophos mobile security is one of the few free Antivirus apps that doesn’t show in-app ads. Sophos mobile security protects Android devices from malware and viruses. It features loss and theft protection, an app locker, security adviser, which gives you useful security tips, call blocker and lots more.
Still, on the features of the Sophos Mobile security app, the Mobile Sophos security app features a web filter for blocking malicious websites, it houses an app locker, wi-fi security to protect you from snooping.
6. Security Master
As its name depicts, the Security master app is an app designed to give its users optimal security of their smartphones. Security master is the upgraded version of the CM security app. The Security master app keeps your smartphone safe from malware and viruses. The free version of the app offers awesome features like app locker, scanner, message security, Wi-Fi security, junk cleaner, notification cleaner, phone booster, CPU cooler, battery saver, call blocker and lots more.
Still, on the features of this app, the Security master app lets users browse their favorite sites safely within the app. This way, you rest assured of not getting your information leaked or your location tracked. The Security master app houses a safe-connect VPN for accessing websites that are blocked in your region, Anti-theft alarm, message security for hiding notification previews and intruder selfie or capturing intruders. Similar to the already mentioned apps, the security master app can be downloaded from the Google PlayStore.
7. McAfee Mobile Security & Lock
Still, on the topic of Best Free Antivirus Application for Android Devices, McAfee is yet another highly recommended antivirus app for Android device. It is a famous antivirus app that has been able to live up to the hype.
The McAfee Mobile security app houses anti-theft features, security lock, wi-fi security, a battery optimizer, memory cleaner and lots more. Still, on the characteristics of this app, the McAfee mobile security app allows users to remote wipe of data on their smartphone, in case of theft, it also has a feature that prevents a thief from uninstalling the McAfee antivirus app from your phone.
8. DFNDR Security
DFNDR Security is one of the top antivirus apps we have today on Android, with top ratings from AV-Test institute, you rest assured of optimal security of your Android device.
The DFNDR security app provides total protection fro viruses. It also has houses anti-hacking and anti-phishing features. DFNDR security can be used to speed up internet connection by closing background apps that compete for bandwidth. The DFNDR security app is available for download from the Google play store.
9. Avira Antivirus Security
Avira Antivirus security is yet another reliable Antivirus app, that can be used to secure your Android device against spyware, malware, and Viruses. Avira Antivirus scans external storage unit and shows how each app rates on a private scale.
The Avira Antivirus security app can be used as a phone tracker, to track missing smartphones. The premium version of the Avira Antivirus security app offers camera & Mic protection, additional browser security and lots more. The Avira Antivirus security app can be downloaded from the Google PlayStore.
10. AVG Antivirus
Last but certainly not least is the AVG Antivirus app for Android. AVG Antivirus is a sturdy security app, that offers users total protection of their devices. Similar to the already mentioned apps, AVG features all the essentials needed in securing your Android device. It features periodic scan feature, Wi-Fi security, junk cleaner, ram booster, call blocker, power saver and lots more.
The AVG Antivirus app features a dual-engine antivirus for removing viruses and other malicious content; it features a performance booster, photo vault for locking photographs and lots more. AVG Antivirus can be downloaded from the Google PlayStore.
There you have it – a Comprehensive list of Best Free Antivirus Application for Android Devices. If you have other recommendations, feel free to drop them in the comment section below.
Tired of using your stock text messaging app? Do you desire a better text messaging app that offers a ton of exciting features? In this article, we explore a list of top text messaging apps for Android. Text messaging apps featured in this article have been designed to be better alternatives to stock messaging apps. These text messaging apps are listed as follows:
1. Textra SMS
Looking for a third party text messaging app to replace your default messaging app, The extra SMS app may be all you need. The Textra SMS app lets you send SMS and MMS to contacts on your smartphone. It also enables you to schedule the time text messages will be sent. The Textra SMS app features GIFs, 21 text sizes, message blocker/blacklisting, pin-to-top, over 3000 Android, Twitter, Emoji One & iOS style emojis automatic video & picture compression and lots more.
The Textra SMS app has a very appealing user interface. It lets users tweak the appearance of the app to their taste. The Textra SMS app features more than 180 material design themes, bubble & app icon colors. The Textra SMS app can be set to automatically switch between dark and light modes, depending on your schedule.
2. Chomp SMS
Having over 10 million downloads, Chomp SMS is an Android app designed exclusively for sending text messages. It was intended to act as an alternative for your stock Android messaging app. It lets users send text messages as well as MMS seamlessly, in a very intuitive interface. The Chomp SMS app, allows users send scheduled text messages, messages that will be delivered on schedule. You can schedule birthday messages and lots more. Still, on the features of the Chomp text messaging app, this app features a privacy lock, privacy options, ability to stop messages while sending, SMS backup, blacklisting, text snippets, over 3000 Android, Twitter, Emoji One & iOS style emojis and lots more.
3. Evolve SMS
Evolve is yet another power text messaging app designed for Android. It provides an interface that is entirely different from stock messaging apps. It features a highly customizable interface that lets users customize the app to suit their taste. The evolve SMS app features a navigation system, that makes accessing contacts very easy.
The Evolve SMS app features a wide range of themes to choose from, a theme store, gifs, lot of emojis. Similar to the already mentioned apps, the Evolve SMS app is available for download on the Google PlayStore.
4. Handcent Next SMS
Are you tired of using your default text messaging app? The Handcent, Next SMS app, may be the app you need. The Handcent Next SMS app was designed to be a replacement default messaging apps on Android. It features a very appealing interface that meets the needs of its users.
The Handcent Next SMS app lets users send text messages, as well as MMS to contacts on their Android smartphone. This app features quick reply pop-ups, Vacards, themes, backup, restore the system and lots more. The Handcent Next SMS is available on the Google PlayStore for downloads.
5. Google Messages
Despite the fact that this article is all about alternatives to stock messaging apps, the fact that Google has one of the best messaging apps we have today is unarguable.
The Google Messages app is Google’s official messaging app. It comes pre-installed on most Android smartphones. It lets users send SMS, MMS and RCS chats, allowing you to send and receive messages over wifi or cellular data. It lets you stay in touch with your friends and family, allowing you to send text messages seamlessly without stress. The interface of the Google Messages app may not be customizable, but it features clean and intuitive designs. If your Android smartphone doesn’t come with the Google Messages app pre-installed, you download it from the Google Play Store.
6. Go SMS Pro
Still on the topic of best text messaging apps for Android, the Go SMS Pro app, is yet another awesome third-party app, designed to replace stock Android messaging apps. It hs all the essential features needed in text messaging apps. Similar to some of the already mentioned apps, the Go SMS Pro app lets you customize the interface; it also comes with themes that help users design the interface to their taste.
The Go SMS pro app features an Auto-reply feature, Spam blocking feature, scheduled message feature and lots more. This app can be downloaded from the Google PlayStore.
7. Pulse SMS
The Plusle SMS app was designed to be a very good alternative of stock messaging apps. It houses most of the features you wished you stock text messaging app featured. All these features are housed in a highly customizable interface.
The Pulse SMS app features an Unparalleled design and fluid animations, password protection for private conversations, lets you share GIfs, features a powerful searching through messages and communications, automatic message backup and restore, enables you to preview web links, backlists pesky spammers and lots more. The Pulse SMS app can be downloaded from the Google PlayStore.
8. QkSMS
The QkSMS app is an app that offers one of the most beautiful interfaces for text messaging. It was designed to be a better alternative to stock text messaging apps. It makes sending text messages more fun.
Qksms lets users send SMS and MMS via a highly customizable interface, with a wide range of in-built themes. QKSMS has dual sim support, allowing you send messages using any of the sims on your smartphone. It features a pre-contact notification, that allows you to prioritize and distinguish your messages. It also lets you backup and restores messages easily. This app can be downloaded from the Google PlayStore.
9. YAATA SMS
YAATA SMS is a third party app that continues the stock design of stock text messaging apps on Android. Using the YAATA app, you are offered a very familiar interface, with a lot of new features. The YAATA SMS app can be best described as an upgrade of your stock text messaging app.
The YAATA SMS app lets users send SMS/MMS. It has multimedia messaging support that allows users to send media files ranging from videos, Audio, Vcards, and GIFs. It also houses a group chat feature, scheduled messages, allows users to convert SMS to MMS, blacklisting and lots more. This app can be downloaded from the Google PlayStore.
10. Mood Messenger
Still, on the topic of best text messaging apps for Android, the Mood Messanger is yet another awesome text messaging app, designed to replace your stock messaging app. It is an ad-free app that offers a ton of exciting features.
The Mood messenger app lets users send and receive SMS and MMS, in a highly customizable interface. It even features a typing indicator. Mood messenger features over 100 themes, allows users to change text and font size, Animated Emojis – iOS, Android or Emoji One style emojis, animated GIf library, chat encryption and lots more. This app can an excellent from the Google PlayStore.
11. Yippeee Messenger
Yipeee lets you send and receive text messages and MMS. Similar to all the already mentioned apps, the Yipeee app was designed to replace the stock messaging app on your Android smartphone. The Yipeee features a super light and intuitive interface. Yipeee lets you customize the interface to suit your taste.
The Yipeee text messaging app lets you share pictures and audio. it features a spam box that enables you to filter spam messages from essential messages. It has a search feature that allows you easily navigate through contacts and conversations.
12. Dual SMS Messenger
Dual SMS Messanger is a super-fast and highly customizable alternative to stock text messaging app. It offers an exciting and intuitive interface to send text messages and MMS. In addition, Dual SMS Messanger lets users customize its interface, to suit their needs.
Dual SMS Messanger Lets users block unwanted messages; it houses a spam filter feature that lets users filter important messages from spam messages. This app is available on the Google Play Store for downloads
13. New Switch
Are you thinking of replacing your stock text messaging app? The New Switch app is yet another awesome app, that can replace the stock messaging app on your Android device. It features a minimal and intuitive interface that makes sending text messages fast and seamless. The New Switch app provides users with the power to customize their interface, allowing them to design the interface to their taste. It features a vast collection of themes that make customization faster. The new switch app has support RCS messaging, allowing users to send messages over wifi.
14. Messaging SMS
The Messaging SMS app is yet another app that offers an interface very similar to what we have on stock text messaging app. Using this app, you are provided a familiar interface with a lot of new and exciting features.
This app lets users send SMS and MMS seamlessly in real time. It also houses security features that let users encrypt their messages. This app is available on the Google Play Store for downloads.
15. MySMS SMS Text Messaging
Last but not least, the My SMS app, is yet another app that provides users with an exciting and intuitive interface to send text messages. It is a very good alternative to stock text messaging apps.
The My SMS app can be synced to your computer, allowing you to view text typed on any of the devices. It supports remote typing, lets users create MMS group chat, lets users send multimedia messages and lots more. This app is available on the Google Play store for download.
There you have it – The best text messaging apps for Android. If you have other recommendations, please let us know in the comment section below.
In a bid to cut down cables, TVs have over the years metamorphosed into stand-alone gadgets, that feature built-in wireless internet connections, with support for a wide range of apps. A modern television with these features is referred to as a smart TV. A smart TV also let you record shows, take screenshots and access YouTube, Netflix and other movie outlets. Now, the idea of having a smart television sounds great, but having to purchase one, may not be too palatable.
Smart TVs don’t exactly come cheap. If buying a one isn’t part of your budget right now, we have good news for your. You don’t necessarily need to purchase a smart TV to be able to gain access to the features of a smart TV. There are external media players you can use to turn your digital television into a smart television. These media players are also know as TV boxes.
A TV box is a small tech gadget that basically transforms your ordinary digital TV into a smart TV. Most TV these days are already equipped with smart technology, however, these does not completely eradicate the need for a TV box. A TV box can relatively expand the capabilities of your television, turning it into a less powerful version of your computer, or a larger version of your smartphone.
If you are in country where DSTV is supported, you won’t need an additional decoder for the kids room. You can can simply connect to DSTV online via your TV box.
Converting your Digital TV (DTV) into a Smart TV
Smart TV with Netflix, YouTube and FilmBox live pre-installed
In this article, we are going to explore the various ways you can convert any Digital TV to a Smart TV using a TV box. While all of these TV boxes run via similar technology, they have different operating systems and thus, different user interfaces. For example, Apple TV runs the mobile iOS format, whereas Fire TV runs off Amazon’s operating system, instantly connecting you with Alexa. Google ChromeCast on the other hand, is powered by a simplified version of Chrome OS.
Using Media Players to Convert DTV to Smart TV
As earlier said, turning a digital TV to a smart TV, can be done using certain external media players otherwise known as TV boxes. These media players are listed below, together with tutorials on how to use them to transform your digital TV to a smart TV.
Using media players such as Apple TV, Fire or ChromeCast is one way of converting your old digital TV into a smart one. However, if these media players are far beyond your reach, there are cheaper alternatives such as using a white label Android TV box. This will be discussed much later in the article.
Note that, most Android TV box or media players require a HDMI port and a HDMI cable. If your TV set doesn’t feature a HDMI port, but instead the traditional yellow red and white port, you can use an HDMI to RCA adapter.
How to Convert any Digital TV to a Smart TV – Using Apple TV
Unarguably, Apple TV is one of the best streaming devices we have today. It is one of the top 3 streaming devices, with others being the Amazon Fire stick and the Google ChromeCast. Apple TV is the only Apple product that isn’t restricted to Apple’s ecosystem.
The TV gadget lets you stream videos, pictures, and music from your digital TV. Apple TV also enables you to buy or rent movies on iTunes. However, you cannot store media files on the Apple TV.
Step 1: Locate the HDMI port on your TV
As earlier mentioned, using a smart media player to convert your digital TV to a smart TV requires the presence of an HDMI port, and also you will need an HDMI cable. You will find HDMI ports on the body of your Digital TV. In case your digital TV doesn’t feature an HDMI port, you can use an HDMI to RCA adapter.
Step 2: Connect Apple TV to your Digital TV
In connecting the Apple TV to your digital TV, you will need to connect one end of the HDMI port to your Digital TV and the other end to your Apple TV. After you might have connected the Apple TV to your digital TV, you are required to power both of them and change your TV’s input to HDMI.
Step 3: Setup Apple TV
immediately you change your TV’s input to HDMI, the Apple TV interface will be displayed. Here you are required to select your language of choice, select a Wi-Fi network and enter a password and download any suggested updates.
Step 4: Use Apple TV as a Smart TV
Once you have completed the steps listed above, you will be presented with a drawer of apps, that include all the top-notch streaming service apps, you will able to stream content from Netflix, Hulu and lots more.
How to Convert any Digital TV to a Smart TV – Using Amazon Fire TV Stick
Amazon Fire Stick is yet another media player that lets you turn your Digital TV into a smart TV. Amazon Fire Stick takes the shape of a pen drive. It is one of those media players that isn’t obvious. Plug it to the HDMI port of your TV, and you will have access to a wide range of streaming services, streaming services that ordinarily won’t be accessed on your digital TV.
As you might have already guessed, the setup of the Amazon Fires Stick is very similar to that of the Apple TV, they both require a functioning HDMI. In case your digital TV doesn’t feature an HDMI port, you can use an HDMI-RCA adapter. Steps to converting your Digital TV using Amazon Fire Stick is listed below:
Step 1: Plug Amazon Fire Stick into HDMI Port Of Your Digital TV
Unlike the Apple TV, Amazon Fire Stick doesn’t require an HDMI cable for connection. As earlier mentioned, the Amazon Fire Stick has the shape of a pen drive. Instead of featuring a USB A or C, the Amazon Fire Stick Features an HDMI connector. So all you need to do for connectivity is plug the Amazon Fire Stick into the HDMI port of your computer.
In case the HDMI port of your TV is located on the rear, and you don’t have enough room for connection since the wall will be obstructing it, you can use an HDMI extension cable. You are required to plug one end of the HDMI cable to your Amazon Fire Stick, while other End will be plugged to your TV.
Step 2: Connect Amazon Fire Stick To A Power Outlet
Apart from featuring an HDMI connector, the Amazon Fire Stick also features a USB port. To power the Amazon Fire Stick, you are required to connect a USB power cord to it’s USB port and connect the other end to the power brick, then finally connect the Power brick to a power outlet. You are also required to place batteries in the remote of the Amazon Fire Stick.
Step 3: Switch To HDMI Input
To gain access to the Amazon TV Fire interface, you will need to switch your TV’s input to HDMI, since the Amazon Fire Stick was connected to the HDMI port of your TV.
Step 4: Setup Amazon Fire Stick
After you must have successfully connected the Amazon Fire Stick to your Digital TV, the next step is to set up the Amazon Fire service. You will be presented with the Amazon Fire interface, as soon as you switch to HDMI output. Here you are required to perform basic tasks before you can start streaming. You will be prompted to press the play/pause button at intervals, you will be required to log in to a wireless network, inputting the password. You are also required to log in your Amazon account. This will ensure This will ensure that you can view your Amazon subscriptions and purchases.
Step 5: Use Amazon Fire Stick As A Smart TV
Once you have completed the steps listed above, and Logged into your Amazon Account, you will be able to view your purchased movies, shows, and games. You will also be presented with a drawer of streaming apps, that you can use to stream content on your Digital TV
How to Convert any Digital TV to a Smart TV using Google ChromeCast
Last but not least, is Google ChromeCast. Google ChromeCast is yet another media player that can turn your Digital TV to a Smart TV. Manufactured by Google, ChromeCast is a media player, that gives you access to many streaming services. Here are the steps to using the ChromeCast to convert your Digital TV to a smart TV.
Step 1: Connect ChromeCast to your TV’s HDMI
Similar to the already mentioned media players; you will need to connect the Google ChromeCast to your digital TV. The ChromeCast comes with an HDMI connector. So all you need to do is locate the HDMI port on your digital TV and connect the ChromeCast HDMI connector. In case your TV doesn’t feature an HDMI port, you can use an HDMI-RCA adapter to connect ChromeCast to your TV
Step 2: Connect ChromeCast To A Power Outlet
ChromeCast comes with a power cable, you can use to power it. All you need to do is to connect the cable to the power port on the ChromeCast and then plug the other end to the USB port on your Digital TV. Please note that the 4k Version of the ChromeCast cannot be powered by a digital TV, you will need a wall socket for connection.
Step 3: Switch To HDMI Input
To gain access to the ChromeCast interface, you will need to switch your TV’s input to HDMI, since the ChromeCast was connected to the HDMI port of your TV.
Step 4: Download Google Home App on your Smartphone
The Google ChromeCast needs a working Google App to function. You are required to download the Google Home App on your smartphone. It is available on both the Android and IOS platform.
Step 4: Setup Google Home App
Launch the Google Home app on your smartphone, click on accept when prompted, you will be taken to the Google Home Page. Click on the devices icon, located on the top-right corner of your screen. Wait for ChromeCast to detect your phone. You will be presented with a confirmation message when ChromeCast recognizes your phone.
Next, you will need to confirm the code on your TV. Once ChromeCast detects your TV, a code will appear on your TV and also on your smartphone. Make sure both codes match. After which you are to tap Yes (iPhone), or I SEE IT (Android).
Now tap continue and then select a wireless network for your ChromeCast. Enter the password and continue. Please note that your smartphone and ChromeCast must be connected to the same network. Follow all other on-screen prompts.
Step 5: Use Your ChromeCast As a Smart TV
Upon completing the steps listed above, you will be able to stream content on your phone, directly on your digital TV. You will also be able to view apps installed on your smartphone
Reading through this article, you must have observed that converting your Digital TV to a smart TV, is a straightforward thing to do. All you have to do is select one these top media players, follow the steps given and you will be home and dry, Streaming media content on your digital TV, as though it was a Smart TV.
If you have any question, regarding this tutorial on how to convert any digital TV to a smart TV, feel free to drop them in the comment section below.
Alfawise A8 Pro Android TV Box
Apple TV, Fire or ChromeCast are the most popular TV boxes in the market. Smaller players like the Alfawise A8 pro device are not so popular but equally effective. It also come way cheaper than most TV box with the same features. The Android TV box comes with both 2.4G and 5G WiFi, provides a faster and more smooth data transmission, which makes it the ideal choice for cord-cutters.
From your A8 Pro Android TV box, you can download apps, watch local TV channels, connect to streaming apps such as Hulu and Netflix. Depending on where you live, you may even be able to connect to premium cable channels at no extra cost, especially if you have installed KODI software.
Windows 10 comes with a lot of amazing features but not all of them are readily available. Let’s dig a little deeper and unveil new tweaks, tricks and features that will change the way you use your PC.
With it being free, and Microsoft pushing the update to users, most of you probably already have migrated to Windows 10. Its constantly evolving nature means fresh features arrive twice per year, and with all the new goodies come a legion of new tweaks and tricks—some of which unlock powerful functionality hidden to everyday users. Others simply let you mold the Windows 10 experience into the shape you see fit. Here are some of the most useful tweaks, tricks, and tips that we are able to put together.
However, you need to brace yourself as some of these may break as the operating system evolves given Microsoft’s new “Windows as a service” mentality. The idea is to keep this page updated overtime to reflect the OS’s current status.
Activate Windows 10 Night Light
If you use an iPhone, iPad or macOS system you may use the built-in blue light feature ‘Night Shift’.
The Night Light feature you’ll find in Windows 10 is pretty much Night Shift for Windows.
Night Light makes the screen warmer in the evenings as it reduces the amount of blue light emitted.
Various scientific studies show that exposure to blue light in the evening makes it harder to fall asleep because (like all artificial light) it affects the circadian rhythms that manage our body clock.
Once preserve of late-night caffeine fuelled coders and over-worked, under-fed writers, screen temperature features have since become mainstream. Google’s Android and ChromeOS operating systems have one, as do iOS and macOS from Apple, and Microsoft’s Windows 10.
Like those features, Windows 10 Night Light automatically warms the temperature of your display after sunset. This makes your laptop screen or PC monitor easier on your eyes and reduces disruption to your circadian rhythm, helping it to tick along nicely.
In the morning, your display returns to its regular settings.
Night Light is a system feature; you do not need to install a separate application like Flux to use it. This makes it very easy to automatically adjust the screen temperature in Windows 10.
Night Light for Ubuntu will automatically adjust the amount of blue light your monitor or laptop display emits based on your location and the time of day.
These features are said to help reduce eye strain by adjusting your screen’s color temperature during after-dark computing sessions. That makes it easier to fall asleep when you’re done.
To activate Night Light, head to Settings > System > Display. Once you’ve done so, open the feature’s settings to fine-tune its behavior.
Scroll any window even when they’re inactive
It used to be that Windows only allowed you to scroll active windows. Now in Windows 10, you can set an option to scroll both active and inactive windows by just hovering with the mouse cursor over a window.
This feature is not a ground-breaking Windows 10 hack or tweak but it comes quite handy when time is in essence and your need to peek through your to-do list.
Windows 10 inactive scroll feature is enabled by default, but if it’s not, go to Settings > Devices > Mouse & touchpad, and make sure to enable the Scroll inactive windows when I hover over them option.
Find the hidden images
The lock screen and logon screen have some really cool images, which as it turns out, by default both rotate AND change.
It may seems Microsoft has a CDN that updates these images based on what you click that you like or not. Want to save one or more of those images for future use? Here’s where they are hiding!
Open Explorer and browse to:
%localappdata%PackagesMicrosoft.ContentDeliveryManager_[custom string of characters]LocalStateAssets
Copy all of the files to a new directory.
Open a command prompt in that directory.
Run this command ren . *.png and [enter]
Browse through them and find the ones you like!
Make Cortana’s ears perk up
Cortana’s finally made the leap to the PC in Windows 10, assuming many of the operating system’s search functions and dishing out just as much sass as the Windows Phone version. But by default, she doesn’t listen for your commands. But by default, she doesn’t listen for your commands.
If you’d like to be able to just shout commands at your PC, launch Cortana by clicking the search field in the taskbar and select the three-lined options menu in the upper-left corner. Select Settings for the list, then simply enable the “Let Cortana respond when you say ‘Hey Cortana’” option. You’ll need an active microphone for this to work, of course.
While you’re poking around Cortana’s options, you can dive into the Notebook menu to fine-tune exactly what personal data Microsoft’s digital assistant can access. Remember, however, that like Google Now, Cortana’s effectiveness is directly related to how much she knows about you.
Enabling Cortana on the Windows lock screen lets you use voice commands to view and edit your schedule at a glance. It’s pretty handy! To turn on the feature, open Cortana and head to “Cog” icon > Settings > Use Cortana even when my device is locked.
Secret, powerful new command line tools
Windows 10 packs a slew of nifty new command line features, including—hallelujah!—the ability to copy and paste inside the command prompt with Crtl + C and Crtl + V.
To activate the goodies, open the command prompt. Right-click its title bar, then select Properties. You can find and enable the new features under the Edit Options section of the Options tab.
Bash comes to Windows
If you got all hot and bothered over the ability to use keyboard shortcuts to paste text in the Command Prompt, wait until you get a load of this.
The Windows 10 Anniversary Update added the full, legendary Bash shell to Microsoft’s operating system, thanks to a partnership with Canonical, the company that guided Ubuntu Linux’s development. And it’s running natively, without virtual machines or containers. With the right tricks, you can even use Bash to run graphic Linux applications or even the Unity desktop itself right inside Windows—though those unintended features are definitely limited. Look for Ubuntu, Fedora, and SUSE Linux entries in the Windows Store to start using Bash in Windows.
Windows 10 Audio Source Switching
Windows 10’s in-taskbar volume controls pack a niche, yet nifty touch: selectable sources. Clicking the audio device name in the volume controls summons a list of all connected audio outputs, meaning you can switch from your headphones to your speakers and back again without having to dive into the Control Panel. Yay!
The April 2018 Update added more granular audio options to the Settings app too, breaking them away from the Control Panel even further.
Activate Windows 10 Spatial Sound
That’s not the only audio trick lurking within Windows 10. Windows Sonic for Headphones offers a virtual surround sound format that can make the audio coming from your headset feel more lush and atmospheric. The effectiveness of the feature varies depending on your gear and how sensitive you are towards audio cues.
To activate Windows Sonic, right-click the speaker/audio icon in the system tray on the right side of your task bar, then select Spatial sound (none). In the window that opens, click the drop-down menu and select Windows Sonic for Headphones. Click , then OK, and you’re done!
Windows Timeline
Timeline helps you pick up where you left off. Clicking the Task View button in the taskbar or pressing Windows Key + Tab summons the feature, which displays a—you guessed it—time line of your activity in supported apps, stretching back over the past. Even more handily, Microsoft lets you group related apps together into “Activities” in Timeline, so that when you open that week-old budget document, for example, the presentations and websites you referenced at the time can be easily summoned as well. This even syncs across devices, so it could be especially useful if you use multiple PCs.
The fly in the ointment: Only a limited number of apps work with Timeline currently, though Microsoft offers tools for developers to bake in support. That includes Office, Adobe’s Creative Cloud, and native Windows 10 apps like News and Maps, but Microsoft Edge is the only compatible browser. Bummer. You can deactivate Timeline by heading to Settings > Privacy > Activity History.
Cloud clipboard
Windows 10’s copy and paste functionality has been hit and miss for years, but now you can deploy that bugginess across multiple PCs with cloud clipboard—a genuinely useful feature introduced in the October 2018 Update. Head to Start > Settings > System > Clipboard and enable “Sync across devices” to start copying data on one PC and pasting it on another PC.
While you’re in this menu, enabling “Clipboard history” lets you save multiple items to the clipboard so you can use them again later. Nifty stuff.
Your Phone
Want to tie your phone and PC closer together? Download Microsoft’s Your Phone companion app for Android, and link it to your PC using the new Your Phone app from the Microsoft Store.
Your Phone lets you open, view, copy, and share photos that you took on your phone, as well as send and reply to texts right on your PC. There’s an iOS version as well, but it’s much, much more limited.
Snip & Sketch
The firmly entrenched Snipping Tool within Windows is finally getting replaced and upgraded. The October 2018 Update added Snip & Sketch, a new tool that lets you select a portion of the screen to copy when you press Windows + Shift + S. After doing so, the selected screenshot will be copied to your clipboard, so you can paste it into any image editing software—including the standalone Snip & Sketch app, which lets you annotate and share your marked-up images.
Near Share
Near Share makes it easy to share files and URLs with local PCs over the air, negating the need for flash drives or chat apps to pass something along. If you open the Share interface in Microsoft Edge or File Explorer, you’ll see PCs with Nearby Sharing enabled appear as an option if you have the April 2018 Update installed. Recipients receive a pop-up notification when something is sent. Think of it as an alternative to Apple’s Airdrop, albeit one without any mobile support.
To use Near Share, your computer needs both Bluetooth and Wi-Fi working, and you’ll have to enable the Nearby Sharing option in Settings before you can start using it. Transfer speeds were pretty slow and Bluetooth-like in our tests, so you may still want to resort to alternative means to pass especially large files around. Microsoft says the feature automatically chooses to use Wi-Fi or Bluetooth depending on what’s available, and what’s faster.
Ransomware protection
Ransomware is a growing problem. It infects PCs, encrypts your files, and holds everything hostage until you pay a ransom—hence the name. The best defense against ransomware is frequent backups and strong security software, but Windows 10 now includes basic protection right in your operating system.
Controlled Folder Access “protects your files and folders from unauthorized changes by unfriendly applications.” Your Documents, Pictures, Movies, and Desktop folders are protected by default, though you can block other folders manually or whitelist trusted software to access your locked-down info. You can tweak Controlled Folder Access by opening the Windows Security app (formerly Windows Defender), heading to the Virus & threat protection tab, and clicking the “Manage ransomware protection” link at the bottom.
Dark theme
If you love dark themes, you love dark themes. Light themes sear your eyeballs. Fortunately, Windows 10 now supports a dark theme.
Head to Start > Settings > Personalization > Color and select the “dark” option under “Choose your default app mode.” The Windows 10 October 2018 Update extended the dark theme to include File Explorer, too. Enjoy!
Enable Windows 10 Dynamic Lock
Say goodbye to Windows + L. Dynamic Lock is a handy feature that pairs your PC with your phone over Bluetooth, then automatically locks your computer when you wander away from it.
To start using it, marry the two devices in Control Panel > Hardware and Sound > Devices and Printers, then activate Dynamic Lock at Settings > Account > Sign-in options.
Game Bar
If you’re into playing around on your PC, Windows 10’s Game Bar—summoned by pressing Windows + G in-game—holds all sorts of nifty extras. It’s always been able to take screenshots or videos of gameplay clips, but as of the Windows 10 Creators Update, the Game Bar also offers easy-peasy Beam game streaming and the intriguing Game Mode, which can improve performance on resource-limited systems. The October 2018 Update overhauled the interface yet again, adding inline volume controls.
The Game Bar’s handy even if you don’t actually play, as it can be used to record video of any app—not just games. Windows 10 also has a dedicated Gaming section in its Start menu Settings to let you tinker with options, including Xbox networking and parental controls.
Per-app GPU management
The Windows 10 April 2018 Update added the ability to tell Windows which graphics hardware—discrete or integrated—to use when you open specific apps. It sounds niche, but the feature could prove pretty helpful if you’ve got a gaming laptop and want it to last longer.
By default, booting up a game switches over to discrete graphics, which use a lot more energy than the graphics cores integrated in Intel chips and AMD Ryzen APUs. But a lot of indie and retro games play just fine on integrated graphics. With Windows 10’s per-app GPU management, you can manually tell the system to stick to the more power-efficient option for games that don’t need the extra oomph.
Go to Settings > Display, then click the Graphics settings link at the very bottom of the page to start tinkering.
OneDrive Files on Demand
It’s back, huzzah! OneDrive Files on Demand resurrects Windows 8.1’s “placeholder” feature for the cloud storage service baked into Windows 10. OneDrive Files on Demand shows all of the files you have stored in OneDrive in a folder on your PC, but they’re just pointers synced with the cloud—not actually files installed on your PC. Unless you want them to be. You can select which files and folders to make available locally.
Storage Sense
Over time, your PC can quietly fill with needless junk without your even realizing it, as the Recycle Bin and temporary files suck up your storage. Storage Sense helps combat the creep. Head to Settings > System > Storage and enable the Storage Sense option to have Windows start automatically clearing out unneeded temporary files, and deleting any files in your Recycle Bin over 30 days old. You can tweak those options using the Change how we free up space link underneath the option.
The October 2018 Update added the ability to have Storage Sense send long-untouched files from anywhere on your computer to your OneDrive cloud storage, freeing up space on your hard drive. It could be a useful addition if you’re close to filling up your local storage, but keep an eye on your available OneDrive space—cloud storage isn’t free. Fortunately, the feature includes granular controls.
Mixed Reality
The Fall Creators Update added “Mixed Reality” to Windows 10. The most obvious use for it is in the legion of new Windows Mixed Reality headsets, but you can check out the benefits even if you don’t have one of those. The Mixed Reality Viewer app lets you drag digital 3D objects you’ve created in the Paint 3D app into the real world, using the combined might of your device’s camera and display. It’s not really augmented reality since you can’t interact with the objects, but it’s closer to “Mixed Reality” than the headsets are.
Somewhat related, the nifty Story Remix tool in the Photos app lets you add fantastic 3D animations to videos you’ve captured, among many other talents. It’s pretty sweet!
Start menu folders
What’s old is new again: You can create basic Start menu folders in Windows 10, organizing Live Tiles into clusters. Simply drag your Start menu apps on top of each other to create folders that expand when clicked on. As of the October 2018 Update, you can now name the folders you create, but you have to expand it open to see the option.
Troubleshooting, troubleshot
The Windows 10 Creators Update added a helpful touch for distressed PC users. The operating system’s consolidated all of its troubleshooting tools in a single location: Home > Update & Security > Troubleshoot. If you run into trouble, run there first.
Turn off File Explorer’s Quick Access view
When you open File Explorer in Windows 10, it defaults to a new Quick Access view that shows your most frequently accessed folders and recently viewed files. I love it, personally, but if you’d rather File Explorer defaulted to the “This PC” view found in Windows 8, here’s how.
Open File Explorer, then select View > Options from the Ribbon. A Folder Options window will open. Click the “Open File Explorer” drop-down menu at top, then select the “This PC” option. Click OK and you’re done!
Manage notifications
Windows 10’s Action Center houses and manages the notifications spawned by your system’s various apps. You might not want every Windows Store app you install barking at you all the time, however, or maybe you don’t want to see any notifications while you’re in presentation mode. You might just want to silent the annoying ads that the Get Office app spawns. Fortunately, those are easy to tweak.
To tinker with you your notification settings, head to Start menu > Settings > Systems > Notifications and actions. Individual Windows Store apps, like the Mail app, tend to have more granular notification options in the Settings menus inside the apps themselves.
Schedule your restarts
This is wonderful. If you’ve got pending updates that require you to reboot your PC, Windows 10 will allow you to schedule a specific time for it to do so. Finally!
Open the Settings option in the Start menu, then head to Updates and Recovery > Windows Update > Restart options to see the scheduling screen above.
Get Windows updates from other sources
But the Windows Update upgrades don’t end there. Windows 10 introduces a new option that lets you download updates using peer-to-peer technology, rather than Microsoft directly. It could help you get that hot security patch faster when everybody’s hammering Microsoft’s dedicated servers, or save you bandwidth in a computer-crowded house—just download the new patch once from Microsoft, then share it among the PCs under your care.
To tinker with the setting, head to Start > Settings > Update & Recovery > Delivery Optimization. By default, “Get updates from more than one place” is enabled and configured to grab updates from PCs on both your local network and the Internet at large. If you don’t like the idea of your PC using your bandwidth to share Windows Updates with strangers, be sure to disable it. If you leave it active, the “Advanced options” link lets you fine-tune how Windows uses your network to download and share updates, as you can see above.
Seize control of Windows Updates
While the ability to schedule installation times for updates is very welcome indeed, not everyone is happy about the way Windows 10 handles patches—specifically, that you can’t refuse them. Windows 10 Pro users—but not Windows 10 Home users—can delay downloading updates for some time, but eventually, Microsoft will force them on you.
There are some actions you can take to exert control over your Windows Update experience, however. Most notably, if you’re using Wi-Fi for connectivity, you can set Windows 10’s Wi-Fi connections as metered to download updates when you’d like to, rather than when Microsoft wants you to. The Active Hours feature lets you tell Windows specific times not to install updates. And if you ever encounter a borked update that refuses to play nice with your PC, Microsoft’s released a tool that allows you to choose individual updates so they won’t be downloaded again.
Those workarounds aren’t a replacement for being able to manually choose the Windows Update you’d like to install, but they should help ease the sting a little, at least.
Fresh keyboard shortcuts!
Windows 10 packs a handful of fresh keyboard shortcuts, all tied to newfound abilities inside the revamped operating system. There are many more than we can list here, so head over to our guide to Windows 10’s keyboard shortcuts to learn all about them. If you really want to get fancy, augment those hotkeys with Windows 10’s new touchpad gestures for true shortcut mastery.
Declutter your taskbar
Two of Windows 10’s standout features are its Cortana search integration and newly added virtual desktop support—but they claim a sizeable chunk of your taskbar. If you don’t care about either (or don’t mind using Windows key + Tab to leap through virtual desktops) you can reclaim that onscreen real estate.
Everything starts by right-clicking an empty section of your taskbar. Select Cortana, and choose to Show Cortana icon only. You can also remove the Cortana and Task View buttons from the same Taskbar menu.
Thank You!
We feel the need to thank you following through with this long episode of top 30 Windows 10 trick, tips and tweaks. The article doesn’t stop here; share your ideas with us on the comment section.
(Opinion) The Nintendo Switch is just a bit shy over 1 year’s old. And while I was late to the party (not obtaining my own copy of the hybrid console until last February), it seems to have had a great lifespan – at least, according to other outlets. And it’s fair enough to assume so. We got Mario Odyssey, Xenoblade Chorincles 2, Fire Emblem Warriors, Breath of the Wild, and more great games. But, wait? Do you notice something there? Most of the Switch’s greatest games released in its first year are either all Nintendo IPs, or published by Nintendo? Seem familiar?
This is the pattern I’ve noticed on Nintendo consoles ever since I interacted with them as a child. The DS, 3DS, Wii, WiiU, all had some great first-party games on it. And some decent third-parties, but mostly first-parties. And while these titles are always a blast, fans have been crying for more and more third-party support ever since the days of the Wii, and even some consoles beforehand. And while we can blame it on the sales (for example, the awfully performing WiiU), I personally believe we have none other than Nintendo to blame. The entertainment company has always been harsh on third-parties; pretty much denying any and all access to their consoles, at least to triple A games and developers. And it’s that push that leads to poorly-performing console sales on Nintendo’s end.
Recently, we saw a light of hope with the Nintendo Switch focusing on a more pro-third-party catalogue and a more pro-mature one as well. We’ve seen titles we’d never suspect make it to a Nintendo console, such as Skyrim, L.A. Noire, and even DOOM. It’s honestly amazing to me, but at the same time, it’s not enough. Now, I know this makes me sound like some nit-picky, over-demanding fanboy. That may be the case. However, it’s not enough to me, because the steam we were picking up for more immersive, third-party games on the new Switch has started to blow down.
And while we can understand – not everyone is eager to port every triple A game to the Switch – there’s another problem present along with it: lack of original, new first-parties. That’s just a big Nintendo-no-no. Sure, we have all the games I previously mentioned, including Pokken, Mario Kart 8, and more. But most of these games are WiiU ports, and if not, there’s not many brand-new Nintendo IPs on the new console. It feels almost as if Nintendo hadn’t even given themselves enough time to have a powerful catalogue to go with.
So, in a hopes to rally some discord and to get Nintendo thinking, here’s the Nintendo IPs that need to be made for the Switch. And not just ported: new AND original, to separate the console from the WiiU/3DS. Alongside this is discussion of the need of a system software overhaul.
1) Pokemon Switch
We’ve already been seeing confirmations of the Pokemon Switch game to be the 8th generation, and this is great news! This most likely points to a guarantee that it will be a new mainline Pokemon game, and not a port or mashup of Sun & Moon.
2) Animal Crossing
The last home console Animal Crossing game is going to be ten years old this November. 10 years old. The last fully-fledged Animal Crossing game is going to be 6 this year. Yes, I’m excluding Happy Home Designer and the mobile Pocket Camp. Animal Crossing is obviously a popular Nintendo IP that many people, young and old, love dearly. The Switch being a hybrid console, means we could indeed have a beautiful, large Animal Crossing game going with us anywhere in the world. I don’t want ports, as stated, but sticking with the idea of City Folk wouldn’t be bad either.
3) Star Fox
One of the more underrated IPs of Nintendo is Star Fox. I personally loved the play style of all the Star Fox games I had the chance to play as a kid. The last attempt to boot up Star Fox on the WiiU didn’t go as well as expected, only averaging a 69% metacritic score. The Switch’s booted graphics and mobility, however, are the perfect environment for a Star Fox game to find itself in.
4) Fire Emblem
We’ve had a very basic confirmation that the Switch will indeed have a Fire Emblem game (not referencing Fire Emblem Warriors). However, this statement was made long ago, not too long after the Switch’s birth. Since then, several Nintendo Directs have passed, and no news has been shared about the project. I’m hoping Nintendo will go for a new game, like Fates or Awakening, and avoid another port, or at the very least bring a from-the-ground-up reboot of an older game.
Alongside these suggestions, of course Nintendo needs to do all they can to make the Switch more inviting to third-party developers. They need to force developers to think “Nintendo-only.” Many great third-party games yet to release for the Switch are also going to release for other platforms, and while this offers a great amount of choice to players, this can very well be bad for business to Nintendo. I’ve noticed this lack of Switch-only third-parties lately, and we all know it’s in fear of failing sales. If Nintendo makes their move now with more first-party releases, and some major system changes (I discuss those down further), they can reignite the hype and buzz the console had upon it’s first announcement. Such a rise in coverage would bolster sales, at least in theory, and make third-parties that aren’t just indies (hopefully) strive to create unique, exclusives for the console.
I mentioned needing a system overhaul earlier, and whether you agree or not, the system itself seems so…lacking. The 3DS is an amazing performer for Nintendo, just ask anyone. This system also has a unique, customizable and interactive software UI. The Switch? A choice between White or Black backgrounds, with some game tiles and a button to the eShop, Album, Settings and Controllers. While many may respect the simplicity, it just seems to barebones for a Nintendo system.
First and foremost, the lack of customizing makes it moot. White or Black are our options of Themes, yet there’s no Theme shop available like there is for the 3DS. I can’t make folders for certain apps, I can’t use a web browser, user profiles are lackluster. I personally think the Nintendo Switch’s UI is where it fails the most. It’s so boring and unimaginative that sometimes browsing your console is just, well, unbearable. I strongly believe Nintendo is hard at work on addressing such changes, but we can only hope it comes soon enough before the interest and lack of support fades from this very promising console.
What are your thoughts? Feel free to debate down in the comments section, or share what games and changes you want to see on the Nintendo Switch.
You don’t want anyone to know what videos you are uploading, watching, liking, commenting on or any of your activity from YouTube to show on your Google+ page or stream.
The good news is, there
is an update concerning that, YouTube will no longer automatically post your activity
(uploads, liked videos and so on) on twitter and Google+,
In an email sent “After January 31st, the ability to automatically post YouTube activity
(uploads, liked videos, etc.) on Twitter and Google+ will no longer be
available. We’ve found that sharing these actions with a custom message
(instead of through automatically generated posts) provides a better experience
for the sharer and their followers on other social networks.”
The email went ahead to say that “You can continue to easily share videos to your
social network” by using the Share button on a video’s
watch page.”
Do you have two accounts for Messaging, tired to log in and out to receive different message?
Have you ever dreamt of having multiple accounts for your favorite game?
Do you have double social accounts for work and personal life,wish them to parallel?
Now Multiple Accounts (2Accounts) is created to fulfill your dream! Multiple Accounts Android application is a portable app that enables you to use more than one WhatsApp, Messenger or Instagram accounts, on your android device. It allows you to use two accounts of one app with only one phone, while data of your main account and second account are in parallel and separate storage.
With Multiple Accounts you can have more than one Facebook Messenger accounts logged in at the same time on your device. If like me, you have more than one phone number and would like to connect with your friends/family on both numbers on WhatsApp account, you are likely to find Multiple Accounts equally handy.
There is no limit to the number of applications you can add. Meaning you can have a two different accounts logged in at the time on your device for Twitter, Google+, Instagram, Messenger, WhatsApp or even your favorite game.
To get the Multi Account app on your android phone, you go to your Play Store or Google Play app on your phone. Then you go to the search dialog box and type in Multi Account and click on the search button.
After clicking on the Enter button, a set of various apps are being displayed. For example, Multiple Accounts: 2 Accounts, Multiple Accounts: Parallel App, Parallel Space, Multi Accounts, just to mention a few.
For this tutorial I recommend Multiple Accounts: 2 Accounts. Select the Multiple Accounts: 2 Accounts, click on install, after it has been installed then you click open.
Add Accounts – WhatsApp, Messenger, etc
Open your Multiple Account app by locating the application icon on your Android device.
Click on the Add button. After clicking on the Add button it shows a list of all your apps on your phone.
Click on the WhatsApp, Messenger, Instagram, any other app you wish to have more than one on your phone.
Now you can use more than one WhatsApp, Messenger, Instagram on your Android device.
This app can also be used for games. You can also have your favorite games on your phone. There are no changes made in your game account.
After waiting for a little over a decade, PayPal arrived Nigeria in 2014 – arrived Nigeria with a half-baked service. A service that does little than market foreign products to Nigerians and prevent Nigerians from marketing theirs.
From the first day they stepped into the Nigerian Market, the intent was quite clear. To make maximum profit from the Africa’s second largest economy and deliver nothing in return. Yes, I said that, the service PayPal provides to Nigerians is completely one dimensional and only profit foreign companies and businesses abroad.
PayPal would fully accept Nigerians only when their US allies has found a more reliable means to do business. Nigeria has always been the dumping ground of failed US investments. It will come of no surprise if PayPal turn to Nigerians – desperate to do business with them – only after their popularity among US companies has declined. See why we think so.
Do Nigerians Really Need PayPal?
In case you are new to the current system, Nigerians can only pay money with their PayPal account but cannot receive money with their accounts. Some Nigerians has led various campaigns, asking that they should be able to receive money through their accounts like in many other countries where PayPal exist. But this campaign don’t usually make it past as many social media platforms.
Nigerians need PayPal both on the individual scale and the corporate scale. There are so many companies looking to integrate a reliable, convenient and globally accepted payment gateway to their online store. PayPal is one of the few payment gateways meeting such criteria. Some individuals, especially freelancers has found themselves in a position where having a PayPal account is the only thing standing between them and a life-transforming job.
Just recently, one Kofi Rukky called out PayPal on change.org. She asked that they should allow Nigerians receive money through their PayPal accounts. The petition like every other campaign, fell on deaf ears even after gaining the attention of over 1200 Nigerians.
Like so many other Nigerians, we have often pondered on the reason why PayPal isn’t fully functional in Nigeria. Reasons why Nigerians cannot receive money through their accounts? In our twitter handle, Geek NG and 3rd Planet Techies responded to our question on why PayPal doesn’t send money to Nigerians. They suggested that “Nigeria is still considered a high risk country, the possibility of getting a full PayPal service is pretty slim”.
Is Nigeria Really that Bad?
Nigeria as a country has long being associated with fraud. How can we ever forget the “Nigerian Prince”? The advance fee fraud has also earned popularity across the globe.
How far away is the 1960s from today?
Does time really change yesterday? PayPal doesn’t think so.
Miss Kofi Rukky is just one example of a Nigerian who is relying on the internet to earn legitimate income for themselves. As at March 31, 2017 there are 93,591,174 people accessing the internet from Nigeria. 8th position in the world’s overall ranking of internet users. According to Internet World Stats, this population amounts to 2.5% of the overall internet internet users in the world (3,731,973,423). It is likely to grow at the rate 46,695.6% in the coming year.
This population of internet users are composed of Bloggers, Programmers, Internet Marketer, Developers, Designers and various other professionals. Professionals who has come to the ‘free web space’ seeking a legitimate way to earn income. It is also important to note that this population has its fair share of cyber criminals and 419 internet frauds.
But is it fair to punish an entire population seeking to make clean income because of a crime committed by a few individuals? I’m sure Byron Howard and Rich Moore of Zootopia will disagree.
Sift Science Disagrees Too
Out of curiosity, I was forced to conduct a research on economic cyber-crime. And it was alarming to know that even the USA has more e-commerce fraud than Nigeria. Really, Nigeria is not even in the top 10. Sift Science has developed a comprehensive analysis on e-commerce fraud activity from practically everywhere in the world. Nigeria, contrary to the general assumption, lies 7 places away from the top 10 countries involved in e-commerce fraud.
The research showed that people in the smaller countries (in terms of population) like Latvia, Egypt, Mexico, Ukraine, etc are found to participate more in e-commerce fraud than Nigerians. Even bigger economic countries like Russia and the USA has earned its place in e-commerce crime above Nigeria.
Most US Companies are Losing Trust in PayPal
Knowledge has increased. US companies are becoming more aware of the loopholes associated with PayPal. Really, if their system is as secure as they claim, why the need to alienate a certain individuals? That is a debate for another day.
Minimizing cost and maximizing profit is the basic objective of every business. Over the years, PayPal hasn’t helped most businesses in the US towards achieving this basic business objective. Customers who do not have a PayPal account and wishes to buy products has to go through the rigorous process of creating a PayPal account. This in return makes companies/businesses lose potential revenues and clients.
It has also being argued that PayPal puts customers at a risk of identity theft as they demands too much personal information, makes misleading claims, tricks people into signing up and creating an account they don’t want and extorts more personal data from those who signed up. With too much privacy questions raised recently, it wouldn’t be surprising to see people considering a life after PayPal. And with Bitcoin gaining more international recognition, it is only a matter of time before more serious businesses start jumping ship.
Why PayPal needs Nigeria?
Nigeria’s economy is the second largest in Africa ( after South Africa) and her banking system is one of the best in Africa. Nigeria is the most populous nation in Africa and the 7th most populous in the world. PayPal would get to realize that there are lot of business people in the country. People who are willing to use their accounts for legitimate businesses in Nigeria.
Also, operating in Nigeria opens a unique opportunity for them in Africa. As the arguable giant of Africa, the success of most businesses in Africa depends on how successful it is in Nigeria. Several companies has denied services to Nigeria on the basis that there is no payment gateway for Nigerians.
PayPal full arrival to Nigeria will mean more companies extending their services to Nigeria. More revenues generated for both parties and more happy Nigerians. Everybody wins! But PayPal won’t see this until their US allies turn their back on them.
From time memorial, man has indulged himself into seeking out ways to improve his living standard. The application of this science into practical purposes is what is termed ‘technology’.
The constant evolution of technology has affected every part of human existence: information is more accessible, we enjoy good roads, better & healthy living. We can also admit that the introduction of some technology has shortened our existence on earth; with the worldwide life expectancy age just lying above 70 years, life is indeed very short.
Games such as Awale are not only there for our entertainment, it also improve family and friendship bonding. These days, we have school and work commitments which make it increasingly difficult to enjoy the thrills that gaming brings. That is where online gaming platforms steps in, providing online gaming platforms where you can play countless games online, with the added benefit of betting.
My business here today is to discuss 3 important games, with historic background that technology has presented us in a platter of gold – playable in your mobile devices at your convenience.
Awale
Awale also known as Ókwè, Alancho, Ayoayo, Oware or Ise, has its root in Africa and played worldwide. A common name in English is Awari but one of the earliest Western scholars to study the game, R.S. Rattray, used the name Wari.
The game is considered the national game of the Ashanti kingdom in Ghana; it is also played traditionally in Nigeria, especially in the Igbo-speaking tribes. Known to encourage family bonding, Awale is one on the most social two-player abstract.
Backgammon is one of the oldest board games known to man. It goes down to the ages when human bones were used for dice and Emperor Nero and Claudius making a fortune through gambling.
Just before technology stepped in, the church and government banished backgammon because of the gambling aspect of it. However, some Good Samaritan in the 1920s introduced doubling to rekindle interest in the game.
In recent years, backgammon has been studied with great interest by computer scientists. Owing to this research, backgammon software has been developed that is capable of beating world-class human players (see TD-Gammon for an example). More developers are also pushing out backgammon games you can play both on your Android and iOS devices.
You can find backgammon games you can play for free on Android here and here, for iOS.
Chess
The Chess game needs no introduction. The game has been around ever since the 6th AD. It’s thought to have originated from India with its modern version (Romantic Era of Chess) characterized by swashbuckling attacks, clever combinations, brash piece sacrifices and dynamic games. Winning was secondary to winning with style.
According to a survey in 2012, “chess players now make up one of the largest communities in the world: 605 million adults play chess regularly”. Chess is played at least once a year by 12% British people, 15% Americans, 23% Germans, 43% Russians, and 70% Indian people.
What’s more? Technology has ensured that the new era of chess can be taking anywhere with you. Thousands of chess games have been developed for both PC and mobile. Even the famous Microsoft Windows 7 Ultimate edition comes with the Chess game as one of the pre-packaged system application.
Owing to the modern trend of mobile technology, mobile application developers has delivered by making countless Chess games you can download both on the Android store and Apple store.
YouTube (the behemoth video website and subsidiary of Google [GOOG]) has been the home for many of the world’s at-home entertainment for years. At its inception, YouTube was a simple video sharing website where people can host their video content on the web. The idea caught on eventually when the first ever viral videos made their way to the young website, and content creators like Smosh began to make creative videos on the website.
Going from 2005, YouTube became a major hub of videos of all types and it saw a very large audience flocking to its service everyday to enjoy an array of content from an even larger array of uploaders/channels. And it is only natural for a new leader of a market to attract the attention of large companies like Google, who bought the company in 2006 for $1.65 billion in stock. And much like anything Google touches (well, almost everything), YouTube became great. It is great, and has been great since its inception.
With the what seems somewhat successful YouTube Red, and the plethora of advertisers and high-quality content creators, YouTube has had many successful quips under its name (even though it still doesn’t make any money for Google), but it has just an equal amount of not-so popular choices. Choices like these include: the forced Google+ integration, introduction of the buggy content-ID system, and now: the demonetization mechanic.
Now, the demonetization feature isn’t new to YouTube: it has been a part of the website since 2012. It is essentially a system that takes the tags and information of uploaded videos applied for monetization, and will remove their monetization (or deliver less of it) if the video results in being “not advertiser friendly.” However, it wasn’t until about last week that popular YouTuber content creators began to take notice of the system: and that was because YouTube finally began to inform creator’s that the system has edited their video’s advertising state.
You could say the fire of this month’s YouTube drama began with creator Philip DeFranco’s video discussing the demonetization of his videos. From there on, multiple other popular YouTubers made videos regarding the concerns, and many others made videos announcing how this was a form of “censorship.” While the publicity of the system has definitely made many content creator’s upset (and has essentially “screwed” over others in some cases), the question about others stating this as “censorship” is quite a hot topic among the community. What many do not know, however, is this is in fact not a form of censorship, and is just the system applying the guidelines for monetization to videos.
The outcry from creators and their arguments of “censorship” have triggered a factory line of similar videos discussing how someone needs to make a new site like YouTube where “free speech” still reigns supreme. These concerns were acknowledged by video site Vid.me in a humorous trailer playing off of the entire trend. However, what many have not taken into account is the difficulty of managing a service like YouTube, and the fact that the demonetization stands and is not censorship.
As aforementioned, this system simply reduces the targeted ads (or removes them altogether) on videos who include tags that are rather brash, racial, harmful, offensive, etc. Tags such as “sex,” or “death” would be ones that fall subject to the demonetization system. And many popular content creators have published several videos that used tags within these categories once or twice. This isn’t a form of censorship, as the videos will remain online but rather it protects ads from being presented to the wrong audience and ensures quality for those engaged in Google’s Adwords system.
Putting to rest the worries isn’t enough however, as the software for this system is still messed up and many videos that are clean for advertisers will still fall victim: reminiscent of the YouTube Content-ID system. And the fact that it took this long for the company to address the demonetization of a creator’s video truly has no justification on YouTube’s part. At the end of the day, this revelation is much like many in YouTube’s career: where the creators and community discover a flaw, creators are effected, the community is enraged, and then the facts are laid out on the table.
This essentially points YouTube out as a still young and somewhat broken service. It lacks in properly educating its creators on the finer points of its legal terms, and it fails to correctly communicate with the creators that care for the platform. YouTube should strive to improve how it handles its community, and to improve its automated systems.
To learn more about YouTube’s demonetization, check out this write by the Internet Creators Guild.
Pokemon GO is a augmented reality mobile game that released (without announcement) on July 6th, 2016 (in the U.S.). I was in my friend’s car when I refreshed the Google Play store, and searched ‘pokemon’ to come across its app tile in the results. When I got home, I rushed to that Play Store and downloaded and installed Pokemon GO. I thought I would love this game; I figured it would be the game to get mobile games the attention and traction they needed. I thought wrong.
Since its release, Pokemon GO and developer Niantic has faced challenge after challenge, bug after bug, complaint after complaint. Many eager North American player’s first few days of the game was greeted with constant server shortages and only able to play every so often for a few minutes. Naturally, these outages came about from the influx of new players trying to access; simple tech stuff, right? Well, the first blow to the game and the first sign of failure arose from this: little to no comment about the servers from the company, and in a game where we were given some PokeBalls, and sent on our way. Eventually (about a week or so later) the servers became stable for the most part; most looked past Niantic’s shy communication with the players and continued to enjoy the game, as did I.
After the servers were finally stable, me and my Pokemon-avid brother would take out at night to “cath em’ all,” and being the mega fan my brother is of the franchise: he enjoyed nearly every minute. I had fun, sure, but something began to set in the back of my mind. Something we all know very well; something we all dread. It was there and I knew it instantly. This feeling creeping on me was none other than boredom. It wasn’t too much to trouble me at first, but then the game finally reached its peak of social media attention and that’s when I knew this would go downhill for me as a player, and for the mobile game itself.
Every single day here in Ohio, out in the blistering heat; people I knew (including my brother and his friends) would travel to universities near and far and wander aimlessly for hours to capture the abundance of Pokemon available. I can say during my time of playing, I never felt the need to travel as this game shouldn’t treat the larger cities with more spawns. However, it does and people in small towns like me are left with little to no spawns – at the beginning this was okay with me. I was just simply leveling up and hoping to evolve my Pokemon; playing freely whilst many others were ditching town and spending a good deal of cash on the game.
So, as I continued to get bored with the capturing mechanics (which felt at the time and at this time still seem quite broken [regarding capture rate]) I decided to simply grind my Pokemon with the most CP so I can take some gyms. This part of the game is nearly impossible. Active players at the time (e.g people on the social media wagon) of course played this game with every single second of their free time that they could, and of course this made capturing and holding gyms within the game very close to impossible. I would capture a gym, just to have it taken within about 20 minutes or more (give or take). It started to make me feel even less motivated to take part in the game.
Then, the social media ‘hype’ and ‘buzz’ of the game soon turned to distrust and conspiracy as the in-game tracker broke. This tool was essential to the whole concept of catching Pokemon, as you could have an estimate of knowing when you’d be close or far from a Pokemon. Without any patch or word, this stayed a problem. Then we got an update: for “minor text fixes.” This, of course being a ridiculous excuse for an update, developed into a bit of a fond ‘meme’ for many of the games players. These ‘minor text fixes’ did not fix the tracker and did not improve gameplay.
Then, the relatively-young Niantic began to dig itself a deeper whole. A considerable “first major update” arrived, and with it they removed the tracker completely. This of course caused an uproar with players, but many continued on in hopes of one day “catching em’ all.” I also continued to play this, but definitely not as much as I did the prior month.
About a day or so after Niantic’s big tracker-fiasco, the company was purportedly the reason behind the shut downs of many of the online Pokemon GO tracker websites. Many players now felt like the company had been suppressing them, and that there was no way to enjoy the game at all. And I agree. Thought, there is much more to why this mobile game “phenomenon” fall short.
People only see the negatives as given: removed tracking, lack of communication, shutting down fan-run websites, etc. Of course, these taint Niantic’s name and all that they do. But there was, from the start, and has been another negative of the game that led it to what I consider it’s demise: the player base.
Many will agree when they say this game belongs into an “over-hyped” and “bandwagon” category of sorts. Many die-hard Pokemon fans hyped it, and many people who never even cared and/or heard of the series played it “because everyone else was.” And this isn’t necessarily bad: all the time. Many people play games because many others are; fun games like Overwatch, CS:GO, and even relative mobile titles like Fruit Ninja and Crossy Road are played by millions due to bandwagon. It’s natural. But in the case of Pokemon GO, it was too much. There’s mobile games that are addictive, and then there’s ones that become addictive strictly because of the need to feel like you have conquered over your peers and other strangers.
Thanks to the awful leveling system, I was stuck at level 16 forever, barely making it to 17 before I stopped playing. And I chose to stop playing 1) because of the player base and 2) because of the brokenness of the game. Every other player and their grandma had done nothing with their lives besides this game in every breathing moment that they weren’t working or sleeping. Every gym holder and those contributing Pokemon to protect it were way out of my league – level 20+ players with Dragonites and Venasaurs all over 1,500+ CP (much much stronger than anything I can hatch/find at level 17.) I no longer had a point to try for gyms, and the only other mechanic was broken due to messed-up catching rates (low CP Pokemon would break out of a Great Ball and run, despite however many razz berries were tossed its way).
And the annoyance brought from the player base also deteriorated the game’s reputation and overall play-ability. Always harsh cracks and disrespect based on what fictional team you were. Players would be threaten, called ‘retarded’, or even have their property destroyed for being on an “enemy team.” (according to a redditor on a /r/pokemongo thread). People who were taking the game and its teams way too seriously; people devoting every second to this game (working out isn’t done with every free hour of your day); people neglecting other things in life simply because they want to brag that their Blastoise is stronger. Mix this awful, confused, and allured audience with a game that is relatively broken, barren, and simply boring, and you get a very great concept that rode upon hype and died surely enough.
The recent figures for the game have come out: Pokemon GO by Niantic has lost over 15 million active players in just one month. And I think the reasons are reflected here in the editorial. Pokemon GO was a great concept, but a rushed release of a buggy game with an over-involved and addicted audience destroyed all that this mobile game had going for it.
Happy Sunday to all EWT readers! This is the 7th month of the year and I hope everything’s going according to plan? If it’s not, it’s not too late to start afresh. One of our major objectives this year is to provide you with valuable information that will help you reach your ambitions in as much as it is tech related.
Regardless of your social class, occupation or belief this apps will help you manage your weekdays effectively and subsequently giving you a memorable week in the end. Keep your eyes fixed as we take you down the stream.
The more I think of Sunday is the more I think of social networking. What other way would you rather spend a cool Sunday evening aside saying hello to your co-workers, leaving a voice note to your classmate or even sharing your awesome videos, musics and photos with your distant family and friends? Pheed is the Android application that lets you achieve all this without lifting a foot.
The free social networking application lets you share voice-notes, musics, videos, photos and text with your followers.
A free app to quickly convert video clips and photos into awesome editable movie; you can add your custom background music, graphics and movie effects.
Imagine having everything you need in one app. This is what Binu is all about. The application serves as a valuable resource for news in your locality. You can also add links to your favourite news website and the app gives recent updates from the websites you have added.
Binu has an in-built chat messenger, 15 credit to send SMS to any phone number globally, sport news resources, dictionary, bible, quran, wikipedia, etc. The application is free, very portable and easy to use.
Talking of having a mobile branch of your office, all it takes is $14.99 – OfficeSuite Pro allows you to view, create, edit, print and share Microsoft Word, Excel and PowerPoint files on the go. You can also open attachments and see PDF files on an Android based phone or tablet with our feature-rich mobile office solution.
OfficeSuite Pro includes a File Browser and integration with Cloud service leaders: Box, DropBox, Google Drive, SkyDrive and SugarSync to give users a multitude of options on how to manage files and attachments.
With the great features of smartphones we often forget that it is actually a phone. Callist Call Manager ensure that you don’t miss that important call you want to make. With the application you can keep a list of the people you want and need to talk to, schedule call reminders, add notes and repetitions, add to, delete from and organise your Callist with simple touch gestures, call, text and email your favorite contacts and contacts you recently talked to.
The application also deliver after call pop ups e.g. If you had a missed call or you could not reach someone Callist will show you a popup from which you can easily add a call reminder directly into your Callist (Can be done automatically, if you’d like).
Above all, this app is free, ads-free and easy to use.
This application will take note of all your activities this week: The people you talk to, the places you visit, the images you capture, and the songs you listen to, etc. And like your brain, it initiates thoughts and ideas for you, it helps you remember information and tries to anticipate adequate actions.
Do not loose this app: You will need it at the weekend. Camera ZOOM FX could easily be the best replacement for the N5 camera application which lacks a lot of options like 16:9 highres shot for example. It takes only $2.95 to preserve that decent memory. If Camera ZOOM FX doesn’t sound like a great app to you, you might as well hang on to any of the awesome camera app that made our best android camera app list.

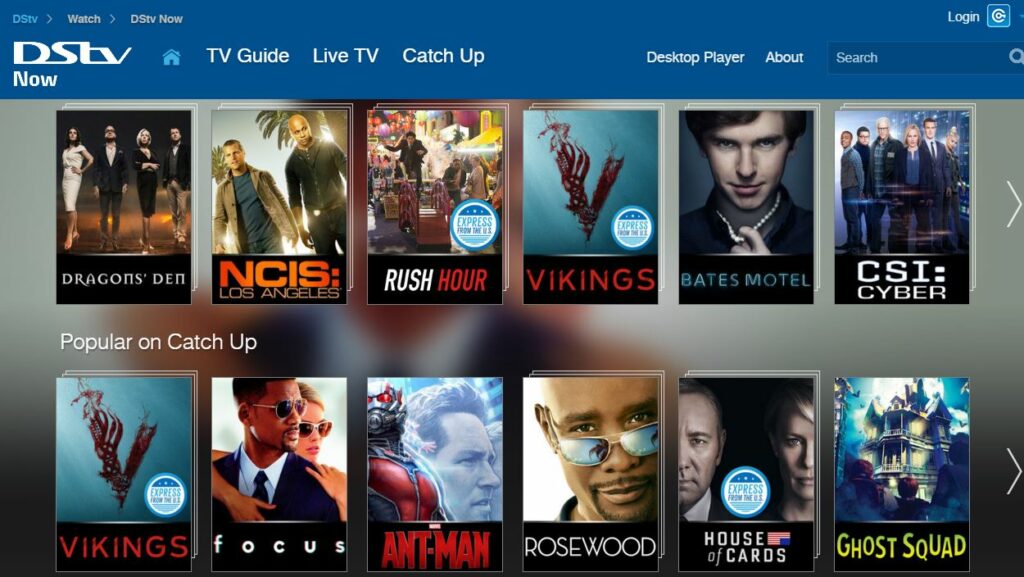
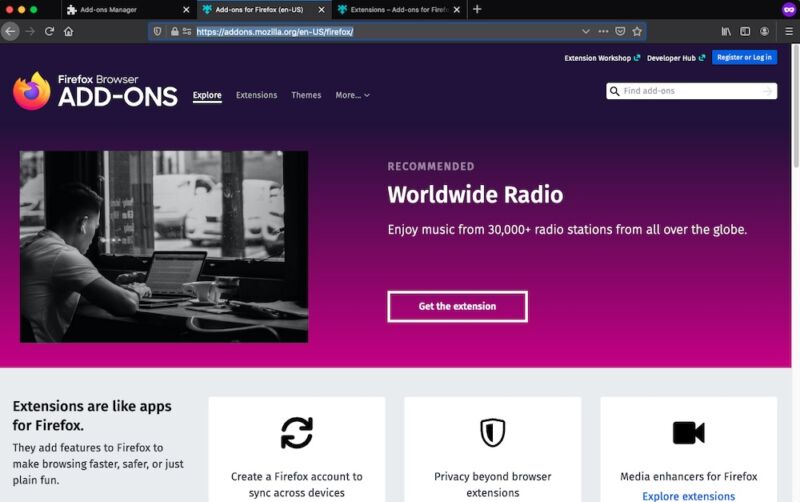
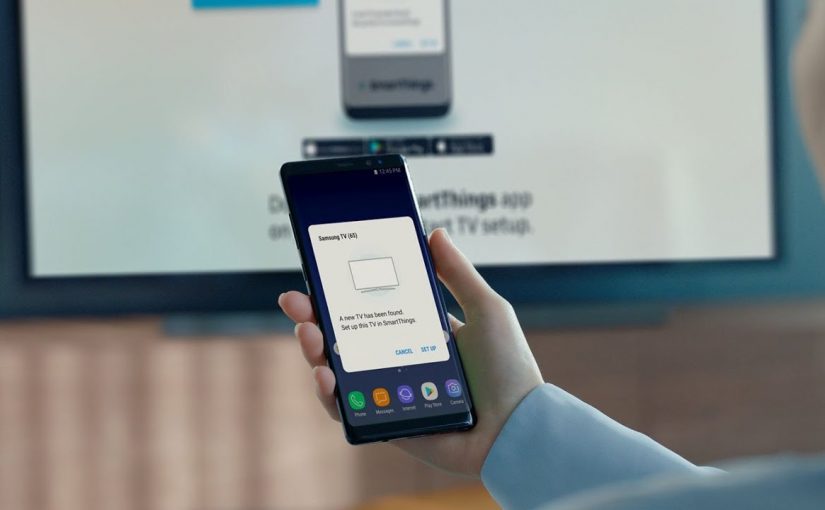

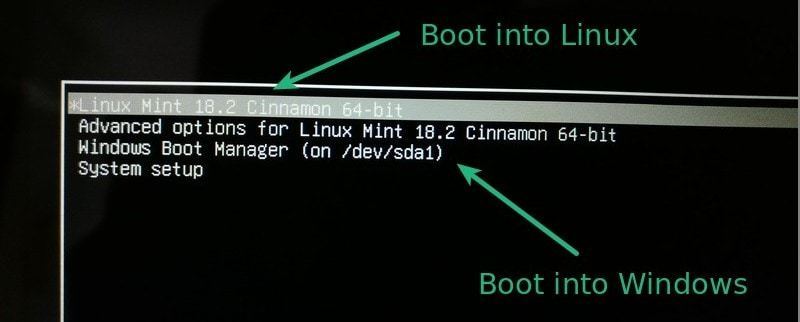
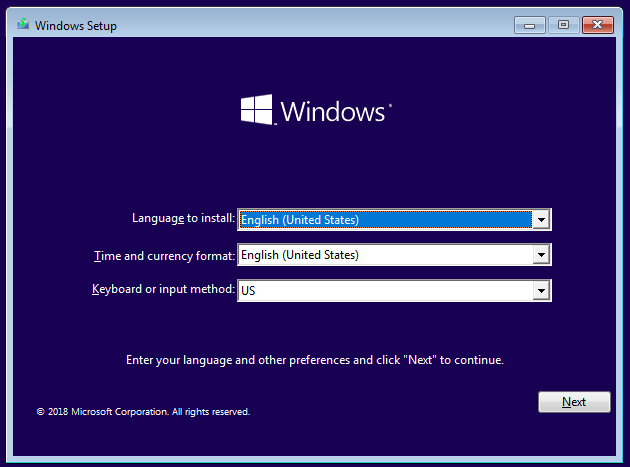
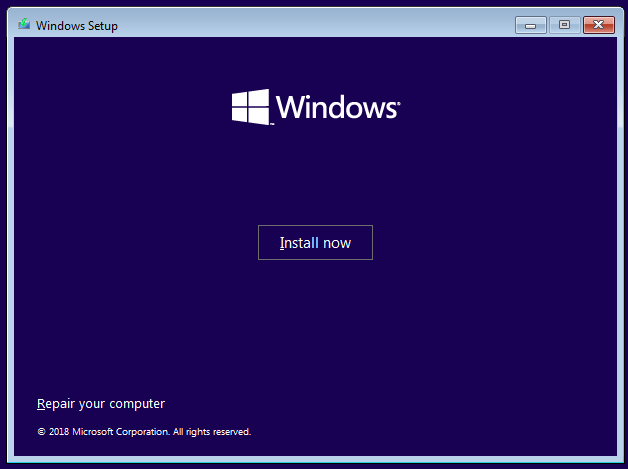
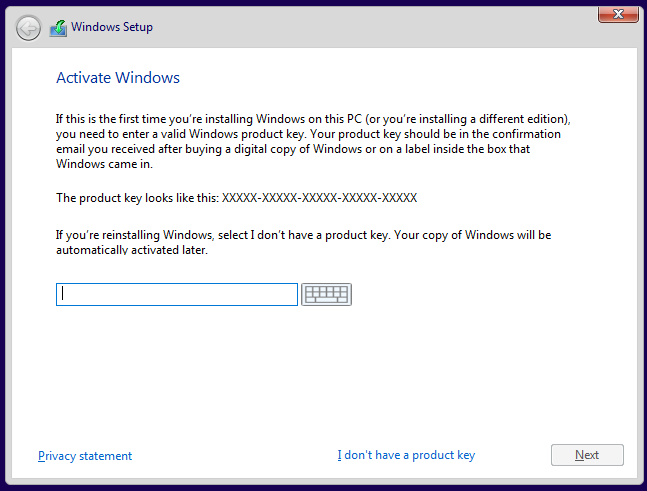

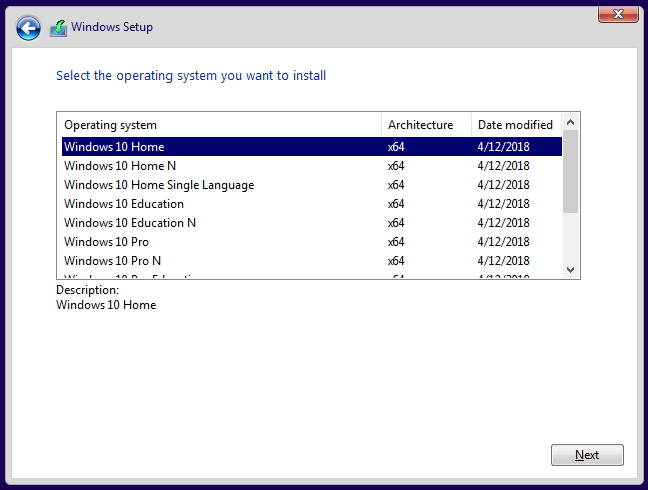
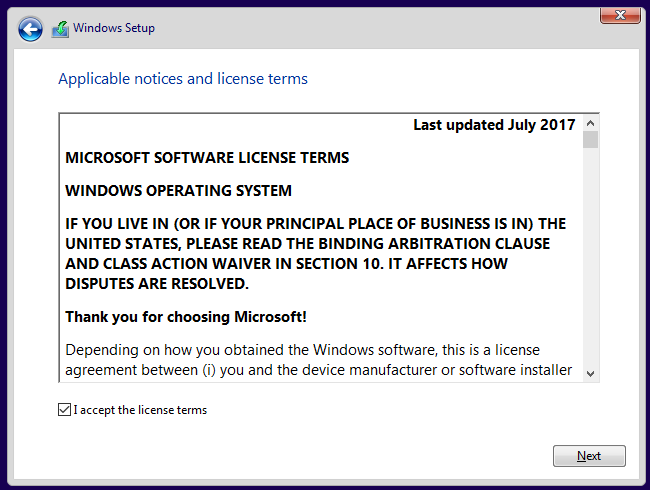
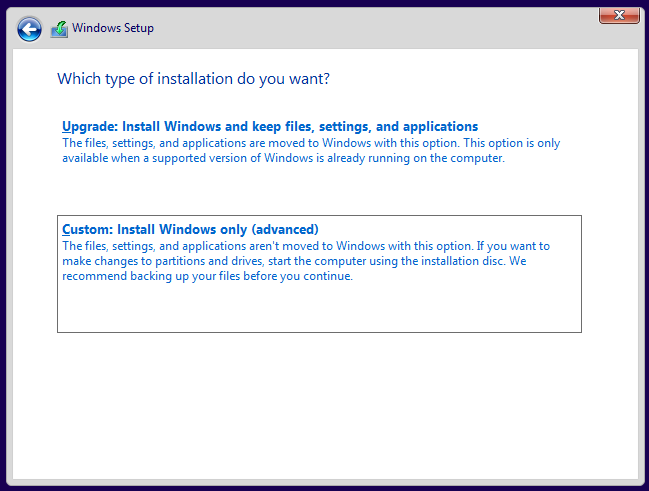
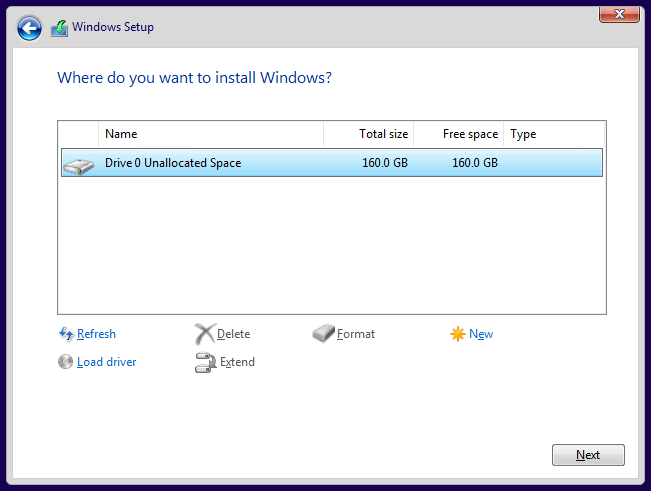
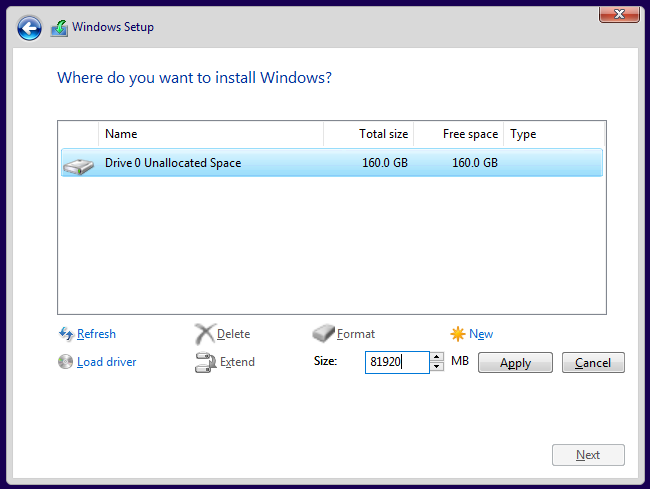

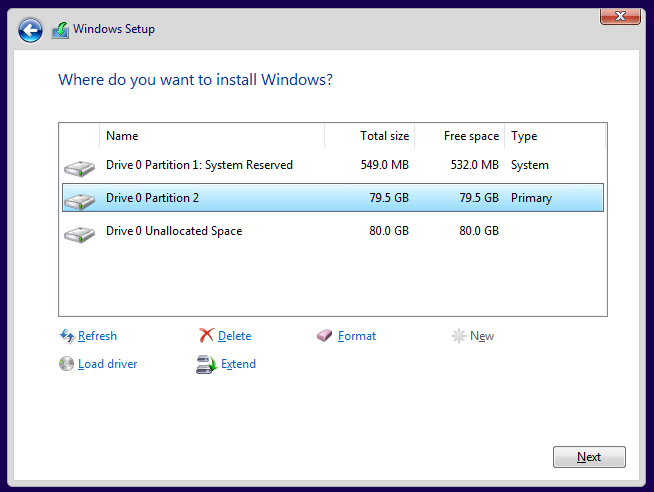
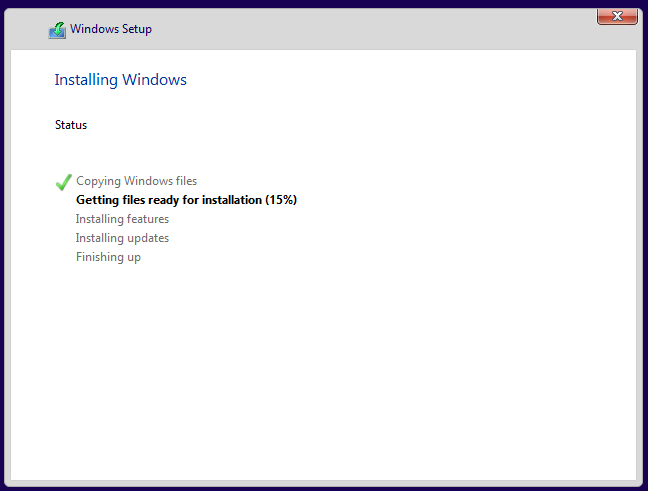
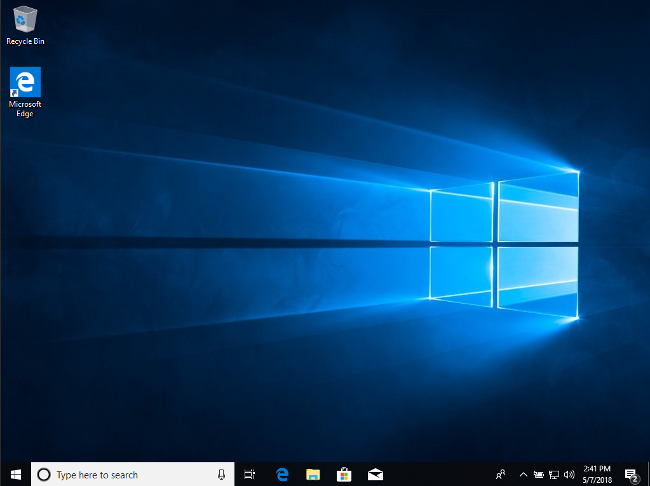

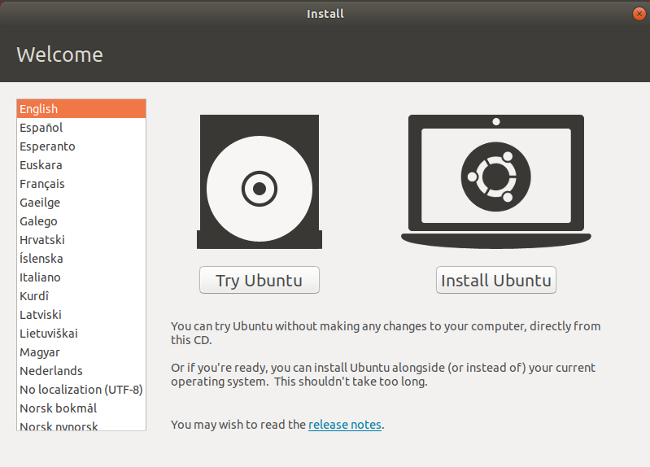
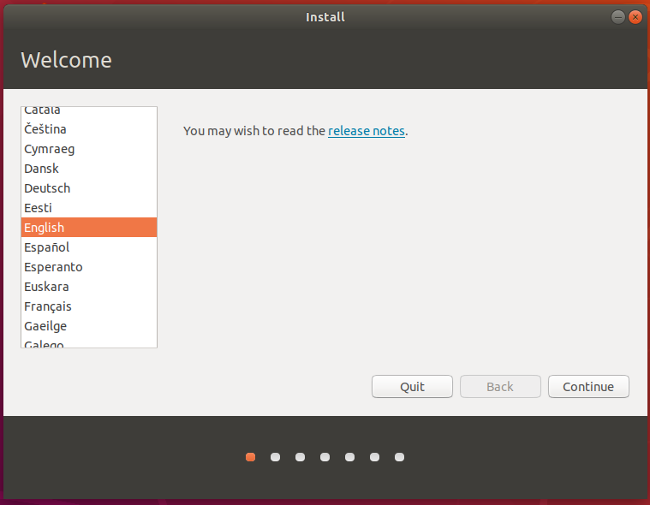
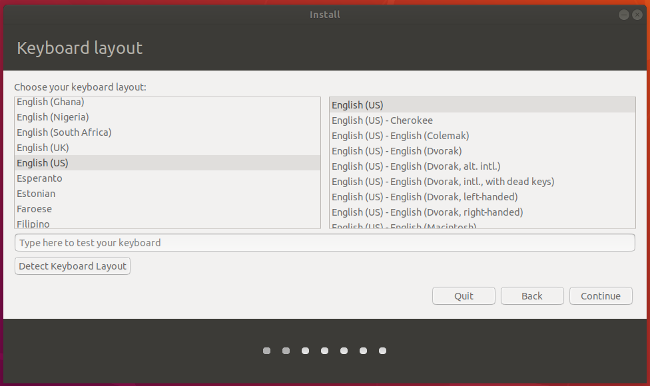
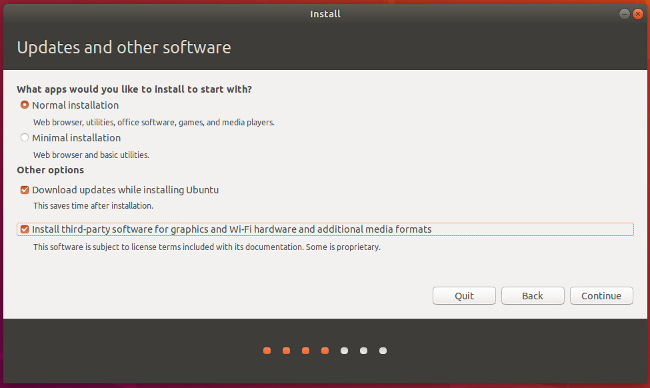

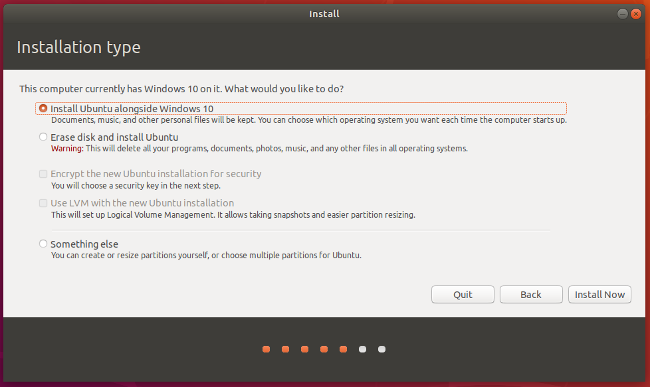

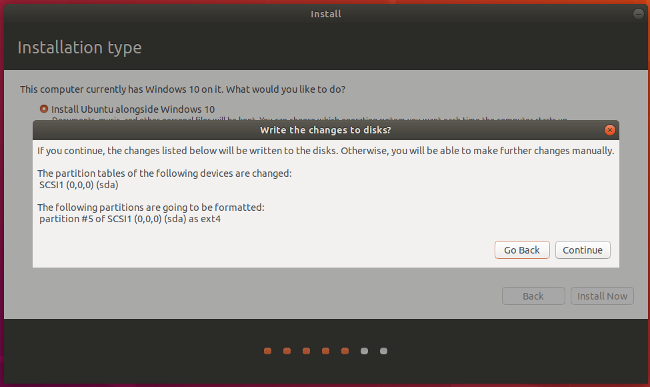
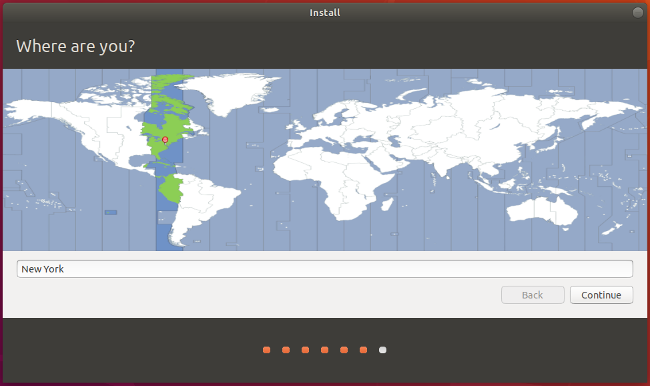
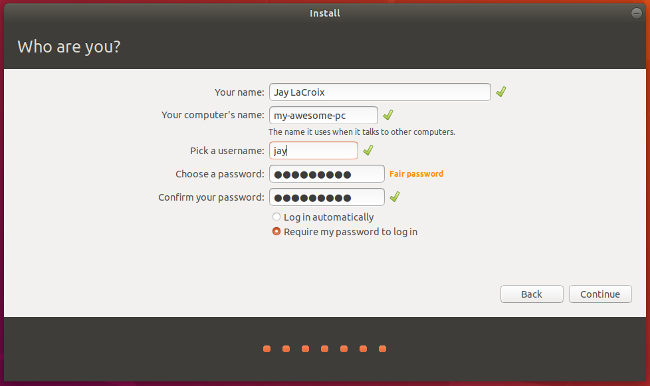

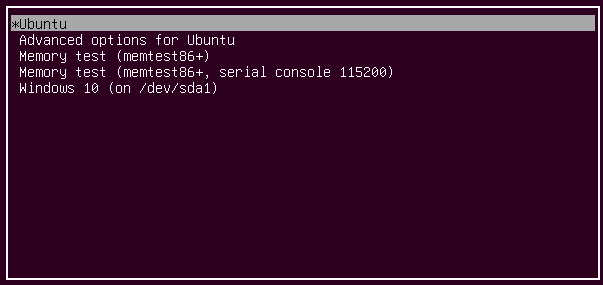


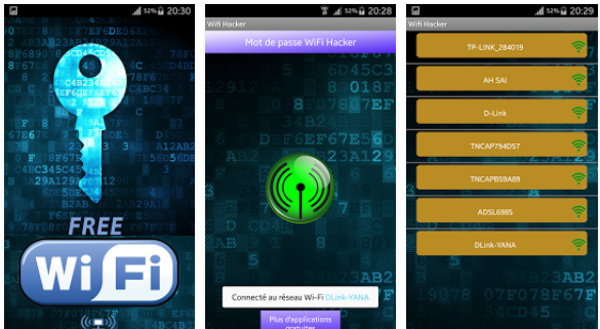


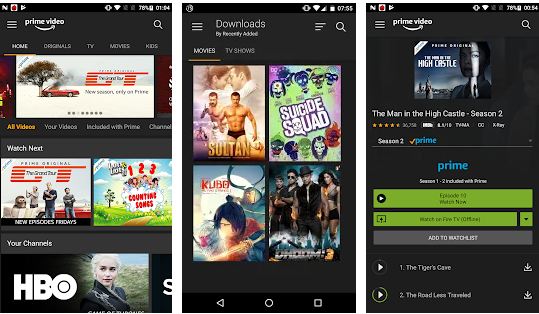


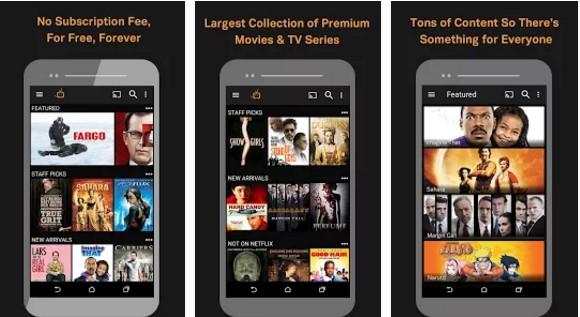
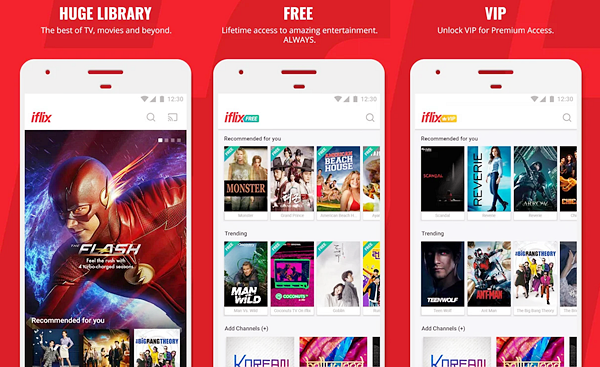


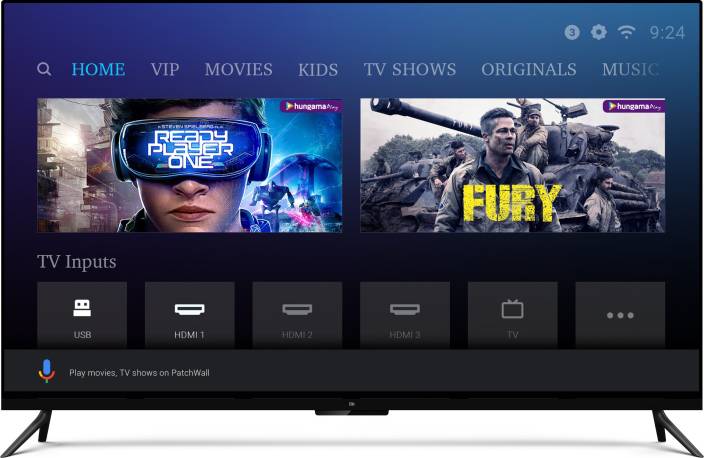
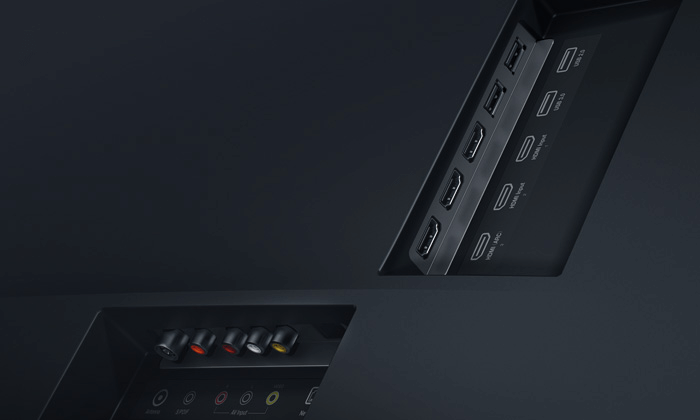
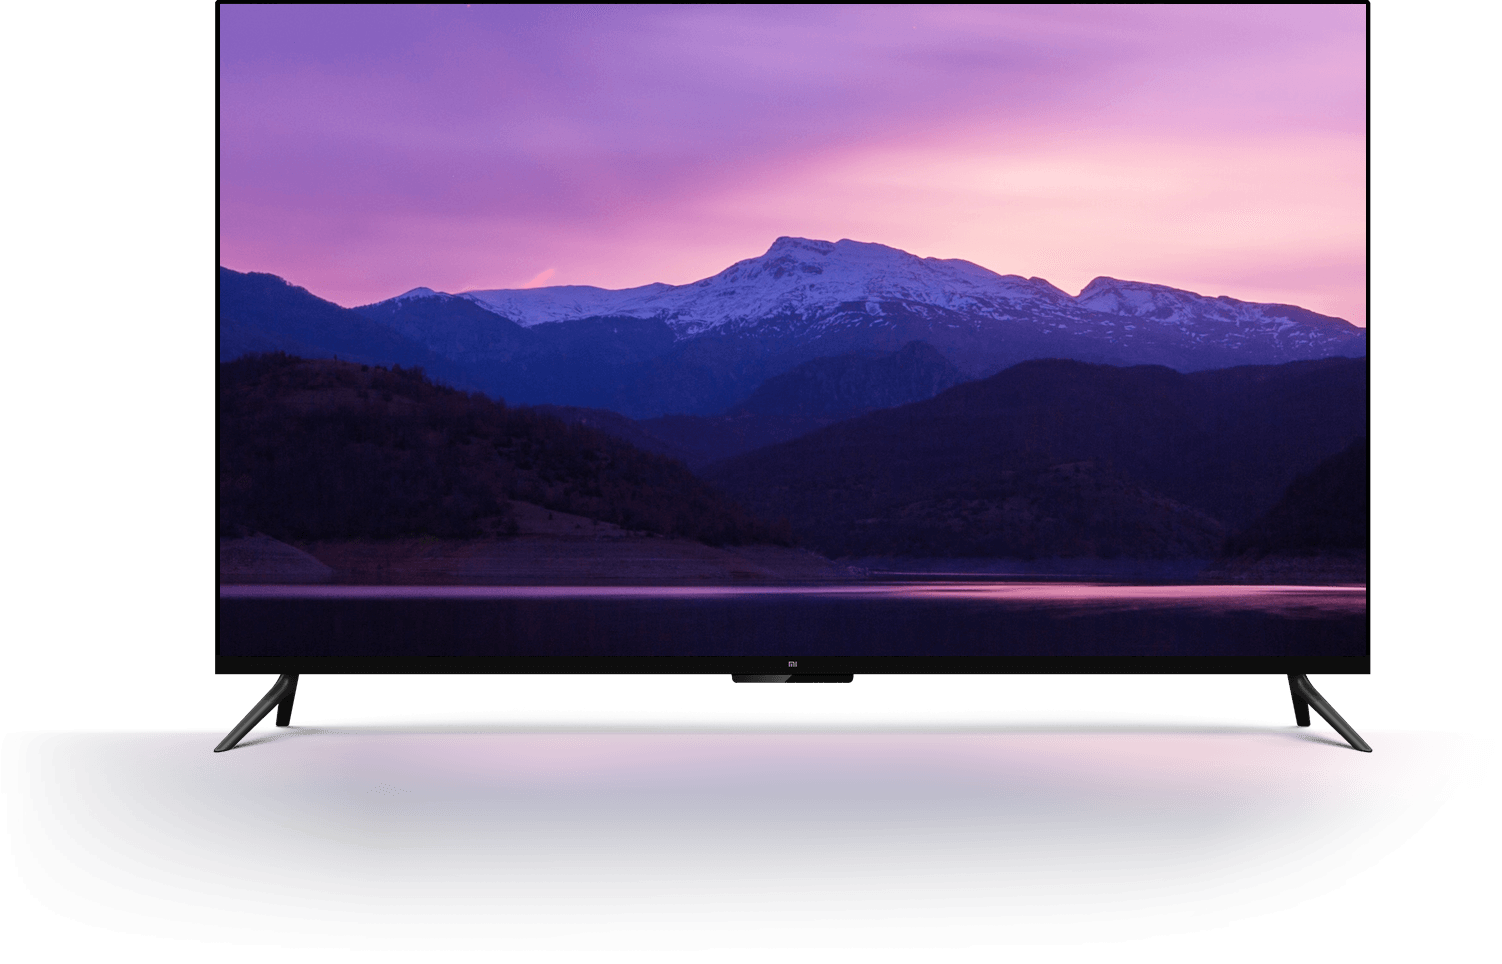
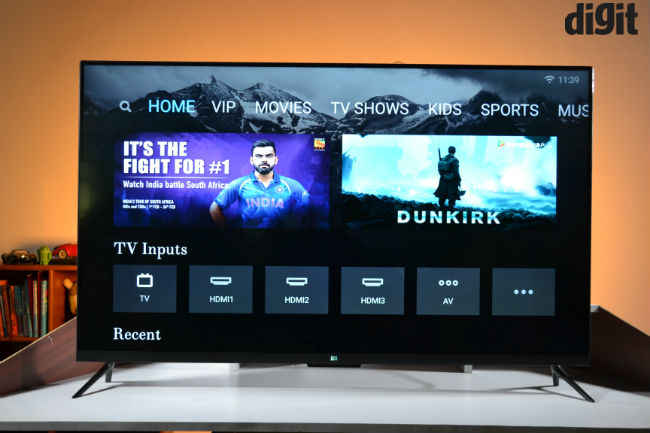
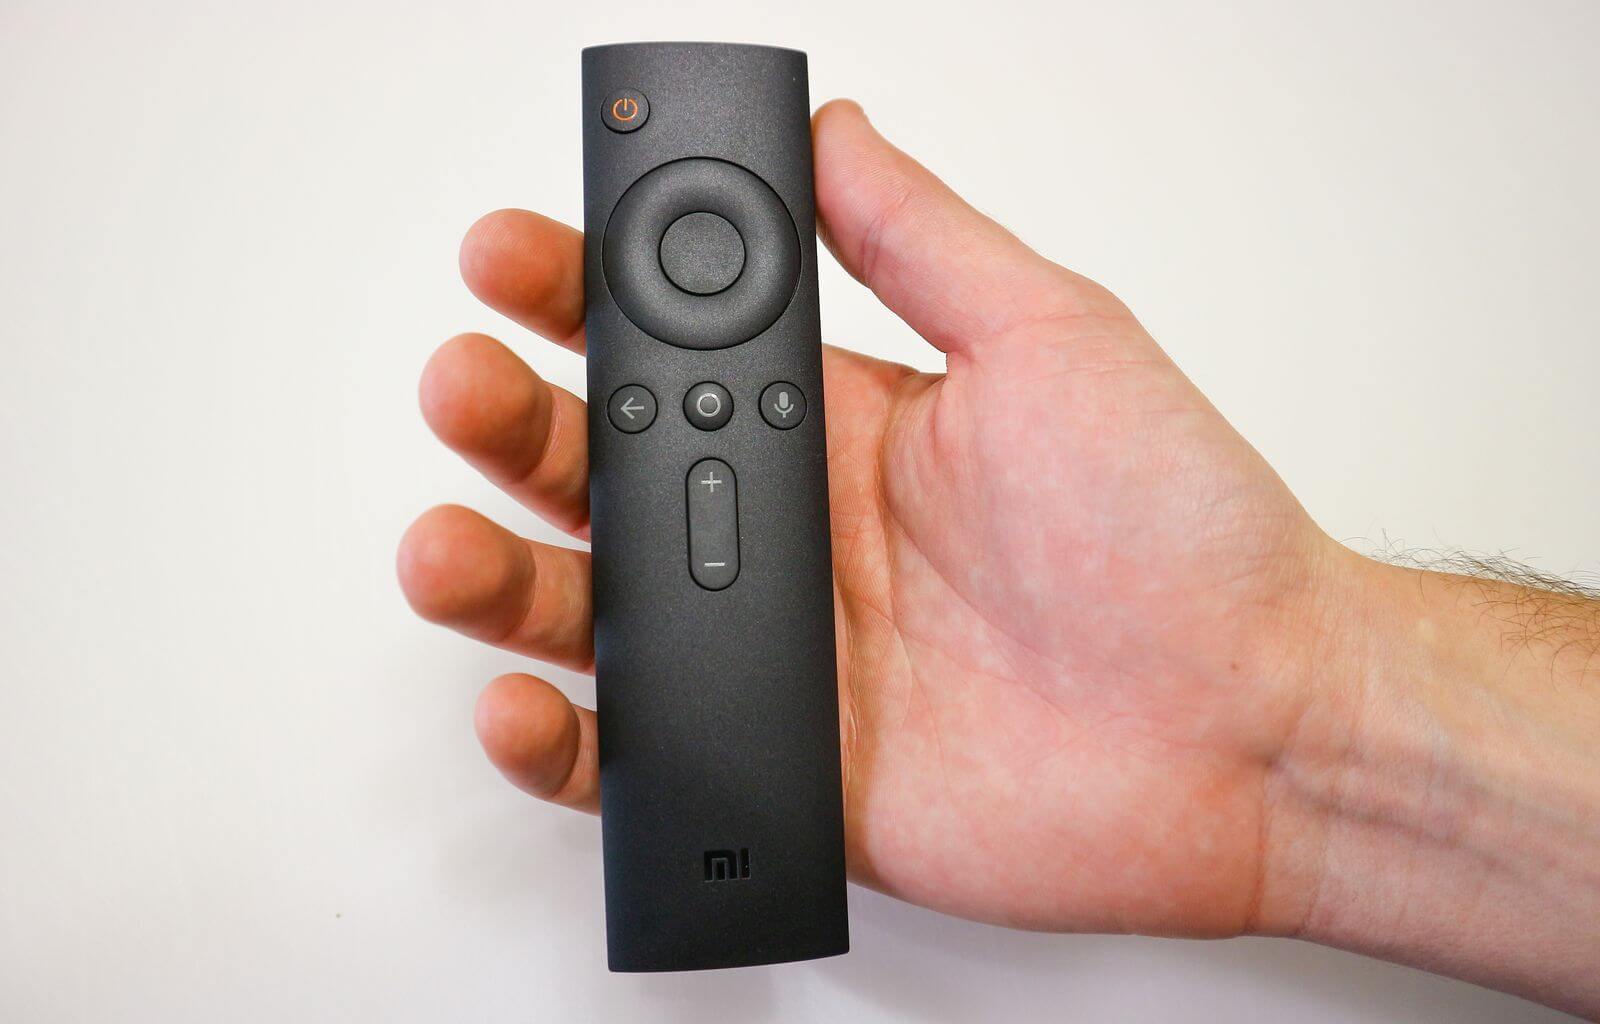
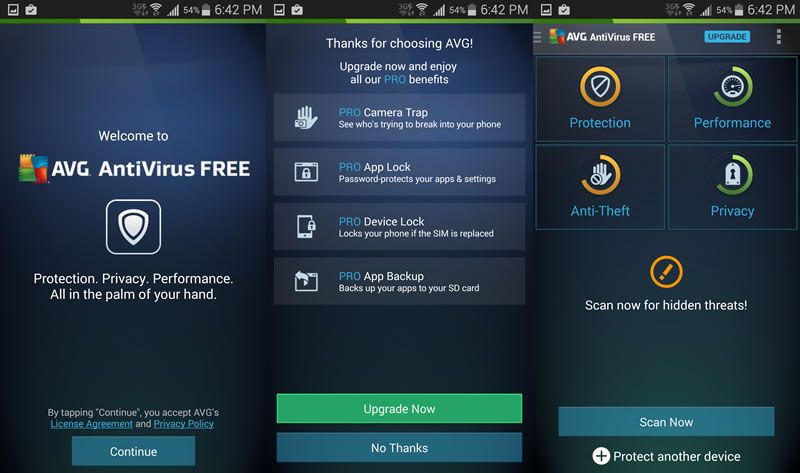



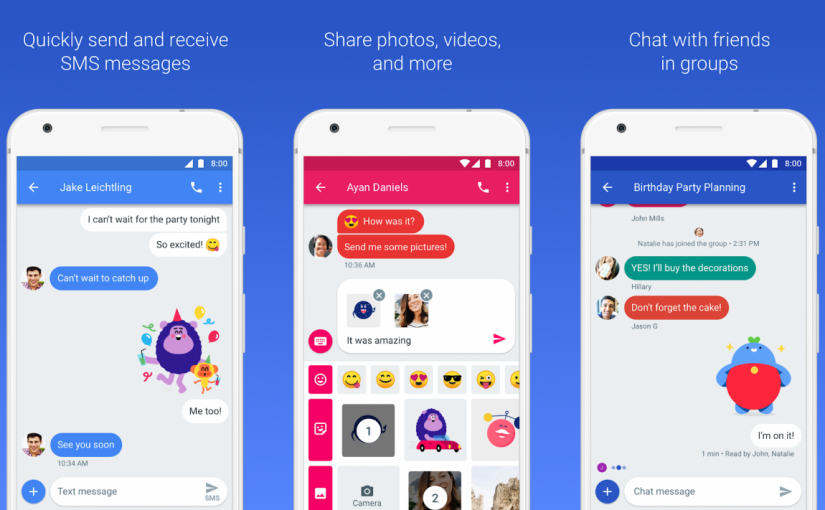


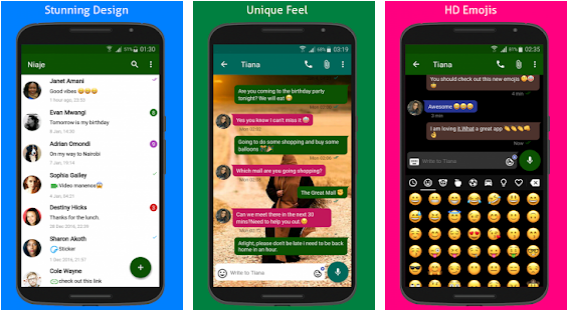
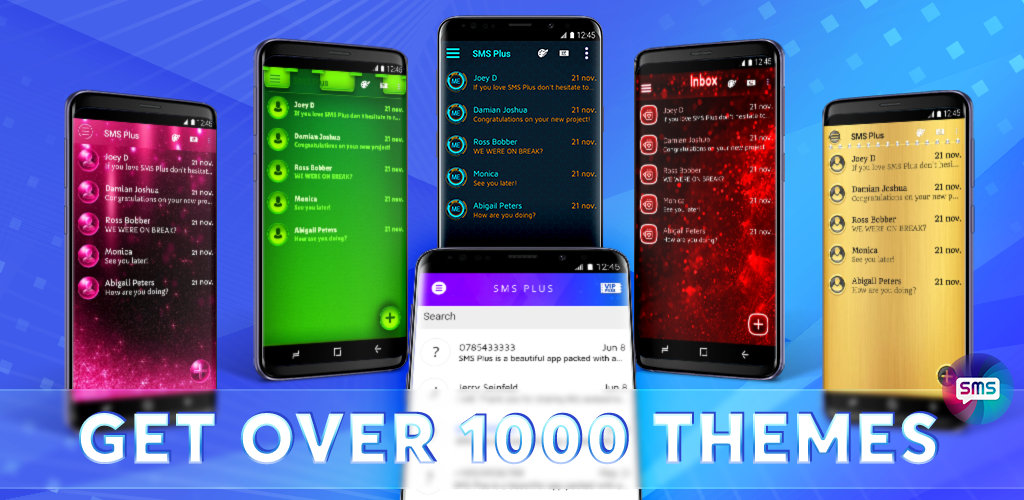
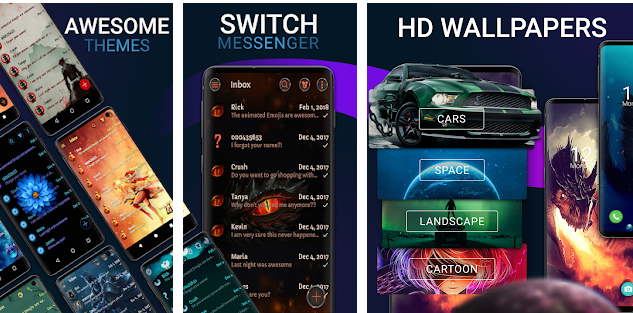
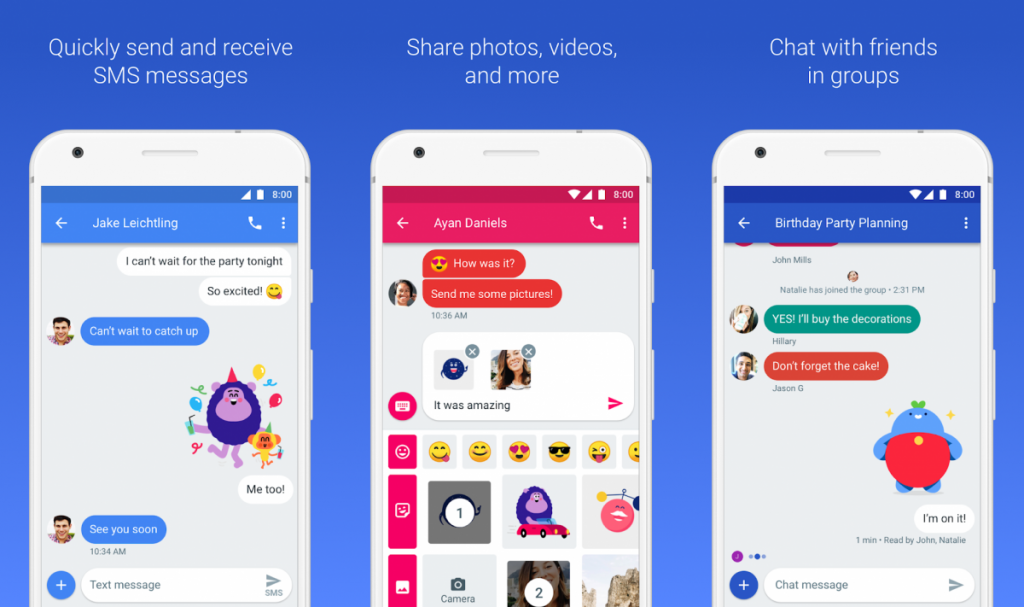
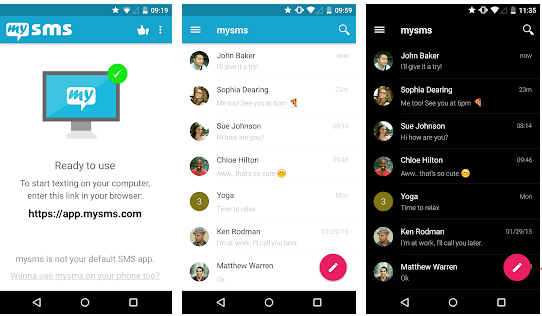
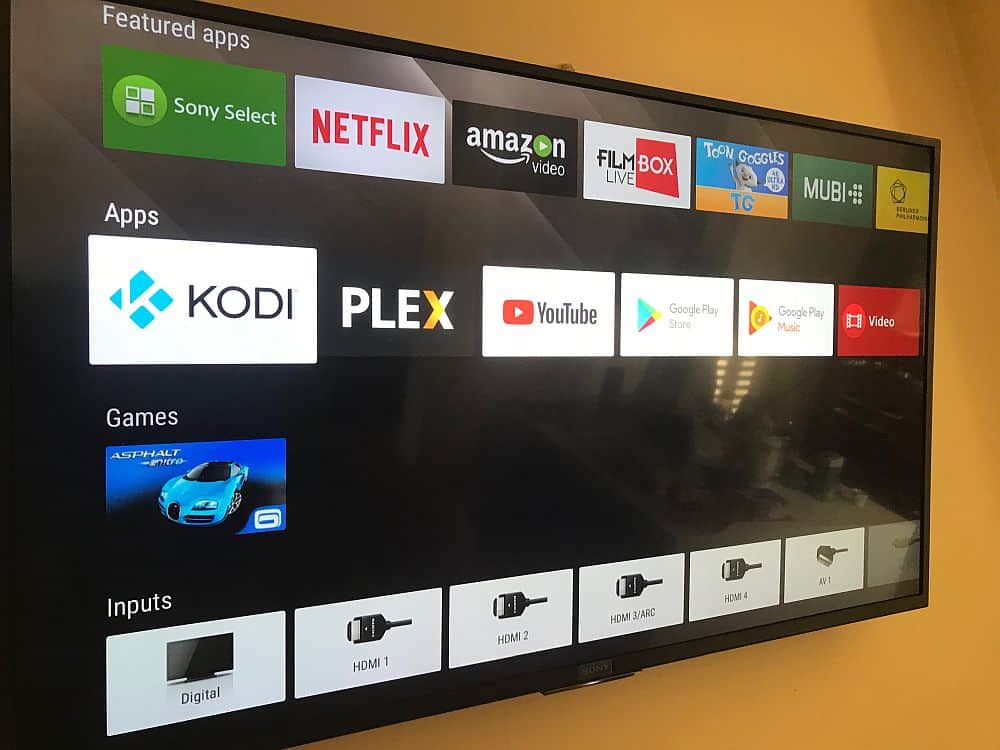
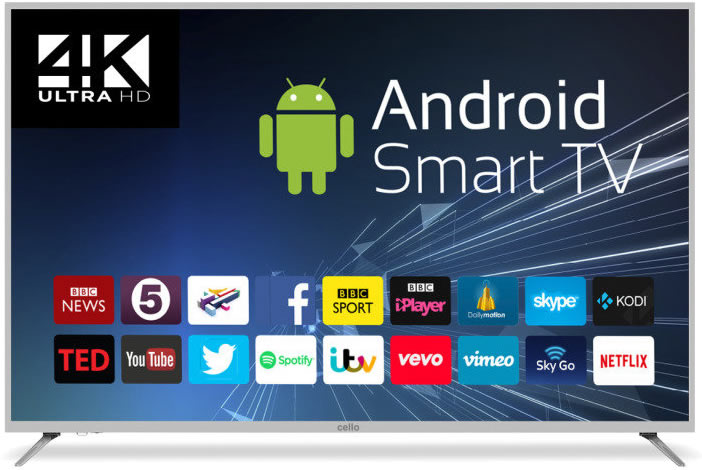
/cdn.vox-cdn.com/uploads/chorus_image/image/58541691/akrales_170919_1976_0104.0.jpg)
/cdn.vox-cdn.com/uploads/chorus_image/image/61618787/Fire_TV_Stick_4K_with_all_new_Alexa_Voice_Remote___Straight.0.jpg)
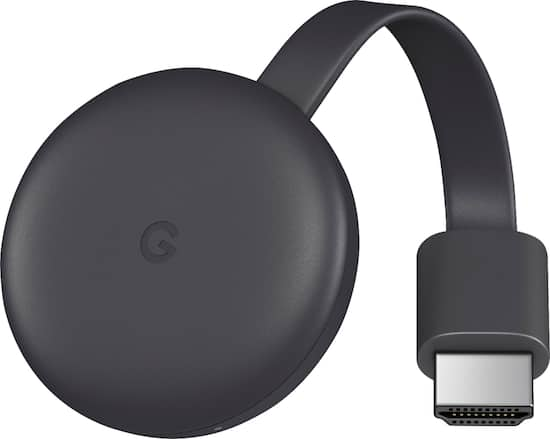
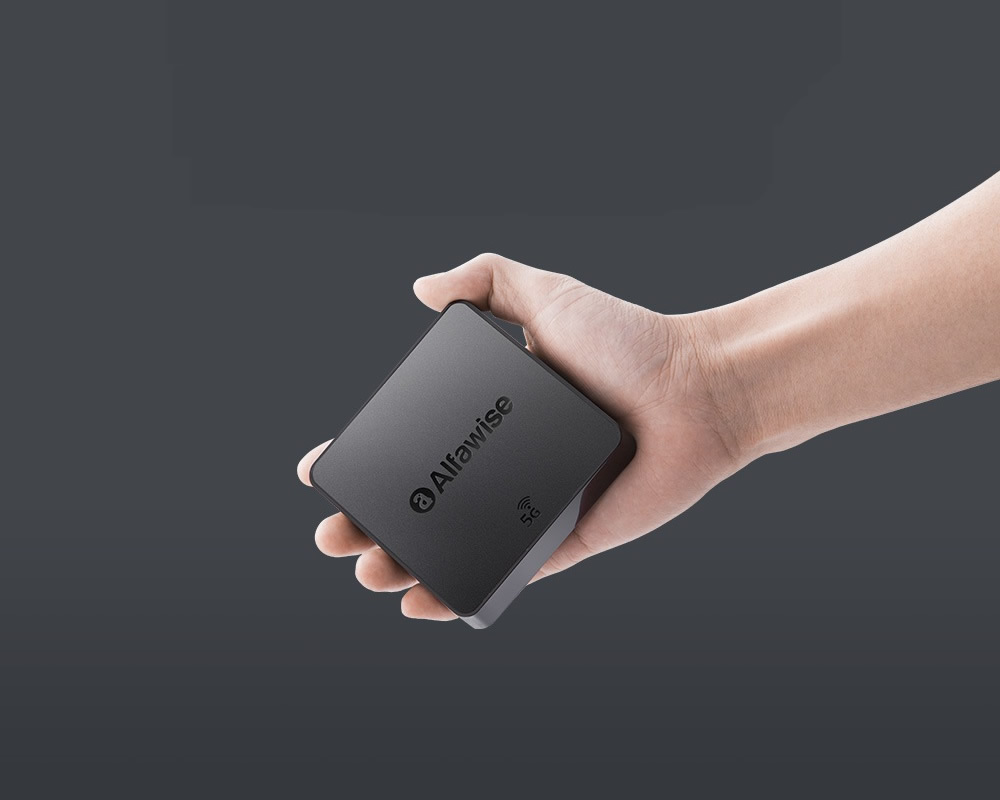
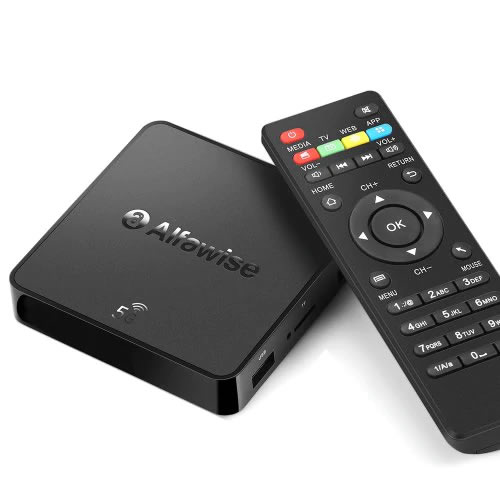


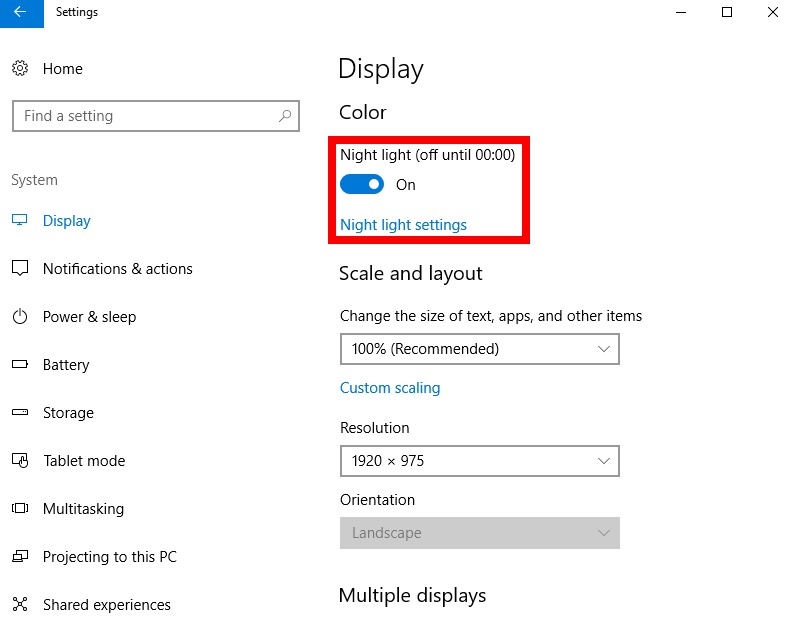
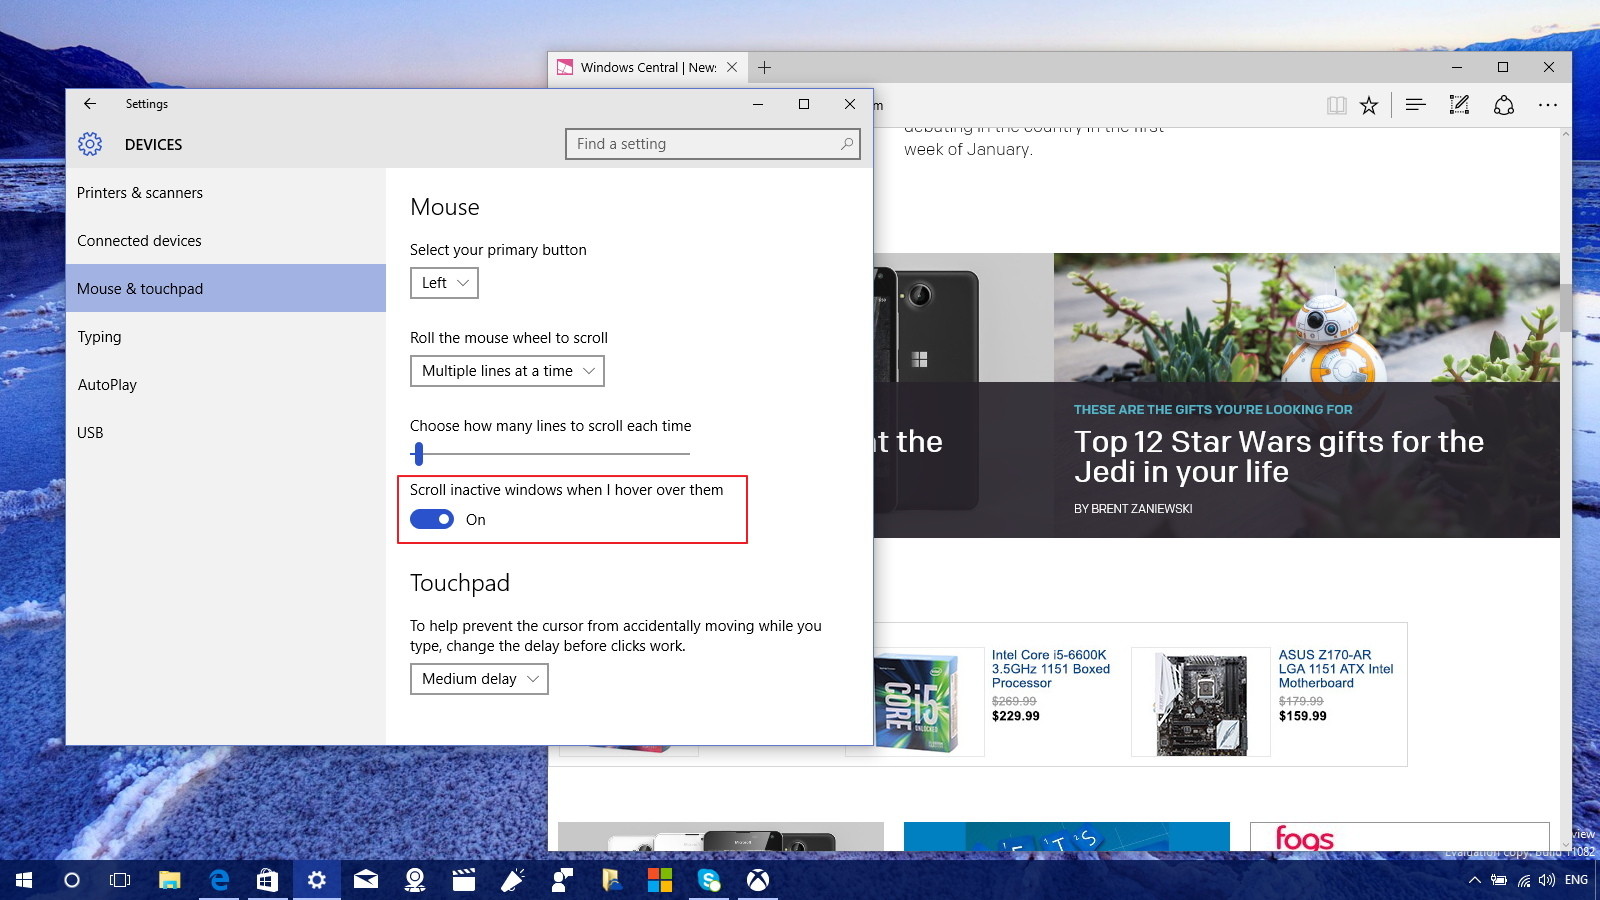
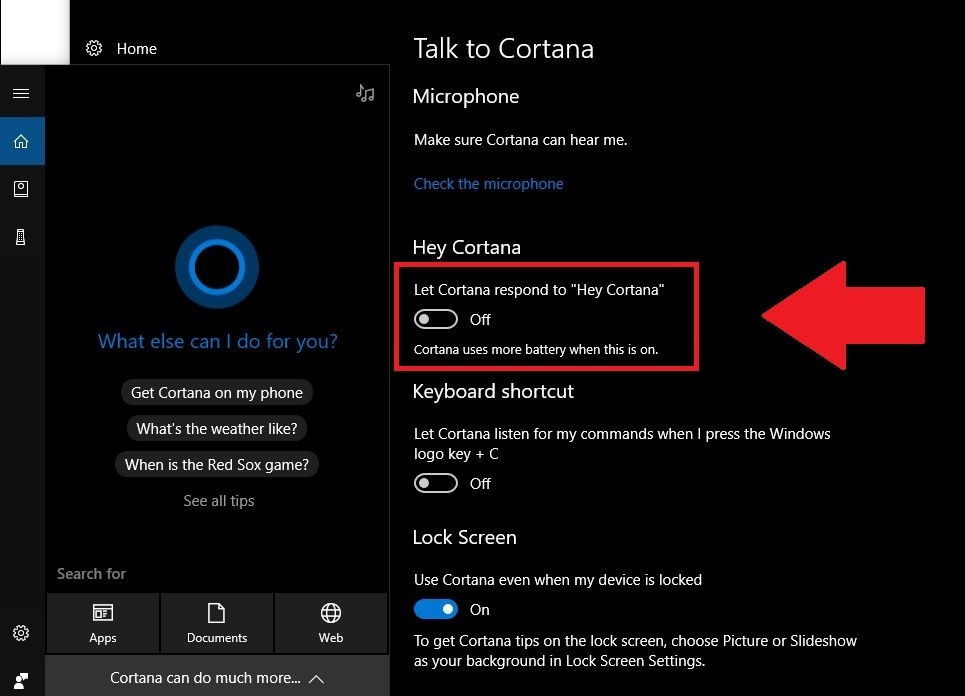
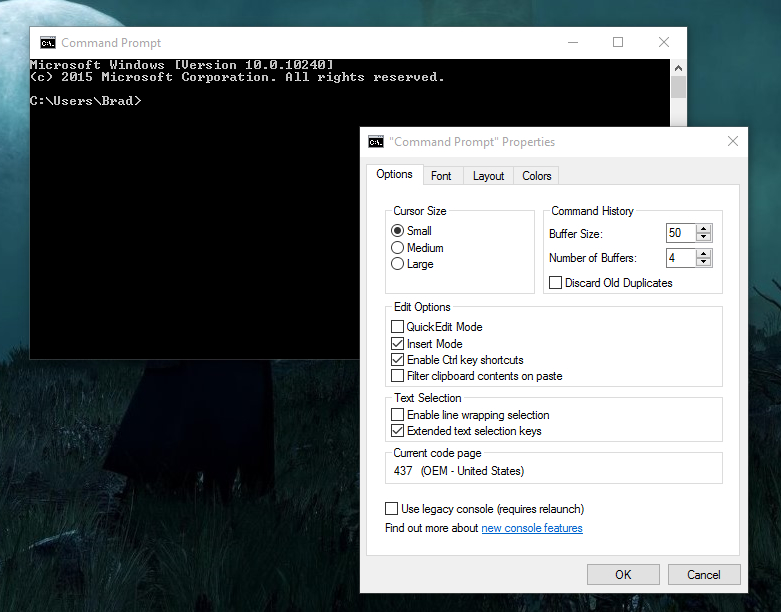
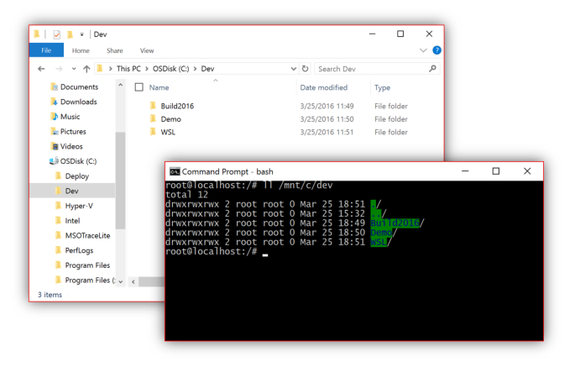

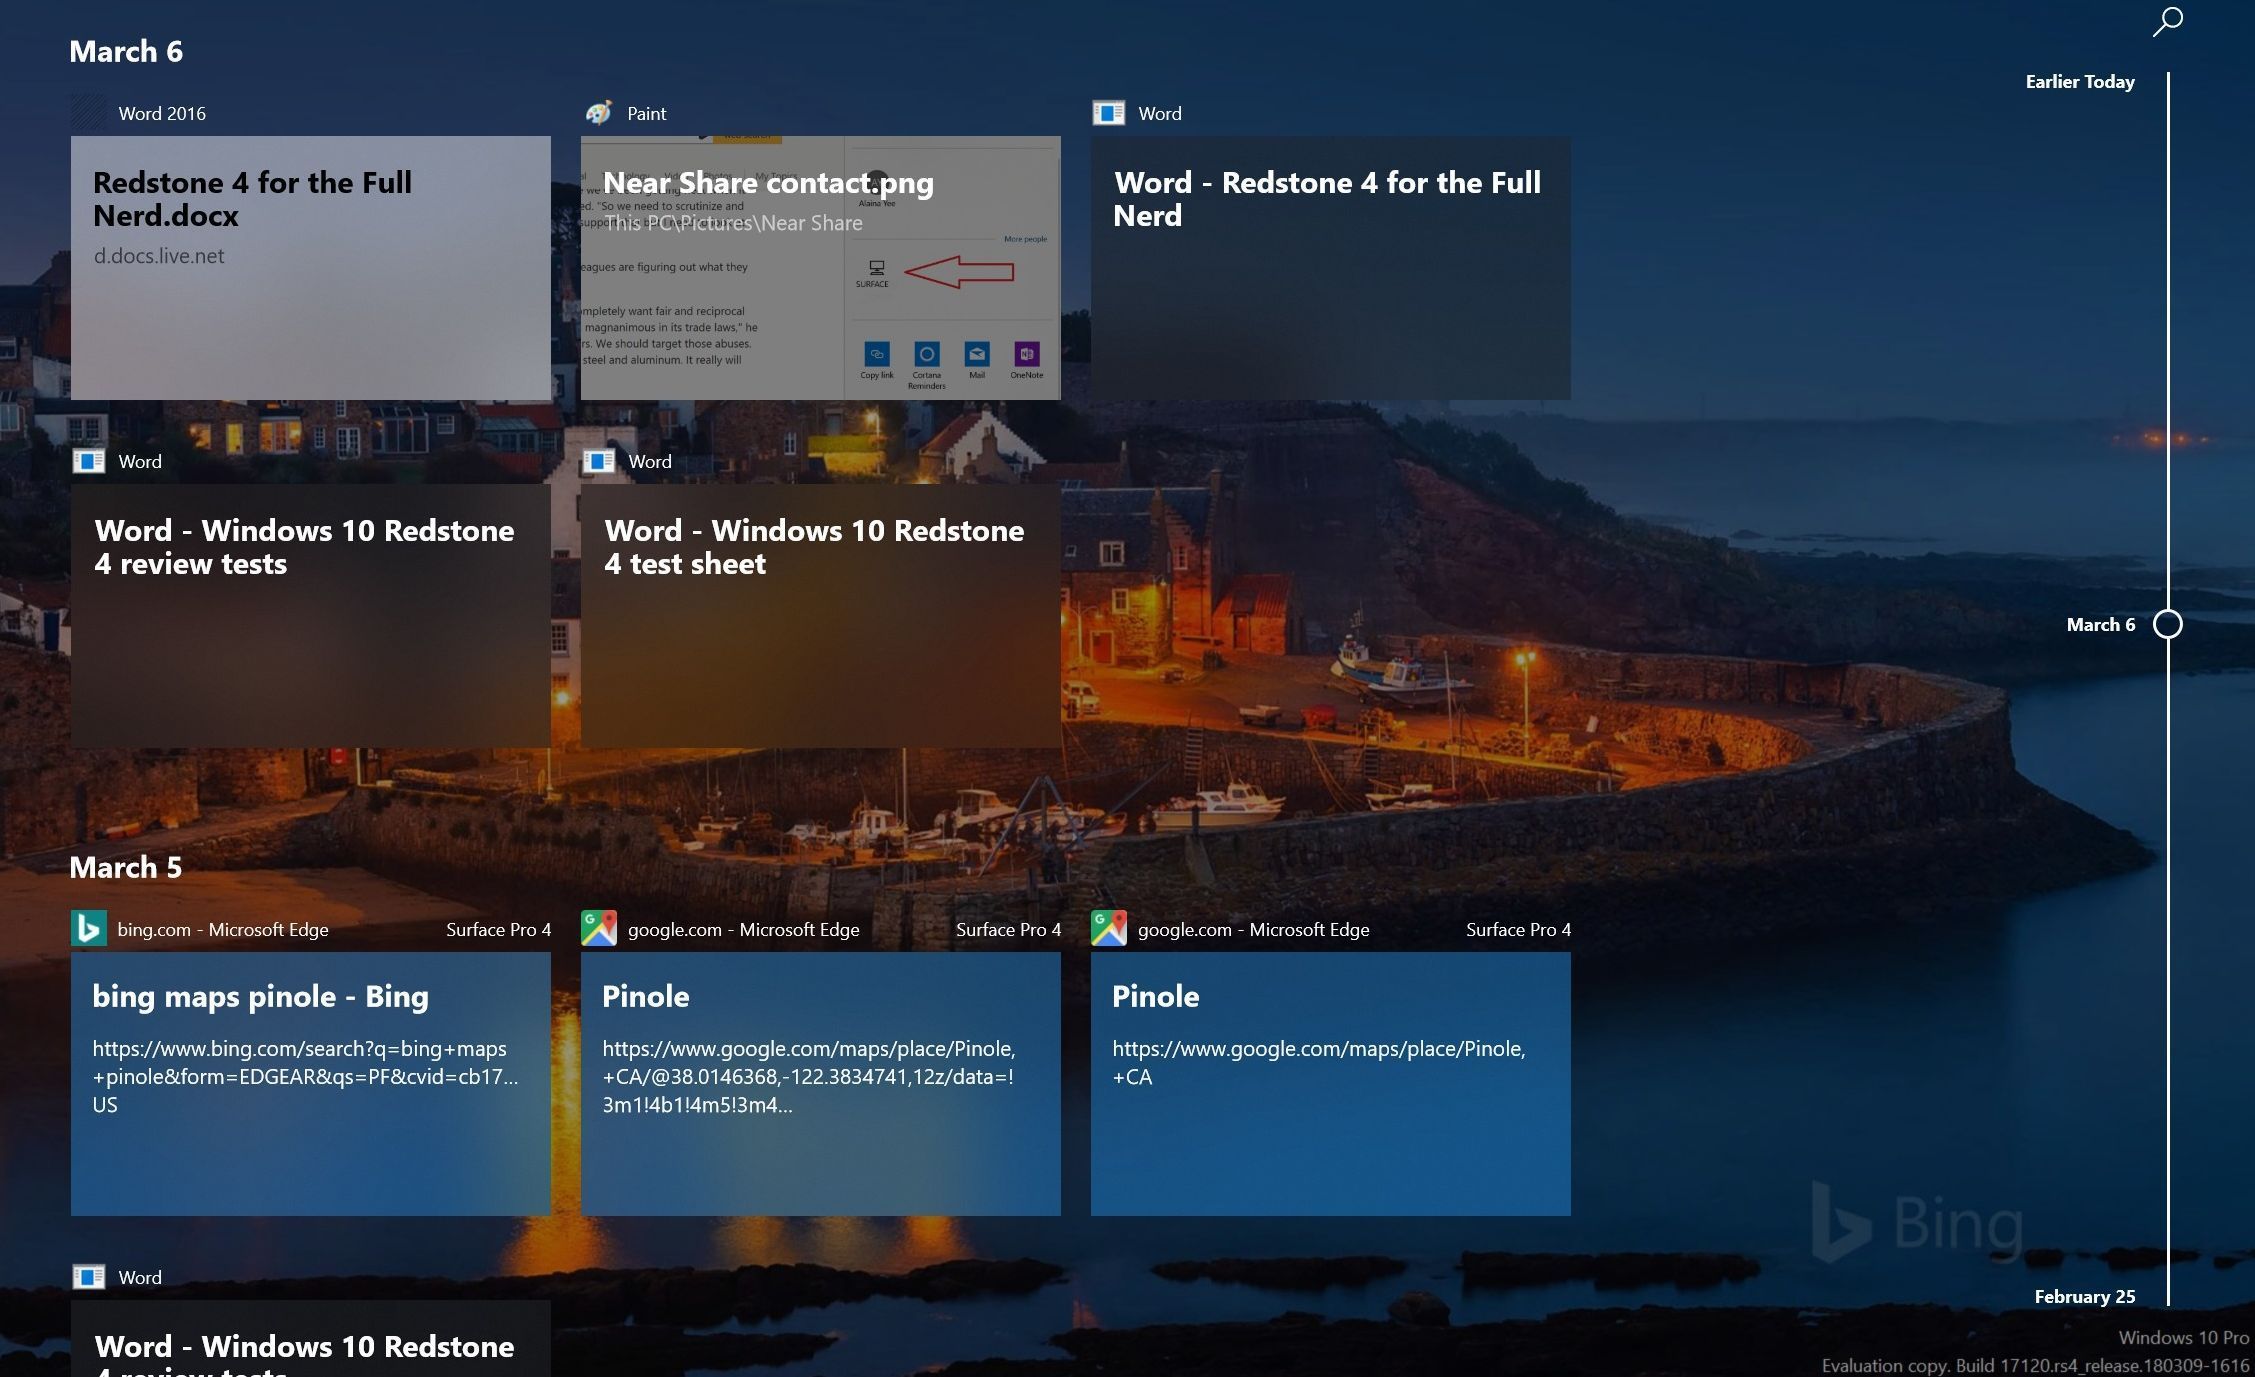
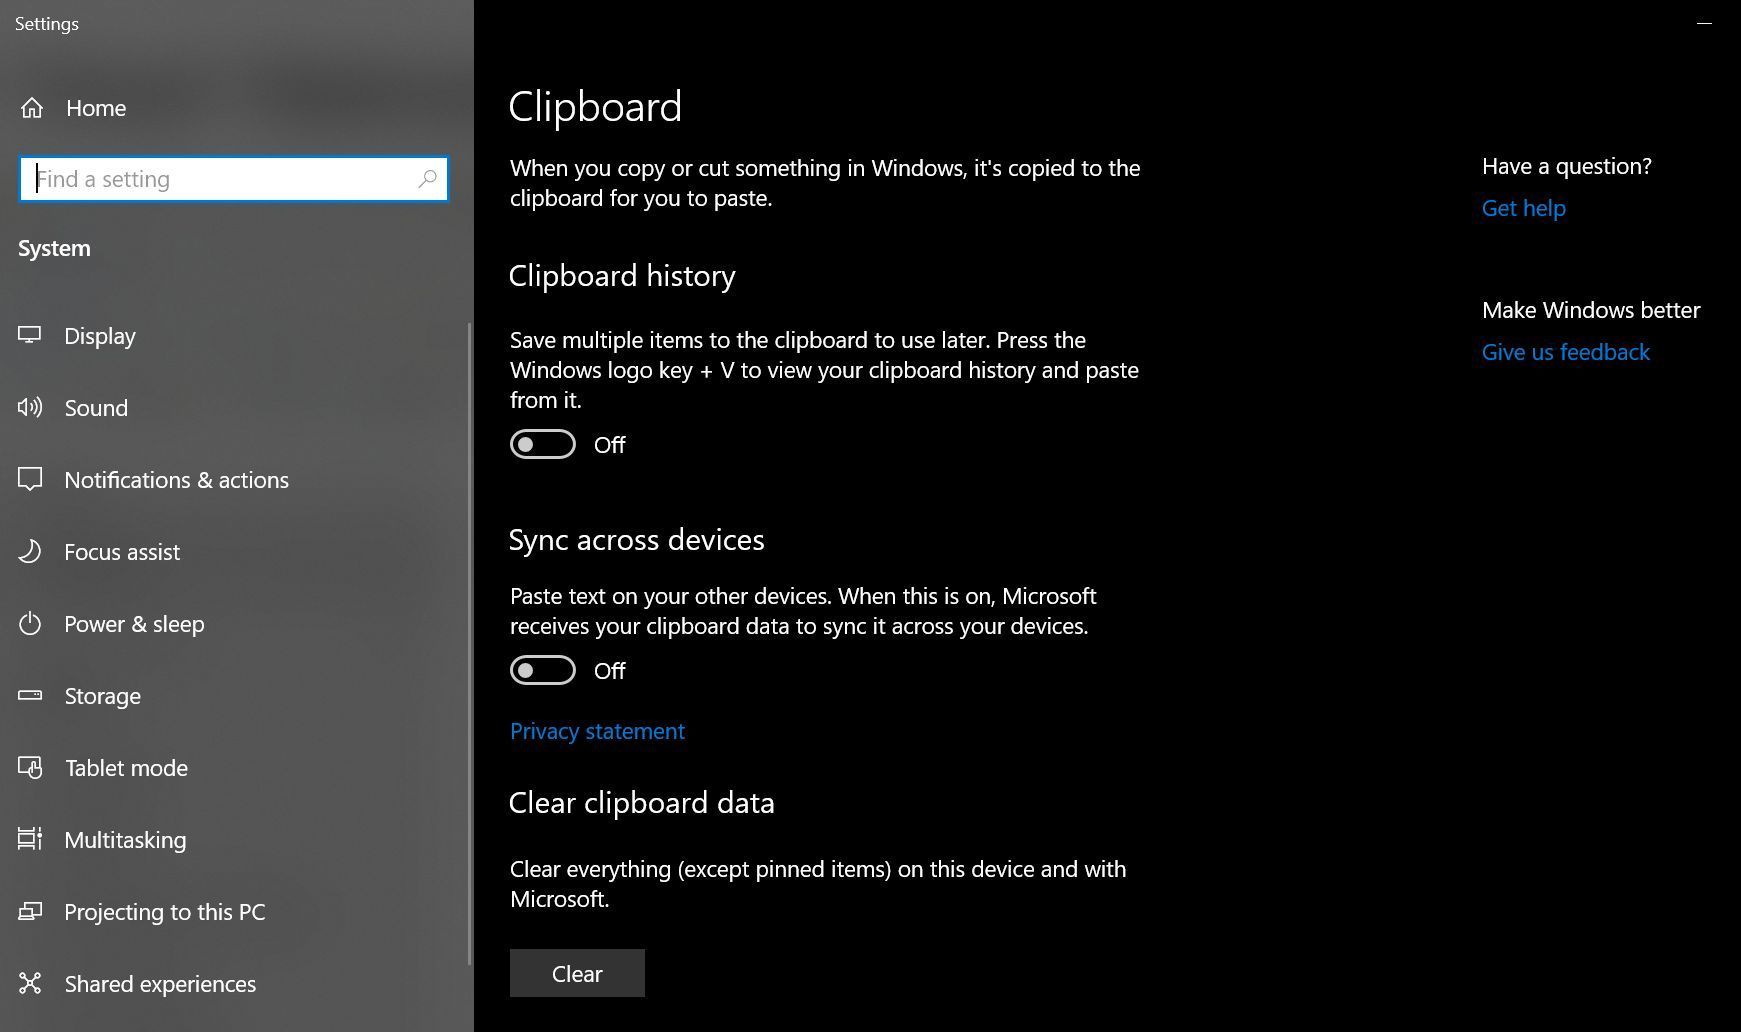
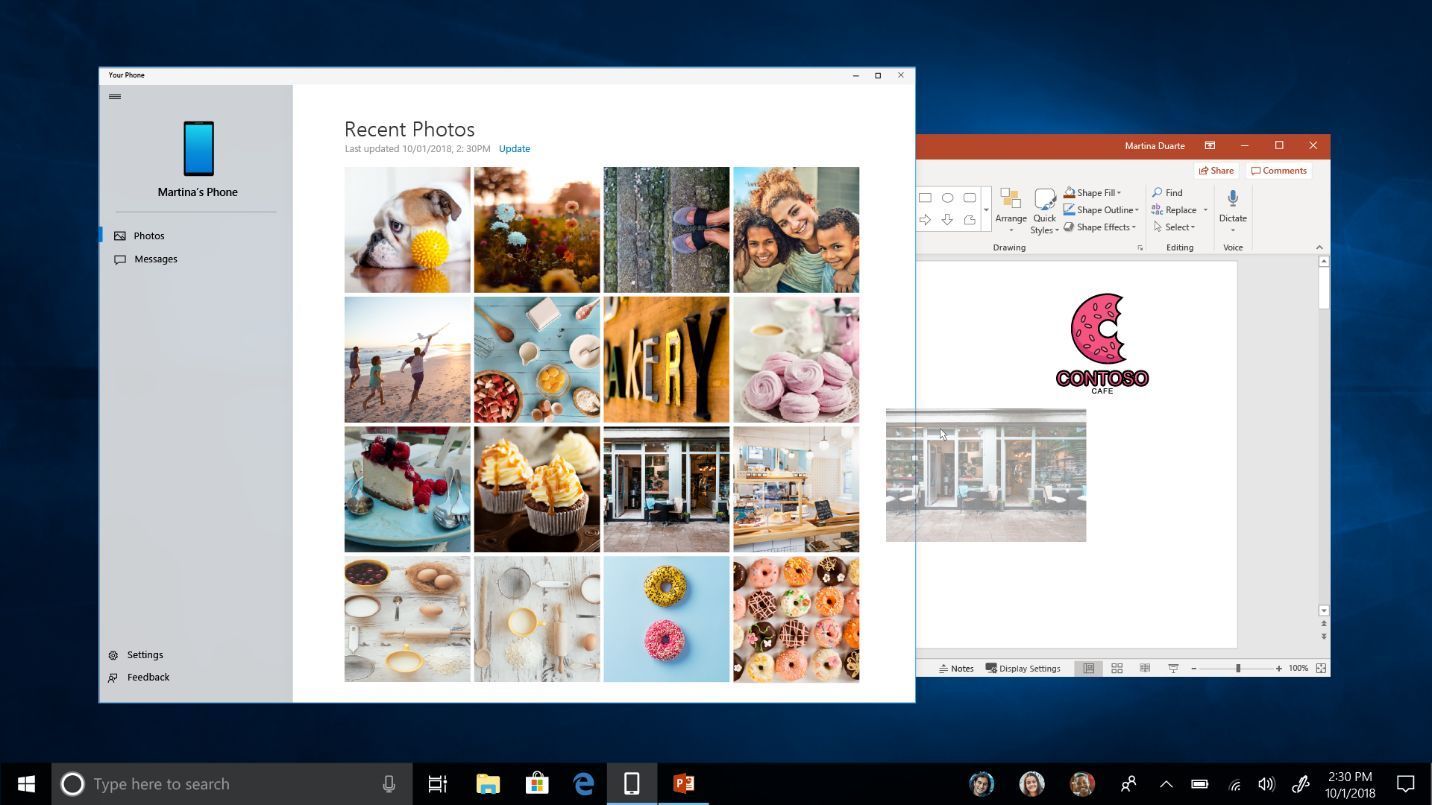
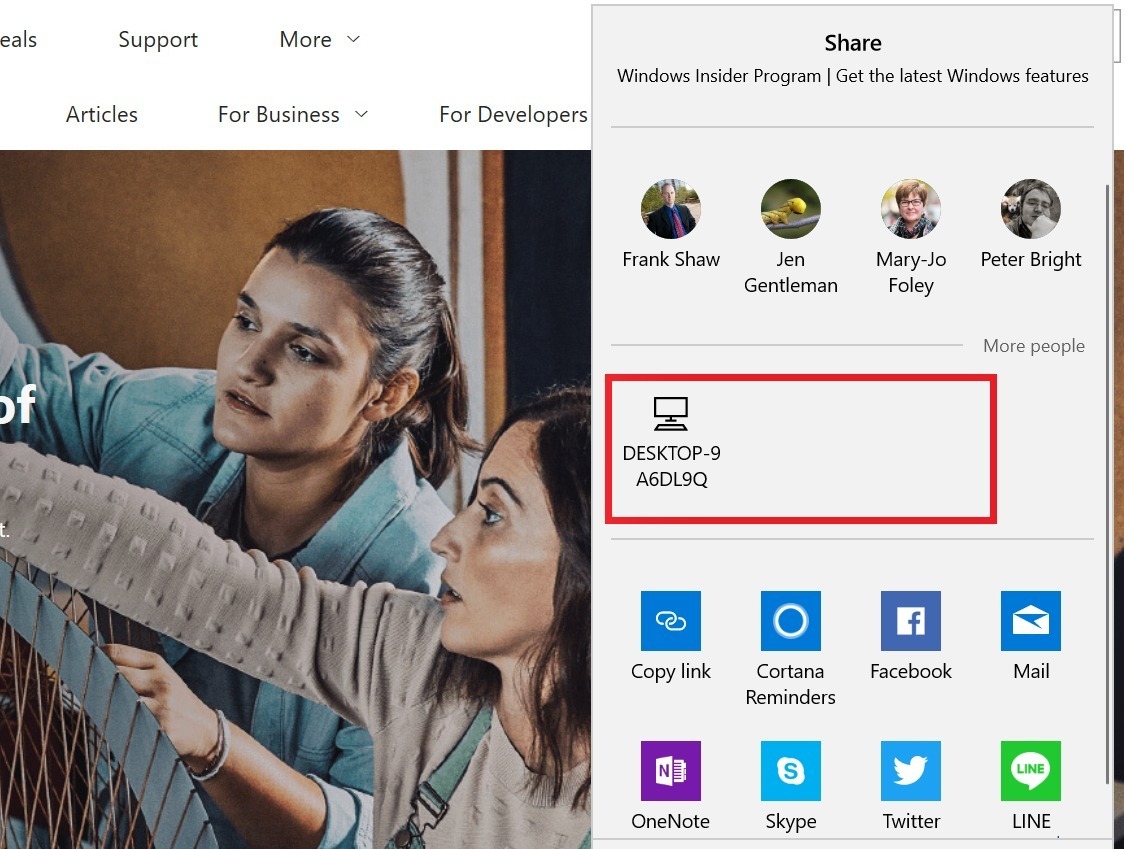
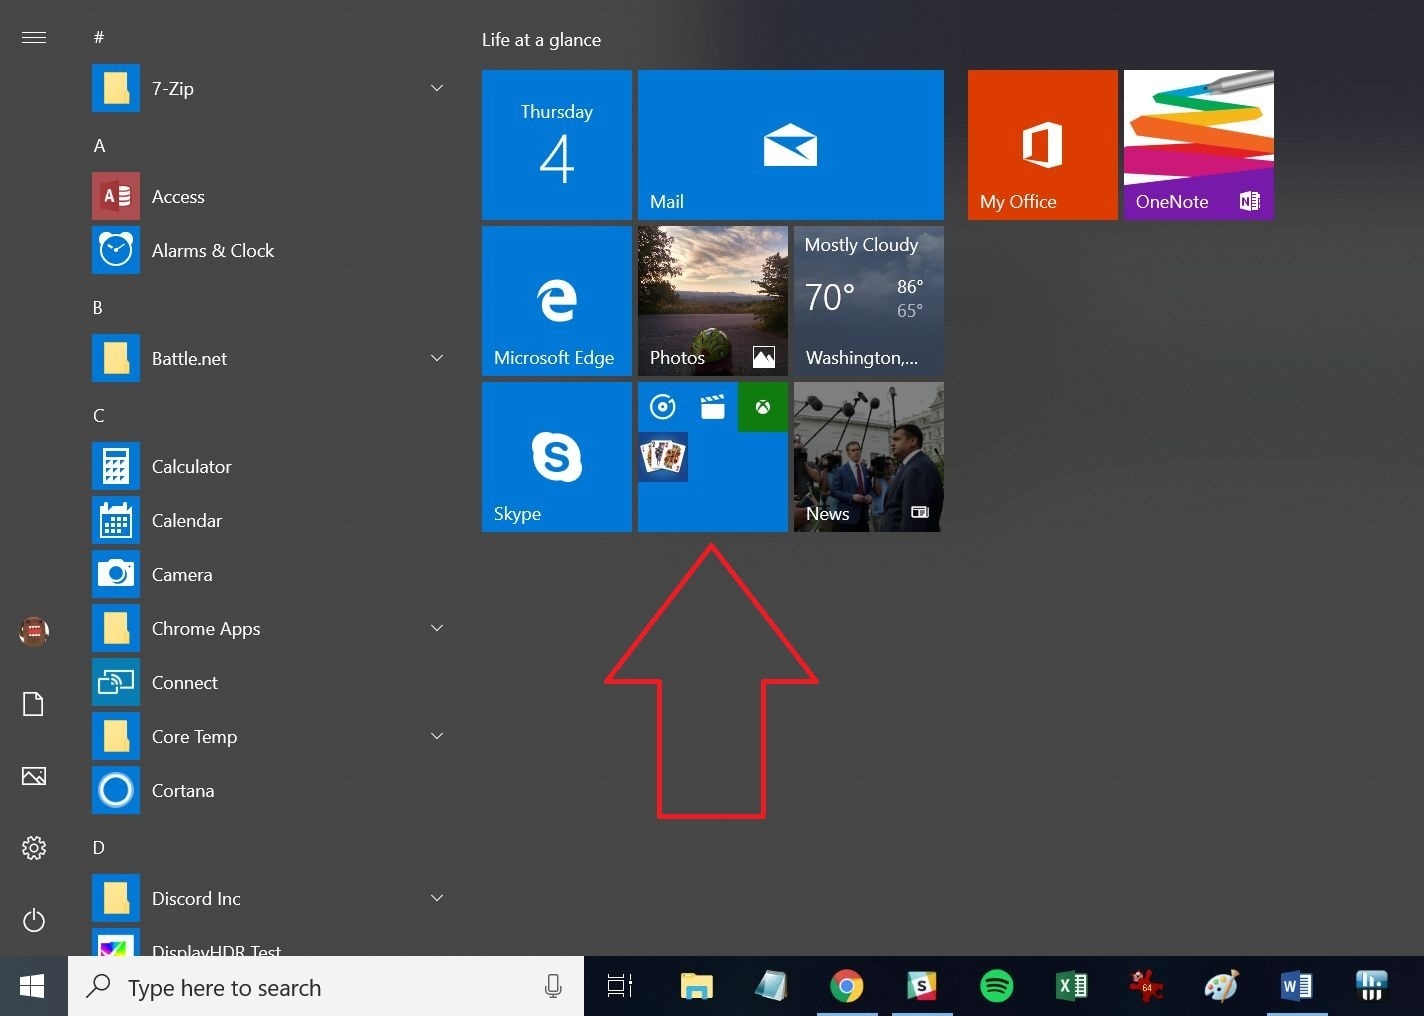
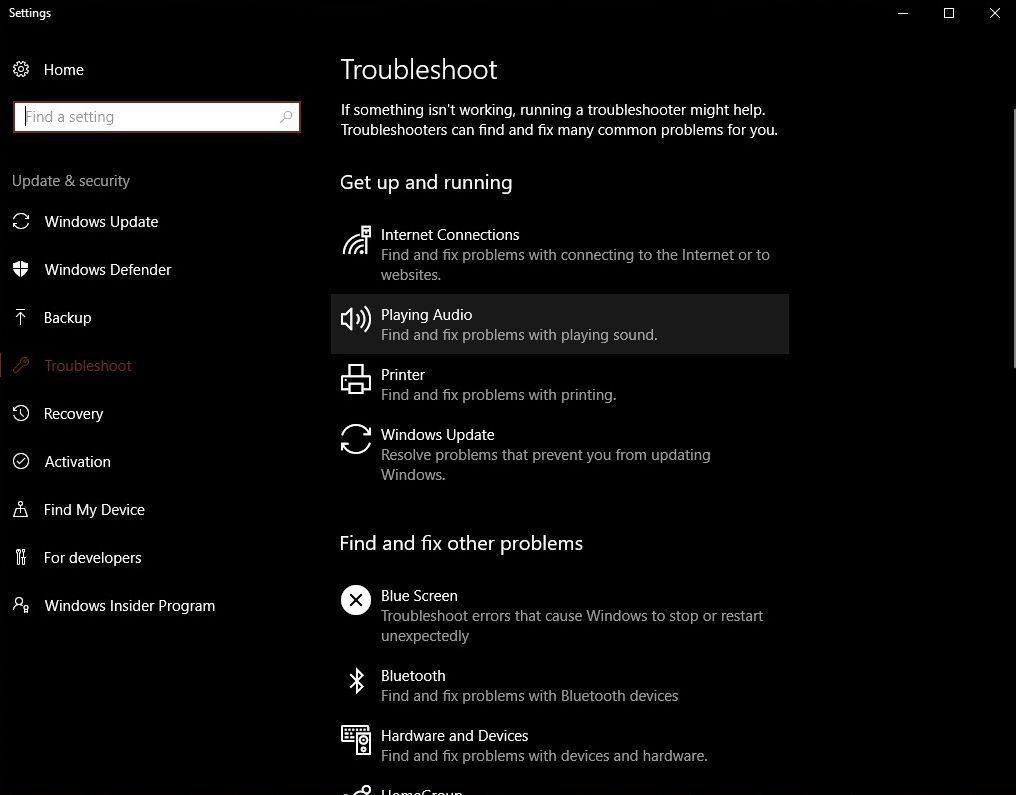
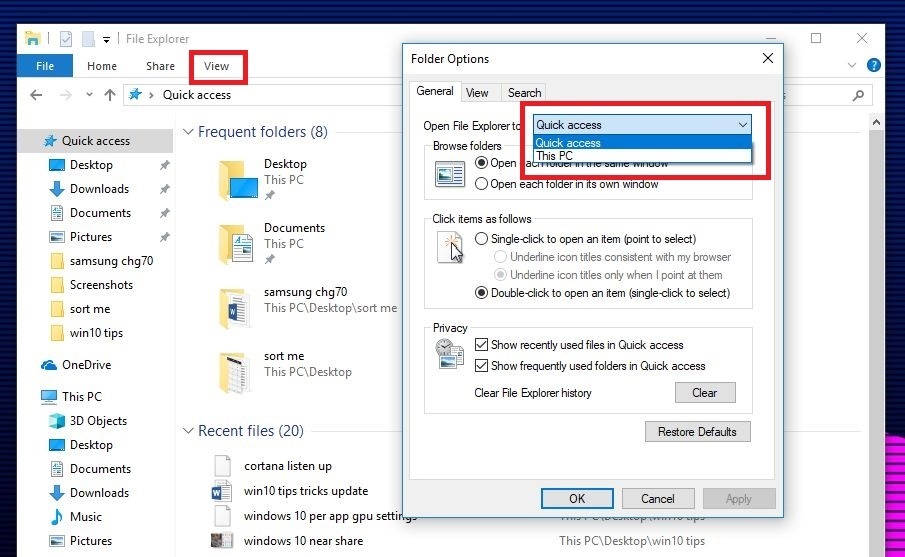
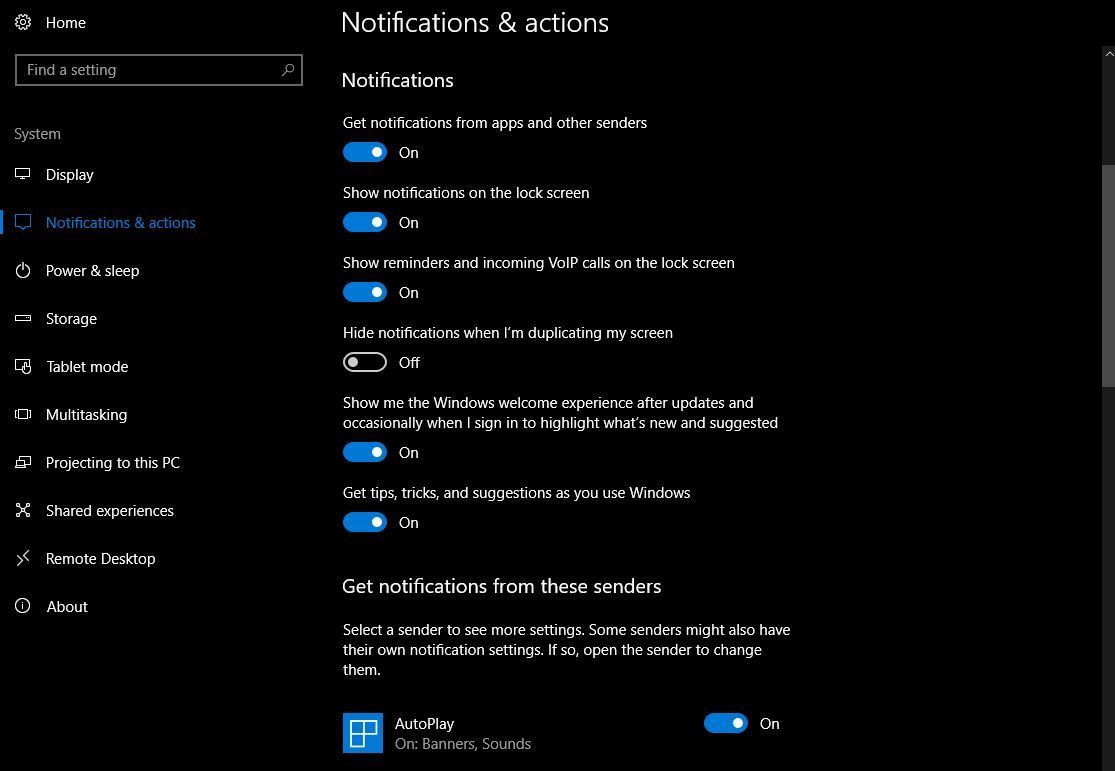








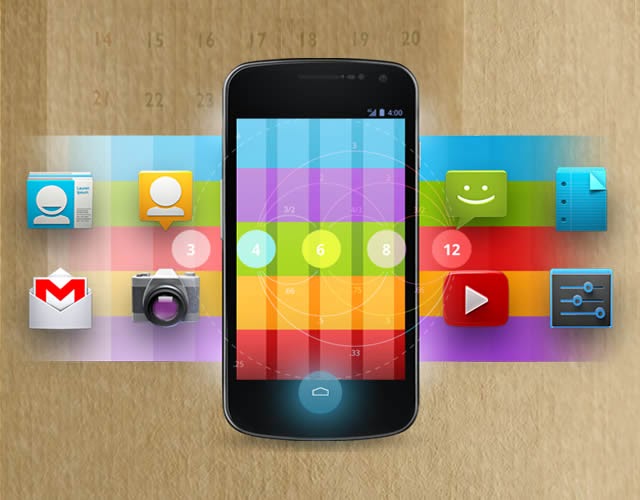
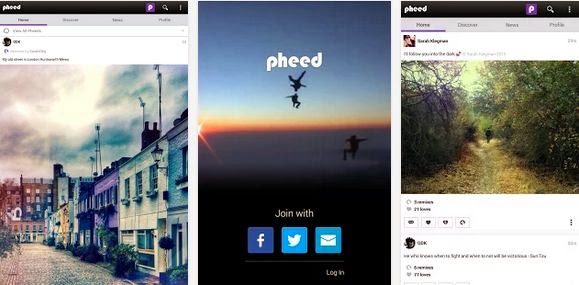
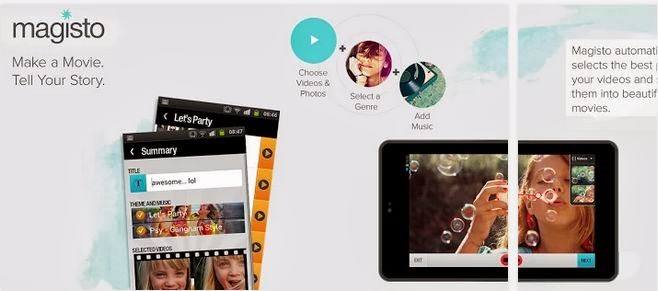
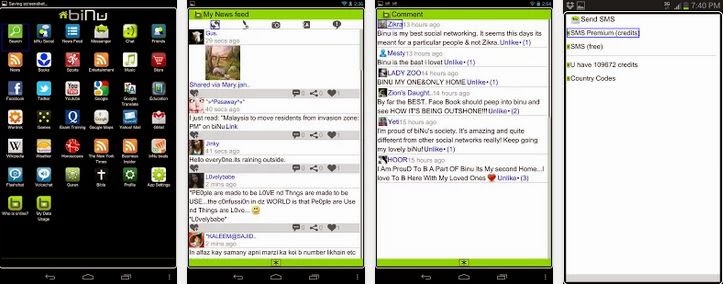
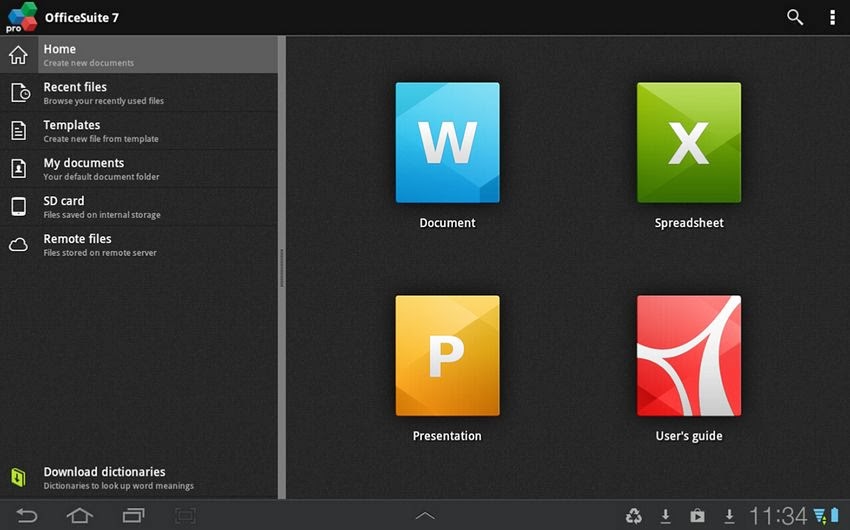
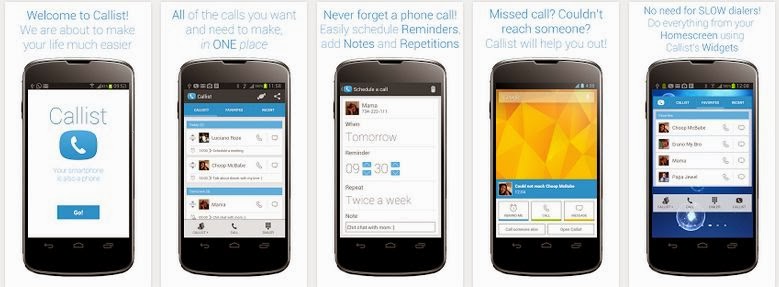
You must be logged in to post a comment.