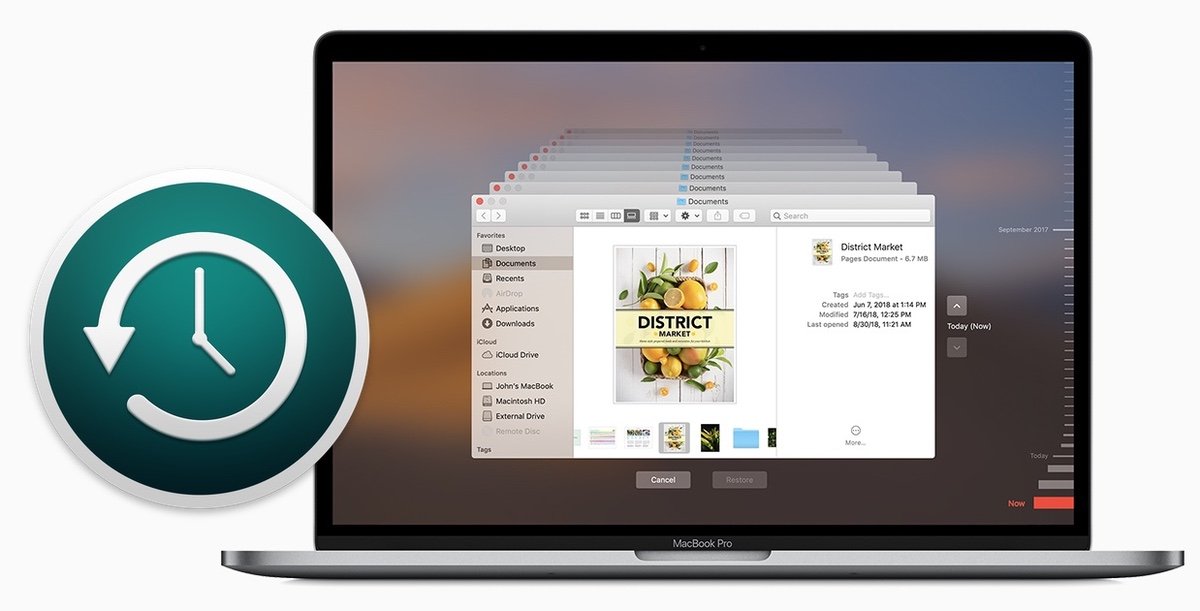
Creating a backup of your Mac is the only guarantee you can have of never losing your data and Apple has made it incredibly easier for you with Time Machine.
Time Machine is a built-in backup feature of your Mac, to automatically back up your personal data, including apps, music, photos, email, and documents. Having a backup allows you to recover files that were deleted, or that were lost because the hard disk (or SSD) in your Mac needed to be erased or replaced.
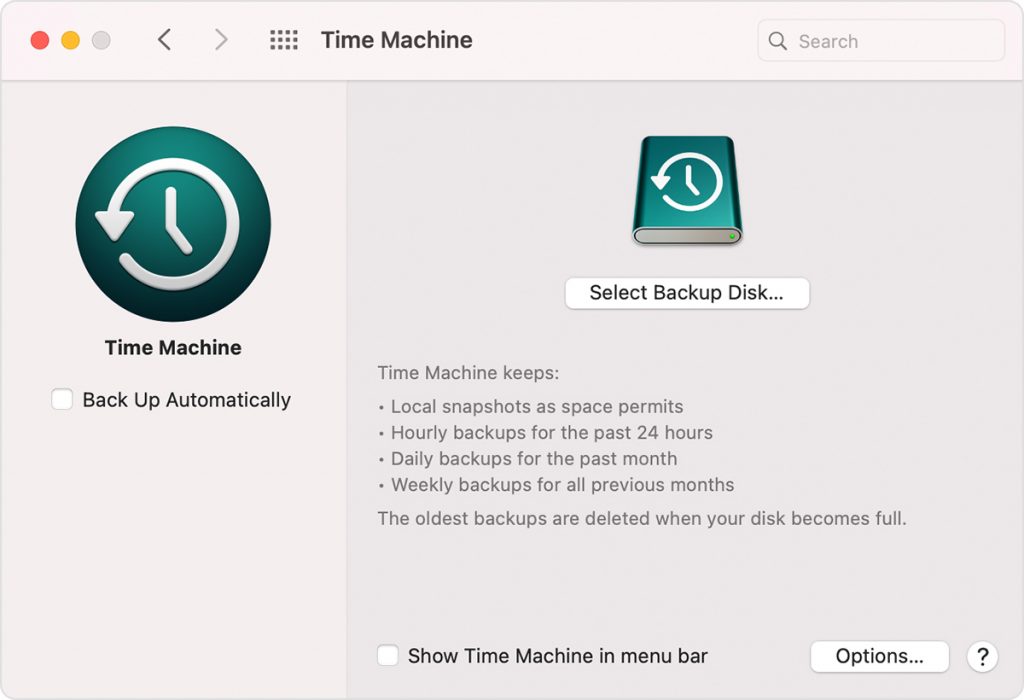
To create backups with Time Machine, all you need is an external storage device. After you connect the storage device and select it as your backup disk, Time Machine automatically makes hourly backups for the past 24 hours, daily backups for the past month, and weekly backups for all previous months. The oldest backups are deleted when your backup disk is full.
External drive connected to your Mac, such as a USB or Thunderbolt drive
Network-attached storage (NAS) device that supports Time Machine over SMB
Mac shared as a Time Machine backup destination
AirPort Time Capsule, or external drive connected to an AirPort Time capsule or AirPort Extreme Base Station (802.11ac)
Select your storage device as the backup disk
Open Time Machine preferences from the Time Machine menu in the menu bar. Or choose Apple menu > System Preferences, then click Time Machine.
Click Select Backup Disk.
Enjoy the convenience of automatic backups
After you select a backup disk, Time Machine immediately begins making periodic backups—automatically and without further action by you. The first backup may take a long time, but you can continue using your Mac while a backup is underway. Time Machine backs up only the files that changed since the previous backup, so future backups will be faster.
To start a backup manually, choose Back Up Now from the Time Machine menu in the menu bar. Use the same menu to check the status of a backup or skip a backup in progress.
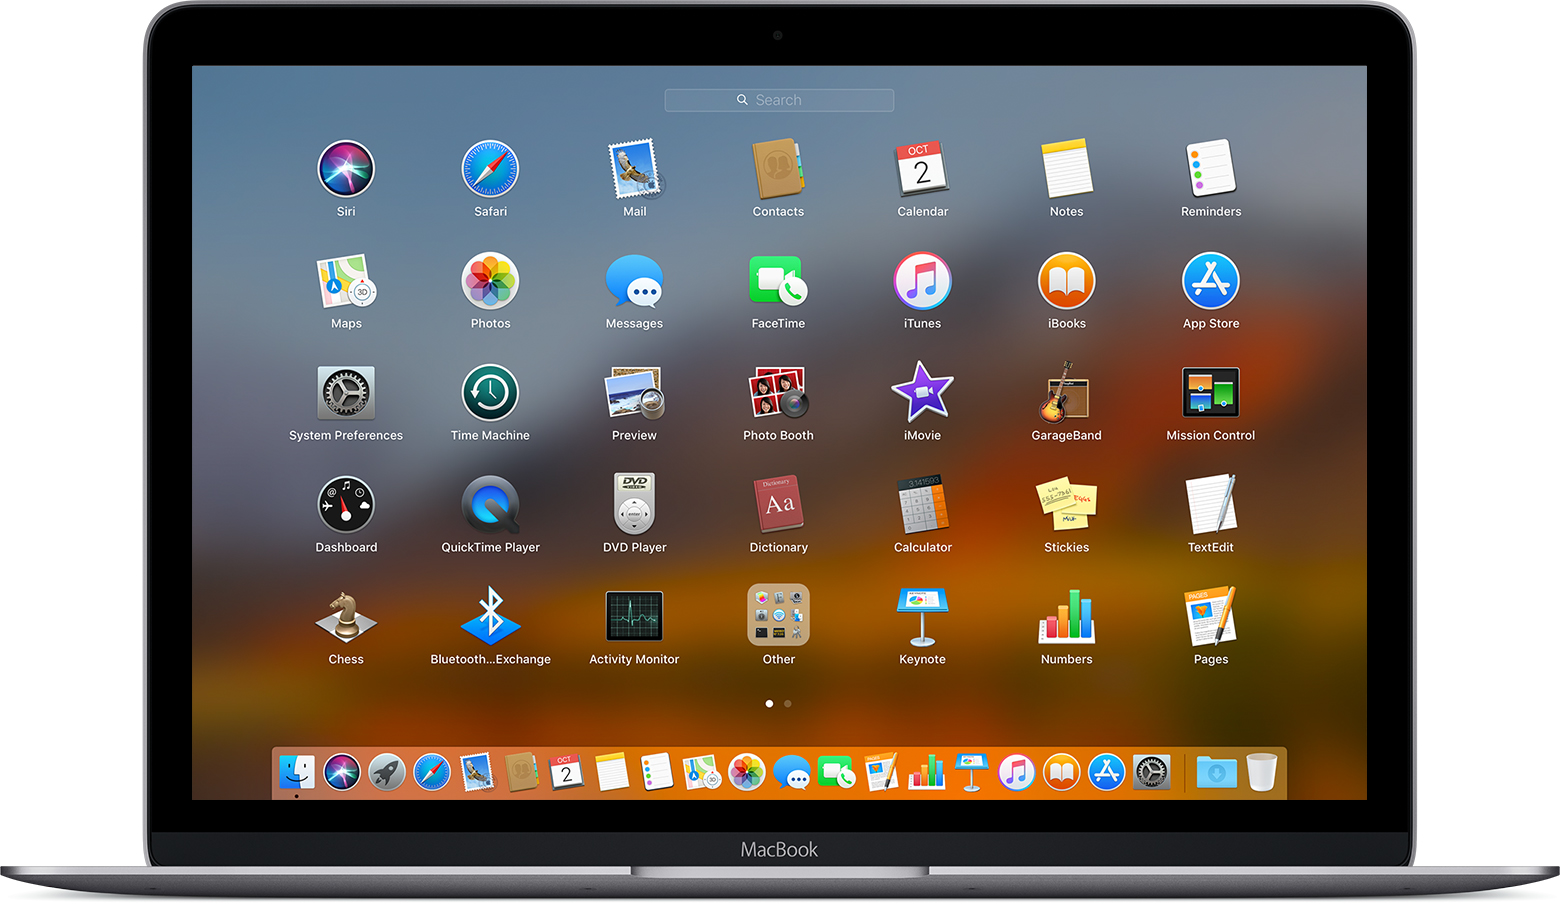
Apps for your Mac. Mac OS is a series of graphical user interface-based operating systems developed by Apple Inc. for their Macintosh line of computer systems. The Mac OS has been pre-installed on almost every Macintosh computer sold. It was first invented in 1984 and now many of its upper versions are ailable.
There are a ton of MacOS applications that you can find on the App Store on your Mac or on internet and some of them are commonly used by many Mac users, but here are the 10 best and must have apps for you Mac.
Backup & Time Machine
The very first thing to do your Mac is to create a backup solution. It will be ill-advised or even stupid not to do so.
latest MacOS comes with a built-in backup feature Time Machine which allows you to automatically back up your personal data, including apps, music, photos, email, and documents. Having a backup allows you to recover files that were deleted, or that were lost because the hard disk (or SSD) in your Mac needed to be erased or replaced.
Having a third party backup application may not be necessary but if you are looking for a reliable alternative to Time Machine, Silverkeeper is your best bet.
SilverKeeper is a Backup application for Mac. It automates backups to external storage devices like hard drives, and other removable storage devices that have SATA/eSATA, IDE, ATA/ATAPI, SCSI, USB, or FireWire interfaces connected with Mac and the backup can be stored as disc image backups to network storage devices.
Audacity is the one of the most popular open source digital audio editor available for Mac. It is a multiplatform, open-source editor Audacity has leaped to the top of our list with its clean interface, excellent features, and support for 32-bit floating-point audio. This editor offers you to record and play sounds and import and export WAV, AIFF, MP3, and OGG files with some ultimate features of mix tracks, or apply effects to your recordings, cut, copy and past (also able to undo). It also has effects like echo, fade, modulation, normalization, reverse, tempo and Publishing Options.
VLC media player is a free and open source media player and multimedia framework. It is a highly portable multimedia player for various video formats, including MPEG-1, MPEG-2, MPEG-4 and DivX as well as for DVDs, VCDs, and various streaming protocols. It is not just a video player, has ability to play many audio formats, including OGG, MP2, MP3 and MP4.
GIMP is a free software raster graphics editor. GIMP becomes the one of the most powerful general-purpose image editors around, the upgrades make the GNU Image Manipulation Program eminently comparable to Photoshop with its amazing features. The advanced scripting interface allows everything from the simplest task to the most complex image manipulation procedures to be easily scripted.
Gimp is easy to learn for beginners and easier to use. Overall, GIMP is a must-have application for Mac.
Apps for your Mac, FileZilla is an easy-to-use FTP client that allows you to view, edit, upload, download, and delete files from a Website or network.
FileZilla is a FTP (File Transfer Protocol) based application. Its easy-to-use interface makes locating and editing files on your website easy. You can also upload or download files with a single button click. It also allows you to synchronize the navigation of a local folder with a remote folder, saving you time and reducing the risk of uploading to the wrong folder.
If you are a developer, consider installing VS Code for your code editing.
Google Chrome may be the most popular, fast, secure and widely used as default web browser. Opera on the other hand is redefining the purpose of web browsers and taking browsing experience to new heights.
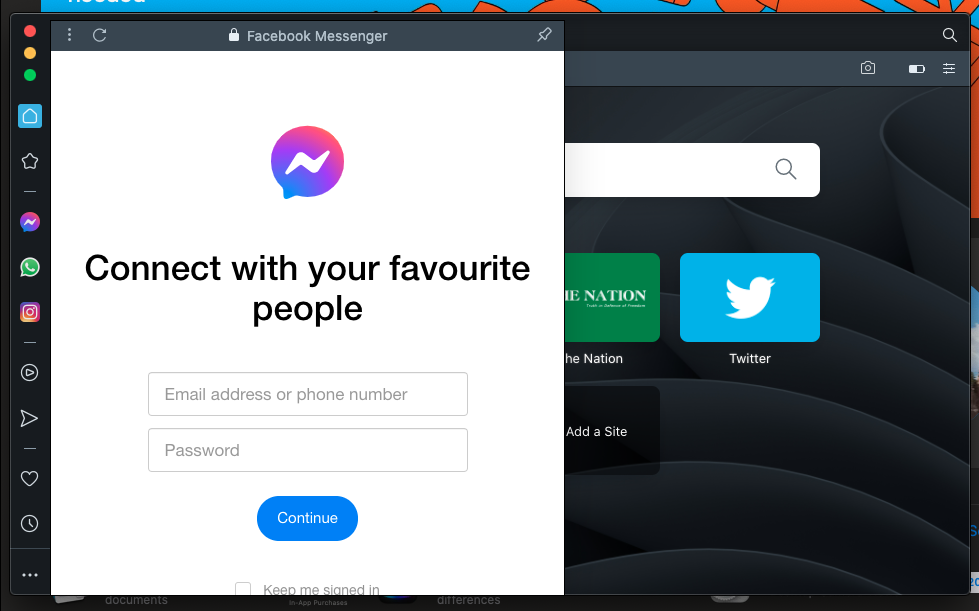
Facebook Messenger on Opera browser
Released in 2019, Opera 75 is built on Chromium engine; same technology as Google Chrome at the core. Chromium is an open-source browser project that aims to build a safer, faster, and more stable way for all users to experience the web.
One of the most important improvements is that the browser now support an instant messaging feature that supports multiple IM networks, including Facebook Messenger, WhatsApp, Telegram, Instagram, Twitter, and VK. You can use these IMs without leaving the browser window or opening a browser tab.
Apps for your Mac, the Unarchiver is a free data decompression frontend of libxad, which supports more formats than Archive Utility (formerly known as BOMArchiveHelper), the built-in archive unpacker program in Mac OS X. It supported file formats include Zip, Tar-GZip, Tar-BZip2, RAR, 7-zip, LhA, StuffIt and many other old and obscure formats. Download
8. Anxiety
Anxiety is a super-lightweight To-do list application for Mac OS X Leopard that synchronizes with iCal and Mail. Its aim is to provide a streamlined, easily accessible interface to add and check off your tasks, while remaining poised to melt into the background at a moments notice. Anxiety also makes it very easy to create and add new notes in a second and you can also choose to have the program’s icon appear either in your menu bar or on the Dock. Download
9. LibreOffice
LibreOffice is your Mac substitute of Microsoft Office. Well, not really, but it’s a free office package for your Mac. Its clean interface and feature-rich tools help you unleash your creativity and enhance your productivity.
Apps for your Mac ,Don’t take your work as a boring thing. Play Angry Birds on your Mac OS , one the most famous game, playing world wide. There is no definition, no any discussion and no need for any disruption. It’s a wonderful game for all kind of users. Which once start make our better and interesting. Download
You may use your Mac for serious work, but sometimes it’s a good thing to add a touch of whimsy to it. Here are four quick tips for customizing OS X and making it a bit more fun to use.
Check them out below…
1. Try the iTunes Artwork screensaver
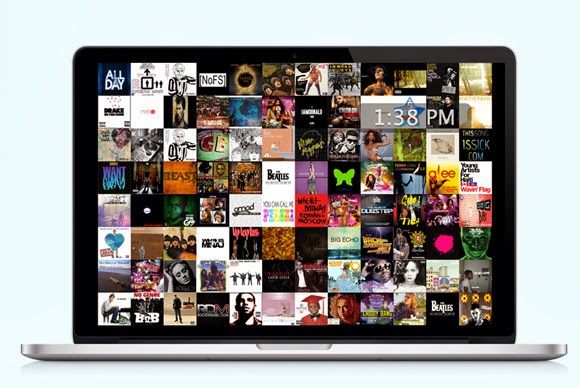
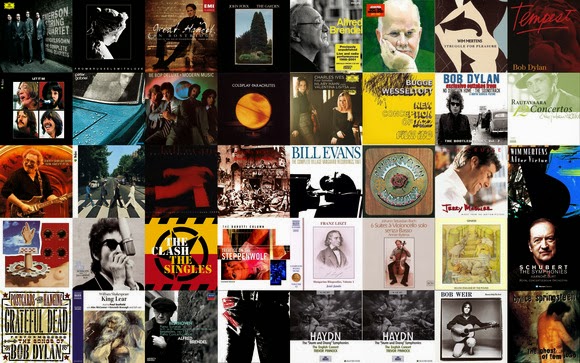
When you’re not working, by default your Mac’s screen turns black with a subtle, shifting white Apple icon and a bit of text, usually your username. But you need not settle for that. To pick something different, go to Apple menu > System Preferences, select Desktop & Screen Saver, and then click the Screen Saver tab. You’ll find a lot of fun options to explore here, such as “Word of the Day.” If you’re a music fan, though, try the iTunes Artwork screensaver, which displays a collage of random album covers from your iTunes library.
Scroll down the list of options in the left-hand column. When you see iTunes Artwork, click to select it, and then click Screen Saver Options. Here you’ll see the option to choose the number of album-cover rows as well as the “delay” in seconds. By default the delay is set to 2 seconds, meaning that every 2 seconds one of the album covers will flip to expose a new cover.
Click the Preview section of the preference pane to see the screensaver in action. You’ll notice that the different albums change at random, one at a time. As a bonus, if you spot an album you want to play, you can hover your cursor over its artwork and click to start the music.
The iTunes Artwork screensaver fills your Mac’s display with the covers of your albums. Even better, you can just click an album to get the music started.
2. Change your wallpaper…all day long
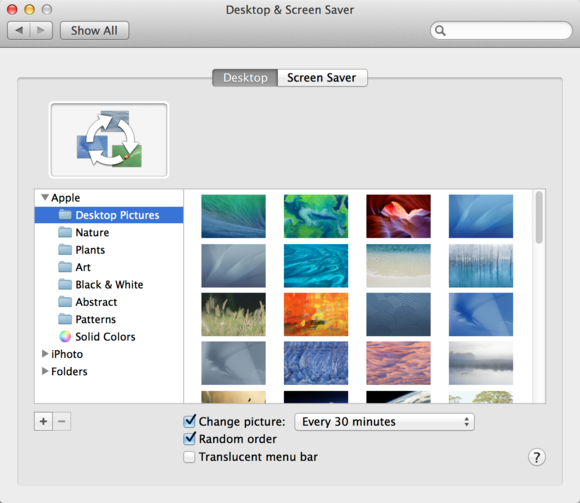
You probably know that you can change your Mac’s wallpaper—that is, the image or color on your Desktop. To do so, first open System Preferences (from the Apple menu or the Dock) and click Desktop & Screen Saver. Click the Desktop tab, and then you can choose an image from a number of folders, or from your iPhoto albums.
But there’s one setting that will make your Desktop a lot more interesting: At the bottom of the window, check Change Picture, and choose a frequency such as every 5 seconds, every day, or when waking from sleep. To make the image unpredictable, also select the Random Order option. Now you’ll never know which photo will come up, and your Desktop will be a source of surprise.
Bring unpredictability to your Mac by making the Desktop wallpaper change throughout the day.
3. Mix it up with emoji in file and folder names
Emoji are small graphics that work like fonts. You might see these little faces, animals, and other images pop up in text messages or tweets. But you may not realize that you can use them in your file and folder names too.
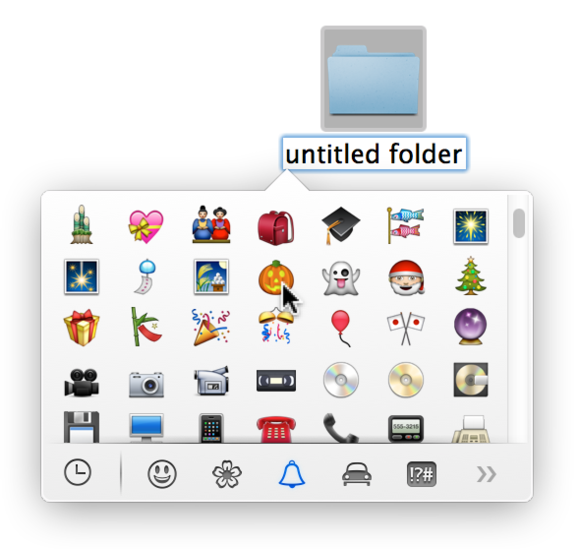
To change an item’s name and add an emoji character, select a file or folder in the Finder, and then press Return or Enter. This action will highlight the item’s name. Next, choose Edit > Special Characters, or press Command-Control-Space. You’ll see a pop-up palette; click any of the icons at the bottom. The clock icon shows characters you’ve recently used; the others sort special characters—including emoji—by category.
Make file and folder names more fun (and perhaps more memorable) by adding emoji. You can also use these small graphics in texts, email, and documents.
Browse through people (smiley faces and more), nature (including cute little animals and flowers), objects (such as food items and sports balls), places (buildings, vehicles, road signs), and symbols (for instance, from the zodiac), to find one you like. Click an emoji to add it to a file or folder name. You can type normal letters before or after the graphic. Emoji will make your file and folder names stand out, and they certainly won’t be drab.
4. Spice up folders with custom icons
Are you tired of all those boring blue folders in the Finder? Change them.
Want to have a folder with a picture of your pet, your child, or your favorite outdoor scene? Easy peasy.
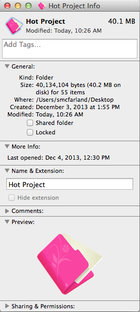
Many sites offer free sets of icons that you can use to dress up your folders, like this one from IconArchive.
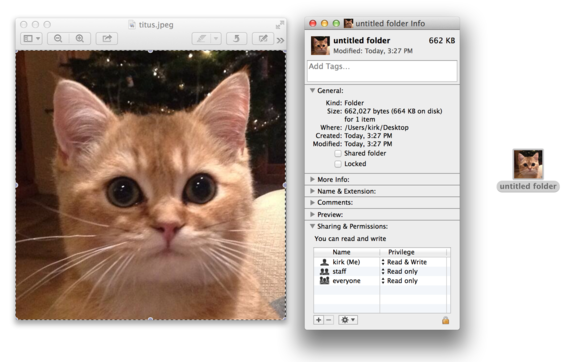
You can use almost any graphic—a photo of your child, a pet, album art from your favorite band—as a folder icon. If you want, you can even search Google for nice pictures to use, but keep in mind that they shouldn’t be too large, or they won’t be easily recognizable as icons. Better yet, download art specifically made to serve as folder icons, for instance from InterfaceLift or IconArchive.
Double-click a picture to open it in Preview, or open it in your favorite image editor. If you want to crop it, drag the crosshair cursor over the picture, and then choose Tools > Crop, or press Command-K. You might want to crop the picture to a square so that it will look more balanced as an icon. To do so, press the Shift key while dragging the crosshair cursor.
Next, press Command-A to select the picture, and then press Command-C to copy it. In the Finder, look for the folder that you want to sport the icon. Select it and press Command-I to display its Info window. Click the small blue folder icon at the Info window’s top-left corner. Press Command-V to paste your picture over the standard folder icon, and then close the Info window. The folder will now appear with its fancy new icon.
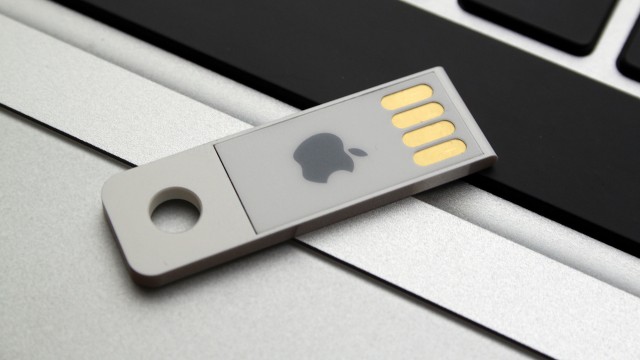
A bootable Mac OS X thumb drive comes in handy when you need to troubleshoot OS issues for yourself, your family, or your friends. It’s also extremely useful for keeping your basic setup consistent across multiple computers, if you find yourself switching hardware regularly; and I’ve had fun in the past setting up a bootable USB keychain loaded with all the apps and files I need to turn any Mac-compatible computer into a viable media center quickly and easily. With Mac OS X Lion and a new piece of free software, it’s easier than ever to create a USB keychain that you can boot from. All you need is a few minutes, a copy of Lion, and a USB flash drive with at least 4GB of storage (though more is preferable).
Preparation
The first step in getting Lion onto your USB drive is to obtain a copy of the OS itself. Unfortunately, the file you download from the Mac App Store to your computer deletes itself after you update to Lion, so you’ll probably need to re-download the OS update.
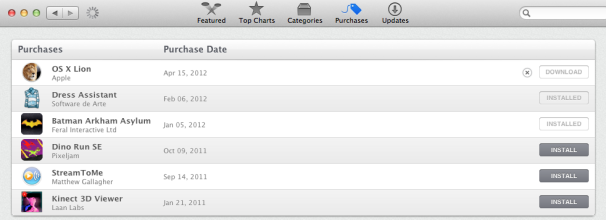
This is a simple but slightly time-consuming process. Go into the App Store application and open the Purchases tab at the top of the screen. From there, you should see OS X Lion as one of your previous purchases.
Click the Download button next to Lion, note the directory that it downloads to and wait for the download to finish. During testing it took me about 50 minutes to re-download the 4GB or so of content that comprises Lion.
Once the OS has finished downloading (and you’ve verified that Lion has landed safely in your Applications folder), you’re ready to transfer it to your trusty USB flash drive. If you already own a copy of OS X Lion, you should be able to download a fresh copy at any time from the Purchases tab of the Mac App Store.
To streamline the process, download the free Lion DiscMaker app. Downloading a third-party app just to handle this process is a bit of a bother, but Lion Discmaker enormously simplifies the process of installing Lion on a USB keychain.
Now, before you start formatting your drive, back up anything currently on your flash drive that you’d like to keep–because this process will completely erase the contents of the USB drive and rewrite it with a copy of Lion. You have been warned!
Creating Your Bootable Drive
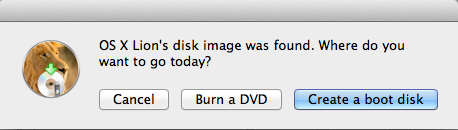
Lion DiscMaker makes this part of the process a snap. Start the Lion DiscMaker app with your USB flash drive plugged in and with the Lion install file sitting inside your application folder. The app will give you the option of creating a bootable drive out of either a DVD or a USB keychain.
Select the USB keychain option. (If you happen to own a Mac with a disc drive, consider creating a DVD backup of Lion. I prefer keeping Lion on a USB keychain so that I can add files to the USB drive to customize the installation; but if you’re just looking for a bootable copy to troubleshoot your hardware, feel free to go with the DVD option and save yourself a little cash.)
Lion DiscMaker makes it easy to create a bootable thumb drive. Once you’ve indicated that you want use a bootable drive, the app will ask whether you’d like to use a USB thumb drive or some other kind of disk. Select the USB thumb drive option again; and when prompted, choose the disk that you’d like to install Lion to. Select your flash drive and you should be ready to rock.
If you’re using a thumb drive that has only 4GB of free space, Lion DiscMaker will remind you that you won’t get a complete of OS X Lion package because there won’t be room for the “additional speech voices” package. This should be no great loss. Select Okay and then, to confirm that you’re aware the volume will be erased, click the Erase then create the disk button.
The copy procedure will take a few minutes and will open a few windows in your finder automatically, but Lion Discmaker should automate the whole process. All you have to do is wait for your Mac to cease displaying its “Copy in progress, please wait…” message, which will indicate that DiscMaker has finished installing Lion onto your flash drive. Once that’s done, you’ll have a bootable USB flash drive that fits in your pocket and can handle system recovery, OS installation, and even basic Web browsing in a pinch.
If you have any space left over on your flash drive, you can add a few of your favorite applications and files, to customize a new installation. Regrettably, these files won’t be accessible when you boot directly from the USB flash drive; but once the installation is finished, they can help you save considerable time while setting up a new computer.
Of course the bootable drive that this method creates is no substitute for a fully customized Mac OS X Lion-based computer, but considering how fast and easy the drive is to set up–and how much time it could save you the next time you need to reinstall or troubleshoot your Mac OS X–there’s no good reason not to make your own bootable copy of Lion to carry in your pocket. Good luck!

You must be logged in to post a comment.