This is a simple but an amazing css gadget that changes you visitors default cursor to your custom cursor when they visit your website. The custom cursor gadget equally works on every platform including the blogger platform.
Does this slow my website load time? This gadget has a very little or no impact as regards to how your website load (in the case of load time)
How do I install this gadget on my blog? To install this gadget just follow the simple tutorials below.
Blogger
To ad this widget your blogger site, simply
Login to your blogger account.
Click on layout.
Add a new Html/Javascript Gadget.
Copy and paste the following code into you Gadget:
Adding to a website
To add this widget to a website or any other platform, simply paste the above code anywhere within the <head></head> section.
The world is changing rapidly, don’t let your pains-taking articles go without credits. What am about to introduce to you are mostly used by cooperate news websites like ehow and the likes. This widget is a free service provided by tynt, it automatically add a credit (attribution) links to any text that is copied from your blog or website, it works on blogger, wordpress and websites.
Why is important to use the tynt widget? If you added the floating Social or social media button we earlier discussed in our forum then I suppose many people will be bookmarking or sharing your post using this button. Now when someone shares your article via email our any of the sharing options it automatically add your link at the bottom of the post. Like me, you might be wondering how you can acquire the services of this great widget in your blogger blog, wordpress blog or website. No need to hurry, listen and let me brief you on what you really need to know about this widget.
Important: If you are running a tutorial blog and share a lot of codes, it is potentially recommended that you do not add this to your blog as it will automatically and some texts to the code you are sharing.
Install Tynt on your site
Here we go, follow the simple steps below to install this feature on your blogger blog, wordpress blog and website.
Submit your Email and in the Domain field submit your website address without adding http:// and the back slash (/) at the end of URL. Your link should look as follows:
e.g: If you are using a sub-domain your link should like this: eobasi.blogspot.com If you are using a full domain then your link should look like this: www.ewtnet.com
3. Accept the privacy agreement and hit Submit
4. Now you will be provided with a code. Do not copy it and first Click the customize Script button just below that code
5. Then click the customize attribution button on next page
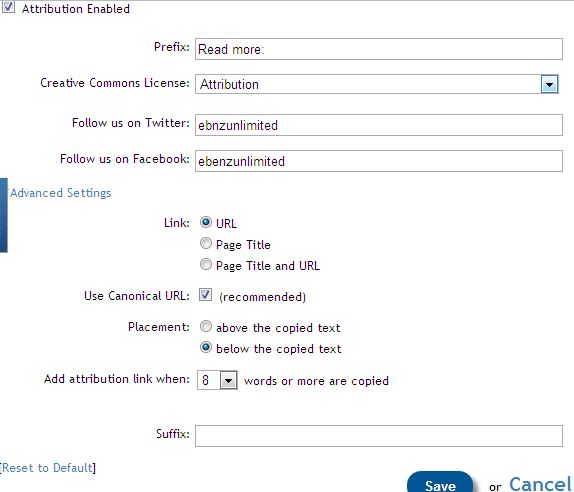
6. You can now customize what text to display and what to hide. If you wish you can only display the read more link and disable Attribution and social profile links by keeping their fields empty.
Submit your twitter and Facebook usernames if you would like to show them below copied text.
You can also decide whether to display the article URL or Page Title or both. Set URL to canonical. Set placement to “below the copied text” for better chances of being ignored by the copier.
See the screenshot below for settings:
7. Click Save and then press Done
8. Copy the code and go to your Blog (blogger or WordPress). Inside your template search for the closing head tag
</head>
Paste the tynt script just above this tag.
Tip: Blogger users may go to Template > Edit HTML > Proceed and then search the tag.
Tip: Wordpress users will find the head tag by going to Appearance > Editor > header.php
10. Save your template and you are all done!
Visit your blog and copy a snippet of any text you like and then paste it anywhere to see the attribution links working just fine.
Track Reader Engagement
By going to your Homepage at tynt account, you will see 4 options to track the text being copied.
SEO:
Keywords: This is where you will see which keywords are copied the most
Content
Social
You play around with these options to take maximum benefit out of this free tool.
Create a simple contact form with no company Ads and along with an upload option that will allow your visitors to send you files straight from your website. The files can be a text file, video, audio, pdf, gif, png, anything. Follow these steps: Live Demo
Create a Free Web Contact Form
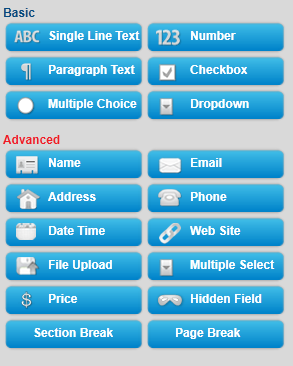
Sign up for a free account at emailmeform Once you are registered click the “Add a Form” button and choose the form builder option. Keep your form simple with some important fields only like Name, Website URL, Email, Age, Country, Subject and Message. The form builder looks like this, The form builder has blue buttons at left and display at right. When you click a button on left the effect is displayed on right. Now kindly follow as I instruct for keeping things simple and for creating a simple but informative contact form. Follow this order:
Click the Name button in advance section
Next click Web site
Next Email
Next Hidden Field. Now click the hidden field section on the right and rename it as Age
Next click Hidden Filed again and rename it as Country
Next click File Upload (Optional you can leave this option if you don’t want users to send you files via email)
Now From the Basic section click Paragraph Text & click it to rename it as Message
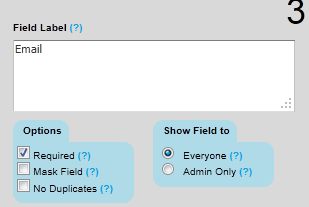
To make a specific form option a must to fill then simply click that row and select required as shown below
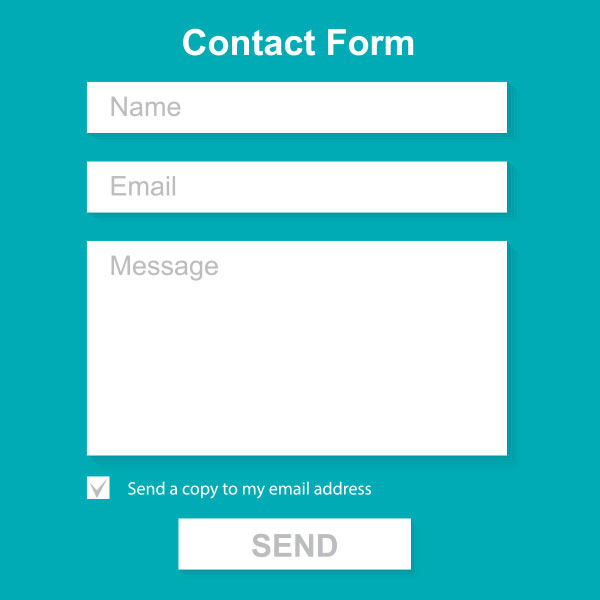
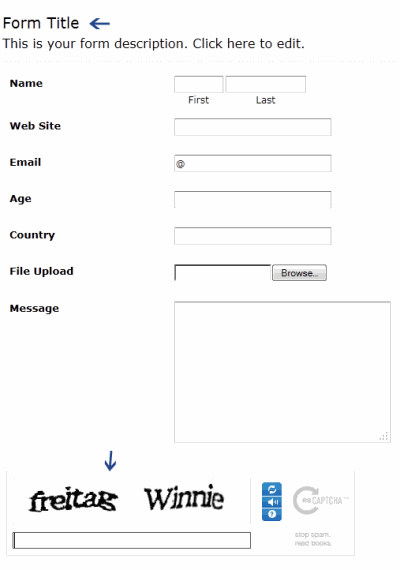
Your contact form now must look something like this: 9. Click the Form Title and add some message there for your visitors. For example you can write :
We Love To Hear From You Feel free to ask for any help. We will catch you back as soon as time allows
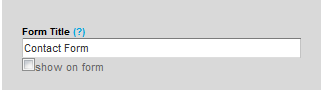
If you wish you can remove the form title by unchecking the box and deleting the description text. See below
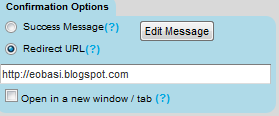
10. Now on the form settings choose Redirect URL and insert the page link of your thank you page. A thank you page is something like this
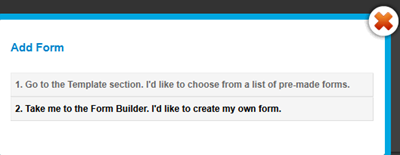
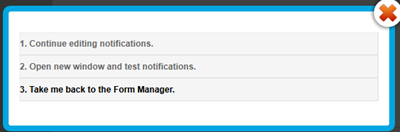
You may create a separate post for this by giving it an old publishing date. Blogger users can create a Page instead of Post. 11. Now replace send Email by submit and align it to right as shown below: 12. Next click the Captcha Code at the bottom and select the none option from the left section as shown below: This security code is often added to prevent spam but I have never used this security code and I honestly have received not even a single spam till today. Just remove it to make the contact form even more neater. 13. Finally hit the Save Form Button and a window will appear as shown below: 14. Choose the second option and add a recipient email ID. Choose an ID that you often use so that whenever someone leave a message you may receive it straight in your inbox. You can also add more than one recipients. See below:
Leave other options as default. Hit Save! Now choose the third option. 15. In Form manager Click Code
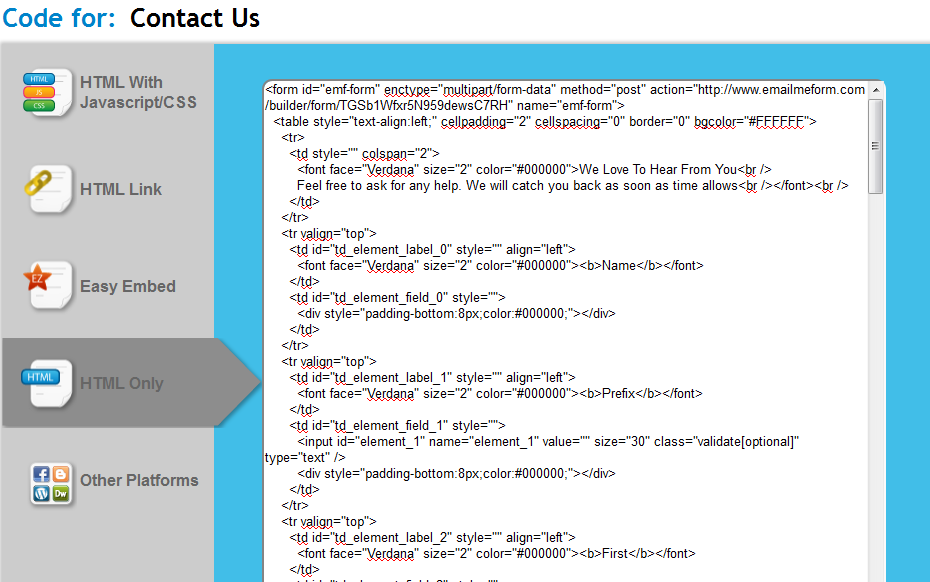
16. Choose the HTML Only option and copy the code.
Now simply copy the code and paste it in your contact page. To delete the emailmeform logo from the contact form find and delete a similar code like the one below from the code you just copied.
Note: Paste the Contact Form code in Edit HTML mode only and hit the publish button on blogger Post Editor. Do not toggle to compose mode because this will collapse the form.
Search engine optimization (SEO) is very essential if you want to successfully earn money online.
Because of the importance of SEO, many website owners spend a lot of money and effort improving their website ranking on search engines. This article outlines the key benefits of SEO to your website and to your online business’ success.
SEO helps to increase the ranking of your website on search engines. When your website ranks high on search engines, it means you get high volumes of traffic that is directed to your web site through the search engines. More traffic means more sales.
SEO helps you to save money on paid advertising. If your website is well optimized and receives large volumes of traffic through search engines, you get a large volume of traffic coming to your website through organic links on the search engines. This means that you do not have to spend money on other advertising tools such as Pay Per Click (PPC).
Optimizing your website for search engines and using your keywords and phrases in this process ensures that you get targeted visitors on your website. If you use all your keywords and phrases in your articles and website content, it means that your website is visible on search engines for your relevant keywords. When people type your keywords on search engines, your website ranks high on search engines.
SEO helps you dominate your niche. If your website ranks high on all major search engines, and for all your keywords, you soon dominate the niche and become an expert in your niche or topic. This builds a good reputation for you, which further drives more traffic to your website.
With all these benefits of SEO, it is important that you start to optimize your website for search engines today!