
With just a bit of work you can set up Android 4.0 on your Kindle Fire, transforming the device into a powerful general-purpose tablet with an unbeatable price tag.
With a vibrant 7-inch IPS display and a 1GHz dual-core processor, the $199 Kindle Fire can make for one lovely tablet. With a bit of work–but no hardware modifications–you can set up Android 4.0 on your Kindle Fire and thenceforth use the device as a powerful general-purpose tablet despite its incredibly low price. Email, games, Web browsing (with Chrome for Android or any other browser)–the Kindle Fire can do it all.
This guide is directly based on the excellent guide written by XDA Developers user Kinfauns. Kinfauns’s guide and his Kindle Fire for Beginners guide are highly recommended reading, but they’re fairly lengthy. We’ve simplified the process and then tested it ourselves, so we can walk you through all of steps; but please use caution when tinkering with your gear, and understand that PCWorld accepts no responsibility for the consequences. That said, read on for a quick step-by-step procedure that you can follow to transform your Kindle Fire into an Android 4.0 tablet!
Ingredients
You will need:
- A Kindle Fire with a full battery (if it’s not full, take time to recharge it fully).
- A USB cable for connecting the Kindle Fire to your computer.
- A Windows computer that you have Administrator rights for.
- fbmode by XDA Developers user Pokey9000.
- The FIREFIREFIRE bootloader for Kindle Fire.
- The TeamWin Recovery image, also known as TWRP.
- The Kindle Fire Utility, a third-party toolkit that simplifies many tasks and includes vital drivers.
- An ICS (Android 4.0) ROM for the Kindle Fire. You can pick one from this list of ROMs. For this wow-to, we’ll be using AOKP, a well-regarded third-party ROM. The latest AOKP version at the time of this writing is build 38, but it’s a good idea to check for the most recent version.
- [Optional] The Google Apps bundle, including Gmail, Google Play, and other essential Android apps. This is packaged separately from the ROM for legal reasons. If you download AOKP, you can find Google Apps for AOKP release 38, under GApps (the last link on the page).
- A willingness to void your warranty and to use the Windows command line. This how-to does not use graphical tools.
Install the Kindle Fire Drivers
For this procedure to work, your computer must correctly recognize the Kindle Fire as an Android device. Here’s how to make that happen:
1. If your Kindle Fire is connected to your computer, unplug it.
2. The KFU zip contains a folder called Kindle Fire Utility. Unzip the contents of this folder into a new folder, c:kfu.
3. Run the install_drivers.bat file that’s in the c:kfu folder. Windows will pop up a UAC prompt, and then start the Kindle Fire Driver Installer.
4. As you step through the installer, you’ll receive a Windows Security alert warning you that the drivers are not signed. Install the drivers anyway.
5. The installer should complete successfully and show a confirmation dialog with the driver name: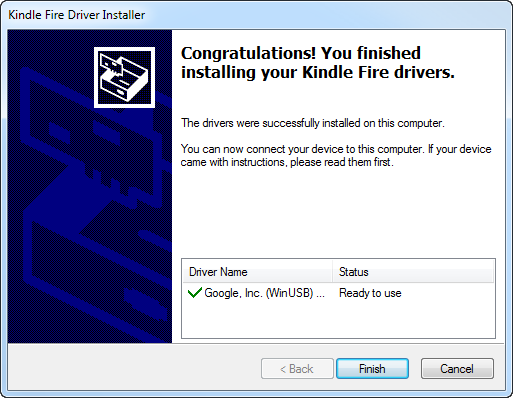 Kindle Fire driver installation confirmation.
Verify That the Drivers Were Successfully Installed
Before doing anything risky with your Kindle Fire, make sure that your PC fully recognizes it as an Android device:
1. Connect the Kindle Fire to your computer and wait for a few moments while Windows recognizes it (even if you’ve plugged it in before).
2. Run Device Manager (Click Start, right-click My Computer, and then select Manage > Device Manager).
3. You should see the Kindle Fire registered as an Android Composite ADB Interface, under Android Phone in the Device Manager tree.
If you see this listing, you’re good to go. If this isn’t exactly what you see, you’ll need to do some troubleshooting; for that, refer to the original guide which has an extended troubleshooting section under the heading “What can I do if the drivers won’t load?”
Switch to Fastboot Mode
It’s still not too late to turn back. Up until this point, you haven’t done anything to the Kindle itself. But now you’re about to take the first step that involves making changes to the tablet. So, without further ado:
1. Make sure that the Kindle Fire is still connected to your computer.
2. Create a new subfolder, c:kfusoftware.
3. Unzip fbmode.zip into c:kfusoftware. It contains a single file, called fbmode (with no suffix).
4. Open a command prompt window, and copy fbmode into a user-writable location on the Kindle Fire using ADB:
adb push C:kfusoftwarefbmode /data/local/tmp/
5. Edit fbmode’s permissions so that it can run:
adb shell chmod 755 /data/local/tmp/fbmode
6. Run fbmode to switch to fastboot mode:
adb shell /data/local/tmp/fbmode
7. Using ADB, reboot the Kindle Fire:
adb reboot
At the end of this process, your command prompt window should look like this: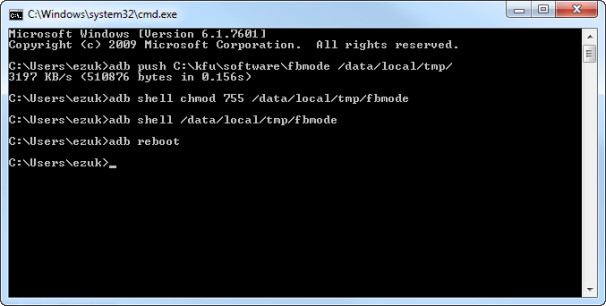 Command prompt window after switch to fastboot mode.
Your Device Manager should look like this:![]()
The meaning of this notation is that the name of the device changes from Android Composite ADB Interface to Android ADB Interface.
Finally, the Kindle Fire itself should look like this:
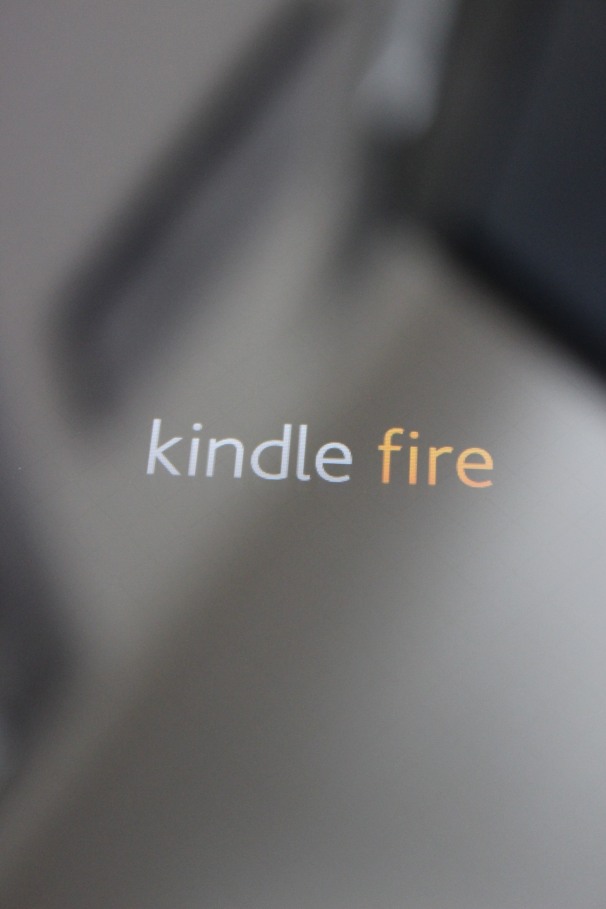
Kindle Fire screen after switch to fastboot mode.
The Fire will simply display a logo and stay put. It’s not “stuck”; rather, it’s in fastboot mode, awaiting further instructions.
Install a Recovery Image
Next, you’ll install a recovery image–a miniature operating system that you’ll use later to flash the complete ROM. The recovery image will also come in handy for creating full backups of the device, among other things.
1. Copy the TWRP .img file into c:kfusoftware. At this writing, the latest TWRP image is named openrecovery-twrp-blaze-2.1.1.img.
2. Open a command prompt window at c:kfutools and install the image:
fastboot -i 0x1949 flash recovery C:kfusoftwareopenrecovery-twrp-blaze-2.1.1.img
3. Change the boot mode to Recovery:
fastboot -i 0x1949 oem idme bootmode 5001
4. Reboot into TWRP:
fastboot -i 0x1949 reboot
At this point, your command prompt should look like this: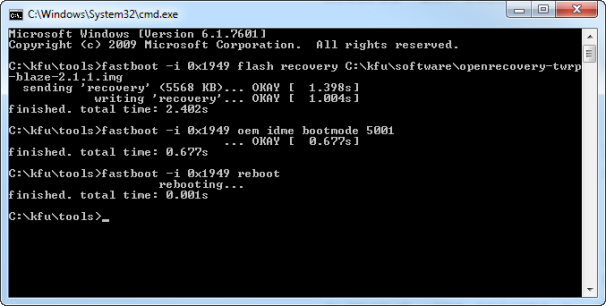 Command prompt window after installation of recovery image.
And your Kindle Fire should look like this: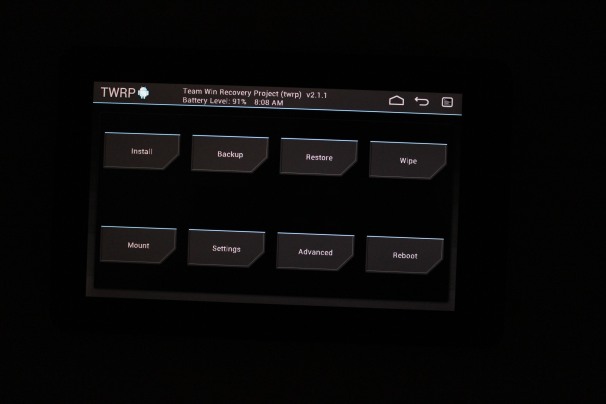 Kindle Fire screen after installation of recovery image
Install a Custom Bootloader
You are well into the process now. Next, install the FIREFIREFIRE custom bootloader:
1. Take the FIREFIREFIRE Zip file and place it (still zipped) into c:kfusoftware. At this writing, the latest filename is called fff-u-boot_v1.4a.zip.
2. Copy FIREFIREFIRE into the Kindle Fire’s /sdcard directory:
adb push C:kfusoftwarefff-u-boot_v1.4a.zip /sdcard/
3. On the Kindle Fire, press the Install button. Navigate to /sdcard if needed (you should already be there by default), and select fff-u-boot_v1.4a.zip.
4. Swipe to confirm. You should get a success message: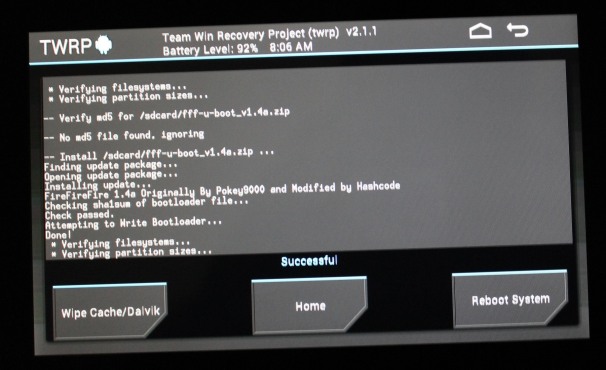 Custom bootloader success message.
5. Back up the stock OS so you can roll back to it at any time. In the root TWRP menu, select Backup, modify the options if you like (the defaults are fine), and swipe to confirm. Backing up will take a while, which is one of the reasons why starting the process with a full battery is so important.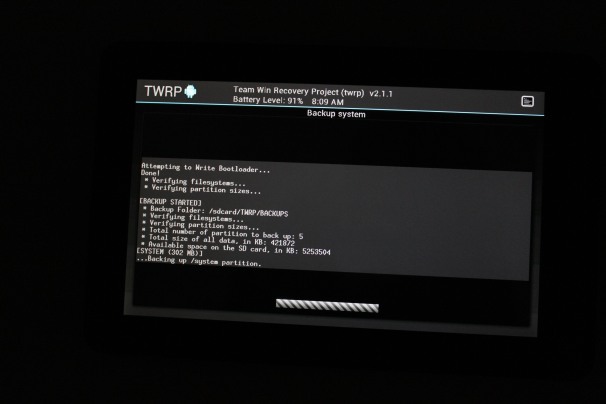 Backing up the stock OS can take a while.
Flash the Ice Cream Sandwich ROM
You’re almost there! Now you just need to copy the ROM and flash it. As noted at the outset, we used AOKP in our test runs, but different ROMs may have different flashing procedures. Read the documentation for the ROM of your choice.
1. Place the .zip files containing the ROM image and Google Apps into c:kfusoftware.
2. Push the ROM and Google Apps onto the device:
adb push C:kfusoftwareaokp_otter_build-38.zip /sdcard/ adb push C:kfusoftwaregapps-ics-20120429-signed.zip /sdcard/
3. In TWRP, select Wipe > Factory Reset. This will remove all existing files from the data and cache partitions, but it won’t affect the /sdcard directory, which contains media files.
4. In TWRP, select Install. Navigate to the ROM .zip file that you placed on the device, tap it, and swipe to confirm. This will take a few moments: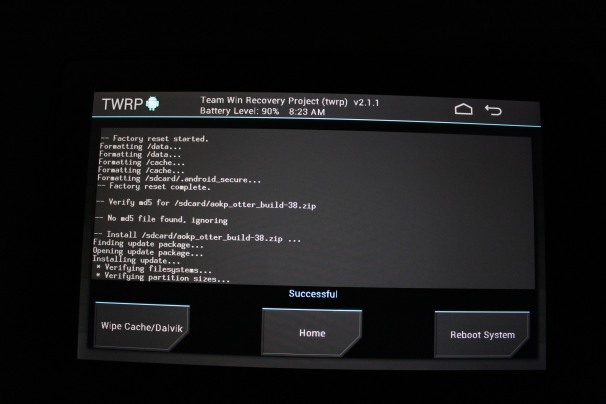 Installing the Ice Cream Sandwich ROM.
5. Once that is done, tap the Back button in the upper right corner, and repeat the process with the Google Apps .zip file.
6. Tap Reboot System in the lower right corner, and boot into your brand-new Android 4.0 experience! If you wish, you can now remove the ROM and Google Apps .zip files from your device.