We’ll show you how to find, buy, and build in a brand-new PC chassis.

If you aren’t a dedicated PC builder, the last thing you probably think about is your PC case. But there are a number of good reasons for moving to a new chassis: You might need space for more components; you might want more cooling; you might long for some fancy features such as clear side panels or glowing fans and lights; or you might be interested in upgrading your front-panel connectors to support the latest and greatest connection types.
Whatever your reason for considering a new shell, we’ll walk you through the process of selecting one–and we’ll look at how to move the parts and pieces from your old case into your new case smoothly and efficiently.
Choose a Suitable Case
PC cases fall into three broad categories: Budget, Midrange, and High-End. But a relatively inexpensive case isn’t necessarily worse than an expensive one.
Budget Bonanza

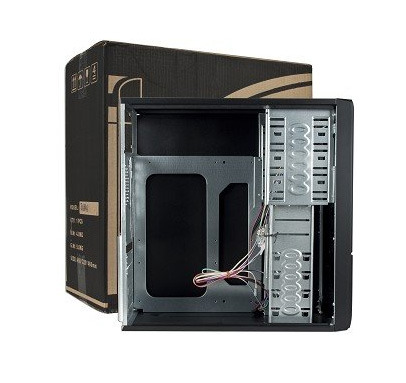
A typical budget case is inexpensive ($20 to $40), rectangular, and featureless. In other words, it’s a nondescript replacement case with few special features to help you fit more components into your rig, tidy up your cables, or installation your system’s current components easily.
Budget cases tend to be plain, functional, and utterly ordinary.
If you want the barest possible enclosure for your PC’s parts, have no interest in expanding your case’s features or available connections beyond what you currently have, or want to spend as little as possible on a new case, you go budget. You’ll get what you pay for with these models in this price range.
Midrange Medley
In this category, prices run from $75 to $200, and you’ll find considerable variation in design and construction.
Midrange cases typically offer handy features such as soundproofing, cable channels for routing wires, and extra connection ports.

These cases may have (or lack) a number of features that suit your needs. The most important variable to consider is case dimensions, since you’ll want to know at the outset that your new chassis can hold all of your system’s components without difficulty. Problems may arise if, for example, you have an extralong video card that won’t fit into a case because of its internal layout. If you have multiple cables, liquid cooling tubes, or huge CPU coolers to accommodate, triple-check that your PC parts will fit comfortably within a prospective new case before buying it.
Also, make sure that your new case can support all of your 3.5-inch and 5.25-inch devices. And don’t buy a three-bay case if your system uses a four-drive RAID array.
In appraising the raw design of the case, consider whether its accouterments–such as a big door covering the front panel, lighting effects that you can’t turn on and off manually, or a manual cooling bar that falls out of the case whenever you pop off the side panel–contribute more nuisance than neatness.
Will the case’s overall design be practical six months after you purchase it? If you buy a soundproof case in the winter, will your system be able to handle the hotter interior temperatures that occur during summertime? Keep the big picture in mind, and don’t let eye-catching details lead you astray.
Here are some other important questions to ask: What kind of connections come built into the case’s front panel (or sides, depending on its design)? Does the case deliver true internal headers for its connections or just pass-through cables? Are the case’s USB ports upside-down? Is the case screwless? Does it come with fans preinstalled? How loud are they when you fire up a system? What other fan configurations could you mount?
For liquid cooling enthusiasts, what size radiators does the case support? How easily could you mount one externally or internally? Does the case come with motherboard standoffs, or are they built into the motherboard tray? Can you remove the motherboard tray separately from the case? Can you install or tweak the backplane of a CPU cooler without having to remove the entire motherboard? What options does the case provide for managing the system’s cables?
High-End Heaven

Once you break the $200 barrier, you have to deal with manufacturers who sometimes let their imaginations run wild, resulting in PC cases that may be flashier than they are functional. So don’t let an expensive case’s ingenious design blind you to potential shortcomings in its usefulness. A manufacturer may go to great lengths to craft a killer yet functional design for its unique chassis, or it may slap an outlandish design or a few gimmick features on a case that is unpleasant to work with.
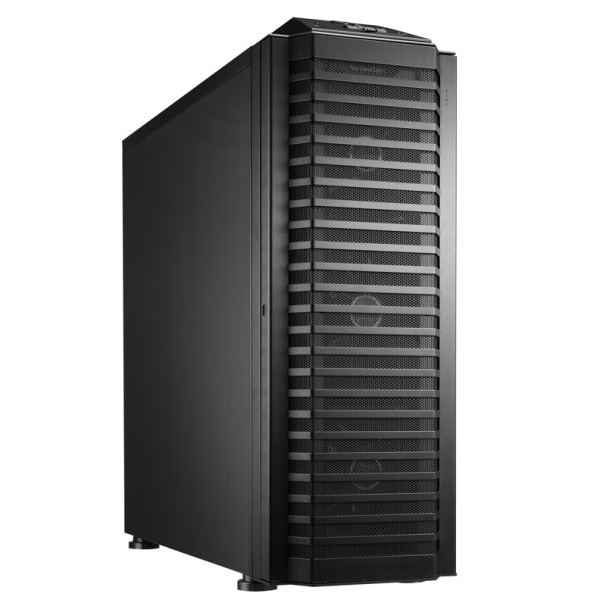
The Lian-Li PC-P80NB is an ATX full-tower case roomy enough to hold every component you could dream of.
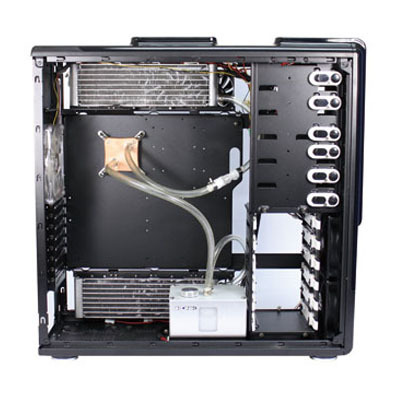
Cases at the high end of the spectrum may come with a ton of cooling, fan controllers, and other switchable features built directly into the chassis. Some may cover every inch of the inside surface with soundproof acoustic foam; others may come with water-cooling loops built into the chassis, like the Logisys CS8009BK. And finally, some cases may be expensive simply because they’re huge: The Lian-Li PC-P80NB, for example, can support 11 PCI devices and 10 hard drives, and comes with six preinstalled fans (five 14-centimeter fans, and one 12-centimeter fan). If that meets your PC building needs, buy it; otherwise, steer clear.
Next: Transfer your PC’s components to the new case.
Move Your PC Components From the Old Case to the New One
The process of transferring components from one case to another is in some ways simpler than the process of selecting the new case. Start with the components that you can easily uninstall, move, and install without affecting any others.
In a typical system build, I like to start by disconnecting all of the wires and power cables in my existing chassis so that I can get the rat’s nest out of the case before I try to remove individual components. Pull out the SATA cables and the power supply, and disconnect other wires inside the system. Then pop off your system’s side panels, remove your case’s front panel (if applicable), and remove your 5.25-inch optical drives. Depending on the design of your new case, you might be able to load these components into the new shell immediately–one reason I love tool-free case designs. Hard drives come next, and they merit the same treatment.
Many tool-free cases let you slot your components into place without using screws or removable case fixtures.
Next, remove your PCI devices, which might consist of a single discrete video card in some instances. Assuming that you aren’t running some fancy water-cooling setup, your old case should be empty of practically everything but the motherboard by now. Unscrew it and gently remove it from the case, gripping it by the edges.
If your new case doesn’t come with motherboard standoffs, screw them in–and install your motherboard’s I/O shield–before attempting to install the motherboard itself.
Once the motherboard is in place, I usually attach the system’s PCI devices, especially the video card; however, this approach may make for trickier access to SATA ports or other connectors, depending on the motherboard’s layout. On the other hand, waiting to install the video card can pose a bit of a challenge if the power cables on the power supply barely reach the top connectors on the motherboard.
Try to route as many cables as possible behind the motherboard, to keep them from cluttering up your case interior and restricting airflow.
Once all of your components are in place and you’re ready to start connecting cables, try to use your case’s built-in cable management options to maximum advantage. In most systems, the goal is to route as many cables as possible behind the motherboard (mashed up against the right side panel). For this purpose, cases that provide multiple routing holes around the motherboard tray or fasteners (for twist ties/Velcro strips/twine or the like) behind it can be immensely helpful. Minimizing clumps of cables in the middle of your PC will give the system better airflow.
Next, examine your case layout and verify whether you need to install the power supply at this stage. I recommend waiting until the last possible moment to install your power supply, to avoid having to deal with a bunch of loose power cables. Unfortunately, some cases make it hard to install your power supply after the motherboard is in place, so plan accordingly. Once you’ve installed the power supply and finished connecting all of the system’s cables, you should be finished.
Transferring components from one case to another isn’t especially difficult, even for computer newbies. For most people, the most time-consuming part of the operation involves cable management–unless you’re migrating a relatively tricky system build (such as one featuring a liquid cooling loop) to a case that may require some creative thinking to achieve the desired results.
Don’t be afraid of cases. Buy one. Build a system in one. You’ll be amazed at the options that await your consideration–including plenty of builder-friendly features–on today’s market of well-priced, well-designed chassis.