Category: News

  • One Time Pop-Up Or Slide-Out Facebook Like Box With Cute Subscription Form.

    One Time Pop-Up Or Slide-Out Facebook Like Box With Cute Subscription Form.

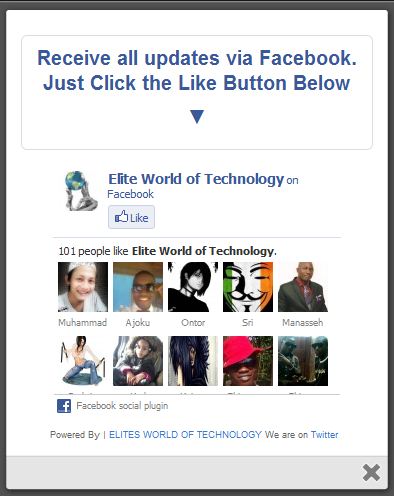
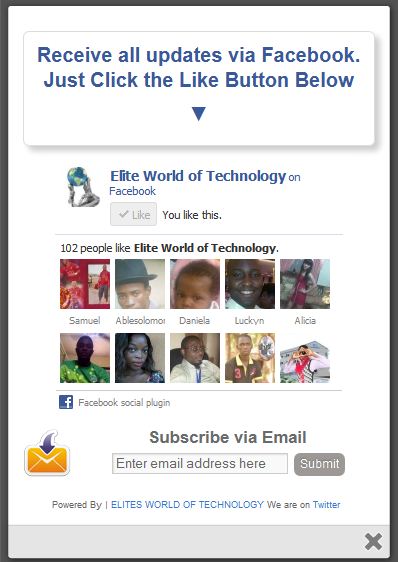
    With Subscription Form
    Without Subscription Form

    I got this trick  from an old friend -Helltrick.

    It’s such a fantastic widget to force your site visitors to subscribe to your updates via email, like your facebook page or follow you on twitter.

    Not only do we acquire the services of an amazing facebook like page we have yet another but extremely beautiful and easy to edit subscription form dozed with new CSS effects. This widget will keep pop-up/slide-out neat and clean and will surely attract visitors to subscribe.


    Demo

    To see this widget in action kindly our demo page to see a live preview on how it works.

    HOW TO ADD A ONE TIME POP-UP / SLIDE-OUT FACEBOOK LIKE BOX WITH CUTE SUBSCRIPTION LINK TO YOUR BLOG.


    In Blogspot:

    1. Login to your blogger dashboard
    2. Select Layout from your blog menu
    3. Add a new Javascript/html Gadget.
    4. Copy and paste the following code
    <style>

    /*
    ColorBox Core Style:
    The following CSS is consistent between example themes and should not be altered.
    */
    #colorbox, #cboxOverlay, #cboxWrapper{position:absolute; top:0; left:0; z-index:9999; overflow:hidden;}
    #cboxOverlay{position:fixed; width:100%; height:100%;}
    #cboxMiddleLeft, #cboxBottomLeft{clear:left;}
    #cboxContent{position:relative;}
    #cboxLoadedContent{overflow:auto;}
    #cboxTitle{margin:0;}
    #cboxLoadingOverlay, #cboxLoadingGraphic{position:absolute; top:0; left:0; width:100%;}
    #cboxPrevious, #cboxNext, #cboxClose, #cboxSlideshow{cursor:pointer;}
    .cboxPhoto{float:left; margin:auto; border:0; display:block;}
    .cboxIframe{width:100%; height:100%; display:block; border:0;}
    /*

    User Style:
    Change the following styles to modify the appearance of ColorBox. They are
    ordered & tabbed in a way that represents the nesting of the generated HTML.
    */
    #cboxOverlay{background:#000;opacity:0.5 !important;}
    #colorbox{
    box-shadow:0 0 15px rgba(0,0,0,0.4);
    -moz-box-shadow:0 0 15px rgba(0,0,0,0.4);
    -webkit-box-shadow:0 0 15px rgba(0,0,0,0.4);
    }
    #cboxTopLeft{width:14px; height:14px; background:url(http://1.bp.blogspot.com/-FiJ_Xz7txEg/Txrt0sy1TiI/AAAAAAAAFWk/Llzvkeyy_J8/s1600/controls.png) no-repeat 0 0;}
    #cboxTopCenter{height:14px; background:url(http://1.bp.blogspot.com/-TcJGMnSfOCY/TxrtzzHDLVI/AAAAAAAAFWc/mdndgrisRuA/s1600/border.png) repeat-x top left;}
    #cboxTopRight{width:14px; height:14px; background:url(http://1.bp.blogspot.com/-FiJ_Xz7txEg/Txrt0sy1TiI/AAAAAAAAFWk/Llzvkeyy_J8/s1600/controls.png) no-repeat -36px 0;}
    #cboxBottomLeft{width:14px; height:43px; background:url(http://1.bp.blogspot.com/-FiJ_Xz7txEg/Txrt0sy1TiI/AAAAAAAAFWk/Llzvkeyy_J8/s1600/controls.png) no-repeat 0 -32px;}
    #cboxBottomCenter{height:43px; background:url(http://1.bp.blogspot.com/-TcJGMnSfOCY/TxrtzzHDLVI/AAAAAAAAFWc/mdndgrisRuA/s1600/border.png) repeat-x bottom left;}
    #cboxBottomRight{width:14px; height:43px; background:url(http://1.bp.blogspot.com/-FiJ_Xz7txEg/Txrt0sy1TiI/AAAAAAAAFWk/Llzvkeyy_J8/s1600/controls.png) no-repeat -36px -32px;}
    #cboxMiddleLeft{width:14px; background:url(http://1.bp.blogspot.com/-FiJ_Xz7txEg/Txrt0sy1TiI/AAAAAAAAFWk/Llzvkeyy_J8/s1600/controls.png) repeat-y -175px 0;}
    #cboxMiddleRight{width:14px; background:url(http://1.bp.blogspot.com/-FiJ_Xz7txEg/Txrt0sy1TiI/AAAAAAAAFWk/Llzvkeyy_J8/s1600/controls.png) repeat-y -211px 0;}
    #cboxContent{background:#fff; overflow:visible;}
    #cboxLoadedContent{margin-bottom:5px;}
    #cboxLoadingOverlay{background:url(http://1.bp.blogspot.com/-PPvu-446sn4/Txrt1QsGH1I/AAAAAAAAFWw/_jWYVoR1HX8/s1600/loading-background.png) no-repeat center center;}
    #cboxLoadingGraphic{background:url(http://1.bp.blogspot.com/-31strss_1-E/Txrt1J6NThI/AAAAAAAAFWo/4P12CJPj924/s1600/loading.gif) no-repeat center center;}
    #cboxTitle{position:absolute; bottom:-25px; left:0; text-align:center; width:100%; font-weight:bold; color:#7C7C7C;}
    #cboxCurrent{position:absolute; bottom:-25px; left:58px; font-weight:bold; color:#7C7C7C;}
    #cboxPrevious, #cboxNext, #cboxClose, #cboxSlideshow{position:absolute; bottom:-29px; background:url(http://1.bp.blogspot.com/-FiJ_Xz7txEg/Txrt0sy1TiI/AAAAAAAAFWk/Llzvkeyy_J8/s1600/controls.png) no-repeat 0px 0px; width:23px; height:23px; text-indent:-9999px;}
    #cboxPrevious{left:0px; background-position: -51px -25px;}
    #cboxPrevious.hover{background-position:-51px 0px;}
    #cboxNext{left:27px; background-position:-75px -25px;}
    #cboxNext.hover{background-position:-75px 0px;}
    #cboxClose{right:0; background-position:-100px -25px;}
    #cboxClose.hover{background-position:-100px 0px;}
    .cboxSlideshow_on #cboxSlideshow{background-position:-125px 0px; right:27px;}
    .cboxSlideshow_on #cboxSlideshow.hover{background-position:-150px 0px;}
    .cboxSlideshow_off #cboxSlideshow{background-position:-150px -25px; right:27px;}
    .cboxSlideshow_off #cboxSlideshow.hover{background-position:-125px 0px;}
    /*———————————————————————————–*/
    /* Facebook Likebox popup For Blogger
    /*———————————————————————————–*/
    #subscribe {
    font: 12px/1.2 Arial,Helvetica,san-serif; color:#666;
    }
    #subscribe a,
    #subscribe a:hover,
    #subscribe a:visited {
    text-decoration:none;
    }
    .box-title {
    color: #3B5998;
    font-size: 20px !important;
    font-weight: bold;
    margin: 10px 0;
    border:1px solid #ddd;
    -moz-border-radius:6px;
    -webkit-border-radius:6px;
    border-radius:6px;
    box-shadow: 5px 5px 5px #CCCCCC;
    padding:10px;
    line-height:25px; font-family:arial !important;
    }
    .box-tagline {
    color: #999;
    margin: 0;
    text-align: center;
    }
    #subs-container {
    padding: 35px 0 30px 0;
    position: relative;
    }
    a:link, a:visited {
    border:none;
    }
    .demo {
    display:none;
    }
    </style>

    http://ajax.googleapis.com/ajax/libs/jquery/1.5/jquery.min.js
    http://yourjavascript.com/11215013191/jquery.colorbox-min.js
    <script type=”text/javascript”>
    jQuery(document).ready(function(){
    if (document.cookie.indexOf(‘visited=true’) == -1) {
    var fifteenDays = 1000*60*60*24*30;
    var expires = new Date((new Date()).valueOf() + fifteenDays);
    document.cookie = “visited=true;expires=” + expires.toUTCString();
    $.colorbox({width:”400px”, inline:true, href:”#subscribe”});
    }
    });
    </script>
    <!– This contains the hidden content for inline calls –>

    <div style=’display:none’>
    <div id=’subscribe’ style=’padding:10px; background:#fff;’>
    <h3 class=”box-title”>Receive all updates via Facebook. Just Click the Like Button Below<center><p style=”line-height:3px;” >▼</p></center></h3>
    <center>

    //www.facebook.com/plugins/likebox.php?href=http%3A%2F%2Fwww.facebook.com%2Fspan%20style=

    </center>
    <style>
    .mbt-email{
    background:url(http://4.bp.blogspot.com/_MbejYjGokMM/TSeZHmWJ6oI/AAAAAAAAALE/93ELYyzmi64/s1600/email.png) no-repeat 0px 12px ;
    width:300px;
    padding:10px 0 0 55px;
    float:left;
    font-size:1.4em;
    font-weight:bold;
    margin:0 0 10px 0;
    color:#686B6C;
    }

    .mbt-emailsubmit{
    background:#9B9895;
    cursor:pointer;
    color:#fff;
    border:none;
    padding:3px;
    text-shadow:0 -1px 1px rgba(0,0,0,0.25);
    -moz-border-radius:6px;
    -webkit-border-radius:6px;
    border-radius:6px;
    font:12px sans-serif;
    }
    .mbt-emailsubmit:hover{
    background:#E98313;
    }
    .textarea{
    padding:2px;
    margin:6px 2px 6px 2px;
    background:#f9f9f9;
    border:1px solid #ccc;
    resize:none;
    box-shadow:inset 1px 1px 1px rgba(0,0,0,0.1);
    -moz-box-shadow:inset 1px 1px 1px rgba(0,0,0,0.1);
    -webkit-box-shadow:inset 1px 1px 1px rgba(0,0,0,0.1); font-size:13px;
    width:170px;
    color:#666;}

    </style>

    <div class=”mbt-email”>
    Or Receive Updates via Email
    <form action=”http://feedburner.google.com/fb/a/mailverify?uri=blogspot/XylXo” id=”feedform” method=”post” target=”popupwindow” onsubmit=”window.open(‘http://feedburner.google.com/fb/a/mailverify?uri=blogspot/XylXo‘, ‘popupwindow’, ‘scrollbars=yes,width=550,height=520’);return true”>
    <input gtbfieldid=”3″ class=”textarea” name=”email” onblur=”if (this.value == &quot;&quot;) {this.value = &quot;Enter email address here&quot;;}” onfocus=”if (this.value == &quot;Enter email address here&quot;) {this.value = &quot;&quot;;}” value=”Enter email address here” type=”text” />
    <input type=”hidden” value=”XylXo” name=”uri”/><input type=”hidden” name=”loc” value=”en_US”/>
    <input class=”mbt-emailsubmit” value=”Submit” type=”submit” />
    </form>
    </div>
    <p style=” float:right; margin-right:35px; font-size:9px;” >Powered By | <a style=” font-size:9px; color:#3B78CD; text-decoration:none;” href=”https://ewtnet.com” rel=”nofollow”>EWT</a> Pop-Up Box <a style=” font-size:9px; color:#3B78CD; text-decoration:none;” href=”https://ewtnet.com/2012/08/one-time-pop-up-or-slide-out-facebook.html” rel=”nofollow”>Get This Widget</a></p>
    </div>
    </div>

    Website

    If you need to use this widget on any website platform other than the blogger platform, simple copy the above code to anywhere in the <body></body> section of your website.

    Make The Following Changes :

    Change Green to custom text or leave it as default, Pink with your facebook username, Blue with your RSS feed Title.


    Finally, Save your widget and you are done! Enjoy!
  • Blogging Tips: Tips on Becoming a Successful Blogger

    Blogging Tips: Tips on Becoming a Successful Blogger

    By: Joseph Onyemakonor

    Tips on Becoming a Successful Blogger: The internet has been one of the widest sources of knowledge and income, and blogging is one of the ways to make some good cash. There are over 10 million blogs and this number increases every day. Blogging is very good and interesting, especially when you are not going into it because of the money you could make. It allows you to share your opinion with the world at large and also reach out to people in need of help and advice. Some people will just rush into blogging without knowing what it involves. You must read this article and know why you shouldn’t start blogging. Here are some facts about blogging you should know and have in mind Tips on becoming a successful blogger

    THE GOOD Tips on Becoming a Successful Blogger

    Blogging has its advantages and is interesting once you get it started fully. Some of the advantages of blogging are

    • You get to share your opinion and ideas and meet people with similar views
    • You can build a steady audience and sell products to them which also serves as a source of income
    • You will make a good amount of money from it through advertising.
    • In some countries, you can win awards of best blog of the year.
    • Blogging is a major investment online.

    Blogging gives you the advantage of extra income to support your earnings and with time it can grow into a steady source of income. I know a blogger who earns $300everyday through advertisement and adsense. Once you have a blog and have successfully build a steady audience you can sell your blog and make over $10,000. Now isn’t that a very good investment?.

    THE BAD

    As good and profitable a blog can be, it has its disadvantages as well. Some of the disadvantages includes;

    • Blogging is highly time demanding and can affect your daily life and routine. Most successful bloggers know the great deal of work they put to get their blog when they first started before they could become freelance bloggers.
    • It requires new and interesting contents constantly: If you want your blog to grow fast, you should never copy and paste content from another site, you have to create new and unique contents. This is very difficult to do and most bloggers hire writers constantly. Now if you do not have the fund or resource to hire a writer then you might find it difficult running a blog
    • Once you start blogging you will spend a long time facing a Screen, this can damage your eye sight and even cause headaches. You have to be ready to face this. I will advice you do not blog if you already have any eye defect.

    THE UGLY

    There is also a very ugly part of blogging. After you must have put much effort into your blog, and also spend time on it, you may not succeed. You may constantly continue to loss money without making any profit. Do not give up on blogging. This should give you an idea on what you are going into if you decide to choose blogging as your way of making money online

  • Why You Must Quit Blogspot Comment System.

    Why You Must Quit Blogspot Comment System.

    Google over the years has brought a lots of amazing  features to improve Blogger platform but they seems to forget about the comment system (is probably one of the worst comment system in existence) or probably they consider it unimportant.

    Like most of you I have always admired the comment system of other blog platforms like wordpress, but has waited (I’m still waiting though!) patiently hoping to see a better comment system one day. (Looks like we are not going to see one in the future either).

    Why You Need To Quit  Your Blogger Comment System??

    One of the most effective ways of retaining readers to your blog is by building a little community in your blog, like I mentioned before; Blogger has one of the most crappy comment system in existence; which is the area I think they still need to improve. On my cause of making my blog convenient for you I went for a journey, With a little research (Google Of-course 🙂 ) I managed to grab some Ideas I think I should share with you. My Discoveries!Ouch: This is a very unusual title to give to reason 🙂 but honestly I can’t think of a better title to give to it (you probably should suggest one for me). While I was still using the blogger comment system, I made a very crucial error while posting a long reply on a user comment, that was when I voiced the word “ouch” what do I do? There was no Edit or Preview Option, I had to delete and re-write the entire comment (so bad I guess?). The worst is coming……   No Threading Comments: In other comment system you might have seen a  REPLY  button or link attached immediately after or below each comments; this is known as threads comment. This all important feature enable you and your readers to reply directly under each comment (Not the ‘@’ trash we normally use), Without having to do some advance xml editing.    Now, this is a very important feature for any blog comment system,  our dear default blogger comments system do not allow you to reply directly to a comment, this can lead to confusion and Ioften see bloggers having to use ‘@’ to specify which person the were replying to for example ‘@quoyo’ ‘@gotmelsh’ I can now post a reply and it will be attached to the bottom of each comment.   Enticing Comment Form: The comment form you probably have seen on wordpress comment system allow users to comment as a guest with their Name and URL, This feature entice your readers to comment on your blog post. ‘Would you want to comment on a blog that doesn’t give user the privilege to share there own blog/site?’ ‘Other people probably won’t like to either’ (that’s the devil’s tempting offer you can’t reject’) or if they have a wordpress account they can comment with that profile.But they can also comment with their social network and online profiles like *Twitter *Facebook *Yahoo *OpenId (Did You Know Your Blogger URL is an open Id?).    When you leave a comment you can also add an image or video to your comment instead of adding an image or video URL that will take users out of your blog. Now that’s is a good example of a good comment system.We have ‘that devil’s tempting offer’ but please do not spam us 🙂   Email Options: This is probably the most important feature that blogger comment system lack. ‘Ask me why?’ This is becourse these option allows your readers to choose if they want to receive new comments or replies posted to the posts they have earlier commented on directly to their email whereby helping the user to know when a reply is posted to his reply… What you probably don’t know is that this feature help you a great deal to maintain a good number of returning visitors. please, remember to choose this option while commenting here becourse I would love to see you again.   Ratings: Many of you know that I’m on bloggers, most time what really takes me to bloggers is to check how many people that voted (Rate) for my talks (comment). If there are so many people who does the same thing out there, then you can imagine how many returning visitors who will often come back to your blog to check if anybody voted for them. Our blogger comment system lacks this feature too… “You are beginning to realize how much features you are missing” Hold on I still need to tell you something and please do not forget to tell me something too 🙂 Your comment is very valuable to me.
    Moderate Options:  Most Comment system other than blogger comment system allows you to reply your post comments directly from your dashboard and email. You receive an email when a new comment or reply is posted on your blog post, the same as with Blogger comments however the options to reply to a comment are much more versatile.

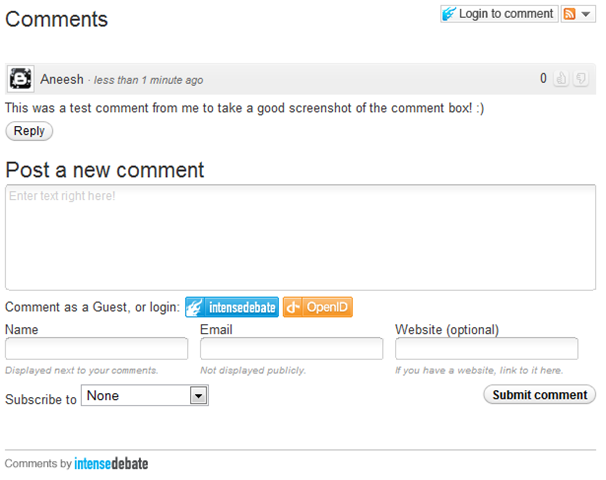
    When I’m away from the computer for a few hours if I have received for example fifty comments I can go to my Intensedebate dashboard to manage the comments.From here I can read the comments and see which posts the comments were posted on.I can click on each comment and reply or delete the comments from the dashboard, now i can reply to comments on one page without the need to go to the blog.
    I Have Heard Enough! Give Me Alternative? Well I have that too, I will be lying if I said I did it all my own but I can assure that about 60% of them are actually my on Idea and please, before I share mine with you promise me you would share yours with me, ‘Ok Deal!’ Lets ride on…. I will be providing you with my idea source,. With this lets move on to our next topic.       Top Five Alternatives To Your Blogger Comment System If you want to get rid of default blogger commenting system and get a better commenting interface, then you can opt for any of these commenting systems.

    intensedebate-

    Intense Debate – I don’t know why I mentioned this first, maybe becourse I’m currently using it on this blog, but what ever the reason might be I want to assure that this is one the best comment system in existence ‘don’t know if it is the best, you will tell me???’  Though most bloggers complain that it does not have the option to export your old blogger comments to your Intensedebate data base, this is true as you might have noticed that most of our posts still have that ‘archaic’ blogger blogger comment system. This is due to we choose to install intensedebate only on new post. I will be publishing an article soon on how to add intensedebate comment system on your blogger blog so make sure you subscribe to our update via email, twitter or facebook. (I promise I won’t spam you; I hate spam too).  This is now owned by  Automattic, the makers of WordPress and is totally free!Features:

    • Comment Threading
    • Reply By Email: Respond to and moderate comments with ease via email
    • Commenter Profiles: Special Profiles for commenters so that there is more interaction between people.
    • Moderation/Blacklisting
    • Reputation Points & Comment Voting
    • Twitter: Tweet your comments
    • Widgets: widgets like blog’s comment stats, the most recent comments made on blog, most popular posts and the most recent comment
    • FriendFeed:(Best Feature)When comments are made in the context of a blog on FriendFeed, IntenseDebate will republish them back on the blog.
    • Plugins API:Developers can enhance the comments by plugins like Seesmic video comments, PollDaddy polls, YouTube videos, smileys.
    • Gravatar support.
    • Facebook Connect and Twitter Sign-in: People comment via their facebook and twitter profiles and can further broadcast the content.
    • Commentluv: This is not a new name to wordpress users, just incase you don’t know; this ‘luvly’ feature automatically put the latest post of your readers to their comments. (You can choose to deactivate it)

    IntenseDebate In Action

    intensedebate-commenting-system
    disqus

    DISQUS  -While on my re-search journey, I happen to read some user reply and discover that this is really the bloggers choice ‘– It is the same thing that Mashable.com uses for its comments.’ (I’m not saying is the best; you still have to me which is the best) I once used it on my blog ‘not this one’ but had to remove after I learned about the commentluv (yes, there is no option for commentluv). One Interesting feature of disqus is the option to export old blogger comment to your disqus comment system database: By so doing you will not loose any of comments.Features:

    • Social Media Reactions: (Best Feature) Display mentions and comments about post from other services around the web (e.g. Twitter, FriendFeed, Digg, YouTube).
    • Trackbacks
    • Seesmic Video Comments
    • Pagination
    • Threading
    • Facebook Connect and Twitter Sign-in: People comment via their facebook and twitter profiles and can further broadcast the content.
    • Widgets like Popular posts and top commenter’s widgets.
    • Blacklisting as well as whitelisting people.

    Disqus In Action

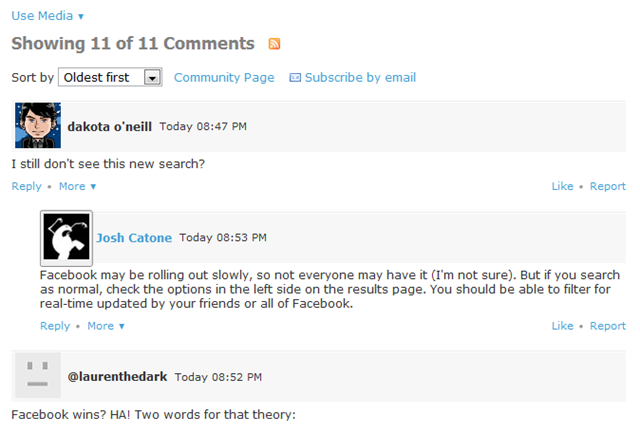
    disqus-commenting system

    JS-Kit (Echo) This is also another JavaScript based commenting system.Echo offers both free and paid packages!The free package comes with threaded comments and an interface where the commenter can add videos,images,similes, etc.The commenter can also format his comments using a simple WYSIWYG comment editor. I really don’t know much about this system (and couldn’t quite link to the source page) as I have never tried them before but I do hope that their a some of you out there that do know one or more things it ‘I honestly hope you share your ideas with me; I’m very Interested’ Or you could as well try it and share your experience with us.Features:

    • Spam control with Akismet
    • Banning : Ban a person by the user name or by IP address
    • Gravatar Support
    • TrackBack/PingBack: Trackbacks/Pingbacks can be automatically be included in comments.
    • Comment Ratings and Karma: Users can rate comments.
    • Blogger Comment Sync: (Best Feature) Transparently switch back and forth between native Blogger comment system and JS-Kit Comment system with no loss of comments because comments are always synchronized with Blogger.
    • Emoticons: 16 emoticons are available.
    • Threads: Threading is also available
    • Pagination: Comments can be paged.
    • Commentluv a feature to give love to your commenter is available to only this commenting system
    • Photo as well as video comments.

    JS-KIT (ECHO) IN ACTION

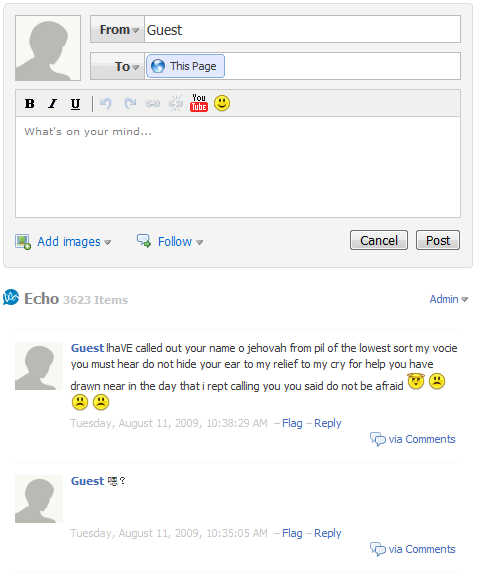
    js-kit-commenting system

    Important: Please make sure to backup your blogger templates before trying any of this system so as to remain on the safer side.

    These are the three most popular commenting systems.They come with threaded commenting with Gravatar based profile images,which can make you commenting system look more professional.I personally prefer Intense Debate over the others.

    Note: These comment forms come with an option to show the comment form on new posts only(means posts with 0 blogger comments)!That means your old comments will stay intact and will use the old blogger comment form.(This is optional.. you can also revert all posts to use the new commenting system.But in that case, you cant display the existing comments easily..)

    These are nothing  but my own lame idea and re-search, I know there hundreds others but it’s your turn to tell me about them (Remember the promise you made to me earlier). ‘to share with me’ 

  • Your Recipe For Long-Term And Targeted Traffic: Generating Traffic To Your Website!

    Your Recipe For Long-Term And Targeted Traffic: Generating Traffic To Your Website!

    Generating traffic to your website can be easy if you know the little secrets about how to drive massive volumes of traffic at no cost.
    This article presents some secret ways through which you can easily boost traffic to your website.

    • Have your own website’s discussion board or forum, and invite people to visit and participate on your forum. This generates traffic to your website and all the posts on your website’s forum will help to improve your search engines position, which will boost traffic to your website. People who visit your forum will also visit your website, hence driving massive amounts of volume to your website.
    • Offer an e-zine on your website and invite people to subscribe to your free e-zine. When people subscribe, they will give in their email address. Every time they read your e-zine, it will remind them to return to your site since you will have your website URL in your e-zine.
    • Invite people to bookmark your website. This is particularly effective if you have high quality content on your website which makes people want to spend more time reading all the useful content on your site. Give away free content to other web masters for them to add on their websites. By allowing your visitors and other webmasters to use your articles on their own web site or in their e-zine, including your resource box, you are effectively advertising your website through their web sites. In addition, allow your visitors to give away your online freebies, and these will include your website URL, thus effectively multiplying your traffic.
    • You can also ask your website visitors to refer your web site to their friend(s) who may benefit from visiting your website. This will increase traffic to your website.
    • Invite your visitors to sign your guest book. When people sign your guestbook they may give you valuable feedback that will help you to improve your web site. This in turn will help you increase traffic to your web site by providing a useful website.
    • Offer an affiliate program. Having hundreds of affiliates advertising your website is an effective way of generating traffic to your website.
    • Give some testimonials or product reviews including your website URL to websites that get high volumes of traffic. By having a testimonial on a website that is visited by thousands of people, you are getting free publicity and free advertising and traffic for your website.

    Use the secret tips outlined above to easily generate high volumes of traffic to your website and boost your online profits.

  • Essential Tips For Generating Traffic To Your Website For Free

    Essential Tips For Generating Traffic To Your Website For Free

    Promoting your website does not need to cost you a lot of money. There are various ways through which you can drive traffic to your website for free.

    If you have no money or if you have a small budget for driving traffic to your website, you can use tips outlined in this articles to generate traffic to your website for free.

    • Exchanging links with other webmasters is a powerful way of generating traffic to your website for free. All you have to do is to identify webmasters with websites that complement your website and exchange website links with them. This means that traffic can be driven to your website through the websites where you have your link.
    • Arrange a joint venture with other webmasters and list owners so that they can advertise your website to their list. This does not cost you anything and all you need to do is to contact some list owners and present your request. By doing this, your website can be advertised to a huge list of people which will drive traffic to your site.
    • Write articles or free reports for other webmasters to publish and put your website address in the author’s resource or biography. If your reports and articles are of good quality, your articles will be published and many readers who will read your article will also visit your website.
    • Include your website address in your business email signature. Anyone you communicate with can potentially be your prospect, so you can therefore be promoting your website every time you send an email.
    • Create RSS feeds for your site and submit the feed URLs to the major RSS feed directories online. This will generate traffic to your website.
    • Have a blog to your site and ping your website on a regular basis when you add new content. When you ping your blog, you make search engines robots index your website, which ultimately drives traffic to your website. It is also very effective to submit your blog address to blog search sites and directories.
    • Include your web address to your forum profile signature. This means that every time you post or respond to questions on the forum, your website URL is seen by all the people in the forum.

    By following these tips, you can generate a steady flow of traffic to your website without spending a lot of money. All you need is to have some time to carry out the steps presented in this article and you will see an increase in traffic to your website.

  • Funny Gallery Gif Images For Your Blog

    Funny Gallery Gif Images For Your Blog

    Copy the code of any of your favorite image below and paste it where your want it to display.

    Note: Use the Javascript/Html widget to add this images on your Blogger sidebars and various widget section.

    Lady Coffee

    Name: Lady Coffee
    File type: Gif Image
    Size: 77.08 KB (78,926 bytes)
    Dimension: 320px × 150px
    Image Code:
    <img src=”https://ewtnet.com/wp-content/uploads/2012/07/KJYss1.gif” title=”Lady Coffee” alt=”Elites World Of Technology Images” /><br /><a href=”https://ewtnet.com/2012/07/funny-gallery-gif-images-for-your-blog.html” rel=”dofollow”>Get Image</a>

    Name: Roflcon Summit
    File type: Gif Image
    Size: 669.34 KB (685,409 bytes)
    Dimension: 283px × 320px
    Image Code:
    <img src=”https://ewtnet.com/wp-content/uploads/2012/07/RINrg.gif” title=”Lady Coffee” alt=”Elites World Of Technology Images” /><br /><a href=”https://ewtnet.com/2012/07/funny-gallery-gif-images-for-your-blog.html” rel=”dofollow”>Get Image</a>
     Shake It Off
    Name: Shake It Off
    File type: Gif Image
    Size: 792.02 KB (811,027 bytes)
    Dimension: 427px × 240px
    Image Code:
    <img src=”https://ewtnet.com/wp-content/uploads/2012/07/dLx5t.gif” title=”Lady Coffee” alt=”Elites World Of Technology Images” /><br /><a href=”https://ewtnet.com/2012/07/funny-gallery-gif-images-for-your-blog.html” rel=”dofollow”>Get Image</a>
     Keyboad Wars
    Name: Keyboad Wars
    File type: Gif Image
    Size: 306.06 KB (313,407 bytes)
    Dimension: 320px × 192px
    Image Code: 
    <img src=”https://ewtnet.com/wp-content/uploads/2012/07/tumblr_lpq12sSaAR1qa02x4o4_500.gif” title=”Lady Coffee” alt=”Elites World Of Technology Images” /><br /><a href=”https://ewtnet.com/2012/07/funny-gallery-gif-images-for-your-blog.html” rel=”dofollow”>Get Image</a>
     Shake It Off (x)
    Name: Shake It Off (x)
    File type: Gif Image
    Size: 301.85 KB (309,090 bytes)
    Dimension: 320px × 180px (scaled to 320px × 179px)
    Image Code:
    <img src=”https://ewtnet.com/wp-content/uploads/2012/07/uFdbj.gif” title=”Lady Coffee” alt=”Elites World Of Technology Images” /><br /><a href=”https://ewtnet.com/2012/07/funny-gallery-gif-images-for-your-blog.html” rel=”dofollow”>Get Image</a>
     Shoo!Name: Shoo!File type: Gif ImageSize: 344.04 KB (352,294 bytes)Dimension: 320px × 184px (scaled to 320px × 183px)


    Image Code:

    <img src=”https://ewtnet.com/wp-content/uploads/2012/07/tumblr_lneonzPELX1qbvaudo1_500.gif” title=”Lady Coffee” alt=”Elites World Of Technology Images” /><br /><a href=”https://ewtnet.com/2012/07/funny-gallery-gif-images-for-your-blog.html” rel=”dofollow”>Get Image</a>Man In Blues
    Name: Man In Blues
    File type: Gif Image
    Size: 474.18 KB (485,559 bytes)
    Dimension: 196px × 181px
    Image Code:
    <img src=”https://ewtnet.com/wp-content/uploads/2012/07/thats-a-penis.gif” title=”Lady Coffee” alt=”Elites World Of Technology Images” /><br /><a href=”https://ewtnet.com/2012/07/funny-gallery-gif-images-for-your-blog.html” rel=”dofollow”>Get Image</a>

  • How To Add Facebook Recommendations Bar To Blogger

    How To Add Facebook Recommendations Bar To Blogger

    Finally, Bloggers can keep readers to their site by using this fantastic recommendation bar.
    It’s designed to display additional recommended articles right after readers have finished reading an article or spent some time on your blog. It will collapse on page load and expand once a reader has reached a specific location on your blog or finished reading the post.

    Only those articles are displayed that are previously liked or shared on Facebook. The number of likes are displayed under each article along with page title and a thumbnail. It also contains a like button and previously contained an Add to Timeline button that has been removed now.

    Unlike Facebook Recommendations box which offered related stories but with lack of user friendly interface and engagement, Facebook bar will force readers to stay longer on your site leading to increased pageviews, page impressions and thus traffic.

    HOW TO INSTALL ON BLOGGER

    This widget works on both blogger blogs and wordpress blogs. Now i’m going to take you true on how to add it on your blogger blog, the amounts of comment i get will determine if i’m going to show the wordpress tutorial. follow this simple steps to add on blogger:  

    Step1: Create a Facebook Application

    For this plugin to work you will need to create a Facebook App in seconds. The below method is the standard and correct method for creating any FB App you like.

    1. Log into Facebook Apps
    2. Click on Create New App button towards Top-rightcreate new app
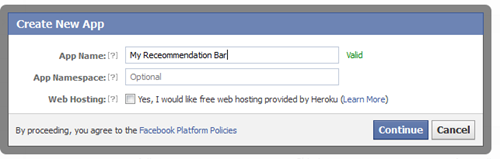
    3. In the box that pops up, type “My Recommendation Bar” inside the App name field and leave other options as default. Click continue.

    app name
         4.   Enter the captcha security code. Click Submit
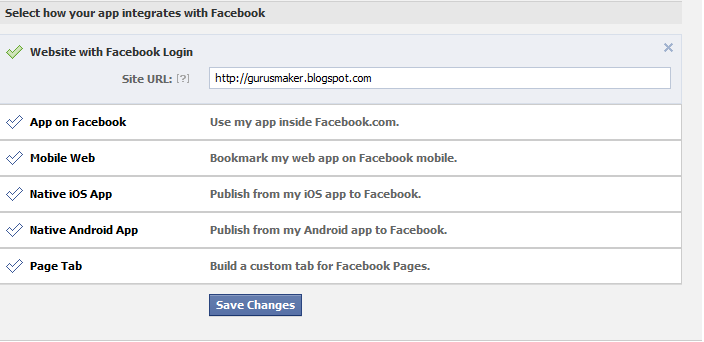
         5.  You are app is almost complete. Just click Website with Facebook Login tab and inside the box input your blog URL. See the screenshot below. Do not touch remaining options and click Save Changes.

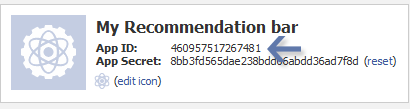
     6.   You will see two strings of alpha-numerical characters. One is App ID and the other is App secret. Just copy the App ID code and keep it save in a notepad. We will need it later.
    App ID
    Congrats App finally created! Lets proceed to step2.
    Step2: Add “Recommendations Bar” To Your Blog
    Follow these steps to add the bar to Blogger:

    1. Go to Blogger > Template
    2. Backup your template
    3. Click Edit HTML > Proceed
    4. Search For this : <html

    Replace it with this code:
    xmlns:fb=’http://ogp.me/ns/fb#’
    This will make the plugin compatible in older versions of  internet explorer also. Since blogger templates are coded in XML therefore inserting this XML namespace will enhance the plugin performance and compatibility.

         5.   Next search for <body> and just below this tag paste the following code:
    Note: If you are using the new blogger templates like Simple, Awesome Inc., Travel, Watermark or Picture window then please search <body for instead. Make sure to paste the code below the entire body tag.

    </p> <div id=’fb-root’></div> <p> <b:if cond=’data:blog.pageType == “item”‘></b:if><b:if cond=’data:blog.pageType != “static_page”‘></p> <div style=’z-index:999999; position:absolute;’> <fb:recommendations -bar action=’like’ max_age=’0′ num_recommendations=’3′ read_time=’10’ side=’right’ site=’https://ewtnet.com’ trigger=’40%’></fb:recommendations></div> <p></b:if>
    You are almost done. Make these changes:

         6.   Save your template and you are all done!
    Visit your blog and scroll down about 50% of your page and wait for 10 seconds for the plugin to expand. Enjoy the new way of free pageviews juice! 🙂

    Optional Steps

    Below are optional customization and control options. You can skip them if you want max_age: will decide the age limit of articles. Sometimes you don’t want to display too old articles so you can set it to display up to 1-180 days old posts. But if you don’t want to take age into account then let it be 0 as default.  num_recommendations: You can set how many articles to display. By increasing or decreasing the value 3
    read_time: As soon as the user reaches a specified location, the plugin would expand and before expanding it will take some time. I have kept it equal to 10 seconds, you can increase it to 30 or more as you wish.  side: You can decide the location of plugin. By default it shows up towards the bottom right corner of your page. You set it to float to left  trigger: On page load the plugin collapses and as soon as it reaches a specified location it expands. You can choose that location in three ways i.e. onvisible, X% or manual. I prefer locating the trigger point by percentage for better pageviews. The widget will expand as soon as the user scroll downs 40% of your page. You can increase or decrease this value. If you wish that the plugin must expand as soon as the reader reaches the end of your article then instead of pasting the code between the purple lines paste it just below data:post.body tag and use the value onvisible instead of 40%.  The widget will display only on post pages and not on homepage or static pages. To display it on all pages, then simply delete the purple bolded lines

  • How to Add Attribution Links to Texts Copied from your Website/Blog

    How to Add Attribution Links to Texts Copied from your Website/Blog

    The world is changing rapidly, don’t let your pains-taking articles go without credits. What am about to introduce to you are mostly used by cooperate news websites like ehow and the likes. This widget is a free service provided by tynt, it automatically add a credit (attribution) links to any text that is copied from your blog or website, it works on blogger, wordpress and websites.

    Why is important to use the tynt widget? If you added the floating Social or social media button we earlier discussed in our forum then I suppose many people will be bookmarking or sharing your post using this button. Now when someone shares your article via email our any of the sharing options it automatically add your link at the bottom of the post. Like me, you might be wondering how you can acquire the services of this great widget in your blogger blog, wordpress blog or website. No need to hurry, listen and let me brief you on what you really need to know about this widget.

    Important: If you are running a tutorial blog and share a lot of codes, it is potentially recommended that you do not add this to your blog as it will automatically and some texts to the code you are sharing.

    Install Tynt on your site

    Here we go, follow the simple steps below to install this feature on your blogger blog, wordpress blog and website.
    1. Sign up at tynt
    2. Submit your Email and in the Domain field submit your website address without adding http:// and the back slash (/) at the end of URL. Your link should look as follows:
    e.g: If you are using a sub-domain your link should like this: eobasi.blogspot.com
        If you are using a full domain then your link should look like this: www.ewtnet.com
         3.  Accept the privacy agreement and hit Submit
         4. Now you will be provided with a code. Do not copy it and first Click the customize Script button just below that code
    customize script
      5. Then click the customize attribution button on next page
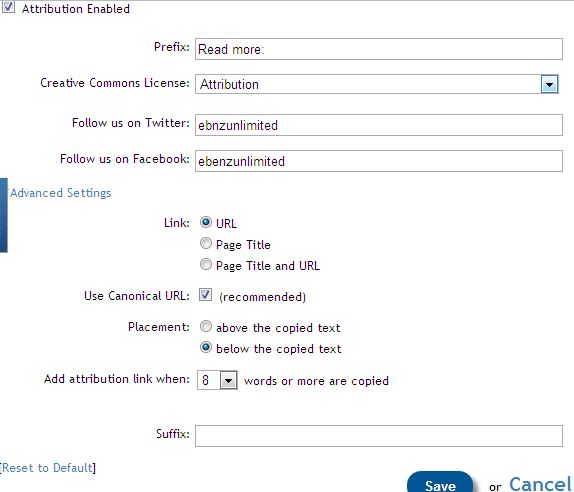
      6. You can now customize what text to display and what to hide. If you wish you can only display the read more link and disable  Attribution and social profile links by keeping their fields empty.
    Submit your twitter and Facebook usernames if you would like to show them below copied text.
    You can also decide whether to display the article URL or Page Title or both. Set URL to canonical. Set placement to “below the copied text” for better chances of being ignored by the copier.
    See the screenshot below for settings:
         7.   Click Save and then press Done

          8.  Copy the code and go to your Blog (blogger or WordPress). Inside your template search for the closing head tag

    </head>

    Paste the tynt script just above this tag.

    Tip: Blogger users may go to Template > Edit HTML > Proceed and then search the tag.
    Tip: Wordpress users will find the head tag by going to Appearance > Editor > header.php
           10.  Save your template and you are all done!
    Visit your blog and copy a snippet of any text you like and then paste it anywhere to see the attribution links working just fine.

    Track Reader Engagement

    By going to your Homepage at tynt account, you will see 4 options to track the text being copied.
    1. SEO:
    2. Keywords: This is where you will see which keywords are copied the most
    3. Content
    4. Social
    You play around with these options to take maximum benefit out of this free tool.
  • Top 6 Tips For Driving Traffic To Your Blog | 3rd Planet Techies

    Top 6 Tips For Driving Traffic To Your Blog | 3rd Planet Techies

    Blogging is very effective in attracting large volumes of traffic. However, if you really want to drive huge volumes of traffic to your blog, you will need to do more than just blogging. This article outlines the top seven secrets for driving traffic to your blog.

    1. Create high quality content that is rich with your keywords and phrases. This brings two main benefits. First, high quality and useful content will keep your website’s visitors interested and they will visit your blog on a regular basis and will buy the products you sell on your website. Second, fresh content with your key words will improve your search engine ranking which brings traffic to your blog and website.
    2. Optimizing your titles for search engines is also an effective way of driving traffic to your website. You will need to optimize your blogs titles and use all the keywords or phrases which people use while looking for information on the internet. This will make your website visible on search engines, and your website will also rank high for all your keywords, driving traffic to your website.
    3. Use email marketing with your blog. This is an effective way of bringing readers back to your blog as well as to create a list. Having your own list is important because you can sell your products and services to your list. By using an auto responder, you can send emails to your list about updates to your blog, hence driving traffic to your blog.
    4. Social book marking is yet another powerful way to drive traffic to your blog. If you rank high on some of the most popular social book marking sites, you can drive large volumes of traffic to your website.
    5. RSS feed for blog traffic. RSS feed is another way you can use to keep people coming back to your blog because after people subscribe to read your RSS feed, they will get updates continuously. This means that you will be bringing readers back to your blog every time you make a new blog post.
    6. You can use some of your blog posts and covert them into articles. All you have to do is to add more content to your blog posts if necessary, add a catchy article heading and convert it into an article. Writing and submitting articles is one of the most excellent strategies for traffic generation.

    These six strategies can significantly increase the volume of traffic to your website and blog.

    Read more http://obasimvilla.com/top-6-tips-for-driving-traffic-to-your-blog/

  • Keyword Search Optimization Advice For Bloggers

    Keyword Search Optimization Advice For Bloggers

    If you’re blogging then you will almost certainly have heard about keyword search optimization. There are many ways to get traffic to your blog, but the best free method is to appear in the search engines for relevant keywords. Searchers will then click through to your blog to find what you’re looking for. Although the search engines may include your site in results when you take advantage of keyword search optimization or not, you can give them a helping hand. By doing keyword research, finding highly searched keywords, and then using them appropriately in your content, you can make sure that the search engines rank you higher for these terms. Keyword Density When writing using keywords, the number of times you include a given keyword throughout the content is known as “keyword density”. For example, if your blog post is 400 words long and contains 4 instances of the keyword, this means that you’ve got a 1% keyword density (one instance of the keyword per 100 words). There is debate about how much you should use the keywords, but it’s often recommended you use them at least once per 100 words. Where you use the keywords is also important. You should include them: * At the beginning of the title, * Within the first sentence, * Within the last sentence, * And spread through the article body.  Keep It Natural Although keyword search optimization is an important strategy for many bloggers, it’s also important to sound natural. After all, it’s not just the search engines looking at your content – there are real human readers too! And they’re likely to be turned off if it sounds like you’ve just stuffed in your keyword as many times as possible. This is why it’s important to work on writing a good blog post first, and worry about the keywords you’re including second. No matter how well you’ve incorporated keyword search optimization into your article, your site isn’t going to do well unless you can keep readers interested with well crafted, interesting content that’s written with their needs in mind. Too Many Keywords Can Have The Opposite Effect Although we all know that it’s useful to include keywords in your blog posts, including too many can even turn the search engines off. The giants like Google are well aware that bloggers and internet marketers are trying to improve their rankings with methods like this, so they won’t reward you for taking shortcuts and stuffing your content with too many keywords. If they did, it would be too easy for low quality rankings to get to the top of the rankings. Keywords Aren’t Everything Following on from the point above, it’s important to realize that Google is looking at a lot more than just keywords to rank your site. It takes into account who links back to your site, how you link to your own pages, how well your site is laid out and, importantly, whether your website actually delivers the information your visitors are searching for. Keyword search optimization is definitely something you should be incorporating into your blog posts if you want to take advantage of free search engine traffic. However, it’s also important to work on the quality of your blog. The visitors will follow.

  • Create a contact Form for Websites, Worpress, Blogger With File Upload Option

    Create a contact Form for Websites, Worpress, Blogger With File Upload Option

    Email contact-form

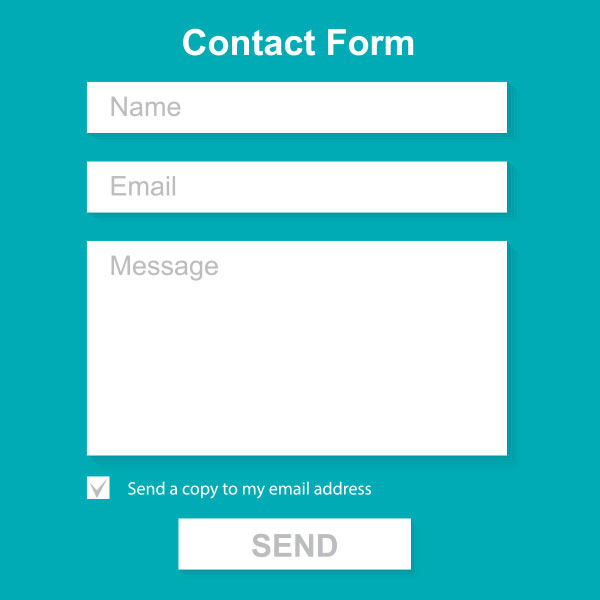
    Create a simple contact form with no company Ads and along with an upload option that will allow your visitors to send you files straight from your website. The files can be a text file, video, audio, pdf, gif, png, anything. Follow these steps:
    Live Demo

    Create a Free Web Contact Form

    Sign up for a free account at emailmeform
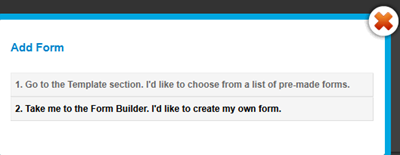
    Once you are registered click the “Add a Form” button and choose the form builder option.
    add form
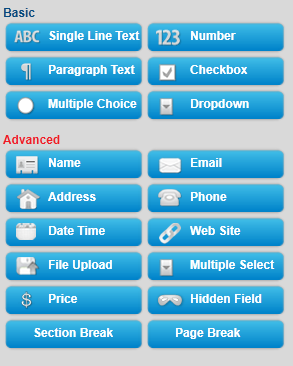
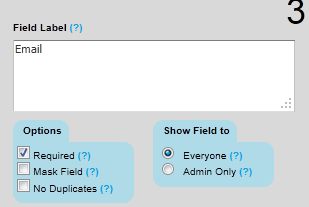
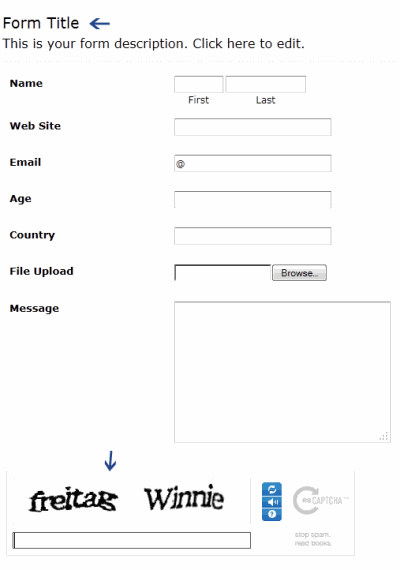
    Keep your form simple with some important fields only like Name, Website URL, Email, Age, Country, Subject and Message. The form builder looks like this,
    form builder
    The form builder has blue buttons at left and display at right. When you click a button on left the effect is displayed on right. Now kindly follow as I instruct for keeping things simple and for creating a simple but informative contact form.
    Follow this order:

    1. Click the Name button in advance section
    2. Next click Web site
    3. Next Email
    4. Next Hidden Field. Now click the hidden field section on the right and rename it as Age
    5. Next click Hidden Filed again and rename it as Country
    6. Next click File Upload  (Optional you can leave this option if you don’t want users to send you files via email)
    7. Now From the Basic section click Paragraph Text & click it to rename it as Message
    8. To make a specific form option a must to fill then simply click that row and select required as shown below
    edit form fileds

    Your contact form now must look something like this:
    contact-form
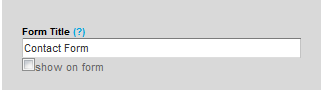
         9.   Click the Form Title and add some message there for your visitors. For example you can write :

    We Love To Hear From You
    Feel free to ask for any help. We will catch you back as soon as time allows

    If you wish you can remove the form title by unchecking the box and deleting the description text. See below

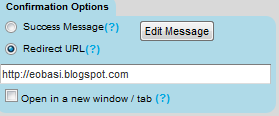
         10.    Now on the form settings choose Redirect URL and insert the page link of your thank you page. A thank you page is something like this

    You may create a separate post for this by giving it an old publishing date. Blogger users can create a Page instead of Post.    
    11.  Now replace send Email by submit and align it to right as shown below:
    submit button
      12.  Next click the Captcha Code at the bottom and select the none option from the left section as shown below:
    remove captcha-code
    This security code is often added to prevent spam but I have never used this security code and I honestly have received not even a single spam till today. Just remove it to make the contact form even more neater.
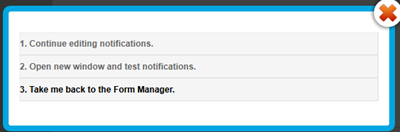
    13.   Finally hit the Save Form Button and a window will appear as shown below:
    save form
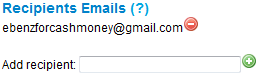
    14.   Choose the second option and add a recipient email ID. Choose an ID that you often use so that whenever someone leave a message you may receive it straight in your inbox. You can also add more than one recipients. See below:

    Leave other options as default. Hit Save! Now choose the third option.
    save contact form
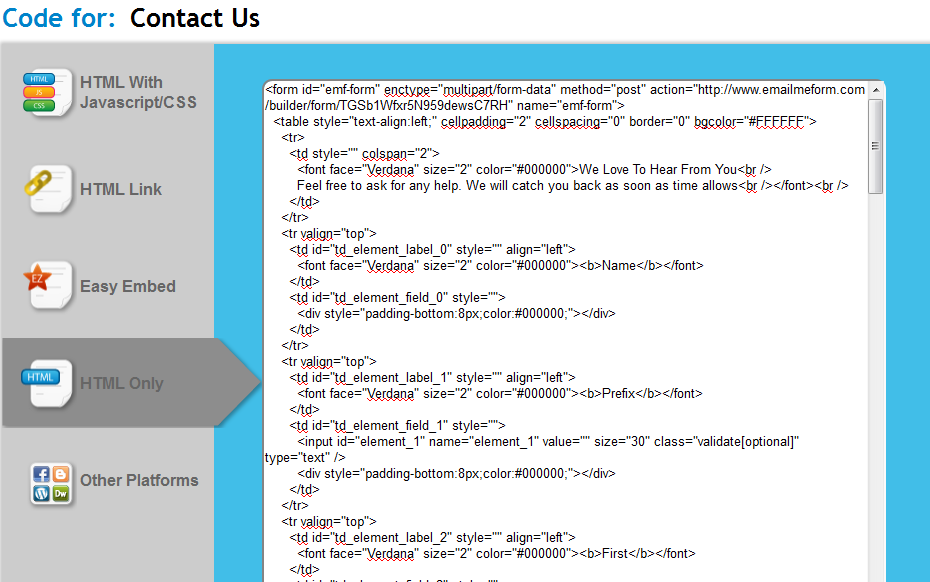
    15.   In Form manager Click Code

    16.  Choose the HTML Only option and copy the code.

    Now simply copy the code and paste it in your contact page. To delete the emailmeform logo from the contact form find and delete a similar code like the one below from the code you just copied.

    </p> <div>Powered by<span style=”position: relative; padding-left: 3px; bottom: -5px;”><img src=”https://ewtnet.com/wp-content/uploads/2012/06/footer-logo.png” /></span>EMF <a style=”text-decoration:none;” href=”http://www.emailmeform.com/” target=”_blank” rel=”noopener noreferrer”>Forms Online</a> </div> <p><a style=”line-height:20px;font-size:70%;text-decoration:none;” href=”http://www.emailmeform.com/report-abuse.html?http://www.emailmeform.com/builder/form/r99G329aiV6k6″ target=”_blank” rel=”noopener noreferrer”>Report Abuse</a>

    Note: Paste the Contact Form code in Edit HTML mode only and hit the publish button on blogger Post Editor. Do not toggle to compose mode because this will collapse the form.

  • How To Use The Old Blogger Interface Without Reverting to the Old Blogger Interface

    How To Use The Old Blogger Interface Without Reverting to the Old Blogger Interface

    How To Use The Old Blogger Interface Without Reverting to the Old Blogger Interface

    With blogger threatening to take down the old blogger interface, it becomes extremely  relevant to use this trick to work on your blogger with the old blogger interface without needing to revert to the old blogger interface.
    just follow the simple steps below:

    • On your address bar, copy and paste the link below

    http://draft.blogger.com/posts.g?blogID=8830827511167965358

    •  Replace 8830827511167965358 with your blog ID

    Tap Enter and your are done.

  • How To Add the Multi Column Footer Widget To Blogger

    How To Add the Multi Column Footer Widget To Blogger

    This widget adds a multi column widget section to your blogger template. You must have seen the multi-column footer in most websites and wordpress blogs.

    The Multi Column Footer Widget allows you to add upto 4 (recommended column is 4 but you can add more sections) widgets in different columns at your footer region. This feature is quite new to blogger and luckily, you will be among the first people to enjoy this widget.

    Below we have prepared a complete walk through that will guide you in installing a similar widget to your blogger site.

    Multi column widget

    How To Add the Multi Column Footer Widget To Blogger

    First we will add the CSS code to your blogger templates and then the HTML.
    So without wasting any time lets jump straight to the steps,

    1. Go To Blogger > Design > Edit HTML
    2. Backup Your Template
    3. Search for ]]></b:skin>
    4. Just above ]]></b:skin> paste the code below,


    /*----- EWT MULTI COLUMN FOOTER WIDGET -----*/
    #lower {
    margin:auto;
    padding: 0px 0px 10px 0px;
    width: 100%;
    background:#333333;
    }
    #lower-wrapper {
    background:#333333;
    margin:auto;
    padding: 20px 0px 20px 0px;
    width: 960px;
    border:0;
    }
    #lowerbar-wrapper {
    background:#333333;
    float: left;
    margin: 0px 5px auto;
    padding-bottom: 20px;
    width: 23%;
    text-align: justify;
    color:#ddd;
    font: bold 12px Arial, Tahoma, Verdana;
    line-height: 1.6em;
    word-wrap: break-word;
    overflow: hidden;
    }
    .lowerbar {margin: 0; padding: 0;}
    .lowerbar .widget {margin: 0; padding: 10px 20px 0px 20px;}
    .lowerbar h2 {
    margin: 0px 0px 10px 0px;
    padding: 3px 0px 3px 0px;
    text-align: left;
    border:0;
    color:#ddd;
    text-transform:uppercase;
    font: bold 14px Arial, Tahoma, Verdana;
    }
    .lowerbar ul {
    color:#fff;
    margin: 0 auto;
    padding: 0;
    list-style-type: none;
    }
    .lowerbar li {
    display:block;
    color:#fff;
    line-height: 1.6em;
    margin-left: 0 !important;
    padding: 6px;
    border-bottom: 1px solid #222;
    border-top: 1px solid #444;
    list-style-type: none;
    }
    .lowerbar li a {
    text-decoration:none; color: #DBDBDB;
    }
    .lowerbar li a:hover {
    text-decoration:underline;
    }
    .lowerbar li:hover {
    display:block;
    background: #222;
    }

    5.    Now search for </body> and paste the following code just above </body>

    <div id='lower'>
    <div id='lower-wrapper'>
    <div id='lowerbar-wrapper'>
    <b:section class='lowerbar' id='lowerbar1' preferred='yes'>
    </b:section>
    </div>
    <div id='lowerbar-wrapper'>
    <b:section class='lowerbar' id='lowerbar2' preferred='yes'>
    </b:section>
    </div>
    <div id='lowerbar-wrapper'>
    <b:section class='lowerbar' id='lowerbar3' preferred='yes'>
    </b:section>
    </div>
    <div id='lowerbar-wrapper'>
    <b:section class='lowerbar' id='lowerbar4' preferred='yes'>
    </b:section>
    </div>
    <div style='clear: both;'/>
    </div>
    </div>

    6.   Save your template and you are done!
    Now go to Page Elements and add your widgets to the newly added Footer Widget that will look something like this,
    image You can observe that there a total of four columns by default and you can add as many widgets as you want to each column. If you wish to increase or decrease the number of vertical columns then follow the steps below.

    How to Customize the Widget?

    Well I will keep it simple. I think the colors and overall size and padding and margining are just perfect. The only thing that you will need to adjust according to your template is the width of the widget and the number of vertical columns.

    1.  In order to reduce or increase the overall width of the widget simply change width: 960px;
    2.  If you wish to decrease the number of widgets to three then simply delete this part of the code,
    <div id=’lowerbar-wrapper’>
    <b:section class=’lowerbar’ id=’lowerbar4‘ preferred=’yes’>
    </b:section>
    </div>

    3.  Or if you wish to add an extra column then add the code below just above <div style=’clear: both;’/>
    <div id=’lowerbar-wrapper’>
    <b:section class=’lowerbar’ id=’lowerbar#‘ preferred=’yes’>
    </b:section>
    </div>

    Remember that lowerbar# refers to the column number. So if you want to add a fifth column then simply replace  lowerbar# with lowerbar5.
    After you have added the fifth column then remember to change width: 23%; with width: 17%;
    You will repeat step 3 for as many columns as you wish to create. But three and four and five columns are a standard. Increasing them will make things look ugly.

  • The Key SEO Mistakes That You Must Avoid

    The Key SEO Mistakes That You Must Avoid


    This article presents the common mistakes which people make in search engine optimization (SEO).

    • Failure to apply constant effort in optimizing a website for search engines. SEO involves continuous effort in carrying out all the key activities that can help you rank high on search engines. Many people fail in their efforts to rank high on search engines because they expect overnight success, and they soon give up when they fail to see immediate results. It is important for you to gradually add new content to your website so that search engines visit your website more often.  You also need to steadily build links to your website in order to improve your ranking on search engines.
    • Failure to use different SEO strategies and tools. It is important for you to use different tools for optimizing your website. You must also aim to rank high on several major search engines. Choose about four main search engines and aim to rank high on them. Write and submit articles, participate in relevant forums, submit your website to many directories and search engines and exchange links with related websites that have high popularity rank. List the strategies that you intend to follow in optimizing your website for search engines, and make sure that you carry them out on a regular basis.
    • Lack of a good understanding of your niche’s keywords and phrases. If you want to successfully optimize your website, it is important that you know all your keywords and it is also important that you use these keywords on your website content, in your articles, and in any other content that you use to promote your website. Many people make the mistake of using untargeted keywords and phrases on their websites and other content that is meant to drive traffic to their website. Some internet marketers and website owners also fail to use their keywords on the title tag of their website.
    •  Lack of patience. Many web masters get impatient and they want to see their website rank high on search engines immediately. They fail to apply constant effort in implementing their SEO strategies. SEO requires that you patiently use your selected strategies and tools in optimizing your website for search engines.

    If you want to succeed in optimizing your website for search engines, it is important that you avoid the mistakes outlined above.

  • What Are The Benefits Of Optimizing Your Website For Search Engines

    What Are The Benefits Of Optimizing Your Website For Search Engines

    Search engine optimization (SEO) is very essential if you want to successfully earn money online.

    Because of the importance of SEO, many website owners spend a lot of money and effort improving their website ranking on search engines. This article outlines the key benefits of SEO to your website and to your online business’ success.

    • SEO helps to increase the ranking of your website on search engines. When your website ranks high on search engines, it means you get high volumes of traffic that is directed to your web site through the search engines. More traffic means more sales.
    • SEO helps you to save money on paid advertising. If your website is well optimized and receives large volumes of traffic through search engines, you get a large volume of traffic coming to your website through organic links on the search engines. This means that you do not have to spend money on other advertising tools such as Pay Per Click (PPC).
    • Optimizing your website for search engines and using your keywords and phrases in this process ensures that you get targeted visitors on your website. If you use all your keywords and phrases in your articles and website content, it means that your website is visible on search engines for your relevant keywords. When people type your keywords on search engines, your website ranks high on search engines.
    • SEO helps you dominate your niche. If your website ranks high on all major search engines, and for all your keywords, you soon dominate the niche and become an expert in your niche or topic. This builds a good reputation for you, which further drives more traffic to your website.

    With all these benefits of SEO, it is important that you start to optimize your website for search engines today!

  • Keyword Search Optimization Advice For Bloggers

    Keyword Search Optimization Advice For Bloggers

    If you’re blogging then you will almost certainly have heard about keyword search optimization. There are many ways to get traffic to your blog, but the best free method is to appear in the search engines for relevant keywords. Searchers will then click through to your blog to find what you’re looking for.


    Although the search engines may include your site in results when you take advantage of keyword search optimization or not, you can give them a helping hand. By doing keyword research, finding highly searched keywords, and then using them appropriately in your content, you can make sure that the search engines rank you higher for these terms.

    Keyword Density

    When writing using keywords, the number of times you include a given keyword throughout the content is known as “keyword density”. For example, if your blog post is 400 words long and contains 4 instances of the keyword, this means that you’ve got a 1% keyword density (one instance of the keyword per 100 words). There is debate about how much you should use the keywords, but it’s often recommended you use them at least once per 100 words.

    Where you use the keywords is also important. You should include them:

    • At the beginning of the title
    • Within the first sentence
    • Within the last sentence
    • And spread through the article body.

     Keep It Natural

    Although keyword search optimization is an important strategy for many bloggers, it’s also important to sound natural. After all, it’s not just the search engines looking at your content – there are real human readers too! And they’re likely to be turned off if it sounds like you’ve just stuffed in your keyword as many times as possible.


    This is why it’s important to work on writing a good blog post first, and worry about the keywords you’re including second. No matter how well you’ve incorporated keyword search optimization into your article, your site isn’t going to do well unless you can keep readers interested with well crafted, interesting content that’s written with their needs in mind.

    Too Many Keywords Can Have The Opposite Effect

    Although we all know that it’s useful to include keywords in your blog posts, including too many can even turn the search engines off. The giants like Google are well aware that bloggers and internet marketers are trying to improve their rankings with methods like this, so they won’t reward you for taking shortcuts and stuffing your content with too many keywords. If they did, it would be too easy for low quality rankings to get to the top of the rankings.

    Keywords Aren’t Everything

    Following on from the point above, it’s important to realize that Google is looking at a lot more than just keywords to rank your site. It takes into account who links back to your site, how you link to your own pages, how well your site is laid out and, importantly, whether your website actually delivers the information your visitors are searching for.

    Keyword search optimization is definitely something you should be incorporating into your blog posts if you want to take advantage of free search engine traffic. However, it’s also important to work on the quality of your blog. The visitors will follow.

  • Top 6 Tips For Driving Traffic To Your Blog

    Top 6 Tips For Driving Traffic To Your Blog

    Blogging is very effective in attracting large volumes of traffic. However, if you really want to drive huge volumes of traffic to your blog, you will need to do more than just blogging.

    This article outlines the top seven secrets for driving traffic to your blog.

    1. Create high quality content that is rich with your keywords and phrases. This brings two main benefits. First, high quality and useful content will keep your website’s visitors interested and they will visit your blog on a regular basis and will buy the products you sell on your website. Second, fresh content with your key words will improve your search engine ranking which brings traffic to your blog and website.
    2. Optimizing your titles for search engines is also an effective way of driving traffic to your website. You will need to optimize your blogs titles and use all the keywords or phrases which people use while looking for information on the internet. This will make your website visible on search engines, and your website will also rank high for all your keywords, driving traffic to your website.
    3. Use email marketing with your blog. This is an effective way of bringing readers back to your blog as well as to create a list. Having your own list is important because you can sell your products and services to your list. By using an auto responder, you can send emails to your list about updates to your blog, hence driving traffic to your blog.
    4. Social book marking is yet another powerful way to drive traffic to your blog. If you rank high on some of the most popular social book marking sites, you can drive large volumes of traffic to your website.
    5. RSS feed for blog traffic. RSS feed is another way you can use to keep people coming back to your blog because after people subscribe to read your RSS feed, they will get updates continuously. This means that you will be bringing readers back to your blog every time you make a new blog post.
    6. You can use some of your blog posts and covert them into articles. All you have to do is to add more content to your blog posts if necessary, add a catchy article heading and convert it into an article. Writing and submitting articles is one of the most excellent strategies for traffic generation.

    These six strategies can significantly increase the volume of traffic to your website and blog.

  • 500 hits/per day guaranteed with over 100 twitter followers and facebook shares

    500 hits/per day guaranteed with over 100 twitter followers and facebook shares

    You just created a new website, business or brand? It is time to create awareness. The web over the years have been somewhat populated with various contents from different website and business owners, therefore keeping young bloggers and business starters off the spotlight, many of the well-to-do starters go as far as even paying internet marketers web scammers for advert and social media followers/share and end up profiting scam.

    My Experience?


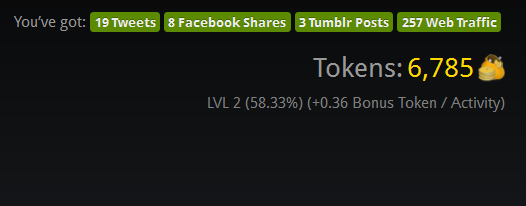
    You can actually get upto 500 hits per day, 1000 twitter followers, more than 1000 facebook shares to any website/post of your choice, over 50 facebook likes for all your blog/website post (you will need to verify your site to activate this feature), maybe 50 shares on tumblr and stumbleupon (for some reason people seems not to be using this feature often) and Page Rank 4 backlink. This is just too good to believe, but however, it is far from being exaggerated, the above stats is a friends testimony but I do have a testimony of my own: Started using linkcollider yesterday (10th May, 2013) and I already had a total of 19 Tweets 8 Facebook Shares 3 Tumblr Posts 257 Web Traffic. I had to disable the web traffic and I haven’t yet enabled the Facebook Like, Pinterest Followers, Twitter Followers and Youtube Subscribe. Below contains the screen shot of my overall stats in one day.

    Getting Started Getting started is a breeze! All you need to do is to create a free account on
    LinkCollider and add your website details.   Free Offers Buy a cheap domain name even cheaper click here.   Grab bing ads coupon code click here.

    Was this post helpful to you? Do give your feedback in the comments section below. And remember: please keep your comments relevant, and avoid spamming and/or promoting your own blog/business. Thank you 🙂