Tag: Blogger

  • How To Install IntenseDebate Comment System In Blogger

    How To Install IntenseDebate Comment System In Blogger

      Last week I wrote an article on Why You Must Quit Blogspot Comment System. As expected  many of you contacted me, asking me how to change your default blogger comment system, in regard to that I want to start by telling you how to install IntenseDebate comment system on your Blogger platform.

    CommentLuv
    One of the most popular used 3rd party comment system on Blogger.com is IntenseDebate. What attracts most people is the ability to use the Plugin CommentLuv.
    In a way, it is to encourage and also as a reward to commentators who took their time to comment on one’s blog. CommentLuv rewards your readers and helps to discover new and interesting posts by automatically adding a dofollow titled link to the comment authors last blog post when they comment.

    HTML Formatting
    You can also customize your links and add some photos to your comments. IntenseDebate supports the following HTML tags: <a>, <b>, <i>, <u>, <em>, <p>, <blockquote>, &lt;br&gt;, &lt;strong>, <strike>, <img>
    Gravatar
    Intensedebate offers full Gravatar support. If you have a Gravatar they will automatically upload your Gravatar when you signup for IntenseDebate. You can choose to use your Gravatar or upload a different profile pic.
    In this tutorial, I’m going to show you (with pictures) on how to install CommentLuv on your Blogger blog.Note: You will not loose your old comments when you install IntenseDebate
     Features Of IntenseDebate:

    IntenseDebate is one of the most popular feature-rich comment system for WordPress, Blogger, Tumblr and many other blogging/CMS platforms.In this tutorial I am going to explain how to add IntenseDebate comment system to Blogger blog.
    With IntenseDebate,you can do many things than your default comment system.These are some main features of IntenseDebate comments.

    •  Commentluv
    • Comment Threading.
    • Reply-By-Email.
    • Email Notifications.
    • Commenter Profiles.
    • Moderation/Blacklisting.
    • Reputation Points & Comment Voting.
    • Plugins API.
    • OpenID.
    • Widgets.
    • Twitter Connect.
    • Facebook Connect.
    • RSS Readers & Tracking.

    HOW TO INSTALL INTENSEDEBATE ON BLOGGER PLATFORM Follow the following steps below to Install IntenseDebate On Your Blogspot. Before you start this process,you must backup your blogger template first.Save the backup template file on your hard drive.

    Step 1 – Download your Blogger blog template

    1. Signin to your Blogger account
    2. Navigate to Template
    3. On the top right hand corner, select Backup/Restore
    4. Select Download full template and save it on your computerHow To Add IntenseDebate's CommentLuv To Blogger

    Step 2 – Create and setup your IntenseDebate account

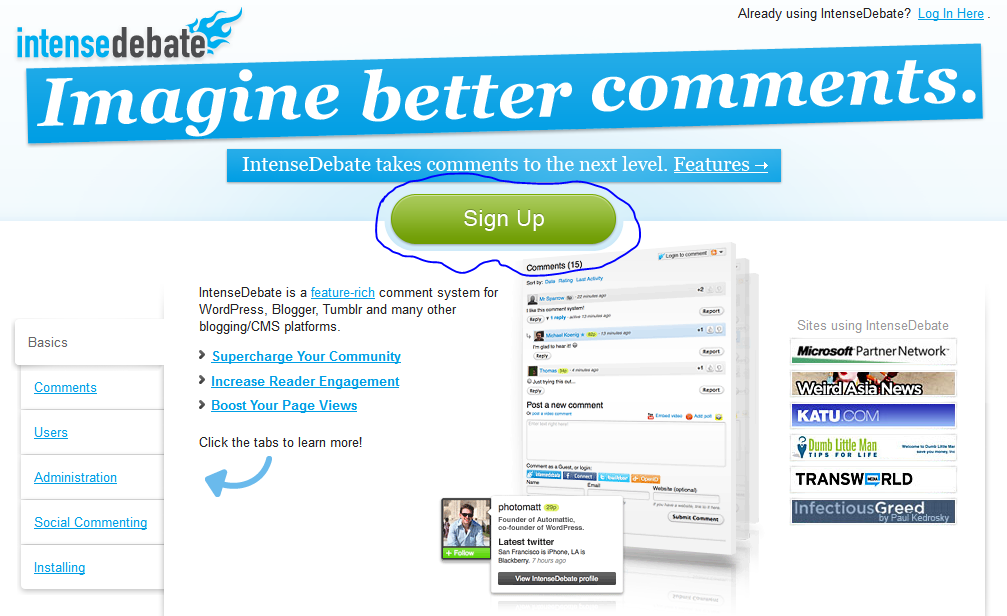
    1. Open a new browser tab and sign up for an account on IntenseDebate here How To Add IntenseDebate's CommentLuv To Blogger
    2. After confirming your account, sign into Intense Debate
    3. On the top bar menu, under Sites, select Add blog/site or use this link: http://intensedebate.com/install How To Add IntenseDebate's CommentLuv To Blogger
    4. Fill in your blog’s URL and select Next Step
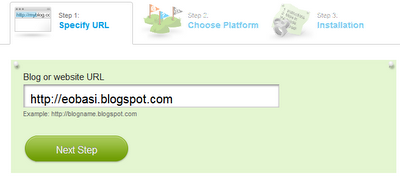
    1. Select the Blogger platform How To Add IntenseDebate's CommentLuv To Blogger
    2. Next, you’d need to choose how you want to display your IntenseDebate comment. To keep your old Blogger comments, choose All new posts (IntenseDebate will only appear on new posts and posts without comments). To start your comments from scratch, choose On all blog posts (IntenseDebate will hide your previous comments). How To Add IntenseDebate's CommentLuv To Blogger
    3. Scroll down and upload the Blogger template that you’ve downloaded in step 1 and select continue How To Add IntenseDebate's CommentLuv To Blogger
    4. You will be brought to a page where a new set of template code is created
    1. Copy the codes 

    How To Add IntenseDebate's CommentLuv To Blogger
    Step 3 – Install IntenseDebate comment system

    1. Return to the Blogger tab in step 1
    2. Navigate to Template
    3. Select Edit HTML and then Proceed
    4. Select Expand Widget Template
    5. Replace all the template codes with the new codes that you’ve copied previously Select Savetemplate


    Step 4 – Install CommentLuv plugin

    1. Return to the IntenseDebate tab in step 2
    2. Select configure this IntenseDebate accountHow To Add IntenseDebate's CommentLuv To Blogger
    1. On the left hand side menu, select Plugin
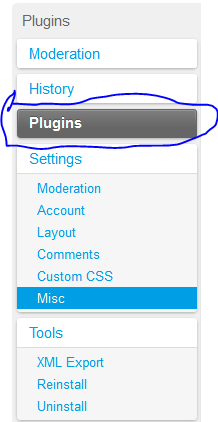
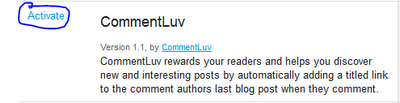
    Scroll down till you find CommentLuv and select Activate
    Done!

  • Blogging Tips: Tips on Becoming a Successful Blogger

    Blogging Tips: Tips on Becoming a Successful Blogger

    By: Joseph Onyemakonor

    Tips on Becoming a Successful Blogger: The internet has been one of the widest sources of knowledge and income, and blogging is one of the ways to make some good cash. There are over 10 million blogs and this number increases every day. Blogging is very good and interesting, especially when you are not going into it because of the money you could make. It allows you to share your opinion with the world at large and also reach out to people in need of help and advice. Some people will just rush into blogging without knowing what it involves. You must read this article and know why you shouldn’t start blogging. Here are some facts about blogging you should know and have in mind Tips on becoming a successful blogger


    THE GOOD Tips on Becoming a Successful Blogger

    Blogging has its advantages and is interesting once you get it started fully. Some of the advantages of blogging are

    • You get to share your opinion and ideas and meet people with similar views
    • You can build a steady audience and sell products to them which also serves as a source of income
    • You will make a good amount of money from it through advertising.
    • In some countries, you can win awards of best blog of the year.
    • Blogging is a major investment online.

    Blogging gives you the advantage of extra income to support your earnings and with time it can grow into a steady source of income. I know a blogger who earns $300everyday through advertisement and adsense. Once you have a blog and have successfully build a steady audience you can sell your blog and make over $10,000. Now isn’t that a very good investment?.

    THE BAD

    As good and profitable a blog can be, it has its disadvantages as well. Some of the disadvantages includes;

    • Blogging is highly time demanding and can affect your daily life and routine. Most successful bloggers know the great deal of work they put to get their blog when they first started before they could become freelance bloggers.
    • It requires new and interesting contents constantly: If you want your blog to grow fast, you should never copy and paste content from another site, you have to create new and unique contents. This is very difficult to do and most bloggers hire writers constantly. Now if you do not have the fund or resource to hire a writer then you might find it difficult running a blog
    • Once you start blogging you will spend a long time facing a Screen, this can damage your eye sight and even cause headaches. You have to be ready to face this. I will advice you do not blog if you already have any eye defect.

    THE UGLY

    There is also a very ugly part of blogging. After you must have put much effort into your blog, and also spend time on it, you may not succeed. You may constantly continue to loss money without making any profit. Do not give up on blogging. This should give you an idea on what you are going into if you decide to choose blogging as your way of making money online

  • How To Add Facebook Recommendations Bar To Blogger

    How To Add Facebook Recommendations Bar To Blogger

    Finally, Bloggers can keep readers to their site by using this fantastic recommendation bar.
    It’s designed to display additional recommended articles right after readers have finished reading an article or spent some time on your blog. It will collapse on page load and expand once a reader has reached a specific location on your blog or finished reading the post.

    Only those articles are displayed that are previously liked or shared on Facebook. The number of likes are displayed under each article along with page title and a thumbnail. It also contains a like button and previously contained an Add to Timeline button that has been removed now.

    Unlike Facebook Recommendations box which offered related stories but with lack of user friendly interface and engagement, Facebook bar will force readers to stay longer on your site leading to increased pageviews, page impressions and thus traffic.

    HOW TO INSTALL ON BLOGGER

    This widget works on both blogger blogs and wordpress blogs. Now i’m going to take you true on how to add it on your blogger blog, the amounts of comment i get will determine if i’m going to show the wordpress tutorial. follow this simple steps to add on blogger:  

    Step1: Create a Facebook Application

    For this plugin to work you will need to create a Facebook App in seconds. The below method is the standard and correct method for creating any FB App you like.

    1. Log into Facebook Apps
    2. Click on Create New App button towards Top-rightcreate new app
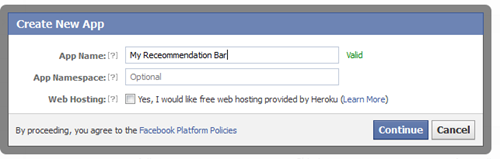
    3. In the box that pops up, type “My Recommendation Bar” inside the App name field and leave other options as default. Click continue.

    app name
         4.   Enter the captcha security code. Click Submit
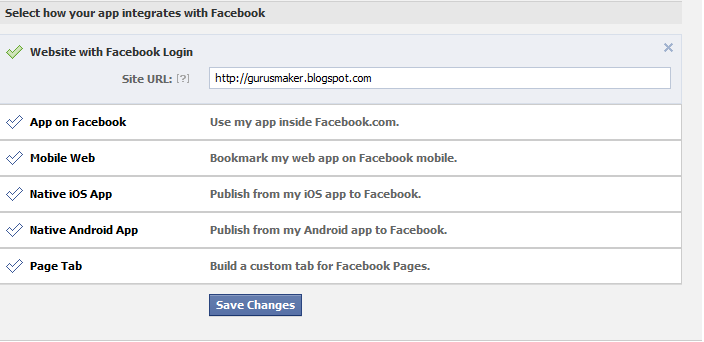
         5.  You are app is almost complete. Just click Website with Facebook Login tab and inside the box input your blog URL. See the screenshot below. Do not touch remaining options and click Save Changes.

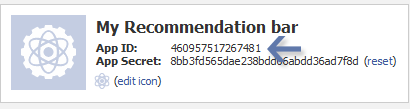
     6.   You will see two strings of alpha-numerical characters. One is App ID and the other is App secret. Just copy the App ID code and keep it save in a notepad. We will need it later.
    App ID
    Congrats App finally created! Lets proceed to step2.
    Step2: Add “Recommendations Bar” To Your Blog
    Follow these steps to add the bar to Blogger:

    1. Go to Blogger > Template
    2. Backup your template
    3. Click Edit HTML > Proceed
    4. Search For this : <html

    Replace it with this code:
    xmlns:fb=’http://ogp.me/ns/fb#’
    This will make the plugin compatible in older versions of  internet explorer also. Since blogger templates are coded in XML therefore inserting this XML namespace will enhance the plugin performance and compatibility.

         5.   Next search for <body> and just below this tag paste the following code:
    Note: If you are using the new blogger templates like Simple, Awesome Inc., Travel, Watermark or Picture window then please search <body for instead. Make sure to paste the code below the entire body tag.

    </p> <div id=’fb-root’></div> <p> <b:if cond=’data:blog.pageType == “item”‘></b:if><b:if cond=’data:blog.pageType != “static_page”‘></p> <div style=’z-index:999999; position:absolute;’> <fb:recommendations -bar action=’like’ max_age=’0′ num_recommendations=’3′ read_time=’10’ side=’right’ site=’https://ewtnet.com’ trigger=’40%’></fb:recommendations></div> <p></b:if>
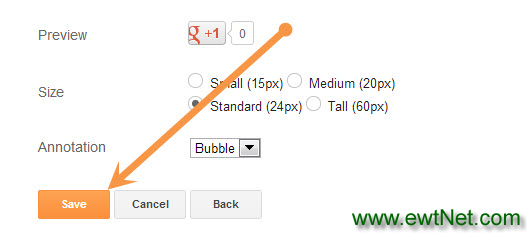
    You are almost done. Make these changes:

         6.   Save your template and you are all done!
    Visit your blog and scroll down about 50% of your page and wait for 10 seconds for the plugin to expand. Enjoy the new way of free pageviews juice! 🙂

    Optional Steps

    Below are optional customization and control options. You can skip them if you want max_age: will decide the age limit of articles. Sometimes you don’t want to display too old articles so you can set it to display up to 1-180 days old posts. But if you don’t want to take age into account then let it be 0 as default.  num_recommendations: You can set how many articles to display. By increasing or decreasing the value 3
    read_time: As soon as the user reaches a specified location, the plugin would expand and before expanding it will take some time. I have kept it equal to 10 seconds, you can increase it to 30 or more as you wish.  side: You can decide the location of plugin. By default it shows up towards the bottom right corner of your page. You set it to float to left  trigger: On page load the plugin collapses and as soon as it reaches a specified location it expands. You can choose that location in three ways i.e. onvisible, X% or manual. I prefer locating the trigger point by percentage for better pageviews. The widget will expand as soon as the user scroll downs 40% of your page. You can increase or decrease this value. If you wish that the plugin must expand as soon as the reader reaches the end of your article then instead of pasting the code between the purple lines paste it just below data:post.body tag and use the value onvisible instead of 40%.  The widget will display only on post pages and not on homepage or static pages. To display it on all pages, then simply delete the purple bolded lines

  • How to Add Attribution Links to Texts Copied from your Website/Blog

    How to Add Attribution Links to Texts Copied from your Website/Blog

    The world is changing rapidly, don’t let your pains-taking articles go without credits. What am about to introduce to you are mostly used by cooperate news websites like ehow and the likes. This widget is a free service provided by tynt, it automatically add a credit (attribution) links to any text that is copied from your blog or website, it works on blogger, wordpress and websites.

    Why is important to use the tynt widget? If you added the floating Social or social media button we earlier discussed in our forum then I suppose many people will be bookmarking or sharing your post using this button. Now when someone shares your article via email our any of the sharing options it automatically add your link at the bottom of the post. Like me, you might be wondering how you can acquire the services of this great widget in your blogger blog, wordpress blog or website. No need to hurry, listen and let me brief you on what you really need to know about this widget.

    Important: If you are running a tutorial blog and share a lot of codes, it is potentially recommended that you do not add this to your blog as it will automatically and some texts to the code you are sharing.

    Install Tynt on your site

    Here we go, follow the simple steps below to install this feature on your blogger blog, wordpress blog and website.
    1. Sign up at tynt
    2. Submit your Email and in the Domain field submit your website address without adding http:// and the back slash (/) at the end of URL. Your link should look as follows:
    e.g: If you are using a sub-domain your link should like this: eobasi.blogspot.com
        If you are using a full domain then your link should look like this: www.ewtnet.com
         3.  Accept the privacy agreement and hit Submit
         4. Now you will be provided with a code. Do not copy it and first Click the customize Script button just below that code
    customize script
      5. Then click the customize attribution button on next page
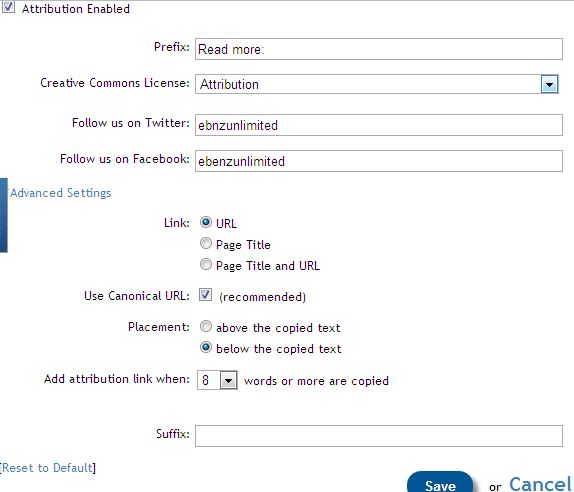
      6. You can now customize what text to display and what to hide. If you wish you can only display the read more link and disable  Attribution and social profile links by keeping their fields empty.
    Submit your twitter and Facebook usernames if you would like to show them below copied text.
    You can also decide whether to display the article URL or Page Title or both. Set URL to canonical. Set placement to “below the copied text” for better chances of being ignored by the copier.
    See the screenshot below for settings:
         7.   Click Save and then press Done

          8.  Copy the code and go to your Blog (blogger or WordPress). Inside your template search for the closing head tag

    </head>

    Paste the tynt script just above this tag.

    Tip: Blogger users may go to Template > Edit HTML > Proceed and then search the tag.
    Tip: Wordpress users will find the head tag by going to Appearance > Editor > header.php
           10.  Save your template and you are all done!
    Visit your blog and copy a snippet of any text you like and then paste it anywhere to see the attribution links working just fine.

    Track Reader Engagement

    By going to your Homepage at tynt account, you will see 4 options to track the text being copied.
    1. SEO:
    2. Keywords: This is where you will see which keywords are copied the most
    3. Content
    4. Social
    You play around with these options to take maximum benefit out of this free tool.
  • Add Advance Slider Widget For Blogger

    Add Advance Slider Widget For Blogger

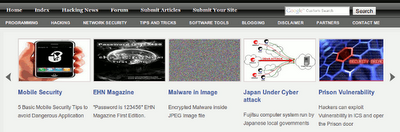
    This is another fantastic blogger widgets I would like to share with you, it cost me a sleepless night to be able to set this up. With just a few steps we can setup this amazing widget on your blog.  

    View Demo

    HOW TO INSTALL THE WIDGET

    • Login to your Blogger dashboard
    • Click on template, edit html, proceed.
    • Find the following ( Ctr +f to find) ]]></b:skin>and paste the code below just above]]></b:skin>

    <!– slider design starts from ElitesWorldTechnology–>#slidearea{height:242px;overflow:hidden;margin:0px 20px 0 20px;position:relative;width:960px;background:#F2F2F2;border:1px solid #E9E9E9} #gallerycover{overflow:hidden;margin:15px 30px 0 30px;width:900px;} .mygallery{overflow:hidden;position:relative} .mytext img{float:left} .mytext{position:relative;margin:0 5px 0 5px;width:170px;height:210px;display:inline;float:left;color:#c4c4c4} .inpost{position:absolute;top:0;left:0;width:250px;background:url(images/trans.png)} .mytext h2{padding:5px 0;color:#3B5998;width:170px;font-size:14px;font-weight:bold} .mytext h2 a:link,.mytext h2 a:visited{color:#3B5998} .mytext p{padding:0 0;color:#555;font-size:12px;line-height:20px;width:170px;text-shadow:1px 1px 0 #f6f6f6} .prevb{float:left;width:20px;height:35px;z-index:200;background:url(http://2.bp.blogspot.com/-3S-ip5IFf3g/Tkbe7yTjaeI/AAAAAAAAAMo/_Y7vdPbJRWA/s1600/previous.gif) no-repeat;position:absolute;left:5px;bottom:110px} .nextb{float:right;width:20px;height:35px;z-index:200;background:url(http://3.bp.blogspot.com/-56lfNNoaXq4/Tkbe6986c-I/AAAAAAAAAMk/FhPtd1y1k24/s1600/nextt.gif) no-repeat;position:absolute;right:5px;bottom:110px;display:block} img.sidim{width:170px;height:100px;border: 2px solid #D9D6D6} <!–slider design ends from ElitesWorldTechnology–>

    • Now just above </haed> post the following code above it

    <!–slider script starts–> <!–slider script ends–>

    • We are almost there. Find <div id=’content-wrapper’> and paste the following code above it

    <!–slider content starts–> </p> <div style=’height:242px;overflow:hidden;margin:0px 20px 0 20px;position:relative;width:950px;background:#F2F2F2;border:1px solid #E9E9E9;right:20px’> <div> <div> <ul> <li> <div> <a href=”http://your-post-link1/”> <img class=”sidim” src=”http://your-image-link1/” /> </a> </p> <div class=’clear’></div> <h2><a href=”http://your-post-link1/”>Post Title</a></h2> <p>Post content summary</p> </div> </li> <li> <div> <a href=”http://your-post-link2/”> <img class=”sidim” src=”http://your-image-link2/” /> </a> </p> <div class=’clear’></div> <h2><a href=”http://your-post-link2/”>Post Title</a></h2> <p>Post content summary</p> </div> </li> <li> <div> <a href=”http://your-post-link3/”> <img class=”sidim” src=”http://your-image-link3/” /> </a> </p> <div class=’clear’></div> <h2><a href=”http://your-post-link3/”>Post Title</a></h2> <p>Post content summary</p> </div> </li> <li> <div> <a href=”http://your-post-link4/”> <img class=”sidim” src=”http://your-image-link4/” /> </a> </p> <div class=’clear’></div> <h2><a href=”http://your-post-link4/”>Post Title</a></h2> <p>Post content summary</p> </div> </li> <li> <div> <a href=”http://your-post-link5/”> <img class=”sidim” src=”http://your-image-link5/” /> </a> </p> <div class=’clear’></div> <h2><a href=”http://your-post-link5/”>Post Title</a></h2> <p>Post content summary</p> </div> </li> </ul> <div class=’clear’></div> </p></div> </div> <p><a class=”prevb” href=”https://ewtnet.com/#”></a> <a class=”nextb” href=”https://ewtnet.com/#”></a> </div> <p><!–slider content from ElitesWorldTechnology–>

    • Don’t save the template just yet, replace the following:

    http://your-post-link1,2,3,4,5 with your links to your post.
    http://your-image-link1,2,3,4,5 with your post image link.
    Post content summary and post title with your post title and summary.

    • Now save your template and view your amazing blog!!
  • Create a contact Form for Websites, Worpress, Blogger With File Upload Option

    Create a contact Form for Websites, Worpress, Blogger With File Upload Option

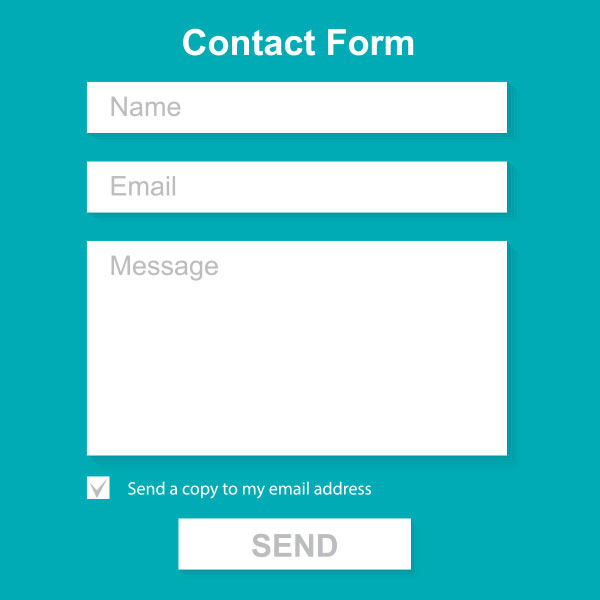
    Email contact-form

    Create a simple contact form with no company Ads and along with an upload option that will allow your visitors to send you files straight from your website. The files can be a text file, video, audio, pdf, gif, png, anything. Follow these steps:
    Live Demo

    Create a Free Web Contact Form

    Sign up for a free account at emailmeform
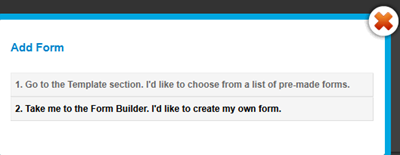
    Once you are registered click the “Add a Form” button and choose the form builder option.
    add form
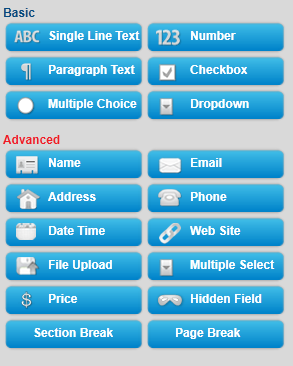
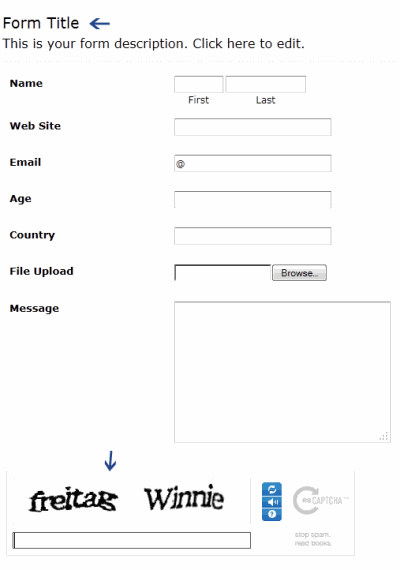
    Keep your form simple with some important fields only like Name, Website URL, Email, Age, Country, Subject and Message. The form builder looks like this,
    form builder
    The form builder has blue buttons at left and display at right. When you click a button on left the effect is displayed on right. Now kindly follow as I instruct for keeping things simple and for creating a simple but informative contact form.
    Follow this order:

    1. Click the Name button in advance section
    2. Next click Web site
    3. Next Email
    4. Next Hidden Field. Now click the hidden field section on the right and rename it as Age
    5. Next click Hidden Filed again and rename it as Country
    6. Next click File Upload  (Optional you can leave this option if you don’t want users to send you files via email)
    7. Now From the Basic section click Paragraph Text & click it to rename it as Message
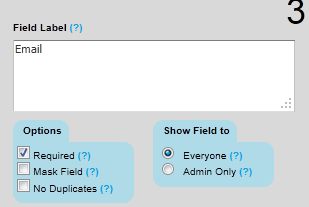
    8. To make a specific form option a must to fill then simply click that row and select required as shown below
    edit form fileds

    Your contact form now must look something like this:
    contact-form
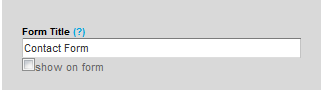
         9.   Click the Form Title and add some message there for your visitors. For example you can write :

    We Love To Hear From You
    Feel free to ask for any help. We will catch you back as soon as time allows

    If you wish you can remove the form title by unchecking the box and deleting the description text. See below

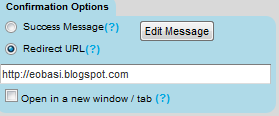
         10.    Now on the form settings choose Redirect URL and insert the page link of your thank you page. A thank you page is something like this

    You may create a separate post for this by giving it an old publishing date. Blogger users can create a Page instead of Post.    
    11.  Now replace send Email by submit and align it to right as shown below:
    submit button
      12.  Next click the Captcha Code at the bottom and select the none option from the left section as shown below:
    remove captcha-code
    This security code is often added to prevent spam but I have never used this security code and I honestly have received not even a single spam till today. Just remove it to make the contact form even more neater.
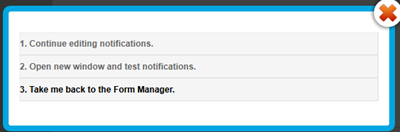
    13.   Finally hit the Save Form Button and a window will appear as shown below:
    save form
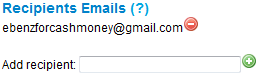
    14.   Choose the second option and add a recipient email ID. Choose an ID that you often use so that whenever someone leave a message you may receive it straight in your inbox. You can also add more than one recipients. See below:

    Leave other options as default. Hit Save! Now choose the third option.
    save contact form
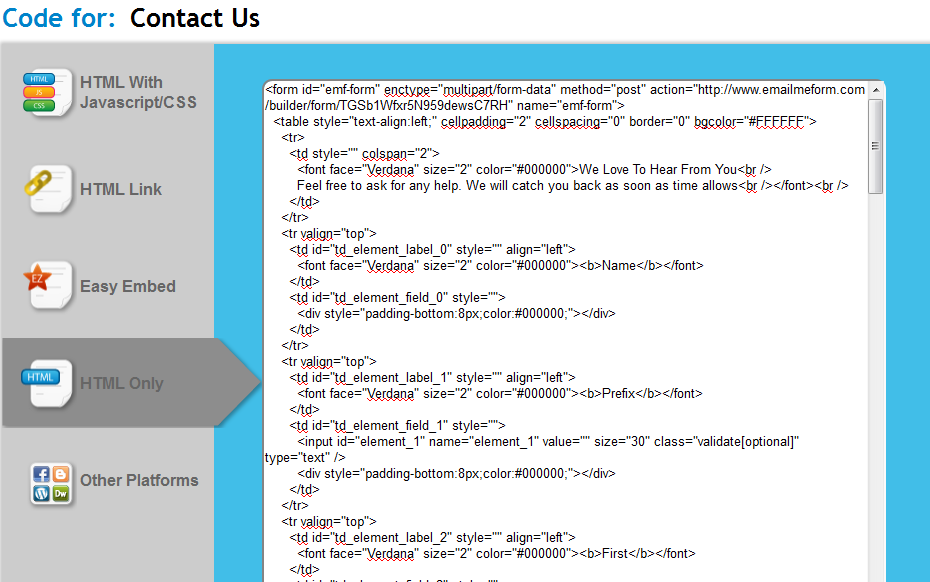
    15.   In Form manager Click Code

    16.  Choose the HTML Only option and copy the code.

    Now simply copy the code and paste it in your contact page. To delete the emailmeform logo from the contact form find and delete a similar code like the one below from the code you just copied.

    </p> <div>Powered by<span style=”position: relative; padding-left: 3px; bottom: -5px;”><img src=”https://ewtnet.com/wp-content/uploads/2012/06/footer-logo.png” /></span>EMF <a style=”text-decoration:none;” href=”http://www.emailmeform.com/” target=”_blank” rel=”noopener noreferrer”>Forms Online</a> </div> <p><a style=”line-height:20px;font-size:70%;text-decoration:none;” href=”http://www.emailmeform.com/report-abuse.html?http://www.emailmeform.com/builder/form/r99G329aiV6k6″ target=”_blank” rel=”noopener noreferrer”>Report Abuse</a>

    Note: Paste the Contact Form code in Edit HTML mode only and hit the publish button on blogger Post Editor. Do not toggle to compose mode because this will collapse the form.

  • How To Use The Old Blogger Interface Without Reverting to the Old Blogger Interface

    How To Use The Old Blogger Interface Without Reverting to the Old Blogger Interface

    How To Use The Old Blogger Interface Without Reverting to the Old Blogger Interface

    With blogger threatening to take down the old blogger interface, it becomes extremely  relevant to use this trick to work on your blogger with the old blogger interface without needing to revert to the old blogger interface.
    just follow the simple steps below:

    • On your address bar, copy and paste the link below

    http://draft.blogger.com/posts.g?blogID=8830827511167965358

    •  Replace 8830827511167965358 with your blog ID

    Tap Enter and your are done.

  • How To Add the Multi Column Footer Widget To Blogger

    How To Add the Multi Column Footer Widget To Blogger

    This widget adds a multi column widget section to your blogger template. You must have seen the multi-column footer in most websites and wordpress blogs.

    The Multi Column Footer Widget allows you to add upto 4 (recommended column is 4 but you can add more sections) widgets in different columns at your footer region. This feature is quite new to blogger and luckily, you will be among the first people to enjoy this widget.

    Below we have prepared a complete walk through that will guide you in installing a similar widget to your blogger site.

    Multi column widget

    How To Add the Multi Column Footer Widget To Blogger

    First we will add the CSS code to your blogger templates and then the HTML.
    So without wasting any time lets jump straight to the steps,

    1. Go To Blogger > Design > Edit HTML
    2. Backup Your Template
    3. Search for ]]></b:skin>
    4. Just above ]]></b:skin> paste the code below,


    /*----- EWT MULTI COLUMN FOOTER WIDGET -----*/
    #lower {
    margin:auto;
    padding: 0px 0px 10px 0px;
    width: 100%;
    background:#333333;
    }
    #lower-wrapper {
    background:#333333;
    margin:auto;
    padding: 20px 0px 20px 0px;
    width: 960px;
    border:0;
    }
    #lowerbar-wrapper {
    background:#333333;
    float: left;
    margin: 0px 5px auto;
    padding-bottom: 20px;
    width: 23%;
    text-align: justify;
    color:#ddd;
    font: bold 12px Arial, Tahoma, Verdana;
    line-height: 1.6em;
    word-wrap: break-word;
    overflow: hidden;
    }
    .lowerbar {margin: 0; padding: 0;}
    .lowerbar .widget {margin: 0; padding: 10px 20px 0px 20px;}
    .lowerbar h2 {
    margin: 0px 0px 10px 0px;
    padding: 3px 0px 3px 0px;
    text-align: left;
    border:0;
    color:#ddd;
    text-transform:uppercase;
    font: bold 14px Arial, Tahoma, Verdana;
    }
    .lowerbar ul {
    color:#fff;
    margin: 0 auto;
    padding: 0;
    list-style-type: none;
    }
    .lowerbar li {
    display:block;
    color:#fff;
    line-height: 1.6em;
    margin-left: 0 !important;
    padding: 6px;
    border-bottom: 1px solid #222;
    border-top: 1px solid #444;
    list-style-type: none;
    }
    .lowerbar li a {
    text-decoration:none; color: #DBDBDB;
    }
    .lowerbar li a:hover {
    text-decoration:underline;
    }
    .lowerbar li:hover {
    display:block;
    background: #222;
    }

    5.    Now search for </body> and paste the following code just above </body>

    <div id='lower'>
    <div id='lower-wrapper'>
    <div id='lowerbar-wrapper'>
    <b:section class='lowerbar' id='lowerbar1' preferred='yes'>
    </b:section>
    </div>
    <div id='lowerbar-wrapper'>
    <b:section class='lowerbar' id='lowerbar2' preferred='yes'>
    </b:section>
    </div>
    <div id='lowerbar-wrapper'>
    <b:section class='lowerbar' id='lowerbar3' preferred='yes'>
    </b:section>
    </div>
    <div id='lowerbar-wrapper'>
    <b:section class='lowerbar' id='lowerbar4' preferred='yes'>
    </b:section>
    </div>
    <div style='clear: both;'/>
    </div>
    </div>

    6.   Save your template and you are done!
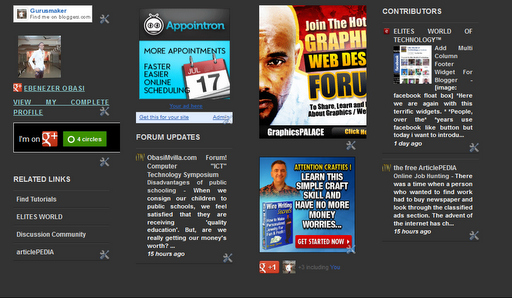
    Now go to Page Elements and add your widgets to the newly added Footer Widget that will look something like this,
    image You can observe that there a total of four columns by default and you can add as many widgets as you want to each column. If you wish to increase or decrease the number of vertical columns then follow the steps below.
    How to Customize the Widget?

    Well I will keep it simple. I think the colors and overall size and padding and margining are just perfect. The only thing that you will need to adjust according to your template is the width of the widget and the number of vertical columns.

    1.  In order to reduce or increase the overall width of the widget simply change width: 960px;
    2.  If you wish to decrease the number of widgets to three then simply delete this part of the code,
    <div id=’lowerbar-wrapper’>
    <b:section class=’lowerbar’ id=’lowerbar4‘ preferred=’yes’>
    </b:section>
    </div>

    3.  Or if you wish to add an extra column then add the code below just above <div style=’clear: both;’/>
    <div id=’lowerbar-wrapper’>
    <b:section class=’lowerbar’ id=’lowerbar#‘ preferred=’yes’>
    </b:section>
    </div>

    Remember that lowerbar# refers to the column number. So if you want to add a fifth column then simply replace  lowerbar# with lowerbar5.
    After you have added the fifth column then remember to change width: 23%; with width: 17%;
    You will repeat step 3 for as many columns as you wish to create. But three and four and five columns are a standard. Increasing them will make things look ugly.

  • How to Add A Gadgets/Widgets in Blogger

    How to Add A Gadgets/Widgets in Blogger

    Widgets, also known as gadgets, are small tools or applications that can be added to a website or blog to enhance its content or functions, or to pull content and services from third-party websites. Widgets come in multiple forms, such as countdown tickers, photos, games, or interactive social media applications that allow you to chat. Some widgets in Blogger serve the purpose of enhancing your blog, such as listing your blog followers or allowing readers to subscribe to your blog content.

    Here are steps on how to add a widget to Blogger.

    Log in to your Blogger account with your username and password. Once you are logged in, make sure you are at your blogger’s dashboard; otherwise, click on the “Dashboard” link, which will take you to a list of your blogs.

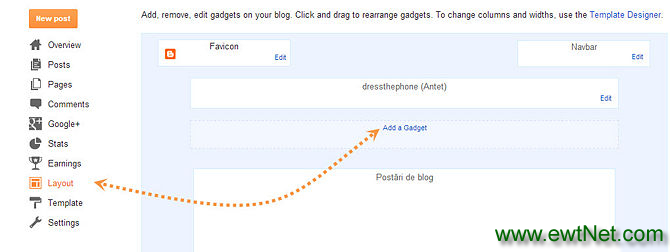
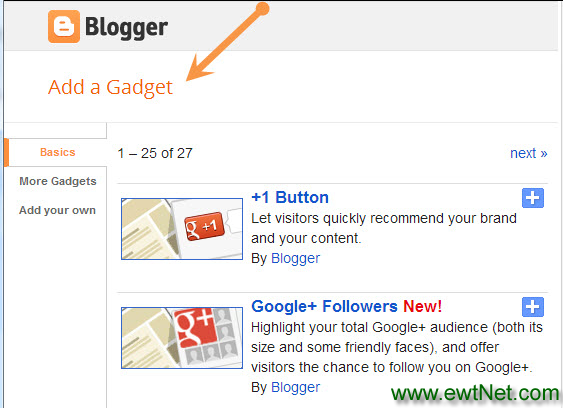
    2Access the Layout page of your blog. After selecting your blog, click on the “Design” link, which will take you to the Layout page. Click on the “Page Elements” link, then click on “Add a Gadget.”

    3Choose a widget or gadget. A Blogger pop-up window will appear that lists all the gadgets available to you through Google Blogger. You may search for the name of a specific gadget, or you can browse through several categories, including Basic gadgets, Featured gadgets, Most Popular gadgets or More Gadgets, which are contributed by third-party developers for Blogger.

    4Add the widget to Blogger. Once you find the widget you want to add, click on the blue plus sign symbol to add it to your blog’s layout. On the Layout screen, you will be able to click and drag the widget to where you want it to appear on your blog.
    Save your changes. Once you have added the widgets you want to your layout, click on the “Save” button at the bottom of the Layout screen to save your changes to Blogger.

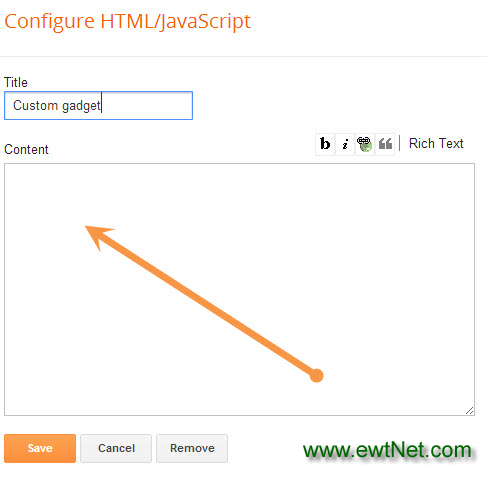
    5Add a custom widget to Blogger using the HTML and JavaScript widget. The HTML and JavaScript widget within Blogger is a blank widget that allows you to add or paste third-party functionality or other code to your blog. The HTML and JavaScript widget can be found by clicking on “Add a Gadget” from the Blogger Layout screen.

    Watch Video

    Tips

    • When adding Blogger widgets or customized widgets to your blog’s sidebar, take note of the pixel width size to make sure it fits and is visible within your sidebar. If you are using a Blogger template, you can adjust the sidebar width using the Template Designer on the Design tab to accommodate your widget.
    • Each time you use the “Add a Gadget” feature in Blogger, your new widget will always appear at the top of your layout above all your other widgets. You will be required to drag and drop your new widget to its desired location.
    • When adding a widget using the “Add a Gadget” tool within Blogger, you have the option to enter the URL for a gadget you want to add from outside of Blogger. Click on the link that says “Add Your Own” and type in the name of the website you want to add.

    Warning

    Adding a large number of widgets to your blog may potentially cause your blog pages to load slower, however this may vary depending on the browser being used and personal browser configurations.Credit to Wikihow.com