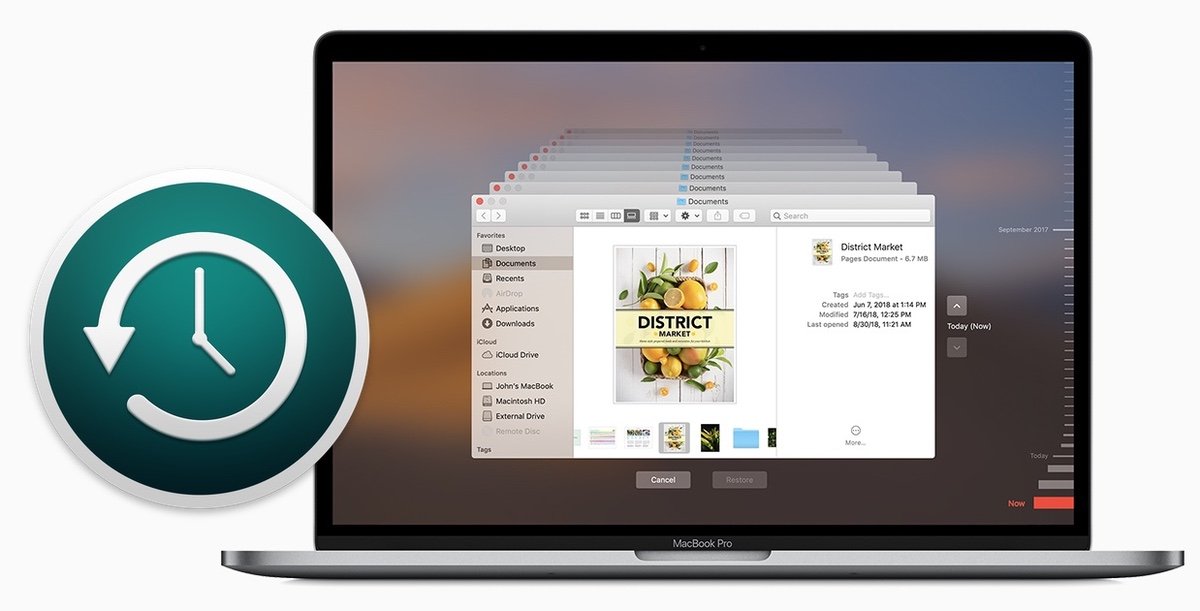
Backup disks you can use with Time Machine
Time Machine can back up certain external storage devices connected to your Mac or available on your network.
To use Time Machine to make a backup of your Mac, you need one of these types of storage devices:
- External USB, Thunderbolt, or FireWire drive connected to your Mac
- Network-attached storage (NAS) device that supports Time Machine over SMB
- Mac shared as a Time Machine backup destination
- External drive connected to an AirPort Extreme Base Station (802.11ac) or AirPort Time Capsule
- AirPort Time Capsule
External drive connected to your Mac
Time Machine can back up to an external drive connected to a USB, Thunderbolt, or FireWire port on your Mac. If the disk isn’t using the correct format, Time Machine will prompt you to erase it.
Network-attached storage (NAS) device that supports Time Machine over SMB
Many third-party NAS devices support Time Machine over SMB. For details, check the documentation for your NAS device.
Mac shared as a Time Machine backup destination
To use another Mac on your network as a Time Machine backup destination, complete these steps on the other Mac:
Choose Apple menu > System Preferences, then click Sharing.
From the list of services on the left, select File Sharing.
From the Shared Folders list on the right, click the add button (+), then choose a folder to use for Time Machine backups.
Control-click the folder that you added, then choose Advanced Options from the shortcuts menu that appears.
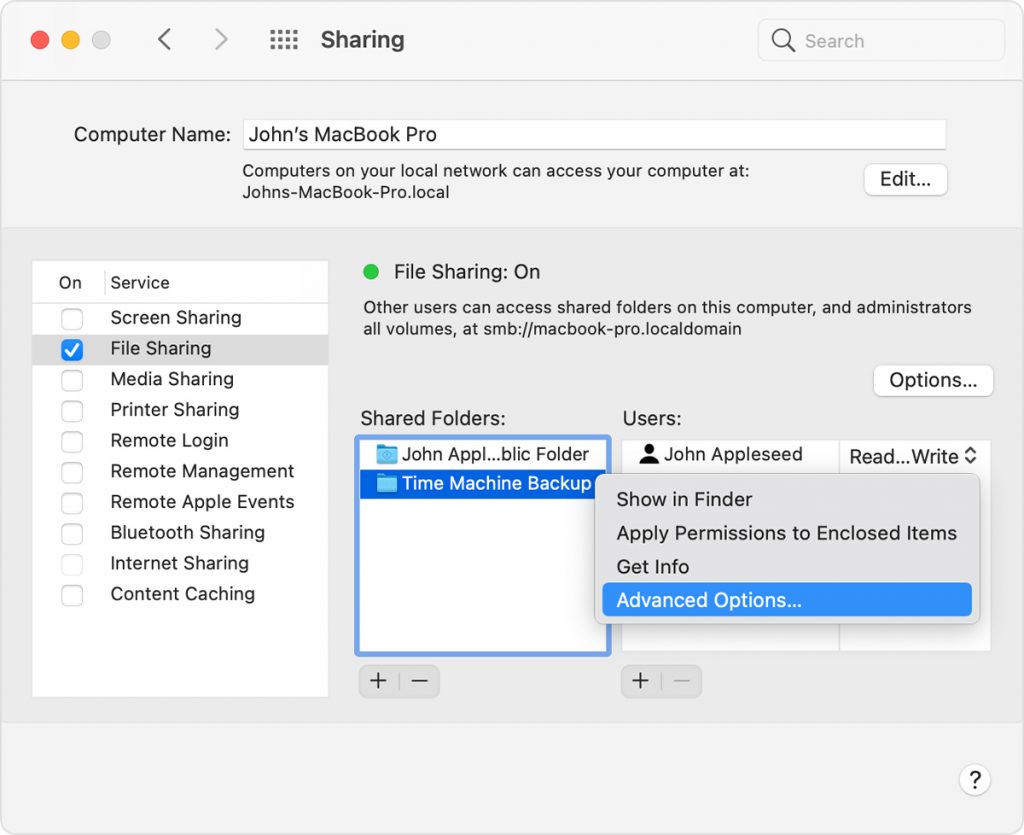
From the Advanced Options dialog, select “Share as a Time Machine backup destination.”
When setting up Time Machine on your other Mac computers, you should now be able to select the shared folder as a backup disk.
External drive connected to an AirPort Extreme Base Station (802.11ac) or AirPort Time Capsule
Time Machine can back up to an external USB drive connected to an AirPort Extreme Base Station (802.11ac model) or AirPort Time Capsule.
Connect the drive directly to your Mac, then use Disk Utility to erase it.
Connect the drive to a USB port on your AirPort base station, then turn it on.
Open AirPort Utility, then select your base station and click Edit to view its settings.
Click the Disks tab in the settings window.
Select your backup disk from the list of partitions, then select “Enable file sharing”:
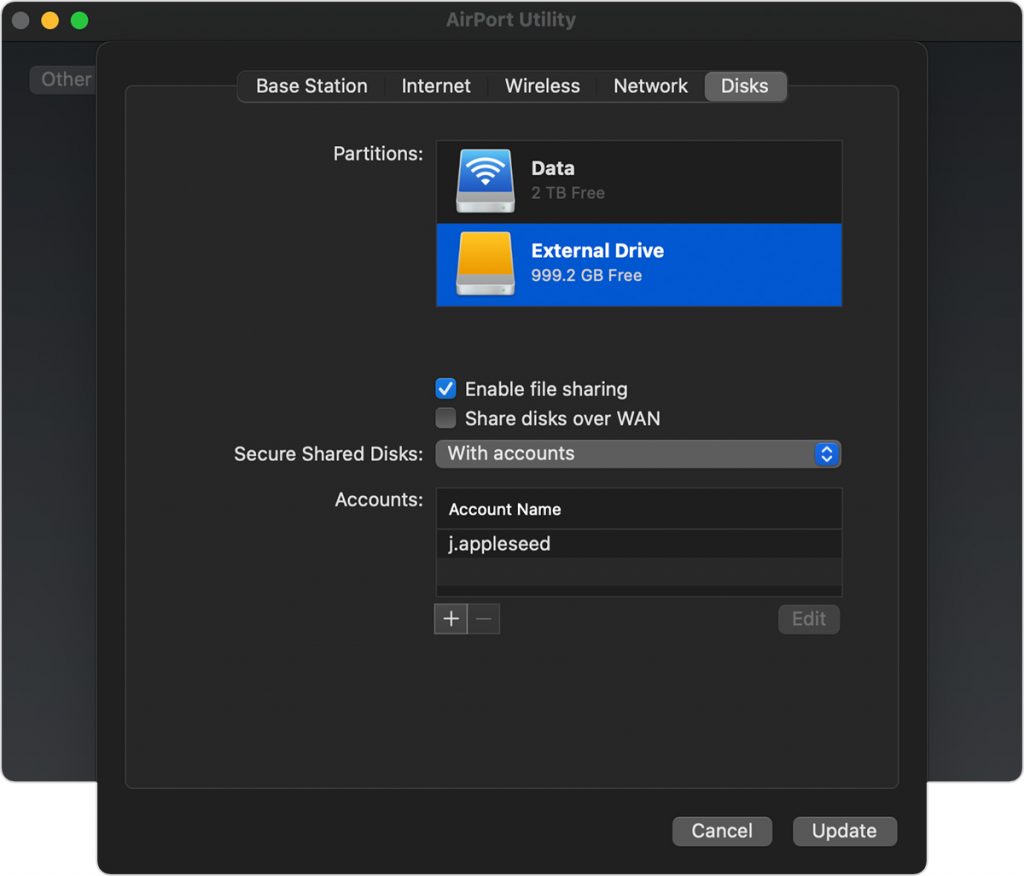
If more than one user on your network will back up to this disk with Time Machine, you can use the Secure Shared Disks pop-up menu to make sure that they can view only their own backups, not yours. Choose “With accounts” from the menu, then click the add button (+) to add users.
Click Update to restart your base station and apply the settings.
AirPort Time Capsule
Time Machine can back up to the built-in hard disk of an AirPort Time Capsule on your network.
You must be logged in to post a comment.