Like every new Windows release, Windows 8 is more secure than the operating systems that came before it. That’s due in large part to three major enhancements: An increased emphasis on UEFI Secure Boot optimizations, the extension of the SmartScreen Filter across the operating system, and the default inclusion of a more robust version of Windows Defender, which now protects against all kinds of malware—not just spyware.
Windows Defender’s increased scope doesn’t sit well with computer manufacturers, however. OEMs make beaucoup bucks by installing those trial versions of McAfee, Norton and other security suites you’ll find bundled on boxed PCs. Windows Defender’s default installation threatens that gravy train.
Microsoft tossed its partners a bone by allowing OEMs to deactivate Windows Defender in order to ship boxed PCs with alternative security solutions installed. That’s all well and good from a “variety is the spice of life” perspective, but one side-effect that isn’t so hot is what happens when you fail to register that third-party security software: Windows 8 doesn’t automatically reactivate Windows Defender by default. In other words, your pretty new prepackaged PC is wide open and vulnerable to all the nasties of the ‘Net.
Fortunately, activating Windows Defender is a snap. Here’s how to do it.
Activate Windows Defender in Windows 8

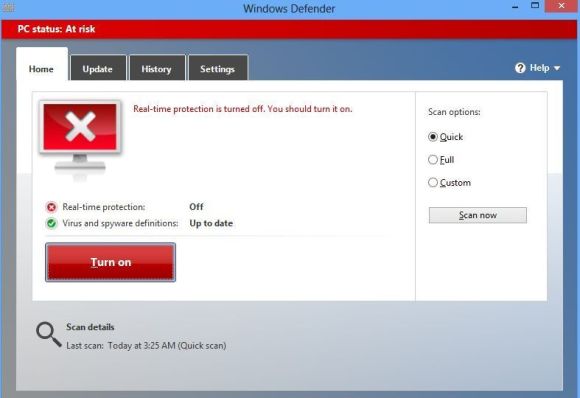
First, head to the modern-style Start screen and type “Windows Defender” to have Windows search for the program, then click on the Windows Defender icon when it appears in the results. A Windows Defender window will appear on the classic desktop. If Microsoft’s security software is disabled, you’ll seen a lot of scary red tones alongside an “At risk” warning and an image of a computer screen with a big X on it. Subtle, eh?
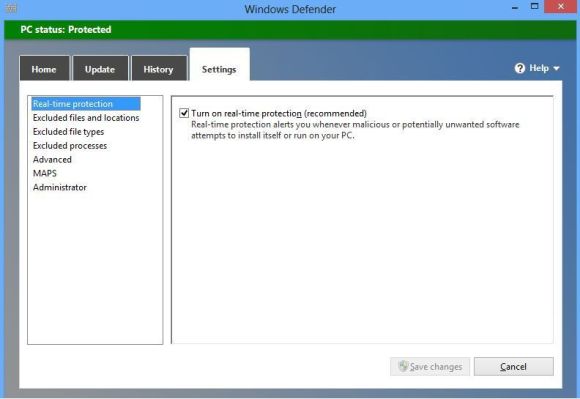
Next, click on the Settings tab at the top of the window. Make sure “Real-time protection” is selected in the left pane, then check the box next to “Turn on real-time protection (recommended).” Finally, click Save Changes at the bottom of the Window.

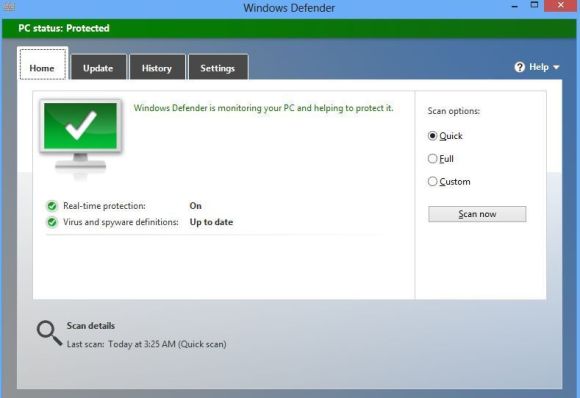
You’ll know it worked when the terrifying red “At risk” bar at the top of the Windows turns a much more soothing shade of green and switches to “PC Status: Protected.”
Check for leaks
You’re not quite done yet. Now it’s time to make sure your PC is actually malware-free! Click the Update tab, then click on the big Update button in the middle of the Window to download the latest malware definitions Microsoft has on file.
Next, open the Home tab and select the “Full” radio button in the Scan Options list. All you have to do now is click Scan Now, then sit back and wait while Windows Defender checks the nooks and crannies of your PC for any hidden baddies. Grab a cup of coffee; it may take some time. While you’re waiting, we recommend checking out your Windows 8 antivirus options.

