Here’s the scoop on what Samsung didn’t discuss at the launch party of the next hot Android phone.
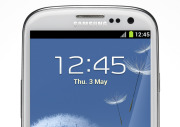
Samsung Galaxy S IIIAfter all of the rumors and speculation, the Samsung Galaxy S III is finally here but you probably have a few questions about this new Android phone.
Samsung is the master of flash and flare at its press conferences, but we’re here to help you get to the nitty gritty of why you should care about this phone. The Galaxy S III will go on sale in Europe on May 23. No official word yet on a U.S. launch, but it could come this summer.
Can the S III Really Follow Your Every Move?
The Samsung S III really wants to be your new best friend–your new psychic best friend. According to Samsung’s somewhat creepy commercial (shown below), the S III “follows your every move.” Scared yet?
http://www.youtube.com/embed/_JkkkdH6zTQ
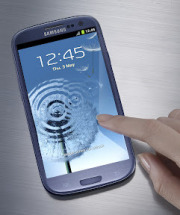
In reality, the Samsung S III can do things like predict when you want the screen awake by using the front-facing camera to monitor your eyes. If you’re watching a movie on your phone and happen to fall asleep, the phone’s display will turn off.
The S III also has a feature called S Voice, which is a customized voice-recognition system. Hmm, sound familiar? Like Apple’s Siri, S Voice can recognize a variety of commands. For example, you can say “snooze” when your alarm goes off and buy yourself a little more sleeping time. You can also say “direct call” and ring somebody while you’re in the middle of a text. You can also control the volume of your music, organize your calendar, and launch the camera via voice commands.
However, there’s no word, so far, on whether S Voice works with third-party applications. S Voice works with eight different languages, including British English and American English. A few of my friends from across the pond have complained about Siri’s difficulty in understanding them so I guess this is good news there.
Is It Quad-Core Powered?
Samsung confirmed before today’s announcement that the Galaxy S III phones will be powered by the company’s own quad-core 1.4GHz Exynos 4 Quad processor. Oddly, however, the processor specs were not in the press materials we received today. I have a suspicion that the Samsung quad-core processor is not compatible with U.S. LTE networks. If true, we might see a different processor on the S III phones in the United States. Samsung would not comment on what sort of processor the U.S. versions will have when I asked.
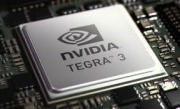 HTC pulled a similar trick with the One X. The global version runs on an NVidia Tegra 3 processor, while the U.S. phone uses a dual-core Qualcomm Snapdragon S4 processor. NVidia’s quad-core processor was not yet compatible with AT&T’s LTE network at the time of the One X’s manufacture. In our benchmarks, however, the U.S. version of the One X did quite well despite having fewer cores.
When Will the S III Come to the United States?
According to our sources at Samsung, the 4G (HSPA+/LTE) versions of the S III will come to North America this summer. Samsung said it will optimize the phones for the LTE and HSPA+ networks. Timing, pricing, or carrier partners have not yet been announced.
What is the Deal with the New Sharing Apps?
Samsung made a big deal about the ease of sharing from the S III, but from what I can tell, it looks like you can only share from your S III to another. Samsung has enhanced Android Beam, which allows large files to be transferred between phones quickly. Now called S Beam, you can share music, photos, and up to 1GB of video from your S III to your buddy’s S III.
To help you understand, here’s how Android Beam works on the Galaxy Nexus.
Samsung also enhanced its DLNA service for sharing content from your phone to your TV. AllShare Cast lets you wirelessly connect your Galaxy S III to your TV, tablet, or PC and share files over WiFi. However, you’ll have to buy the separate All Cast Hub accessory in order to use this feature (see the Accessories question below)
What is an HD Super AMOLED display?
 The 3.4-inch-thick S III has a 4.8-inch HD Super AMOLED display with a 1280-pixel by 720-pixel resolution. This is the same display technology we saw on the Galaxy Nexus. The Galaxy S II had Super AMOLED Plus, which is actually based on a PenTile pixel structure in which pixels share subpixels.
The Galaxy S II phones, on the other hand, have full RGB displays in which the pixels have their own subpixels. This means that HD Super AMOLED displays have lower overall subpixel density, which could translate to reduced sharpness and degraded color accuracy.
When we compared the Galaxy Nexus to the Galaxy S II, however, we didn’t notice a huge difference in display quality. The only quality different we detected was color accuracy, especially with whites (they appeared to have a yellowish tint). I have yet to see the Galaxy SIII up close and personal, so I’m not sure if it suffers from this same issue
One cool thing is that despite the Galaxy S III having a larger display than its predecessor (4.8 inches versus 4.3/4.5 inches), it isn’t much bigger. There’s very little bezel around the phone as the display takes full advantage of the hardware real estate.
Will Battery Life Really Improve?
Battery life is the bane of every tech user. Samsung claims that it won’t be an issue with the S III as it has a larger 2100mAh battery. For comparison, the Galaxy S II has a 1560mAh battery, while the Galaxy Nexus has a 1750mAh battery. The granddaddy of phones with long battery life, the Droid Razr Maxx, has a 3300mAH battery.
I fear that Samsung’s all-seeing front-facing camera might put a strain on the battery life, however. Also, phone manufacturers still haven’t worked out all the kinks with battery conservation on LTE networks. Battery life will depend on what sort of processor Samsung is packing into its S III phones for the United States and, as we’ve learned, this is still very much up in the air.
Is the Camera Any Good?
The Samsung Galaxy phones have always performed quite well in our PCWorld Test Center camera subjective tests. While I haven’t personally gotten my hands on the Galaxy S III’s 8-megapixel camera, I can tell you a little bit about its new features.
According to Samsung, the Galaxy S III will have zero shutter lag. The company also claims that the camera will start in “less than one second.” The S III will also have a burst-shot mode, a feature we saw on HTC’s One phones.
The S III camera also will have a feature called “Best Photo,” which will automatically select your best photos out of a series of eight photos taken in succession. But do you really want your phone to be your photo assistant?
What About Accessories?
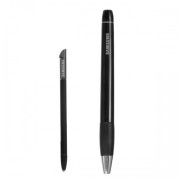 Samsung Galaxy Note S PenSamsung announced a slew of accessories, including a C Pen stylus (which seems pretty similar to the S Pen on the Galaxy Note), an AllShare Cast Hub for wireless streaming, a docking station for your desk, a wireless charger, a car kit, and an HDMI adapter.
Samsung also announced the S Pebble “music companion” MP3 player. Why does this accessory look so familiar? Oh yes, in 2009, I reviewed the Samsung Pebble MP3 player which looks strikingly similar to the S Pebble.
Is the Galaxy Nexus Outdated Now?
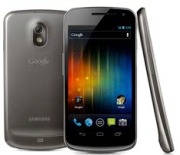 Samsung Galaxy NexusNo, relax. It might not have as many cores as the S III, and the display might be a little smaller, but don’t feel bad if you just walked out of the store with a brand new Galaxy Nexus. Your Galaxy Nexus is still an excellent, current phone and offers something the Galaxy S III does not: A pure, untouched Android experience.
Have more questions? Sound off in the comments and I’ll try my best to answer them for you.


 Nokia, the one of most popular and trusted mobile company. Nokia made wide range of


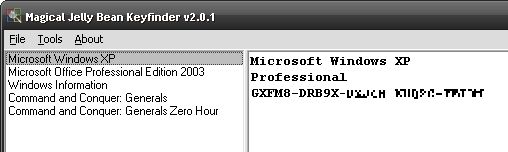 Magical Jelly Bean Keyfinder helps you round up your serial numbers.

 Apple announcement that it’s integrating Facebook into its operating system software should be welcome news for a social network that’s
  While Apple’s move doesn’t offer an answer to
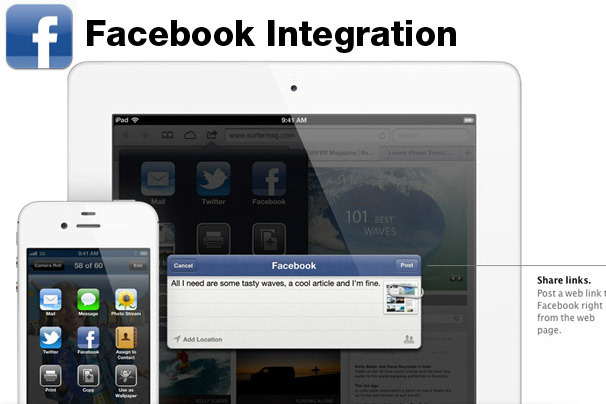


 Security breaches of mind-numbing size like those at LinkedIn and eHarmony.com set


