How to Backdate your Posts and Photos on Facebook

Share This Post

As +Brian Gardner rightly said “the social media makes you look better, and that’s the problem”: We all like to appear slicker than we actually are, just to get a few likes and comments on Facebook.

Whether you are using Facebook as a business entity (page) or as an individual you can backdate your new status update, schedule an update (scheduling updates is only available to page admins) or even change the date of your already posted items.

Maybe you just remembered a photo you were suppose to post three years ago or something you were suppose to say yesterday, don’t worry, you can still go back to the past – at least on Facebook.

Scheduling Posts on Facebook Pages

If you need to make a statement at a time you won’t be available on your Facebook page, scheduling your status update may come handy. The system allows you to post a status update and schedule it to be publish at a given time.

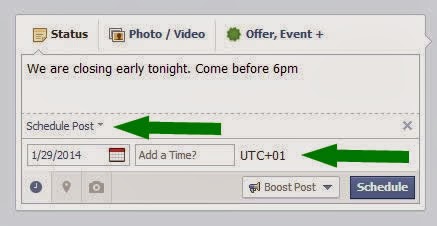
You can prepare a post and schedule it to appear later by adding a date and time in the future before you post it. You can schedule a post up to 6 months in advance in 10-minute intervals.

From your Page’s sharing tool:

  1. Choose the type of post you want to add to your Page
  2. Clickin the lower left of the sharing tool
  3. Choose the date and time you want the post to appear
  4. Click Schedule
If you choose a date in the past, the post will appear immediately at the appropriate place on your Page’s Timeline. All times correspond to the current time zone you’re in.

Note: Scheduling post is currently available to only Facebook page admins.

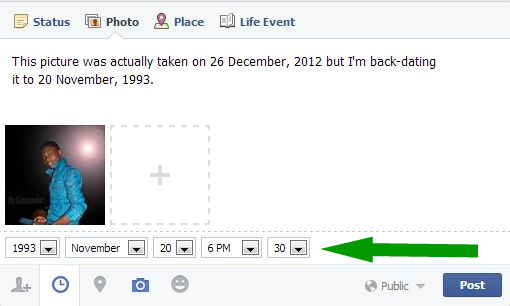
Backdating Timeline Post

You can backdate your videos, photos, status and just about everything you own on Facebook. Simple goto to your Facebook sharing tool:
  1. Choose the type of post you want to add to your Timeline
  2. Clickin the lower left of the sharing tool
  3. Choose the date and time you want the post to appear
  4. Click Post
To backdate an existing photo:
  1. Click on the photo you want to backdate.
  2. From the right-hand panel, click Edit.
  3. Choose the date and time you want the post to appear.
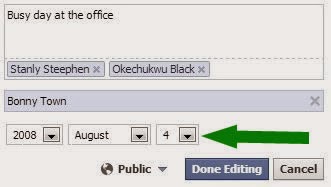
  4. Click Done Editing.

Have fun and Happy Midweek!

Stay Ahead: Join the EwtNet Insider Email Club!

Stay informed and up-to-date with EwtNet's email subscription. Join our exclusive community and receive curated news, updates, and insights tailored to your interests.

Related Posts

Tim Cook, Facebook, Google and Tech Giants throw their Support for Same-Sex Marriage

When the Supreme Court issued its historic ruling on...

North Korea’s Internet goes Offline

DEVELOPING - Just days after the U.S. government accused...

How to Avoid Facebook and Twitter Disasters

Who knew your boss could see so much of...

“We Took Down Trump Tower’s website”, Anonymous Claims

A group of cyber activist has claimed that it...

How to Check the Power Status of Remote Control Batteries with your Smartphone

Earlier today I published an infographics on things you...
- Advertisement -

Discover more from EwtNet

Subscribe now to keep reading and get access to the full archive.

Continue reading